January Nail Art for Square Nails: Crisp Edges, Fine Lines and Tiny Accents

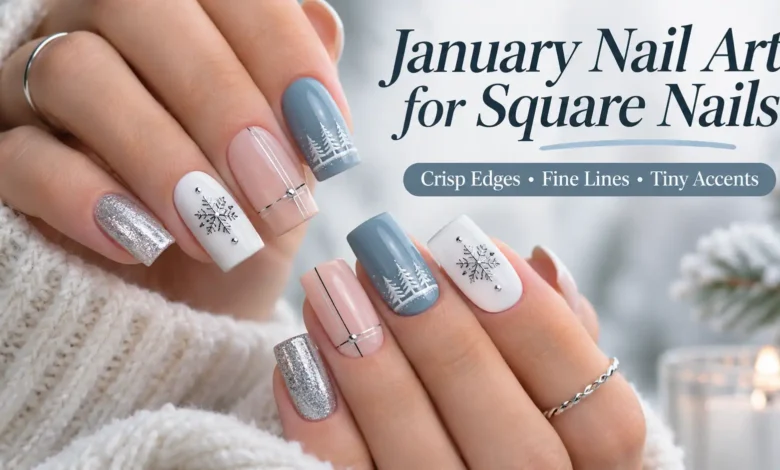
For January nail art for square nails, start with a detail that follows the shape: a narrow blue rim along the flat tip, a graphite stripe beside a straight sidewall, or a tiny outlined square on one nail. Keep enough base color visible for the edges and artwork to read separately.
The six looks below range from icy blue to warm espresso. Choose the micro tips if you want color across the whole hand, the silver dots if you want one small accent, or the windowpane if you enjoy a more graphic pattern. Each can be scaled to your actual nail length.
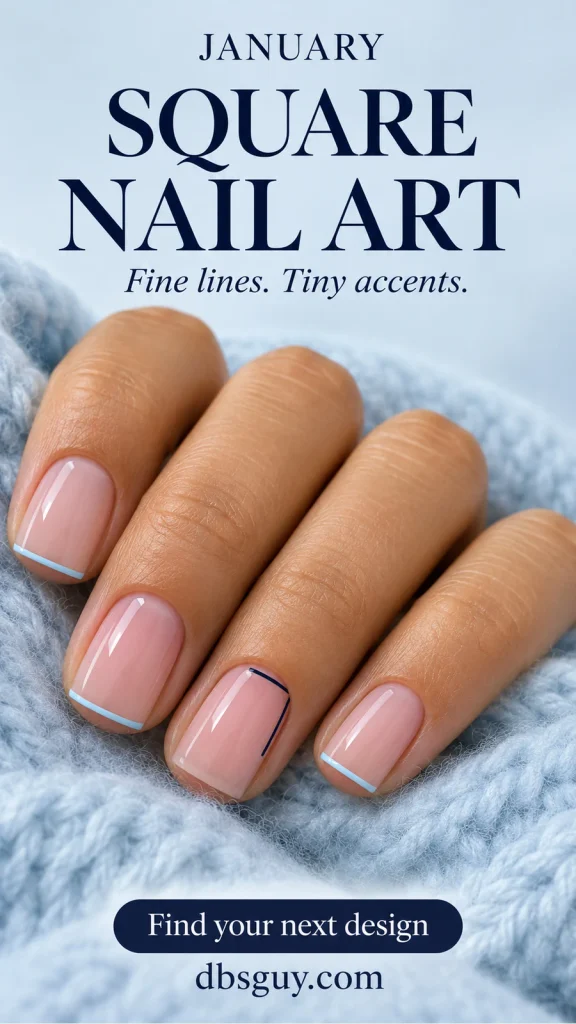
The visuals are AI-generated manicure concepts. They illustrate suggested shapes, colors, and placement rather than documenting tested manicures.
Start With a Square Outline You Can Keep Comfortable
A square nail has a flat free edge—the end away from the cuticle—and sides that look roughly parallel. Rounding the corners noticeably moves the shape toward squoval. OPI’s nail-shaping guide distinguishes the two and describes filing straight across the tip for a square shape.
Choose your length before planning the art. You need enough free edge to establish a flat end, but these designs do not require long extensions. If the corners catch on fabric, have the roughness smoothed rather than keeping a sharp point for the picture. Ask for “short square with smooth corners” and check one nail before the rest are shaped.
Look at the hand with your fingers relaxed. A slightly slanted painted stripe can exaggerate an uneven tip, so decide which line you want to follow: the nail’s side for a vertical stripe, or its flat end for a micro tip. The decoration should fit the shape you have.
1. Icy-Blue Micro Tips Along a Flat Edge
A sheer rose-beige base and a slim blue edge give square nails a clear winter color without covering the whole nail. The important detail is the shallow band: it follows the flat end, with only a gentle turn at each corner. A deep, curved smile line would create a different look.

Start the blue on your shortest nail when choosing its width. Keep it narrow enough that the pink base remains the main color. On the longer nails, aim for a similar visual weight rather than making each band proportionally thicker.
For a salon reference, say: “Sheer rosy beige, short square shape, and a very thin icy-blue edge with a shallow smile.” Ask to see the blue over your chosen base; a pale shade can blend into a milky base more than expected. If that happens, choose a slightly deeper blue rather than widening the band.
Also Read: 17 January French Tip Nail Ideas Beyond the Classic White Edge
2. A Graphite Pinstripe on Cool Gray
One dark line can do enough. This version uses a pale cool-gray base with a single graphite stripe on the middle and ring nails. The other nails stay plain, so the narrow strokes become the focus.
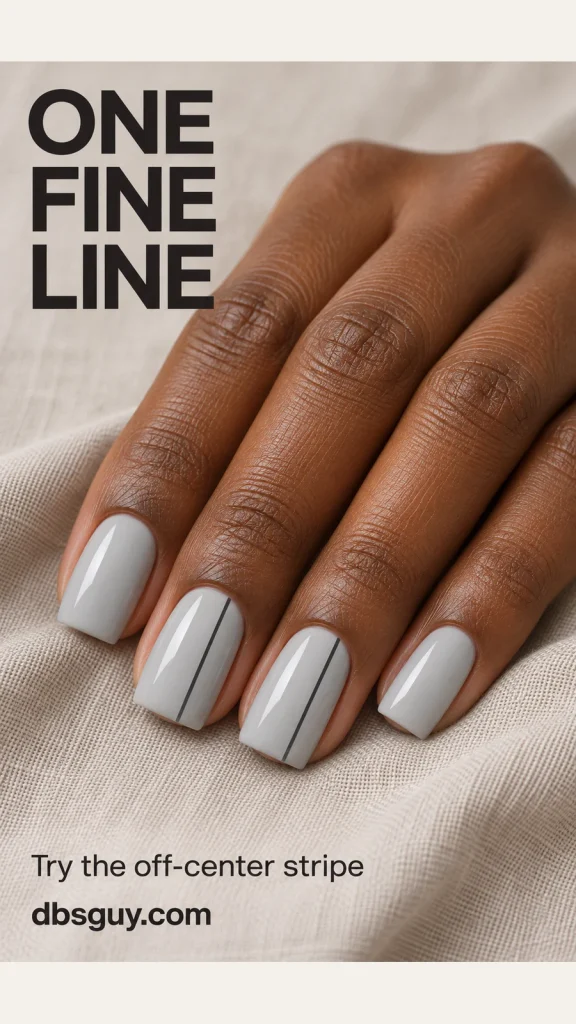
Place each stripe slightly off-center and run it lengthwise, roughly parallel to the nearest sidewall. In the concept, it travels from near the base to the flat tip. Avoid curving it inward at the end; that changes the straight, tailored effect.
This is a useful choice when a horizontal band feels too dominant on your square nails. You can also keep the stripe on just one finger. Choose a liner brush that makes a fine continuous mark on a practice tip, and use enough contrast to see the line without repeatedly tracing it thicker. If graphite feels too stark, a dark slate can soften the contrast while keeping the same placement.
3. An Open Navy Corner Bracket on Blush
The navy bracket borrows the right angle of a square nail without outlining the entire nail. On two blush-pink accents, a short crossbar near the base joins a longer stroke that travels down one side toward the tip. The shape stays open toward the center.

Keep a visible pink margin between the navy and the skin, and leave most of the nail untouched. The crossbar should be parallel to the flat free edge; the side stroke should follow the sidewall. That relationship makes the little angle feel connected to the nail shape.
Show your artist the open end as well as the corner: “One navy right-angle bracket near the base, on the middle and ring nails, with the rest sheer pink.” A complete border would be much stronger. On a very short nail, shorten both arms and use one accent finger rather than squeezing the same bracket onto every nail.
4. An Espresso Windowpane on Creamy Oat
For a warmer January palette, use creamy oat polish with two crossing espresso lines. One runs lengthwise just to the side of center; the other crosses the nail nearer the cuticle end. Together, they divide the surface into four unequal panes.

The unequal spacing is what separates this from a centered cross. Keep the surrounding nails plain oat and use the pattern on the middle and ring fingers, as pictured. Adding more lines would turn it into a denser plaid and reduce the open cream areas.
If you are painting the lines yourself, let the first stroke dry as your polish directs before crossing it with the second. Practice the crossing on a spare tip so you can check whether the junction becomes noticeably thicker. For shorter nails, move the vertical line closer to the side and keep the horizontal stroke fine; you want four readable spaces, not four tiny filled boxes.
Also Read: January Dip Nail Colors for Winter: Soft Neutrals and Rich Jewel Tones for more winter palette options.
5. Three Silver Dots on Dove Gray
Three silver dots near the base of one ring nail give a gray manicure a small metallic focal point. Leave a gray gap between each dot and a border above the row so the accents do not touch the skin.

Choose this if you like the neat square outline but want less brushwork than a stripe or frame. The reference has a jewel-like metallic finish; a painted version with silver nail polish gives you a simpler interpretation without having to attach separate embellishments.
For painted dots, test the size with a small ball-ended dotting tool. Place the middle dot first, then one on each side. Try to keep their sizes similar, and stop while all three remain visibly separate. If the row is too wide for your ring nail, use smaller dots or choose your broadest accent nail. Plain gray on the remaining fingers gives the silver room to stand out.
6. One Tiny Burgundy Outline Square
A miniature burgundy square repeats the nail’s geometry in a single accent. Use a milky rose base and place the hollow square around the middle of the ring nail, as pictured. The pink showing through the center is part of the design.
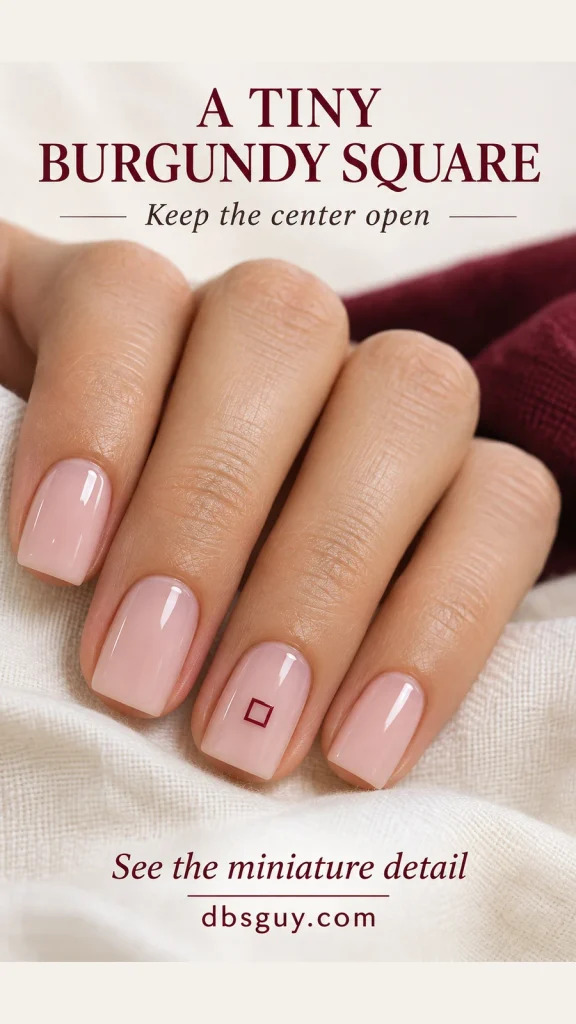
Keep the motif roughly a quarter of the nail’s width as a starting point, then adjust until you can see pink inside and around it. Its sides should follow the nail’s length and width rather than tilting into a diamond. Burgundy supplies a small, rich color accent without taking over the pale set.
This is the most precise miniature drawing in the collection. A nail-art decal with an open center can be an alternative if one fits your nail. If you want it hand-painted, ask your artist to check the outline before adding the final finish. Making the square larger is usually clearer than repeatedly thickening four crowded sides.
Choose the Detail Before You Choose More Decoration
- For very little nail space: start with the silver-dot accent or a shortened navy bracket on one finger.
- For a consistent detail across the hand: choose the narrow blue tips and keep their depth restrained.
- For a graphic look: choose the graphite stripe for one direction of linework, or the espresso windowpane for an intersecting pattern.
- For a single miniature focal point: choose the burgundy square and leave the other nails plain.
Compare the art at your everyday viewing distance as well as in a close-up. If a small detail disappears, first increase the color contrast or simplify what surrounds it. Adding more decoration can make it harder to see the feature you originally liked.
How to Paint a Simple Version With Regular Polish
The painted elements here can be interpreted with air-drying nail polish. Gather your base shade, one detail shade, a fine liner brush or small dotting tool, and the base and top coats recommended for your polish. A spare nail tip gives you somewhere to test the line width before working on your hand.
- Establish the shape first. Remove old polish, refine the flat edge, and smooth any rough spots. Prepare the nail surface according to your polish’s instructions.
- Build the base in thin coats. Keep a narrow space around the skin and let the base dry as directed before putting a tool over it.
- Test the actual mark. Use a fresh drop of detail polish on a palette. Check whether your brush makes a narrow stripe or your dotting tool makes a suitably small circle. Refresh polish that has become stringy.
- Complete one accent before repeating it. Rest your painting hand on the table. For intersecting lines, allow the first to dry before adding the next. Keep extra nails plain until you are happy with the scale.
- Finish without reworking wet art. Let the details dry as the product directs, then apply a compatible top coat with a light touch. Avoid repeatedly brushing over the same fine line.
There is no universal drying interval for every formula, layer thickness, and room condition. These steps describe regular polish, so do not use them as a curing routine for gel. If you prefer a salon service, bring the image and discuss the product system with your nail professional.
Also Read: January Nail Art for Beginners: Simple Designs to Practice at Home
What to Show Your Nail Artist
Save one main reference and identify the detail that matters most: the blue band’s width, the navy bracket’s open center, or the empty space inside the burgundy square. Confirm the length and base coverage before the art begins. Ask to see the design on one nail with your hand relaxed.
A clear request might be: “Short square nails, a glossy pale-gray base, and one fine off-center graphite stripe on the middle and ring fingers. Keep the other nails plain.” That gives your artist a shape, finish, color, placement, and limit on the artwork.
Questions About Square January Nails
Can these designs work on very short natural nails?
Yes, if there is enough free edge to create a comfortable square outline. Begin with one small accent and reduce the art to fit your shortest nail. If the ends are currently rounded, wear the detail on that shape while the corners grow rather than filing away the sides to force a square.
What if my square nails look wider after adding art?
Try a narrower tip or replace the horizontal detail with the lengthwise graphite stripe. Keep a pale base visible around the art. These are visual adjustments, so compare one sample nail before changing the whole set.
Do I need gel, acrylic, or extensions?
No. The designs are arrangements of painted color that can be adapted to natural nails. Extensions change the available length and surface, but they are not a requirement for a dot, stripe, or small outlined shape.
How can I keep the corners crisp without making them sharp?
Keep the free edge flat and have roughness smoothed. If a pronounced corner keeps catching, ask for a slight softening or choose squoval. The artwork can still follow the straighter part of the tip even when comfort calls for softer corners.
Also Read
For smaller canvases, explore Extra-Short January Nail Designs With Tiny Details That Fit.