
To make a giant Christmas bow that holds its shape, start with ribbon wired along both edges, build manageable loops, and bind every layer firmly at the center. The wire in the ribbon shapes the loops; the separate center tie keeps the bow together. A pretty center wrap cannot do both jobs.
This tutorial makes a full, eight-loop bow from four separately measured ribbon rings. Aim for roughly 18–20 inches across after shaping, with two long tails. You can prepare each layer on the table instead of holding a growing handful of ribbon while guessing the loop lengths.
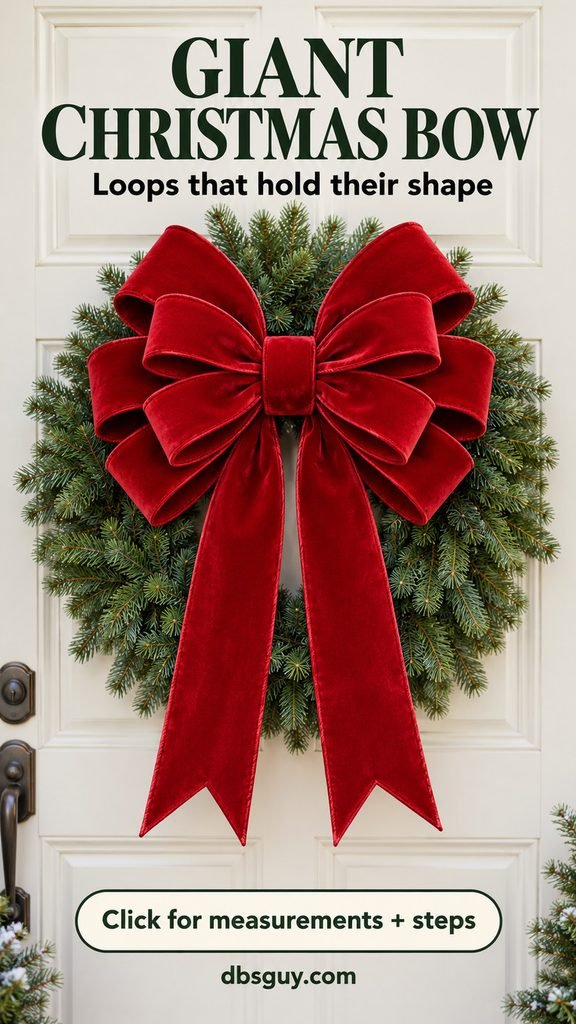
The images are AI-generated craft illustrations. Use the written measurements for cutting; the illustrations show the construction and finished look rather than exact scale.
The bow you’re making
- Style: eight side loops, four on each side, with larger layers behind smaller ones.
- Ribbon: 4-inch-wide wired ribbon with enough body to support an open loop.
- Finished width: approximately 18–20 inches; gathering and shaping change the final dimensions.
- Tails: start with two 30-inch lengths joined at the midpoint; trim them after shaping.
- Ribbon to have available: 7 yards, including room for adjustments.
The red velvet version shown works especially well as a statement on a large wreath. Choose your display spot before cutting: a bow that fills most of a small wreath will hide its greenery, while long tails can overwhelm a narrow door.
What you need
- 7 yards of 4-inch-wide ribbon, wired on both long edges
- A flexible length of floral wire, about 30 inches long, for binding and attachment
- Measuring tape and sharp craft or fabric scissors
- Wire cutters
- Four small sewing clips to hold the temporary overlaps
- A glue gun and glue suitable for your ribbon, or a needle and matching thread, for the decorative center wrap
- A wreath with a structural frame, or another secure support for the finished bow
Look for “wired edge” on the label. Velvet describes the fabric finish, not whether it contains wire. A smooth satin ribbon can also be wired; a thick velvet ribbon can still be unwired. Ribbon supplier Morex explains how the wire along the edges lets you position individual loops.
Before committing the whole spool, bend a short section into a broad, rounded loop and stand it upright. If it immediately folds over, use firmer ribbon or make a smaller bow. For this project, a solid color is forgiving because you do not have to keep a printed pattern facing the same direction on every layer.
Step 1: Cut four loop pieces, one tail piece, and one center wrap
Lay the ribbon flat without stretching it. Cut these six pieces:
- 42 inches: the largest, back layer
- 38 inches: the second layer
- 34 inches: the third layer
- 30 inches: the smallest, front layer
- 60 inches: one continuous piece for both tails
- 10 inches: the decorative center wrap
Those cuts total 214 inches, or about 5.94 yards. Seven yards leaves 38 inches for trimming, a longer center wrap if your ribbon is bulky, or a small adjustment. Keep the offcut until the bow is finished.
The four loop pieces will each have a 2-inch overlap. Once flattened, their spans are approximately 20, 18, 16, and 14 inches. That is the width of each entire flattened ring, not the length of a single loop from the center.
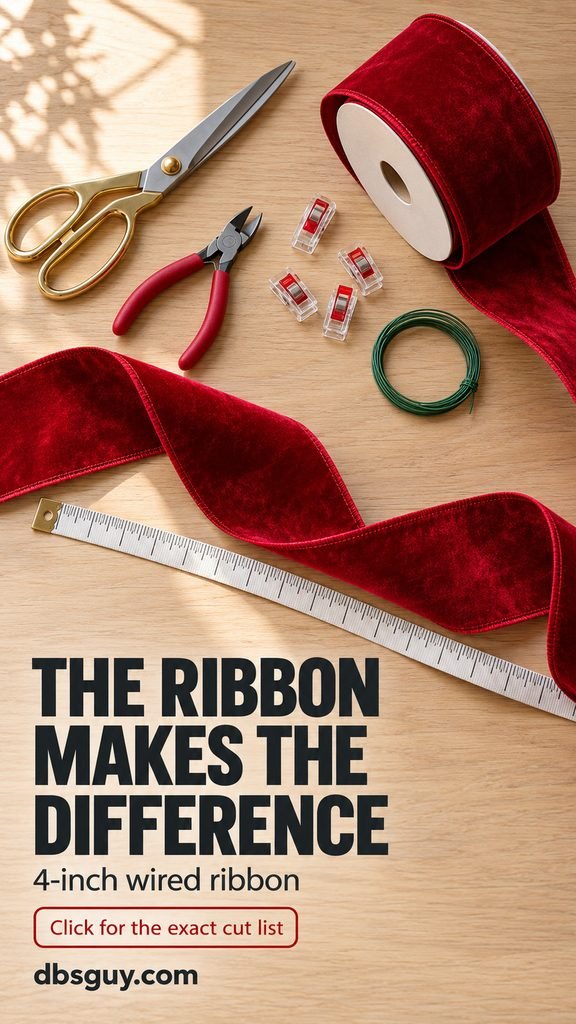
Set the 60-inch tail piece and the center wrap aside. Leave the tail ends straight for now. A final trim looks better once you can see the bow hanging in its actual position.
Step 2: Turn each loop piece into a flattened ring
Take the 42-inch piece and bring its two short ends together to form a closed ring, with the decorative side facing outward. Overlap the ends by 2 inches and hold that overlap with a sewing clip.
Lay the ring down and flatten it gently into a long oval. Position the overlap halfway between the folded left and right ends. It must sit at the center where you will eventually bind the bow, rather than out near one of the loop tips.
The flattened ring has two layers of ribbon running between the folded ends. When you gather those layers at the midpoint, the left half becomes one bow loop and the right half becomes another. One ring makes two side loops.
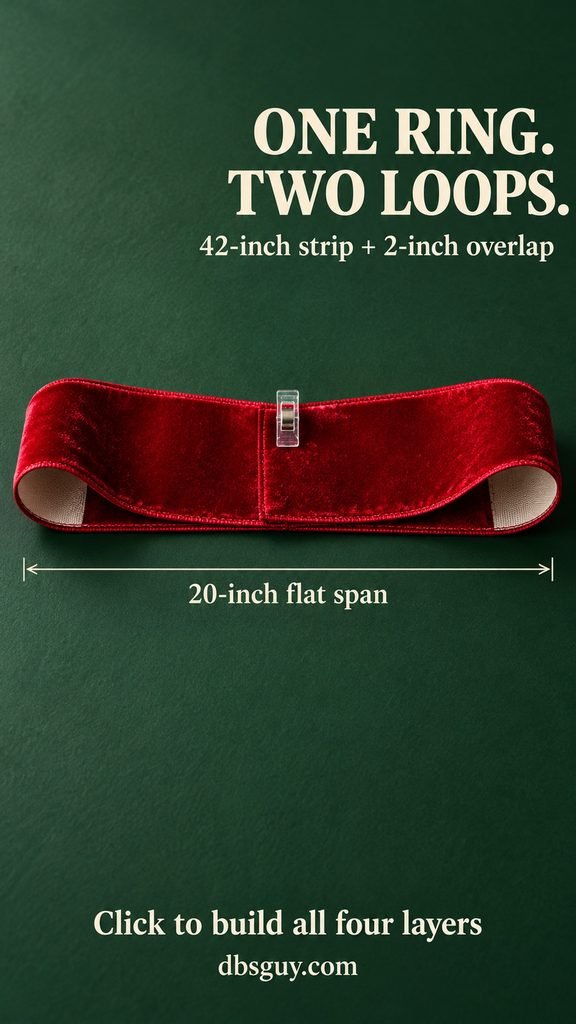
Repeat with the 38-, 34-, and 30-inch pieces. Keep the overlaps centered and check the spans against your measuring tape. Make any correction now, while each ring is separate. You do not need glue at these joins: the final center binding will capture the overlapping ends.
Avoid pressing a sharp crease into the folded tips. They will become the outside curves of the bow, so leave those turns soft enough to round out later.
Step 3: Stack the layers, add the tails, and secure the center
Gather the midpoint of each flattened ring across its 4-inch width into a few small accordion pleats. Both the front and back layers of the ring, including the overlapping ends, must enter that pinch.
Stack the four pinched centers together, largest ring at the back and smallest at the front. Keep their midpoints aligned. Remove the clips one at a time as you capture each layer in your hand; do not leave a clip buried inside the bow.
Find the midpoint of the 60-inch tail strip and gather it across its width. Place that gathered midpoint against the back of the stack. Let its two halves fall downward as the two tails, with their decorative faces turned toward the front.
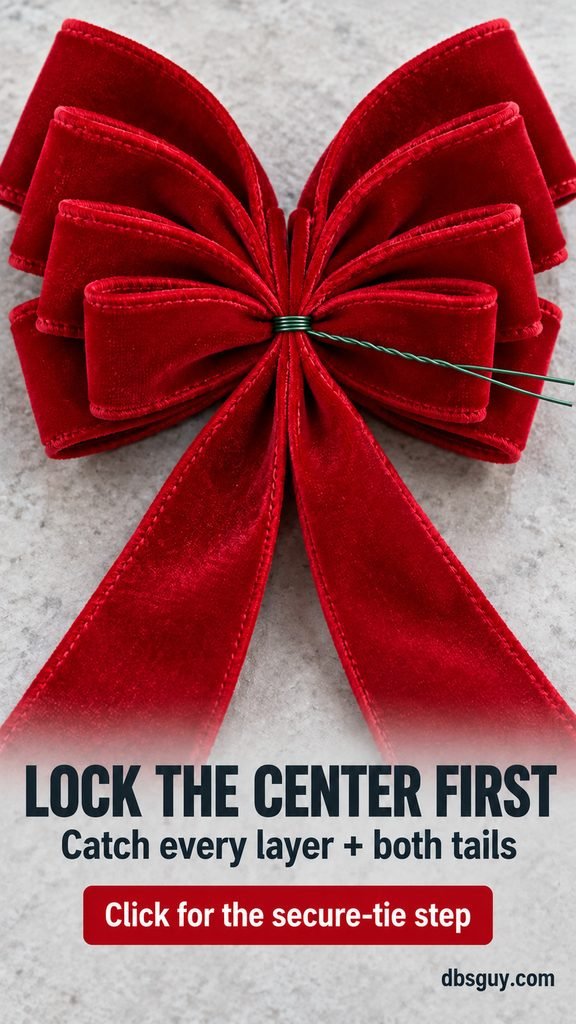
Wrap the floral wire snugly around the entire gathered bundle, catching all four rings, their overlaps, and the tail midpoint. Twist the two wire ends together at the back until the layers stop sliding. Keep the remaining ends long for mounting.
Hold the tied center and gently check each layer. If an overlap slips out or a tail moves freely, reopen the tie and catch the missing section before tightening again. Pulling harder on the decorative wrap later will not repair an incomplete binding.
The center should feel compact, but the ribbon should not be cut or torn by the wire. Keep any exposed wire tips turned away from the front of the bow.
Step 4: Cover the wire with a narrow ribbon wrap
Take the 10-inch center piece. Fold its two long wired edges inward so the visible band is about 2 inches wide. You are folding the ribbon, not cutting the wires out.
Wrap this band around the gathered center, with the smooth, decorative face showing at the front. Bring the short ends together at the back and check their overlap before fastening. If your ribbon makes an unusually thick bundle, cut a longer wrap from the reserved offcut.
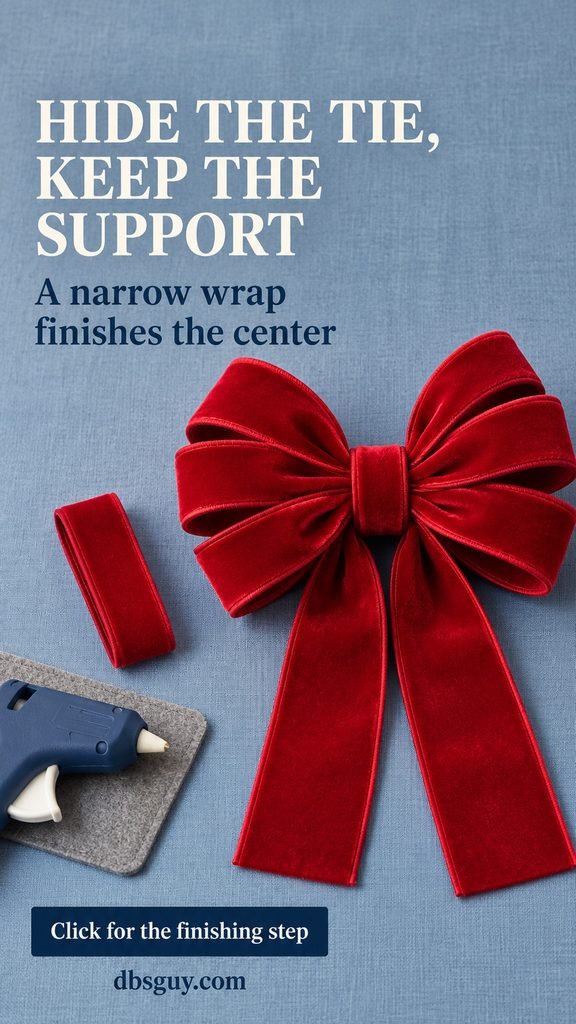
Use a small amount of glue suitable for the ribbon to join the wrap’s ends, following the glue maker’s directions, or close the overlap with a few hand stitches. Let glue cool or set before handling. Keep it away from the attachment wire so the long wire ends remain free to mount the bow.
The wrap should hide the binding without spreading across the base of the loops. A wide, tight band can squash the smaller front loops before you have a chance to open them. The center wire carries the structure; this band gives it a finished appearance.
Step 5: Open the loops and finish the tails
Work from the largest back layer toward the smallest front layer. Open one loop at a time, easing its folded tip into a rounded curve. Shape the two wired edges into matching arches so the fabric between them has room to rise.
Fan the loops into slightly different directions. Let the larger loops frame the bow and bring the smaller ones forward. Keep the lower loops clear of the tails instead of pulling every loop straight sideways into a flat stack.

Pause and look at the bow from the front and from the side. If a loop is closed like a folded envelope, open its hollow center. If it has a pointed tip, smooth the bend in the edge wires. The loops need space between them, not more ribbon piled into the middle.
Trim the tails only after that first shaping. For the V-shaped ends shown, fold a tail lengthwise so its wired edges meet. Start the diagonal cut at the folded edge, farther up the tail, and angle toward the two outside edges nearer the tip. Open the ribbon to reveal an inward V. Try the direction on a scrap first if you are unsure.
Use scissors suitable for cutting wired ribbon and tuck any protruding wire ends back into the hem. Bowdabra’s instruction booklet illustrates dovetail cutting and recommends completing the final shaping after the bow is attached.
Step 6: Mount the bow through its center support
For a wreath, thread the long wire ends from the bow’s center through the greenery and around the actual wreath frame. Twist them together at the back. Attaching to a loose spray of greenery can let the whole bow tilt even when its loops are shaped well.
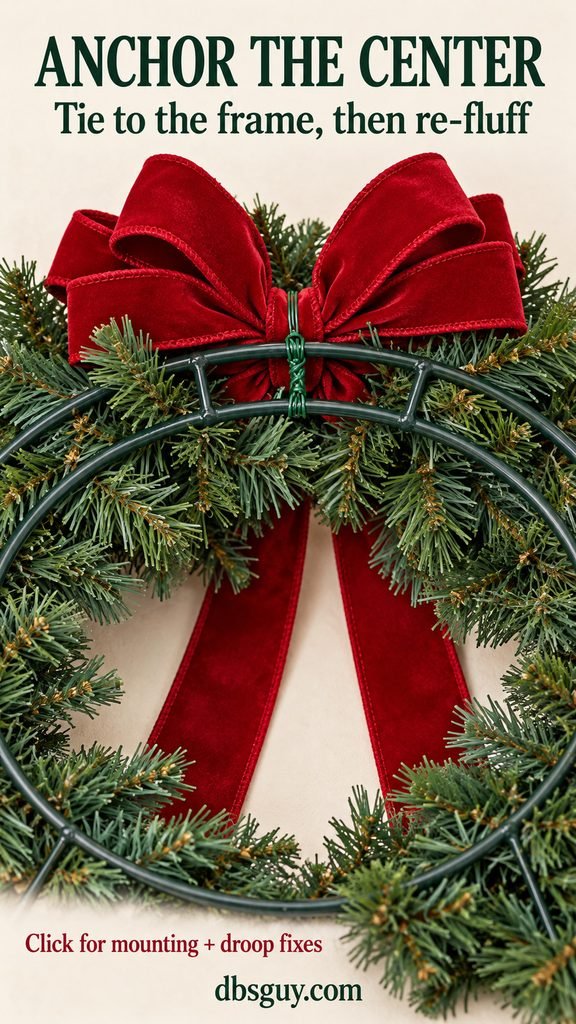
Hang the wreath, then check the bow in that vertical position. Make sure the mounting wire supports the gathered center and the loops have room to project forward. Reopen any loop compressed during attachment, separate the two tails, and tuck the wire ends where they cannot scratch the door.
If the bow rotates, add a second short tie between its center binding and another nearby frame point. Keep that extra support behind the bow. Do not use a loop tip or a tail as the load-bearing attachment.
The same principle applies on a tree: attach through the center binding to a sturdy trunk or stable branch junction and shape the loops after mounting. Use a proper mounting point for a freestanding display; the decorative center wrap alone is not a hanger.
If your giant Christmas bow still droops
The loops collapse, but the center stays in place
Check the ribbon’s edge wire and fabric body. Round the wired edges again and watch what happens when you release the loop. If it falls immediately, that ribbon is too soft for the loop size you are asking it to hold.
For a smaller version, use loop strips of 34, 30, 26, and 22 inches with the same 2-inch overlaps. Their flattened spans become 16, 14, 12, and 10 inches. This changes the scale of the same bow rather than adding more weight to a weak loop.
The layers slide or the bow becomes lopsided
Inspect the binding. All the overlapping ribbon ends need to be inside the center pinch. An unsecured end can creep outward as you shape the loops. Rebind the center with the layers aligned; then work outward again.
The whole bow leans forward
Look behind it. The attachment may be loose, anchored to greenery, or positioned so the bow can rotate. Move the tie to the structural support and add the second center attachment described above if needed. Extra glue on the front will not correct the mounting angle.
The bow looks flat instead of full
Separate the front and back layers. Open the hollow part of each loop and bring the smaller loops a little forward. A bow can have eight loops and still look flat when they all occupy the same plane.
Questions worth answering before you start
Can I make this bow with unwired ribbon?
You can make a large decorative bow with unwired ribbon, but it will usually have a softer, falling shape. For the open, supported loops in this tutorial, choose wired ribbon with enough body for the planned size. A floppy fabric bow needs its own support method.
Will 2½-inch ribbon work?
Use it for a smaller version rather than expecting it to fill out the 20-inch design in the same way. Start with shorter loops and check one upright before cutting the rest. Ribbon width affects fullness, while the fabric and wire determine how much support you have.
Can this bow go outdoors?
Only use it outside if the ribbon, fasteners, and attachment method suit that location. Wired does not mean waterproof or colorfast. Check the product’s care guidance and favor a sheltered spot; rain and wind can still flatten or move a bow.
How should I store it after Christmas?
Remove it by undoing the attachment wire rather than tugging a tail. Place the dry bow in a roomy box with lightweight tissue inside the loops, and keep heavy decorations off it. Next season, reshape the edge wires and inspect the center binding before hanging it again.
A giant bow looks best when its center is secure and its loops have room to open. Get those two things right before making the tails longer or adding extra decoration.