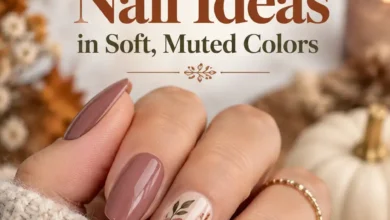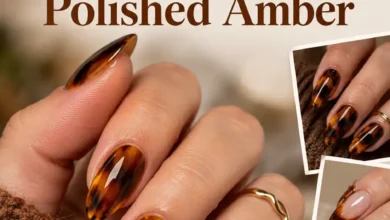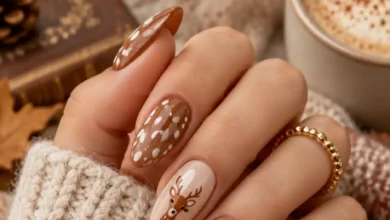
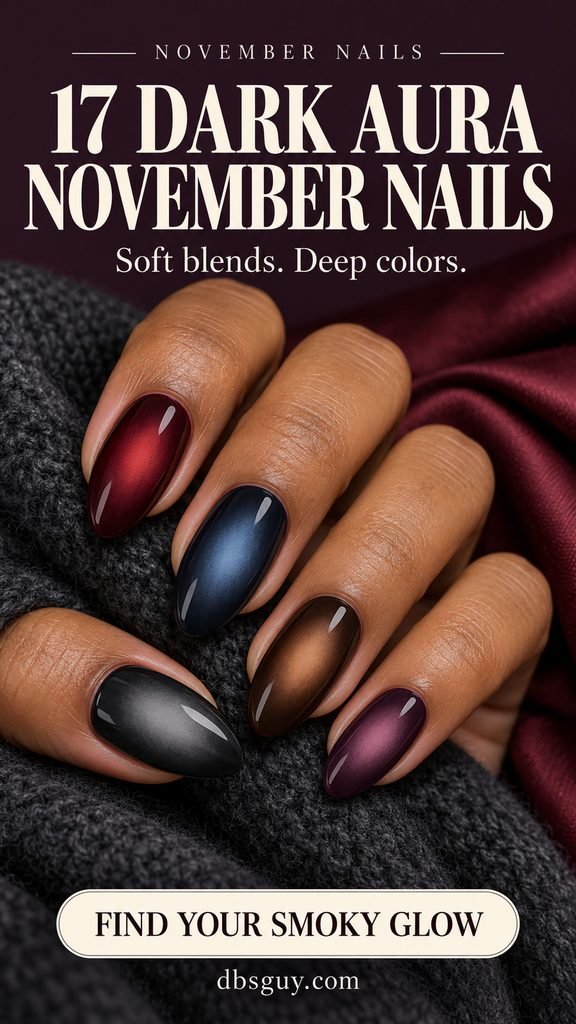
The prettiest part of a dark aura manicure is the color you notice after the first glance: a little ruby inside oxblood, a misty blue inside navy, or a soft gray cloud surrounded by charcoal. That blurred contrast brings depth to a November manicure without needing a busy pattern.
These 17 dark aura November nail designs explore different glow placements, finishes, and accent details. There are simple short sets, a single warm accent nail, and a few dressed-up options for dinner plans. Each look has its own image and a salon note, so you can save the blend you like and explain exactly where you want the color to sit.
What Makes a Dark Aura Manicure Work?
An aura design concentrates a softly blended patch of color within the nail. A traditional ombré often travels from one end to the other; an aura usually has a center with another shade around it. The center can sit low, shift to one side, or turn darker than the edges for a reverse effect.
Choose three things before the appointment: the outside shade, the center shade, and the size of the glow. A small center leaves more dark polish visible. A broad center makes the lighter shade a bigger part of the manicure. To keep the effect smoky, ask for a gradual fade with no crisp ring around the color.
For a simple first choice, look at the short charcoal set or the single caramel accent. If you want more detail, try the silver loops or the clear dewdrop. Save the whole image rather than only the colors: placement and finish are what make these designs feel different.
Allure’s fall nail-art report includes dark aura designs, with nail artists describing soft centers over deeper bases. The ideas here adapt that contrast into 17 original November concepts.
1. Charcoal Fog on Short Squoval Nails
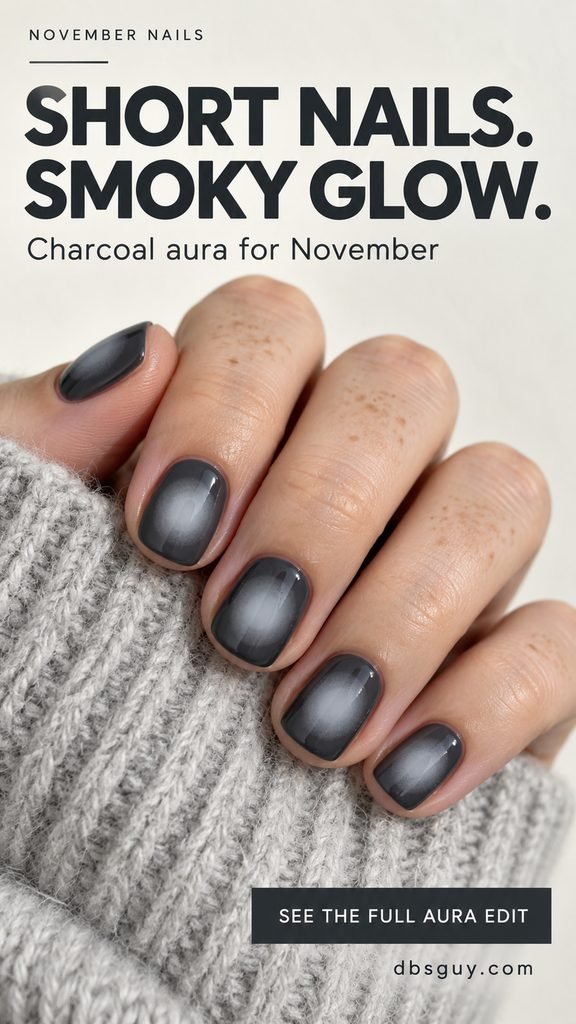
A small pale-gray cloud gives short charcoal nails a quiet focal point. The squoval shape keeps the outline compact, while the dark perimeter makes the center easy to spot. With a gray knit sleeve, the colors feel coordinated without looking perfectly matched.
Keep the gray slightly muted rather than bright white if you want a softer result. On a small nail, the center does not need much space to make an impact. Ask for a visible charcoal margin all the way around, including near the tip, so the design still reads as an aura.
Salon note: Short squoval nails, charcoal base, and a small diffused pale-gray center on each nail. Keep a dark border on every side and finish glossy.
2. Ruby Embers Inside Oxblood Almond Nails
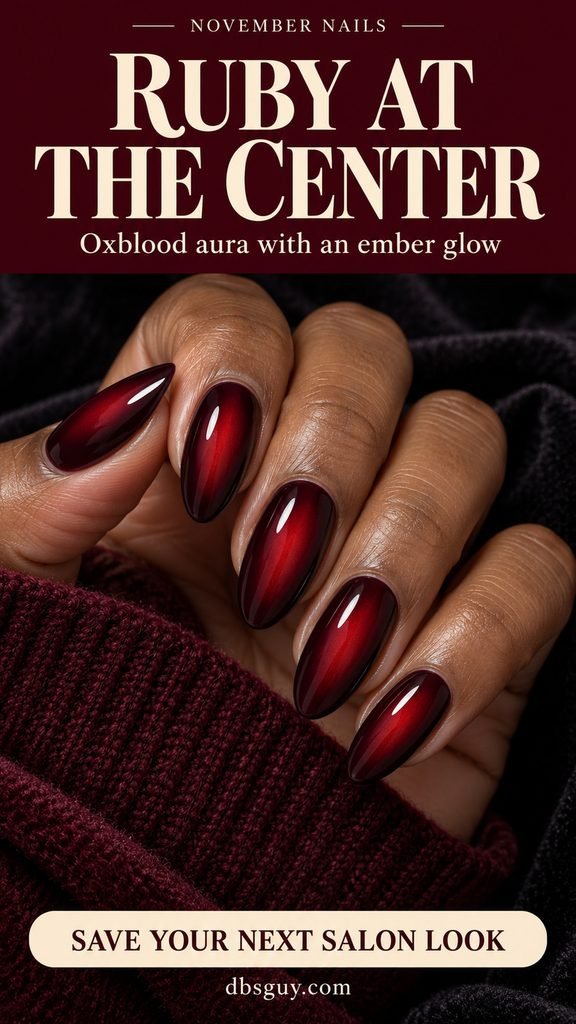
Ruby through the middle of an oxblood nail creates a warm ember effect. The elongated center follows the almond shape, leaving deep red visible along both sides. It is an easy color story to picture beside a black dress or a merlot sweater on a chilly November evening.
The red should fade before it reaches the cuticle and tip. That little bit of dark polish around the ends makes the glow look contained within the nail. Ask to compare the two reds together; if they are almost identical, the blend may be difficult to see in softer indoor light.
Salon note: Oxblood almond nails with a narrow ruby oval blended down the center. Fade the ruby before the cuticle and tip, with a glossy finish.
3. An Off-Center Blue Halo on Midnight Navy
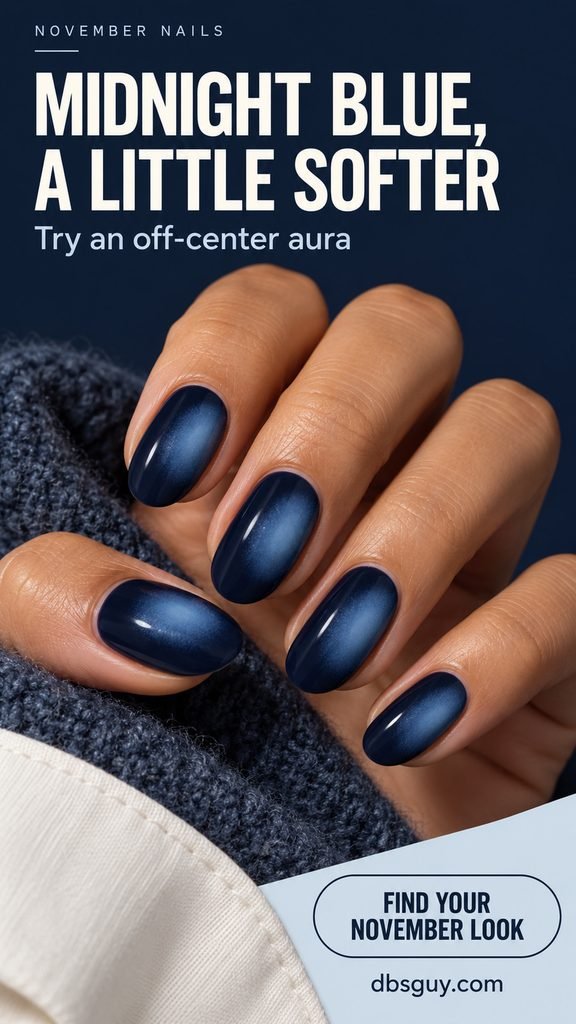
Moving the blue halo a little to one side changes the balance of a navy manicure. One edge stays deeply shaded while the other holds more misty denim color. The effect feels atmospheric, especially against a slate-blue sleeve or a crisp ivory cuff.
Choose the same side placement across the set so the shift looks intentional. Leave a narrow navy margin beside the lighter area instead of letting the blue run right off the nail. This is a useful reference if you like the aura idea but want something less symmetrical than a centered circle.
Salon note: Midnight navy oval nails with a soft denim-blue halo shifted to one side. Keep the placement consistent and retain navy around the entire glow.
4. A Single Caramel Aura Accent on Espresso
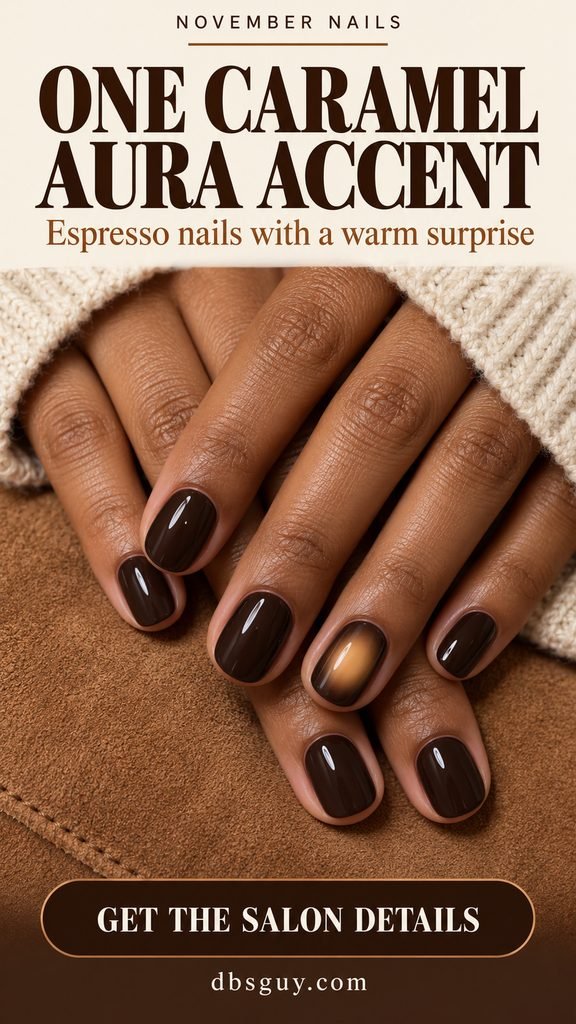
You can try the aura effect on just one nail. A caramel center on the ring finger adds warmth to an otherwise solid espresso set, giving the hand one small point of contrast. Short rounded nails keep this version particularly straightforward.
Use the same espresso shade for the accent’s border and the other four nails. That repeated color makes the set feel connected even though the ring finger has more detail. Camel suede, oatmeal knits, and a brown leather bag all fit the warm palette without competing with it.
Salon note: Four solid espresso nails and one ring-finger aura accent with a soft caramel center. Match the brown border to the rest of the glossy set.
5. Twin Sage Halos on Deep Pine
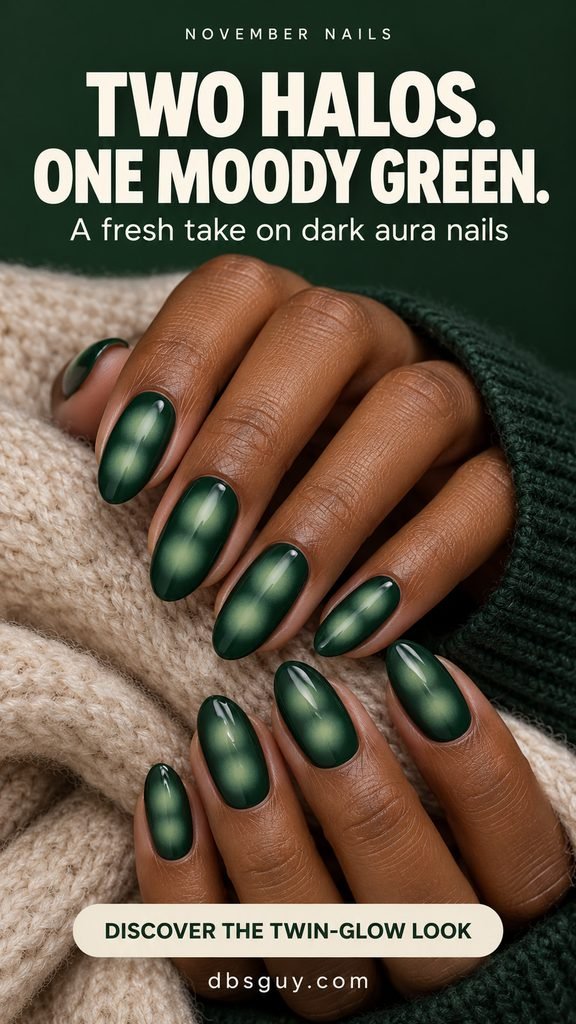
Two sage halos give deep pine nails a more unusual arrangement. The centers sit one above the other, with their blurred edges gently meeting. You still see the dark green around them, but the eye moves along the nail instead of settling on a single spot.
This design needs enough room to distinguish the two brighter areas. On a shorter nail, reduce the size of each halo rather than crowding them together. The edges should stay cloudlike; sharp little circles would create a different, dotted effect. A medium oval shape offers a comfortable amount of space for the reference.
Salon note: Deep pine with two small sage aura centers stacked vertically on each nail. Let the soft edges overlap slightly while keeping two distinct centers.
6. Matte Black Nails With a Dusty-Rose Aura
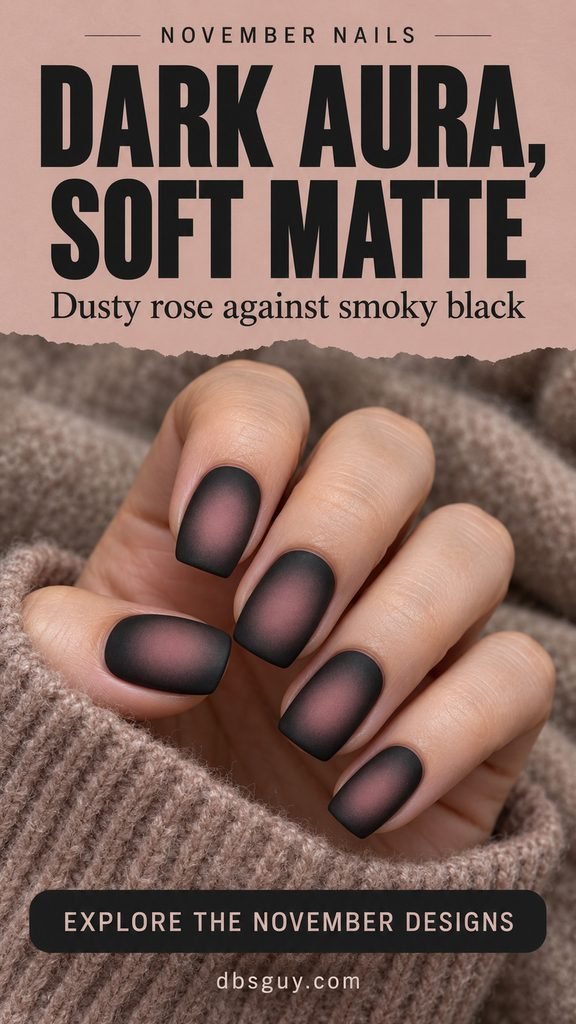
Dusty rose softens smoky black, and a matte finish gives the blend a flat, powdery appearance. The broad center brings more pink into view than a tiny halo would, while the black outline keeps the manicure moody. It works beautifully with brushed taupe wool and muted rose layers.
Ask to see a sample with the matte top coat already applied. The final finish is a large part of this look, and it changes how the light lands on the color. Keep the rose muted rather than neon so the transition feels hazy and gentle.
Salon note: Smoky-black soft-square nails with broad dusty-rose aura centers, finished evenly matte. Keep the pink muted and the transitions softly blurred.
7. Lilac Haze With Tiny Silver Studs
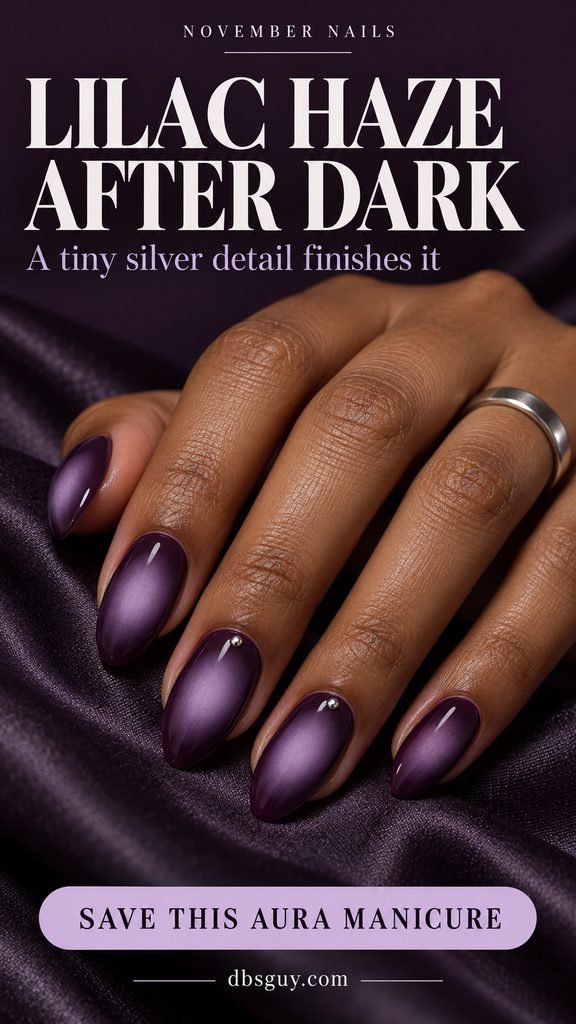
A lilac center opens up a deep aubergine manicure, while tiny silver studs add two small points of reflection. Place the studs close to the cuticle, away from the brightest part of the aura, so both details remain visible. A simple silver ring is all the extra jewelry this set needs.
Keep the metal pieces small enough that the purple blend remains the main feature. If you prefer a completely smooth manicure, ask the artist about a painted silver detail instead. The lilac should fade gradually into the aubergine rather than becoming a pale patch with a hard outline.
Salon note: Aubergine almond nails with soft lilac centers. Add a tiny silver stud near the cuticle on two accent nails, leaving the aura centers clear.
8. Reverse Black-Cherry Aura With Mauve Edges
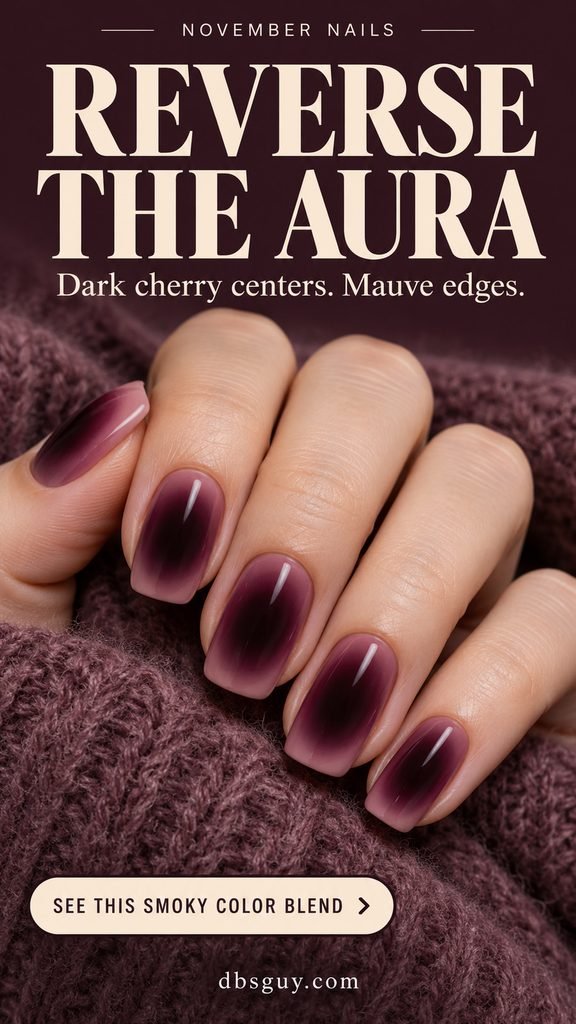
Reverse aura places the deepest shade in the middle. Here, a black-cherry center dissolves into a muted mauve rim, creating a softer outline around the nail. The contrast is different from the ruby set: your eye lands on darkness first, with the lighter color framing it.
Show the artist the picture and specifically say that you want the center darker than the edges. Color names alone will not communicate that reversal. Keep the dark area generous so the manicure retains its moody character, and use a glossy finish to show the smooth transition.
Salon note: A reverse aura with large black-cherry centers and muted mauve around the edges. Blend outward softly, with full coverage and a glossy finish.
9. Diagonal Amber Glows on Smoky Brown Coffin Nails
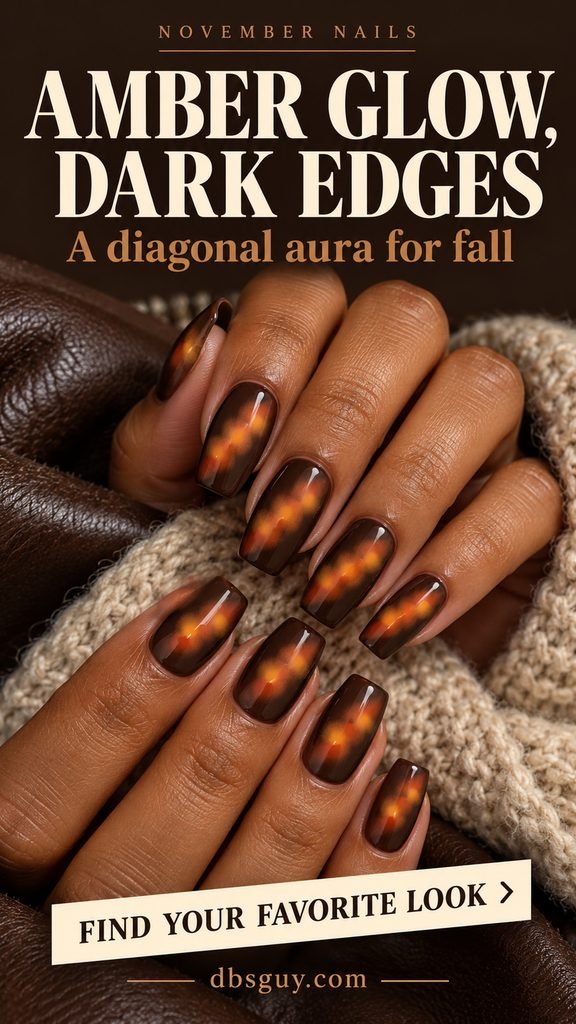
A diagonal trail of amber glows brings movement to smoky brown nails. Several small, overlapping clouds create the blend rather than one large center. The warm orange sits comfortably in a November palette, especially beside chocolate leather and oatmeal wool.
A medium coffin shape gives the diagonal arrangement enough room without needing extreme length. Ask for the amber to remain hazy at the edges so the result does not turn into a row of dots. Let brown show around the trail, particularly at the corners, to preserve the dark frame.
Salon note: Smoky-brown coffin nails with a diagonal trail of softly overlapping amber glows. Keep the clouds diffused, the perimeter dark, and the surface glossy.
10. A Long Teal Glow on Ink-Black Almond Nails
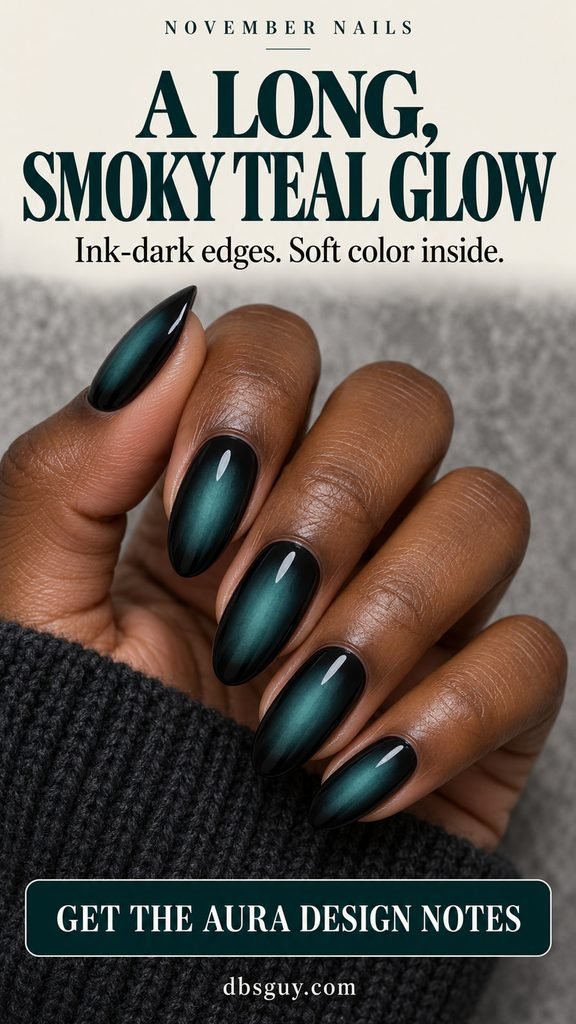
A long teal glow emphasizes the length of an almond nail. The color stays narrow through the middle, with rounded, faded ends and plenty of ink-black polish beside it. Against a charcoal cuff, the teal gives the manicure a cool-toned point of interest.
Ask for blended color rather than a sharp stripe. The edges need to feather into black on both sides, and the teal should stop before the tip. A close-up reference is helpful here because an elongated aura can otherwise be interpreted as a different type of line or light effect.
Salon note: Ink-black almond nails with a long, narrow teal aura and softly rounded ends. Use a blurred color gradient, with dark space around every edge.
11. Glazed Merlot Aura With a Pearl Sheen
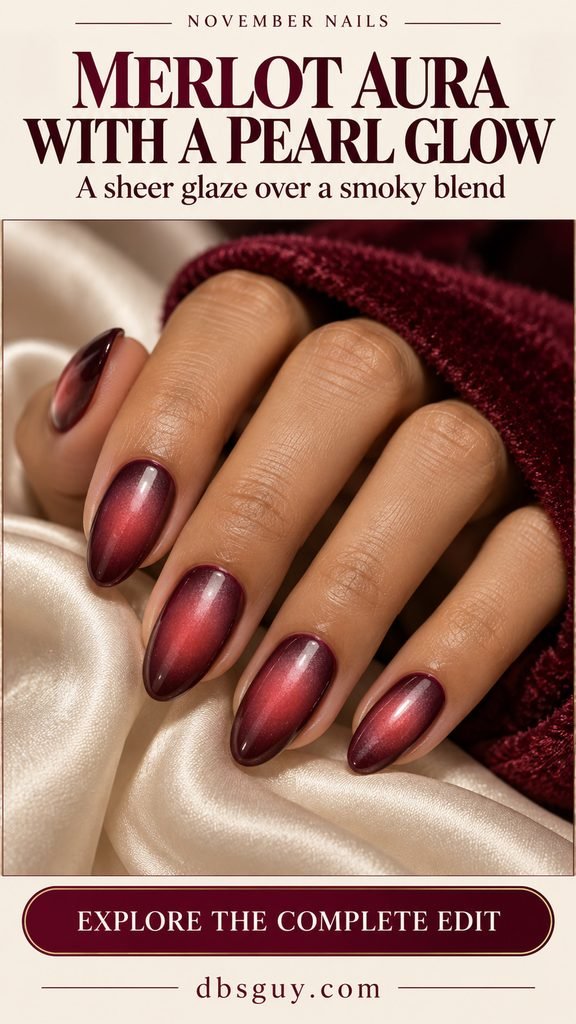
A sheer pearl sheen adds another layer of interest to merlot and rose-red aura nails. The gradient still provides the main color, while the glaze catches light across the surface. This is a lovely option for a November dinner when you want a little shimmer without visible glitter pieces.
Keep the glaze translucent. An opaque metallic finish can hide the blend you chose underneath it. Ask to see the effect over a sample nail before finishing the whole set, and check that the darker merlot border is still easy to distinguish from the rose center.
Salon note: Merlot borders with diffused rose-red centers, topped with a sheer pearl sheen. Keep the glaze light enough that the aura remains clearly visible.
12. Smoky Plum Aura With a Fine Black Bow
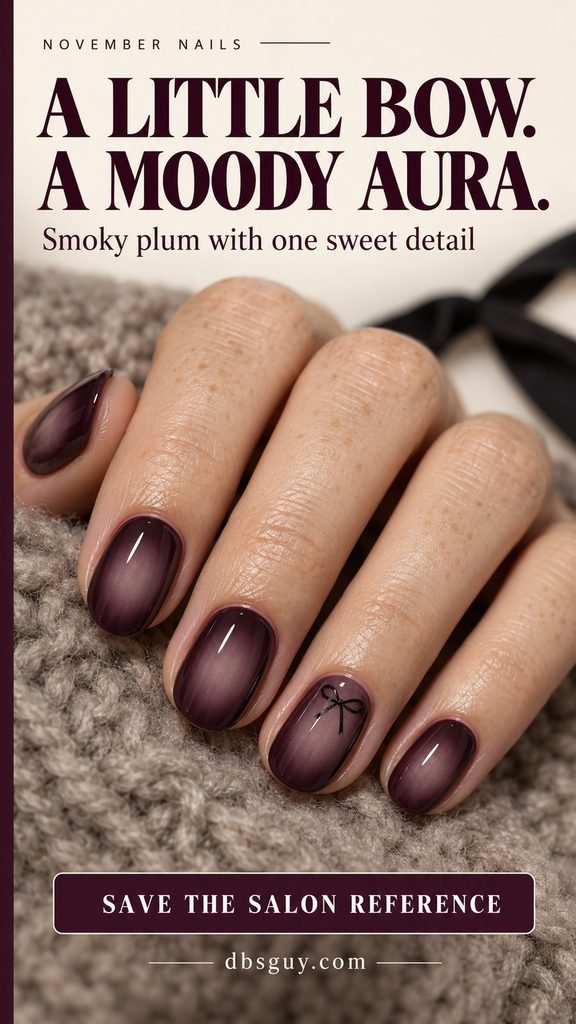
A tiny black bow adds a sweet detail to smoky plum without changing the overall mood. The bow sits over the lighter taupe-mauve area on one nail, where its fine lines can show. The remaining nails stay focused on the soft color blend.
Keep the bow flat and small, with open loops rather than a solid block of black. That leaves some aura visible through the design. Short-to-medium oval nails are enough for this version; the artist can scale the loops and tails to your actual nail width.
Salon note: Smoky plum with taupe-mauve aura centers. Add one tiny, flat black bow to the ring finger using fine lines and open loops.
13. Steel-Gray Aura With Fine Silver Loops
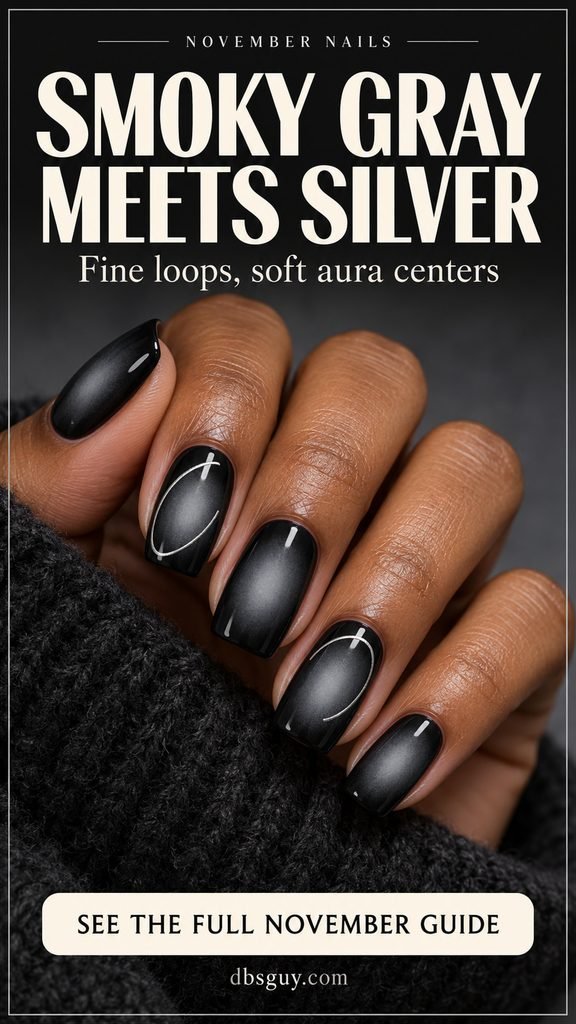
Fine silver loops bring a crisp detail to a soft charcoal-and-gray blend. An open loop curves around part of the aura on two accent nails, letting the smoky center remain visible inside it. The small amount of metal works especially well with a gray sweater and silver jewelry.
Keep the loops thin and slightly different in angle. Their open ends make the design feel lighter than a complete metallic border. The other nails can stay plain aura, giving the eye a break between the two detailed accents.
Salon note: Charcoal nails with steel-gray aura centers and one thin, open silver loop on each of two accents. Keep the loops delicate and the other nails simple.
14. Cocoa Aura With a Clear Dewdrop Accent
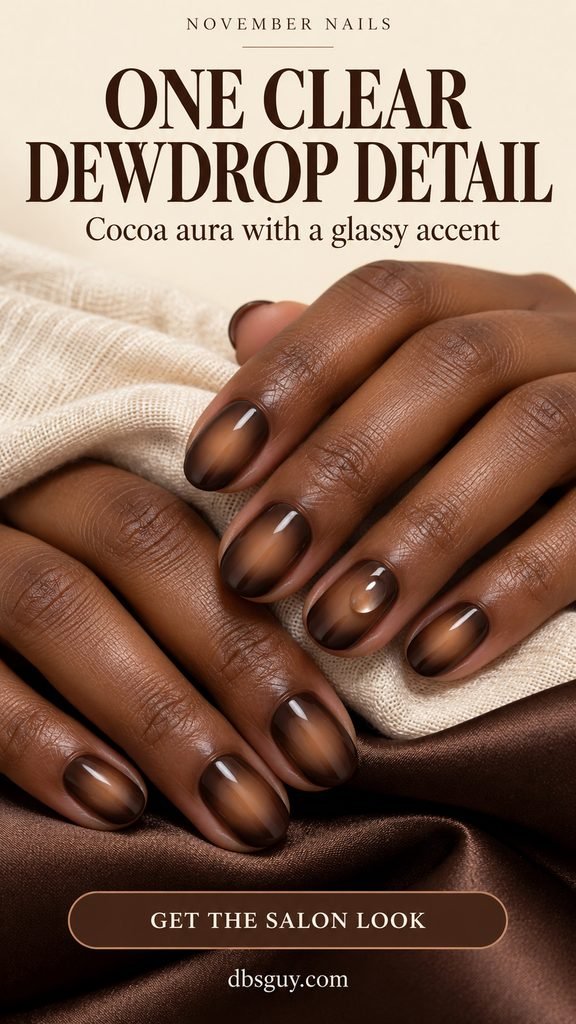
One clear dewdrop adds a glassy detail over a cocoa-and-hazelnut aura. Because the accent is transparent, you can still see the blended brown beneath it. The raised shape adds a different kind of highlight from the flat, glossy polish on the other nails.
This is a design to discuss with a nail artist, including how high you want the accent to sit. A small, low dome keeps the detail restrained. Mention the knitwear you usually wear if you want the artist to prioritize a smooth shape that is less likely to catch on fabric.
Salon note: Cocoa nails with soft hazelnut centers and one small, clear oval dewdrop on the ring finger. Keep the other nails flat and the accent low-profile.
15. Oxblood Aura With a Low Rose Glow
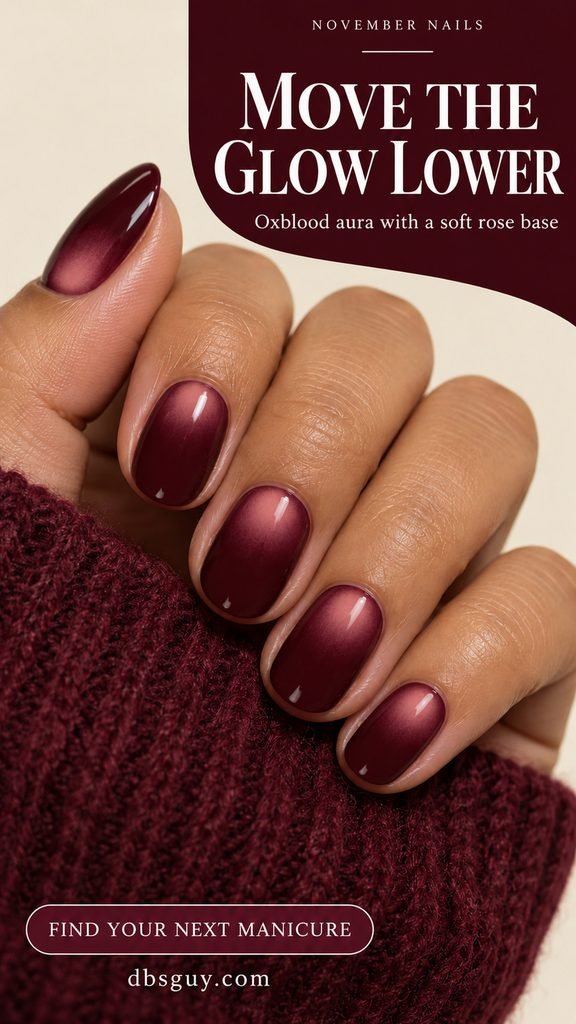
Placing the rose glow near the base of an oxblood nail leaves the tips deeper and darker. It is a small adjustment with a noticeable result: the color seems to gather low on the nail rather than sitting in its middle. Short oval nails give this version a neat, compact shape.
Leave a narrow oxblood margin between the rose and the cuticle. The glow should have a fuzzy edge, not the crisp outline of a half-moon manicure. If you like this placement, save the picture even if you plan to change the two colors.
Salon note: Short oxblood oval nails with a diffused dusty-rose glow in the lower third. Keep a dark margin at the cuticle and leave the tips predominantly oxblood.
16. A Moody Mixed-Tone Aura Manicure
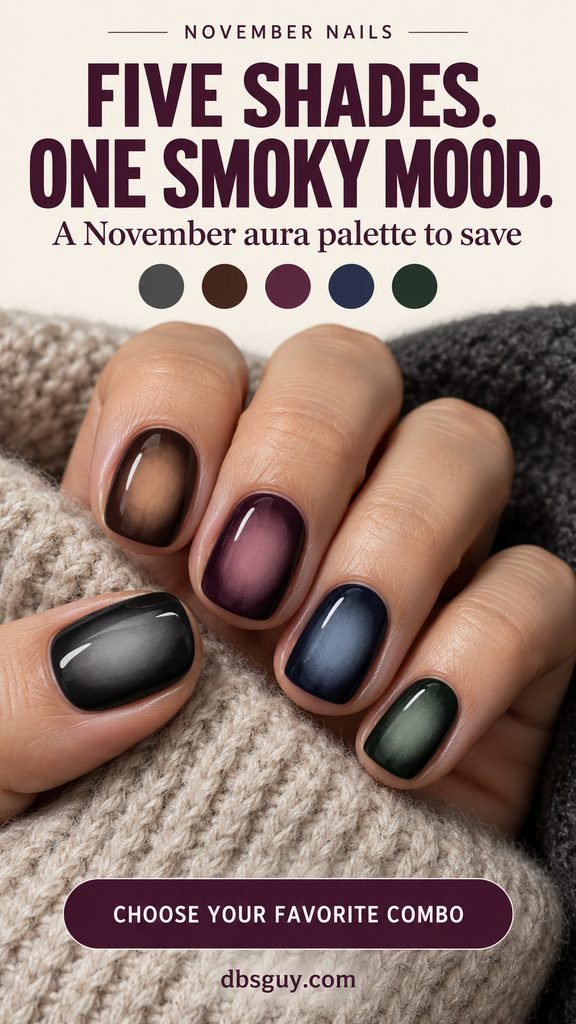
A mixed-tone set lets you bring several November colors into one manicure. Charcoal, espresso, plum, navy, and pine each get a softer center from the same general color family. The palette varies, but the small oval glows and short squoval shape keep everything connected.
Choose a similar level of contrast on all five nails. One very bright center can pull attention away from the rest of the hand. Lay out the color pairs before painting, then keep the size of the aura and the glossy finish consistent across the set.
Salon note: Five dark color pairs with matching small oval aura centers, short squoval shapes, and gloss. Keep the brightness of the centers balanced across the hand.
17. Sheer Taupe Nails With Smoky Black Centers
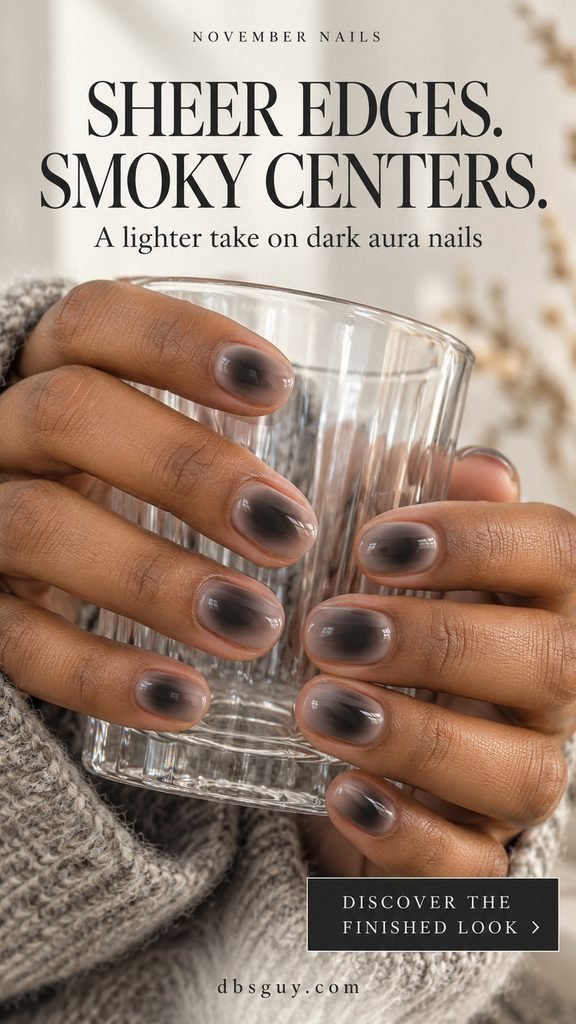
Sheer taupe edges give a smoky black center some breathing room. You can see a little natural nail detail around the sides, while the middle stays dark and softly blurred. This version is a good reference if you enjoy a moody color but prefer some transparency in the finished manicure.
Decide how sheer you want the rim before the color is built up. The black should fade gradually into taupe, with no hard spot in the middle. A short rounded shape and glossy finish keep the effect simple, leaving the blend itself as the only decoration.
Salon note: A translucent taupe base with smoky-black aura centers, leaving sheer edges visible. Keep the nails short and rounded with a soft blend and glossy finish.
What to Tell Your Nail Artist
Bring the image with its salon note, then identify the darkest area with your artist. Is it the border, the center, or mostly the tip? Point out the size and position of the lighter patch as well. These decisions communicate more than simply requesting a burgundy or gray aura manicure.
Confirm the length, finish, and accent fingers before the service begins. Ask for a sample blend when you are unsure how the two shades will look together. Mention metallic linework, studs, a pearl glaze, or a raised dewdrop when booking so the salon can confirm the technique, time, and price.
How to Try a Simple Aura Accent at Home
For a first try, use regular air-dry polish on one accent nail. Choose a dark base and a lighter center, and let the base dry according to its directions.
Use a clean cosmetic sponge to dab a little lighter polish into the center. Build the color gradually while leaving a dark border, and test the blend on a practice tip first.
Let the design dry before sealing it with a compatible top coat. Follow the instructions for your products; gel application and curing need their own system-specific directions.
OPI’s Pose-in Pretty tutorial demonstrates building sponged color and fading it outward from the center. Its colors differ from these dark designs, but the gradual application is a useful starting point.
Dark Aura November Nails: FAQs
Can dark aura nails work on short natural nails?
Yes. The charcoal set, the single caramel accent, and the low rose glow all use compact shapes. Keep the center small enough to leave a visible border. More involved patterns can be reduced to one accent, and the design does not automatically require extensions.
Do I need an airbrush for aura nails?
No. A sponge can create a softly blended effect with regular polish, as shown in OPI’s sponged-color tutorial linked above. A salon may use another technique. Tell the artist the finish you want and let them recommend the method that suits their products and your chosen design.
Why does a dark aura design sometimes look almost solid?
The center and surrounding shade may be too similar, or the lighter area may be too small to notice in dim light. Compare a sample near a window and indoors. Ask for a slightly lighter center or a broader glow if you want the contrast to remain more visible.
Which designs are simplest to start with?
Choose the short charcoal aura or one caramel accent. Both use a single soft center and no embellishment. Twin halos, fine silver loops, and raised accents need more control or an additional technique, so use those as salon references if you are new to nail art.
Do dark aura nails actually glow in the dark?
The glow in these designs is a visual effect created by blended colors. It does not require glow-in-the-dark polish and should be visible under ordinary light. If you want a manicure that glows in darkness, that is a separate product request to discuss with your artist.
Save the Glow You Want to Wear
Save the design that matches the amount of color and detail you want to wear all week. Then bring the image and salon note together, especially if you love an off-center halo or a reverse blend. A clear placement reference is the small detail that helps turn a dark polish idea into the smoky November manicure you pictured.
Manicure images are AI-generated concepts created for dbsguy.com. Your nail artist can adapt the colors, proportions, and placement to your nails.
Further inspiration: Byrdie’s dark aura manicure gallery. Designs, styling notes, and images in this article were developed for dbsguy.com.