When another full coat of navy, gray, or berry feels too familiar, change where the color goes. A sweep along one side, a small square floating in the center, or an outlined tip can give you January nail art while leaving much of the nail sheer.
These eight ideas use placement as the main detail. Choose navy or silver for a cooler look, cocoa or taupe for something softer, or burgundy when you still want a dark accent. The winter palette is a styling choice; you can use a color you already love.

The visuals are AI-generated nail-design concepts for dbsguy.com. They illustrate color and placement, rather than documenting completed manicures or product tests.
Decide How Much Color You Want to See
For the lightest effect, start with the silver base arcs or the floating blue squares. The navy side sweeps and cocoa waves give you a more visible line. Half-taupe nails create the largest block of color in this group, while still keeping a substantial sheer section.
Here, “sheer” means you can still see the natural nail bed through clear polish or a translucent tint. It does not mean skipping the base coat or finishing coat your polish system calls for. Choose a sheer shade you like on your own hand; the same pink-beige tint will look different on different nail beds.
Before choosing the most detailed design, look at your actual nail length. A small corner or glitter tip needs less room than two separate French curves. You can also put any of the designs on just one or two nails per hand and leave the rest sheer.
1. Navy Side Sweeps Over a Sheer Base
This keeps the depth of a navy manicure without turning the whole nail dark. A tapered sweep follows one side of each nail, leaving the center open. It is a good choice if you like dark polish beside winter-white sleeves but want less coverage.
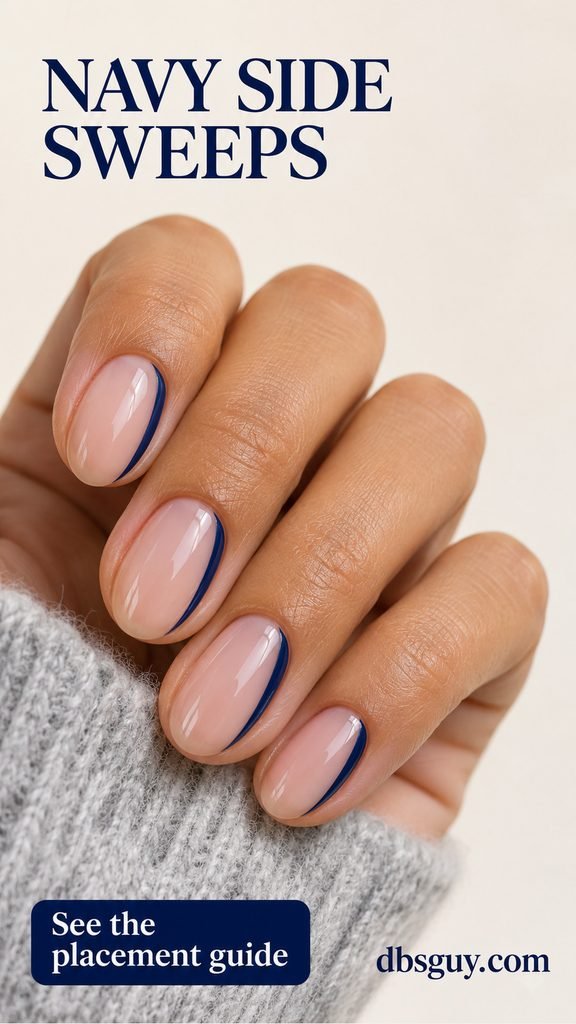
Ask for a narrow navy curve on the same side of every nail, with the widest part still taking up only a small portion of the surface. The sweep should sit inside the nail boundary, with a clean margin from the skin. Skip a complete navy border around the tip; that would change the side-focused look.
On shorter nails, use a gentle bend instead of a dramatic swoosh. If you are trying it with regular polish, practice the curve on a spare nail tip with a fine liner brush before committing to both hands. Repeatedly widening a wobbly line can quickly eat into the sheer space.
2. Tiny Silver Arcs Near the Cuticle
Put the shine at the base rather than across the whole nail. Each silver arc follows the lower curve of the nail, with a narrow sheer gap separating it from the cuticle. The small reflective detail is easy to pair with a silver ring or watch.
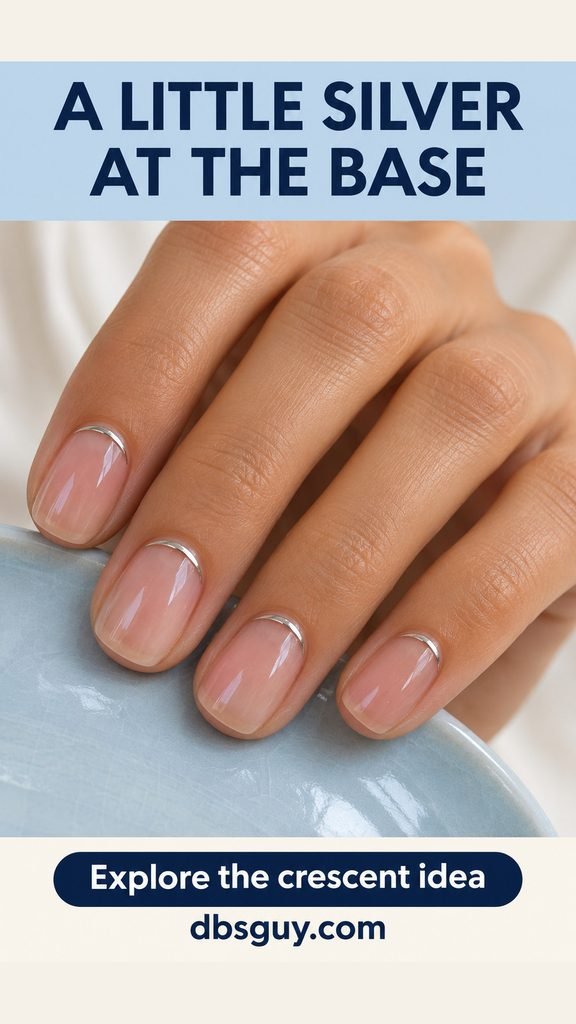
The distinction to show your artist is a thin arc, not a filled half moon. Keep the center and tip translucent. Ask to see the line on one nail first so you can decide how much silver you want before repeating it.
This placement fits short rounded-square nails because it does not depend on a long free edge. Metallic nail polish can create the effect without a raised decoration. If matching ten base curves sounds fiddly, keep the silver on the ring nails and use the same sheer base everywhere else.
3. Floating Ice-Blue Squares on Two Nails
A small geometric shape changes the look more than another pale-blue coat would. Put one opaque ice-blue square in the center of the middle and ring nails, then keep the other nails plain and sheer. The empty space around each square is part of the design.

Start with a square around one-third of the nail’s width, then adjust it to fit your nail bed. It should have breathing room on all four sides and sit entirely on the nail. A border or extra dot is unnecessary; the crisp blue shape already gives the eye somewhere to land.
A small flat nail-art decal is an alternative to painting four straight edges. Check its size against your nail before applying it and follow its placement and sealing directions. On a narrow nail, use a smaller square rather than stretching it into a full-width band.
Also Read: 13 Easy January Nail Ideas Where One Small Detail Does the Work for more accents you can limit to one finger.
4. Mushroom Taupe on Half of Each Nail
If tiny artwork feels too delicate for your taste, try a broad vertical split. One half of each nail is opaque mushroom taupe; the other half stays sheer. This gives you a substantial color block and a clear change from your usual full-coverage manicure.
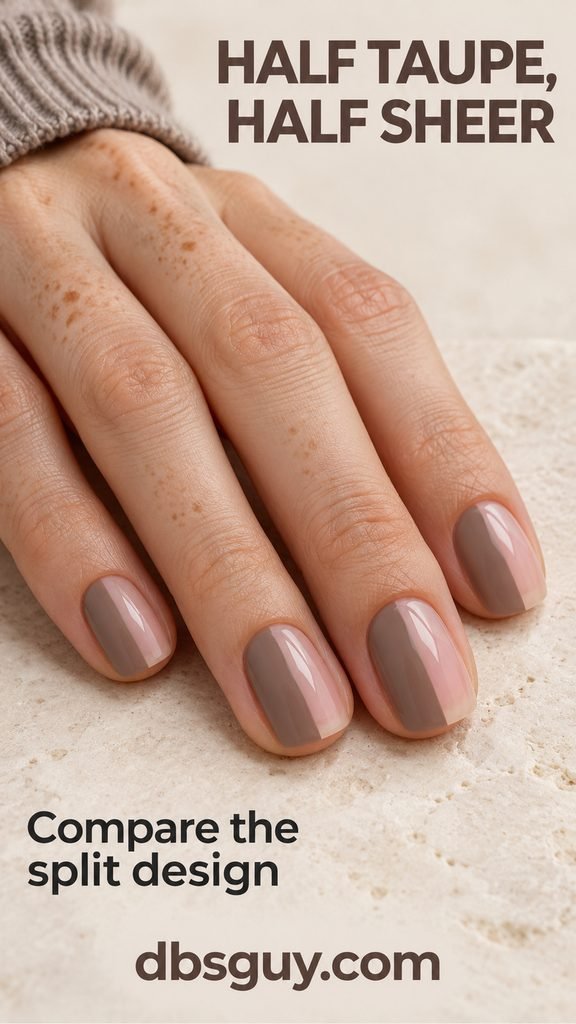
Request a straight boundary down the center, with the taupe on the same side across the set. Leave out a metallic dividing stripe so the split itself remains the focus. A short rounded-square shape suits the clean geometry, but you can keep your comfortable shape.
For a home version, a straight nail-art guide can help define the boundary. Follow the guide’s directions for when the underlying polish is ready for adhesive contact. A sheer base that looks dry may still mark under pressure. Paint the colored half in thin layers instead of building a ridge along the guide.
5. A Hollow Charcoal French Tip
This version outlines the tip and leaves its interior sheer. One fine charcoal curve follows the outer edge; a second follows the smile line below it. Together they frame a narrow, unfilled crescent.
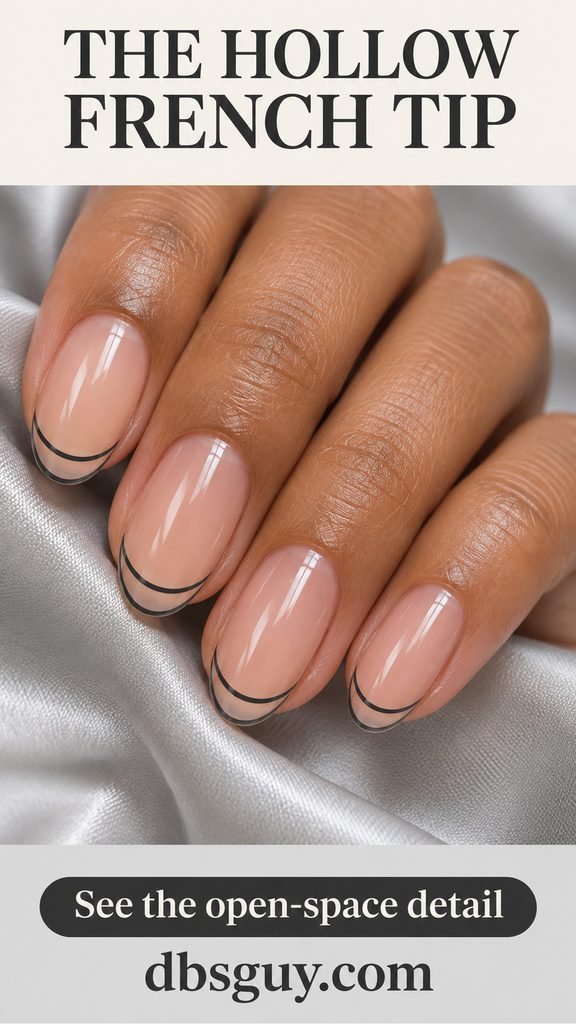
Use the words “outlined tip with a clear channel between the lines” at your appointment. Without that detail, you may get a solid charcoal French band. Ask for both lines to remain fine enough that the sheer strip between them is easy to see.
The reference has some free edge beyond the fingertip, which gives the two curves room. If your nails are very short, avoid squeezing them together until the gap disappears. Choose the silver base arc in idea 2 instead, or ask your artist whether a shallower outline will fit your existing length. This is one of the more precise options here.
6. Burgundy Triangles at One Tip Corner
You can keep a favorite winter berry shade and use far less of it. A small burgundy triangle occupies one outer corner of each nail, leaving the center, base, and opposite corner sheer. The straight diagonal feels sharper than a curved French tip.
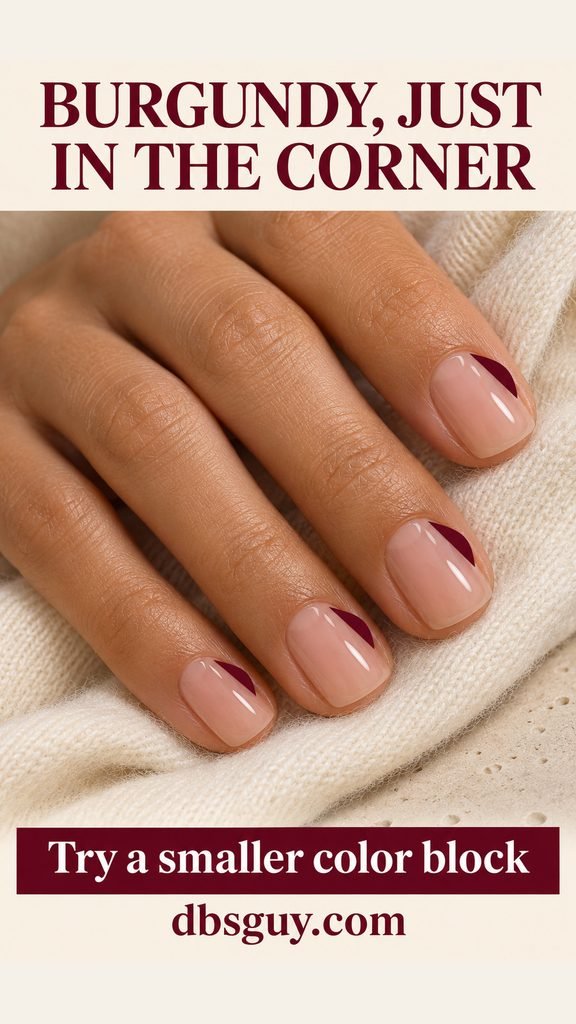
Choose which corner you want before painting, then repeat that direction across the hand. Ask for the wedge to cover less than a quarter of each nail. On a pinky, the triangle needs to shrink with the available space rather than match the index nail’s exact size.
For regular-polish practice, sketch the short diagonal boundary on a spare tip, then fill only the area between it and the outer corner. If the wedge keeps growing as you correct it, restart that practice tip with a smaller boundary. The dark accent should remain a corner, not spread into a full burgundy tip.
7. One Fine Cocoa Wave on Each Nail
A single brown line gives a sheer manicure movement without adding a big colored area. Keep it slightly off-center and let it bend gently from near the base toward the tip. The cocoa shade offers a warmer alternative to charcoal or navy.

Ask for one open, softly bending line per nail. It does not need an identical curve on every finger, but the color and line weight should be consistent. Leave plenty of sheer space on both sides; extra loops or crossing lines would make a much busier pattern.
If you prefer short nails, reduce the bend instead of trying to squeeze in a tight S. For an at-home attempt, rest your painting hand on a stable surface and test how much polish your liner brush holds. A lightly loaded brush gives you more control than a large drop at the start of the stroke.
8. Sparse Lavender Glitter at the Tips
For a softer edge, scatter a little lavender and silver sparkle near the tips. The flecks should be most noticeable at the outer edge and fade quickly, leaving most of the nail translucent. You still get a glint when your hand moves, with no solid band of color.

Choose a nail glitter topper with a clear base and small particles. An opaque lavender polish or densely packed glitter will cover the sheer area rather than create this scattered effect. Look at the product on a swatch before deciding it is the right finish.
With regular polish, use a small amount of topper at the tip and stop while individual flecks still have visible space between them. Follow the formula’s drying and finishing directions. This is the more forgiving choice if straight lines frustrate you: the fade can vary slightly from finger to finger and still look intentional.
Also Read: January Nail Art for Beginners: Simple Designs to Practice at Home if you want to practice small brush movements before doing a full set.
Keep the Sheer Space Clear and the Edges Deliberate
For a regular-polish version, gather your compatible base and top coats, a sheer tint if wanted, the one detail color, and the tool that suits your chosen design. A fine liner brush helps with curves; flat decals can replace painted squares. You do not need supplies for all eight looks.
Apply your base products as directed and let them dry as instructed before adding artwork. For guided edges, OPI’s sticker-stencil guide explains why the sticker edges need to lie flat and why flooding the stencil with polish can cause bleeding. For lacquer, it advises removing the stencil while the added color is still slightly wet, pulling slowly at an angle. Follow the directions for the actual guide and polish you use.
Finish with the compatible top coat when the detail is ready. Test the finishing step on a practice tip if your dark line tends to streak. These are regular-polish design suggestions, not curing instructions for gel; ask your nail professional about the products and method for a salon version.
Questions About Sheer January Nail Art
Which idea should I choose for very short nails?
The silver base arc, a small floating square, or a sparse glitter tip can work with very little free edge because the detail can be scaled down. Keep the square away from the sides and leave the glitter sparse. Save the hollow French for nails with enough space to distinguish both curves.
Can I use a sheer tint if I do not want my natural nail line to stand out?
Yes. Ask to compare a clear finish with a translucent pink, beige, or brown-toned tint on one nail. A tint can soften the contrast while leaving the nail bed visible. If you choose an opaque base, you can still use the placements, but the result will be a color-on-color design rather than the sheer look pictured.
Will leaving more nail sheer make the manicure last longer?
Do not choose it on that promise. An open area near the base may make the color boundary less obvious as the nail grows, but chips and lifting can still happen. These designs change the appearance of the manicure; they do not come with a wear-time guarantee.
What should I tell my nail artist?
Show one reference and specify the base, placement, and amount of coverage. For example: “A sheer nude base with one small ice-blue square on each middle and ring nail; keep the other nails plain and glossy.” Point out the empty areas you want to preserve, since those matter as much as the painted detail.
Also Read: Fun January Nail Designs for Anyone Bored With Plain Polish when you want to compare these sheer placements with bolder patterns.