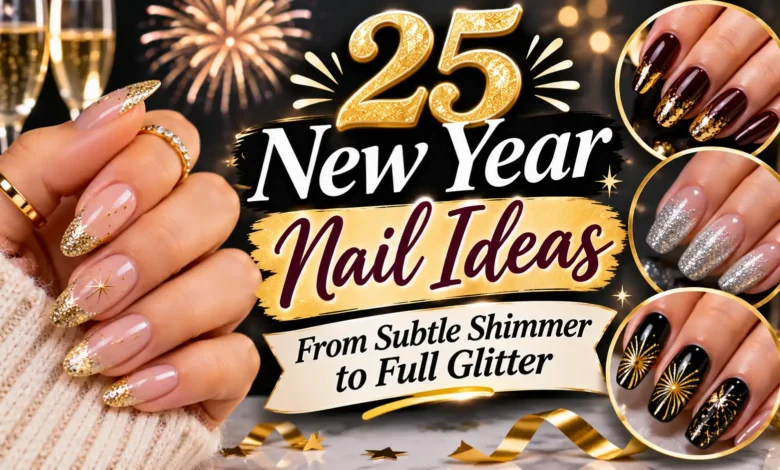
A champagne sheen can feel just as festive as a nail covered in glitter. The useful question is how much sparkle you want to notice: a soft glow across every nail, a small detail against a plain base, or an opaque glitter finish that becomes part of your outfit.
These 25 New Year nail ideas move from quiet shimmer through little accents to full party sparkle. Each reference explains the color, placement, and detail worth keeping when you adapt it to your own nail length.

The images are AI-generated nail-design concepts created for dbsguy.com. They illustrate colors, shapes, and placement, rather than documenting completed salon work or tested polish results. Real finishes vary with products, application, and lighting.
A Quick Way to Choose Your Sparkle Level
- You want a little glow: start with the champagne, ivory pearl, or espresso shimmer. The finish supplies the detail without separate artwork.
- You want a small party accent: compare one gold nail, a silver micro-French, a glitter corner, or sparse confetti. Choose the placement you would enjoy seeing on an ordinary January day, too.
- You want your nails to be an accessory: look at ruby glitter, opaque holographic silver, alternating metals, or the full champagne finish.
For a sequin sleeve or a heavily embellished outfit, a small accent leaves more visual space. With plain clothing, full glitter can be the detail you build the outfit around. Those are styling options, not rules about which colors you can wear.
1. Sheer Champagne Microshimmer
Start here if you want festive nails that still feel close to your usual neutral. A translucent peach-beige base lets a little natural nail show through, while very fine champagne shimmer adds a warm glow. Short rounded nails keep the silhouette soft.
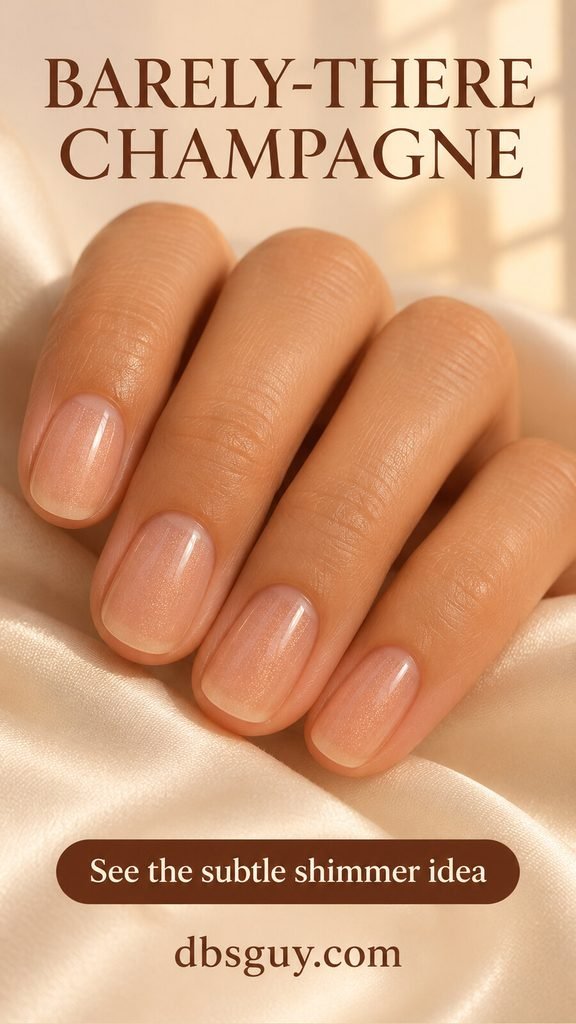
Look for a sheer shimmer polish rather than a clear topper packed with large glitter. Compare a painted sample beside your hand: champagne can lean pale beige or yellow-gold. At home, build only the coverage the formula allows; extra coats may make the color much less sheer.
2. Milky Ivory With a Pearl Sheen
Milky ivory gives this manicure its light color; a fine pearly sheen gives it the New Year detail. The reference uses short squoval nails, with gently squared ends and rounded corners. There are no separate glitter pieces or mirror-like chrome reflections.

For a straightforward home version, choose an ivory pearl polish that already contains the finish. Ask to see how it looks when the hand turns away from the light, too. If the sample becomes too white or opaque for your taste, compare a sheerer formula rather than adding more shimmer.
3. Dusty Mauve With a Holographic Haze
Choose dusty mauve when you want a little color under the sparkle. Here, very fine holographic particles create scattered rainbow flashes while the muted purple-pink base stays visible. The effect is quieter than the opaque silver holographic manicure later in the guide.
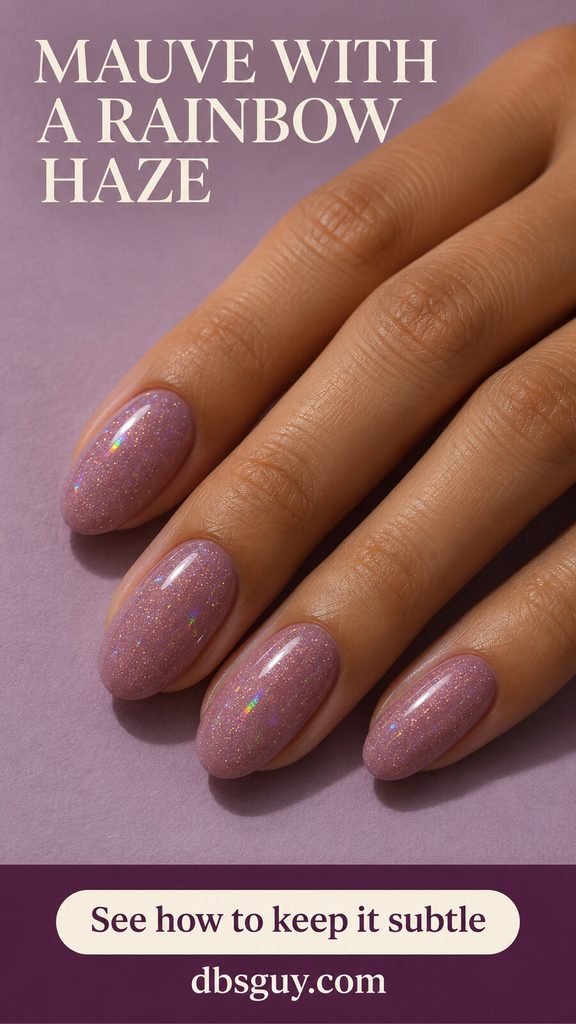
Check a finished swatch in ordinary room light as well as under a bright lamp. You should enjoy the mauve even when the rainbow effect is less obvious. Keep the particles fine and the coverage light if you want this to remain a subtle manicure.
4. Espresso Brown With Bronze Shimmer
A dark brown base and tiny bronze particles make a warm alternative to silver party nails. On the short rounded shape shown, the color reads as espresso first, with a coppery glow where the light catches it. This is an especially useful reference if you wear a lot of camel, chocolate, or cream.
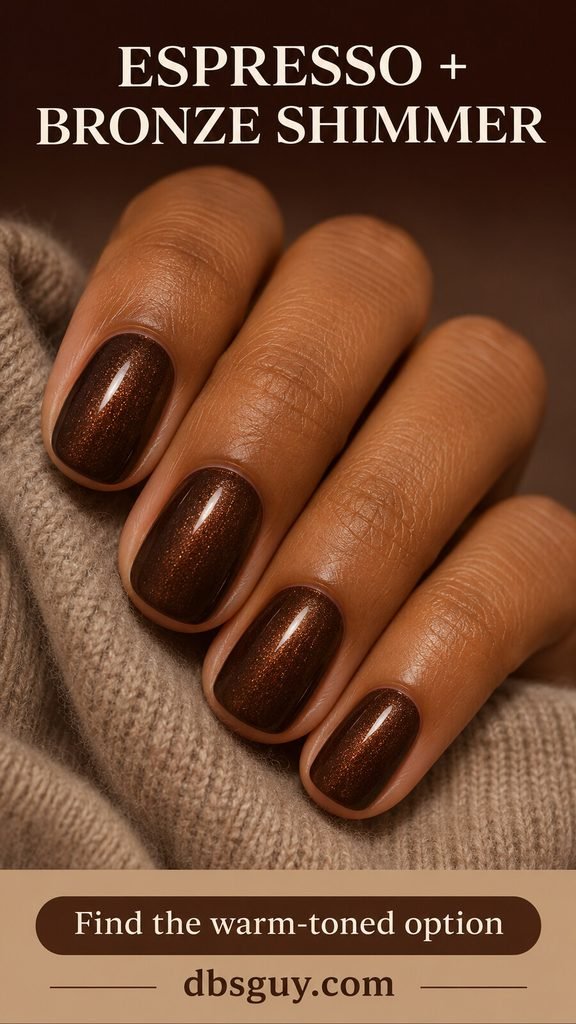
Ask for shimmer within the brown polish, not a layer of large gold flakes over it. Compare the sample beside a plain brown: you want the bronze to add reflection without turning the whole nail orange.
5. Midnight Blue With Glass-Fleck Sparkle
Inky navy with little silver-blue flecks gives you an after-dark color without painted stars. The flecks look irregular and scattered, with plenty of dark polish visible between them. Medium almond nails give the light room to travel across the surface, but the finish also works on a shorter oval.
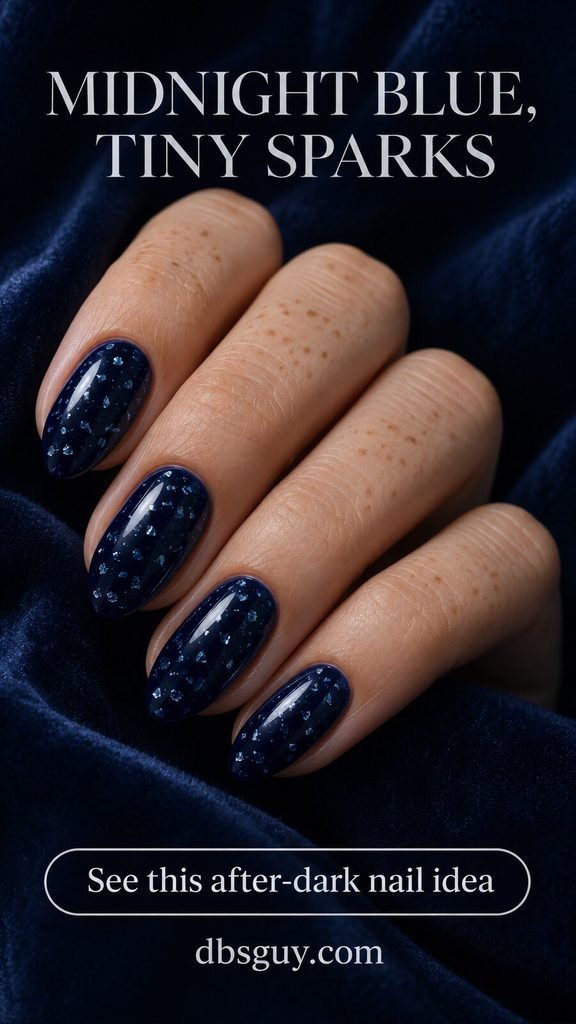
Look for a flecked polish or a compatible fine-flake topper. A dense silver glitter will cover the navy and change the idea. If the blue seems almost black indoors, compare a slightly brighter navy before committing.
6. Smoky Silver Velvet
This finish gets its interest from a broad silver glow over smoky gray. It looks smooth and glossy, with a diffused magnetic highlight rather than a painted stripe or a fuzzy texture. Choose it when you want movement in the light without little motifs on each nail.
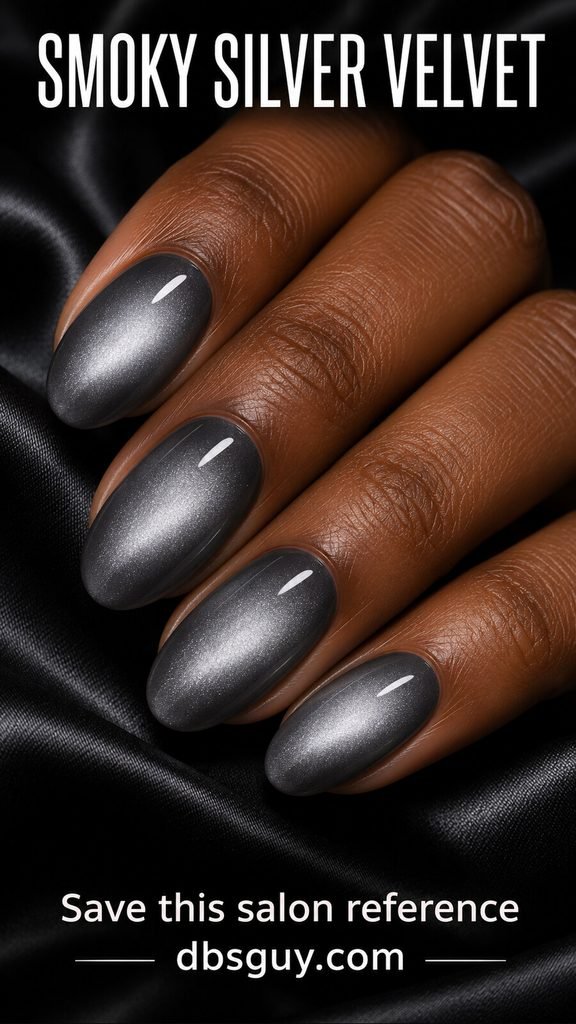
Take the image to a technician and ask for a soft velvet effect with darker gray at the edges. Magnetic polish needs a compatible magnet; ordinary shimmer cannot create the same controlled highlight. For magnetic gel, the effect is arranged before curing, following that product’s specified system and instructions.
7. Blush Pink With One Gold Glitter Nail
One fully sparkling ring fingernail changes the mood of an otherwise plain blush manicure. Keep the other nails glossy and free of decoration so the single gold accent remains the focal point. The short squoval shape makes this a useful reference for someone who wants party detail without extra length.
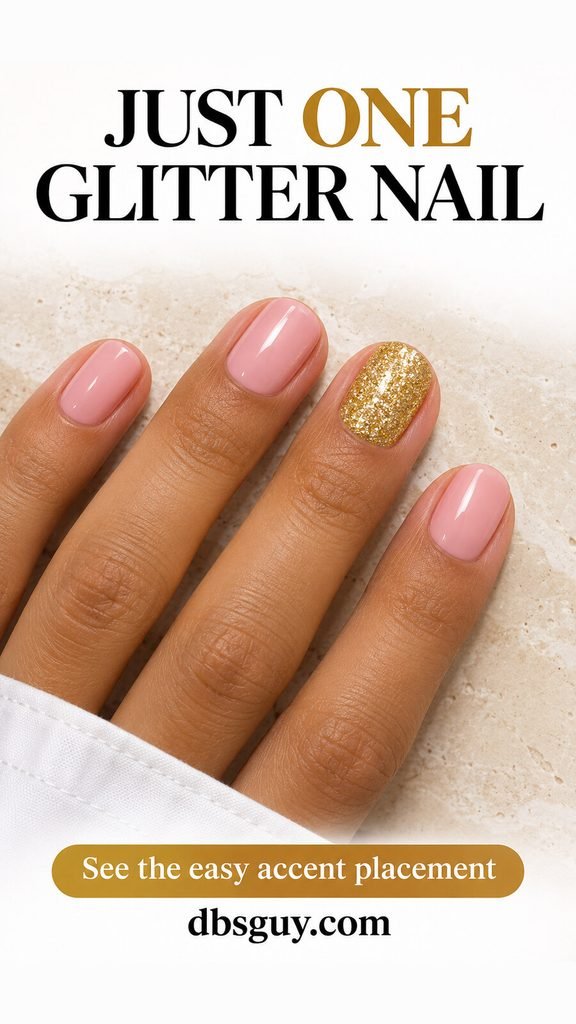
Paint the accent with a gold glitter polish that suits your preferred coverage, then leave the rest of the set alone. For a softer contrast, compare champagne gold with the brighter yellow-gold shown. You do not need to add stars or a second accent to make it feel finished.
8. Silver Micro-French Tips
A sheer rosy base and a very narrow silver edge give you sparkle only at the tips. Keep the line close to the free edge; a broad band would make this a much bolder French manicure. The short rounded reference leaves most of each nail clear and glossy.
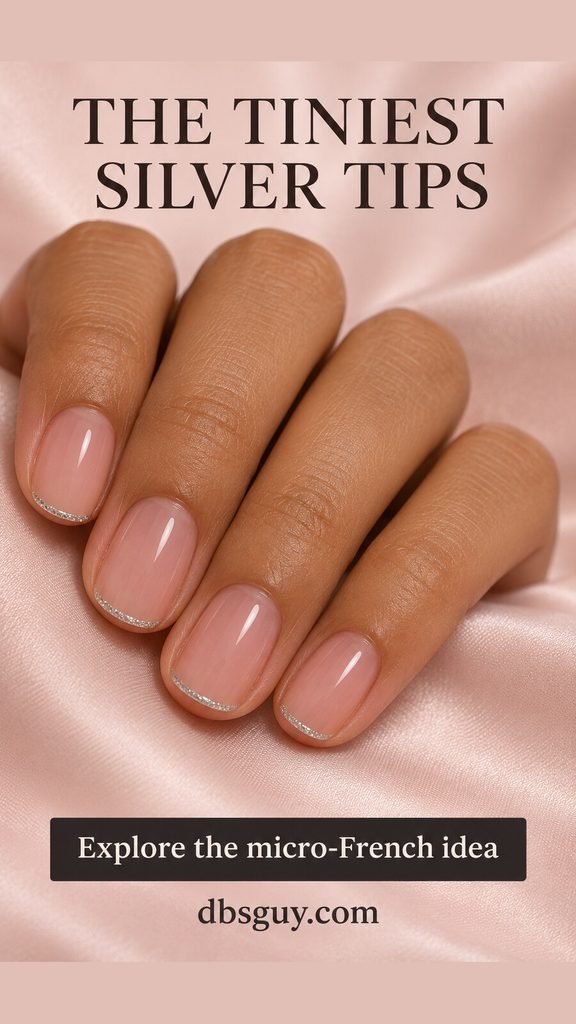
Use a fine liner brush with a suitable silver nail-art polish, or ask your technician to scale the tip to your visible nail length. On very short nails, start with the thinnest line you can manage rather than copying a longer nail’s proportions. For more small-scale placement ideas, explore these short December nail designs.
9. Black French Tips With a Silver Pinline
Here, the black tip supplies the shape and the silver supplies a little light. A fine silver glitter line follows the curved boundary between the sheer pink base and the black French tip. Leaving the black visible is what separates this from an ordinary glitter French.
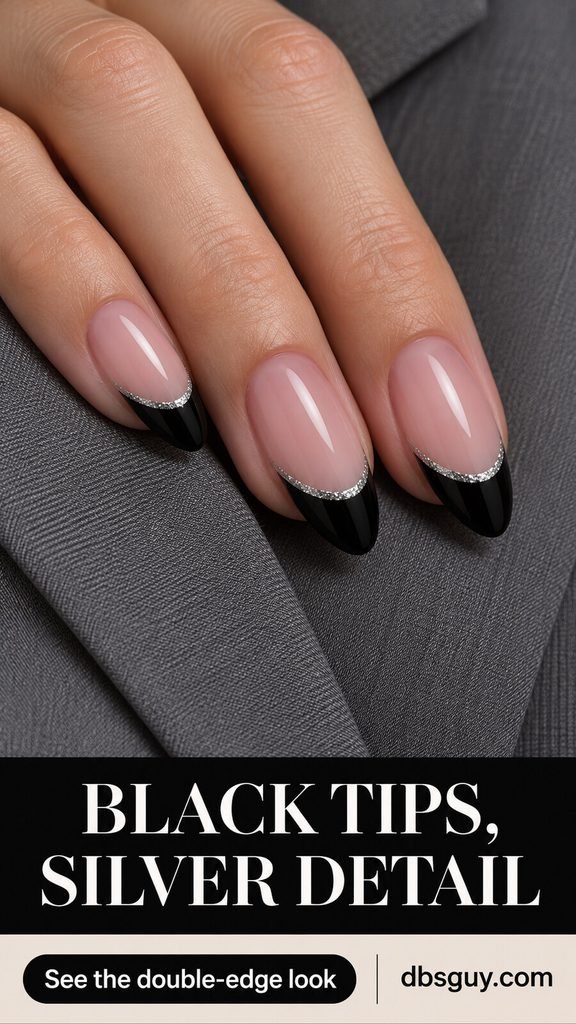
This is a precise salon reference if you find thin curved lines frustrating at home. Ask your artist to paint and check the black shape before adding silver. On a shorter nail, reduce the depth of the black section so it does not take over the whole manicure.
10. Dusty Rose With Gold Half-Moons
Small filled gold half-moons sit at the base of these dusty rose nails. Unlike glitter French tips, the shine stays near the cuticle end, with most of the rose color left plain. A compact semicircle is enough to make the placement readable on short oval nails.
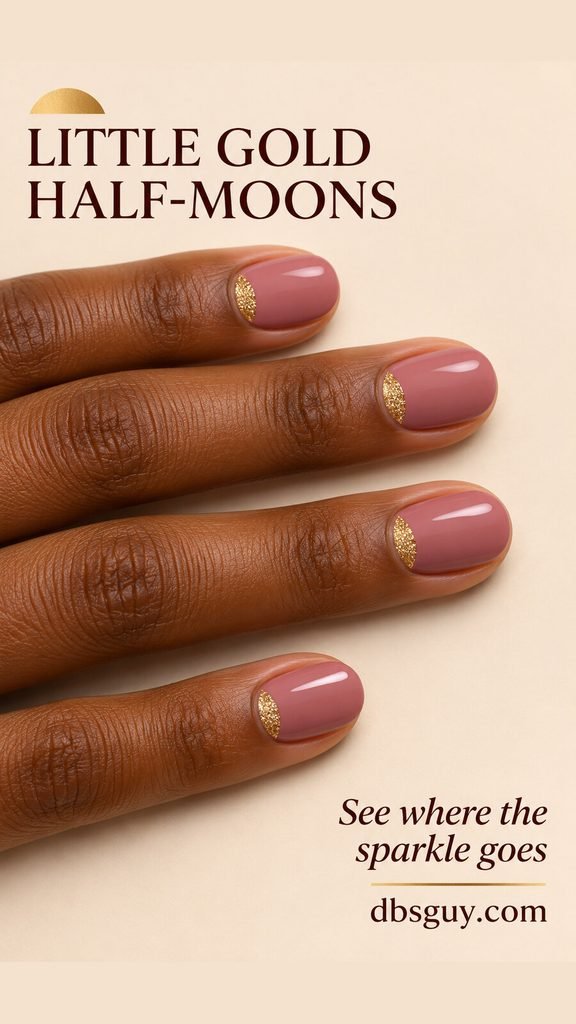
Ask for the gold to stop short of the skin and occupy only a small part of each nail. A fine nail-art brush gives more control than the main bottle brush. Try the size on one nail first; a deep gold section quickly changes this from a small accent to a two-color manicure.
11. Wine Nails With One Glitter Corner
Glossy wine polish gets a small geometric accent: a champagne-gold triangle at the outer tip of the ring fingernail. The other nails stay plain burgundy. This placement suits a square or squoval shape because the corner gives you a clear place to anchor the triangle.
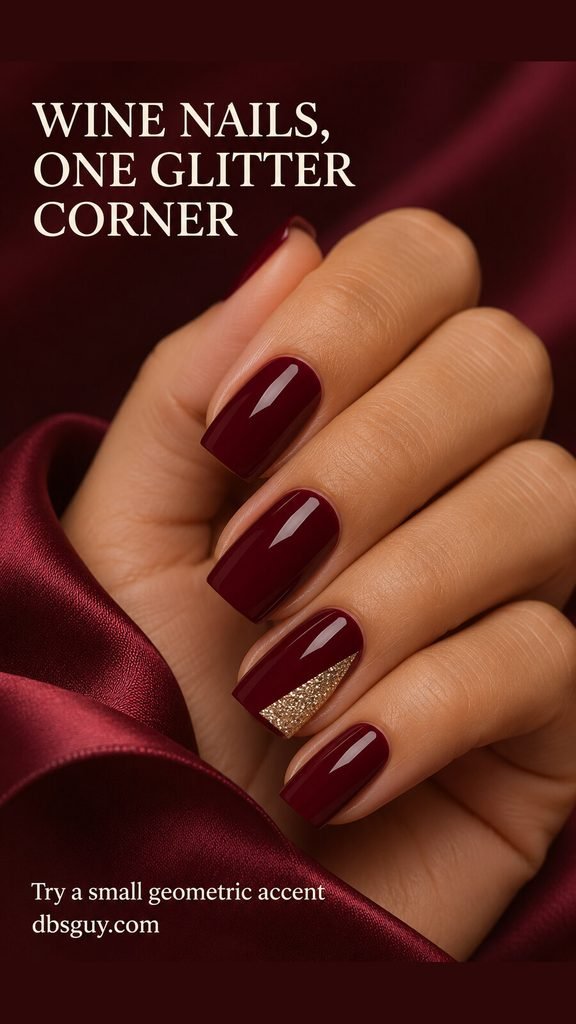
Keep the patch to roughly a quarter of the accent nail, as shown. Sketch its diagonal boundary with a small brush before filling the corner. If your nails are rounded, use a slightly softened triangle; there is no need to change your nail shape for this one detail.
12. Taupe With a Slim Silver Side Stripe
Move the sparkle away from both the tip and the cuticle. A slim silver stripe runs lengthwise just inside one side of each taupe nail, leaving a narrow margin of base color beside it. The result is graphic without filling much of the surface.
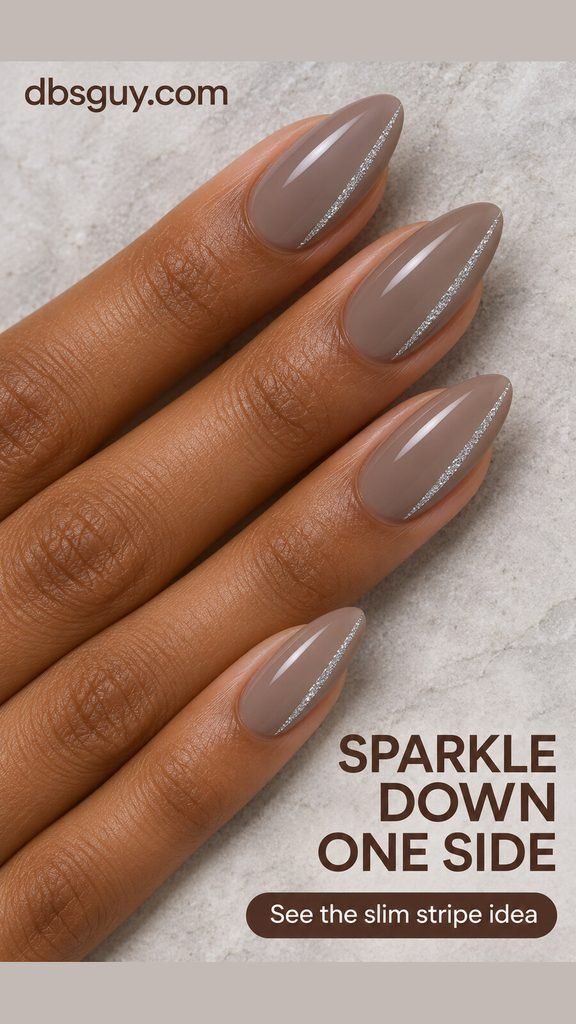
Choose the same side on each nail for an orderly set. Follow the nail’s curve instead of forcing a ruler-straight line onto a rounded surface. For a simpler version, keep the stripe on one accent nail per hand. A fine liner brush or a salon appointment makes this detail easier to control.
13. A Rose-Gold Glitter Tip Fade
Rose-gold glitter gathers at the free edge and thins into the blush base. There is no sharp French line; the scattered pieces make the transition soft. Leave the cuticle half mostly clear so you can still see the fade.
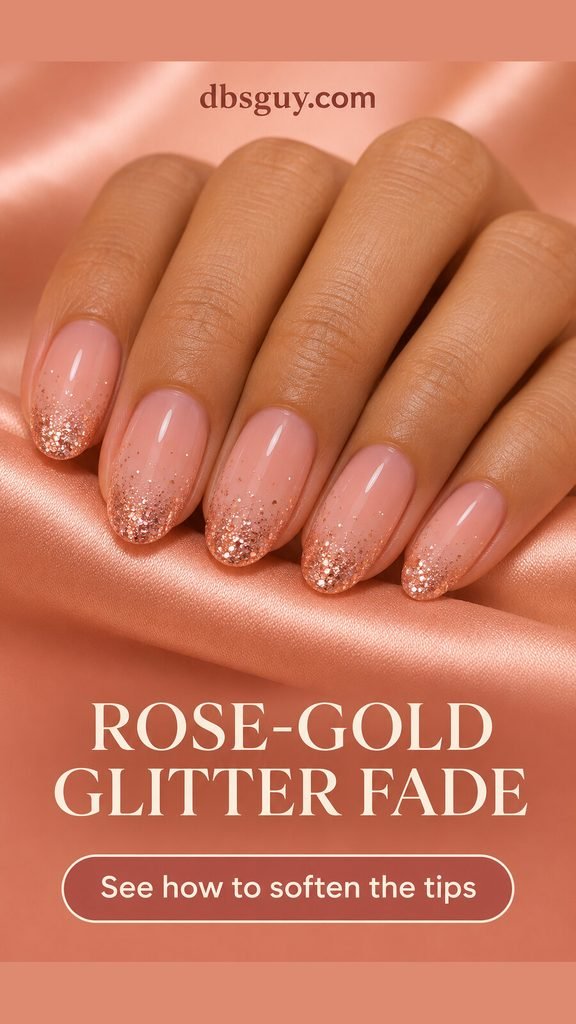
For regular polish, begin with a dry blush base and a light pass of a compatible glitter topper over the upper part of the nail. Add a little more at the tip once that layer is ready according to its directions. Start sparingly: spreading glitter farther down with every correction can erase the gradient.
14. Sheer Rose With Sparse Party Confetti
A few flat multicolored pieces can suggest a New Year’s celebration without a dense glitter layer. Space them over a translucent rose base and keep visible gaps between them. In this reference, the little colored hexagons are separate details rather than an all-over sparkling finish.
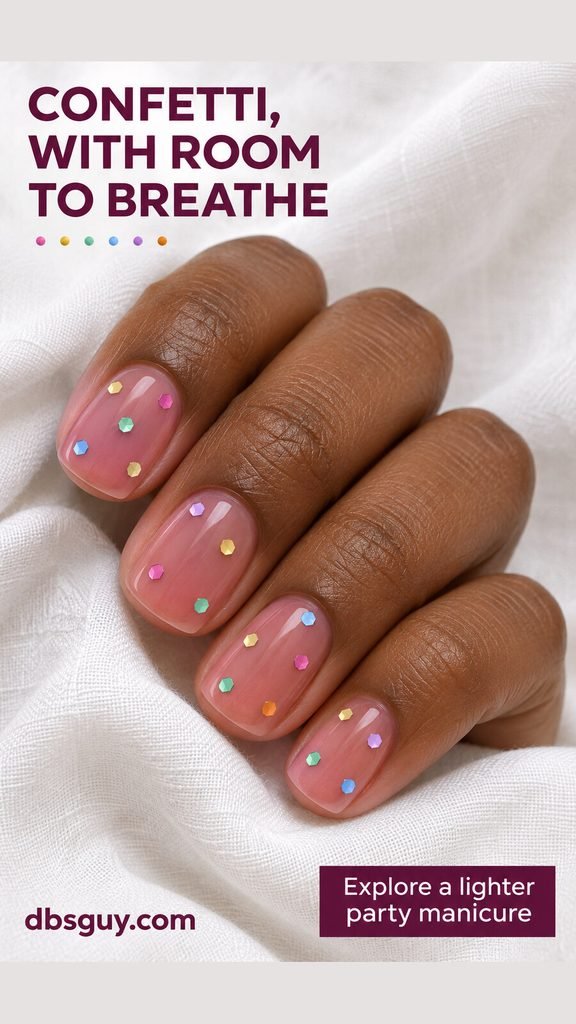
Choose a nail-art topper or flat confetti made for nails. If its brush deposits too many pieces, use a suitable small nail-art tool to place fewer, following the product directions. On tiny nails, reduce the number of pieces before reducing their spacing; the open rose areas are part of the design.
15. Glossy Black With One Silver Firework
Keep the set glossy black, then put one small silver burst on a ring fingernail. Fine radiating lines and a few tiny dots give it a midnight-fireworks reference without numbers or a full scene. An off-center placement leaves black space around the motif.
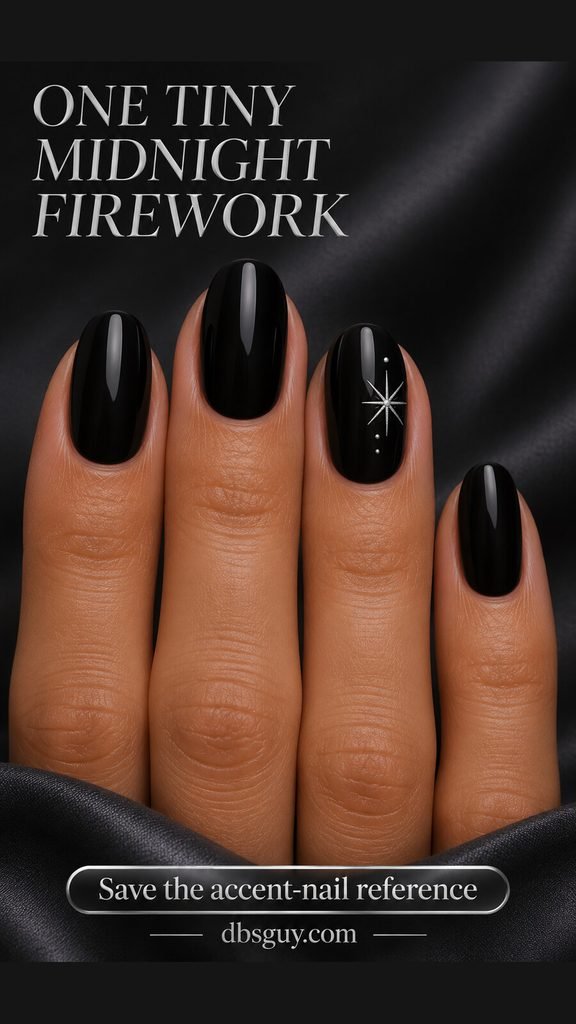
A flat starburst decal is a useful alternative to drawing the lines. Check its width against the bare nail first; its points should not crowd the sides. If you take it to a salon, ask for one delicate burst and plain surrounding nails, rather than several overlapping fireworks.
16. Cobalt Blue With Little Silver Stars
Cobalt makes the color statement before you add any sparkle. Keep the index and pinky plain, then place small flat silver stars on the middle and ring nails. A blue margin around each star keeps its shape easy to read on the short squoval reference.
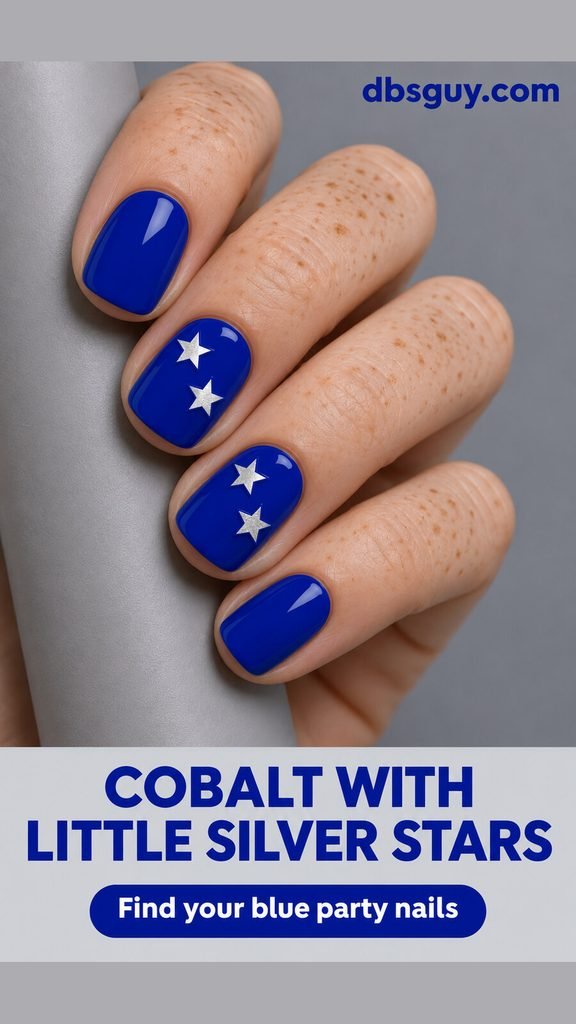
Choose smaller decals if two stars feel crowded; one star on each accent nail is enough. Let a regular-polish base dry fully before applying stickers, and seal them as their directions specify. If you are deciding between this vivid blue and a quieter shade, compare the blue January nail color guide.
17. Gold Glitter Waves Over Sheer Nude
One slender gold ribbon crosses each sheer nude-pink nail in an S-shaped curve. The empty-looking areas on either side are intentional: they keep the flowing line visible. Medium almond nails give the wave room, although you can shorten its path on an oval shape.
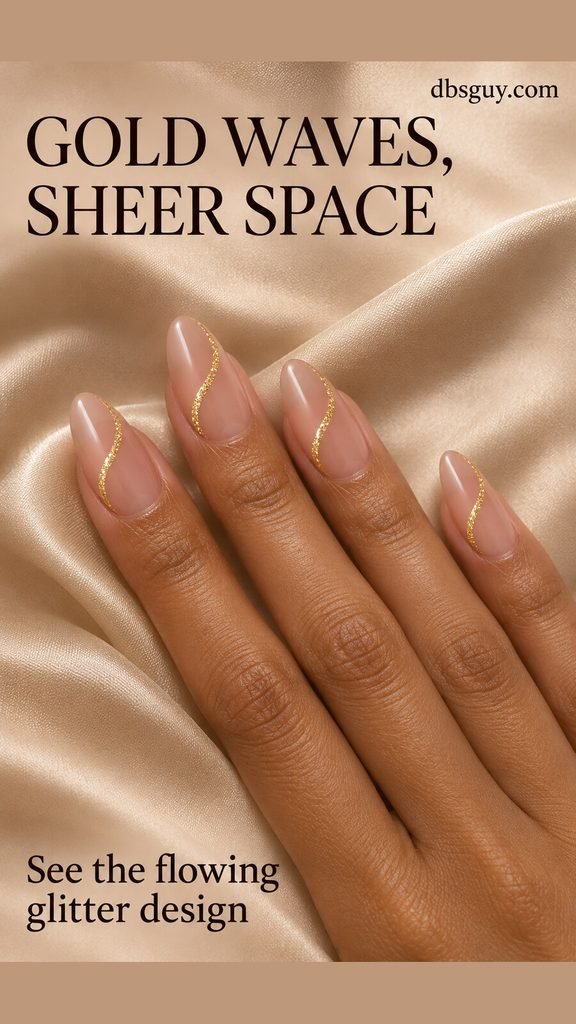
Draw the curve with a fine nail-art brush, or bring this reference to a technician. Keep the ribbon narrow rather than widening it repeatedly to fix an uneven edge. For a home version with less brushwork, use the wave on a single nail and leave the others in the same sheer base.
18. Blackened Ruby Glitter
Deep ruby glitter brings the sparkle across the entire nail while keeping the overall color moody. A dark wine base shows near the edges and between the red glints. On short oval nails, this gives a full party finish without needing extensions or extra artwork.
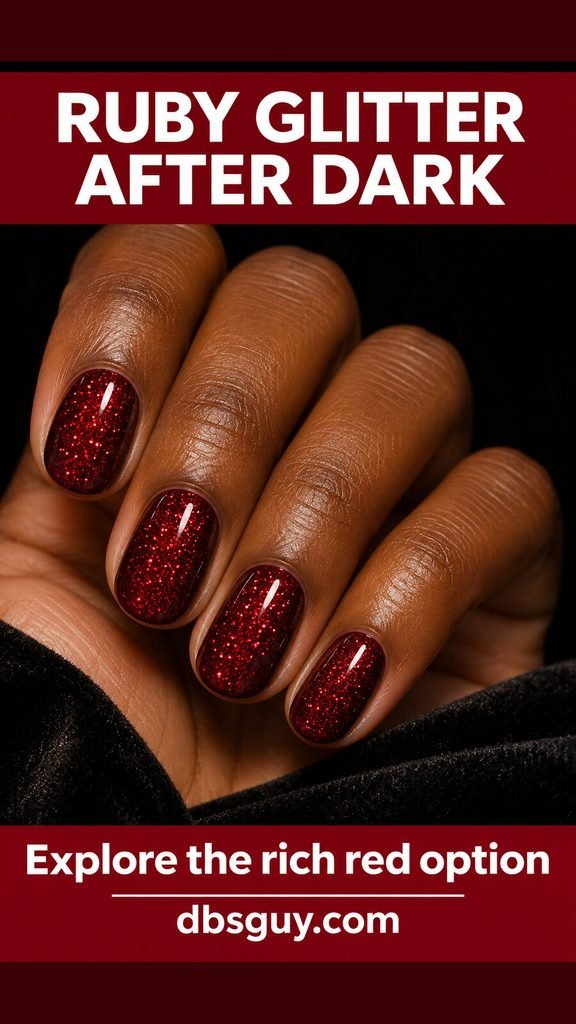
Compare the swatch with a brighter scarlet glitter before choosing. The reference needs a deeper red body color to create that blackened-ruby effect. Use a polish formulated for the coverage you want rather than burying a dark cream under repeated coats of a sparse topper.
19. Emerald Green Inside a Gold Glitter Frame
A thin gold border traces the edge of each emerald nail, leaving a clear green center. This is more detailed than a single stripe because the frame must follow the whole outline. The medium almond shape makes the curved perimeter especially visible.
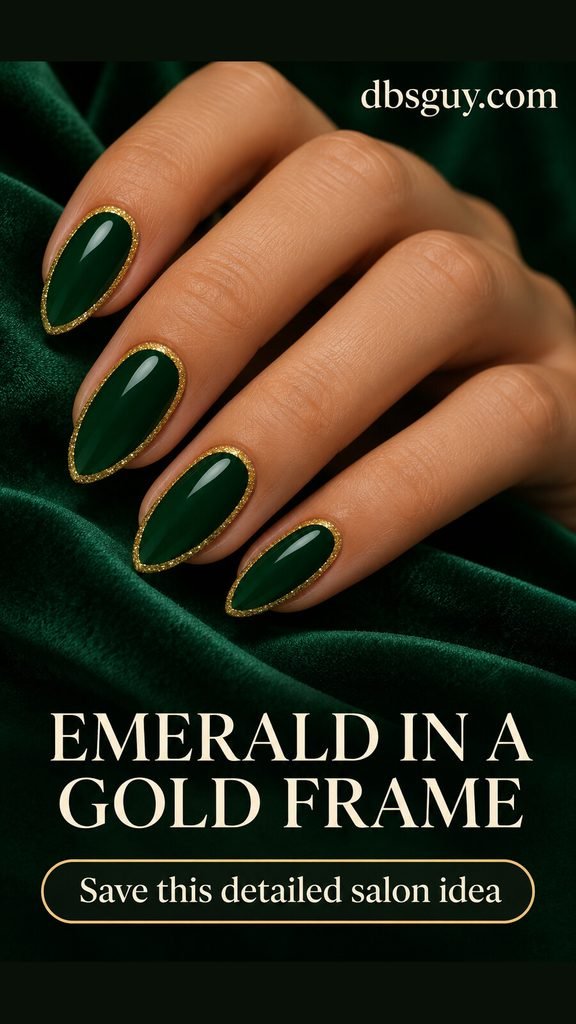
Treat it as a salon request unless you already enjoy precise linework. Ask for a narrow border, a clean gap from the skin, and enough uninterrupted green to keep the frame distinct. If you want less decoration, frame only the ring fingernail and use the same emerald on the others.
20. Violet Jelly With Suspended Glitter
Translucent violet and visible silver-violet glitter give this manicure a layered look. Some pieces seem deeper in the color than others, rather than all sitting on top of an opaque purple. The glossy surface and translucent base are essential to the effect.
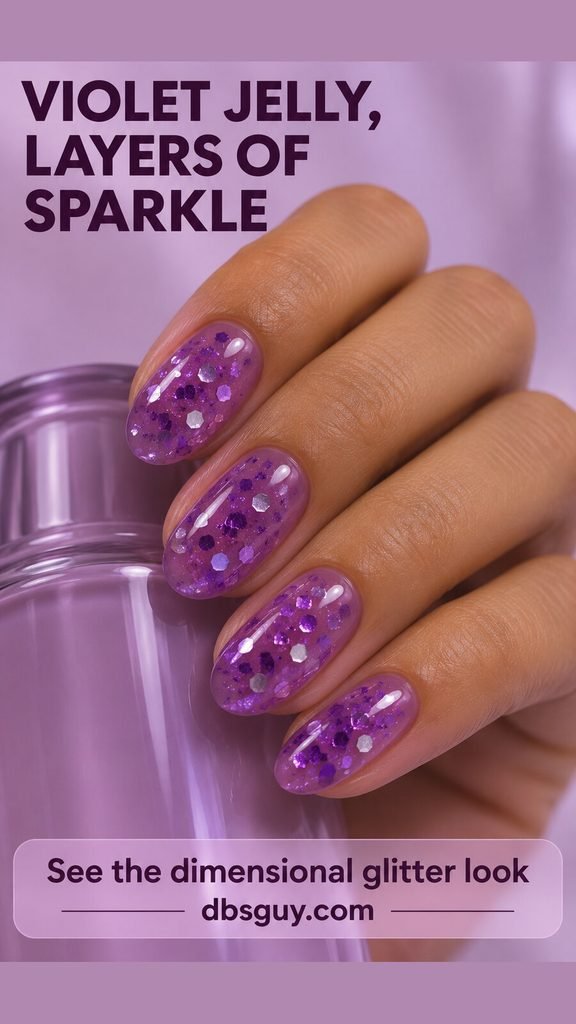
Look for a jelly glitter polish that builds this appearance, or ask a technician for a compatible layered system. Keep the violet translucent; a solid cream will hide whatever is underneath it. Follow the formula’s directions rather than adding thick layers to imitate the depth in a concept image.
21. Opaque Silver Holographic Glitter
This is the full-sparkle counterpart to the light mauve haze near the beginning. Dense fine silver holographic glitter covers each short square nail, with rainbow flashes when the light catches it. There is no plain base color left as a quiet background.
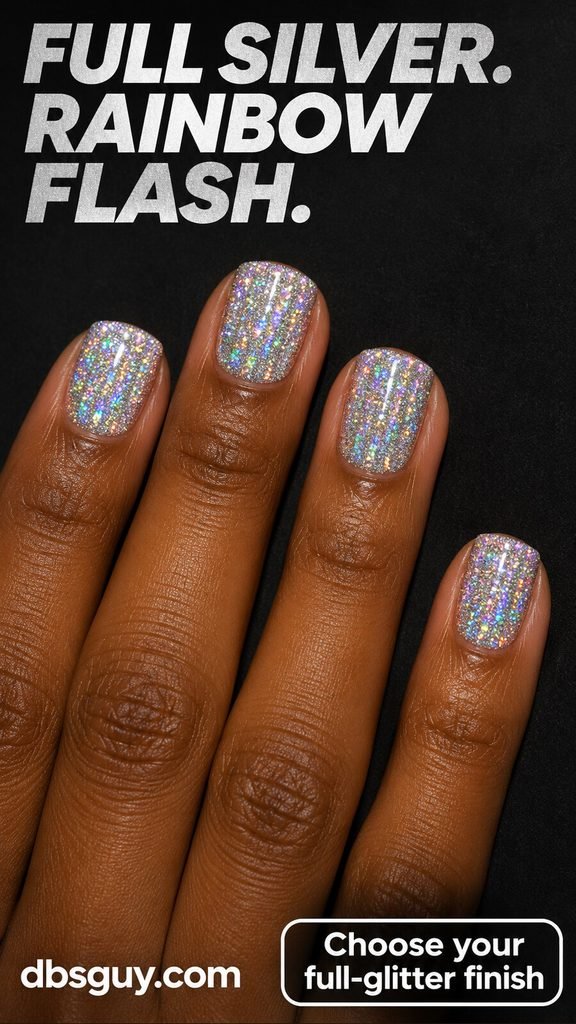
Choose an opaque or coverage-building glitter formula and check a finished sample. Holographic effects vary with the lighting, so a flash photo cannot show exactly how the nails will look throughout an evening. Keep the design undecorated if you want the shifting finish to remain the focus.
22. Alternating Gold and Silver Glitter
Use full gold glitter on one nail and full silver glitter on the next, repeating the sequence across the hand. Keeping the particle size and coverage similar makes the two metals feel related. The medium almond reference uses the alternating colors as the design, with no extra motifs.
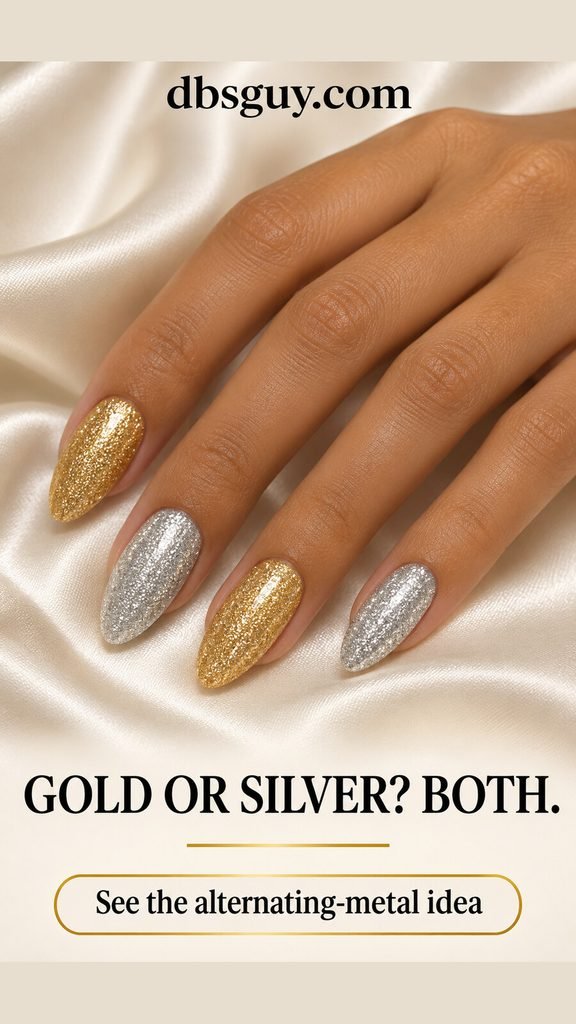
Lay the bottles or painted swatches in order before you start. Repeat your preferred finger sequence on the other hand if you want both hands to match. If one formula is sheer and the other opaque, compare compatible base colors or different glitter polishes before painting the whole set.
23. Charcoal Glitter With a Disco Mosaic Accent
A silver mosaic ring fingernail sits beside charcoal microglitter nails. Small square tiles and narrow dark gaps create the disco-ball reference; large round crystals would give a different effect. The accent works best when the grid stays small enough to follow the nail’s shape.
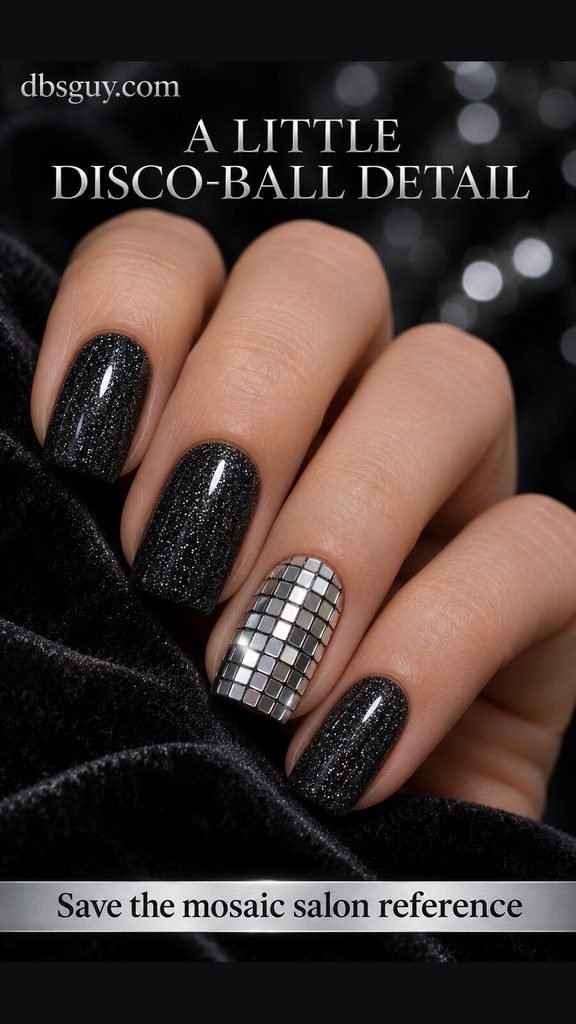
Take this one to a technician and discuss flat nail-art pieces or a suitable decal rather than improvising with craft materials. Ask for the finish to feel smooth at the edges. For a less involved version, choose one flat mosaic decal that fits inside the nail with a little border around it.
24. Silver Glitter With Multicolor Confetti Tips
Fine silver sparkle covers the full nail, then larger multicolored pieces gather near the tips. That gives the design two scales of glitter: a bright continuous background and a more playful accent at the ends. Keep the larger pieces in roughly the outer third so the placement stays clear.
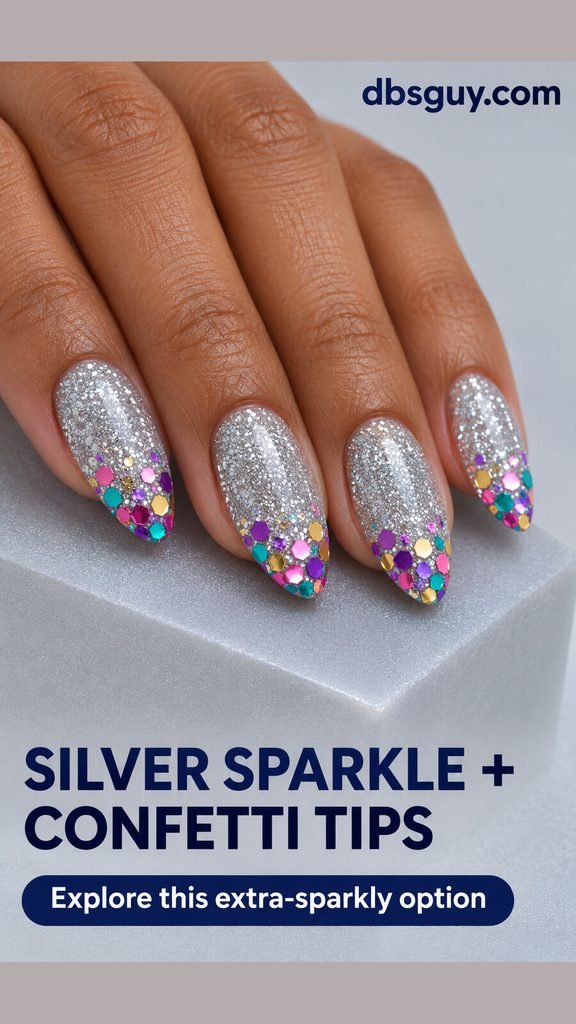
Choose flat nail-art confetti and a compatible application system, or ask for a smooth salon finish. If the pieces overwhelm a short nail, use fewer of them on one accent tip. Adding large pieces everywhere would lose the distinction between the silver base and the confetti zone.
25. Full Champagne Glitter on Coffin Nails
For the most dressed-up finish in this set, cover every nail in champagne glitter that mixes fine sparkle with slightly larger flat pieces. The pale gold color family keeps the texture cohesive. A coffin shape, with tapered sides and a straight tip, gives the glitter a broader stage.
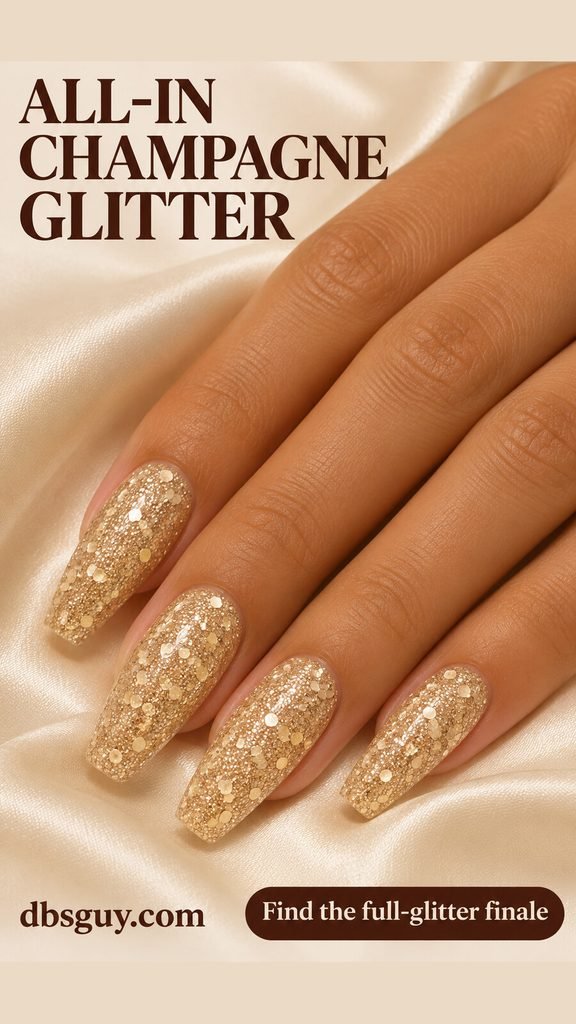
Keep your usual comfortable length if you want the finish without the longer silhouette shown. Ask to compare pale champagne and yellow-gold samples, then choose the one you like beside your outfit. With this much sparkle across the hand, additional gems or artwork are optional rather than necessary.
Turn Your Favorite Reference Into a Clear Request
Save one image, then name the parts you want to keep: the base color, whether it is sheer or opaque, the sparkle placement, and your preferred length. For example: “Short blush squoval nails, with full gold glitter on the ring finger only.” That is clearer than asking for “something festive.”
Ask to compare a finished sample beside your hand before choosing the final shade. Check it near a window and in ordinary indoor light, particularly for holographic and magnetic effects. You can borrow a finish from a longer reference without copying the length.
At home, start with clean, dry nails and follow the base-coat, color, and top-coat directions for your chosen formula. Use thin layers rather than trying to get coverage with one heavy coat. Regular lacquer air-dries; lamp-cured gel needs the specified compatible lamp and curing instructions. A glossy image cannot tell you which system was used.
If you choose gel, the American Academy of Dermatology recommends protecting your hands with broad-spectrum, water-resistant SPF 30 or higher sunscreen or dark, opaque gloves with the fingertips removed. Leave cuticles intact, and do not pick off gel when it starts lifting.
Questions About New Year Nails
Which of these ideas is easiest to do at home?
Start with a single shimmer polish, such as champagne, ivory pearl, or espresso bronze. One gold accent nail is another manageable option because you can use the bottle brush rather than draw a pattern. Full glitter can also be straightforward with a suitable coverage-building formula, but leave time for its recommended layers and drying.
Can I recreate New Year nails without gel?
Many of these color-and-placement ideas can use regular nail polish, compatible glitter toppers, and flat nail decals. Magnetic velvet is different: it needs a magnetic formula and its matching technique. If you want an air-drying version, check that the product is magnetic lacquer rather than assume a magnetic gel will air-dry. Fine linework and the mosaic accent may be more comfortable salon requests.
Which designs suit very short nails?
Fine shimmer, one full glitter accent, sparse confetti, and ruby or silver full glitter do not rely on a long free edge. For French tips, keep the band narrow relative to the nail. Shrink the number of stars or confetti pieces before crowding a short nail with the same amount of decoration shown on a larger reference.
What is the difference between shimmer and glitter?
For choosing these designs, shimmer means particles fine enough to read mainly as an overall sheen, while glitter means individual reflective pieces you can see more clearly. The terms overlap between brands. Compare the actual sample: a soft pearl glow, scattered flecks, a magnetic highlight, and dense chunky sparkle are visibly different even when their labels sound similar.
How do I remove regular glitter polish?
Use the remover recommended for your polish and follow its directions. Essie’s FAQ suggests holding a remover-soaked cotton pad against regular glitter polish for about 30 seconds before wiping. If pieces remain, let the remover work again rather than scrape them off. That advice is for ordinary polish; gel and extensions need their own removal process. Moisturize afterward.
Do New Year nails need a year number or a clock?
No. Any of these finishes can work for December 31 without a literal date. That also makes it easier to keep wearing the design into January. Choose the amount of sparkle you like, then keep the nail shape and length comfortable for your own plans.