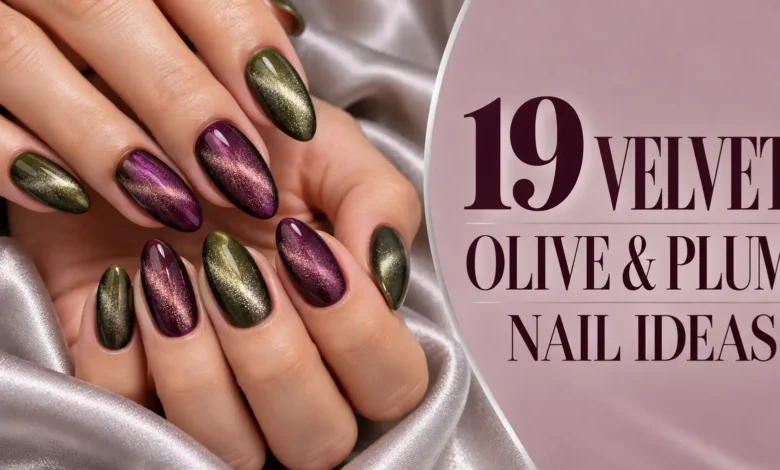
For velvet olive and plum nails, start with the balance you want: alternate the two colors for an even mix, use plum as one accent against olive, or keep the shimmer inside tips and small panels. The magnetic glow supplies the movement; the color placement gives each manicure its character.
These 19 ideas range from short, plain nails to framed velvet panels and a few painted accents. Each includes the detail to save with your reference, plus a way to keep the design readable at your own nail length.
Here, velvet means a broad, light-catching magnetic finish under a smooth glossy surface. A cat-eye usually concentrates the reflection into a more defined streak. Picture Polish’s magnetic polish guide explains how magnet placement changes the result. Tell your artist you want a diffused velvet glow if that is the effect you like in these references.
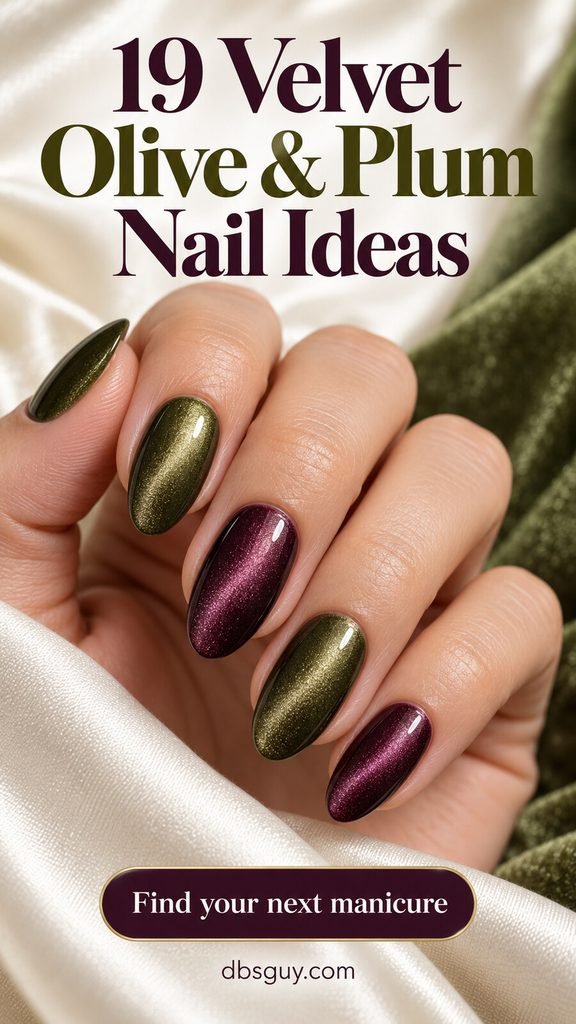
The images are AI-generated manicure concepts created for dbsguy.com. Use them to discuss color, shape, finish, and placement with your nail artist; they do not document completed or tested salon services.
1. Alternating Velvet on Short Squoval Nails

An alternating set is a clear starting point when you want both colors to have equal attention. Olive, plum, olive, plum gives each shade its own nail, so the green never disappears into a purple gradient. A short squoval shape keeps the outline tidy while leaving enough surface for the shimmer.
Compare the finished swatches side by side. A very dark plum beside a pale khaki can make the set feel uneven; choose a green and purple that remain recognizable in ordinary room light. Keep the artwork off this version and let the broad glow be the detail.
Salon note: Short squoval nails, alternating earthy olive and aubergine plum magnetic polish, with a diffused velvet glow and glossy finish.
2. Olive Velvet With One Glossy Plum Accent
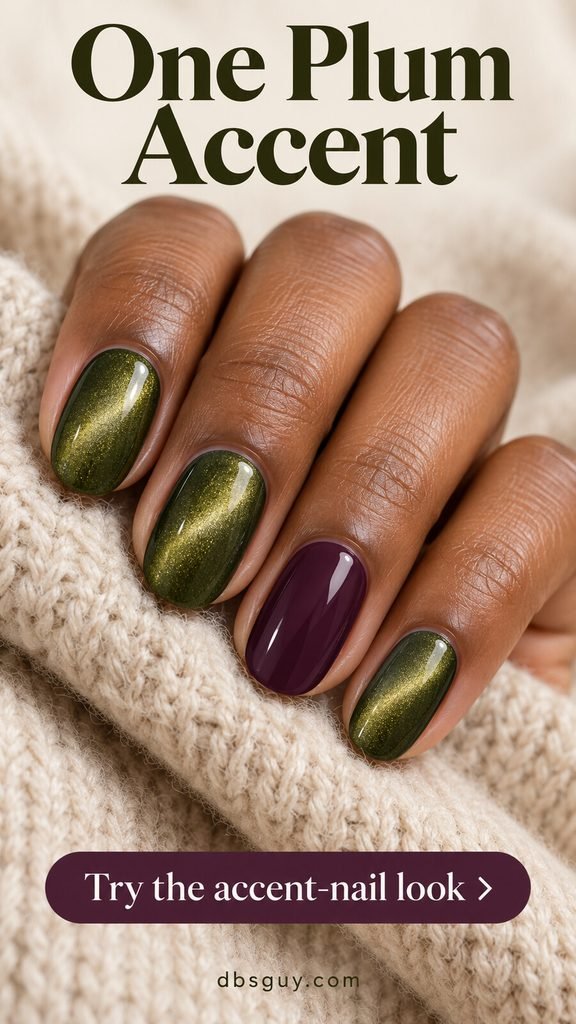
Keep the index, middle, little finger, and thumb in olive velvet, then make the ring nail a plain glossy plum. The accent changes both color and finish: a still patch of purple sits beside the shifting green shimmer. This suits someone who likes olive most but wants a noticeable second color.
Choose an opaque cream polish for the plum accent if you want the smooth, solid look shown here. A magnetic purple would create a different result, with shimmer across the whole set. Keep the same oval shape on every nail so the accent comes from the polish alone.
Salon note: Olive magnetic velvet on all nails except the ring fingers; glossy opaque plum cream on those accents, without shimmer.
Also read: 19 Olive Green November Nail Ideas That Pair Beautifully With Cozy Neutrals
3. Olive on One Hand, Plum on the Other
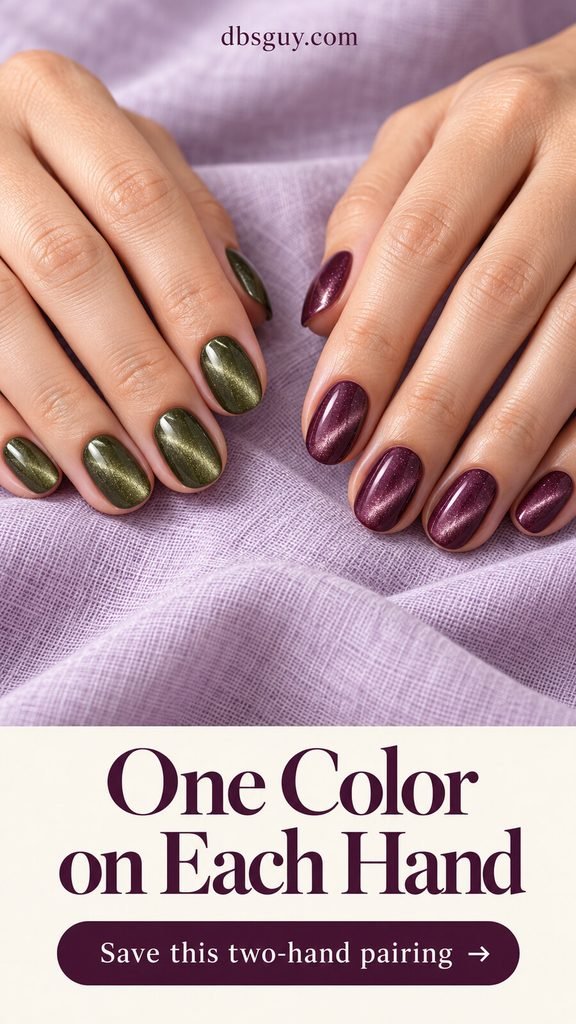
Give each hand one color when you want a two-tone manicure without patterned nails. One hand stays entirely olive velvet; the other stays entirely plum velvet. Seen together, the pairing is bold. Seen separately, each hand looks like a simple single-color manicure.
Match the length and finish across both hands. Two similar shimmer levels make the color difference feel deliberate. If you are choosing between several purples, hold the finished purple sample beside the olive rather than picking each shade on its own.
Salon note: One complete hand in olive magnetic velvet and the other in plum magnetic velvet; matching short oval shapes and glossy top coats.
4. A Straight Half-Olive, Half-Plum Split
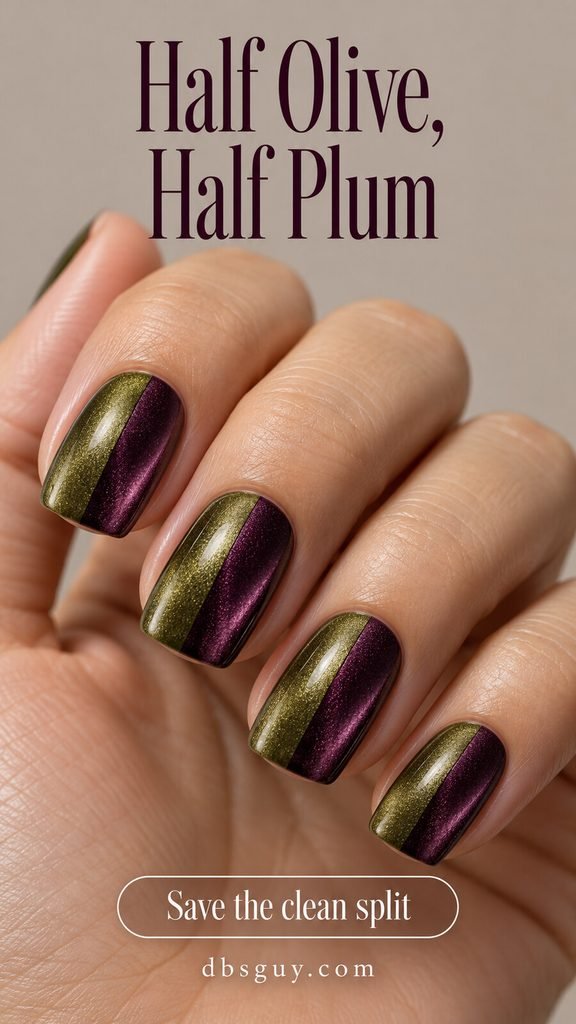
A vertical division puts both colors on every nail. Keep olive on one side and plum on the other, with a clean border running from the cuticle toward the free edge. The straight seam gives the soft reflection a more graphic frame.
A soft-square shape makes that geometry especially clear. On a narrow nail, skip an extra outline: it would take up space without improving the color split. Ask your artist to keep the same left-right arrangement throughout rather than switching it randomly between fingers.
Salon note: A centered vertical split on each nail: olive velvet on one half, plum velvet on the other, with no blended seam.
5. Diagonal Velvet Color Blocks

Move the seam across the nail at an angle for a more dramatic block of color. Olive fills the area nearer the cuticle, while plum crosses the tip. Unlike an ombré, the meeting point stays sharp enough to read as a deliberate diagonal.
Medium almond nails give the plum tip room to taper. For a shorter version, let the diagonal cut across the middle of the nail instead of squeezing the purple into a tiny corner. The useful detail to preserve is the clean change of direction, not the exact amount of each color.
Salon note: Olive velvet near the cuticle and plum velvet toward the tip, separated by one crisp diagonal border across each nail.
6. Alternating Olive and Plum Velvet French Tips

Leave the nail beds sheer pink and put the velvet only at the free edge. Alternating olive and plum tips keeps the palette visible while showing more of the neutral base. It is a useful option when full dark nails feel heavier than you want.
Give the colored tip enough depth for the shimmer to show. An extremely fine micro-tip may read mainly as a dark line in a still photo. On short nails, a modest curved tip can preserve the idea without making the pink bed look crowded.
Salon note: Sheer pink bases with alternating olive and plum magnetic velvet French tips; clean curved smile lines and no full-color accents.
Also read: 25 November Nail Ideas That Give Classic French Tips an Unexpected Fall Twist
7. Velvet Half-Moons on an Ivory Base
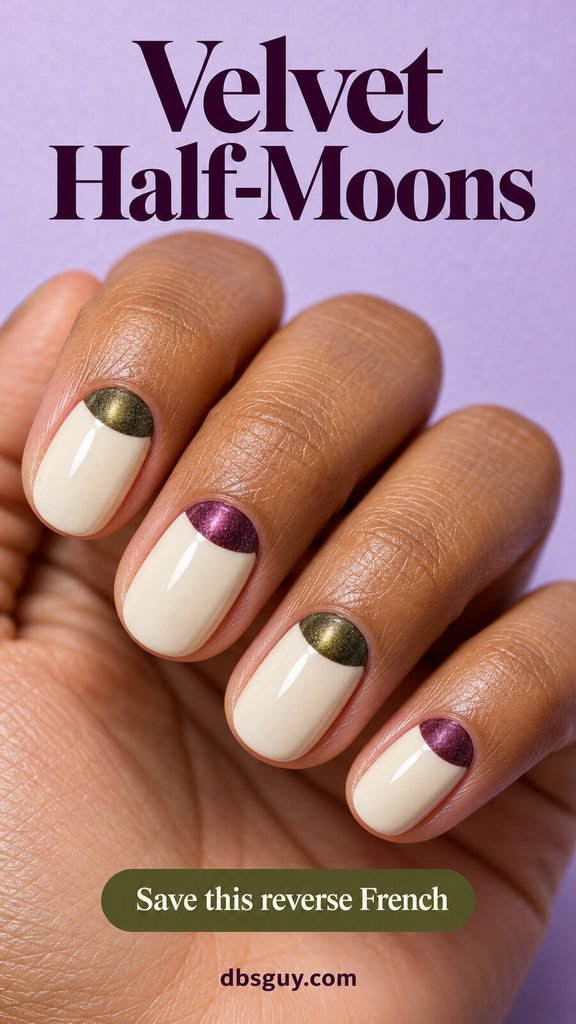
Reverse the usual French placement by moving the color to the base of the nail. Small olive and plum velvet half-moons sit against a warm ivory cream polish. Most of the nail stays light, making this one of the brighter options in the collection.
The colored area should look like a small semicircle, not a thin cuticle outline. Keep its size consistent from nail to nail, allowing for different nail widths. A short oval shape is enough; the design does not depend on a long free edge.
Salon note: Glossy ivory nails with alternating olive and plum velvet semicircles at the cuticle, covering roughly the lower quarter of each nail.
8. Olive and Plum Velvet Side Waves
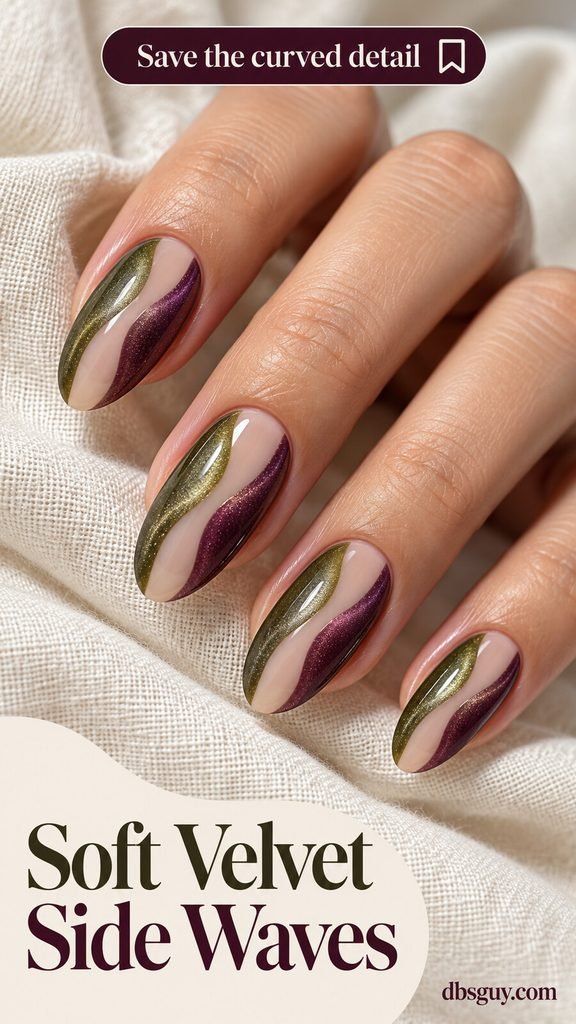
Curved ribbons give the two colors room to move around a sheer nude center. Put an olive wave along one side and a plum wave along the other, keeping an open channel between them. The shapes should be broad enough to look like colored panels rather than thin painted outlines.
This is a good reference for someone who enjoys abstract nail art but wants a controlled palette. If your nails are short, use one gentle bend in each ribbon. Several tight turns can make the negative space disappear.
Salon note: Sheer nude nails with broad olive and plum velvet waves at opposite sides, leaving a visible nude channel through the center.
9. Velvet Oval Windows With Contrasting Frames

Frame an olive velvet oval with a plain plum border, then reverse the colors on neighboring nails. The central shimmer looks contained, almost like a small polished stone set into a colored frame. Keeping the border solid makes the difference in finish easier to see.
The center needs most of the nail surface. Ask for a narrow, even rim rather than a thick outline that leaves only a tiny spot of velvet. For very short nails, use this as one accent beside plain velvet nails; the framed panel can then stay large enough to read.
Salon note: Large olive velvet oval centers within plum cream borders, alternating with plum velvet centers within olive cream borders.
10. Large Olive-and-Plum Velvet Checks

Use four large blocks on each nail instead of a dense checkerboard. A two-by-two arrangement gives both olive and plum a visible area of shimmer. It also makes the pattern easier to recognize at normal viewing distance than a grid of tiny squares.
A short soft-square shape works with the blocky design. Keep the crossings crisp and leave out extra plaid lines; they would change the character of the look. If a full checked set feels busy, choose two checked nails and repeat the same two velvet shades as solids on the others.
Salon note: Two-by-two olive and plum magnetic velvet checkerboards with four large blocks per nail and no overlaid plaid lines.
11. Olive Velvet With a Plum Pinstripe
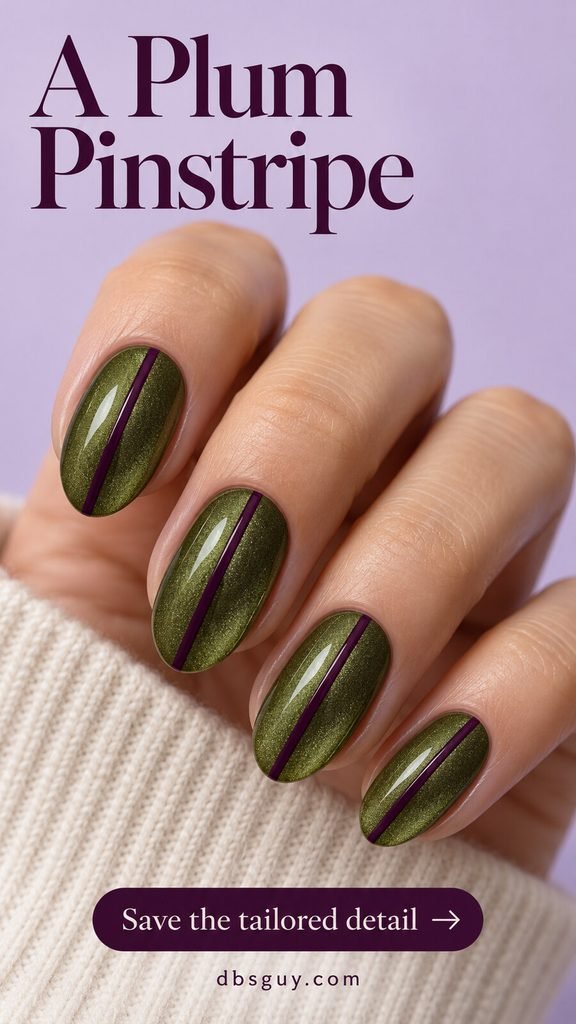
A single plum stripe brings a tailored detail to an olive velvet base. Keep the purple opaque and narrow so the green glow remains the main surface. The straight stripe is painted artwork; it should not be confused with a narrow magnetic cat-eye reflection.
Place the stripe in the same position across the set, either centered or slightly off-center. On short nails, keep it fine and uninterrupted. Adding a second line is possible, but the appeal of this version is how little artwork it needs.
Salon note: Olive velvet oval nails with one fine, straight, opaque plum stripe running lengthwise on each nail.
12. Three Plum Dots on an Olive Velvet Accent
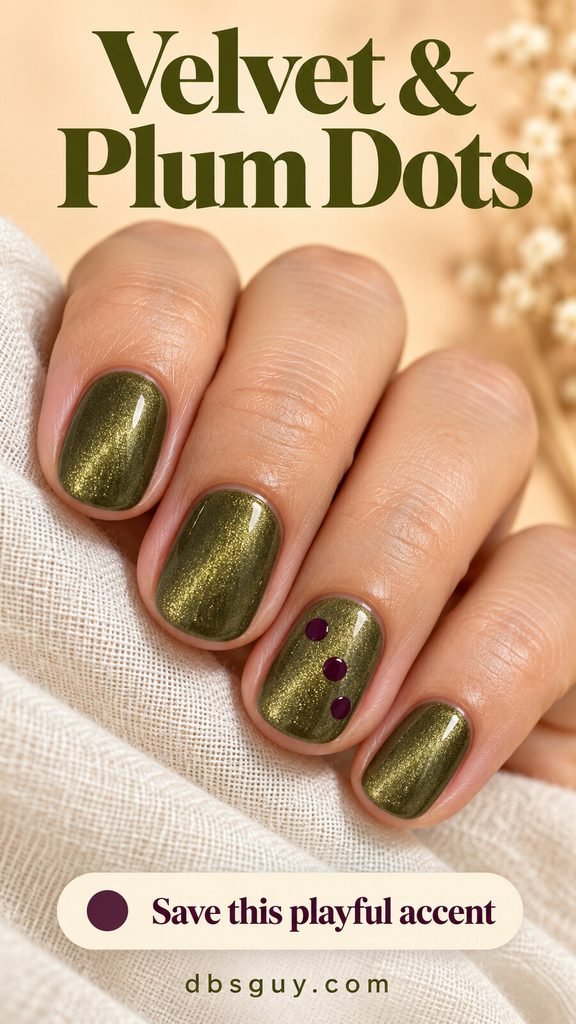
Three small plum dots are enough to give an olive set a playful detail. Put them on the ring nail and leave the neighboring nails plain velvet. Their solid color makes them visible against the green reflection without bringing in a third shade.
Keep space between the dots so they do not merge into one dark shape when you look at your hand from farther away. A loose diagonal suits a short rounded nail. Ask for painted dots if you want the flat effect shown here, rather than raised beads or stones.
Salon note: Plain olive velvet nails with three small flat plum dots arranged diagonally on the ring-finger accent.
13. Velvet Hearts on Sheer Nude Nails
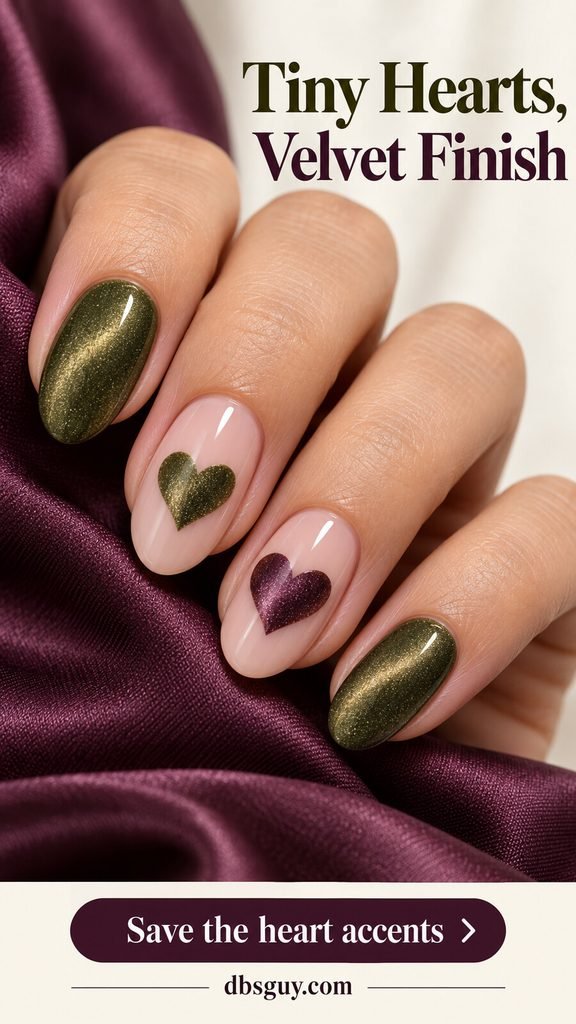
Use the magnetic finish inside the motif itself: one olive heart and one plum heart on sheer nude accent nails. Solid olive velvet nails beside them connect the small shapes to the rest of the set. The open base keeps the hearts from competing with a dark background.
Make each heart large enough to show two clear lobes and a pointed base. A scattering of tiny hearts would give a different, busier look and much less visible velvet. If your nails are especially small, choose just one heart accent and keep the remaining nails solid.
Salon note: Sheer nude middle and ring nails with one olive velvet heart and one plum velvet heart; olive velvet on the remaining nails.
14. One Plum Flower Over Olive Velvet
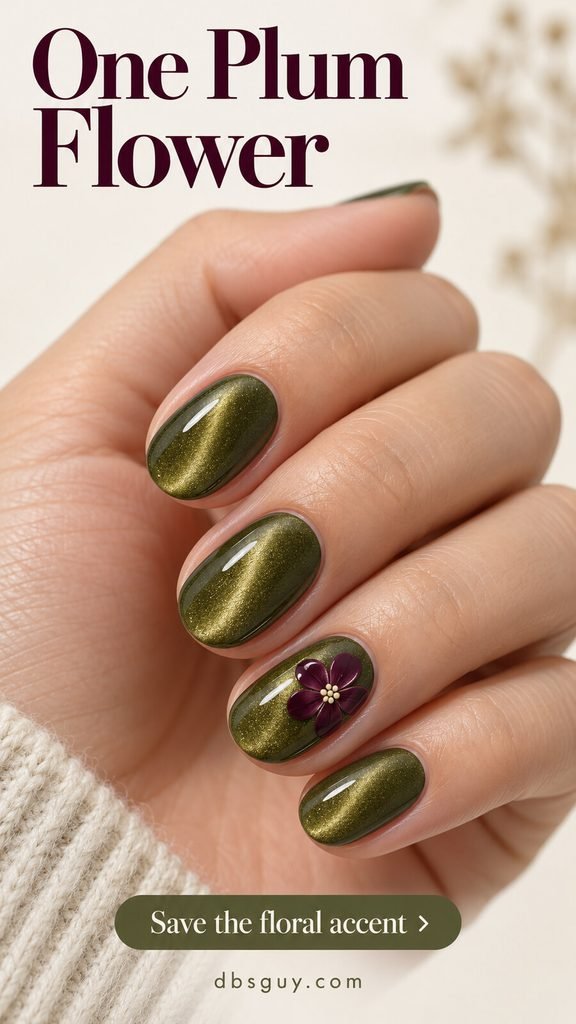
A dimensional plum flower turns an olive velvet manicure into a small floral design. Keep it to one ring nail, with five rounded petals and a small cluster of cream dots at the center. The plain nails around it give the flower enough attention without needing leaves, stems, or a second bloom.
For earthy nail inspo with a softer mood, choose a muted purple rather than a bright violet. The reference has a raised-looking floral accent, so ask to see how that detail would feel and sit on your nail. A flat painted five-petal flower with a single cream dot is a simpler adaptation if you prefer a smooth surface.
Salon note: Olive velvet nails with one dimensional five-petal plum flower and a small cream dotted center on the ring nail; discuss a flat painted version if preferred.
Also read: 19 Fall Floral November Nail Ideas in Soft, Muted Colors
15. Alternating Velvet With Fine Gold Crescents
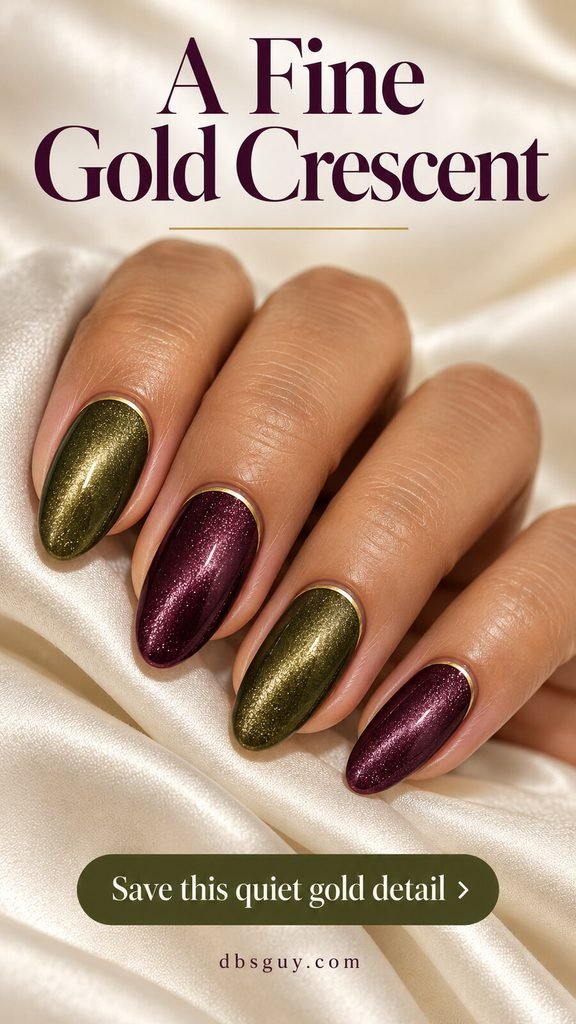
A fine gold curve at the cuticle gives alternating olive and plum velvet a more dressed-up finish. The metal stays at the edge, leaving the shifting color across the rest of the nail. It is a restrained option for a fall dinner or an outfit with simple gold jewelry.
Specify a painted crescent rather than scattered foil. An even, delicate curve keeps the look precise; a thick metallic band becomes a much stronger feature. If you prefer less metal, reserve the gold detail for the ring fingers and leave the other velvet nails plain.
Salon note: Alternating olive and plum velvet almond nails with a very fine metallic-gold curve tracing the cuticle edge.
16. Plum Velvet With Silver Stars and an Olive Accent

Let plum dominate this celestial set, then add one olive velvet nail to keep the two-color story. Two small silver four-point stars on a plum accent provide the artwork. The cool silver changes the mood from the warmer gold-crescent design.
Leave plenty of space around the stars. Filling every nail with silver would hide the purple reflection and make the green accent feel disconnected. For short nails, one slightly larger star can be clearer than two tiny ones. Keep the motifs flat if you do not want raised embellishments.
Salon note: Mostly plum velvet nails, one olive velvet ring nail, and two flat silver four-point stars on a plum middle nail.
Also read: 19 Celestial November Nail Designs for a Starry, Moody Manicure
17. Two Velvet Blocks With a Nude Diagonal Gap

Leave a visible diagonal strip of sheer nude between an olive lower block and a plum tip. That gap changes the design from a simple color split into negative-space nail art. The skin-toned opening should be intentional and wide enough to see.
Match the nude to the kind of base you enjoy wearing: clear, pink-beige, or another sheer neutral. Avoid an opaque white stripe if you want the open-space effect in the reference. On shorter nails, keep the two colored areas simple and skip any extra outlining.
Salon note: Olive velvet near the cuticle and plum velvet at the tip, separated by a clear sheer-nude diagonal band across each nail.
18. Olive and Plum Velvet Mixed With Cream Nails
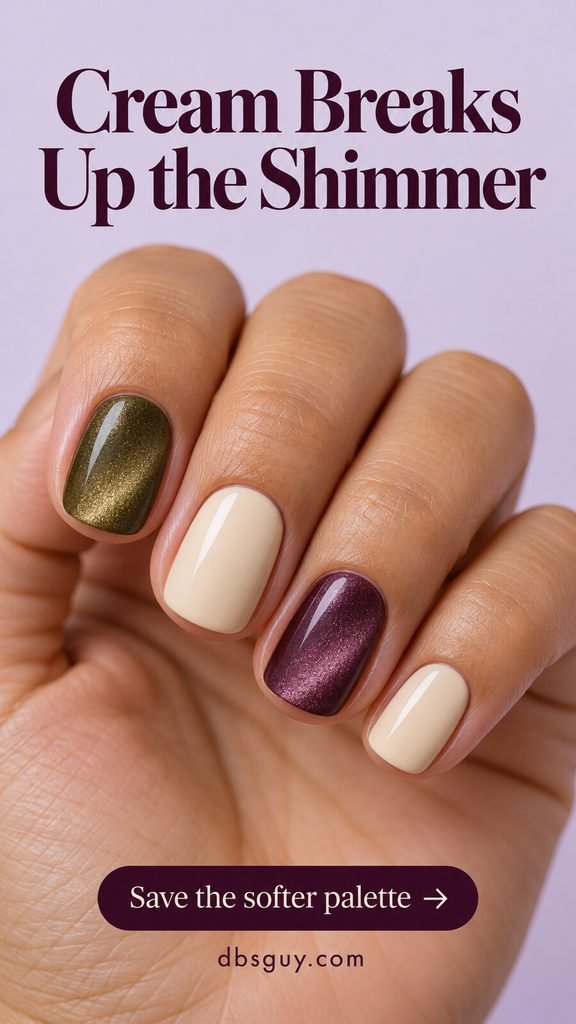
Use warm cream nails to break up the shimmer. In this reference, an olive velvet index and plum velvet ring nail sit between plain creamy nails. The pale polish is a full third color, making the overall manicure lighter than an all-dark set.
Choose an opaque cream if you want this clear contrast; a sheer nude would produce a softer, more transparent result. Decide the thumb color with your artist before starting. Cream keeps the balance light, while olive repeats the green and makes the set feel a little richer.
Salon note: An olive velvet index, glossy warm-cream middle, plum velvet ring, and warm-cream little finger; choose the thumb shade to suit the balance you want.
19. An Olive Velvet Set With One Plum Ribbon Bow

A little plum ribbon bow gives an olive velvet set a decorative finish. Keep it on one ring nail, with two clear loops and two short tails. The reference suggests a dimensional ribbon; discuss its size and how far it would sit above the nail before choosing that version.
The bow needs enough space to read as a ribbon rather than a dark knot. For a smooth adaptation, ask for a flat painted plum bow, simplifying the loops and shortening the tails on a small nail. Leave the other nails plain so the single accent can carry the detail.
Salon note: Olive magnetic velvet nails with one small dimensional plum ribbon bow on the ring nail; request a flat painted version for a smooth alternative.
Choose the Color Balance Before Your Appointment
If you are saving fall nails for 2026, decide which part of the reference matters most: the olive-to-plum balance, the magnetic reflection, or the accent art. The alternating short set is a useful starting point for equal color. The single plum accent puts green first. French tips, half-moons, and cream nails leave more light space.
Color names are only a starting point. Olive may lean yellow-brown or gray-green; plum may look wine-toned or distinctly purple. If your saved references are mostly burgundy and green nails, compare a redder plum with an aubergine sample before choosing. Look at both colors together, finished and tilted in ordinary light.
Send one image and its salon note ahead of booking. Include your current nail length, the number of accent nails, and whether the flower or bow should be dimensional or painted flat. Ask which service and art level cover that exact layout. A still concept image cannot show every angle of a moving magnetic finish.
Questions About Olive and Plum Velvet Nails
Are velvet nails actually fuzzy?
The velvet finish in these ideas is an optical shimmer effect under a smooth top coat. It does not require fabric or flocking powder. The flower and ribbon-bow references are separate dimensional accents; ask for painted versions if you want a smooth manicure throughout.
Can I get the velvet effect without gel?
Yes. Magnetic air-dry nail lacquers can also create velvet effects. Use a magnetic formula and a suitable magnet, and follow that product’s application and drying directions. Gel has its own compatible lamp and curing requirements. A cream polish with ordinary shimmer will not become magnetic just because you hold a magnet beside it.
Which designs are good options for short nails?
Start with alternating solids, a single plum accent, separate colors on each hand, or the cream mix. Their color placement stays clear without needing much nail length. For detailed art, keep one readable motif on one accent rather than shrinking several motifs until they are difficult to see.
Why does my magnetic polish look different from the picture?
The formula, magnet placement, lighting, and viewing angle all affect the reflection. For an air-dry formula, work one nail at a time and magnetize while the relevant coat is wet, following the maker’s directions. For gel, shape the effect before curing as instructed for that system. Ask to see one finished sample move in the light before repeating the full set.
Does every nail need a velvet finish?
No. A plain plum accent, warm cream nails, or a sheer nude base can make the velvet sections easier to notice. Keep the magnetic finish where you want the glow and use solid polish where you want a clear stripe, dot, or border.
Save the reference that fits your usual nail length, along with the salon note underneath it. Choosing the color placement and the amount of shimmer first gives your artist a clear starting point for adapting the design.
Also read: 19 Plum November Nail Ideas That Make Deep Purple Look So Wearable