19 Christmas Nail Art Designs for When You’re in the Mood to Paint the Tiny Details

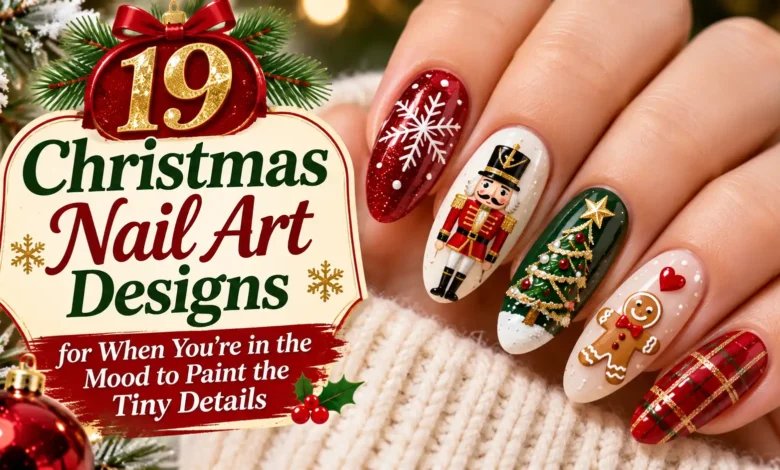
A tiny gold cap turns a red dot into a Christmas ornament. Two loops make a ribbon look tied. If those are the details you enjoy painting, start with one pale accent nail and keep the rest of your manicure simple enough to let it show.
These 19 Christmas nail art designs give you different things to paint, from a small holly cluster to a miniature snowy scene. Choose the drawing first, then adjust its size to your nail. A clear silhouette usually does more than a crowded collection of microscopic details.
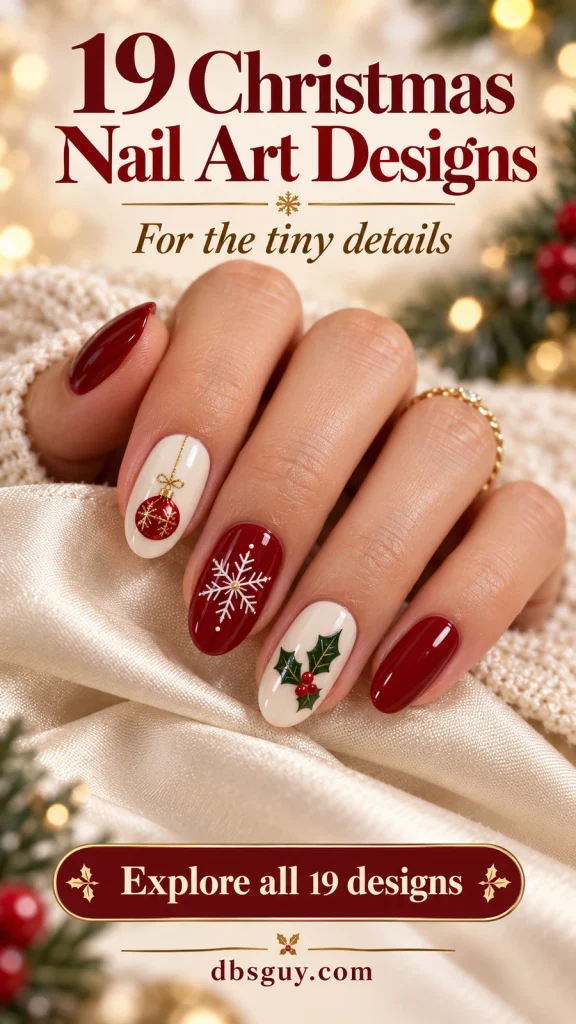
The images are AI-generated design concepts, not photographs of completed or tested manicures. Some use dimensional-looking shading; you can request smooth, flat painted versions. Use the close-ups to plan colors and placement rather than as a promise of an exact salon result.
Choose a Detail You’ll Enjoy Painting
- Start with a few dots: the hanging ornament in design 1 or the holly berries in design 3.
- Try controlled linework: the ribbon in design 2, evergreen sprig in design 7, or little envelope in design 18.
- Settle in for illustration: save the cottage, nutcracker, robin, and snow globe for a practice tip or an appointment that includes detailed art.
One illustrated ring nail with plain companion nails makes a useful starting layout. For a wide scene, use a thumbnail if it offers more room. Keep the length you normally wear; simplify the picture to fit.
Set Up Before the First Tiny Stroke
For an air-dry polish version, gather your base and top coats, a pale background color, opaque detail colors, a fine liner brush, a small dotting tool, and a disposable palette. Put out only the colors your chosen design needs. A practice nail tip helps you judge the size before working on your hand.
Apply your base color according to its label and let it dry before adding art. Work from the largest shape toward the smallest accents. Use a small fresh drop of polish when the color on your palette becomes stringy; loading more thickened polish onto the brush makes tiny lines harder to control.
Let contrasting details dry before layering or sealing, and follow your products’ directions rather than a universal timer. These are color and placement guides, not instructions for curing gel. If your artist uses gel, the product and compatible lamp determine that process.
1. One Ruby Bauble on an Ivory Nail
Give a warm ivory accent nail one ruby-red ornament, with cranberry on the neighboring nails. Place the circle below the midpoint so there is space for a fine gold string toward the cuticle. Leave a visible ivory border at both sides.
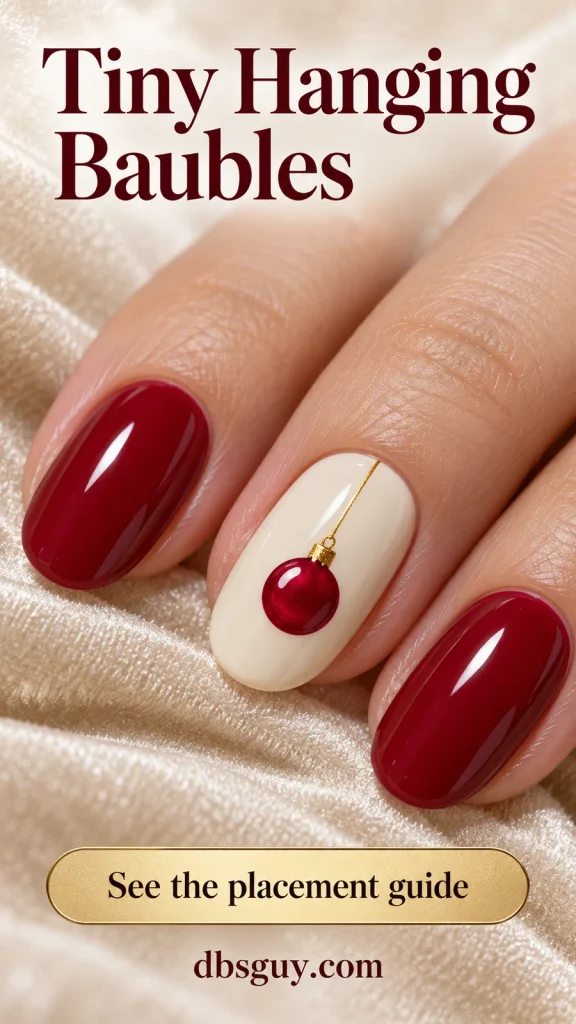
Build the circle first, then add its small cap and hanging line once the red has dried. A little white comma on one side suggests reflected light. On a short nail, shorten the string before shrinking the bauble into a speck. The circle, cap, and line are the details that matter; decorative patterns inside the ornament can wait.
2. A Blush Nail Wrapped Like a Gift
A pale pink nail becomes the wrapping paper for a red ribbon. Cross one lengthwise line with a narrower line across the nail, then tie the intersection visually with two open loops and short tails. Red companion nails repeat the ribbon color.
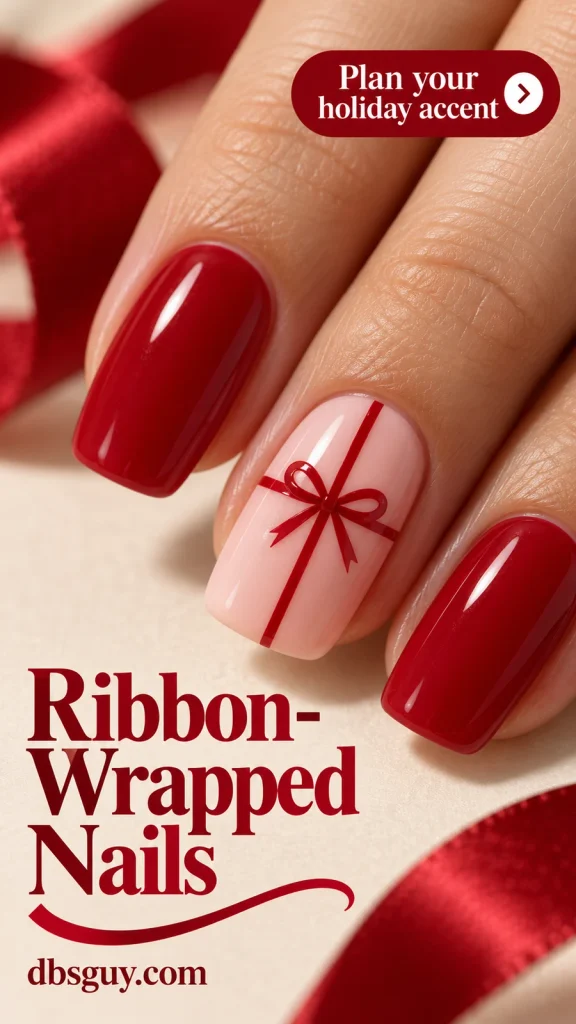
Paint the crossed lines before attempting the bow. Keep a little pink visible inside each loop; filling both loops can turn the knot into a red blob. If the entire gift-wrap layout feels too busy on your nail, use the bow alone near one side. That also leaves fewer long lines to repeat with your less steady hand.
3. Holly Berries Tucked Into a Corner
Three red berries and two pointed green leaves give short nails a recognizable Christmas detail without taking over the whole surface. Place the cluster toward a tip-side corner, leaving a clean margin beside the skin and the free edge.
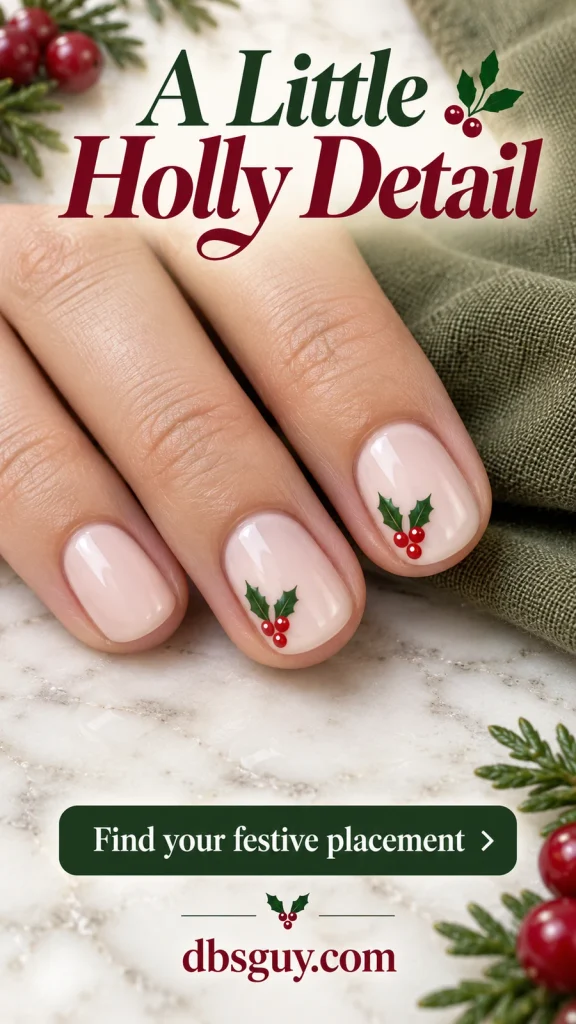
Mark the berries with a dotting tool, let them dry, and work the leaves into the space behind them. You only need a few distinct leaf points. Add tiny white highlights if the berries are large enough; otherwise, plain red dots are clearer. Repeat the cluster on one or two nails and leave the remaining milky blush nails undecorated.
4. A Single Curved Candy Cane
Instead of striping the entire nail, paint one curved candy cane over ivory. Its white hook and spaced red diagonal bands make a small, complete illustration. A faint gray edge can separate the white candy from the light background.
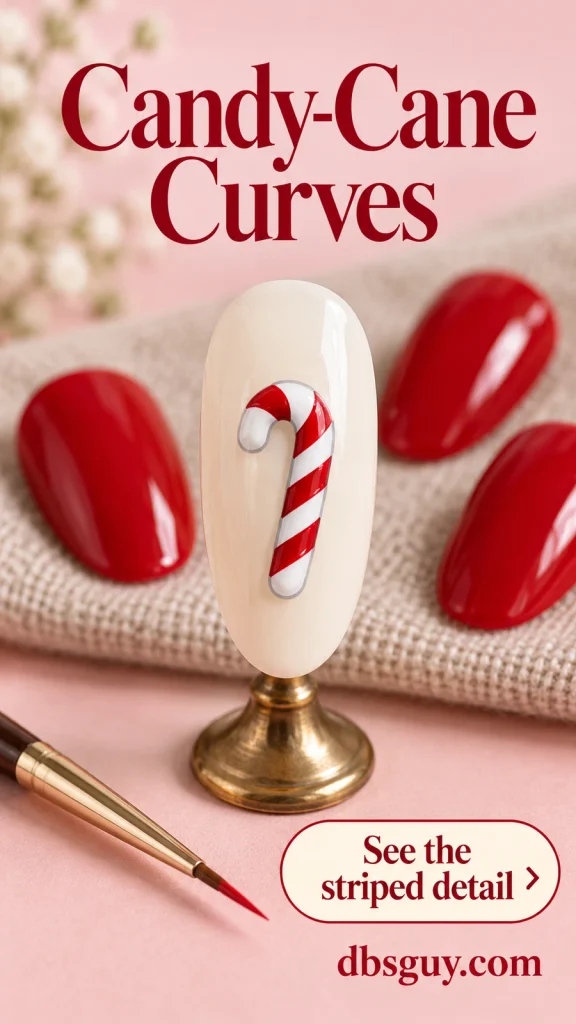
Establish the white silhouette first, leaving an open gap inside the hook. Once dry, add the red bands without joining them into one red side. For a reference on spaced detail-brush stripes and drying between layers, OPI’s Candy Paint Job tutorial demonstrates those techniques on a French tip. The hooked motif here is a different layout. If the curve is difficult, a flat candy-cane decal is a sensible shortcut.
5. One Fine Snowflake on Smoky Blue
A smoky blue background gives fine white linework enough contrast to show. Center one snowflake on the accent nail and keep the surrounding nails to a few small snow dots. The slight shimmer in the concept adds depth without introducing another motif.
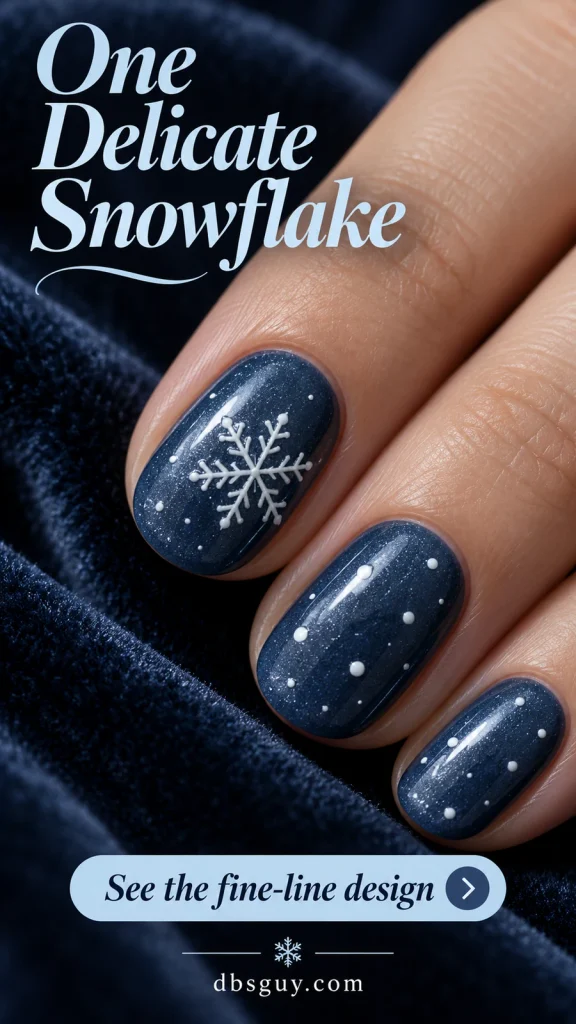
For the basic flake, cross three fine lines at one center to make six arms. Add small paired branches only where there is room. If your white lines start meeting, remove the extra branches from the plan rather than making the whole drawing larger. A cropped half-flake at one side is another option for a narrow nail.
Also Read: 19 Snowflake Nails So Delicate They Look Freshly Fallen.
6. A Caramel Star With Icing Detail
Cookie art does not need a face. One caramel star on ivory, paired with cinnamon nails, gives you a holiday baking reference through shape and color alone. A white line just inside the star’s edge supplies the icing.
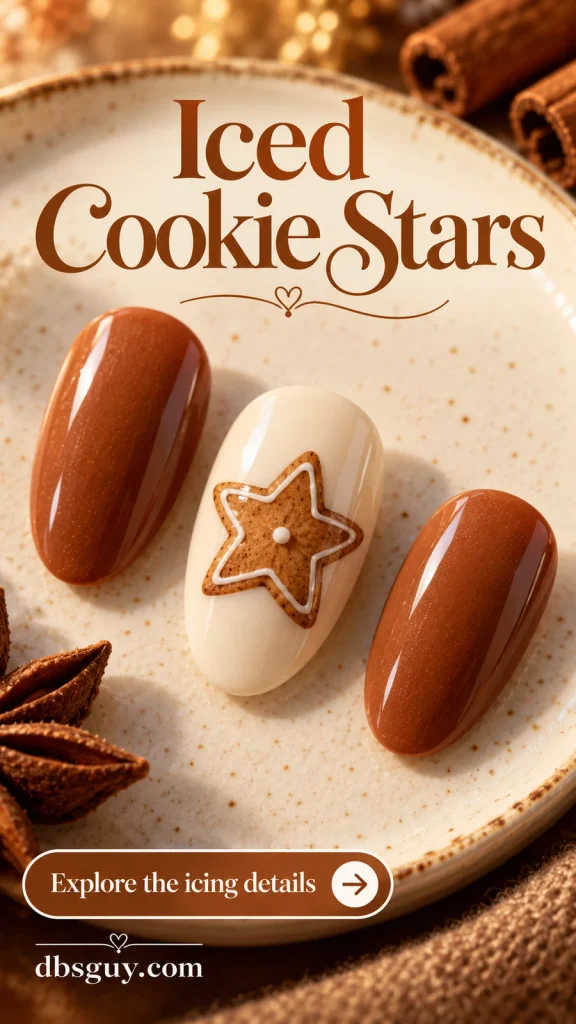
The concept has a dimensional cookie appearance. For a smooth painted interpretation, use a flat caramel silhouette and a thin white outline, with no raised charm. Mark five points on a practice tip before connecting them so the star does not spread across the whole nail. On a smaller nail, replace the continuous icing line with a white center dot and a few tiny icing marks.
Also Read: 15 Gingerbread Nails Too Cute to Eat (But Totally Wearable).
7. A Fine Evergreen Sprig on Milky Ivory
This is a quieter Christmas nail art design for someone who prefers botanical details. A slender diagonal stem with dark green needles looks particularly clear against milky ivory. Keep the companion nails plain so the branch retains its delicate character.
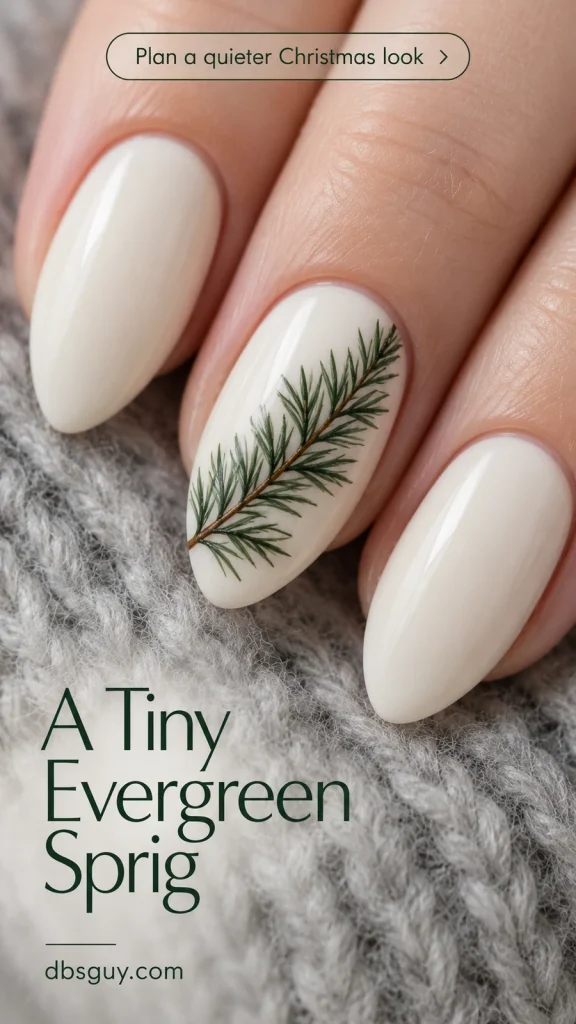
Draw the stem, then add short angled strokes pointing toward its tip. Vary their length slightly and leave slivers of ivory between them. The reference has many fine needles; a home version can use fewer, more deliberate strokes. Stop before the green becomes a solid leaf shape. On short nails, one smaller branch is enough.
8. A Little String of Colored Lights
A dark curved wire and a few colored bulbs bring a Christmas-lights manicure into focus. The reference uses red, yellow, green, blue, and red over blush pink. The curve crosses the nail with room above and below it.
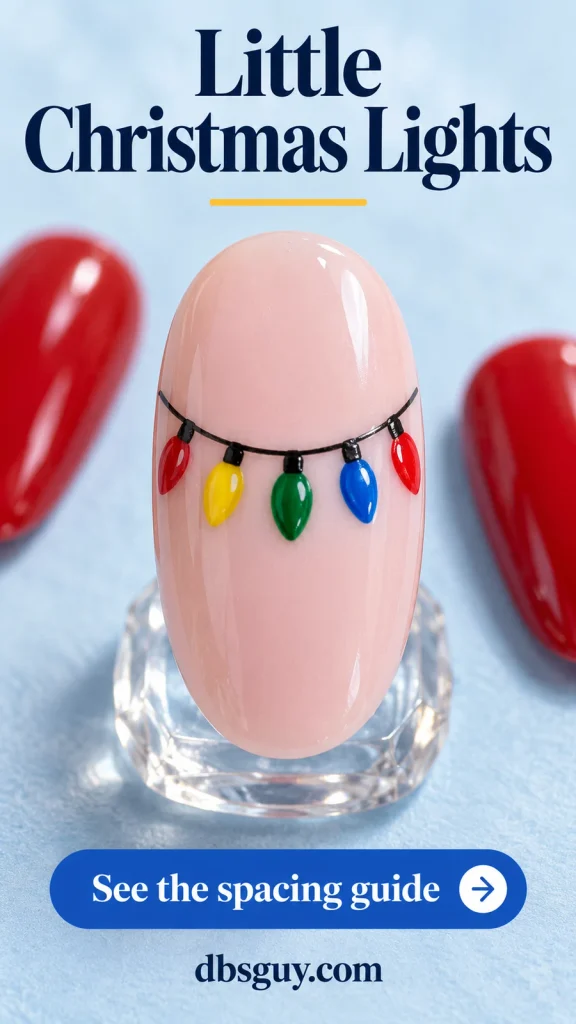
Plan the bulb positions before painting the wire. Add small teardrop shapes beneath it, keeping a gap between each one. For a narrower nail, use three bulbs instead of five. A tiny white glint is optional; it should stay inside the colored shape. Avoid adding a second string unless you have enough space for both wires to remain distinct.
9. A Mini Wreath With a Red Bow
A little green wreath gives you a round motif with more texture than the bauble. Place it centrally on a cream accent nail, with a red bow at the bottom and a few small red berry clusters around the greenery.
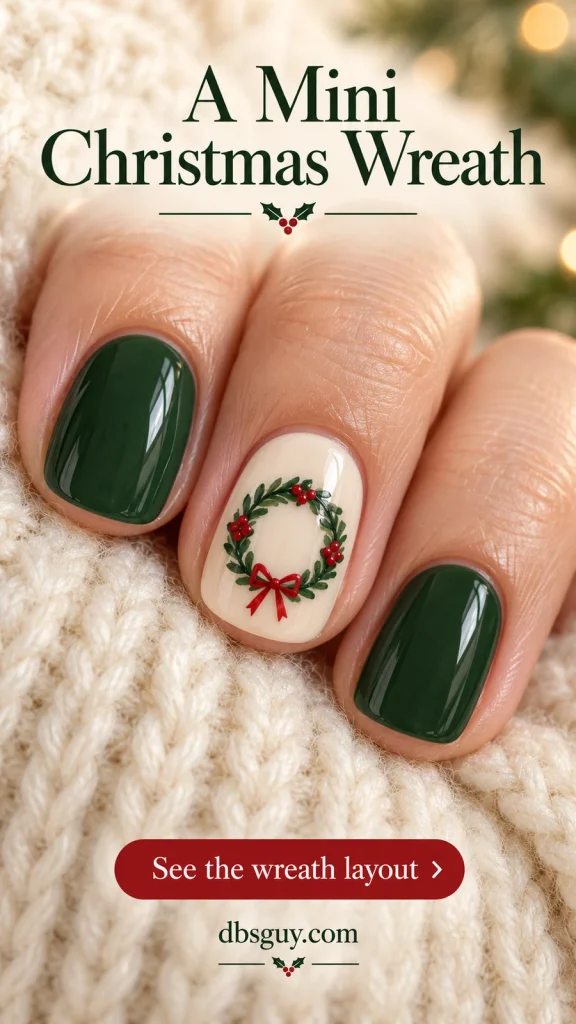
Sketch a faint circle as a guide, then suggest leaves with short green strokes around it. Keep the center visibly cream. If the wreath is filling in, leave out more leaves and berries before attempting the bow. A short nail can take a tiny open ring of green dots with two bow tails; it does not need individual leaf veins.
10. A Snowy Cottage With One Warm Window
A little red cottage on pale blue makes this manicure feel like a Christmas card. The useful details are simple: a block of red for the house, a roof with white snow, and one warm yellow window. A few snow dots finish the surrounding space.
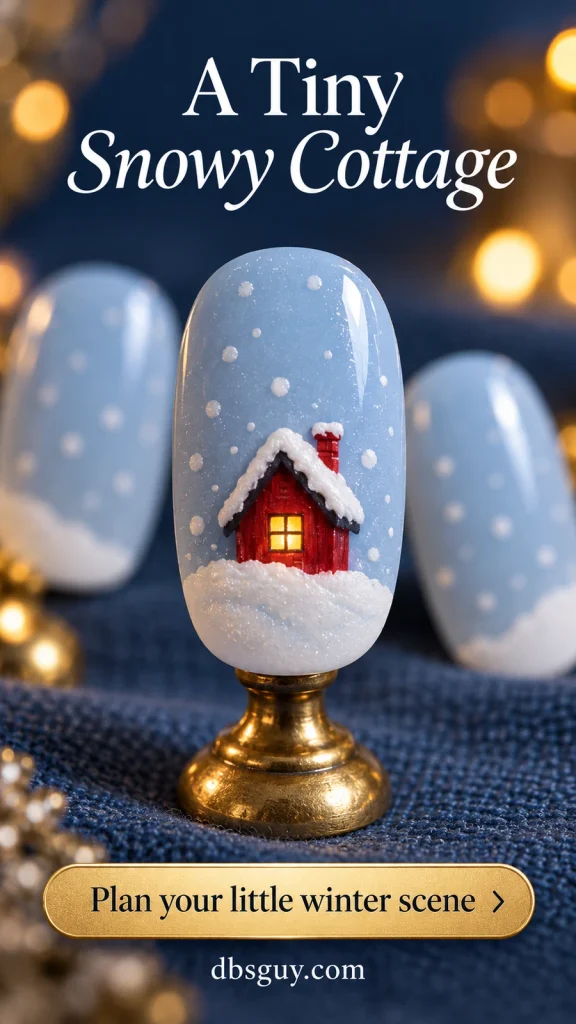
The reference has textured-looking snow and a divided window. For a flat painted adaptation, reserve your widest suitable nail for the house and simplify the window to one yellow square. Paint the house and roof as separate shapes, then add the window once the wall color has dried. Leave chimney bricks, fence posts, and window grids out of the first attempt. If the house still feels cramped, draw only a red roofline and a lit window peeking above a white snowbank. Plain blue companion nails keep the scene readable.
11. A Nutcracker Portrait Accent
A nutcracker portrait offers more character than a full figure squeezed onto a narrow nail. Keep the tall dark hat, pale face, white mustache, and red jacket as the main color blocks. Ivory around the portrait separates it from the red companion nails.
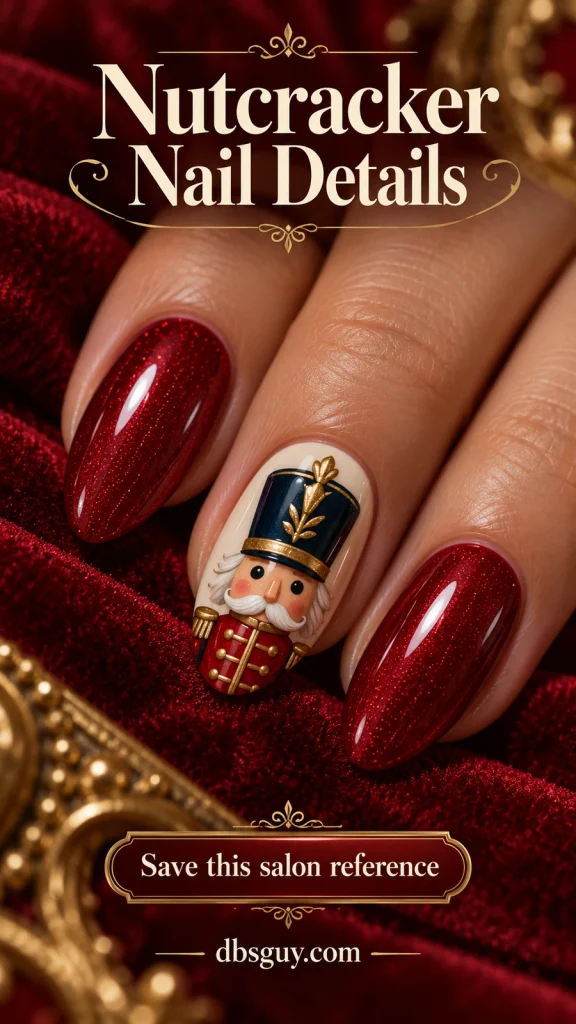
The reference has sculpted-looking features; specify a flat painted portrait if you prefer a smooth surface. This is a detailed appointment request or a practice-tip project. Send the reference when booking so the artist can assess the illustration work. Ask for the head and upper jacket, with the hat toward the cuticle. If facial features blur at the size you need, choose a flat printed decal or simplify to the hat, two eyes, and a white mustache. You do not need tiny teeth.
12. A Red-Breasted Robin on a Winter Branch
A small robin makes a softer companion to all the ribbons and ornaments. Use an ivory base, a brown body, and a rust-red breast, with a fine branch underneath. The other nails can stay warm taupe.
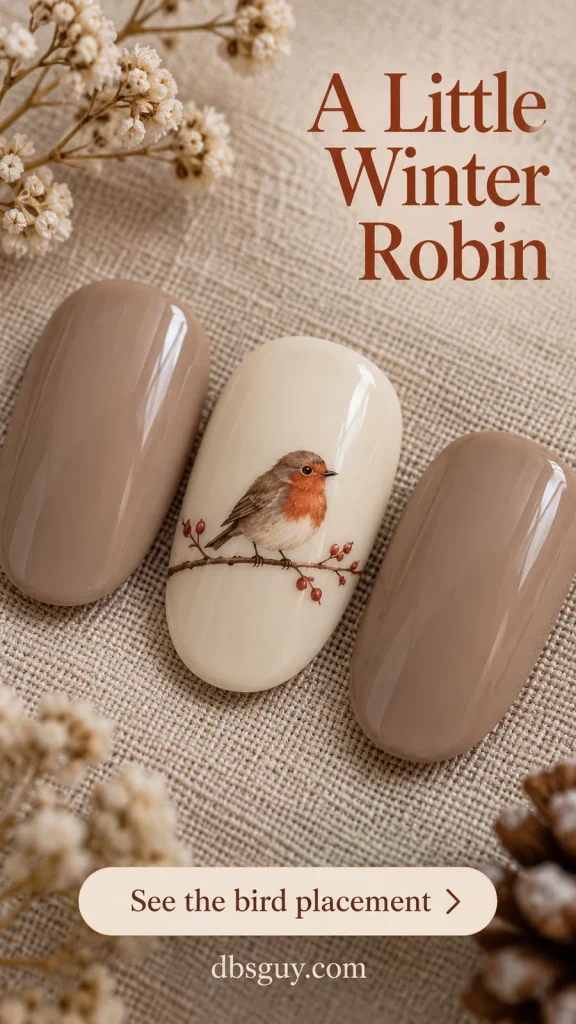
Block in the body as a small oval with a round head and short tail before adding the red breast. A dot for the eye and a short beak are enough facial detail. Position the bird so neither the tail nor the beak wraps out of sight at the sidewall. For a shorter nail, skip the extra twigs and give the bird a single horizontal perch.
13. One Poinsettia With Fine Gold Details
One poinsettia gives a holiday manicure a floral direction. Place the red star-like bloom slightly off-center on ivory, with a little green showing behind it. Small gold center dots connect the flower to a warmer festive palette.
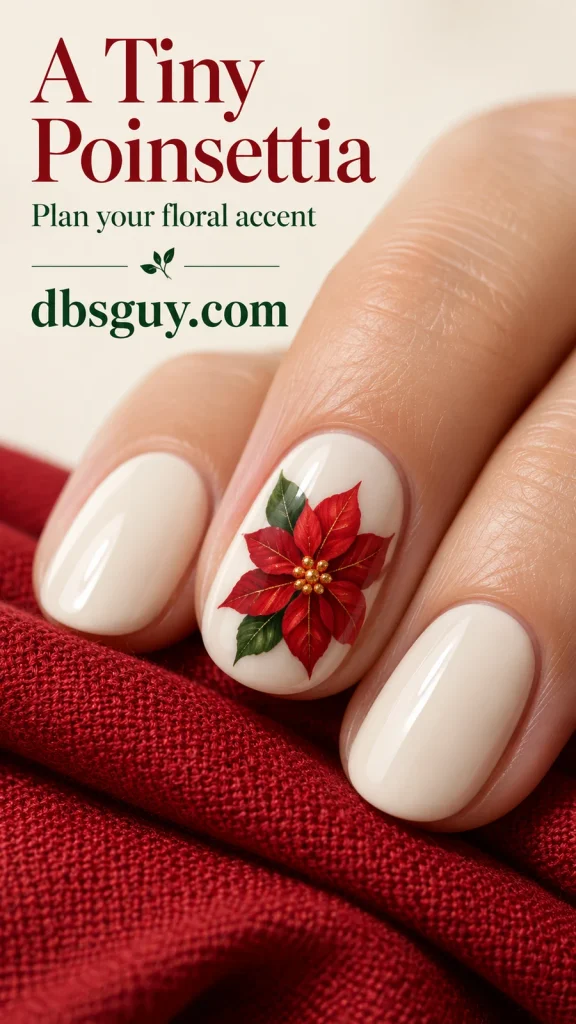
Work around a center point so the red shapes radiate outward instead of leaning to one side. Add fine internal lines only after the larger red areas are dry. On a small nail, use fewer pointed shapes and keep the gold center compact. A partial flower at one edge is preferable to forcing every tip of every petal-shaped bract into the available width.
14. A Tiny Stocking With a White Cuff
A red stocking on blush pink brings a playful Christmas detail to a short manicure. A white cuff and a small gold hanging loop finish it; plain red nails on either side make the little illustration feel connected.
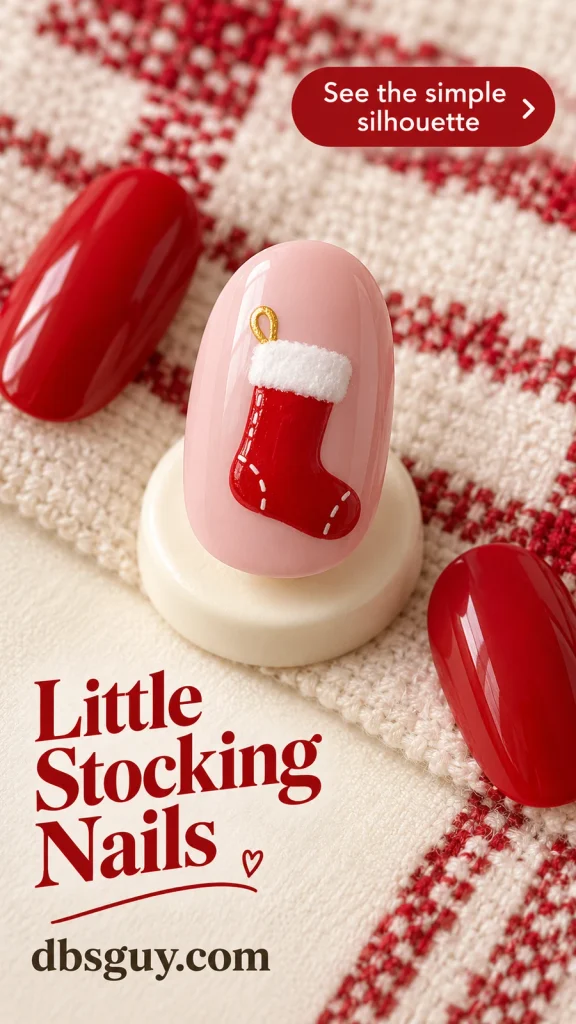
Think of the silhouette as a short leg with a rounded foot turned to one side. Leave space beyond the toe so it does not disappear over the curve of the nail. Paint the cuff after the red has dried. If the nail is narrow, omit stitching and trim; the bent toe and contrasting cuff are enough. Keep the loop inside the nail rather than extending it onto the skin.
15. Two Gold Bells on Deep Green
Paired gold bells make a small accent feel dressier. Set them at slight opposing angles over deep forest green and connect them with a red ribbon. Plain green nails leave room for the gold to catch attention.

The reference uses dimensional-looking metallic shading. For a smooth painted version, choose a metallic art polish that gives a clear mark at this scale. Shape each bell with a rounded top and a wider lower rim, then add a short dark slit or tiny clapper detail if there is room. Too many reflection lines can break up the silhouettes. For short nails, use one bell with a red ribbon tail instead of squeezing two together.
16. A Christmas Candle With a Golden Flame
A red candle, a gold-yellow flame, and a small green sprig create a quiet holiday scene. The slim vertical shape fits an oval nail without needing a wide illustration. Use cream for the background and red on the companion nails.
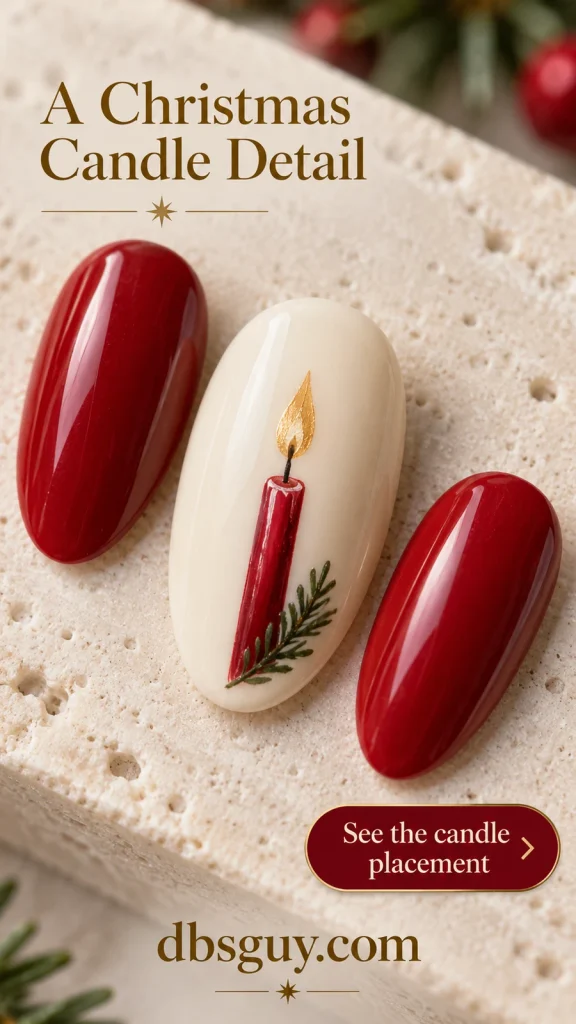
Keep the candle body narrow enough to leave cream visible on both sides. Add a tiny dark wick above it, then a tapered flame with open space around the top. The sprig belongs near the bottom, where it will not compete with the flame. For a simpler version, leave off the greenery and use one small white wax mark. This motif works through its outline, not through many drips.
17. A Peppermint Pinwheel Accent
A round peppermint sweet gives candy-themed Christmas nails a different drawing challenge from the hooked cane. Keep the disc white with red curved wedges moving toward one center, and surround it with glossy red nails.
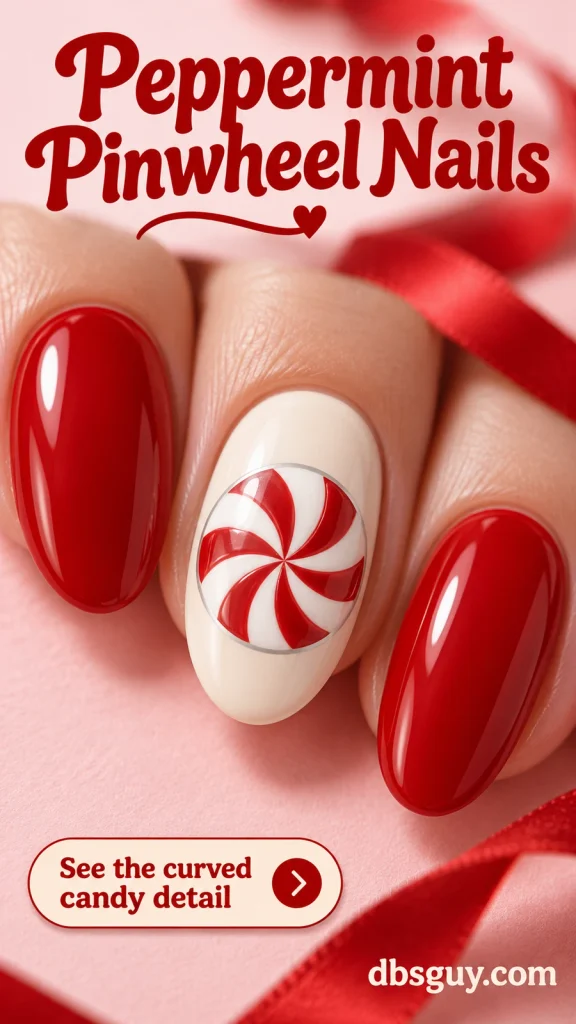
Practice the circle and spiral separately before putting them together. Mark the center, then bring a few curved red wedges inward, leaving white channels between them. The important feature is the turning motion; a crowded collection of hair-thin stripes will be harder to read. If you want crisp symmetry, a small flat peppermint decal is a more practical choice than repeatedly correcting wet red polish.
18. A Little Christmas Letter With a Red Seal
A miniature envelope brings a Christmas-letter detail to the manicure without asking you to paint tiny words. Set a small cream rectangle on a milky blush base, then define the flap with fine warm gold lines and one red seal.
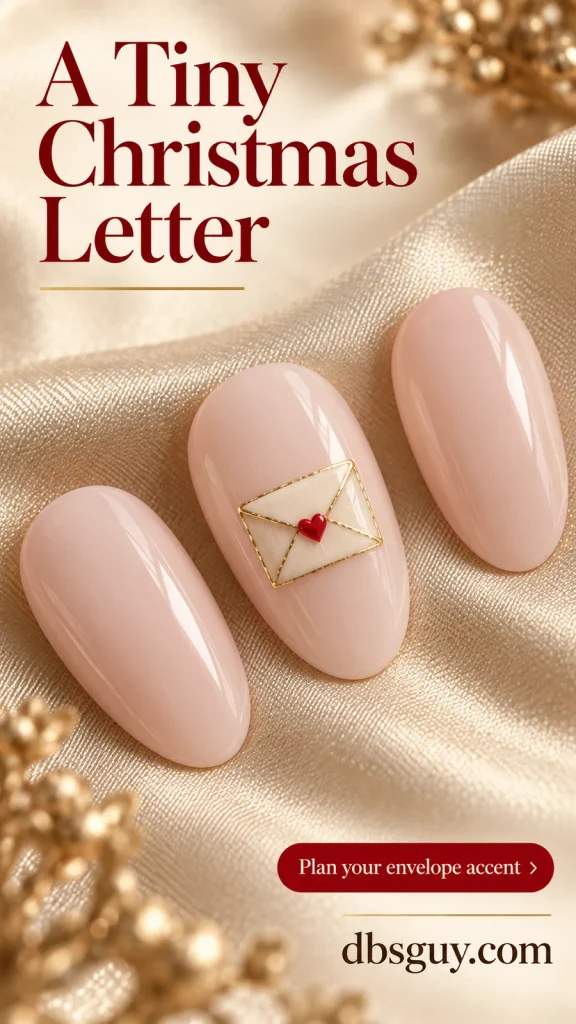
Keep the envelope well inside the nail edges so the whole rectangle stays visible from above. Let the cream shape dry before drawing the diagonal flap lines. Use a red dot if a heart-shaped seal is too small to paint cleanly. Skip addresses and postage text; plain blush companion nails let this little illustration do its job.
19. A Snow Globe With a Tiny Tree Inside
Finish with a snow globe if the painting is the part you look forward to. A fine circular outline encloses one green tree and white snow, with a small gold base below. Pale blue outside the globe gives the snowy interior a gentle contrast.
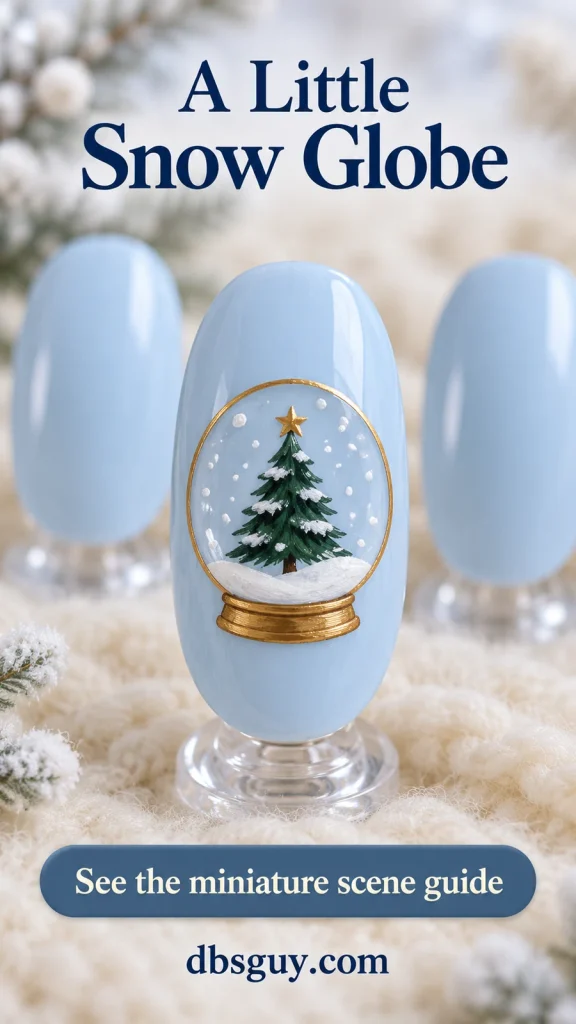
Map the circle and base first, leaving room between the globe and the sides of the nail. Inside, keep the tree to a few widening green strokes over a white snowbank. Add only a handful of snow dots so the tree remains visible. This is a good thumbnail or salon illustration choice. On a shorter nail, drop the internal tree decorations before reducing the globe to an unreadable size.
Make the Detail Work on Your Actual Nails
Look at your chosen reference at roughly the width of your nail, not only enlarged on a screen. If the important shape disappears, simplify it. A bauble needs its cap; a wreath needs an open center; a candy cane needs its hook. Keep those features and remove optional dots, veins, or reflections first.
Before a salon visit, decide on your base shade, the number of illustrated nails, and whether you want a smooth painted finish. Share the reference when booking intricate work. At home, paint one complete practice accent before starting all ten nails, especially when the motif needs several colors layered together.
Christmas Nail Art Questions
Which design is the most approachable for a first attempt?
Start with the bauble’s circle or the holly’s berry dots on one accent nail. Add the cap and string, or the two leaves, after those shapes dry. The evergreen sprig uses fewer colors but asks for more fine brush control. A practice tip will show which motion feels easier for you.
Can I paint these designs on short nails?
Yes—choose a smaller, simpler motif rather than copying every mark in an enlarged reference. Holly corners, one stocking, a small bauble, or a single evergreen sprig all give you a clear shape to work with. Use your widest nail for a cottage or snow globe, or choose a decal sized to fit.
How do I keep red details from smearing into the top coat?
Let the art dry according to your polish directions before sealing it. Use a compatible top coat and enough product for the brush to glide without repeatedly scrubbing across the drawing. Test the combination on a practice tip first; drying behavior varies by formula and layer thickness.
Do I need gel for tiny Christmas nail art?
No. You can interpret the flat painted designs with air-dry nail polish and fine tools. Gel is a different system with product-specific application and curing requirements. A detailed motif may be easier for you as a flat decal or predesigned press-on, regardless of the system you choose.