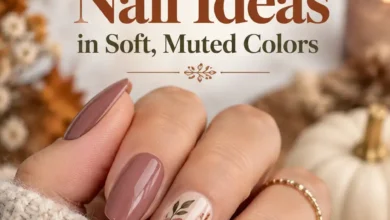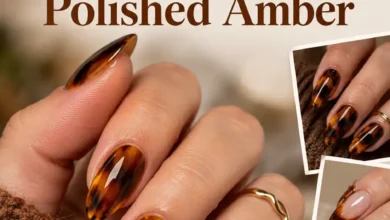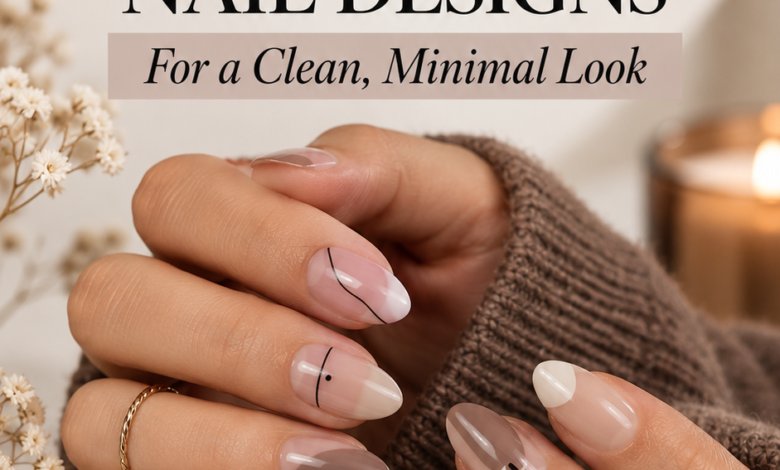
You want a November manicure that feels like fall, but you still want to see your nails underneath it. A tiny cocoa tip, a curved olive edge, or a clear window through caramel polish can be enough. Negative-space nail art makes those small details the whole point.
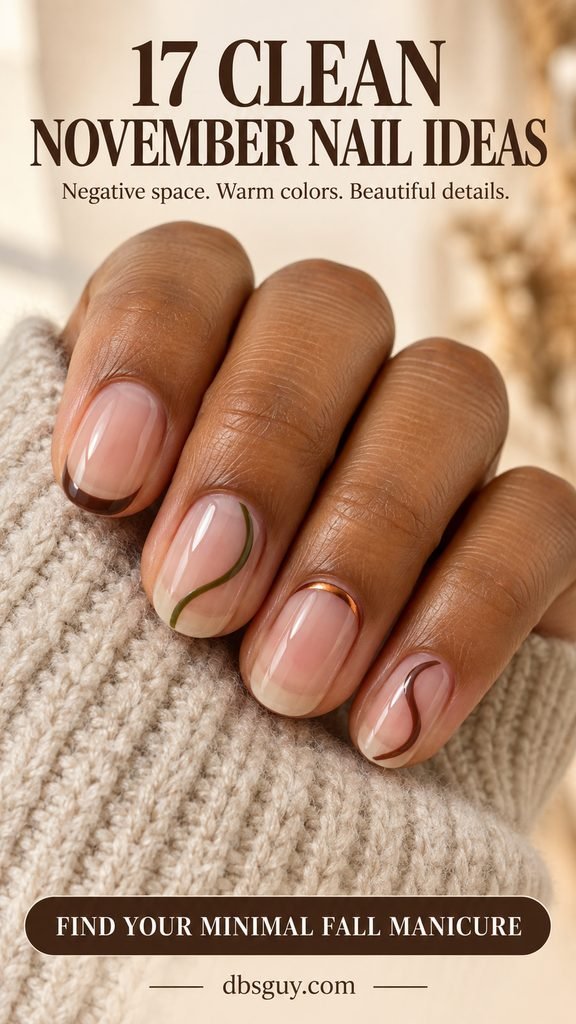
These 17 negative-space November nail designs range from barely-there lines to more graphic cutouts. Each has its own reference image and a salon note, so you can save the look you like and explain exactly which part should stay clear. Start with the short cocoa tips for something subtle, or scroll to the heart and diamond windows if you want a stronger focal point.
Choose the Clear Space First
Negative-space nails leave parts of the natural nail visible through clear polish or a sheer tint. Those open areas are part of the pattern. They can still have base coat and top coat; they do not need to be bare of every product. An opaque nude background creates a similar color contrast, but it covers the natural detail that gives this style its translucent look.
Before choosing the art, look at a swatch of the proposed base on your own nail. A sheer pink, peach, or brown-toned tint can soften the overall appearance while allowing your nail bed to show. Ask to see the actual coverage: a shade called nude can be sheer or fully opaque, and another coat can change the result.
On very short nails, start with micro tips, corner accents, or the tiny offset crosses below. Medium oval and almond shapes give floating arches and ribbons more room. If you like stronger color, choose the half-moons or clear windows. Keeping the same amount of open space across the set helps even a bolder design look considered.
1. Short Cocoa Micro-French Tips
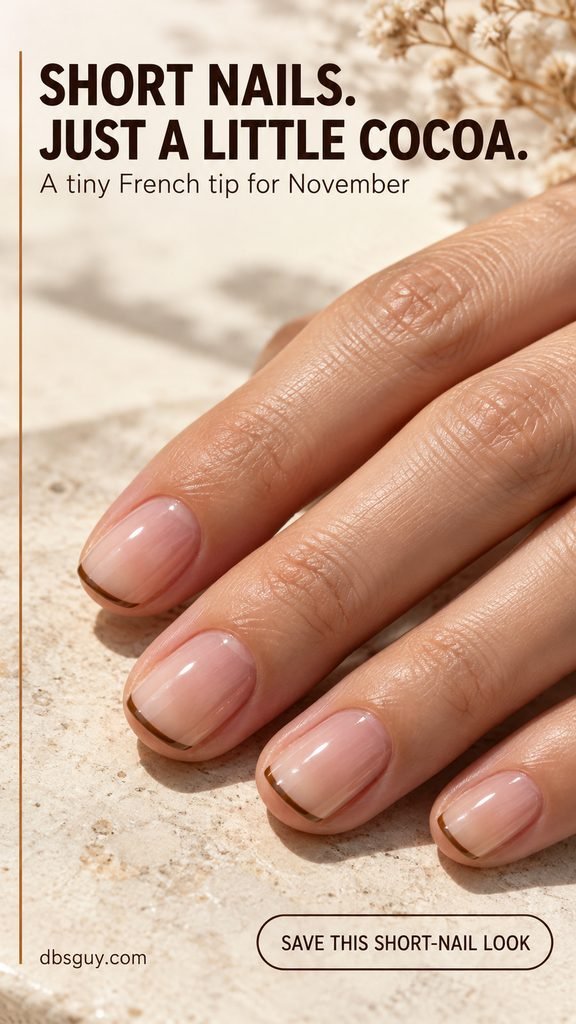
A narrow cocoa edge is a gentle way to bring brown into your manicure. The clear center keeps the nails looking light, while that little smile of color shows up when your hands move. Short squoval nails give the line a soft, tidy shape without needing extra length.
The important detail is the width of the tip. A thick brown band will change the balance, especially on a small nail bed. Ask your artist to keep it fine and proportionate on each finger rather than copying one fixed width from thumb to pinky.
Salon note: Short squoval shape, a clear or very sheer base, and the thinnest practical cocoa French tip.
2. Burgundy Outline French Tips
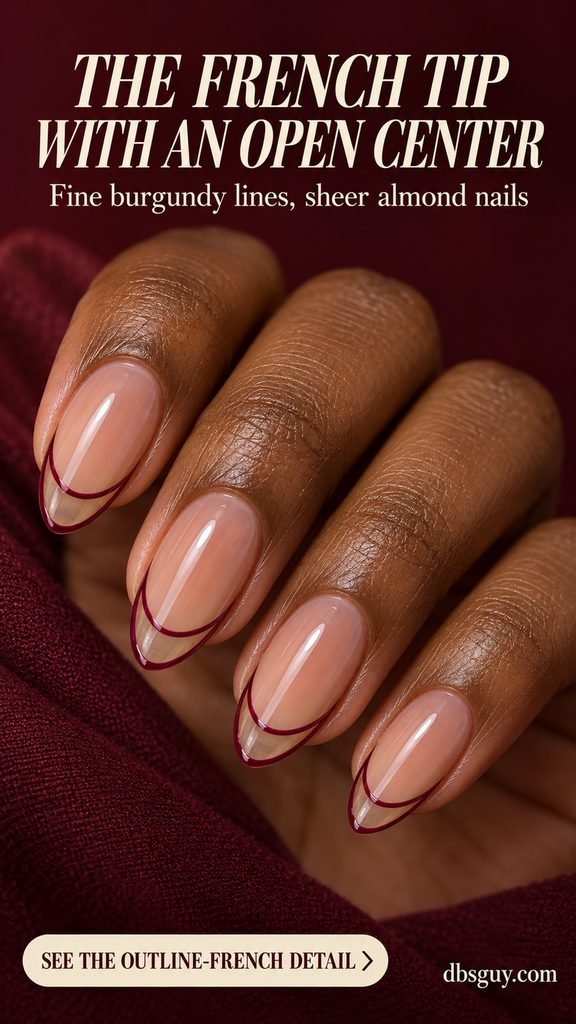
This French tip gets its shape from the outline. Two fine burgundy curves enclose a transparent space at the end of the nail, giving you the depth of a wine-colored manicure without a solid block of color. The natural free edge remains visible inside the frame.
A little length helps the hollow section read clearly. On an almond shape, keep both curves smooth as they meet at the sides. If the lines crowd together, the open center disappears and the design starts to look like an ordinary colored tip.
Salon note: A hollow burgundy French outline on sheer almond nails; leave the area between the curves transparent.
3. Caramel Half-Moon Nails
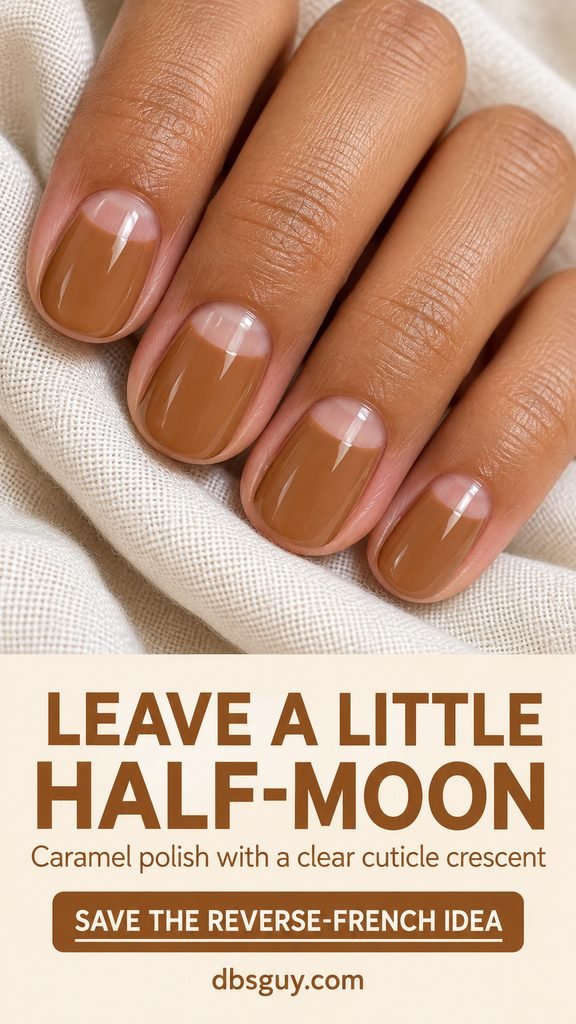
Caramel gives this set a warm, creamy color, and the clear half-moon near each cuticle breaks it up. Most of the nail stays painted, so this is a good place to start if nearly transparent manicures feel too understated for you.
Let the rounded opening follow the shape of your nail rather than forcing a large semicircle onto every finger. The clean border matters more than the size. Keep the tips solid caramel so there is one obvious design feature instead of competing details at both ends.
Salon note: Glossy caramel nails with a smooth clear half-moon at the base; no cream-colored paint inside the opening.
4. Mocha Nails With a Clear Vertical Window
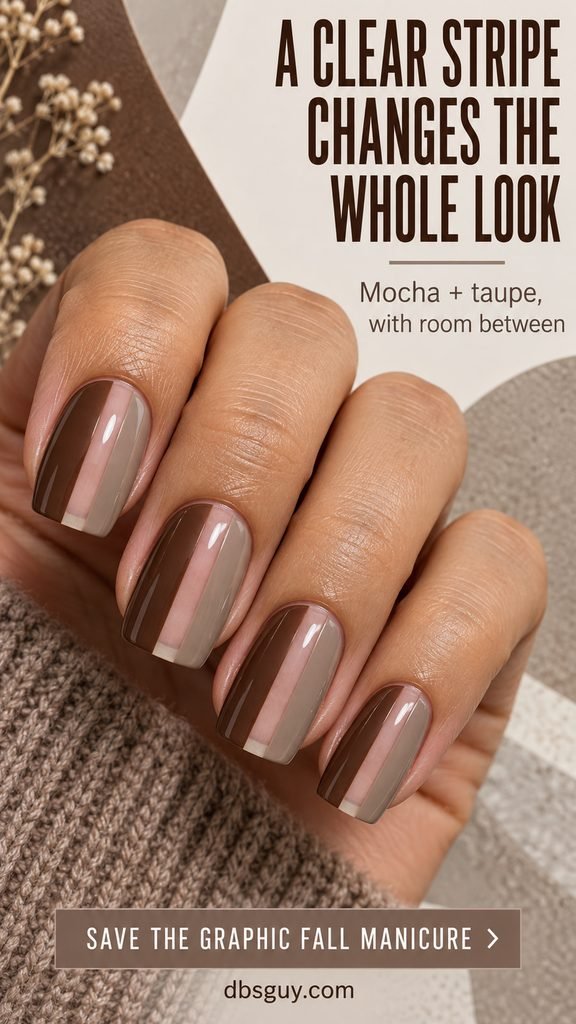
Mocha on one side, mushroom taupe on the other, and a clear stripe down the middle: this is negative space with a more architectural feel. The two browns are close enough to look calm together, while the visible nail between them keeps the blocks separate.
A soft-square shape suits those straight edges. Ask for a stripe wide enough to remain visible at a glance, especially if you are shortening the reference. Uneven panels can look intentional, but a wobbly clear channel will distract from the clean geometry.
Salon note: Two vertical brown panels with an uninterrupted clear channel from cuticle to tip, finished in gloss.
5. Rust Nails With a Diagonal Clear Stripe
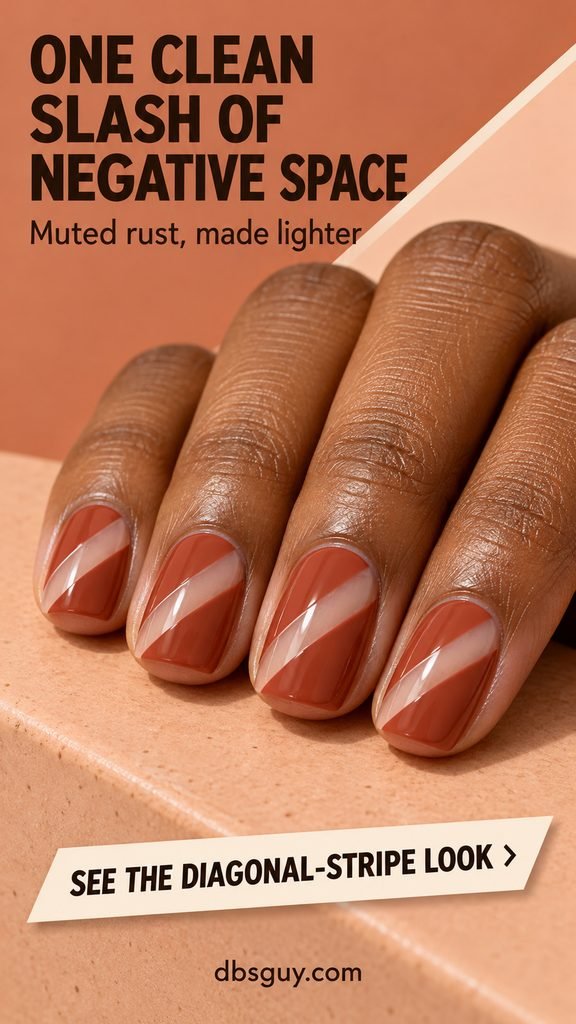
Muted rust has that late-fall warmth without needing leaf art or a pumpkin motif. A diagonal clear stripe opens up the color and makes a short, simple manicure feel more graphic. Both sides of the stripe stay the same shade, so the shape carries the interest.
Choose the angle before the color goes on. Repeating roughly the same direction across the hand makes the set feel connected, even when individual nail widths differ. The clear section should be an obvious opening, not a hairline that could disappear under a reflection.
Salon note: Muted rust on both sides of one diagonal clear stripe, with smooth parallel borders.
6. Olive Side-Swoop Nails
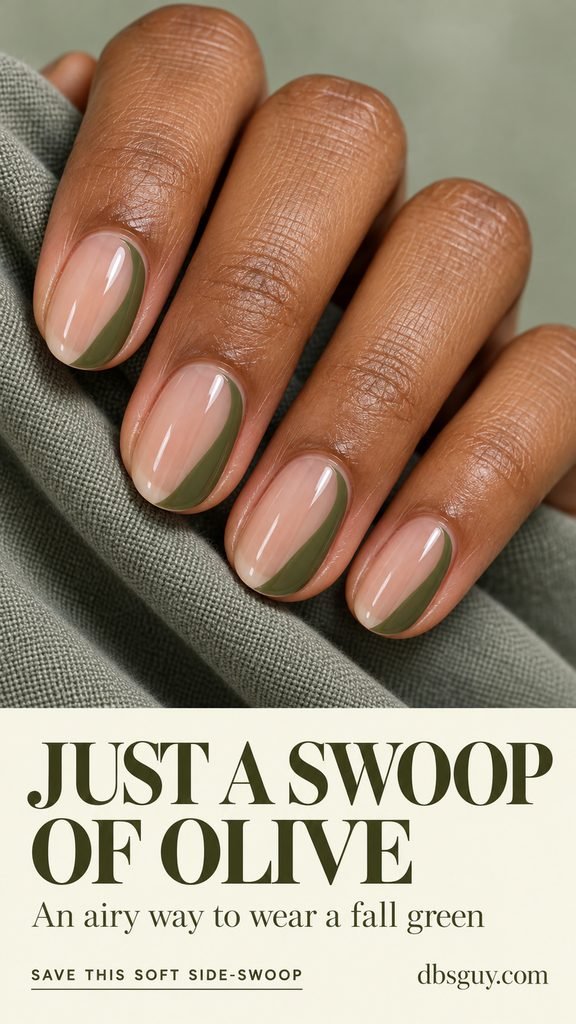
An olive swoop along one side gives you a little green without covering the nail. The curve is softer than a straight color block, and the mostly clear surface makes it easy to notice the shape. It is a lovely match for a simple oval outline.
Keep the color beside the nail center rather than wrapping it across the entire tip. That placement is what separates this look from a French manicure. A muted, brown-leaning olive will give the reference its subdued November feel.
Salon note: One tapered olive crescent along a side edge, with most of the nail and its center left sheer.
7. Floating Espresso and Taupe Arches
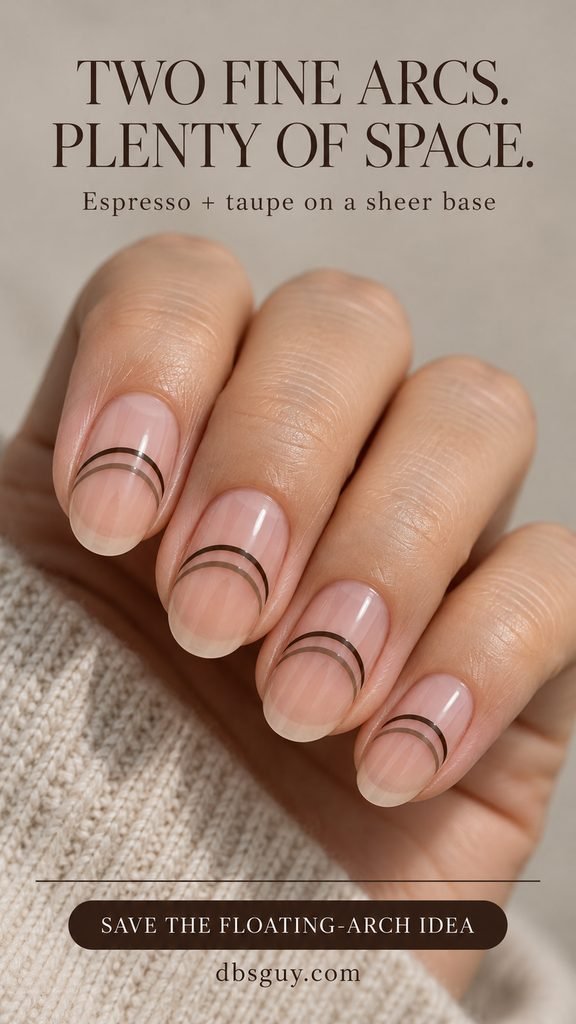
Two fine arches bring a little rhythm to an otherwise clear nail. Espresso gives the first curve definition; taupe makes the second one softer. Because the lines sit within the nail rather than tracing its edge, they look like small pieces of drawn art.
Give each arch space above, below, and between the lines. They should remain easy to distinguish instead of merging into one dark band. On a smaller nail, shrinking the whole motif is more useful than squeezing the two curves closer together.
Salon note: Two slim floating arches, one espresso and one taupe, with a visible clear gap and open space around them.
8. Cocoa Corner Accents
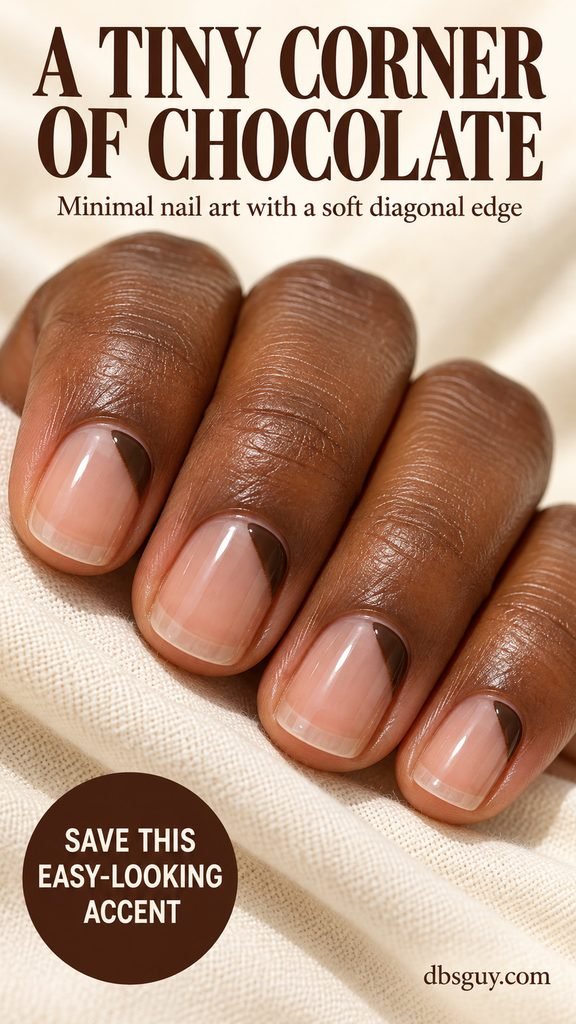
A single chocolate-colored corner can be all the decoration a short nail needs. This little wedge sits beside the cuticle at one side, leaving the center and free edge clear. The placement gives you a small point of color that feels tucked into the shape of the nail.
A softened diagonal border keeps the accent from feeling too sharp against rounded-square nails. Keep a neat margin between polish and skin. If you are practicing with regular lacquer, focus on one smooth boundary rather than trying to make the wedge larger or adding another detail at the tip.
Salon note: A small cocoa wedge at one side near the cuticle, with the nail center and entire free edge left clear.
9. Fine Taupe Outline Nails
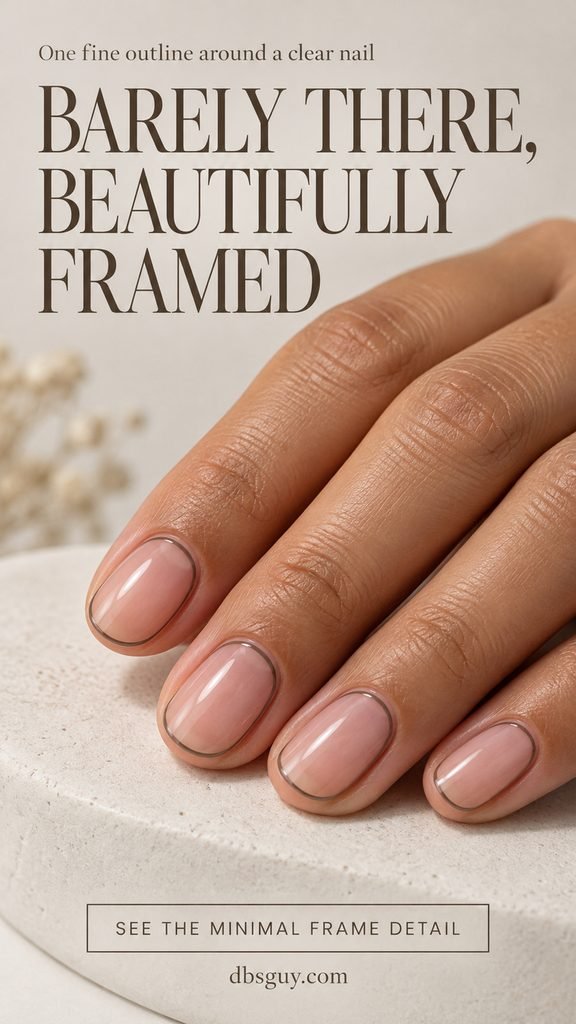
A fine taupe frame makes the natural nail the centerpiece. The line follows the oval outline all the way around, enclosing a clear interior. From a distance it is subtle; up close, the continuous border gives the manicure a deliberate, finished look.
Choose enough contrast for the line to show against your natural nail color. A very pale taupe may disappear, while a thick dark border will feel much stronger. Ask for a slim, even frame that sits inside the nail edge and stays off the skin.
Salon note: A thin taupe perimeter outline around a transparent center, with an even line weight all the way around.
10. Burgundy Nails With a Tiny Clear Heart
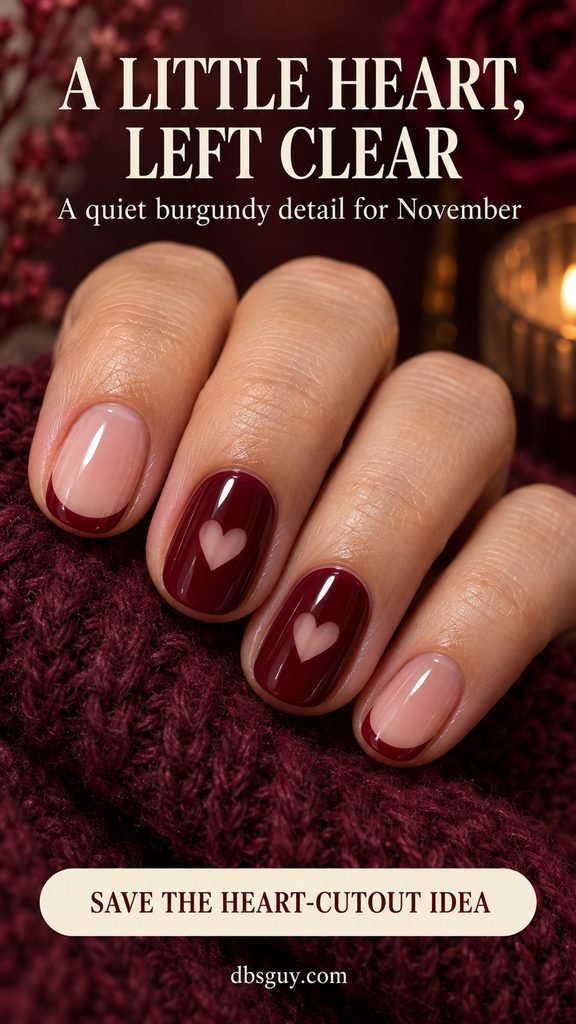
A clear heart gives burgundy polish a small, sweet interruption. In this set, the heart windows sit on the middle and ring nails, while the neighboring nails keep a lighter burgundy French tip. That contrast lets the heart detail stand out without covering every finger in solid color.
The distinction to explain is that the heart is a window through the burgundy, not a pale heart painted on top. Keep it large enough for the two rounded lobes and lower point to remain recognizable. A cramped heart can lose its shape on a very short nail.
Salon note: Two burgundy accent nails with clear heart-shaped windows, paired with sheer burgundy French tips.
11. Toffee S-Curve Ribbon Nails
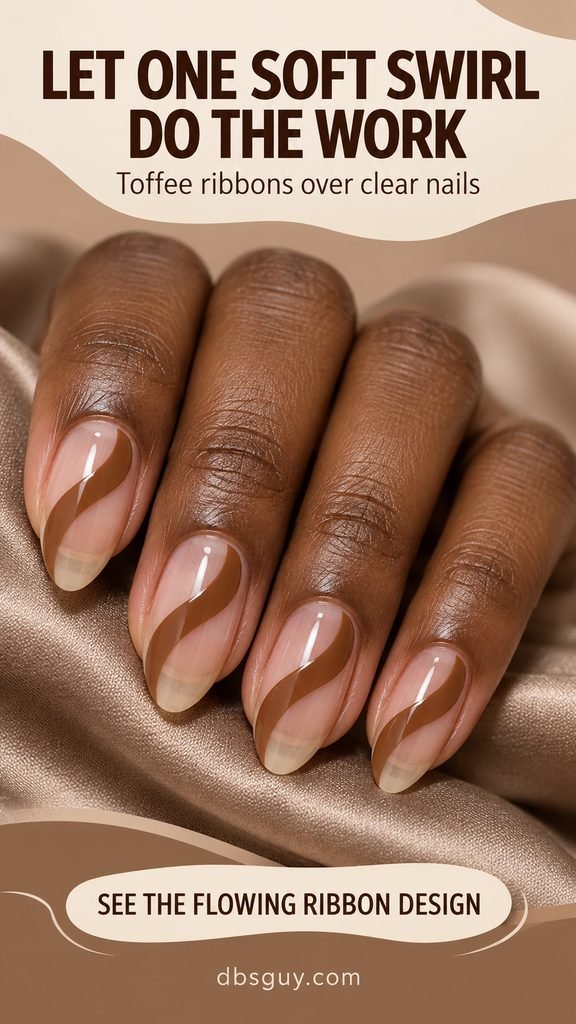
One toffee ribbon gives this manicure movement. The S-curve winds across the clear nail, leaving an open area on either side. It feels a little more expressive than straight lines, but the single color keeps the whole set easy to take in.
Medium almond nails give the curve room to bend. The ribbon can vary slightly from finger to finger, provided its width and color stay consistent. Avoid filling the clear pockets around it; those spaces are what make the brown line look fluid instead of heavy.
Salon note: One smooth toffee S-curve per sheer nail, with two generous clear areas on either side.
12. Chocolate Checker Corners
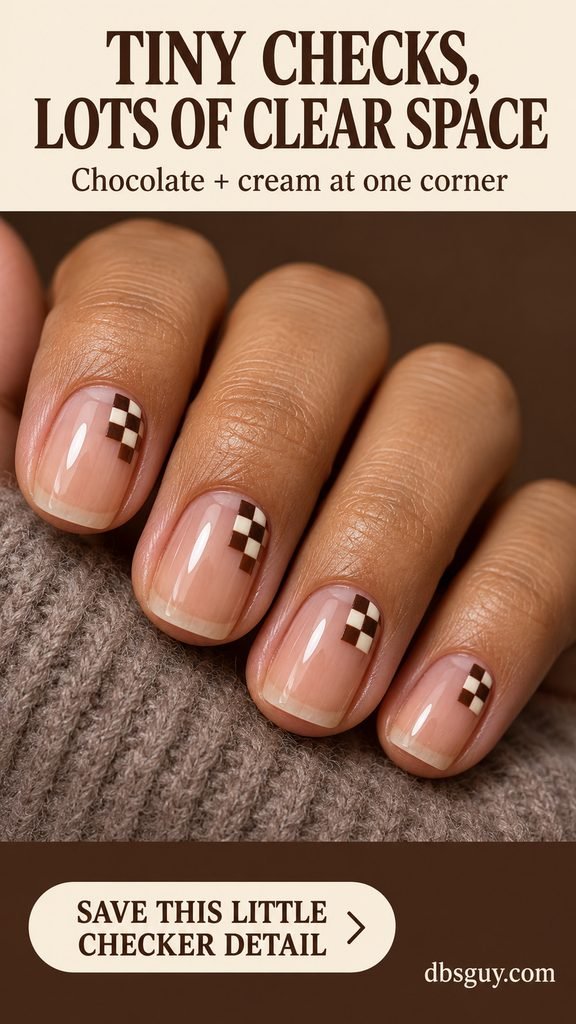
A tiny checker patch gives clear nails a playful edge. Chocolate and cream squares occupy just one corner, so the pattern never takes over the whole surface. The open nail around it is especially useful if you love checks but prefer a quieter manicure.
Make the patch readable before making it tiny. A few crisp squares will communicate the pattern better than lots of crowded ones. Short soft-square nails echo the geometry, and the glossy finish brings the painted corner and clear base together.
Salon note: Small chocolate-and-cream checker patches at one side near the base, with most of every nail left transparent.
13. Fine Copper Cuticle Cuffs
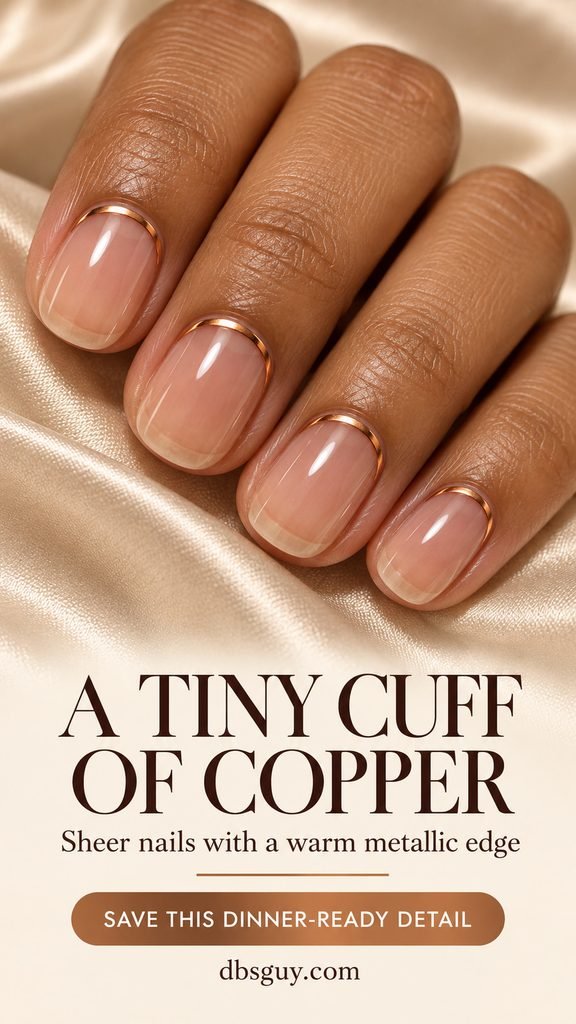
For a Thanksgiving dinner manicure with just a little shine, try a fine copper cuff. The metallic curve sits near the base of the nail, leaving the rest glossy and clear. It catches the light without turning the entire manicure into a reflective surface.
The cuff should follow the cuticle shape while staying on the nail plate. Keep it narrow and smooth, particularly where it turns up at the sides. Ask your artist which metallic product will make a crisp line in the polish system you are using.
Salon note: A delicate copper curve near each cuticle on clear rounded nails; keep the free edges completely clear.
14. Tiny Espresso Offset Crosses
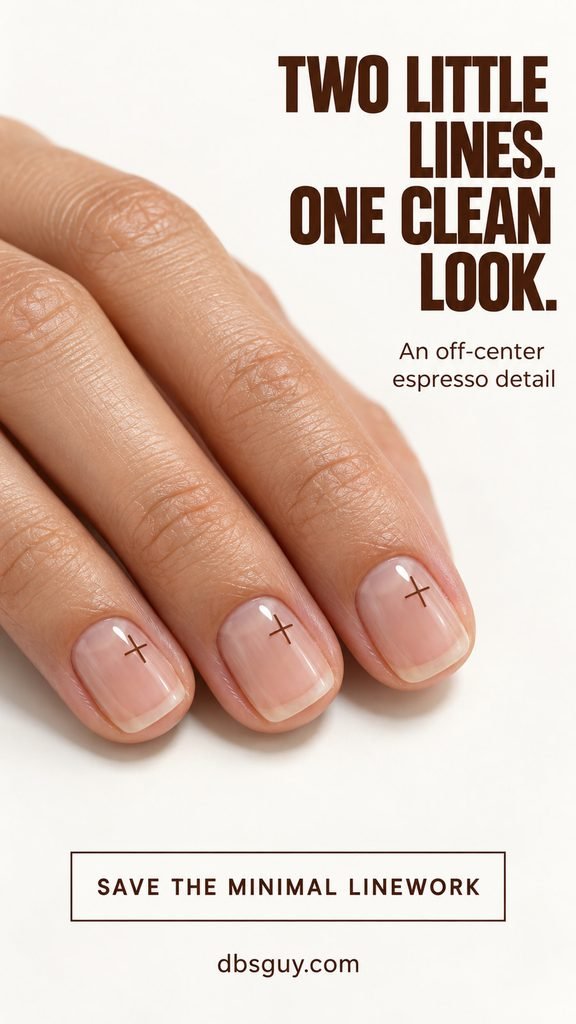
Two little intersecting lines create a small graphic accent on a nearly clear nail. Placing the mark off-center gives it more personality than a perfectly centered motif, and espresso adds enough contrast to make the detail visible without using black.
Keep the arms short and similar in length so the mark reads as a tiny plus sign. There is no need to stretch it across the whole nail or add a grid around it. This is a useful reference when you want nail art that leaves almost everything open.
Salon note: One tiny espresso plus-shaped mark off-center near the base of each sheer nail, with fine, balanced arms.
15. Greige Nails With Clear Diamond Windows
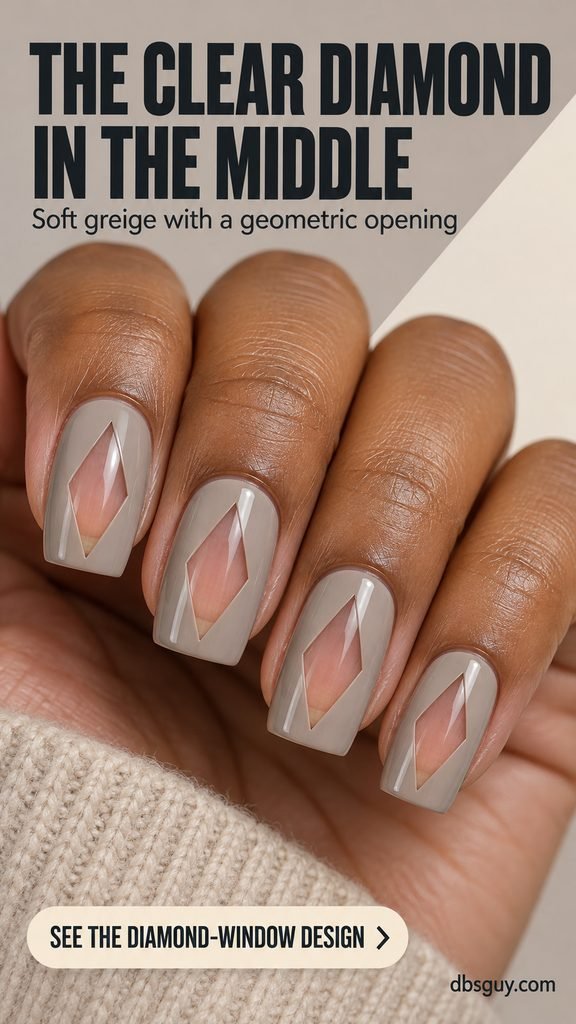
A clear diamond turns a quiet greige manicure into a geometric one. The surrounding color is soft, but the four pointed edges give the opening definition. This is one of the more covered looks in the collection, with negative space concentrated in the center.
A medium soft-square nail gives the elongated diamond enough height to read clearly. The reference is about an open shape, not a jewel: keep the finish flat and glossy. Let the artist adjust the diamond to each nail bed rather than forcing identical dimensions onto every finger.
Salon note: Glossy greige around an elongated clear diamond window; no painted fill, gemstone, or raised outline.
16. Broken Espresso Bands
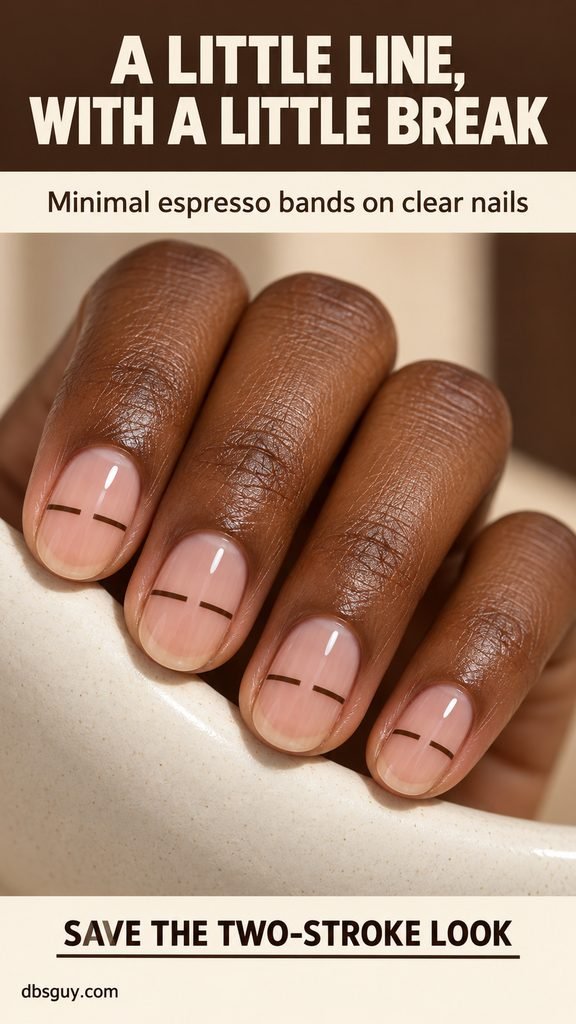
A tiny break in a line can change the whole design. Here, two short espresso strokes sit across the middle of each nail, aligned like a band with its center missing. The clear gap gives a very simple manicure a distinct little detail.
Keep the strokes fine enough that they feel drawn, and leave a gap you can see without zooming in. Their alignment matters more than making every segment exactly the same length. On short oval nails, a small margin at both sidewalls keeps the line from feeling cramped.
Salon note: One fine horizontal espresso band split into two aligned strokes, with a clear break in the middle.
17. Warm Neutral Abstract Islands
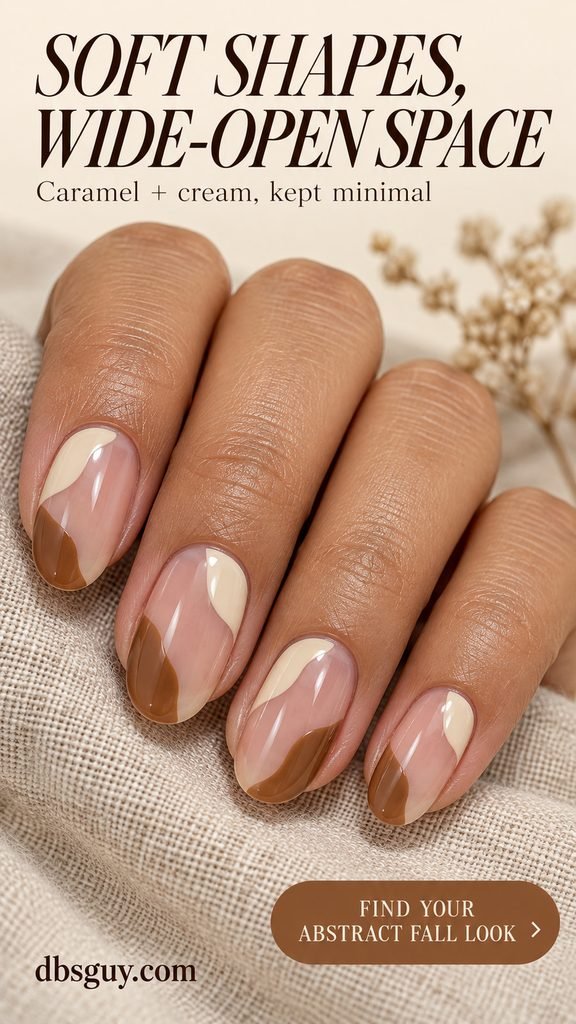
Caramel and cream patches sit at opposite corners, with a broad clear space winding between them. The shapes are softly irregular, which gives the manicure a relaxed feel while keeping the palette simple. Think small pools of color rather than carefully matched circles.
Let the curves change a little across the hand, but keep the amount of painted space similar. If both patches grow too large, the manicure becomes a mostly opaque color block. The open middle is the detail to preserve when adapting this reference to shorter nails.
Salon note: Small caramel and cream organic shapes at opposite corners, separated by a generous clear center.
How to Explain Your Negative-Space Design at the Salon
Save the full-hand reference and a closer crop of the detail you want. Before the service starts, point out the clear section, the color, and the line thickness separately. A phrase such as ‘I want to see my natural nail through this opening’ is more precise than asking for a nude patch.
Then agree on your actual nail length and the polish system. Ask whether a complex outline or masked window changes the appointment time or nail-art price. For a shorter version, have the artist simplify the scale while keeping the main opening visible. You do not need to copy the reference nail length to keep its defining feature.
A Practical Way to Try Negative-Space Nails at Home
Start with a small corner tip or the tiny offset cross if you are using regular nail polish. Follow the base-coat instructions, then use a fine nail-art brush to place a modest amount of color. Practice the shape on a nail tip or practice surface first so you can judge the brush width before painting your hand.
For a masked stripe or cutout, a nail-art stencil can help define the opening. In OPI’s lacquer method, the underlying polish is dry to the touch before the stencil goes on. The stencil edges need to lie flat, and the new color should be applied lightly. Remove the stencil slowly at an angle while that new color is still slightly wet, then finish according to your top-coat instructions.
Keep the polish system consistent. Regular lacquer dries in air; gel uses its specified lamp and curing directions. Follow the instructions for the exact products and stencil you choose rather than borrowing a cure time from a different tutorial. For your first attempt, one clean accent can be a more practical practice goal than a full set of perfectly matching windows.
Negative-Space November Nails: FAQs
Do negative-space nails have to be completely bare underneath?
No. Clear base and top coats can cover the nail, and a sheer tint can soften its appearance. The key is that the natural nail still shows through the open parts of the design. A fully opaque beige background gives a different result.
Which designs work best on very short nails?
The cocoa micro-French tips, corner accents, and tiny offset crosses are good starting points because the detail occupies a small area. Pick one clear feature and give it enough room. A larger pattern is easier to simplify than to squeeze into a crowded miniature.
Can I get this look with regular nail polish?
Yes. Simple brushwork and stencil-based designs can be done with regular lacquer. You do not need gel to create a clear section. Fine outlines require a steady hand, so choose a simpler shape if you are still getting used to a detail brush.
Will negative-space nails hide new growth?
A sheer area near the cuticle can make the transition look less obvious than an opaque block of color. Placement matters: the perimeter outline and cuticle cuffs can still develop a visible gap. The design does not stop growth or guarantee a longer-lasting manicure.
How do I keep a clear window from looking like missing polish?
Make its shape intentional. A smooth border, consistent placement, and an evenly finished clear section help it read as nail art. Save a close reference so your artist can distinguish a planned stripe or window from an irregular patch.
Which option feels dressy enough for Thanksgiving?
The fine copper cuffs add a small metallic detail, while the burgundy outline tips offer a richer color. Both leave plenty of the nail visible. Choose the shape that suits the length you already enjoy wearing, then keep the linework neat and restrained.
Save Your Favorite Minimal November Manicure
Save the design you would actually enjoy seeing on your own hands, then note what makes it work: a tiny tip, a floating line, or a clear shape inside the color. For a minimal November manicure, that one detail is often enough. Keep the opening visible, choose your favorite warm or muted shade, and let the rest of the nail stay simple.
Manicure images are AI-generated concepts created for dbsguy.com. Your nail artist can adapt the colors, linework, clear areas, and shape to your nails.