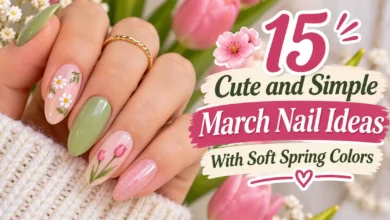
If you want a little spring color on short nails, start with a cherry-red dot on sheer pink, one white daisy tucked at the tip, or a different pastel on each finger. All three are easy to adapt to the length you already have. For a little more pattern, try the diagonal sage dots or the denim-blue daisy chain.
These March nail designs include layouts you can paint with regular polish and a few worth saving for the salon. The images are AI-generated manicure concepts. Use them as references for color and placement.

Simple Dot Designs
A dotting tool gives you plenty to work with. Line the dots up for a tidy edge, stagger them for a repeating print, or give a single dot room to stand on its own.
1. One Cherry Dot on Sheer Pink

Use a sheer pink base and place one cherry-red dot low on each nail, slightly above the cuticle. It’s an easy place to start if you’re painting with your non-dominant hand. You only have one mark to make per finger.
Keep the dots small enough that you can still see pink around them. To make the design even quieter, put a dot on each ring finger and leave the rest sheer.
2. Powder Blue with Dotted French Tips

Paint the whole nail powder blue, then follow the curve near the free edge with three white dots. Start with the middle dot and add one on either side. That gives you a midpoint to work from when the two outer dots are hard to line up.
On a narrow pinky, use a smaller tool or let that nail stay blue. The pattern reads clearly when the dots sit a little inside the edge.
3. Diagonal Ivory Dots on Sage

Place three ivory dots on a diagonal across sage polish. Start with the largest near one lower corner, then go smaller as you move toward the opposite side. It’s a good way to fit a pattern across a short nail without squeezing in whole rows.
Use different tip sizes if you have them. With one tool, practice making progressively smaller marks on a scrap of foil by using less polish on the tip.
Also Read 25 St. Patrick’s Day Nail Ideas From Understated Green to Full Glitter
4. Lilac and Milk Polka Dot Swap

Alternate lilac and opaque milk-white nails, then reverse the colors for the dots. Matching the dot size across the set pulls the two versions together. A slightly deeper lilac helps the pattern stay visible against the white.
Try three dots in a loose triangle on small nails. On a wider thumb, add a dot between two of the others before you decide whether the nail needs a full second row.
5. Peach Confetti Tips

Dot coral, butter yellow, and ivory over a creamy peach base. Keep most of the dots near the tips, with a little more room between them as you work toward the middle. The loose spacing makes this an easy choice if your dots tend to come out in different sizes.
Set down the coral dots first. They have the strongest contrast here, which makes it easier to judge where the softer colors should go.
6. Butter Yellow with Espresso Polka Dots

If a spring pastel feels too sweet on its own, pair butter yellow with espresso brown. Put the pattern on the two middle nails and use plain yellow on the others so the print has a clear focal point.
For evenly spaced polka dots, start with a short row down the middle. Put each dot in the next row between two dots in the first. Stop before you reach the sidewalls, where the brush angle gets awkward.
Also Read 21 Polka Dot November Nail Ideas That Make Fall Colors Feel Playful
Daisies That Fit Real Nail Lengths
Pick the nail that has room for the flower you want. A bloom at one corner can fit on a narrow nail, while a chain or a stem needs some space from cuticle to tip.
7. One White Daisy in the Corner

Use a sheer beige or pink base and tuck one white daisy near a side corner of the ring-finger tip. Position it a little inward if you want all five petals to fit. The offset placement is the detail worth keeping when you adapt this to your own nails.
On extra-short nails, move the flower down a touch and make the center smaller before you shrink the petals. A little yellow center helps the white petal dots read as a daisy.
Also Read 21 Short December Nail Ideas That Make Tiny Details Stand Out
8. Butter-Yellow French Tips With a Half Daisy
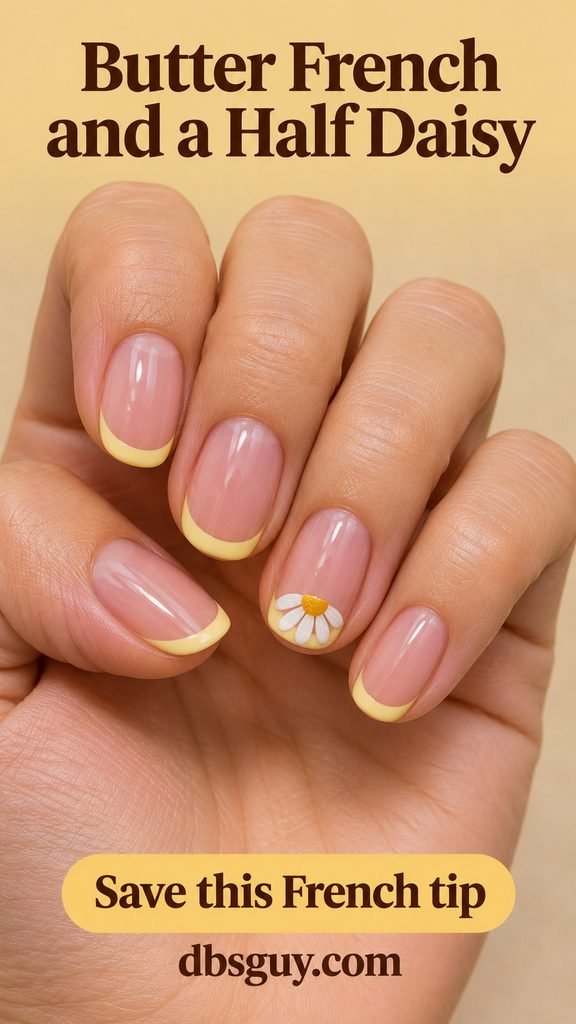
Paint narrow butter-yellow tips on a sheer rosy base. On one nail, set a golden center at the inner border of the tip and fan a few short white petals toward the free edge. Leave the other tips plain so the little half flower is easy to pick out.
If your tips are barely visible, ask for a little extra yellow on the accent nail so the petals have room. Keep the rest of the tips as narrow as you like.
9. Two White Daisies on Cornflower Blue

Cornflower blue gives white petals enough contrast for a bolder spring look. Put two daisies on a single accent nail, one larger and one smaller, and offset them diagonally. The two sizes are what make the pair feel loose and playful.
Use a thumb if your middle nail is too narrow for both. Leave a little blue between the flowers so the petal edges stay easy to see.
10. Mint Petals on Cream
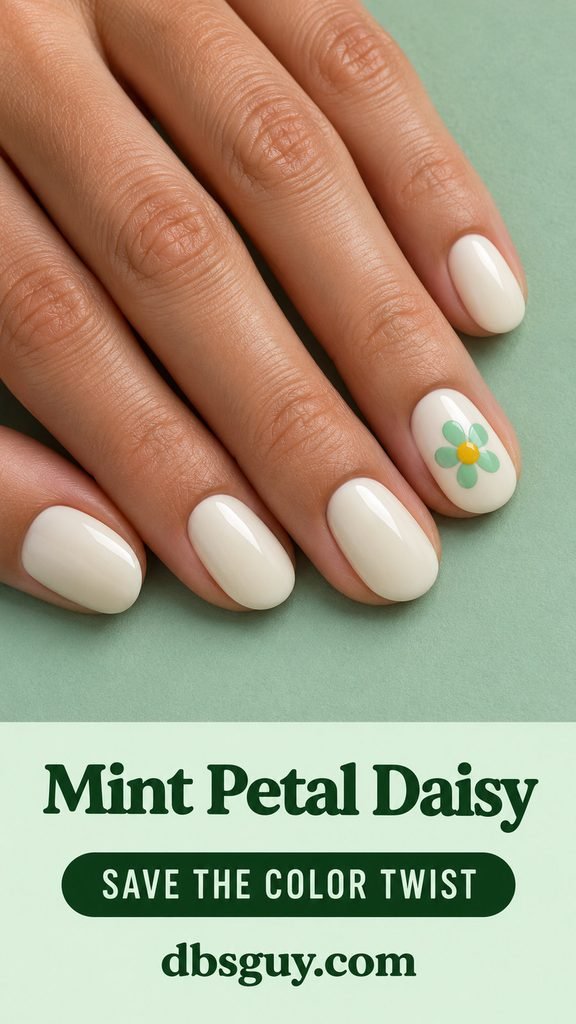
Keep the usual golden center but trade white petals for a fresh mint green. An opaque ivory base makes the manicure feel warm, and a mint with a little depth keeps the petals visible. Try the two shades side by side before you commit.
Pick this one if you like the color of green French tips but would rather place five petal dots than paint an even edge.
11. Tiny Daisy Sprigs on Blush

Give each white daisy a short sage stem that curves down and ends well above the cuticle. A single leaf is enough. Keep the artwork to one or two accent nails so the stems stay visible against the blush base.
At home, a fine nail-art brush helps with the stems. If the curve keeps wobbling, borrow the short-stem shape from a small flat flower decal and use the same blush polish underneath.
12. A Daisy Chain on Washed Denim Blue

Arrange tiny white daisies end to end down one nail over a washed denim blue. Start by placing the yellow centers and check the spacing. Add the petals once you know there’s enough blue between the centers for separate flowers.
Three small flowers suit a little extra nail-bed length. If there’s room for only two, keep both on the center line. The straight placement is what makes them look like a chain.
Also Read 27 Short Almond Spring Nails 2026 Ideas
Spring Colors With Minimal Nail Art
If you’re drawn to the shades themselves, try a glossy solid-color mix, a narrow French edge, or a soft fade.
13. Five Sorbet Pastels

Paint each nail a different color. From thumb to pinky, try mint, powder blue, lilac, peach, and pale lemon. A plain glossy finish gives the colors a common thread.
Use similarly soft shades if you want the colors to sit together. If you only own three pastels, repeat them in the same order across both hands. The effect comes from seeing a different shade on the neighboring nail.
14. Pastel Micro French Tips

Keep the base sheer pink and use a different pastel along the very edge of each nail. Put the strongest color on the nail you like to see first, then keep the rest light. Look for opaque tip colors so you can paint a narrow line that still shows up.
If you’re doing it yourself, pick one edge color for all ten nails first. That leaves you free to concentrate on following the curve without juggling open bottles.
Also Read Classy Spring Nails 2026: Elegant Almond, French Tip, Floral & Minimal Nail Designs for Spring
15. Coral and Lilac Split Nails

Give coral and lilac equal space by splitting the nail lengthwise. A straight divide makes both colors visible even when the free edge is short. Choose a pastel lilac and a coral with enough pink in it to sit comfortably beside the purple.
If you’re painting at home, start with one split accent and use the colors separately on the other nails. Paint the lighter shade first and let it dry fully before using a small piece of nail striping tape to guide the dividing line.
16. Cloud Blue With Cream Half-Moons

Place an ivory half-moon at the base of a light blue nail. Keep the curve shallow so the blue has room to show. Color at the base draws the eye toward the cuticle and keeps the tips plain, which works well when the free edge is especially short.
Bring this reference to the salon if you care about getting the curves even. You can also put the moons on just your thumbs and keep the rest plain blue.
17. Sheer Pink-to-Peach Jelly Fade

Choose this one for soft color with a glossy, see-through finish. Keep rosy pink near the base and let peach build toward the tips. At the salon, ask to see the polish on a clear swatch so you can check how sheer it is before choosing it.
For a simpler regular-polish version, use one sheer peach shade and apply a thin extra layer from around the middle of the nail toward the tips. Wear it if you like seeing a soft suggestion of the natural nail edge.
Also Read Spring Nails Solid Color 2026: Trendy Simple Shades in Pink, Red, Yellow, Green and Neutrals
How to Paint Dots and Daisies With Regular Polish
Set out your base color, accent polish, a dotting tool or the rounded end of a bobby pin, a small piece of foil, and a clear top coat. Use an opaque polish for your detail if you want it to show over a pastel or sheer base.
- Paint thin coats of your base color and let it dry. Put a drop of accent polish on the foil, then practice a dot with a light touch before you work on your nails.
- For a daisy, place five white petal dots around an open center. Tap a small yellow dot into the middle. Leave a bit of space between the petal dots if you want each petal to stay distinct.
- Give the art time to dry before top coat. Brush the clear coat on gently and avoid repeatedly dragging the brush through the same spot.
If the dots flatten into puddles, use less polish on the tool and tap straight down. See Essie’s beginner nail art guide for more on polish contrast and applying dots with a light touch.
What to Tell Your Nail Tech
Show one reference and point to the part you want to keep. For the corner daisy, you could say, “Keep my nails short and rounded. I’d like a sheer beige-pink base and one white daisy on each ring finger, near the outside corner of the tip.” If you have two photos, say which one is for color and which one is for placement.
March Nail Design FAQs
Which designs fit very short nails?
Try a single cherry dot, three graduated sage dots, or five sorbet pastels. For a daisy, use your widest nail for the accent so there’s room for the center and petals.
Do I need gel or acrylics for these designs?
Regular polish works for the dots, flat flowers, and solid pastel sets. It also gives you an easy way to try the color before committing to a salon service. If you want the translucent fade, look for sheer regular-polish colors or ask your nail tech to show you how the layered shades look.
What colors feel like early March if I’m still wearing winter clothes?
Try sage with ivory dots, washed denim with a little white, or espresso dots on butter yellow. Each brings in one spring shade while keeping a color you can wear with winter knits and denim.
Also Read 19 Nail Colors for February and March That Ease You From Winter Into Spring