21 Cute St. Patrick’s Day Nails With Rainbows, Clovers, and Playful Patterns

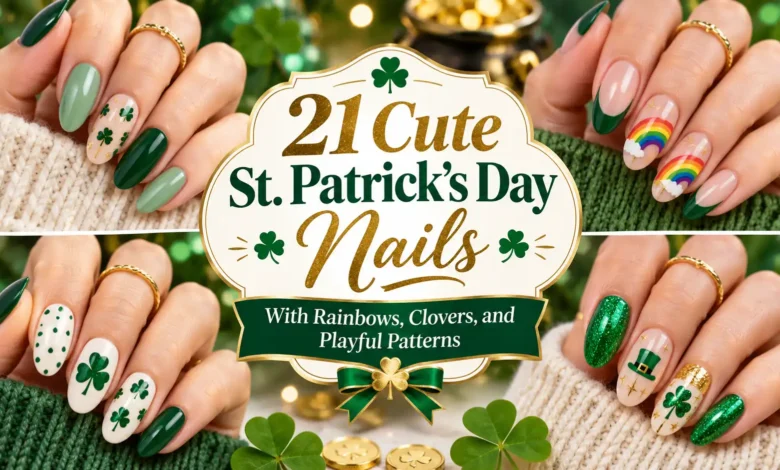
For cute St. Patrick’s Day nails that fit short tips, try a tiny green clover on sheer pink, a diagonal trail of rainbow dots, or one nail with big kelly-green checks. If you have more room for nail art, try a rainbow split across two nails or a little pot of gold on an ivory accent.
Start with the design you want people to notice first. A clover needs a little breathing room around its leaves. A rainbow needs enough width for the colors to stay distinct. If your nails are narrow, give the design to your widest nail and repeat one of its colors on the others.

The images are AI-generated nail art concepts you can use as design references.
Clover and Shamrock Nails
1. Tiny Emerald Clover on Sheer Pink
Put a single emerald clover near the base of a short round ring nail and leave the surrounding sheer pink visible. For a home version, use the approach in OPI’s clover nail art tutorial as a starting point. Set four small dots around a center, then pull a short stem down with a fine brush. Make the first clover on a swatch so you can see how far the polish dots spread before you try it on your nail.

2. Kelly-Green French Tips With One Lucky Accent
Trace the free edges of short squoval nails with a slim kelly-green line. Keep the clover nail sheer from base to tip so its small green motif gets its own space. If your nails have different free-edge lengths, ask for a similar-looking line width across the set. The green will look more even from nail to nail.

3. Two-Tone Clover on Sky Blue
A mint clover with a forest-green border is easy to pick out against pale sky blue. Give the design to one medium oval nail and use the same blue everywhere else. On a narrow nail, ask your tech to keep the outline fine and give the four leaves room. A heavy border can swallow the mint center.

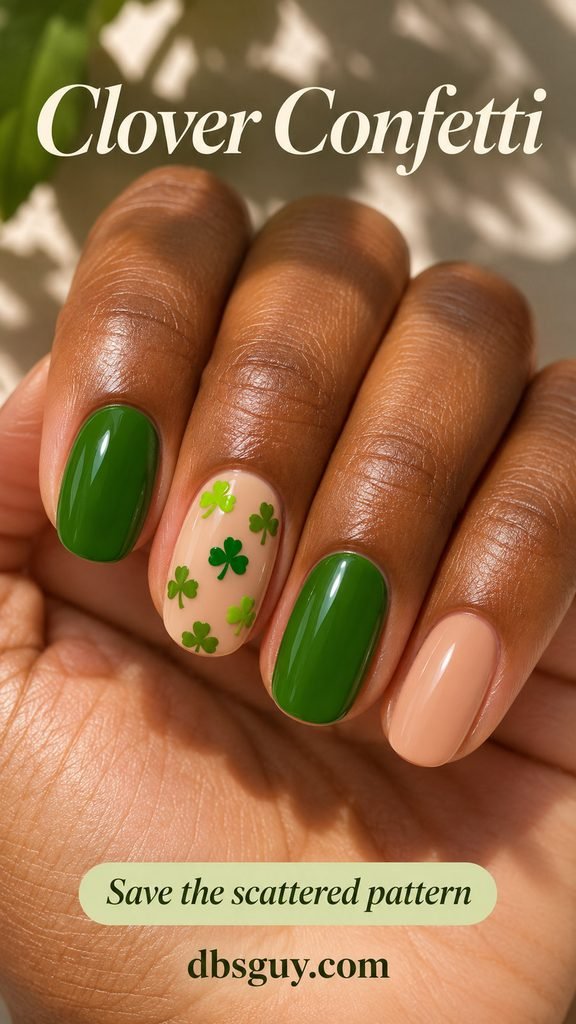
4. Clover Confetti on One Nail
Scatter tiny lime, moss, and emerald clovers across one wide accent nail. Turn the little shapes in different directions and let patches of the nude base show through. If you only have room for two or three clovers, space them out and keep the neighboring green nails solid. You’ll still get the scattered look.
5. A Big White Shamrock on Forest Green
Use one large white shamrock on a glossy forest-green nail. Three rounded leaves and a short stem give this version a bold silhouette on a short square shape. If you’re shopping for a decal, compare its width with your nail before applying it. Leave a green border on both sides so the white shape stays easy to read.

6. Pearl-Polish Clover on Pistachio
Paint four little pearl-white dots and a short stem on a pale pistachio nail. The soft contrast works when you want the detail to show up close, especially with a creamy green base. Use pearl-finish polish for the dots to keep the surface smooth. If the white disappears against your green, switch to an opaque pearly white for the accent.

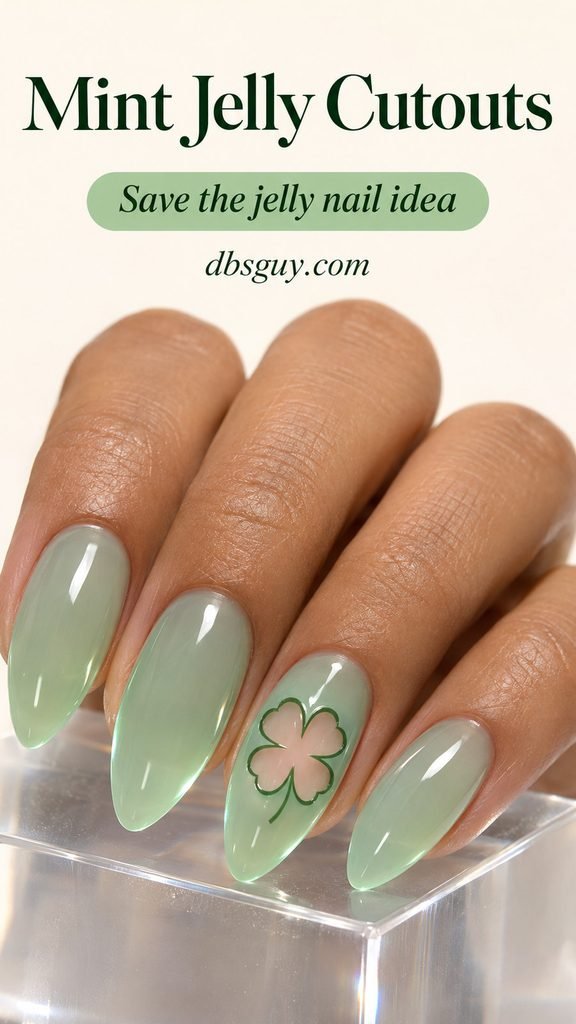
7. Mint Jelly With a Clear Clover Window
Leave a clover-shaped window in the middle of one translucent mint nail. Ask your tech to keep the center nearly clear and trace it with a thin darker mint line. That outline helps the window read on a jelly base, where both areas let the natural nail show through.
Also Read · Green Spring Nails 2026 Ideas: Light Sage, Dark Mint Designs, Floral Art & French Tips Trends
Rainbow St. Patrick’s Day Nails
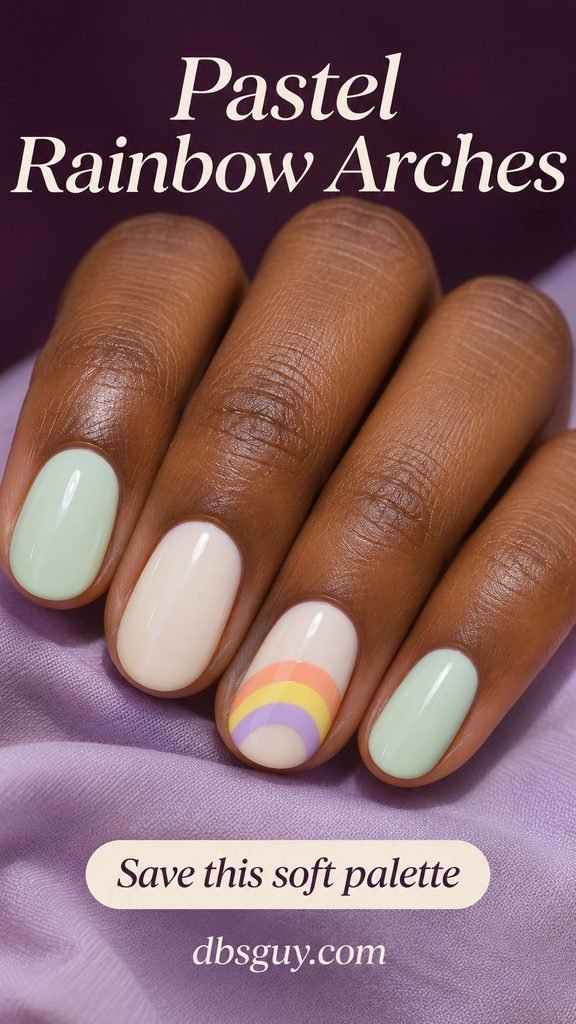
8. Low Pastel Rainbow on Milky Ivory
Paint a low arch in peach, butter yellow, and lilac on one short oval nail. Put lilac along the inner curve if the yellow needs a stronger edge against the ivory. Keep the arch wide and low enough to fit comfortably on the nail, then repeat pale mint or ivory on the others. If you’re deciding how much of an oval tip to keep, the oval nail ideas by length show how the shape looks at different lengths.
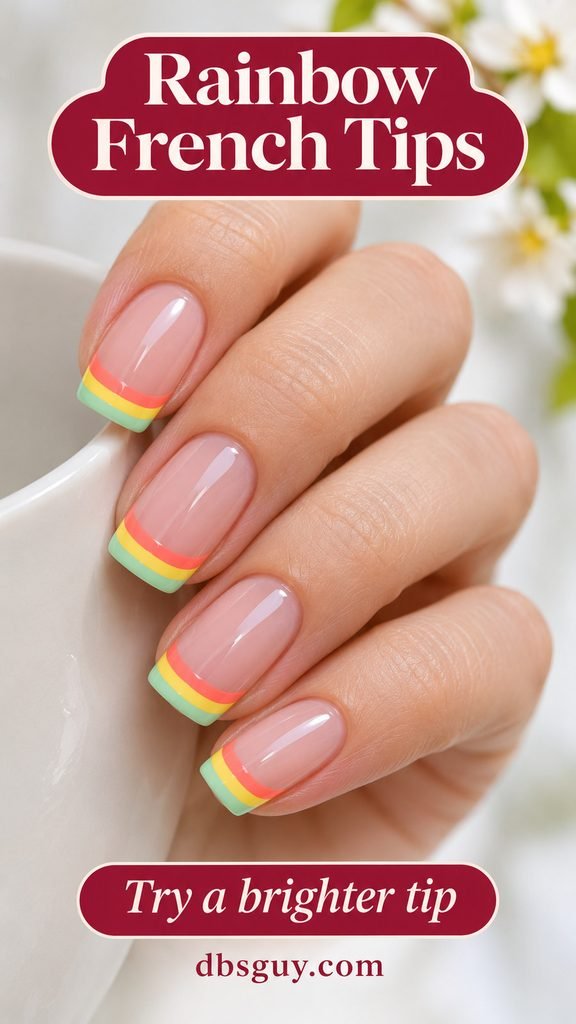
9. Coral, Yellow, and Mint Rainbow French Tips
Follow the free edge with three parallel bands over a nude-pink base. Mint goes along the edge, yellow goes in the middle, and coral gives the line closest to the pink base a warm border. On very short nails, put the full striped tip on one or two fingers and use a single mint line on the rest.
10. Rainbows With Tiny Cloud Puffs
On a pale blue oval nail, end a small rainbow with two little white cloud puffs. Leave a blue margin around the clouds so their edges stay visible. If you’re working with a dotting tool, overlap two or three white dots for each puff. Let the rainbow dry before adding the white so the colors stay clean.

11. A Rainbow Split Across Two Nails
Use two neighboring nails for one arch. Hold your middle and ring fingers together in a relaxed pose and mark where the colors should meet along the inner edges. Start both halves with the same outer color and keep the band widths similar. The ends will look more like a single arch when the fingers sit side by side.

12. A Rainbow That Ends at a Pot of Gold
Give the scene to one ivory almond nail. Place a small black pot near the tip and arc the rainbow toward it. Add a few metallic gold polish dots just above the rim, where they’re easy to spot. If your nails are short, put the rainbow on a neighboring nail and give the pot the full width of its own accent nail.

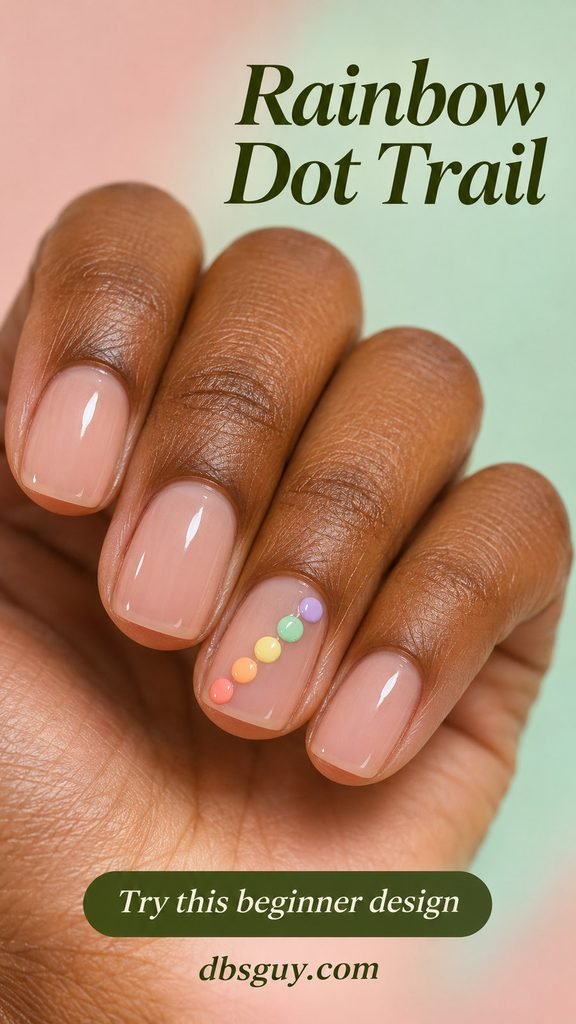
13. A Diagonal Trail of Rainbow Dots
Across one sheer nude nail, place coral, apricot, butter yellow, mint, and lilac dots from one corner toward the opposite edge. Leave a little clear space between dots. If five colors crowd a short nail, use three well-spaced colors and repeat that order on the other hand.
14. A Rainbow With One Color per Nail
Paint each nail a single spring color. Try lilac, peach, butter yellow, grass green, and sky blue, with the green on your index finger so it shows when you hold a glass or take a photo. Lay the bottles side by side first. If one pastel looks much paler than the rest, swap in a slightly stronger shade to keep the colors balanced.

Also Read · Spring Break Nails 2026: Cute Simple French Tip, Pink Gel, Acrylic Almond & Beach Inspo Ideas
Playful Patterns and Spring Accents
15. Mint Gingham on a Cream Accent Nail
Picture a spring picnic blanket in mint and cream. To get the gingham effect, make the areas where the stripes cross darker than the rest of the stripes. On a short square nail, ask for a few broad crossings so the weave is visible. A gingham decal is handy if you want an even grid at home.

16. Big Kelly-Green Checkerboard Squares
Alternate opaque green and white squares across one short squoval nail. A few big checks make a stronger graphic than a packed grid. Let the outer squares crop naturally at the curved sides, and pull the same green onto a neighboring solid nail to tie the two together.

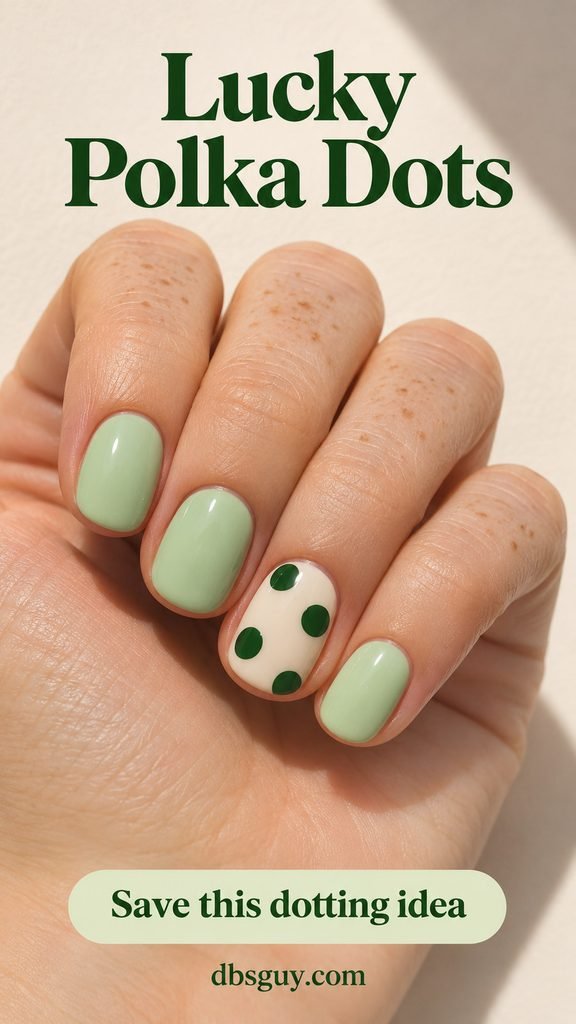
17. Forest-Green Polka Dots on Cream
Start near the center of one cream nail and place a few generous green dots around it. A mostly round shape and plenty of cream between marks give the design a retro feel. Reload the dotting tool for each mark if you want a consistent dot size, then carry soft mint onto the plain nails.
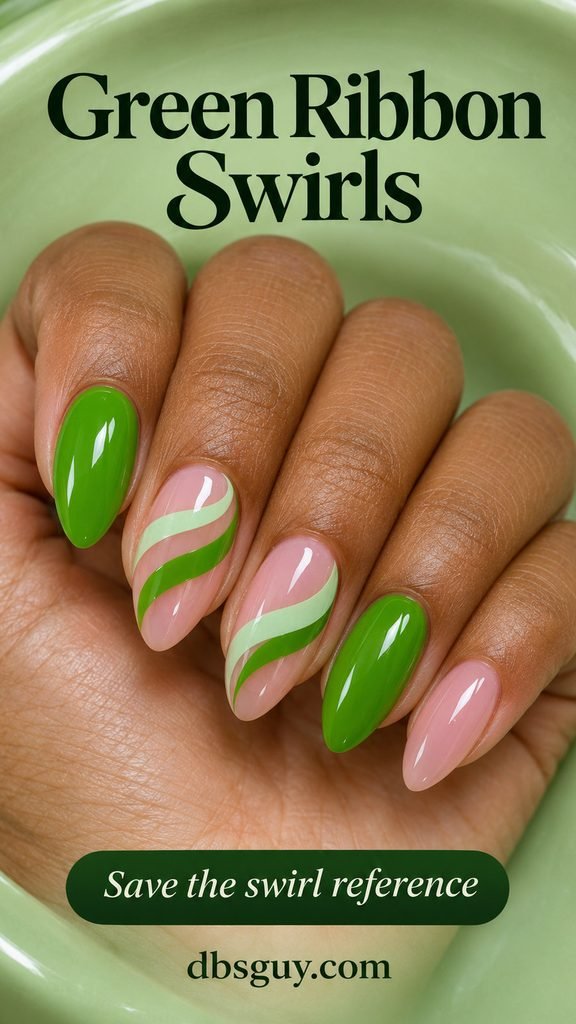
18. Mint and Grass-Green Ribbon Swirls
Let two broad ribbons sweep diagonally over sheer pink, with one in mint and one in brighter grass green. Use the curve of an almond nail to guide the sweep and leave pink visible between the bands. If you wear short rounds, put one broad curve on each of two accent nails to preserve that open space.
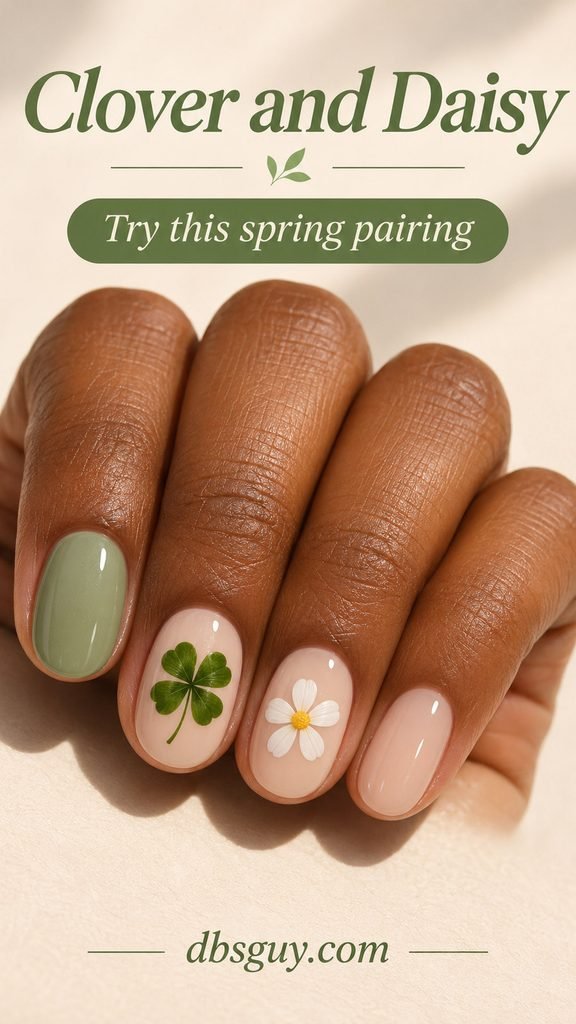
19. A Clover and a Daisy on Separate Nails
Pair a green clover on one nail with a white daisy and yellow center on its neighbor. Putting the motifs on separate nails gives each a little more room on short ovals. A warm nude base makes the white petals easier to see, and a solid sage nail carries the spring palette across the set.
20. Emerald Ribbon Bow With Mint French Tips
Place one emerald bow on a sheer blush nail near the tip. Keep the loops small enough to leave room for two loose tails, then give the neighboring nails mint French tips. On a short nail, a slim flat decal can give you a cleaner outline than trying to squeeze in a hand-painted bow.

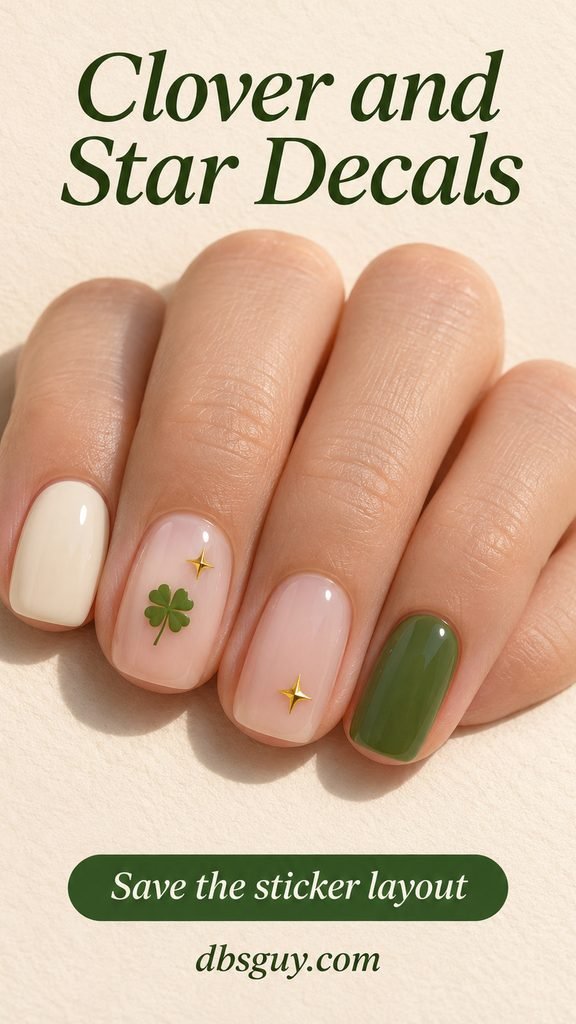
21. Green Clover and Gold Star Decals
Place a small green clover low on one milky nude nail and a gold four-point star higher on the next. A second tiny star can sit above the clover if there’s room. Flat stickers suit very short nails. Choose sizes that leave a visible nude margin around each motif.
Also Read · Spring Gel Nails 2026: Cute Short Ideas, Simple Designs, Pink Inspo & Trendy Colors
Also Read · 17 January French Tip Nail Ideas Beyond the Classic White Edge
St. Patrick’s Day Nail Art FAQs
Which St. Patrick’s Day designs work on very short nails?
Try a single clover made with a dotting tool, a three-color diagonal dot trail, or one large-check accent. Choose the nail with the widest visible surface for your design. A slim green French tip works well if your free edge is even and you want most of the nail bare.
What’s the easiest cute design to do at home?
Use one rainbow shade per nail if you only have the brushes in your polish bottles. For a single accent, try the rainbow dot trail or a flat clover sticker. Test the sticker size against your smallest nail if you plan to use it on both hands.
What should I tell my nail tech when I show a reference?
Point out the art you want to keep, the nail it should go on, and which shade should repeat on the plain nails. If you bring the split rainbow, ask to check the two nails side by side before the design is finished. For a gingham set, point to the darker stripe crossings so you get the pattern you had in mind.