13 Cute, Easy February Nails to Try With Dots, Stickers and a Little Glitter


For easy February nails you can do at home, start with the accent you feel comfortable applying. A few dots give you a pattern with just a dotting tool. A peel-and-stick heart gives you a Valentine look in one placement. For a manicure you can wear all month, try sage with one daisy sticker or sheer blush with a little silver at the tips.
These 13 designs use regular nail polish. Most put the detail on just one nail per hand, so there’s less to match on your dominant hand and plenty of room on short nails.

These AI-generated nail concepts illustrate color and placement.
What You Need for Dots, Stickers, and Glitter
Start with a base coat, a color you like, and a compatible top coat. For dots, use the small end of a dotting tool and put a drop of polish on a disposable palette. For decals, choose flat, peel-and-stick nail art sized for the nail you’ll decorate. For sparkle, look for fine glitter suspended in regular clear polish so you can control it with the bottle brush.
Let the color dry before adding details. Test the size of a dot on the palette and lift the tool straight up after each mark. Apply stickers to dry color with tweezers, press them flat from the middle outward, and seal over their edges. If the product gives different directions, follow the label. For the sticker technique, see OPI’s guide to sealing stickers with lacquer.
If the first few dots come out oval or uneven, practice on a spare nail tip with the dotting exercise in our beginner nail art guide.
Easy February Nails With Dots
1. Cherry Milk Polka Dots
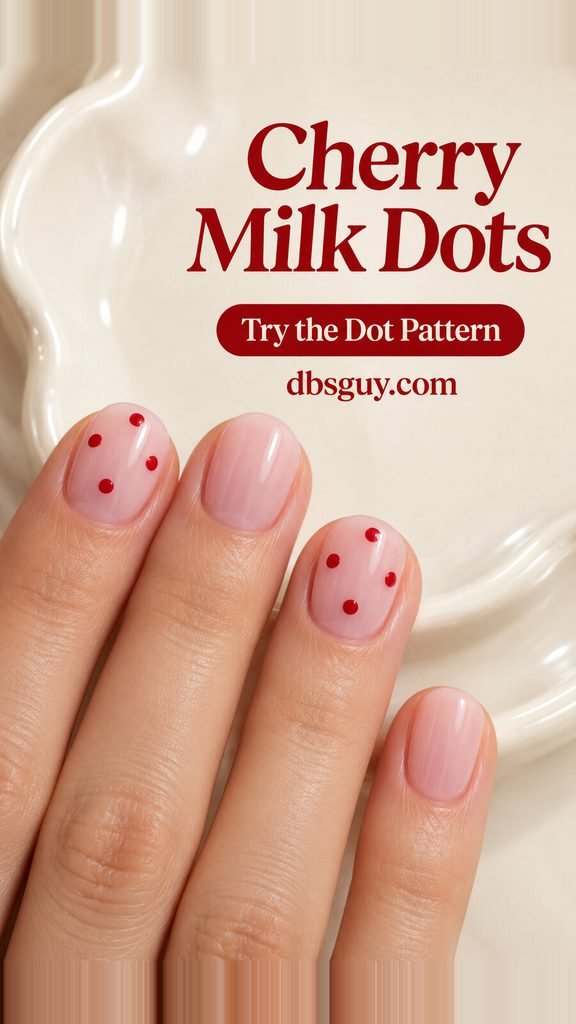
Pair a milky pink base with cherry-red dots for a Valentine manicure you can wear without a heart motif. Pick two accent nails per hand. On each, place one dot near the middle, then stagger a few smaller dots around it. Keep a narrow border of pink around the outside of the design.
If your pinky is too narrow for the pattern, make the middle and ring fingers your accents. Dot sizes can vary a little as long as the spaces between them stay open.
2. Cocoa Dot Trio
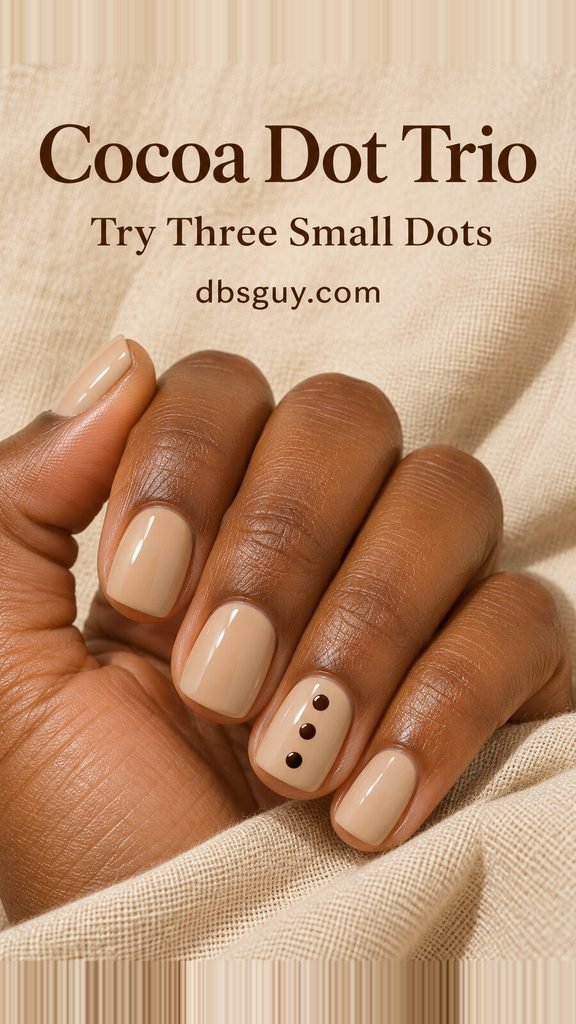
On a glossy café-au-lait base, run three chocolate-brown dots down the middle of one accent nail, keeping the middle dot close to the center. A short squoval nail gives the column a straight edge to line up with, but a rounded nail works too.
Make the middle dot first, then place one on either side of it along the same line. Use two dots if three would crowd the tip.
3. Plum Dot Crescent
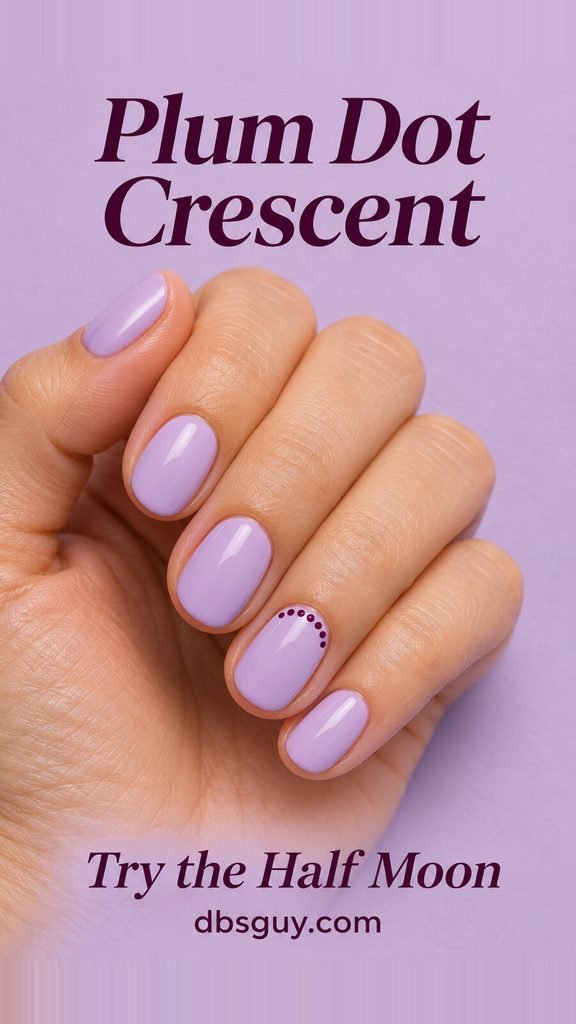
Paint your nails pale lavender and trace the base of one accent nail with a shallow arc of plum dots. Place the center dot first, then add smaller ones to either side along the curve. Leave a band of lavender between the dots and the skin so the shape reads clearly.
On a short nail, three evenly spaced dots make the curve. Check the shape with your hand flat on the table before adding any more.
4. Two-Tone Pink Confetti Dots

Start with sheer pink. On one nail, scatter a few tiny raspberry dots and fill some of the gaps with opaque baby pink. Keep both colors apart so they read as confetti, especially if the lighter shade is close to the base color.
Set the dark dots first, then add only as many pale ones as will fit without touching. The irregular spacing makes this a forgiving option for your dominant hand.
Cute February Nail Ideas With Stickers
5. One Tiny Red Heart

Pair a sheer pink manicure with a single cherry-red heart on each hand. Position the decal near the center of the ring fingernail, where you can see pink all the way around the heart. The plain nails make the accent visible even when it’s tiny.
Before peeling it off the backing, hold the sheet near the nail to judge the width. If the heart nearly reaches both sidewalls, choose the next size down or move it to the thumb.
6. Cream Bow on Lilac

Use opaque lilac as a backdrop for a flat cream bow decal. Place the bow near the center of one nail with room below the tails and on both sides of the loops. Lilac gives the small cream shape enough contrast to show up in daylight.
If the bow keeps lifting at the ends, try a smaller decal on the flatter center of the nail and press it flat before sealing.
7. Powder Blue With a Corner Star

For a February look with a wintry palette, paint the nails powder blue and place a tiny white star slightly off-center on one accent nail. Aim for the side of the nail near the cuticle, with a sliver of blue between every point and the nearest edge.
On a very short nail, slide the star a little closer to the middle. It will still read as an off-center accent, and you’ll have room to seal all the points.
8. One Daisy on Soft Sage

On a soft sage base, put one small white daisy with a butter-yellow center near the tip of an accent nail. A flat flower decal gives you a crisp center and recognizable petals in one placement.
Leave a visible outline of green around the petals. When a sticker feels crowded at the tip, try the same placement on the thumb and let the other nails stay solid.
February Nail Designs With a Little Glitter
9. Rose Gold on One Nail

Paint all your nails dusty rose, then add one light coat of fine rose-gold glitter polish across the whole ring fingernail. Choose a clear glitter base if you want some of the dusty rose to show between the flecks.
Check the finish in daylight before adding more. If you want slightly more shine, add a second thin coat after the first dries according to the label.
10. Sheer Blush With Silver Glitter Tips
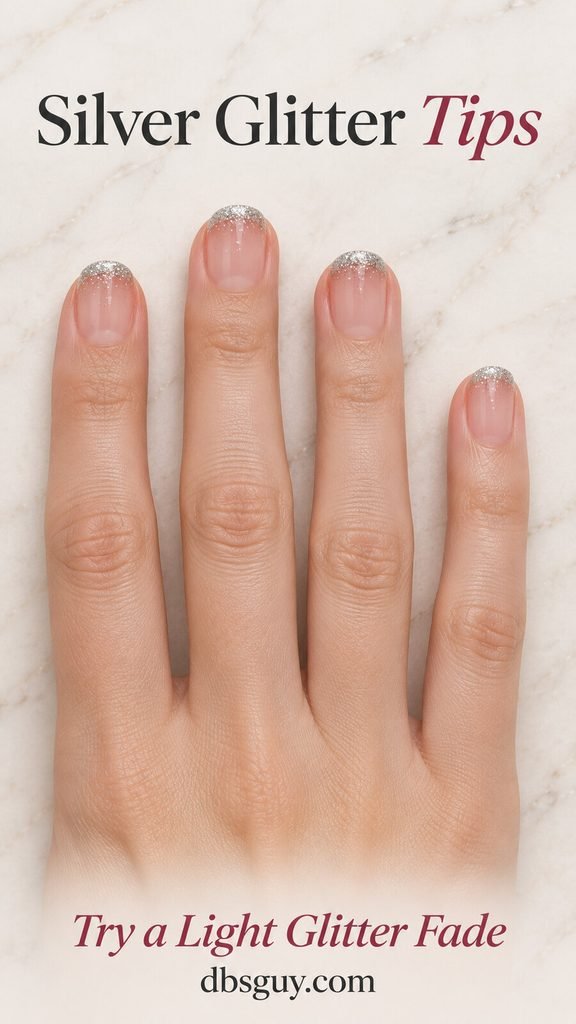
Make a simple glitter fade over sheer blush by wiping most of the fine silver polish off the brush, then dabbing what remains along the very tips. With the nearly dry brush, tap a few stray flecks just below the edge. Stop in the upper third so there is a clear stretch of blush underneath.
If you have almost no free edge, place the glitter on the top surface just inside the tip. A few loose flecks will give you the effect without drawing a straight line.
11. Champagne Glitter at One Corner
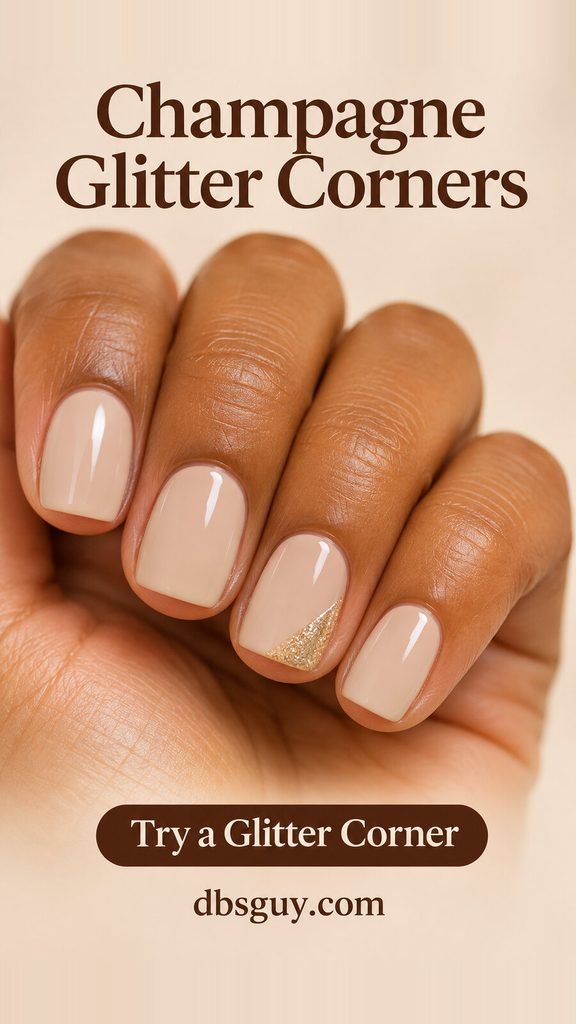
Over light beige, dab a small patch of champagne glitter in one outer tip corner on the ring finger. Use the corner of a lightly loaded bottle brush. Keep the sparkle above an imaginary diagonal across the tip so the placement stays deliberate.
A squoval nail gives you an easy corner to aim for. On a round nail, use the place where the side starts curving into the tip.
12. Berry With a Pink Glitter Half-Moon

Put pale pink glitter near the base of a deep berry accent nail, following the curve of the cuticle. Pick up a small amount of glitter polish with the tip of a dotting tool, then place tiny deposits close enough to form a shallow crescent. Keep the curve clear of the skin.
If the crescent is tricky on your dominant hand, use a small cluster of glitter at the center of the nail base. The berry above it still gets to be the main color.
13. Lilac With an Iridescent Glitter Veil
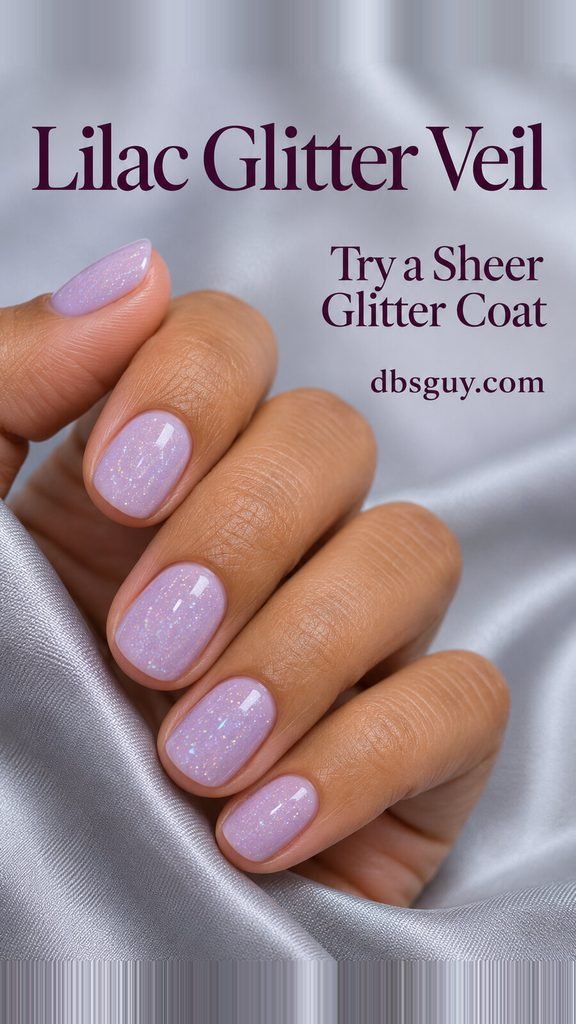
Use a thin coat of clear polish with fine iridescent glitter over light lavender. Look for flecks that catch the light at an angle and leave the lilac color easy to see head-on.
Try a single nail first to gauge how densely the glitter applies. If it looks heavier than you want, use the glitter on two accent nails and keep the rest glossy lilac.
Easy February Nail Art FAQs
Which designs work on very short nails?
Start with the centered heart, the cocoa trio scaled down to two dots, or the lilac glitter veil. For corner placements, move the design slightly toward the center so there’s still a margin around it.
Can I do these with regular polish?
Yes. Choose regular air-dry color, glitter polish, and top coat. For the sticker ideas, use small adhesive nail-art decals and check the package for application instructions.
How do I keep my dots from smearing under top coat?
Make a test dot on a spare practice tip. When the detail on the test tip can take a light pass of top coat without dragging, use light strokes over the manicure. A heavy dot may take longer to dry than a thin coat of color.