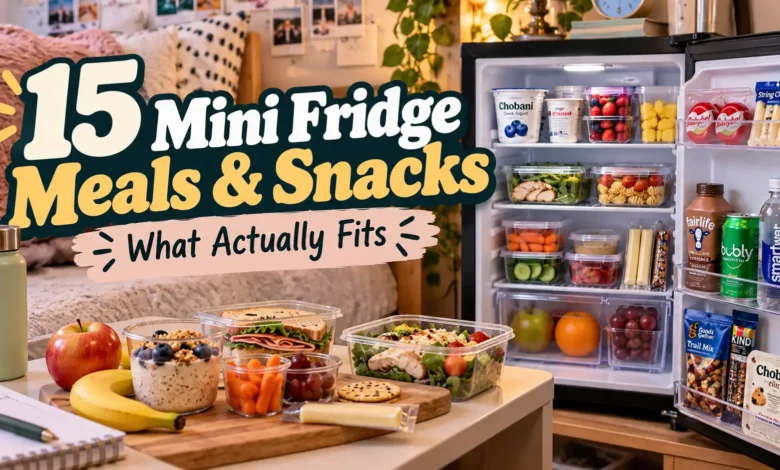
The easiest mini fridge meals start with a few cold ingredients and a pantry that does the rest. Keep yogurt, a small protein portion, cheese, and a little produce chilled. Let unopened shelf-stable rice, tuna pouches, oats, and crackers wait outside the fridge.
These 15 meals and snacks include single-serving quantities, simple assembly or microwave steps, and a clear explanation of what needs cold space. Choose a few that share ingredients. This is a menu to rotate through, not a shopping list meant to fit in your fridge all at once.
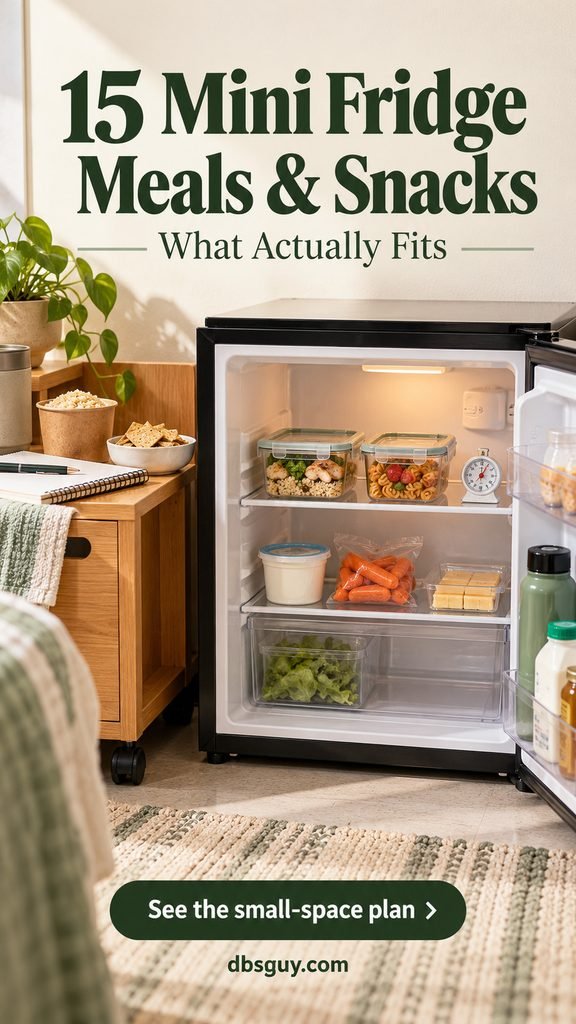
Recipe and visual note: These research-informed meal ideas have not been kitchen-tested. Preparation times are estimates. The AI-generated images illustrate serving and storage concepts; they do not document tested portions or prove that a particular fridge will hold them.
What Actually Fits? Measure the Shelf Before Buying the Food
A fridge’s advertised cubic-foot capacity does not tell you whether your lunch container will clear the shelf, door bins, or raised section at the back. A short cube fridge and a taller compact fridge can need very different packing plans.
- Measure usable width, depth, and height. Include the container’s lid and clips. Check the narrowest area and make sure the door closes without pushing against food.
- Try one low, roughly 2-cup container first. If it fits, look for matching containers that stack securely. A capacity label describes volume, not the outside dimensions.
- Agree on your share. If you share a fridge, measure your allotted space rather than planning around the whole appliance.
- Leave room around food. Avoid filling every gap or blocking vents. Follow the appliance manual for shelf placement, rear clearances, and defrosting.
For a concrete fit check, two lidded boxes measuring 6 × 4 × 2½ inches each need a 12 × 4-inch footprint when placed side by side, plus clearance around them. Those are example outside measurements, not a standard size for every 2-cup box. Try the empty containers on your shelf before filling them.
The cold-space notes below describe the food or ingredient packs to allow for. They are planning estimates, not universal fit guarantees. Your microwave bowl, serving plate, and utensils can stay outside the fridge.
Keep a Small Fridge Cold Enough for Real Food
Use an appliance thermometer to check that the refrigerator stays at 40°F (4°C) or below. A dial setting alone does not establish the temperature. Check again after restocking, and keep air moving around the food. The FDA’s refrigerator guide explains these basics.
Refrigerate perishables promptly, within two hours, or one hour when the air temperature is above 90°F. Divide hot leftovers into small, shallow containers and refrigerate promptly rather than leaving them out to cool completely. Use refrigerated cooked leftovers within three to four days, and reheat them to 165°F. Follow a package’s shorter storage or use-after-opening instructions.
Keep raw eggs in their carton on an interior shelf, protected from ready-to-eat food. Store ready-to-eat ingredients covered, label opening or preparation dates, and wash hands, produce, and prep surfaces. If your fridge cannot maintain a safe temperature, choose shelf-stable food until that is resolved.
None of these ideas needs a freezer. Treat a little icebox or chiller as frozen-food storage only if its manual allows that use and a thermometer confirms 0°F (-18°C) or below.
1. Blueberry Overnight Oats in One Low Container
A squat container is easier to tuck under a low shelf than a tall breakfast jar. Mix one breakfast tonight rather than giving five jars permanent residence.
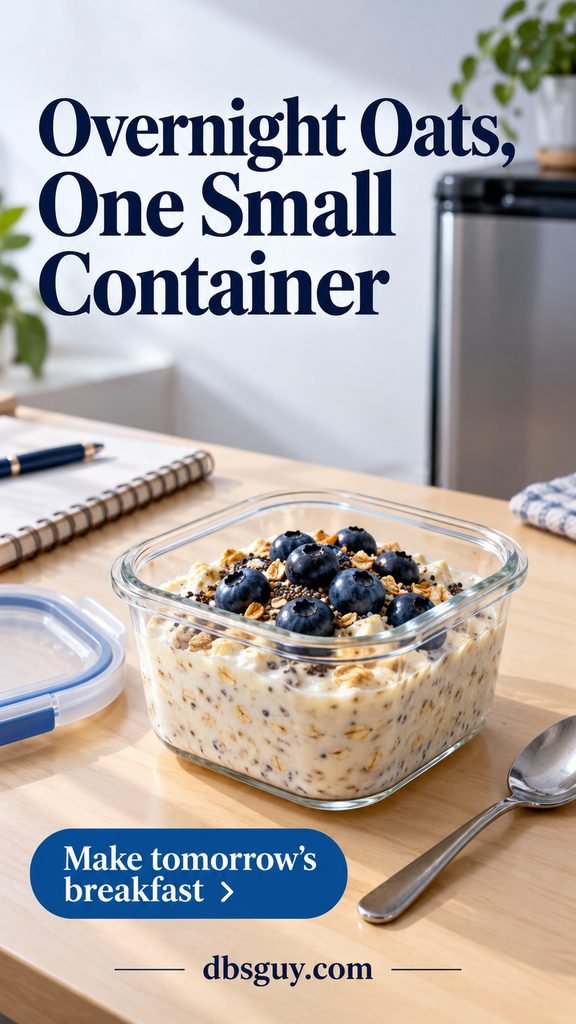
For 1 breakfast: ½ cup old-fashioned rolled oats, ½ cup milk, ¼ cup plain Greek yogurt, ¼ cup blueberries, and a pinch of cinnamon. Optional: 1 teaspoon chia seeds and 1 tablespoon granola.
Stir the oats, milk, yogurt, cinnamon, and optional chia in a covered 2-cup container. Refrigerate overnight, at least eight hours. Add the washed blueberries and optional granola just before eating. Stir in a splash of milk if you prefer looser oats.
Cold space: One low container for the prepared oats, plus any remaining milk, yogurt, and berries. A small milk carton makes more sense here than buying a gallon for one recipe. Make one portion at a time for this plan.
Also Read: 19 Dorm Breakfast Ideas: Microwave & No-Cook Mornings.
2. Greek Yogurt with a Separate Crunch Topping
This is the quick option when you did not prepare breakfast the night before. Keep the crunchy part dry until the moment you eat.
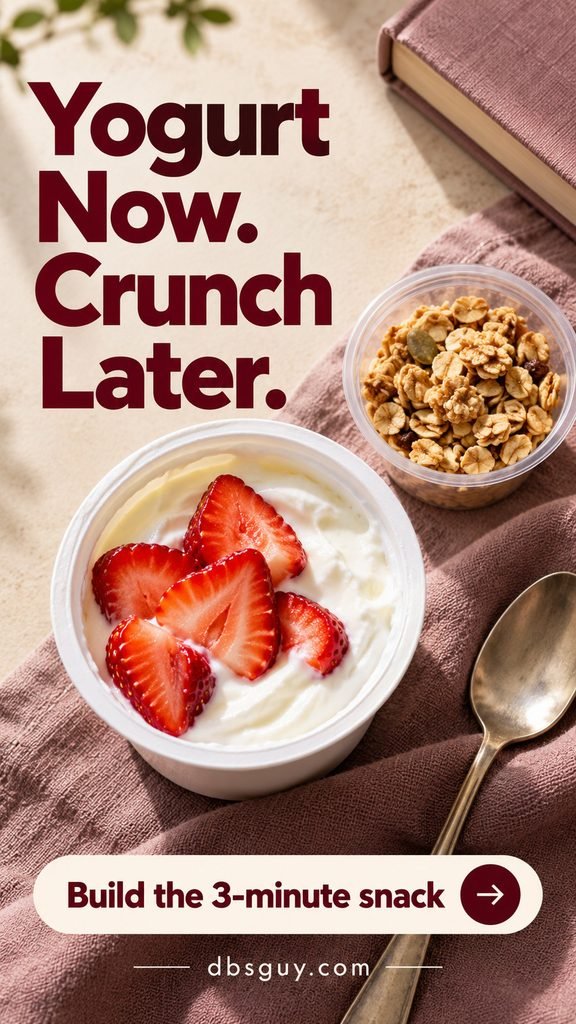
For 1 snack: One 5- to 6-ounce cup plain Greek yogurt, ¼ cup sliced strawberries, and 2 tablespoons granola.
Wash and slice the strawberries, spoon them over the yogurt, and add the granola at serving time. The whole thing takes about three minutes. If you are taking it away, carry the granola in a separate dry container and keep the yogurt and fruit cold.
Cold space: The yogurt cup and your small berry pack. Eat from the original cup when practical; transferring it into a larger bowl creates extra washing without helping the fit. Finish the topping before resealing any remaining yogurt.
3. Cottage Cheese with Pineapple and Walnuts
A shelf-stable fruit cup supplies the sweet part, leaving only the dairy to take up fridge space before you assemble the snack.
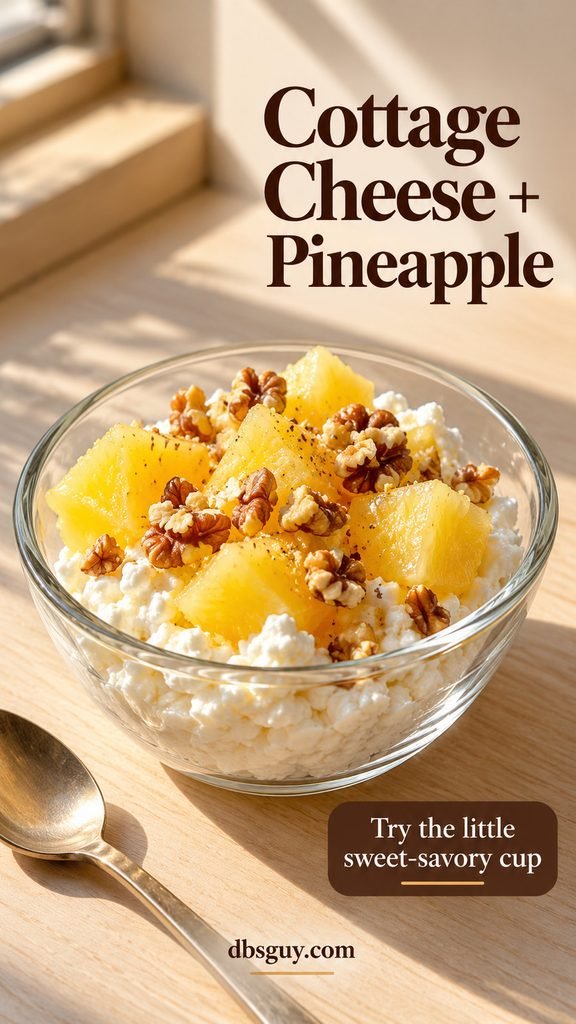
For 1 snack: ½ cup cottage cheese, one 4-ounce pineapple fruit cup packed in juice, drained, and 1 tablespoon chopped walnuts. Add a small pinch of black pepper if you like a savory finish.
Spoon the pineapple over the cottage cheese and scatter on the walnuts. Drain the fruit well so the dairy does not become watery. This takes about two minutes.
Cold space: One small cottage-cheese tub or single-serving cup. Keep an unopened shelf-stable fruit cup and the walnuts in your pantry, following their labels. Once you open the fruit, refrigerate any unused portion. Choose this dairy option instead of buying both cottage cheese and yogurt unless you will use both.
4. Hummus, Carrots, and Cucumber in a Shallow Box
A small dip pot inside the box keeps hummus off the vegetables until you want it. You can also assemble the snack directly from the ingredient packs.
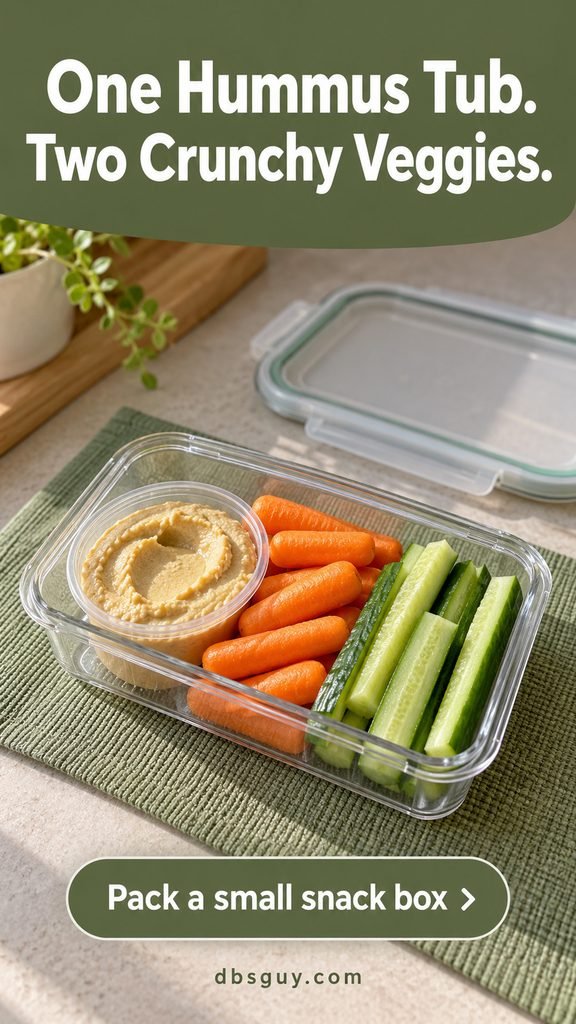
For 1 snack: ¼ cup hummus, ½ cup baby carrots, and ½ cup cucumber sticks.
Wash and dry the vegetables, cut the cucumber, and arrange everything in a low container. Allow about five minutes. Add crackers from the pantry if you want a bigger snack, keeping them separate so they stay crisp.
Cold space: Roughly one 2-cup box for the assembled snack, plus any unused ingredients. An 8-ounce hummus tub is easier to finish than a party-size tray. Use that same hummus in the chicken wrap below, and follow its label after opening.
5. Apple and Cheddar, Sliced When You Eat
Whole apples give you flexibility: keep a small amount in a cool spot for near-term use, then cut one for your snack instead of storing a bulky tray of wedges.
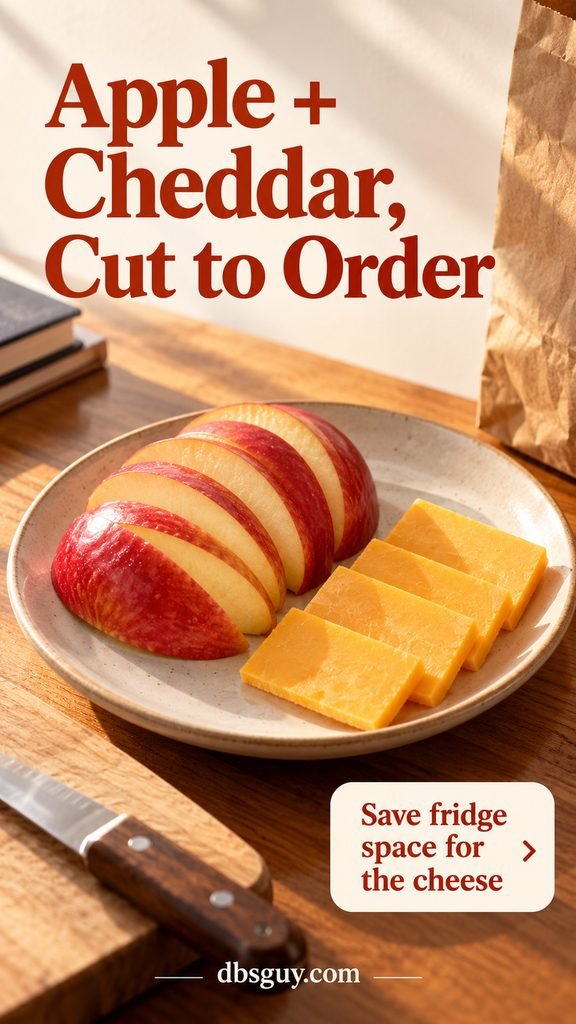
For 1 snack: One small apple and 1 ounce cheddar, cut into thin slices.
Wash the apple, slice it on a clean board, and serve with the cheese. Allow about three minutes. If you prefer crackers, add a few from the pantry. Refrigerate leftover cut apple promptly rather than returning it to the fruit bowl.
Cold space: A small cheese pack. Buy only a few whole apples for a cool room; refrigerating them helps them keep longer when you have space. In a warm dorm, buy less rather than counting on a big bag to last.
6. A Hard-Cooked Egg Snack Box
Store-bought hard-cooked eggs work when you have no shared kitchen. You do not need to boil anything in the dorm.
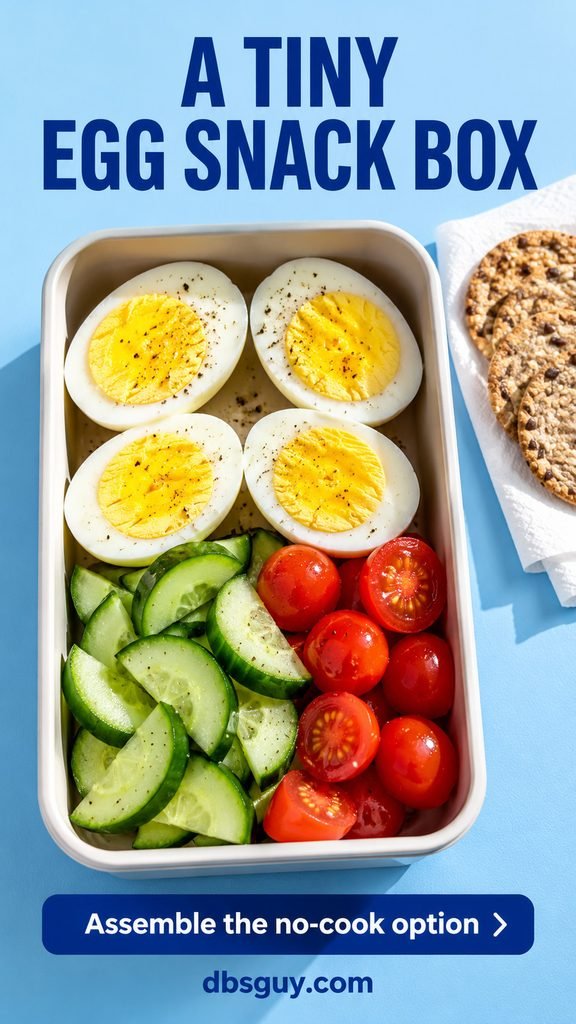
For 1 substantial snack: Two fully hard-cooked eggs, ¼ cup cucumber slices, ¼ cup halved cherry tomatoes, and a small serving of whole-grain crackers.
Halve the eggs, add the washed vegetables, and season with pepper if you like. Pack the crackers separately. Assembly takes about five minutes.
Cold space: One shallow box, with crackers outside. FoodSafety.gov lists one week refrigerated for hard-cooked eggs; a packaged product may give a shorter limit after opening. Write down the cooking or opening date. Do not microwave a whole hard-cooked egg to warm it.
7. Chicken and Hummus Wrap
This lunch uses the hummus and cucumber from the snack box. A small pack of fully cooked, ready-to-eat chicken avoids storing and preparing raw poultry.
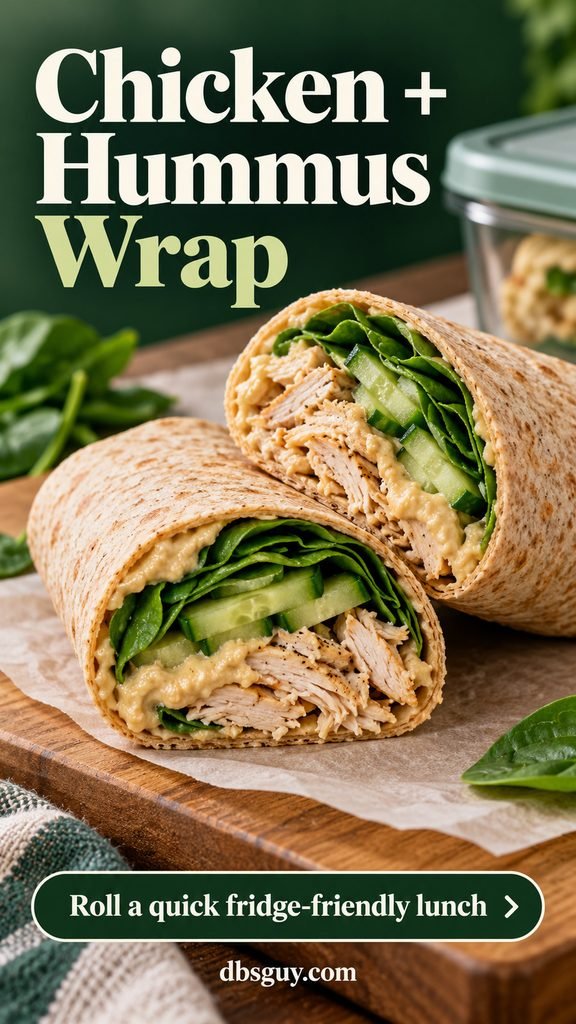
For 1 wrap: One 8-inch tortilla, 3 ounces fully cooked ready-to-eat chicken, 2 tablespoons hummus, ¼ cup cucumber sticks, and ¼ cup baby spinach.
Spread hummus across the center of the tortilla. Add the chicken, dry cucumber, and spinach; fold in the sides and roll snugly. Cut in half if you like. Allow about five minutes. Make it near mealtime for a tortilla that holds up better.
Cold space: The chicken pack, hummus, cucumber, and small greens bag; a prepared wrap can go in a slim covered container. Cooked chicken leftovers have a three- to four-day refrigerator limit, counted from cooking, not from the day you make the wrap. Follow ready-to-eat chicken package instructions when applicable.
8. Chickpea, Cucumber, and Feta Salad
Make a single lunch in the container you will eat from. Canned chickpeas do not need cold space until you open them.
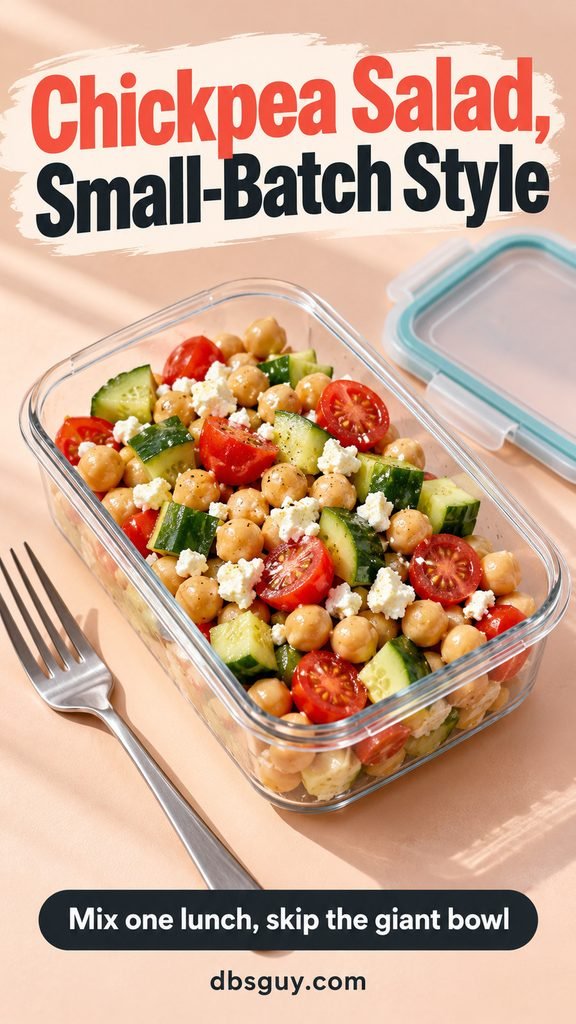
For 1 light lunch: ¾ cup drained, rinsed canned chickpeas, ⅓ cup chopped cucumber, ⅓ cup halved cherry tomatoes, 2 tablespoons crumbled feta, 1 teaspoon olive oil, and 1 teaspoon lemon juice. Add pepper to taste.
Dry the vegetables after washing, then toss everything together. Allow about seven minutes. Serve with a pita or crackers if you want a larger meal. Add the dressing close to eating for a less watery salad.
Cold space: About one 2-cup container for the salad. Refrigerate unused chickpeas in a covered container and plan another use soon; opening a can creates leftovers even if the can started in the pantry. A small feta pack is optional—omit it if cheddar already fills your cheese space.
9. Tuna, Crackers, and Cucumber Kit
This is the option to keep in reserve when your shelf is nearly full. The tuna waits in the pantry until lunch.
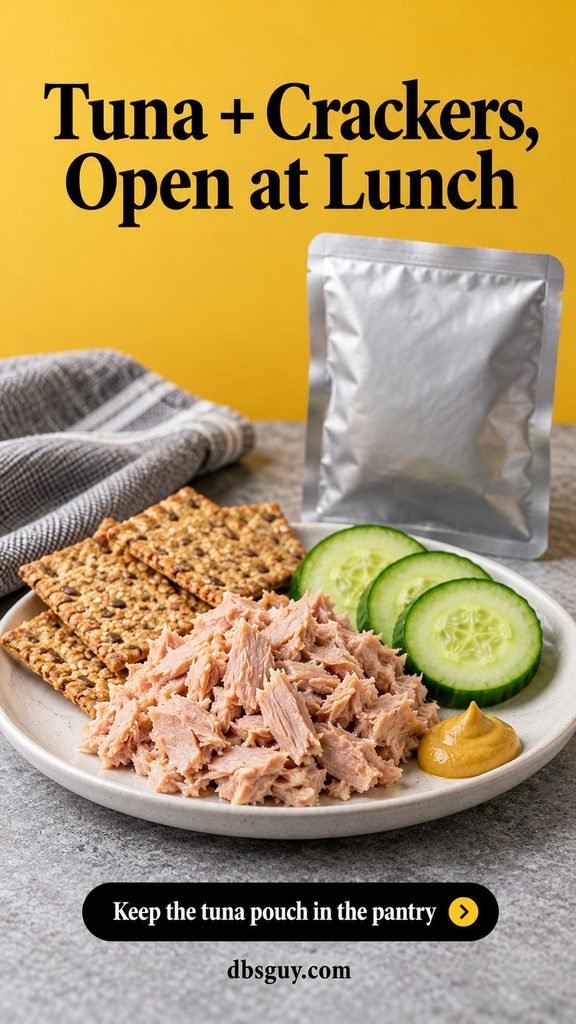
For 1 light meal: One 2.6-ounce shelf-stable ready-to-eat tuna pouch, one serving of whole-grain crackers, ½ cup cucumber rounds, and 1 teaspoon mustard.
Open the pouch at mealtime, flake the tuna onto a plate, and eat with the crackers, cucumber, and mustard. Allow about three minutes. Use a single mustard packet if that is more practical than keeping a bottle.
Cold space: Just the cucumber before assembly, provided the unopened tuna is labeled shelf-stable. Opened tuna must be refrigerated if it is not eaten promptly. A single-serving pouch helps you avoid another half-used container; it does not make opened tuna shelf-stable.
10. Fresh Mozzarella and Tomato Pita
A soft pita needs no toaster. Spinach gives the filling some structure, while the tomatoes and mozzarella make it feel like a fresh lunch.
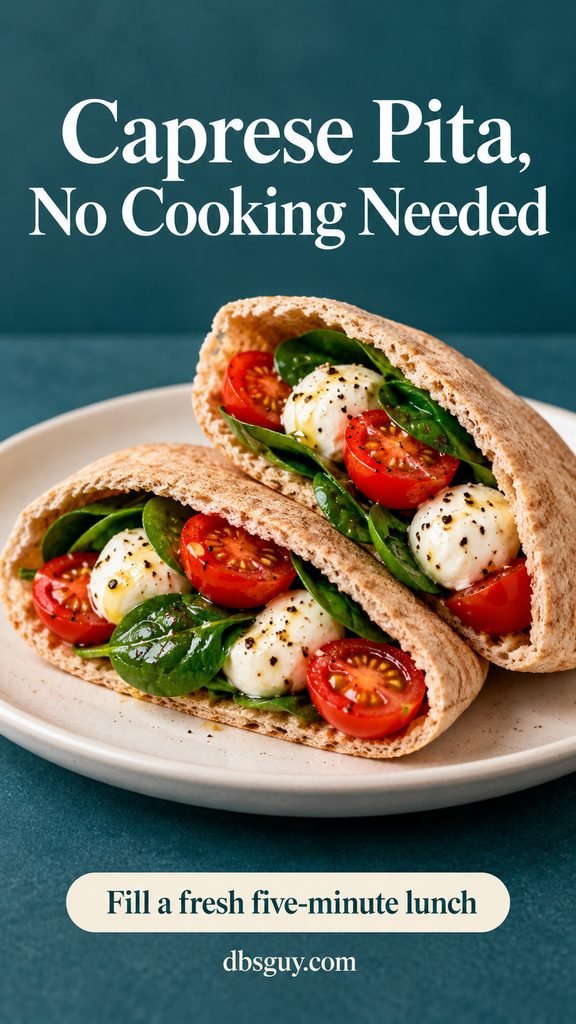
For 1 pita: One 6-inch pita, 2 ounces fresh mozzarella, ½ cup halved cherry tomatoes, ¼ cup baby spinach, 1 teaspoon olive oil, and black pepper.
Drain and pat the mozzarella dry. Toss the washed tomatoes and spinach with oil and pepper. Cut the pita into two pockets and divide the filling between them. Allow about five minutes. Eat promptly so tomato juice does not soak through the bread.
Cold space: A small mozzarella pack and your produce. Follow the cheese label for storage after opening, including any directions about its liquid. Buy fresh mozzarella as your cheese choice for this rotation rather than adding it to several open cheese packs.
11. Rice and Black Bean Bowl
The rice and beans can start in the pantry. The fridge contributes a small amount of cheese and salsa.

For 1 meal: One shelf-stable microwave rice cup yielding about 1 cup cooked rice, ½ cup drained, rinsed canned black beans, ¼ cup shredded cheddar, and 2 tablespoons salsa.
Heat the rice following its package directions. Transfer it to a roomy microwave-safe bowl and stir in the beans. Cover loosely and heat in 30-second intervals, stirring until thoroughly hot. Sprinkle on the cheddar, heat briefly to melt it, and add salsa. Allow about six minutes overall.
Cold space: Cheese, opened salsa, and any leftover beans. Unopened shelf-stable rice cups stay outside. If you save a cooked portion, use a shallow container, refrigerate promptly, and count it within the three- to four-day leftover window. Rice is not a food to leave on your desk overnight.
12. Broccoli-Cheddar Microwave Potato
A medium potato makes a filling base without taking a meal container’s worth of fridge space before cooking. Use fresh broccoli so you do not need a freezer.

For 1 meal: One medium russet potato, ½ cup small fresh broccoli florets, 1 tablespoon water, ¼ cup shredded cheddar, and 1 tablespoon plain Greek yogurt.
Scrub the potato and pierce it several times with a fork. Microwave on a microwave-safe plate for five minutes, turn carefully, then continue in one-minute intervals until tender throughout. Let stand for two minutes. Many medium potatoes need about five to eight minutes of cooking, but size and wattage matter.
Meanwhile, put the broccoli and water in a microwave-safe bowl with a vented cover. Microwave for about 1½–3 minutes, checking until tender; drain carefully. Split the potato, add broccoli and cheddar, and heat briefly to melt the cheese. Finish with yogurt. Allow roughly 12–15 minutes total.
Cold space: A little broccoli, cheddar, and yogurt. Keep the uncooked potato in a cool, dark, ventilated spot for near-term use. Do not microwave it in foil or store a cooked potato at room temperature.
Also Read: 23 Easy Microwave Recipes for Dorm Rooms: No Kitchen Needed.
13. Spinach and Egg Breakfast Wrap
Cook the filling in a bowl, then roll it into a soft tortilla. This uses the same spinach and cheddar as other meals, with no extra sauce bottle.

For 1 wrap: Two large eggs, 1 tablespoon water, ¼ cup finely chopped baby spinach, 2 tablespoons shredded cheddar, one 8-inch tortilla, and ½ teaspoon oil for the bowl.
Lightly oil a microwave-safe bowl that holds at least 2 cups. Beat the eggs and water thoroughly in it, then stir in the spinach. Cover loosely with a microwave-safe cover. Microwave for 30 seconds, stir, and continue in 15- to 20-second bursts, stirring between them, until the egg is fully set and reaches 160°F on a food thermometer. Let stand one minute.
Stir in the cheddar and roll the filling into the tortilla. Allow about six to eight minutes. Wash anything that touched raw egg, and never microwave eggs in their shells.
Cold space: A small egg carton, cheese, and spinach. Keep the carton on an interior shelf. If there is no safe place for raw eggs, choose the ready-to-eat egg snack box instead.
14. Peanut-Slaw Noodles
A small bag of shredded cabbage and carrots supplies the refrigerated ingredient. The sauce comes together from pantry staples.

For 1 meal: One 3-ounce instant ramen cake, seasoning packet omitted; ½ cup plain ready-to-eat cabbage-and-carrot slaw mix; 1 tablespoon smooth peanut butter; 1 teaspoon reduced-sodium soy sauce; 1 teaspoon rice vinegar; and 2 tablespoons hot noodle water.
Cook the noodles using the package’s microwave directions in a sufficiently large microwave-safe bowl, with the specified water. Save 2 tablespoons of the hot water, then drain carefully. Stir that water into the peanut butter, soy sauce, and vinegar until smooth. Toss with the noodles and slaw. Allow about eight minutes.
Cold space: The small slaw bag, plus any condiments whose labels require refrigeration. Check the peanut butter label too. Choose plain slaw without dressing and use the remaining bag in a chicken wrap. Peanut butter is essential to this version; choose another meal if you need to avoid peanuts.
Also Read: 13 Instant Ramen Upgrades: Ditch the Flavor Packet. That collection includes stove-based options, so check the equipment before choosing a recipe.
15. White Bean and Spinach Soup
This is a useful way to finish spinach before buying more produce. Mashing a few beans gives the broth body without opening cream or milk.

For 1 light meal: ¾ cup drained, rinsed canned white beans, 1 cup low-sodium vegetable broth, ½ packed cup baby spinach, ⅛ teaspoon garlic powder, and black pepper. Serve with a small portion of whole-grain crackers.
In a 4-cup microwave-safe bowl, mash 2 tablespoons of the beans with a fork. Add the remaining beans, broth, garlic powder, and pepper. Cover loosely and microwave for two minutes. Stir in the spinach, then continue in 30-second bursts until the spinach wilts and the soup is thoroughly hot. Let stand one minute and uncover away from your face. Allow about eight minutes.
Cold space: Spinach and any opened bean or broth leftovers. Use a small shelf-stable broth carton and follow its after-opening instructions. If you have no room for leftover broth, use 1 cup water plus the label-directed amount of a shelf-stable bouillon powder instead; taste before adding salt.
A Small Grocery Rotation That Does Not Become 15 Shopping Lists
Start with one breakfast, one lunch, and one snack that share ingredients. For example, choose the yogurt cup, hummus vegetable box, and chicken wrap. Try fitting their actual packages before adding another choice.
- Cold foods for that rotation: Two small yogurt cups, a small strawberry pack, one 8-ounce hummus tub, one small cucumber, a small bag of baby carrots, and a 6-ounce ready-to-eat chicken pack. Add a small spinach bag only if it fits; the wrap also works without it.
- Outside the fridge: Granola, tortillas stored as their label directs, and crackers. Keep dry food sealed and away from cleaning supplies.
- Use-up plan: Make two chicken wraps from the 6-ounce pack, and use the remaining hummus with carrots and cucumber. Buy only enough for the next few days, then adjust after seeing what you actually finish.
If that list crowds your allotted shelf, drop the berries and serve yogurt with granola, or choose the tuna kit instead of refrigerated chicken. Do not solve a fit problem by leaving food that needs refrigeration out of the fridge.
Keep one clear spot for unexpected leftovers. Before bringing a dining-hall or takeout portion home, check that you can refrigerate it promptly and that it will fit in a small covered container. A large clamshell box can take more room than the food inside needs.
Questions About Mini Fridge Meals and Snacks
Can I keep a whole week of meals in a mini fridge?
That depends on the appliance, container shapes, and how much space you share. It is also a storage-time question: most cooked leftovers should be eaten within three to four days refrigerated. A week of refrigerated meal prep is not the default plan here. Restock in smaller rounds or use a properly functioning freezer for suitable foods.
What if I have a fridge but no microwave?
Choose ideas 1–10. The overnight oats, dairy cups, vegetable snacks, ready-to-eat egg box, wraps, salad, tuna kit, and pita need no heat. Buy chicken labeled fully cooked and ready to eat, and buy eggs already hard-cooked.
Can a little skincare or drink cooler replace a food fridge?
Do not assume it can. Check its manual for the intended use, and verify that it consistently holds food at 40°F or below in your actual room. A cooler that only lowers the temperature relative to the surrounding air may not meet that requirement.
What is most worth removing when the fridge is too full?
Start with things that never needed refrigeration: unopened shelf-stable cans and pouches, dry snacks, and empty serving dishes. Then buy smaller chilled packages or fewer varieties next time. Follow labels for condiments and opened drinks; moving something out just because it is in a bottle does not make it safe.
How do I carry a cold wrap to class?
Use an insulated lunch bag with cold sources that keep the food at 40°F or below, or refrigerate it at your destination. Without reliable cold storage, stay within the two-hour room-temperature limit, shortened to one hour above 90°F. For a long day without that setup, open shelf-stable foods at mealtime instead.
Also Read: 17 Microwave Mug Meals: Breakfast, Dinner & Dessert in a Mug.