
A homemade Advent calendar can do more than hold December treats. Give it a place on the wall, a spot on a console, or a corner of the kitchen, and it becomes part of your Christmas decorating instead of another box to hide.
These 12 DIY Advent calendars offer different ways to count down: open an envelope, slide out a drawer, lift a paper tree, unwrap a book, or turn over an ornament. For the quickest start, choose the envelope gallery. For something you can refill next year, try the felt banner or drawstring bags. For a display that stays intact all month, the paper village is a lovely choice.
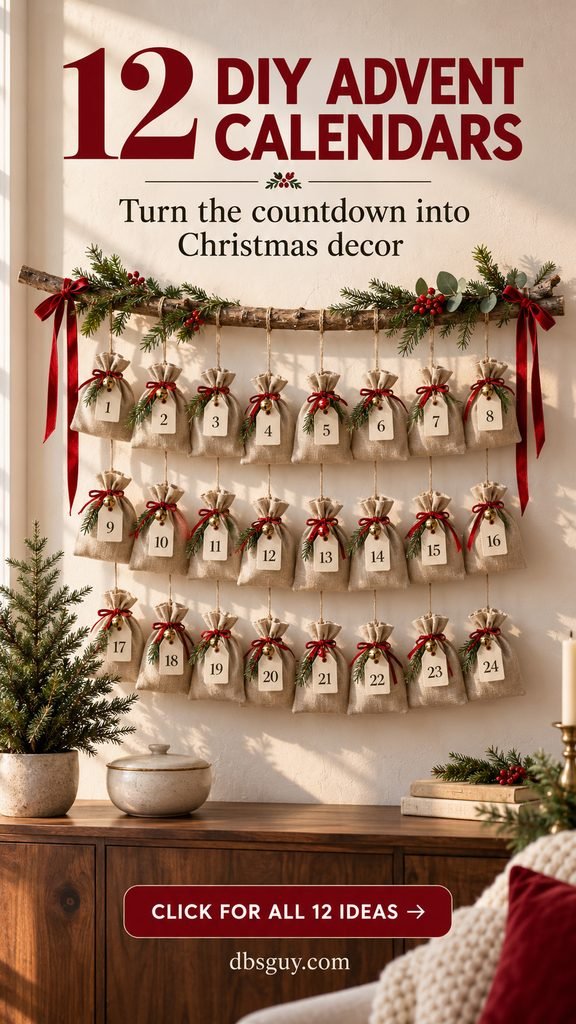
The images in this article are AI-generated design concepts, not photographs of tested finished projects. Use them for styling inspiration; the suggested dimensions below are starting points. Make and fill one sample before cutting the other 23 pieces.
Choose the spot and the surprises first
Decide where the calendar will live before buying supplies. A narrow hallway needs a shallow wall display; a console can hold a village; a reading corner can handle wrapped books. Measure the usable space, including room to reach the highest date without climbing.
Next, pick what goes inside. Flat activity cards fit envelopes, wreath parcels, and tiny drawers. Wrapped treats need more depth. Books need a supported surface. If you want to include a larger gift, put a clue in the calendar and keep the gift elsewhere.
Each project below uses 24 dates, December 1 through December 24. You can add a separate Christmas Day envelope if your family prefers a 25-day countdown. Use two or three main colors, one consistent number style, and enough contrast to find the next date easily.
1. Turn a picture frame into an envelope Advent gallery
This is a good first project because the envelopes do most of the work. A framed arrangement looks intentional, and it can sit above a breakfast table where opening the day’s card becomes part of the morning.
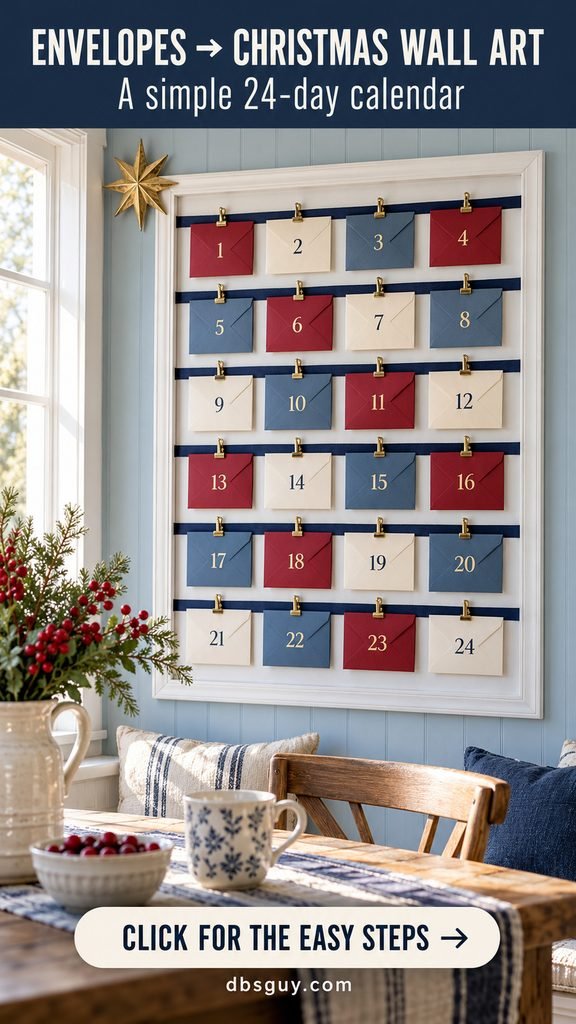
Gather: 24 small envelopes, an empty sturdy frame, six lengths of ribbon, 24 clips, number stickers or a marker, and 24 paper cards. Envelopes around 4 by 3 inches are a useful starting size; an approximately 24-by-36-inch frame may work, depending on its inside opening.
- Lay the frame flat and arrange six rows of four envelopes inside it. Leave enough space above each envelope for its clip and below it for opening.
- Stretch one ribbon across each row. Secure the ends to the frame’s back with a method appropriate to its material; an adult should handle any staples or hardware.
- Number the envelopes 1–24, insert the cards, and clip four to each ribbon.
- Support the frame on a stable surface or hang it with suitable picture hardware. Check that opening an envelope does not pull the ribbon loose.
Keep it decorative: Return each empty envelope to its clip. You can turn opened envelopes backward to reveal a patterned flap, while the unopened dates remain easy to spot. For an adult calendar, fill the cards with tea breaks, favorite songs, or a short message rather than buying 24 gifts.
2. Build a paper-house village that stays on display
A row of little houses gives the countdown a proper home on a shelf. Choose cream and kraft cardstock for a quiet winter village, or use red roofs and white walls for a brighter Christmas look.
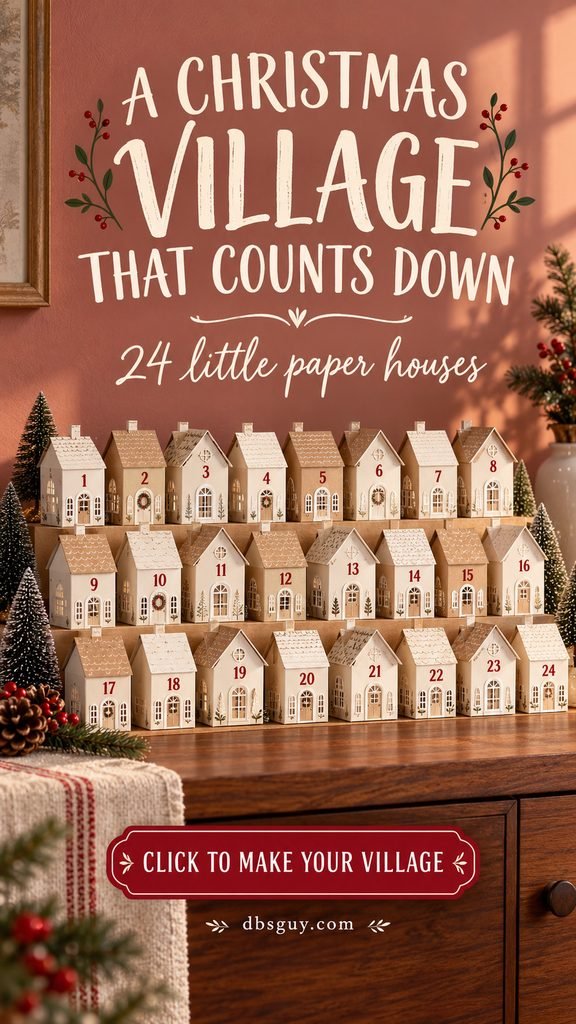
Gather: Cardstock, a house-box template, scissors, a ruler, a blunt scoring tool, paper glue, number labels, and a shelf or tray. Mr Printables offers a numbered paper-house calendar template if you prefer printable shapes to drawing your own. Follow the chosen template’s assembly instructions and usage terms.
- Assemble one house first. Test its opening with the folded card or wrapped surprise you intend to use.
- Score the remaining fold lines before folding. Glue only the structural tabs; preserve the template’s access flap or removable roof.
- Make 24 houses, checking that each date appears once. Keep the same number placement on every house.
- Arrange them in three staggered rows of eight on stable shallow risers, with all dates visible. Leave room to lift out a house without disturbing its neighbors.
Opening a roof or flap is gentler than tearing off a wall. Put the house back afterward, and the village remains complete through Christmas Eve. A few small trees at the edges are enough; filling every gap with greenery can make the dates and openings harder to reach.
Keep this paper village unlit. If you want a warm evening glow, light the room from a separate lamp rather than putting candles inside the houses.
3. Sew a felt-pocket banner you can refill
If you enjoy hand sewing, this is the calendar to settle into over a few evenings. Visible blanket stitches and simple numbers give it a handmade character without needing elaborate embroidery.
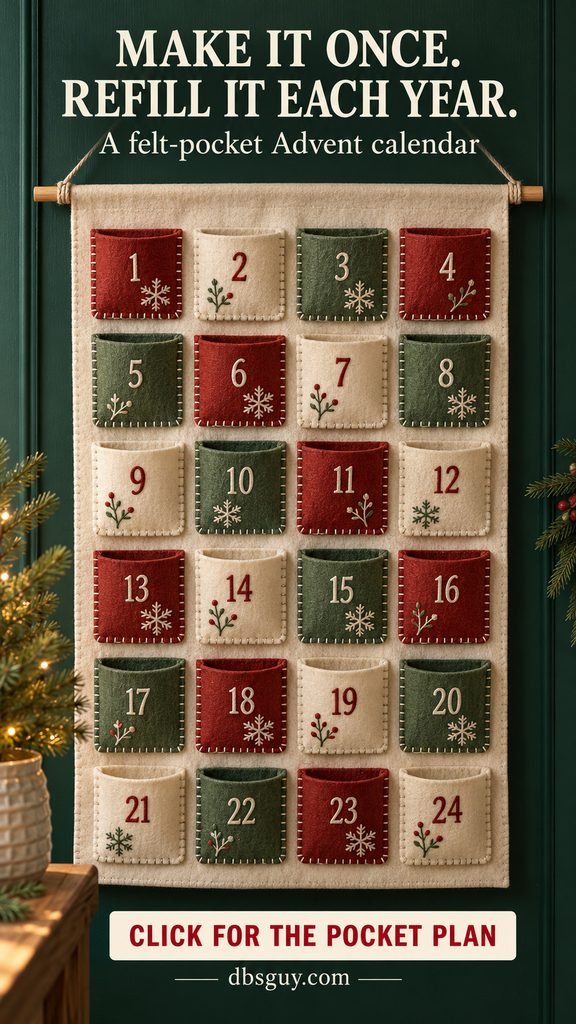
Gather: A firm felt backing, felt for 24 pockets, a dowel, cotton cord, embroidery thread, a needle, scissors, and fabric-safe number decorations.
For a suggested layout, start with a backing roughly 22 by 34 inches and 24 pocket fronts about 4 inches square. Arrange four columns and six rows, allowing roughly 1 inch between pockets, side margins, and extra space at the top for a dowel sleeve. Check the full layout on paper before cutting; adjust it to your actual felt and filler size.
- Add numbers to the pocket fronts before attaching them to the backing.
- Pin all 24 in place. Stitch each pocket along its sides and bottom, leaving the top open.
- Fold and sew the top edge into a sleeve wide enough for your dowel. Reinforce the seams that carry the display’s weight.
- Thread in the dowel, tie the hanging cord to its ends, and test the banner with its intended contents.
Use flat notes and light treats so the banner hangs smoothly. After each opening, tuck the card back into its pocket with a small part showing; the calendar stays full of texture. Before storing it, empty every pocket and follow the felt supplier’s cleaning guidance.
4. Make a cardboard-tube countdown tree
This calendar adds an opening ritual: each date has a tissue-paper front to break through. The geometry matters, because six triangular rows alone make only 21 spaces.
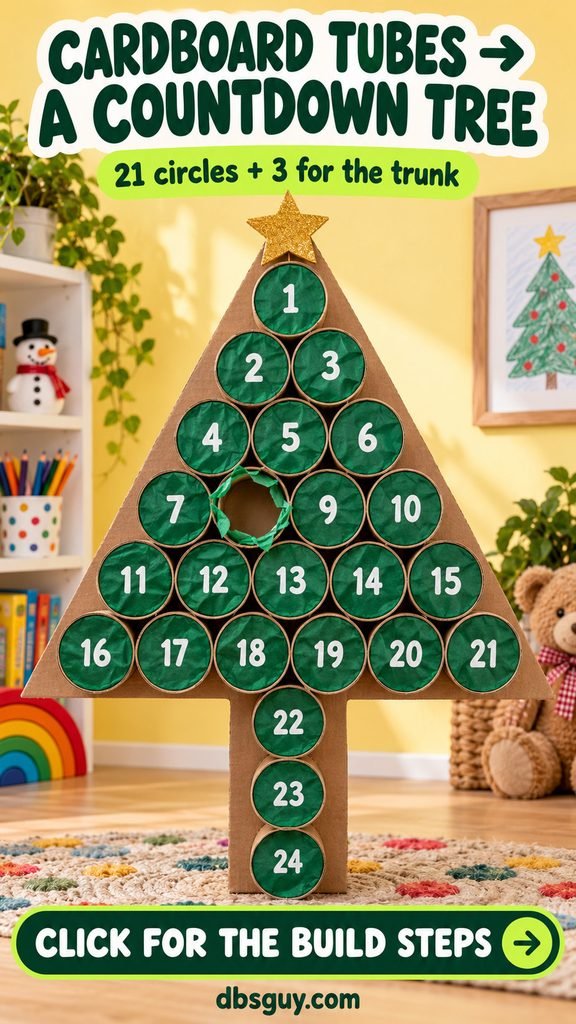
Gather: 24 clean, dry cardboard tube sections of the same diameter, sturdy cardboard backing, tissue paper, paper glue, a marker, and an adult-operated cutting tool. Empty paper-towel tubes cut into short sections work well for collecting matching pieces.
- Cut the tubes to a consistent depth, around 2 inches as a starting point. Test one with your intended filler.
- Arrange the canopy in rows of 1, 2, 3, 4, 5, and 6 tubes. Add three more vertically beneath the center as the trunk: 21 + 3 = 24.
- Draw and cut a backing that supports the entire arrangement. Attach the tube backs and adjacent sides, keeping adhesive out of the usable openings. Let it dry fully.
- Insert a folded note or individually wrapped treat. Glue a single layer of numbered tissue around each tube’s front rim, without coating the middle.
- Support the finished tree securely. Test one opening to make sure pressure does not tip the tree or detach a tube.
Let an adult hold the backing while a child opens a date. For a tidier look afterward, tuck a green paper circle loosely into the emptied tube. The tissue fronts will need replacing next year, even if the backing and tubes survive.
5. Hang drawstring pouches from a natural branch
Cloth bags bring softness to an otherwise plain wall. This version suits a small apartment or hallway, especially when the pouch colors repeat tones already in the room.

Gather: 24 small drawstring bags, a clean dry branch or wooden dowel, short lengths of cord, 24 numbered tags, and suitable hanging hardware. Bags around 3 by 4 inches are a starting point for folded notes and small wrapped treats.
- Lay the bags on the floor in three groups of eight. Work out the branch width and cord lengths before tying anything.
- Number the tags and attach one to each bag. Tie each bag independently to the branch so opening one does not tug on another.
- Stagger the cord lengths slightly, keeping every date visible and each drawstring reachable.
- Support the branch at two points using hardware suited to the wall and the total filled weight. Check the setup after filling the bags.
For the muted look shown, alternate oatmeal, blush, and terracotta rather than making every bag identical. Leave emptied bags hanging and close their drawstrings again. If one day’s surprise is too heavy, use a clue card instead.
Keep hanging cords away from cribs, beds, and places where young children can become entangled. Adults should manage the bags for younger children.
6. Stack empty craft matchboxes into a miniature drawer chest
A small drawer calendar fits on a bookshelf without taking over the room. Deep green, gold numbers, and ribbon pulls make ordinary cardboard boxes feel like a tiny cabinet.
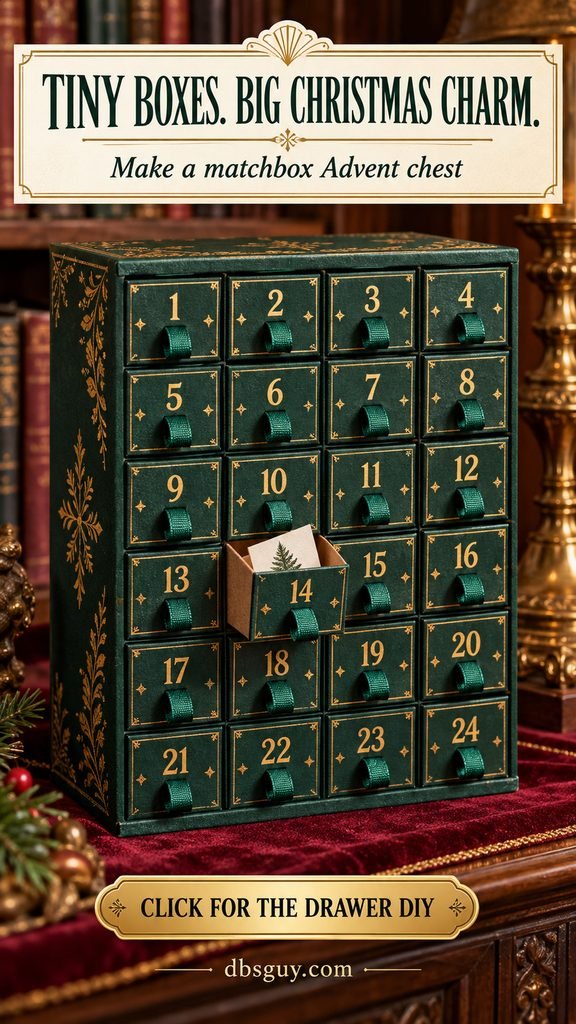
Gather: 24 new, empty sliding craft boxes of matching size, cardstock, paper glue, a stiff cardboard base and back, ribbon, paint or decorative paper, and number labels. Use craft blanks rather than boxes that contain matches or have striker material.
- Remove the trays. Glue the outer sleeves into six rows of four with every opening facing forward. Keep glue away from the sliding surfaces.
- Add a stiff back and base to help the stack hold its shape. Cover the outside with paper or thin coats of paint; allow it to dry.
- Attach a short folded ribbon pull to each tray front. Add dates 1–24.
- Slide every drawer in and out before filling it. Trim bulky paper edges if they catch, and avoid forcing a tight tray.
Matchbox-size drawers suit folded messages, stickers, or a single small wrapped sweet. Larger empty craft boxes offer more room, but the finished chest will also be larger. Close each drawer after opening so the cabinet remains part of the decor.
Keep the project to lightweight contents. Cardboard drawers are not designed to carry heavy gifts, and a calendar made from paper is best stored somewhere dry.
7. Make a mini-stocking garland with a no-sew option
Mini stockings make the calendar recognizable from across the room. Three short garlands above a sideboard keep the dates more accessible than one very long strand.
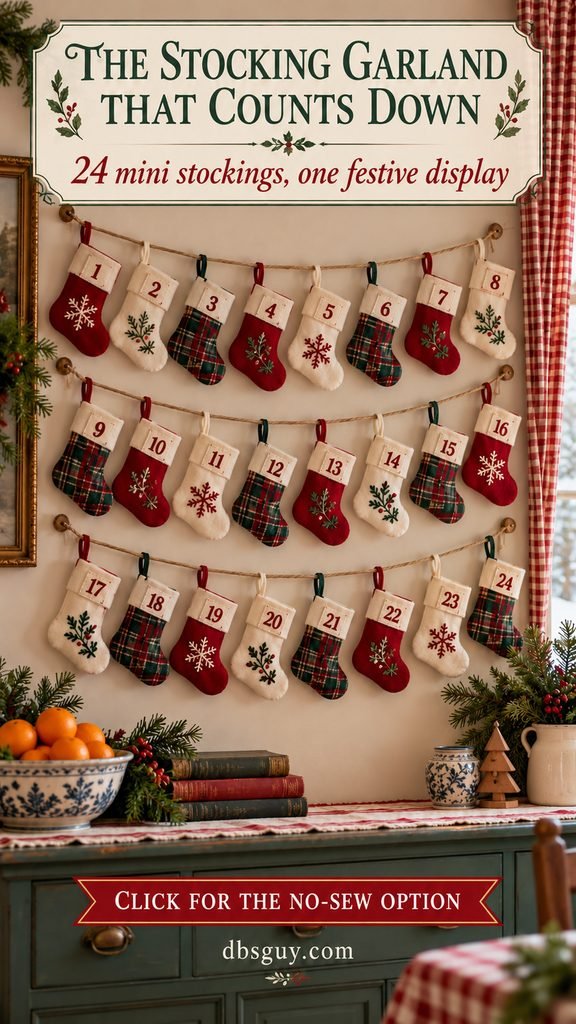
Gather: Felt, scissors, ribbon for loops, number patches or fabric marker, three lengths of cord, and either sewing supplies or fabric adhesive specifically suitable for your felt.
- Draw one stocking shape around 5–6 inches tall, with a neck wide enough for your filler. Cut two pieces and test this first stocking.
- Sew around the toe, heel, and sides, leaving the cuff open. For the no-sew version, apply fabric adhesive to those edges according to its label and let it cure fully.
- Secure a short hanging loop near the cuff. Stitching the loop is a useful reinforcement even if the edges are glued.
- Make 24 stockings, add numbers, and tie eight to each of three cords. Secure both ends of each cord to suitable supports.
For plaid stockings, use plaid felt or add a lightweight plaid fabric layer over a felt front. A fabric overlay alone may fray unless you finish its edges. Limit glued stockings to light notes and test the seams before adding treats.
Keep the garlands on the wall after opening. Above a sideboard, they work with everyday serving pieces and winter textiles; keep the display away from an active fireplace or other heat source.
8. Turn an embroidery hoop into a countdown wreath
This wreath is made for messages rather than bulky presents. A ring of small folded envelopes gives you a decorative shape even in a room without spare shelf space.
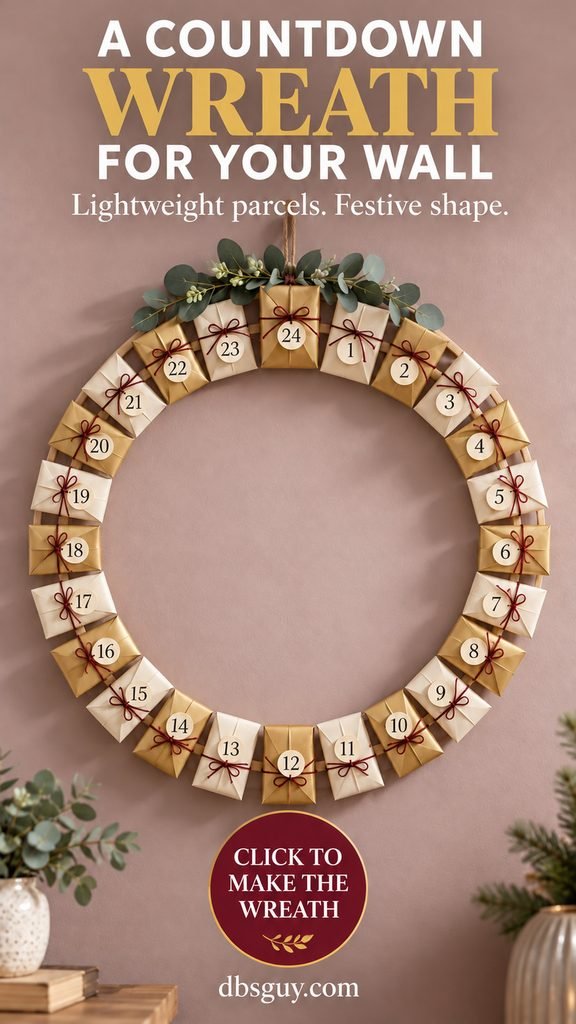
Gather: A sturdy embroidery hoop or craft ring, 24 small paper envelopes, thin ribbon or cord, numbered tags, flat activity cards, and a small piece of faux greenery.
- Choose a ring large enough for your envelopes. An 18-inch ring is a possible starting point for envelopes around 2 inches wide, but lay out all 24 before committing.
- Arrange the empty envelopes evenly around the ring, angled outward. Adjust spacing until the center stays open and all dates can be read.
- Insert one card per envelope. Tie each parcel independently to the ring, with its closure facing outward and accessible.
- Add a small greenery accent at the top. Hang the ring from a secure support and check that it remains balanced.
Tie the ribbon around each envelope as a decorative bow, while using a separate short loop to connect it to the ring. That lets you untie the bow and remove the card without dismantling the wreath.
Reclose and retie opened envelopes instead of removing them. Ivory and gold paper with burgundy ribbon makes this calendar suitable for a dining room as well as a family space.
9. Arrange a paper-cone Advent forest on a tray
Here, the trees are the containers: lift a cone to find the note underneath. It is a useful choice when you want a tabletop calendar that can move as one display.

Gather: Green cardstock in two or three shades, scissors, paper glue, a ruler, number labels, 24 folded cards, and a tray.
- Cut a quarter-circle of cardstock with a radius around 5 inches. Roll it into a cone by overlapping the straight edges slightly and glue the seam.
- Set the sample on a flat surface. Trim the bottom carefully if needed so it stands level, then check that your folded card fits underneath.
- Make 24 cones, varying their heights modestly while keeping enough base width for the contents.
- Add a date near each base. Arrange four rows of six on a tray, leaving room to lift one without knocking over the others.
- Place the matching card beneath each cone and keep a private list of the activities.
Use a few painted dots or paper scallops to vary the trees. Plain cones among the decorated ones help the whole forest feel calmer. After reading a card, put the cone back in its place.
The cones have open bottoms, so lift and carry the tray level. Notes are simpler than loose sweets here; any edible filler should remain in its own packaging. Keep the paper forest away from flames.
10. Wrap a story-a-day book countdown
This calendar makes the reading corner part of the Christmas decorating. You do not need 24 new books: favorites from your shelves can be just as welcome when they arrive in a numbered package.

Gather: 24 books or reading selections, wrapping paper, removable labels, ribbon if desired, and a stable bench, shelf, or basket. Mix holiday books with stories your household already loves.
- Pick reading that fits your evenings. Short picture books suit quick nights; a longer read can be split into dated chapter selections.
- Wrap owned books individually, protecting their covers. For borrowed books, use a removable sleeve or reusable bag and keep all adhesive off the book.
- Add dates and arrange the packages in low stacks, with upcoming dates accessible.
- Put opened books on a nearby shelf so the reading corner stays inviting as the wrapped stacks shrink.
The concept image shows six stacks of four. Adjust that arrangement to your actual book sizes and the surface available; do not place stacks where they can fall onto a child or block a seat you need to use.
If using library books, check borrowing limits and due dates before wrapping. Another option is to wrap a few owned books and put reading cards in the remaining dates. The ritual is choosing time for a story, not collecting 24 purchases.
11. Make a flip-tag Advent tree that changes every day
This calendar needs no hidden treats. One side of each hanging disc shows a date; the other becomes an ornament. As December progresses, a numbered tree gradually turns into a decorated one.
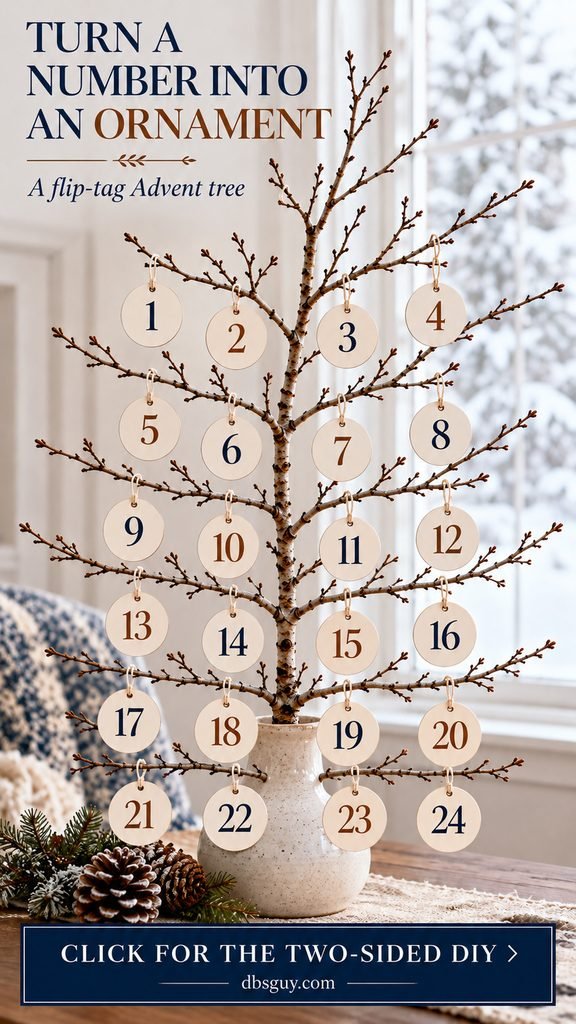
Gather: 24 sturdy cardboard discs, a hole punch, short cotton loops, markers or patterned paper, and a small branch tree secured in a stable vessel.
- Cut discs around 2½–3 inches across. Write dates 1–24 on one side.
- Decorate the reverse sides with stars, stripes, snowy shapes, or other simple motifs. Keep the materials light.
- Punch a hole near each top edge and add a short loop. Hang all 24 with the numbers facing forward.
- Each day, lift off that date’s disc, turn it over, and rehang it with its patterned side facing the room.
A short activity can also go on the patterned side: read it aloud before hanging the ornament again. Spread the dates across the branches so the visual change appears throughout the tree.
The image shows the starting arrangement, with all 24 numbered fronts facing the room. Give the base a gentle stability check and keep the tree away from edges. If it cannot support the discs comfortably, use a sturdier tabletop tree or smaller lightweight tags.
12. Give a 24-well mini muffin pan a Christmas makeover
A mini muffin pan becomes a surprisingly neat countdown when each well gets a removable numbered paper lid. It is especially handy for a kitchen display you want to keep horizontal.
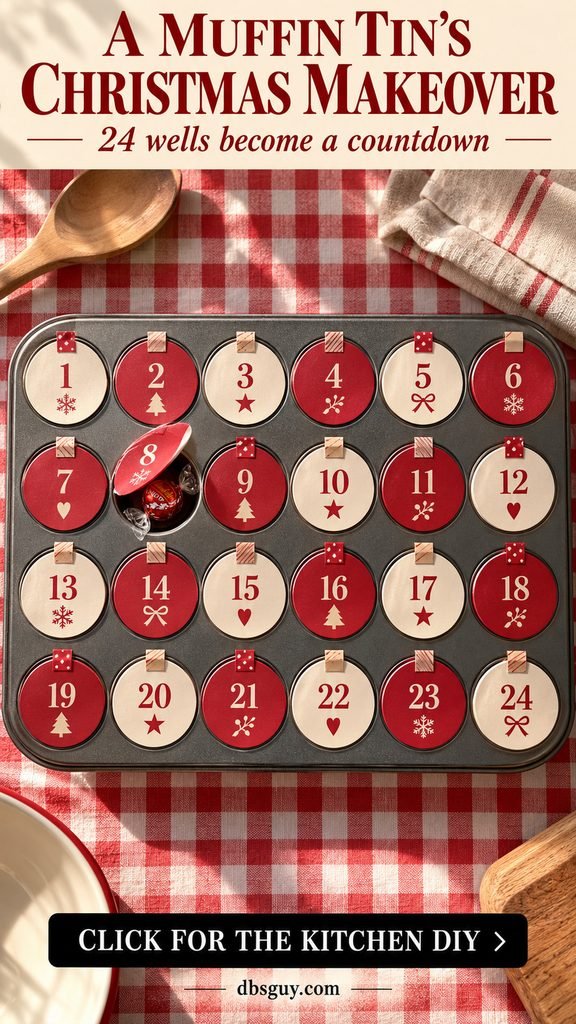
Gather: One clean 24-well mini muffin pan, cardstock, scissors, a pencil, removable washi tape, and 24 notes or small individually wrapped treats. Check that your pan really has 24 wells; standard muffin pans often have fewer.
- Measure one opening and cut a paper circle slightly larger than it. Test that it covers the well without overlapping neighboring lids.
- Make 24 circles and add dates. Put one appropriately sized wrapped item or folded note in each well.
- Attach each circle to the surrounding metal with small removable tape tabs. Leave a tab easy to lift.
- Set the pan flat on a stable surface. Lift a lid each day, take the surprise, and replace the paper cover.
Do not use loose candy directly against painted craft surfaces or adhesive. Keeping treats individually wrapped also makes the project easier to refill and clean.
The pictured pan uses four rows of six; adapt the paper spacing to your own pan. Keep it horizontal unless you have a purpose-built support that securely carries the filled pan. Remove every paper piece and all tape before returning it to kitchen use.
Fill the calendar without buying 24 little gifts
Write down the contents before filling the calendar. Put scheduled outings on their actual dates, choose short activities for busy evenings, and leave a few cards flexible. A five-minute ritual is easier to keep than a month of elaborate plans.
Here are 24 card ideas you can adapt to your household:
- Read a favorite winter story.
- Make hot cocoa together.
- Choose a song for the Christmas playlist.
- Write a card to someone you miss.
- Look at the neighborhood lights.
- Cut paper snowflakes.
- Share a favorite holiday memory.
- Pick tonight’s family movie.
- Draw a Christmas picture.
- Help set the dinner table.
- Decorate one window.
- Read a poem aloud.
- Choose a game to play together.
- Make a paper ornament.
- Call a relative or friend.
- Take a family photo.
- Plan a favorite holiday breakfast.
- Wrap one present together.
- Make a small thank-you note.
- Choose a book to revisit.
- Sing a favorite carol.
- Do a household kindness together.
- Put on pajamas early for a cozy evening.
- Choose the story for Christmas Eve.
For a shared calendar, write one family activity per day or include enough suitable treats for everyone opening it. For edible fillers, check labels for allergens and storage instructions. Avoid anything that requires refrigeration in a calendar displayed at room temperature.
Keep the countdown practical and safe
Test every opening before December 1. Pull out a drawer, open a roof, untie a pouch, and reach the highest date. Rework awkward spots now, while the calendar is empty. When hanging a display, use supports appropriate to its total filled weight and the wall surface; follow the hardware manufacturer’s directions.
Let adults handle craft knives, hot glue, stapling, and wall installation. Supervise opening when young children are involved. Choose age-appropriate contents, keep loose clips and small decorations out of reach, and avoid long accessible cords.
The American Academy of Pediatrics’ holiday decorating guidance recommends keeping small removable decorations away from children and securing battery compartments in light-up decorations. If you add lights nearby, inspect them and follow their instructions; keep paper and fabric away from open flames and heat sources.
Battery-powered does not automatically mean child-safe. The CPSC advises keeping products with accessible button or coin batteries away from children and looking for secure screw closures. None of these calendars needs lights, magnets, or loose batteries to work.
Questions about homemade Advent calendars
What is the easiest DIY Advent calendar for a beginner?
The envelope gallery is a straightforward choice when you already have a frame, clips, and paper. You can make all 24 surprises from handwritten activity cards, and you only need to test the ribbon attachment and spacing.
Should an Advent calendar have 24 or 25 days?
These projects count from December 1 through Christmas Eve, so they use 24 dates. Add a separate December 25 card if you want Christmas morning included. That keeps you from squeezing an extra pocket into a finished layout.
How do I keep it looking good after the surprises are opened?
Choose openings that close again. Return the houses, bags, stockings, envelopes, and cones to their places. Close drawers and replace muffin-pan covers. The flip-tag tree becomes more decorative as its numbers turn into patterned ornaments.
Can I make one without candy or toys?
Yes. Use activity cards, reading selections, messages, or two-sided ornaments. Plan around your household’s schedule so the daily surprise feels manageable. A short story or a favorite song can be enough.
When should I start making it?
Work backward from December 1. Give yourself time to collect supplies, make a prototype, let adhesives dry, fill the calendar, and check the hanging setup. A sewn banner or 24 paper houses deserves more time than numbering ready-made envelopes.
How should I store a reusable calendar?
Empty it completely, remove food and batteries from any separate accessories, and let the materials dry before packing. Keep house boxes and cones from being crushed, store numbered sets together, and follow the care instructions for fabric and felt. Check seams, cords, and attachments again before refilling next year.
Choose the calendar that suits the place you already have and the ritual you want to repeat. A small, usable display with one thoughtful surprise each day can become a lovely part of the room—and a tradition that is easy to return to.