
Your fabric scraps do not need matching prints—or a sewing machine—to become Christmas decorations. Narrow strips can turn into a little tree or a rag wreath. Odd-shaped offcuts can cover stars and baubles. Larger pieces make pretty bundles for small gifts.
These 13 no-sew Christmas crafts use knots, wrapping, or adhesive instead of stitches. Start with the project that fits the scraps you already have. Each idea includes suggested cutting sizes, a practical method, and a detail that helps the finished piece look intentional.
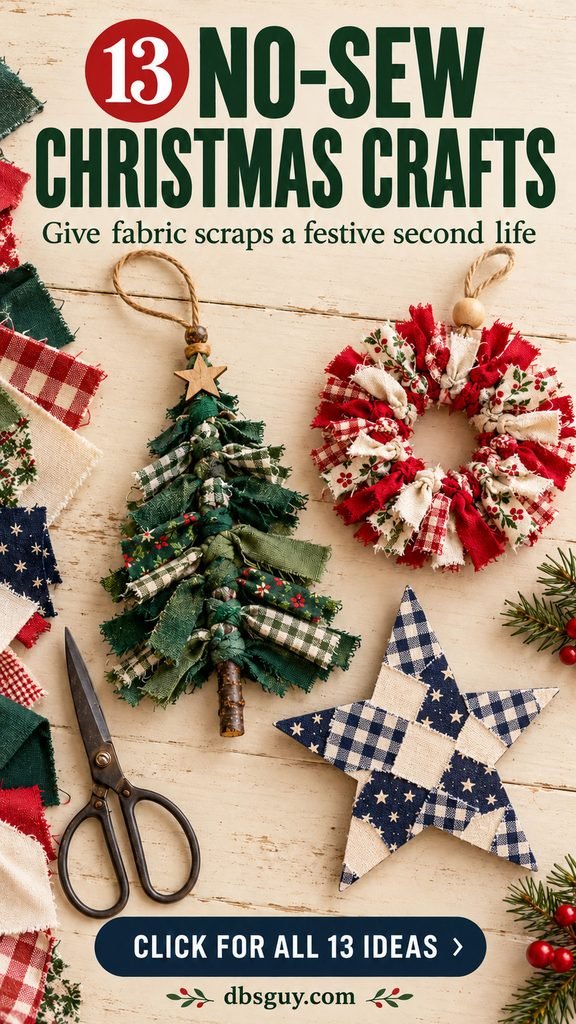
The images are AI-generated styling concepts, not photographs of tested projects. The measurements below are starting points; dry-fit your materials before cutting a whole batch or applying glue.
Sort your scraps before you start
Spread the fabric out and make three piles. This small step saves you from cutting a useful large piece into tiny strips too soon.
- Long, narrow strips: Choose a knotted tree, mini wreath, tied garland, wrapped cone, or spool ornament.
- Small, irregular pieces: Save these for patchwork stars, decoupage baubles, gift tags, and holly leaves.
- Larger squares or rectangles: Set them aside for miniature gift boxes, backed chain links, hoop art, or tie-top gift bundles.
Cotton, flannel, and lightweight linen are useful starting fabrics because they fold and tie without much bulk. Felt is handy when you want a cut edge without loose woven threads. Thick denim is better as a small accent than a tight knot; stretchy jersey works best when a little curl is part of the look. Keep special pieces from an old family shirt together if you want the finished craft to tell a small story.
You will use scissors, a ruler, twine or ribbon, and the base for your chosen project. Match the adhesive to the surfaces: fabric glue for fabric-to-fabric joins, and a craft adhesive or decoupage medium labeled for the relevant fabric and base material. Test a hidden offcut first for stains, stiffness, and adhesion. Wash reused fabric if needed, let it dry completely, and press it according to its care instructions.
Aleene’s Fabric Fusion instructions, for example, call for a test application and a 48-hour wait before washing. That guidance belongs to that product; use your own glue’s label for drying, curing, and care. Cardboard-backed decorations still need to stay dry.
These are indoor decorations. Keep fabric away from flames and heat sources, and supervise children around scissors, glue guns, and small embellishments. Prince William County Fire and Rescue’s holiday guidance recommends keeping lit candles at least 12 inches from anything that burns. Flameless candles are the easier styling choice around these crafts.
1. Knot fabric strips into a little Christmas tree
This is a good first project when your scrap pile is mostly narrow offcuts. The branch gives the ornament its structure; the fabric makes the tree shape. A mix of green plaid, olive prints, and cream looks coordinated without requiring matching yardage.
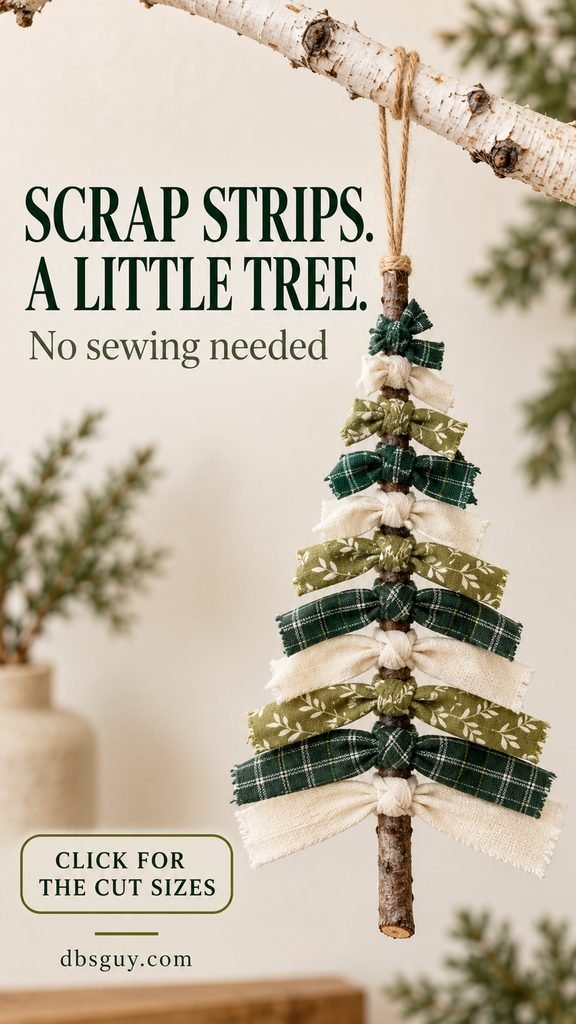
For one ornament: Gather a clean, dry twig about 7 inches long, 10–12 fabric strips approximately ¾ inch wide and 3–8 inches long, and a 10-inch piece of twine. Avoid brittle or sharp branches.
- Tie the twine securely around the top of the twig, leaving a loop for hanging.
- Tie the shortest strip around the twig just below the hanger. Use a snug double knot, with the two fabric tails pointing sideways.
- Add progressively longer strips below it. Keep the knots close together and leave about an inch of exposed twig for the trunk.
- Lay the ornament flat. Trim the outer ends into a triangle, cutting a little at a time so both sides stay balanced.
If a knot spins, tighten it before trimming. Slippery fabric may need a small dot of suitable adhesive behind the knot. For a completely glue-free version, use cotton strips that grip the twig and skip extra toppers. A slightly uneven outline gives this tree its handmade character.
2. Make a mini rag wreath with a clear open center
A mini wreath puts short strips to work without taking over a whole afternoon. Red ticking, gingham, and plain cream fabric bring enough contrast to make the texture stand out on a Christmas tree or an indoor cabinet door.
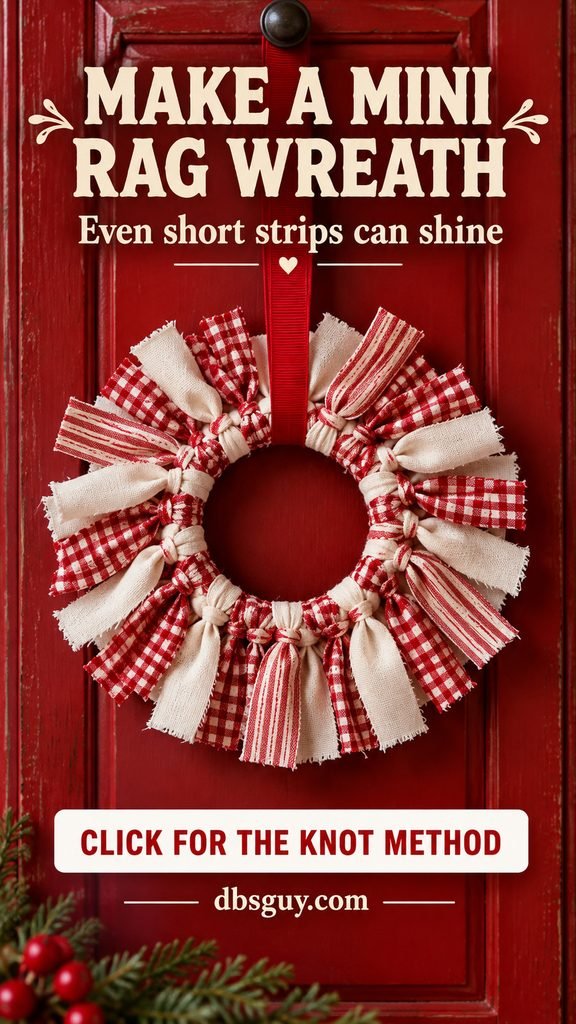
Start with: A smooth, closed craft ring about 3 inches across, roughly 24–36 cotton strips cut ¾ inch wide by 6 inches long, and a ribbon hanger. The strip count depends on the fabric and ring thickness; cut a small first batch and add more as needed.
- Fold a strip in half. Slide the folded end under the ring.
- Bring both loose ends over the ring and through the fabric loop. Pull snugly to make a loop knot.
- Repeat, pushing the knots together until the base is covered. Alternate prints rather than placing all the dark pieces together.
- Turn the knots so the tails fan outward. Trim stray ends, keep the center open, and tie on the hanger.
The open center is what makes the shape read as a wreath. If it disappears under the fabric, rotate the knots outward and trim the inner tails. A ring is easier to tie around than a delicate cardboard base that can buckle when pulled.
3. Cover cardboard stars with a fabric mosaic
Tiny pieces become useful again when they do not have to fit a pattern. This star is a flat cardboard ornament with overlapping fabric patches, so there is no stuffing, turned seam, or sewing hidden in the instructions.
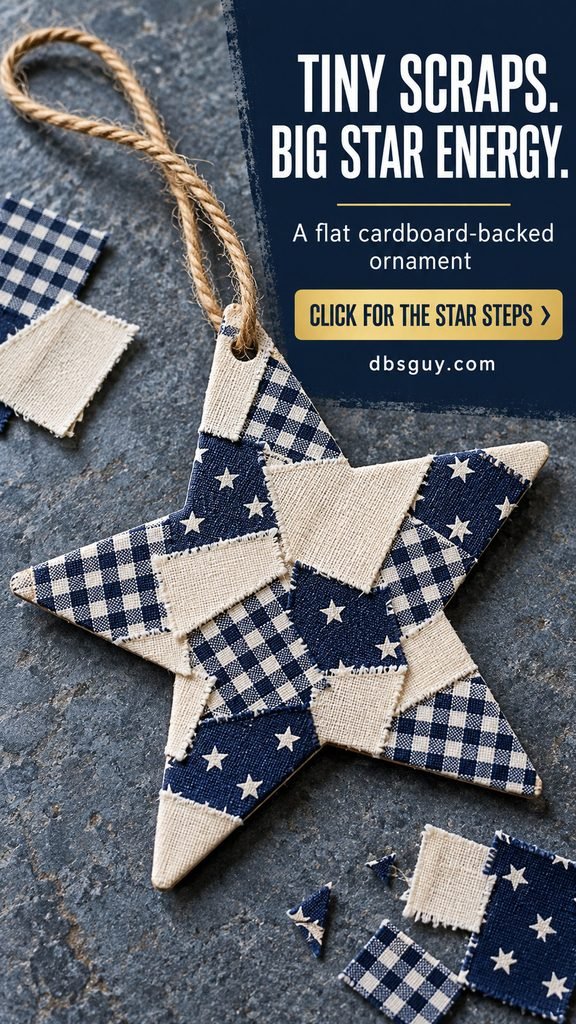
Suggested size: A five-point cardboard star about 4½ inches across, small cotton patches approximately ½–1½ inches wide, decoupage medium compatible with your materials, a brush, and twine. Draw a simple star on paper first, then trace it onto thin, firm cardboard. Punch a small hanging hole near the top, leaving enough cardboard around it to resist tearing.
- Arrange the patches without glue. Choose two or three colors and let one print be the main pattern.
- Brush a thin adhesive layer onto a small area of the star. Add fabric and smooth it outward. Overlap edges just enough to cover the base.
- Let the front dry according to the product instructions. Trim fabric flush to the star’s outline with scissors, then cover the back if desired.
- Reopen the hanging hole carefully, thread the twine, and knot the ends.
Small patches are easier to control at the points than one large sheet. Avoid saturating the cardboard; excess moisture can curl it. Place a pale patch beside a dark one so the five-point outline remains readable from a distance.
4. Give plain baubles a patchwork fabric finish
Fabric-covered baubles are a different use for small scraps: the rounded surface turns a few prints into an all-over pattern. A paper-mâché ornament blank gives the adhesive a porous base and avoids the tricky bond some smooth plastic blanks need.
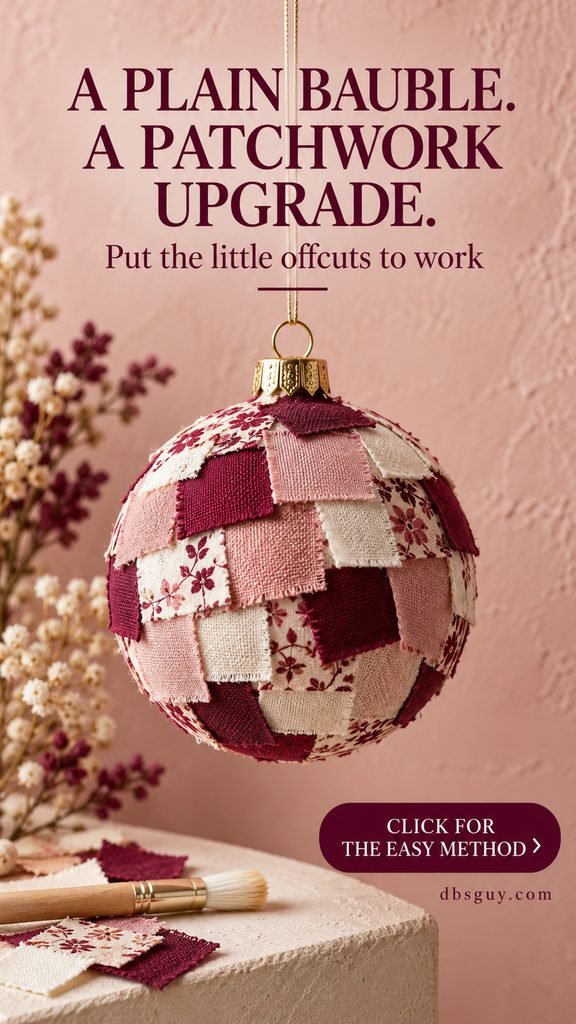
You will need: A round paper-mâché ornament about 3 inches across with an attached hanger, lightweight cotton scraps, a small brush, and a compatible decoupage medium. Start with patches about ¾ inch wide; trim them smaller where the curve is tighter.
- Choose a palette before gluing. Burgundy, blush, and cream make a soft variation on traditional Christmas colors.
- Apply a thin coat of medium to a small part of the ornament, then smooth one patch over it.
- Work around the ball in sections, overlapping edges slightly. Clip a small slit in a stubborn patch if it needs help following the curve.
- Once the first layer is dry, add a thin sealing coat if the product’s instructions call for one. Keep the hanger clear of adhesive.
Use a finish you like: Plaid describes Mod Podge Matte as a clear-drying finish with low reflection. Check the formula’s label for compatibility and cure time. Hold or suspend the ornament by its existing hanger while it dries so it does not stick to the table. Heavy fabric creates ridges, so save upholstery scraps for another project.
5. Turn tiny offcuts into fabric gift tags
One little patch can make plain gift wrapping feel considered. Unlike a fabric star ornament, this project leaves a clean writing area and uses the fabric as an accent rather than covering the whole base.
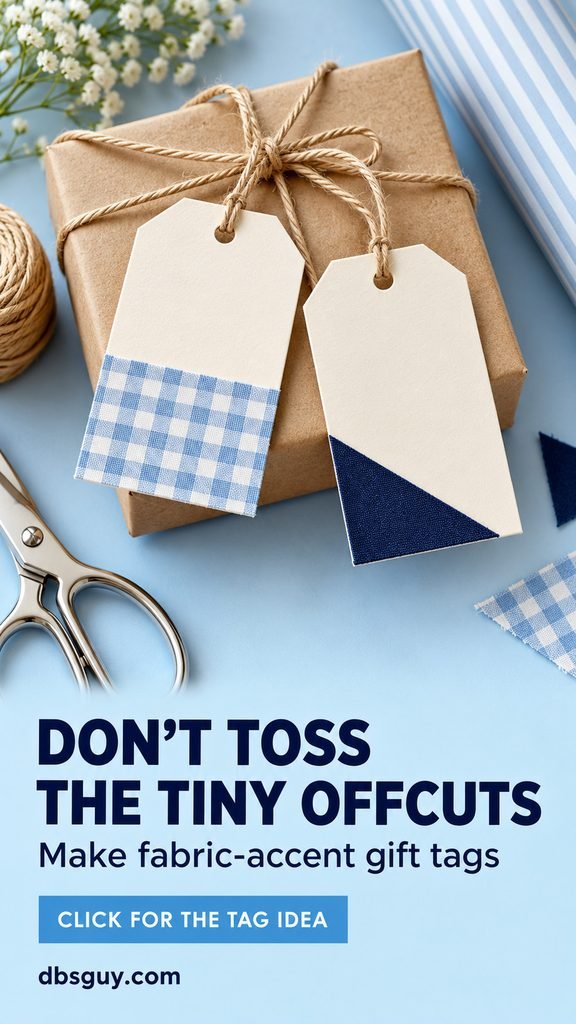
For each tag: Cut a cardstock rectangle about 2½ by 4 inches, clip the top corners, and punch a hole near the top. Add a fabric piece around 1½ by 2 inches, a suitable adhesive, and a short length of twine.
- Choose whether the patch will sit at the bottom or along one side. Leave the upper half or the back bare for the recipient’s name.
- Cut the fabric into a rectangle, a small triangle tree, or a simple stocking silhouette. Pinking shears can make a decorative edge, although they will not stop all fraying.
- Glue the patch down in a thin layer, keeping adhesive away from the writing area.
- Let it dry flat, write the name on cardstock, and attach the tag with twine.
Try pale blue cotton and a dark navy patch for a quieter winter palette. If your marker bleeds on the fabric, write only on the card. Keep the hole free of fabric and glue so threading the hanger stays easy.
6. Tie a scrap garland for a shelf or doorway
This garland is the best home for strips too long for tags but too narrow for wrapping a gift. Its soft fringe gives a plain shelf a festive edge, and you can untie the scraps later if you want to reuse them.
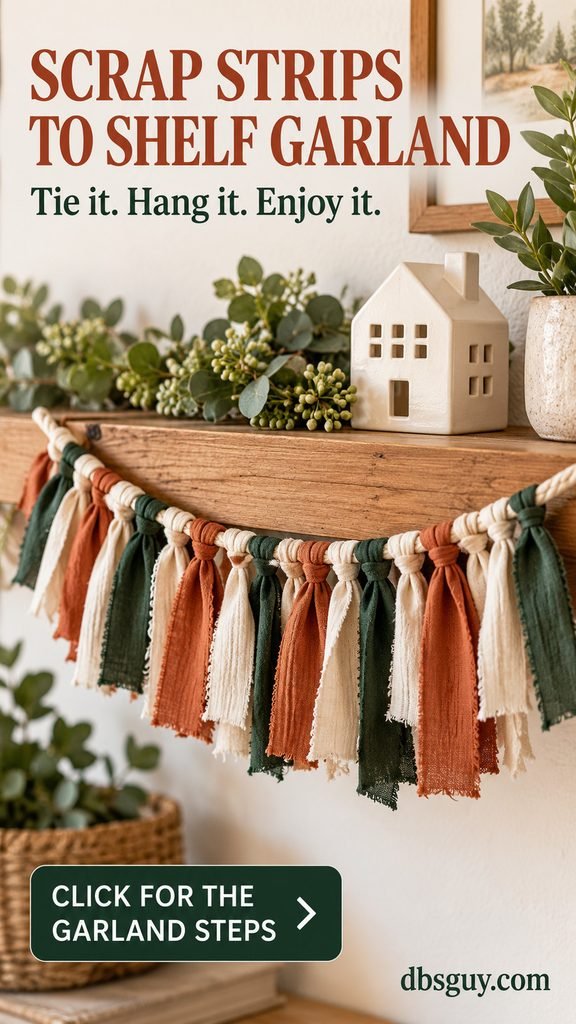
Suggested starting point: Cut about 40 strips, each roughly 1 inch wide by 8 inches long. Use a length of sturdy cotton cord suited to your display, plus about 6 inches at each end for hanging loops. Decide whether you want a dense fringe or small gaps between ties before cutting more fabric.
- Tie loops at the cord ends and stretch it across your work surface without pulling it taut.
- Fold a fabric strip in half. Place its loop behind the cord, pass the two ends through the loop, and pull snugly.
- Repeat along the cord, mixing terracotta, cream, and dark green for a warm, less traditional combination.
- Hang the garland from suitable hooks, then slide the knots into position and trim any tails that look distracting.
Keep the center of the cord from sagging too far by using a shorter span or a middle support. Place this decoration on a shelf away from heat rather than close to a working fireplace. If the room already has busy patterns, use mostly solid scraps and only occasional prints.
7. Wrap a cardboard cone into a tabletop tree
A tabletop tree uses strips in a completely different way: they wrap around a solid form instead of becoming branches. Linen, herringbone, or flannel creates texture without needing beads or glitter.
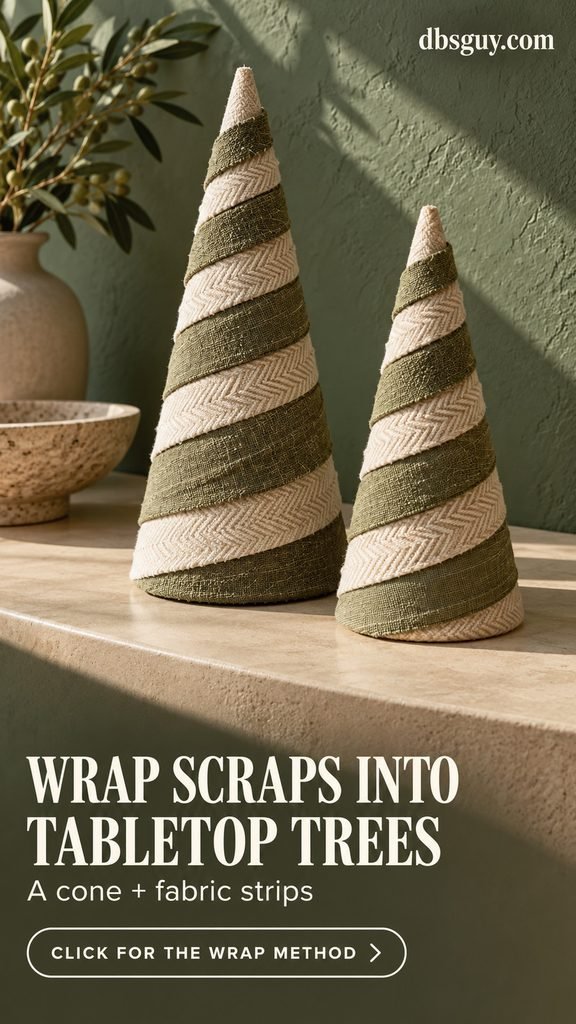
Gather: A ready-made cardboard or paper-mâché cone about 8 inches tall, strips approximately ¾–1 inch wide, and an adhesive labeled for fabric and the cone material. The required strip length varies with the cone; dry-wrap the lower section first to judge how much you need.
- Check that the cone sits level. Trim loose threads from the fabric, leaving a little soft fringe if you like the look.
- Glue the end of the first strip to the back of the cone near the base.
- Spiral upward, slightly overlapping each turn so the cardboard stays hidden. Use thin adhesive lines and tuck new strip ends under the previous wrap.
- At the tip, fold the last small end inward and secure it. Let the tree dry on a flat surface.
A pair of cones wrapped in alternating cream and muted green strips can share a shelf while showing different fabrics. Do not pull the strip so tightly that a lightweight cone distorts. Thick cloth makes a bulky tip; finish that last inch with a narrower strip.
8. Make tiny fabric-wrapped gift-box ornaments
Miniature presents add color to a tree without using much fabric. The easiest base is a small, empty cardstock box, so the ornament stays light enough for a branch.

For one box: Use a cube about 1½ inches across, a fabric square approximately 6 inches across, narrow ribbon, and an adhesive compatible with fabric and card. A cotton scrap from an old plaid shirt works especially well.
- Wrap the box loosely with the fabric before adding glue. Trim the square if the folds build up at the ends.
- Fix the overlapping fabric edges on the underside. Fold the ends like wrapping paper, keeping the folds flat.
- Run ribbon around the box in two directions and tie a small bow on top.
- Thread a separate ribbon loop under both crossed ribbon bands and tie it securely. This loop carries the ornament’s weight.
Keep the box empty; this is a decoration rather than a package for a heavy gift. Place the fabric joins underneath and turn the crispest side toward the room. A glossy teal ribbon gives an ordinary red plaid scrap a fresh finish.
9. Build a fabric-covered chain garland
Soft fabric alone can collapse into a floppy loop. Backing each strip with lightweight card gives this chain the clear oval links you would expect from a paper chain, with fabric texture on the outside.
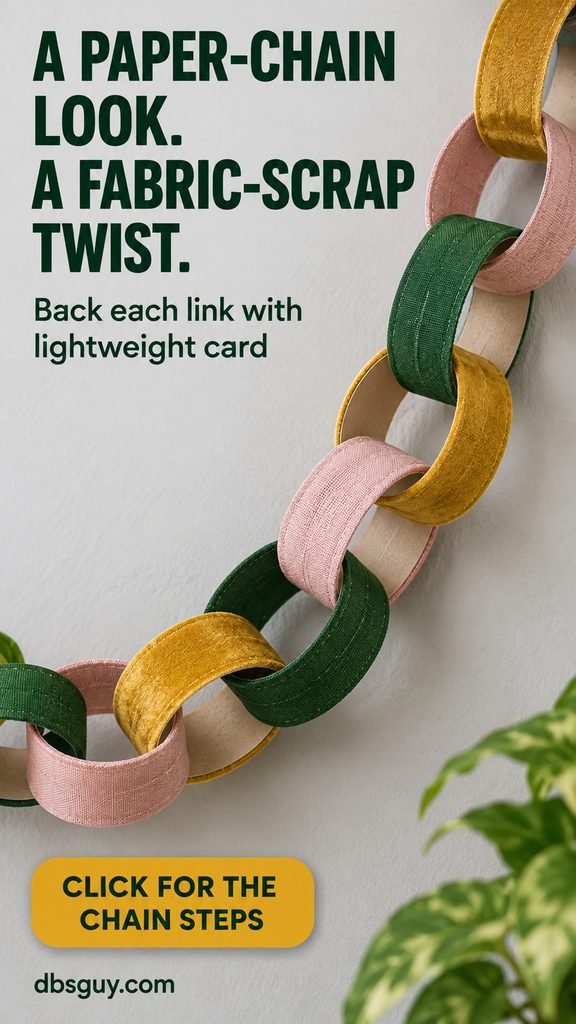
For a short chain: Cut 12 lightweight cardstock strips about 1 by 7 inches. Cut 12 fabric strips about 1½ by 8 inches. Use suitable craft adhesive and small clips. Choose flexible card that bends smoothly rather than thick packaging board.
- Glue each card strip onto the wrong side of a fabric strip. Fold the long fabric edges around to the back and trim excess at the short ends.
- Allow the backed strips to dry while flat.
- Curve one strip into a loop, overlap the ends by about ½ inch, and glue the overlap. Clip it until the bond sets.
- Pass the next strip through the first link before closing it. Continue until you have the length you want.
Alternating mustard velvet-look fabric, muted pink cotton, and dark green keeps the chain playful. If a link is difficult to curve, use thinner card. Hang the garland with a gentle drape and keep it dry; the fabric cover does not make the cardboard weatherproof.
10. Add fabric holly leaves to napkin ties
This idea brings scraps to the Christmas table without making a whole set of sewn napkins. A pair of fabric-covered holly leaves on a ribbon tie gives each place setting a small festive detail.

For each setting: Gather two card or stiff felt leaf shapes about 2 inches long, green cotton offcuts, a small red felt piece, a ribbon about 16 inches long, and suitable adhesive. Draw a simple holly leaf with a few broad points; tiny spikes are harder to cut neatly.
- Glue green fabric to the front of the leaf bases. Let it dry, then trim around the outlines.
- Cut three small circles from red felt for the berries.
- Overlap the leaves slightly and glue them together. Add the felt circles over the join.
- Attach the leaf cluster to the center of the ribbon and tie the ribbon loosely around a folded napkin.
Keep the decoration removable, and take it off before using or washing the napkin. Felt berries give the color contrast without loose beads. Use the same green fabric at every setting, then change the ribbon if you want to mix cream and red napkins.
11. Wrap wooden spools into keepsake ornaments
An empty wooden thread spool makes a small ornament with a visible nod to the fabric’s old life. It is a useful choice for short strips with a favorite print you do not want to cut into smaller patches.
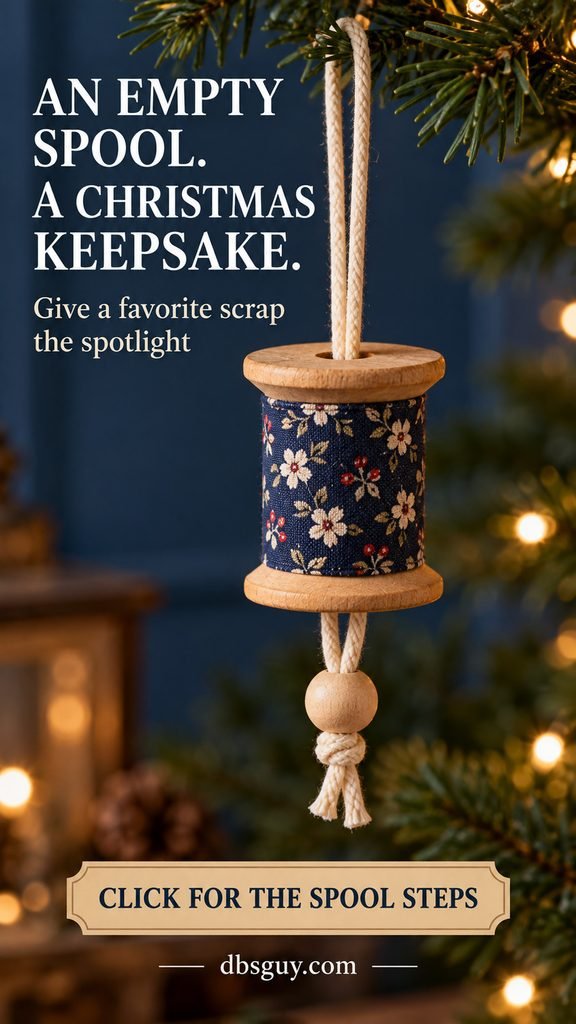
For one ornament: Use an empty wooden craft spool about 1½–2 inches tall, one fabric strip sized to fit between its flanges and go around its middle with a small overlap, thin cord, and a large-hole bead wider than the spool’s center hole.
- Measure the spool’s middle rather than guessing. Cut the fabric just narrower than that space so the wooden edges remain visible.
- Wrap and glue the strip around the middle, putting the overlap at the back.
- Fold a length of cord in half and pass its two free ends down through the spool.
- Thread both ends through the bead underneath and tie a knot large enough to hold it. The bead acts as a stopper while the loop above becomes the hanger.
Check the stopper by gently pulling the hanger before placing it on the tree. Do not rely on a glued-on cap to carry the weight. A navy floral print or a small red check is easier to recognize on the narrow spool than a large pattern.
12. Create no-sew Christmas hoop art
An embroidery hoop can frame fabric without a single stitch. Use it to display a simple tree cutout against a larger background scrap, then let the hoop itself provide the finished edge.
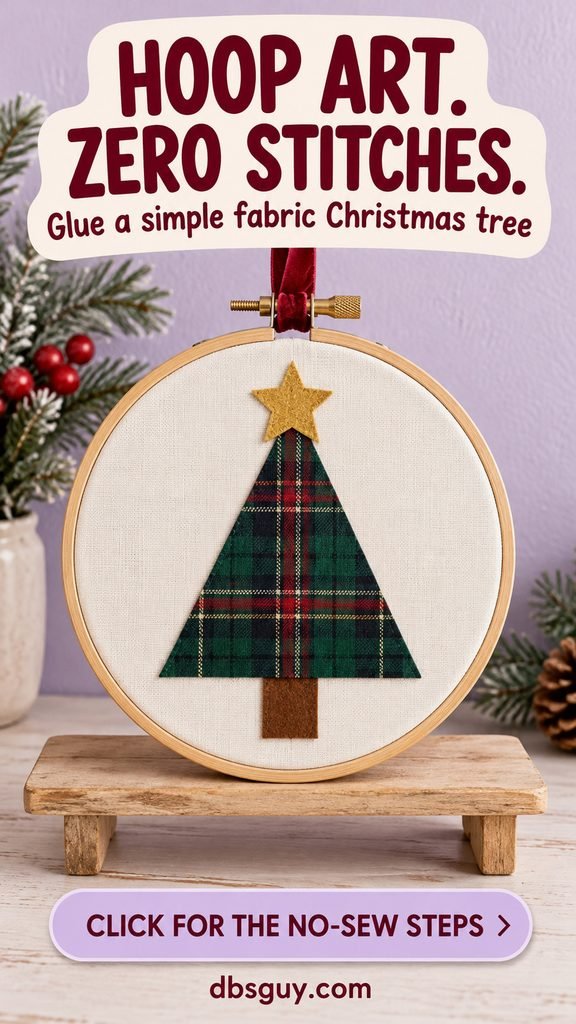
Suggested materials: A 6-inch embroidery hoop, an 8-inch square of background fabric, a contrasting fabric piece about 3 by 4 inches, a little felt for a star and trunk, compatible fabric glue, and ribbon.
- Separate the hoop rings and place the background fabric over the inner ring. Add the outer ring, center the fabric, and tighten the screw.
- Cut a simple triangle tree from the contrasting scrap. Arrange it with a felt trunk and small star before gluing anything.
- Apply a thin layer of fabric glue to the cutouts and press them onto the background. Place a removable protective sheet behind the fabric while you work so glue cannot stick it to your table.
- After the adhesive has cured, trim the excess background fabric to about ¾ inch beyond the hoop. Glue that allowance neatly to the back of the inner ring and add a ribbon hanger.
Choose a plain background if the tree fabric has a busy pattern. The example’s dark plaid tree, ivory ground, and gold felt star stay readable across a room. Do not trim the background flush at the start; you need the extra fabric to grip and finish the hoop.
13. Tie larger scraps into small Christmas gift bundles
Keep your largest squares for this last idea. Gathering fabric around a small item creates a gift bundle without a stitched bag, glued seam, or permanent closure. After opening it, the recipient can reuse the cloth.

Start with: A fabric square about 10 inches across, ribbon or twine, and a small boxed item or commercially wrapped treats. Dry-fit first: larger gifts need larger squares, and the corners must extend far enough to gather comfortably.
- Lay the fabric right side down and place the gift in the middle.
- Bring two opposite corners upward, then bring up the other two. Gather the remaining fabric without stretching it.
- Tie ribbon around the gathered neck with a secure knot, then add a bow.
- Spread the top corners into a loose fan and add a name tag if needed.
Keep food in its original wrapper or a suitable food-safe container; reused fabric should be an outer wrap. Carry the bundle from underneath rather than by the ribbon. For a group of neighbor gifts, a mix of cream, red, and green cloth feels related without needing identical squares.
A few questions before you cut the next batch
Which projects can I make without glue?
The knotted tree, mini rag wreath, tied scrap garland, and tie-top gift bundles can all use only knots. Choose cotton with enough grip, check each knot, and leave off glued embellishments. The other projects depend on an adhesive or a bonded backing.
Can I use old clothes instead of quilting fabric?
Yes. Clean cotton shirts, flannel pajamas, and linen garments can supply useful pieces. Avoid fabric that is brittle, shedding heavily, or still stained after cleaning. Cut around thick seams and buttons so the scrap lies flat. Keep stretchy knits for projects that can tolerate curling rather than flat patchwork.
How do I keep cut edges from looking messy?
Decide whether the fringe belongs in the design. It suits rag wreaths and knotted trees, but a clean tag or holly leaf benefits from careful trimming after the glue dries. Felt avoids woven fraying. Pinking shears change the edge shape; they do not guarantee a permanently fray-free edge.
Can these decorations go outdoors or in the washing machine?
The projects here are designed for indoor use. Cardboard, paper-mâché, and mixed glued embellishments need to stay dry, even when the original fabric was washable. Untied, unglued cloth can be cleaned according to its care label. For a glued fabric-only item, check the adhesive instructions and test the bond before washing.
What is the easiest way to make mismatched scraps look coordinated?
Choose two main colors and one neutral, then repeat them. A large floral, a small check, and a solid can work together when they share a color. Leave a little plain fabric between busy prints so the shape of the craft remains the first thing you see.
Start with one project that fits your pile, rather than buying fabric to recreate every picture. A handful of strips might become a tree today; the small offcuts from that tree can become gift-tag accents tomorrow. That is the useful part of giving scraps a festive second life.