12 DIY Christmas Ornament Makeovers That Give Old Decorations a Vintage Look

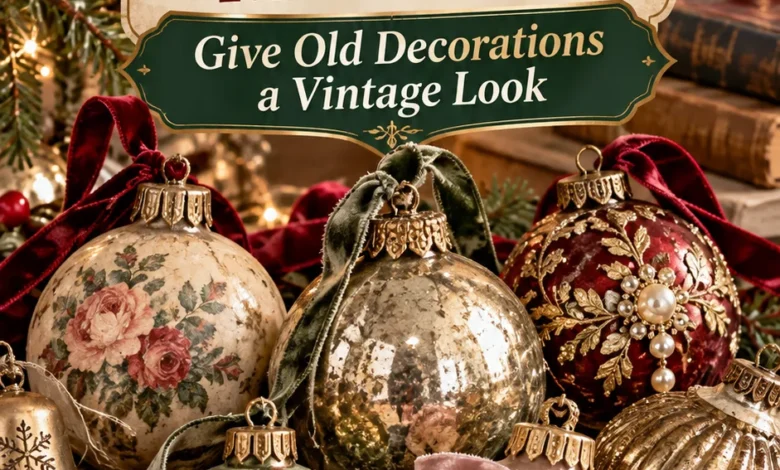
The ornaments you skip every December may be the best starting point for a vintage-style tree. A faded plastic ball can take on the softness of burgundy velvet. A plain flat decoration can become a blue-and-white medallion. Even a molded pinecone can look completely different with an ivory finish and a little sparkle.
These 12 DIY Christmas ornament makeovers focus on changing decorations you already own. Each idea explains which ornament to use, the supplies that create the look, and the detail that makes the finished piece feel thoughtfully aged. You do not need to make all twelve: choose two or three that suit your tree and repeat them across a small batch.
For the simplest start: try the gathered velvet wrap if you want to hide a tired finish, the ribbon lattice if you like the ornament’s existing color, or the hand-painted folk-art design if you enjoy working with a small brush.
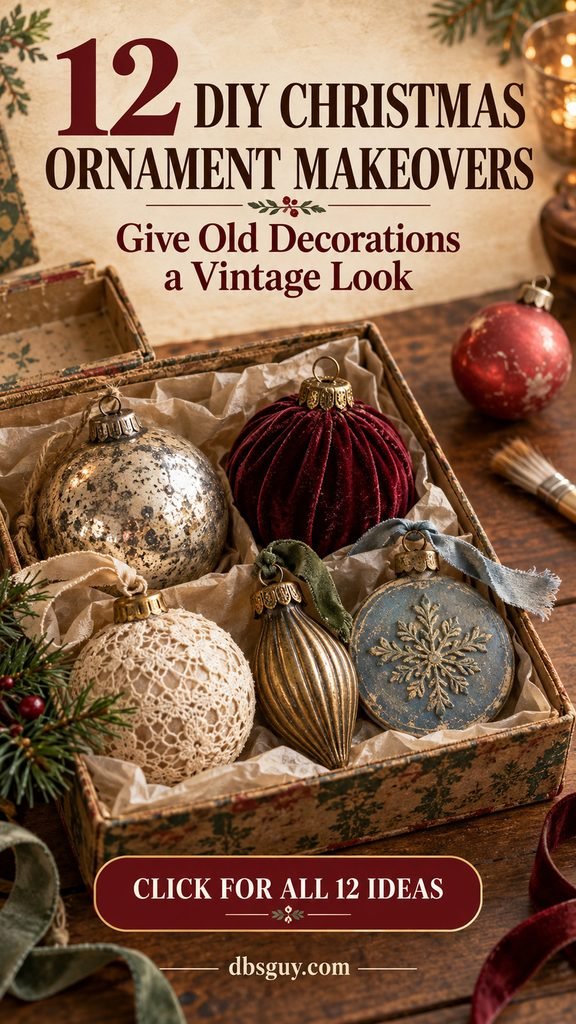
The images are AI-generated design concepts to help you visualize the makeovers; they do not document hands-on testing. Adjust the details to your ornament’s shape and follow the labels on your paint and adhesive.
Before You Give an Old Ornament a Makeover
Start with sturdy, ordinary decorations you are happy to alter. Keep valuable collectibles, thin antique glass, and irreplaceable family ornaments out of the craft pile. Their original finishes and small imperfections may be part of their appeal.
Check each hanger, cap, and body. A loose cap needs a secure replacement suited to that ornament before you hang it. Set aside cracked glass and brittle plastic rather than hiding damage under fabric or paint. Paint and decorative trim do not repair structural weakness.
- Clean gently. For modern, noncollectible ornaments, wipe away dust with a soft cloth. If the finish tolerates it, use a barely damp cloth with mild soap, then wipe clean and let the ornament dry. Do not soak decorations or force off fixed caps.
- Match the product to the surface. A paint that works on unfinished wood may peel from smooth plastic. Choose a craft paint or primer whose label lists your surface, and test one ornament first. DecoArt’s multi-surface paint directions, for example, specify a clean surface and a seven-day air cure. Your product may differ.
- Keep the hanging hardware clear. Mask or avoid the cap opening and hanging loop. Work on the ornament’s body, then add decorative ribbon around the neck without replacing its actual support.
- Plan drying space. Hang pieces separately from their secure loops over a protected work surface. Keep wet paint, glue, and fresh trim from touching another ornament.
Gather only the supplies for your chosen designs: surface-compatible paint, a soft brush, a detail brush, decoupage medium, scissors, fabric or ribbon, and a suitable craft adhesive. Use ventilation required by the labels, and keep small beads and loose glitter away from children and pets. The methods below use brush-on finishes and air drying; do not bake plastic ornaments or unknown vintage pieces.
1. Give a Plain Bauble a Speckled Antique-Silver Finish
For an aged-glass effect, aim for irregular shimmer rather than a perfectly reflective surface. Small charcoal flecks interrupting a silver finish make a plain sphere look more interesting beside evergreen branches.
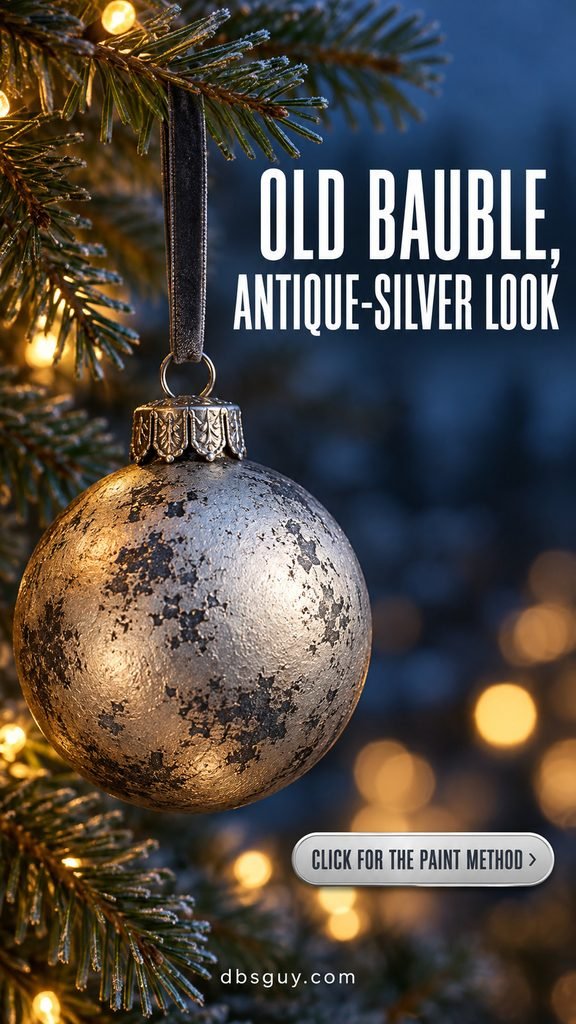
Start with: a sound, smooth plastic or modern glass ball. Gather: compatible charcoal and metallic silver paints, a small piece of craft sponge, and a soft brush.
- Prepare the surface according to the paint label and apply a thin charcoal base coat. Let it dry as directed.
- Load the sponge lightly with silver, dab the excess onto scrap paper, then stipple the ornament. Leave scattered, uneven dark spots showing.
- Add a second light layer where you want more shimmer. Finish with a few tiny charcoal dabs if the surface has become too uniform.
- Allow the finish to dry and cure as directed before replacing removable hardware or adding a narrow ribbon.
This is a painted faux mercury-glass look, not a mirror coating or an antique restoration. Ordinary metallic craft paint gives a softer sheen. Avoid scraping the surface to imitate wear: create the marks with paint, especially on glass.
2. Cover a Faded Ball With Reproduced Sheet Music
Cream paper and black musical notes create a quieter ornament than a bright printed holiday design. Use a photocopy or a craft print so an original family songbook stays intact.
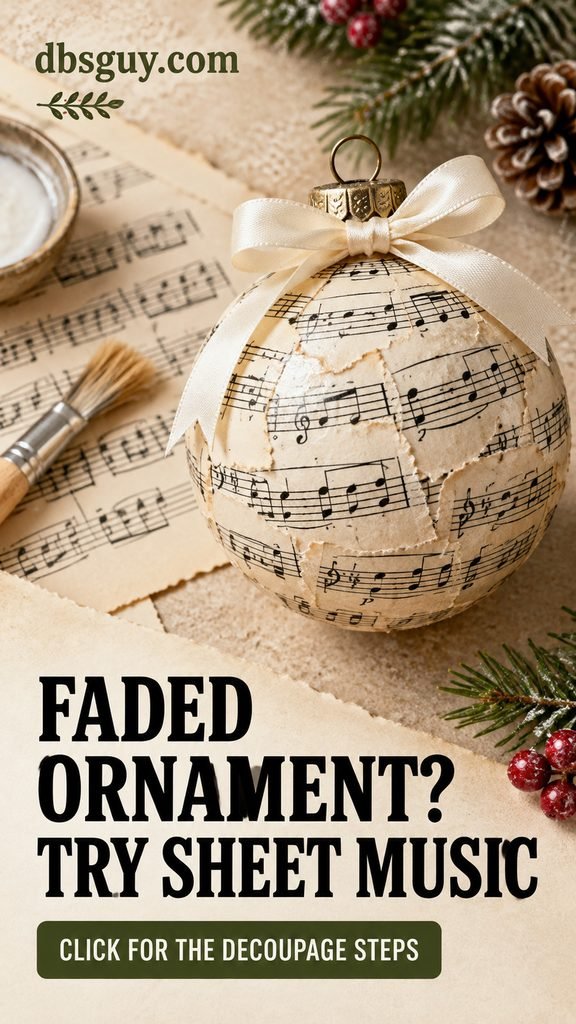
Best base: a smooth, sturdy ball about 2½ to 3 inches across. You will need thin printed paper, matte decoupage medium suited to your surface, a soft brush, and narrow ribbon.
Tear the paper into small pieces roughly ½ to 1 inch wide. Smaller pieces follow a curve with fewer folds than a large rectangle. Brush a thin layer of medium onto one area, lay down a piece, and gently smooth it from the center outward. Continue with modest overlaps, keeping some lines of music visible instead of turning the surface into a dark patchwork.
Let the paper layer dry according to the product directions before applying a thin protective coat. If your printer ink runs during a test on scrap paper, switch to a stable craft print or laser copy. Do not keep brushing a wet piece until it tears.
A cream bow finishes the look. The paper provides all the pattern this ornament needs; extra lettering or large embellishments would compete with it.
3. Wrap a Worn Ornament in Burgundy Velvet
This makeover is useful when the old color no longer fits your tree. Actual velvet covers the surface and adds folds that catch the light, so you do not have to recreate a flawless painted finish.
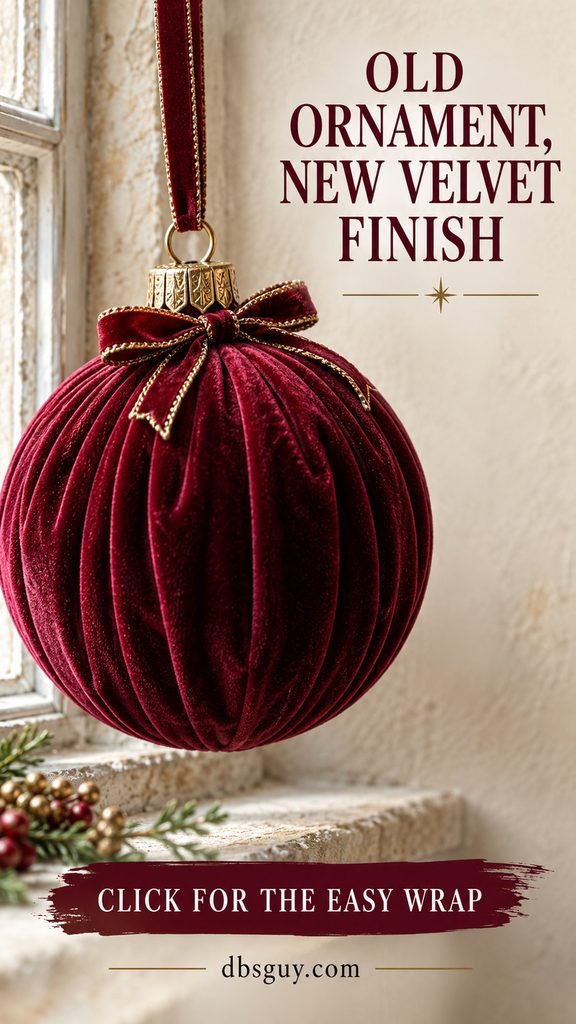
Choose a sturdy plastic ball, lightweight velvet with a little give, narrow gold-colored trim, and a fabric adhesive compatible with the materials if you need it. For a ball around 3 inches across, begin with a generous 12-inch fabric square; test the fit before trimming.
Set the ornament in the center of the fabric and gather the corners evenly around its neck. Adjust the folds so they travel from bottom to top rather than bunching across the front. Tie a temporary thread around the gathered fabric, keeping the original hanging loop accessible. Trim the excess gradually, then hide the gathering with the narrow trim and a small bow.
If the wrap slips, secure a few folds with tiny dots of the suitable adhesive and let it set fully. Thick upholstery velvet can make the neck bulky; a softer, thinner fabric is easier to shape. Hang from the ornament’s original secure loop, not from the decorative tie.
4. Turn a Molded Ornament Into an Antique-Brass Accent
Ribbed drops, molded bells, and ornaments with raised scrolls are good candidates for this finish. Their existing texture gives the darker shading somewhere to settle.
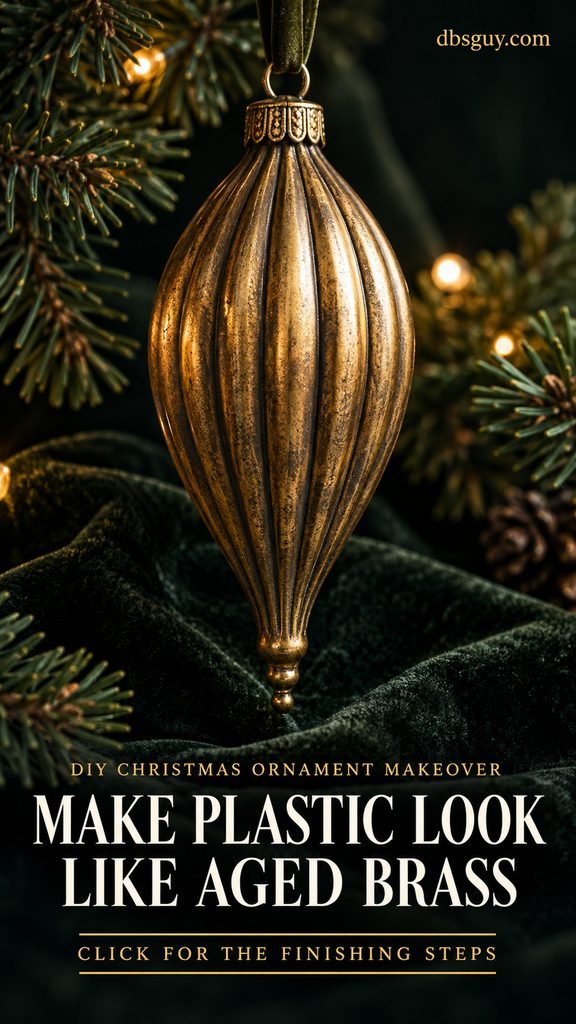
Use a sturdy molded plastic ornament, compatible muted-gold or brass-colored acrylic paint, dark brown acrylic paint, and two small brushes. Apply the metallic base in thin coats and let it dry as directed.
Test a lightly diluted brown wash on a hidden area. Brush it into a small section of the grooves, then lift the excess from raised surfaces with a barely damp soft cloth before it dries. Work in sections so you can control the shading. Once dry, skim a nearly dry brush of metallic paint over the raised details.
The goal is depth around the ribs and edges, with lighter highlights on the high points. If every surface turns brown, the ornament looks muddy. Keep most of the brass color visible and finish with a simple dark ribbon. This is a decorative painted effect; it does not turn plastic into metal.
5. Add Ivory Lace Over a Warm Neutral Base
Lace looks most deliberate when its pattern remains visible. A warm almond or taupe base beneath ivory lace creates enough contrast to show the tiny flowers and scallops.
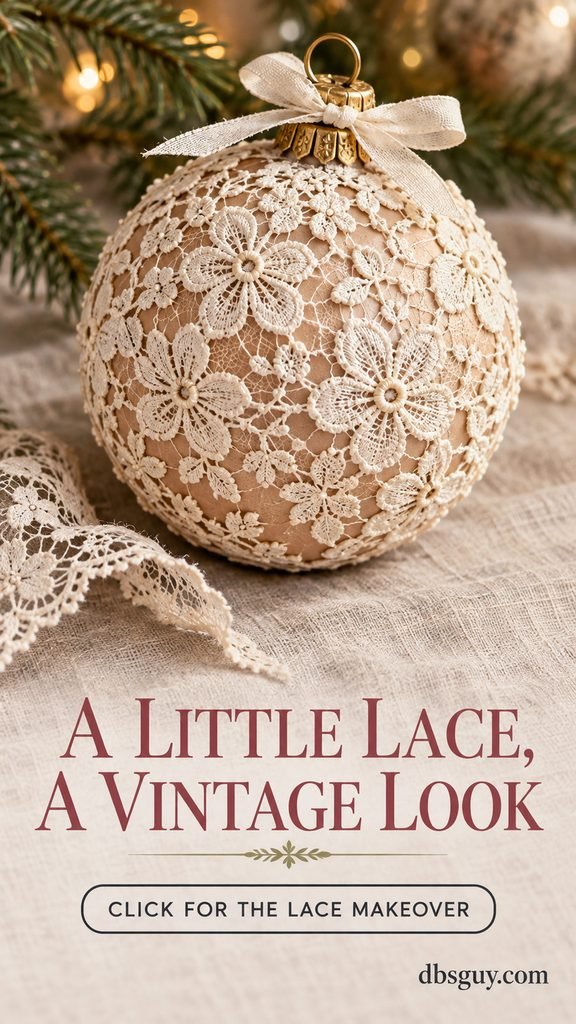
Choose a sturdy ball, soft lace scraps, scissors, and a clear-drying adhesive labeled for your ornament and fabric. Paint the base first if needed, then let it cure before covering it.
Cut small lace motifs or narrow panels rather than forcing a stiff doily around the entire sphere. Dry-fit the pieces with slight overlaps, arranging the prettiest motifs across the front. Apply small amounts of adhesive at the edges and denser parts of the lace. Press gently into place and allow it to set without handling.
Keep glue out of the open mesh where possible. Saturating the lace can flatten its texture or leave shiny patches. Finish with a small ivory ribbon tied around the neck, keeping the hanger clear.
This is a soft cottage-style option for a tree with cream ribbon and natural greenery. Use expendable lace scraps rather than cutting a treasured heirloom textile.
6. Dress Up a Teardrop With Pearl Swags
A long ornament has room for draped details that a small sphere does not. Lightweight faux pearls can turn a plain teardrop into an heirloom-inspired accent without covering its whole surface.
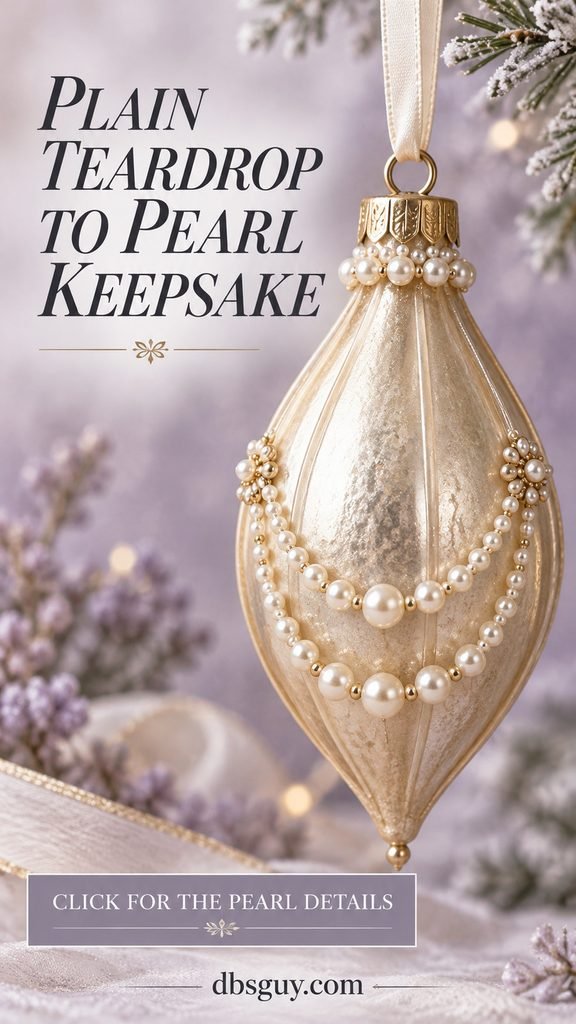
Use: a sturdy plastic teardrop or elongated bauble, pre-strung lightweight faux-pearl trim, a suitable clear-drying adhesive, and a narrow ribbon. A champagne or muted blush base keeps the pearls distinct. Graduated plastic pearls can create the fuller swags shown in the concept image without the weight of solid glass beads.
Lay a short piece of trim on the ornament before cutting. Shape it into a shallow U across the front, then repeat around the sides if you want a fuller design. Fix the ends with small adhesive dots at the upper shoulder and secure the lowest point of each swag where it touches the body. Let those points set before adding another row.
A pearl collar near the cap can conceal the trim ends. Keep the decorations lightweight and check that the original cap still holds securely. A heavy brooch or a strand of heavy beads is too much for a delicate shell.
For this design, a little open space matters: a few neat swags let the ornament’s shape remain the main feature.
7. Make a Flat Ornament Look Like Blue-and-White Porcelain
You can borrow the color and pattern of a decorative china plate without hanging actual ceramic on the tree. A flat ornament makes a small floral print easier to apply neatly.
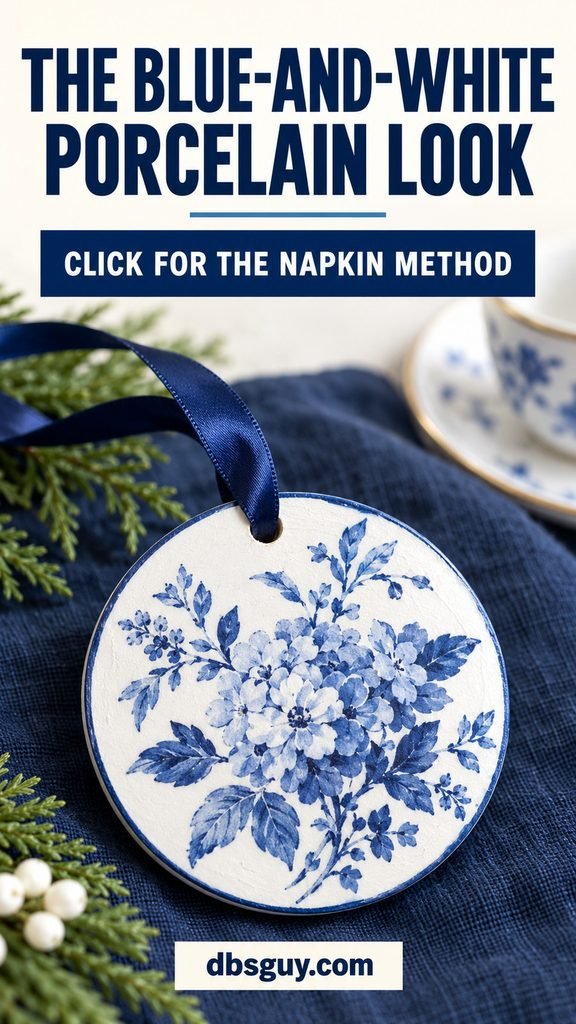
Start with an old flat wooden or plastic disk, white paint compatible with its surface, a blue-and-white floral paper napkin or decoupage paper, and suitable decoupage medium. Paint the disk white and let the finish dry and cure according to its directions.
If using a multi-ply napkin, separate it so you use only the printed top layer. Tear around a small floral motif. Brush a thin layer of medium onto the disk, lay the motif in place, and gently smooth it with a soft brush. Work lightly: napkin tissue tears easily when wet.
After it dries, add the protective coat specified by your medium and a narrow blue painted edge if you like. Avoid piling tissue over the rim or hanging hole. Keep the back simple, or repeat one small motif there.
The result is a porcelain-inspired decoration, not ceramic or a food-safe surface. A slim navy ribbon completes the blue-and-white palette.
8. Paint a Muted Folk-Art Star on an Old Ball
A hand-painted pattern can feel vintage without artificial distressing. An eight-point star, small dots, and a restrained palette give a plain bauble a handmade character.
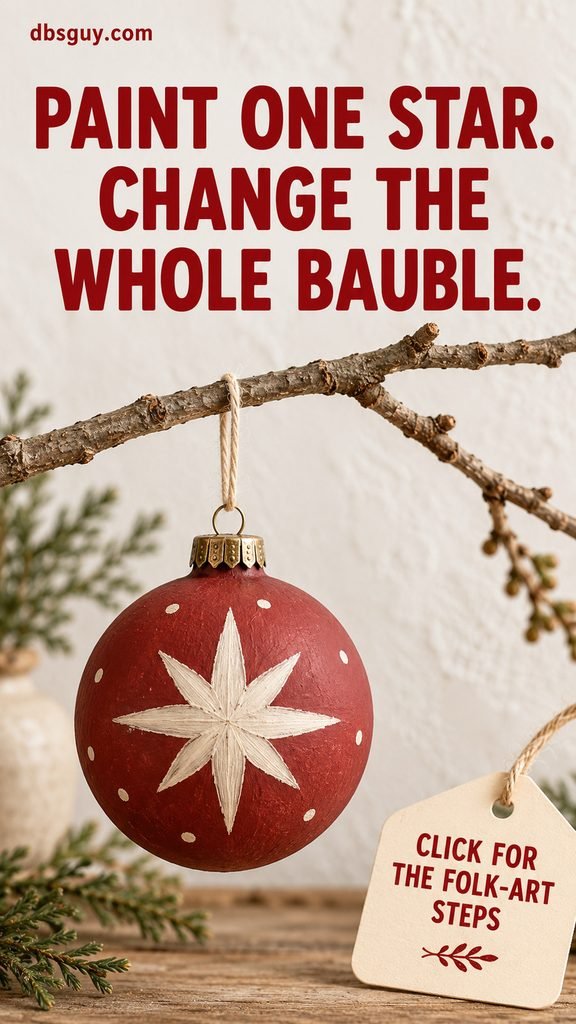
Choose a sturdy smooth ball, compatible muted-red paint, warm cream paint, a detail brush, and a pencil suitable for lightly marking the cured base.
Paint the ornament in muted red. Once the base is ready for another layer, lightly mark a small cross, then a diagonal cross through the same center. Use those eight spokes to guide a simple star. Add a few evenly spaced cream dots around it with the tip of the brush.
You can repeat the star on the reverse so the ornament looks finished from both sides. Practice the motif on paper first, and keep the design small enough that the curve does not make it awkward to paint.
If you make a mistake, let it dry and cover that spot with the base color before trying again. Do not rub aggressively at the old finish. The lines can be slightly imperfect; the limited colors and balanced spacing do more for the look than mechanical precision.
9. Cover an Old Flat Star With Embossed-Look Foil
A flat star that has lost its glitter can become a tin-style ornament. Household aluminum foil provides the metallic surface, while fine cord underneath creates shallow raised lines.
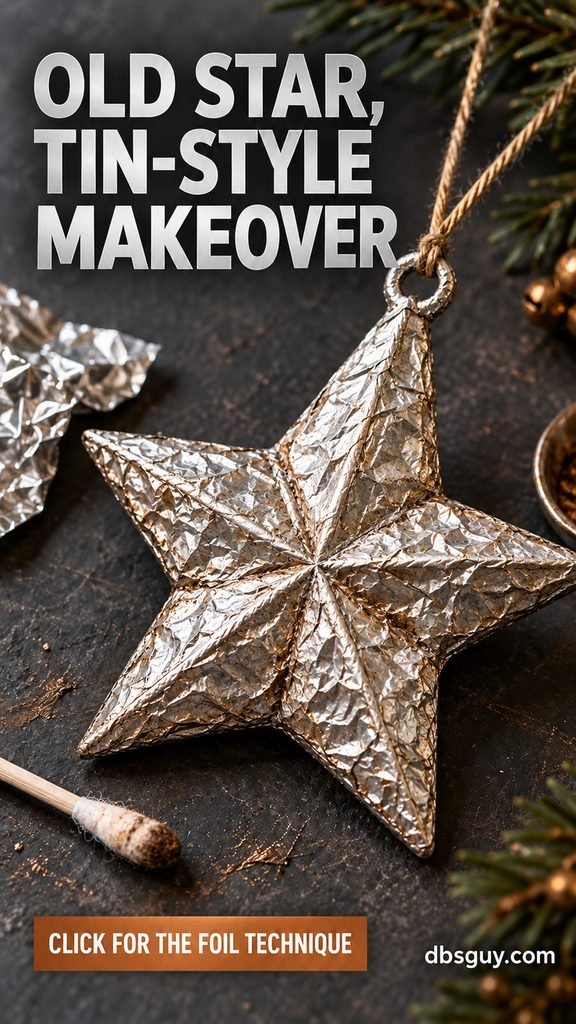
Use a sound flat star ornament, aluminum foil, thin cotton cord, scissors, a blunt cotton swab, and adhesives compatible with the base and foil. Add a little dark brown paint suitable for the foil if you want shaded details.
- Arrange short pieces of cord in a simple starburst on the face. Glue them down and let the adhesive set.
- Cut foil slightly larger than the ornament. Apply a thin, even layer of the suitable adhesive, then lay the foil over the front with the dull side facing out.
- Press gently around the cord with the blunt swab. Fold the excess to the back, trimming carefully at the points without cutting into the ornament.
- After the adhesive sets, test small brown paint accents in the recessed areas. Leave the raised lines brighter.
Keep the hanging hole or loop unobstructed and fold exposed foil edges inward. Avoid sharp engraving tools: they can puncture the foil and leave ragged edges. The finished piece is foil-covered, not solid tin, so handle it gently when packing.
10. Turn a Flat Decoration Into a Silhouette Medallion
A cream disk, dark silhouette, and narrow gold rim create a keepsake-style ornament with very little visual clutter. This also works well when an old printed design no longer suits your tree.
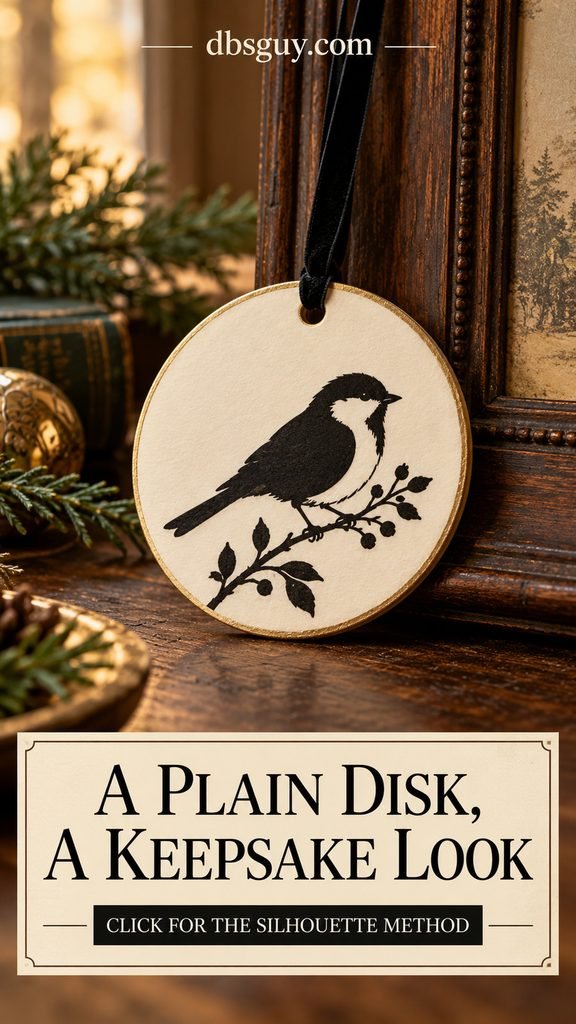
Pick a flat disk you are happy to repaint. Gather compatible cream and gold paints, thin black paper, small scissors, decoupage medium suited to the surface, and black ribbon.
Paint the face cream and let the base finish become ready for decorating. Cut a simple bird silhouette from paper, keeping the shape broad enough to handle. A solid bird is the easiest version; the illustrated concept adds a cream chest opening and a small branch for more detail. Center the motif on the disk with space around the edges. Attach it with a thin layer of medium, smooth gently, and apply the protective coat after it dries.
Paint a narrow gold rim with a small brush. A flat ornament around 3 inches across can usually hold a silhouette about 1½ inches wide, but use a paper mock-up to check the proportions.
A family profile can replace the bird if you have a clear side-view photo to trace. Use a copy of the photo, keep the back plain or add a small date, and let the bold shape carry the design.
11. Add a Ribbon Lattice to a Plain Sage Bauble
This is a useful choice when the ornament’s color still works but its surface feels too plain. Narrow ribbon adds a tailored pattern, while tiny faux pearls mark the intersections.
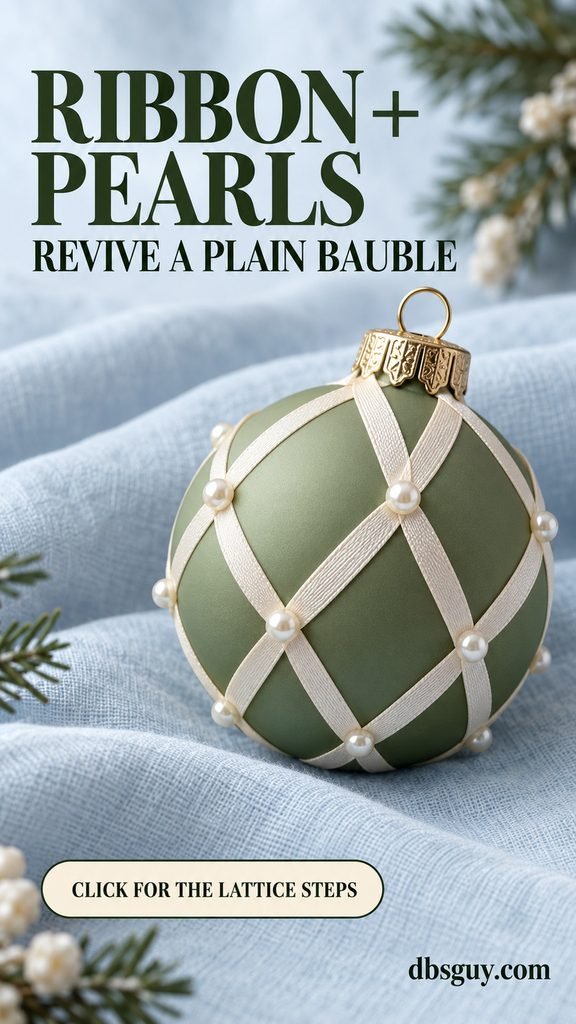
Choose a sturdy ball with a sound finish, narrow ivory ribbon about ⅛ to ¼ inch wide, a few lightweight flat-back faux pearls, and an adhesive compatible with the ribbon and base. Paint the ball muted sage first only if you want to change its color.
Lay two ribbon lengths diagonally across the front, crossing them to form an X. Continue around the sphere with additional lengths, adjusting the spacing before attaching anything. A curved ball makes a perfectly even lattice difficult, so begin with a few generous diamonds rather than many tiny ones.
Secure the ribbon with small adhesive dots at the crossings and hide the ends near the neck or on the back. Add a tiny pearl at selected front intersections. Keep the original hanger accessible and let the glue set before lifting the ornament.
Do not stretch the ribbon so tightly that it slips or compresses a thin shell. Ivory on sage keeps the pattern gentle; too many beads can make the design busy and heavy.
12. Give a Molded Pinecone a Sugared Ivory Finish
Save this idea for an old pinecone-shaped decoration with raised scales. An ivory base and restrained fine sparkle give the shape a snowy, confection-like appearance.
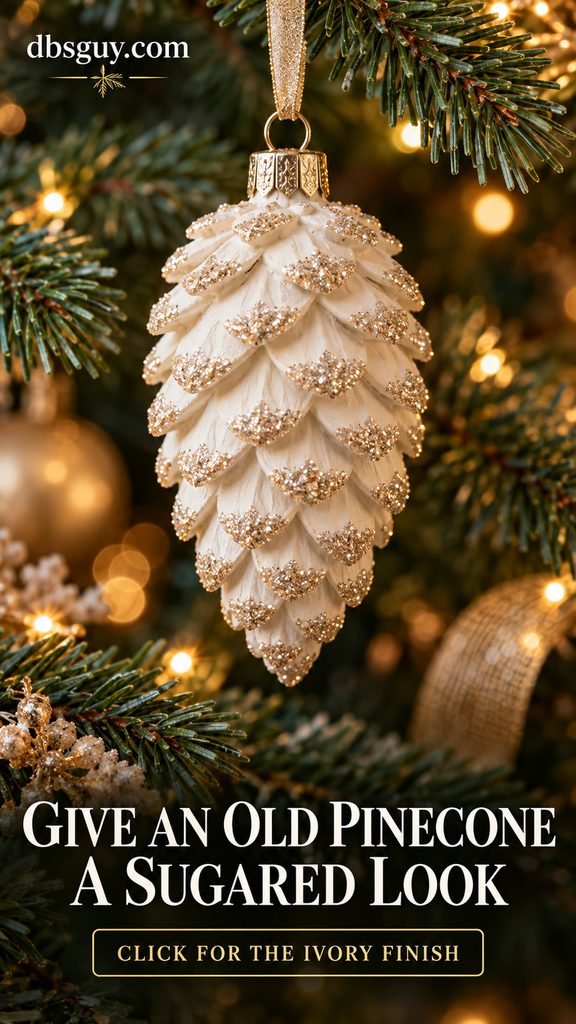
Gather a sound molded ornament, compatible warm-ivory paint, a soft brush, a small detail brush, clear-drying craft adhesive, and fine craft glitter. Use craft glitter rather than real sugar or loose glass glitter.
Paint thin coats so the scale details stay visible. After the finish is ready for decoration, brush small amounts of adhesive onto selected outer tips. Sprinkle glitter over a tray, tap off the excess gently, and let the adhesive set. Add a champagne ribbon once the ornament is dry.
Leave the recesses comparatively quiet. Coating every groove with thick glue and glitter can blur the pinecone shape. If you prefer less sparkle, dry-brush the tips with pearl-colored paint instead of glitter.
This makeover suits cream-and-gold trees, especially beside the lace and pearl designs. Keep it indoors and pack it separately so the textured finish does not rub against another ornament.
How to Make a Mixed Set Feel Collected
Choose a small palette before you start. Burgundy, antique silver, and cream work well for a warm traditional tree. Sage, ivory, and champagne create a softer set. Blue-and-white medallions can sit beside silver ornaments without needing every decoration to share the same pattern.
Repeat one connection across your chosen makeovers: a similar ribbon color, the same warm metallic accent, or a recurring cream tone. Let the textures differ. Velvet, paper, lace, and painted metal effects feel more collected when they share a few colors rather than matching in every detail.
Make one sample of each finish first. Look at it against your actual greenery in the lighting you use at home, then decide whether to repeat it. This is also the time to check that the paint adheres, the trim stays put, and the cap carries the finished ornament securely.
Drying, Handling, and Storage
Dry to the touch does not mean fully cured. Plaid’s Mod Podge guidance gives approximately 28 days for full curing and notes that temperature, humidity, and layer thickness affect the timing. That does not mean every paint or adhesive needs the same wait; follow each product’s own instructions.
For a Christmas craft session, leave enough time for the finish to set before hanging and especially before tight packing. A piece may feel dry while still being vulnerable to impressions from ribbon, tissue, or another ornament. Keep unfinished pieces separated and avoid water or heavy handling during the recommended cure period.
Once fully ready for storage, place ornaments in individual compartments with soft, uncolored tissue as needed. Do not compress velvet folds or pearl swags. Store the box indoors in a dry location away from temperature extremes, and keep delicate foil and glittered finishes from rubbing together.
Questions About DIY Vintage-Look Ornament Makeovers
Can I use these ideas on plastic ornaments?
Yes, sturdy modern plastic ornaments are useful bases for many of these designs. The important part is choosing paint and adhesive labeled for that plastic or using the recommended preparation system. A fabric wrap may hide a worn finish, but it will not strengthen brittle plastic or fix a weak hanging cap.
Can I paint over old glitter?
Fine glitter that is firmly attached may leave a textured result. Loose or chunky glitter makes smooth paint and paper finishes harder to achieve. Gently remove loose material from a modern craft ornament, then test a compatible coating. If the surface continues shedding, choose a different sound base rather than covering an unstable layer.
Which makeover is easiest without paint?
A gathered velvet wrap is a good starting point on a sturdy plastic ball. A ribbon lattice also works without paint if the existing color and finish are in good condition. Both still require care around the hanger, and any adhesive you use must suit the materials.
Does every ornament need a clear sealer?
No. Some paints are self-sealing, while decoupage projects need the protective finish specified by their medium. Follow the product directions and test compatibility before adding a separate sealer. Do not coat velvet or pearl trim just because you sealed another ornament in the batch.
Should I makeover real vintage ornaments?
Keep collectible or sentimental originals as they are unless you have a clear reason to alter them. These projects are intended for ordinary decorations you are comfortable changing. You can get the vintage look on a modern base while preserving an older ornament’s original character.
Start with the decoration you are most willing to change, choose one finish, and make a sample. A small set with careful details will do more for your tree than a large batch rushed through wet paint and loose trim.