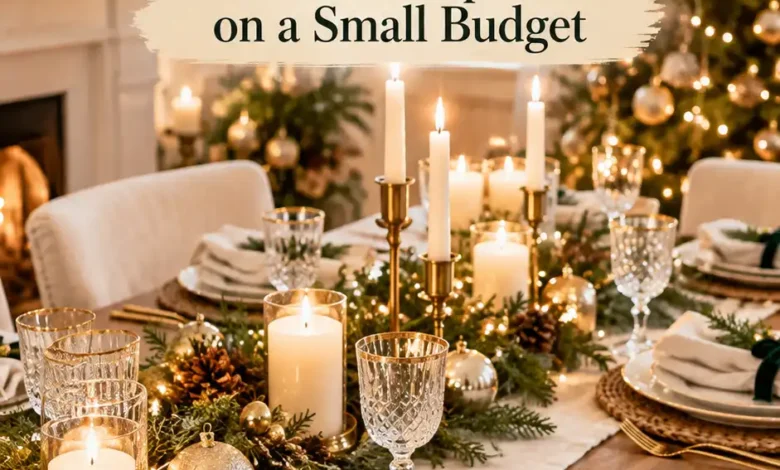
A Christmas table does not need a new set of dishes to feel special. Often, the difference is a folded napkin, a color repeated from one seat to the next, and a centerpiece that looks intentional instead of crowded.
These 21 Christmas table decor ideas are options to choose from, not a shopping list to buy in full. Some use ornaments from the tree box. Others turn paper, grocery-store flowers, or a clean glass jar into the detail people notice first. Pick one main centerpiece, one place-setting idea, and a finishing touch that suits your room.
The goal is a table you can actually eat at. The serving bowls need a home, guests need to see one another, and the person carrying dinner should not have to dismantle a miniature forest to put the platter down.
Start With What You Own Before You Spend
Take ten minutes to lay out your plates, glasses, napkins, and serving dishes. Do this before opening a shopping app. A bowl you use for salad can hold ornaments, a cake stand can lift a small display, and a few matching napkins can connect dishes that are not a complete set.
Decide how dinner will be served before placing the centerpiece. For family-style meals, put the empty serving dishes and trivets on the table first. For buffet service, you have more room for a centerpiece, but still leave the bread, water, and condiments easy to reach.
| Element | Reuse first | When to spend |
|---|---|---|
| Dishes and glasses | Use everyday pieces or borrow a set | Buy only if you are short of the number you need |
| Table covering | Use a clean existing cloth, runner, or bare wood | Add one textile if the surface needs a new base |
| Centerpiece | Reuse a bowl, tray, jar, or small decoration | Choose one focal piece rather than many little purchases |
| Place-setting detail | Use ribbon, paper, or a simple napkin fold | Repeat the same inexpensive detail at every seat |
Set a decorating cap in U.S. dollars before shopping. With a $20 cap, for example, decide which single missing detail deserves it rather than buying a cart of small extras. The ideas below do not assume that you are purchasing dishes, linens, glassware, and decorations from scratch.
Use flameless candles when they sit close to paper, ribbon, or greenery. If you choose real candles instead, NFPA recommends keeping them at least 12 inches from anything that can burn. A pretty table is easier to enjoy when you are not watching a flame beside a napkin.
1. Make Everyday White Plates Feel Like Christmas
White dishes give you a useful blank canvas. A deep-red napkin looks festive against them, while green makes the same plate feel quieter and more woodland-inspired. The upgrade comes from repeating that one decision at every seat, rather than adding a different decoration to each plate.
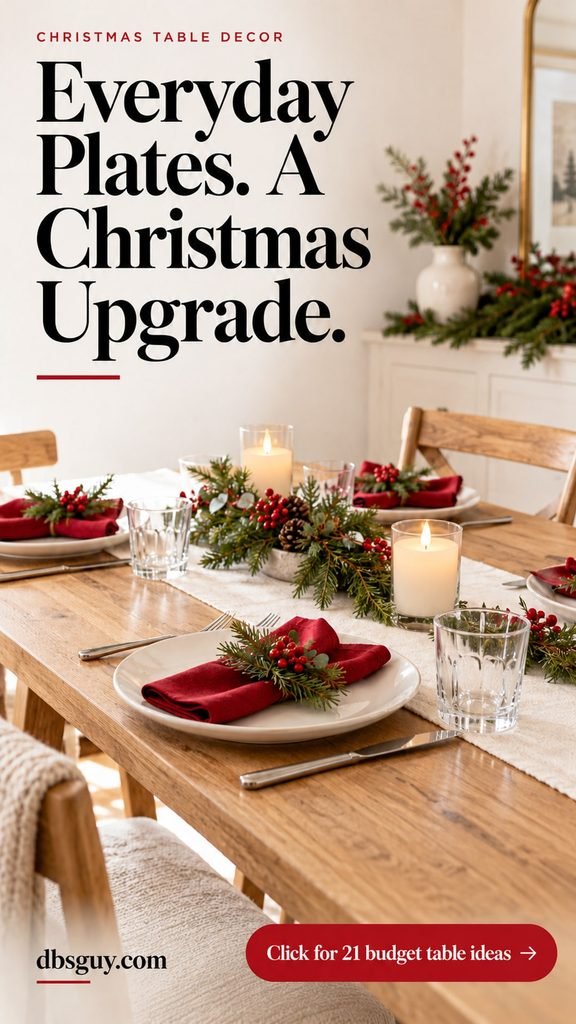
You will need: Everyday white plates, matching napkins or coordinated paper napkins, your usual flatware, and a few small seasonal accents.
How to style it:
- Set every place with the same basic plate arrangement. If dinner has one course, there is no need to add extra plates just to build a stack.
- Fold each napkin into a neat rectangle and lay it across the plate. Turn the fold the same way at each setting.
- Add a small ornament or paper tag beside the napkin, then repeat its color in the centerpiece. Remove the decoration before serving food.
Budget tip: Spend on the napkin color only if you are missing it. Your everyday silverware and clear drinking glasses already fit this look.
For a casual Christmas brunch, skip the second glass and give each person a mug instead. A setting looks thoughtful when it suits the meal, not when it has the most pieces.
2. Tie a Velvet Ribbon Around Each Napkin
A narrow velvet bow can make plain cotton napkins feel dressed for dinner. Burgundy against oatmeal looks warm and soft; green ribbon against white is crisp and traditional. You only need a small amount of ribbon at each seat.
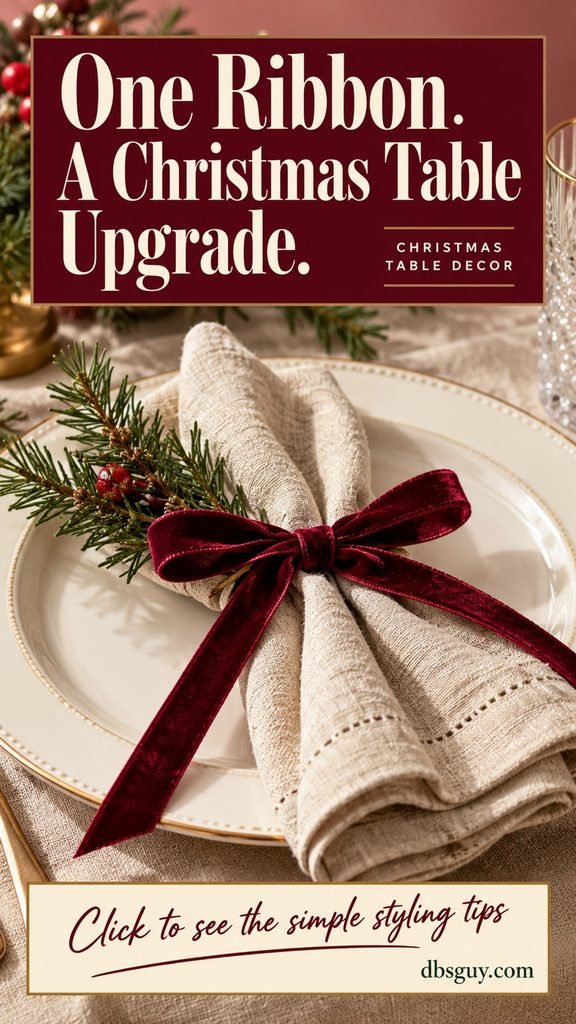
You will need: Clean napkins, narrow ribbon, scissors, and optional paper name tags.
How to style it:
- Make one sample bow around a folded napkin before cutting the rest of the ribbon. That sample tells you how much each setting needs.
- Keep the loop size modest and the tails short enough to stay on the plate. Cut the remaining pieces to match the sample.
- Tie the bow loosely so guests can slide it off without a struggle. Put a name tag under the knot if you want the ribbon to do two jobs.
Budget tip: Use ribbon left over from gift wrapping if the color works. Satin, cotton, or grosgrain can look lovely too; velvet is an option, not a requirement.
If the napkins are patterned, choose a solid ribbon from one color in the print. Two busy patterns competing at every seat can make the table feel fussy.
3. Lay a Slim Greenery Runner Down the Center
A greenery runner works because it joins the table from one end to the other without needing one oversized arrangement. A few separate clippings can give the impression of a continuous runner when their stems overlap. Keep the shape narrow enough that the dinner still has somewhere to go.
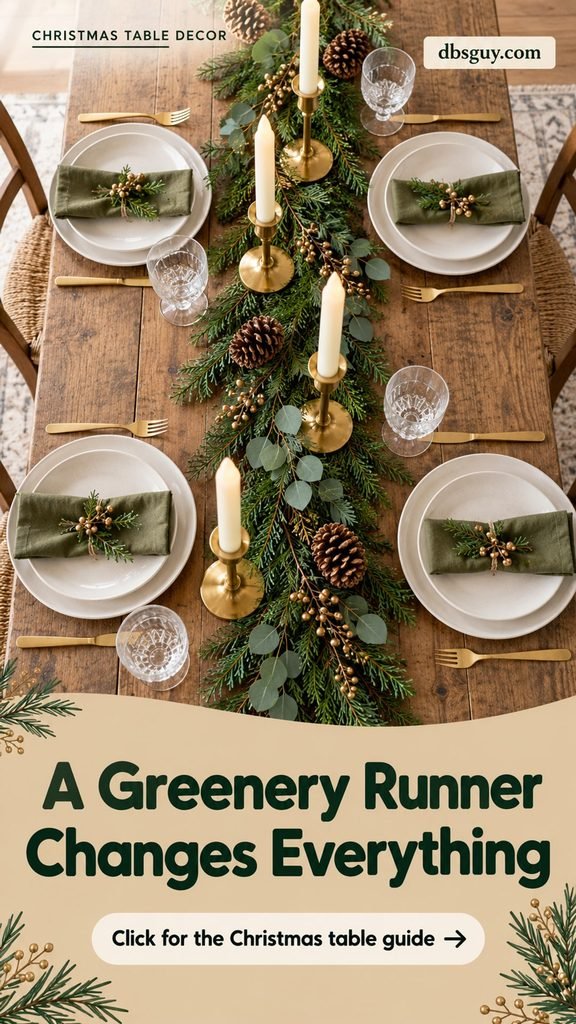
You will need: Clean purchased or existing faux greenery, a washable runner or protective tray, and a few flameless candles if you already own them.
How to style it:
- Arrange the serving dishes first, then mark the strip of center space that remains. Work inside that space rather than stretching greenery across the whole width.
- Lay stems flat and overlap their cut ends. Point some tips in each direction so the runner does not look like a row of sticks.
- Add two or three small accents in the gaps. Leave clear landing spots for dishes and check the view from a seated position.
Budget tip: Reuse a section of faux garland from another room, or buy a small quantity of greenery rather than a finished decorated garland.
Keep loose needles and plant material off food-contact surfaces. If fresh stems start shedding, move them into jars or switch to a reusable faux piece. More greenery is not automatically better.
4. Fill a Serving Bowl With Ornaments
The tree box may already contain your centerpiece. A shallow bowl of ornaments gives you color and shine without wiring, arranging flowers, or buying a new display. The bowl supplies the shape; the ornament finishes supply the interest.

You will need: A clean shallow bowl and a small selection of ornaments in a coordinated palette.
How to style it:
- Pull out ornaments in two or three colors that work together. Mix matte and shiny finishes so the bowl has depth.
- Put larger pieces in first and tuck smaller ones into the spaces. Stop before the pile becomes unstable or pieces hang over the rim.
- Place the bowl on a runner or tray, then step back. If it already looks full, resist adding loose ornaments across the whole table.
Budget tip: Use the ornaments that do not fit this year’s tree scheme. An odd assortment becomes more coherent when you sort it by color first.
Choose shatterproof pieces where children, pets, or busy serving hands could knock the display. Remove any loose glitter after dinner and wash the bowl before using it for food again.
5. Group Thrifted Candlesticks With Flameless Tapers
Candlestick holders do not have to be identical to look related. Similar finishes can connect different shapes, and the change in height makes a small grouping interesting. Three brass-toned holders with ivory flameless tapers are enough to create a warm focal point.
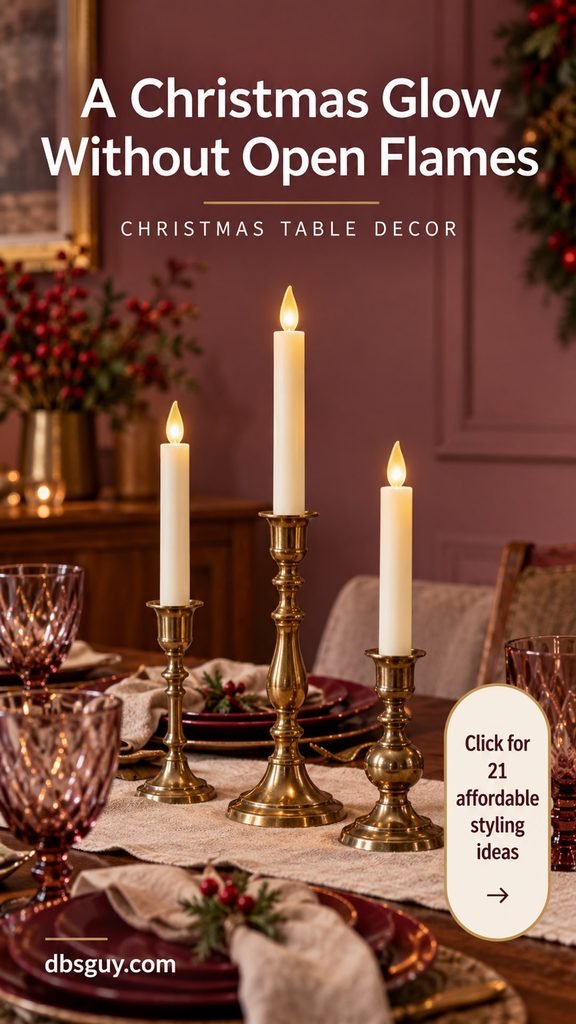
You will need: Stable candlestick holders, compatible battery-operated taper candles, and batteries.
How to style it:
- Check each holder on a flat surface before styling it. Skip anything that rocks, has sharp damage, or cannot hold the candle securely.
- Keep the candle color consistent and vary the holder heights. Place the tallest one slightly off center instead of building a rigid staircase.
- Switch the candles on before guests arrive and look at the grouping from both sides of the table. Adjust it if a candle blocks a face or crowds a glass.
Budget tip: Borrow holders or check a thrift store before buying a matching set. If you already have only one, use it as a small accent beside a low bowl instead.
Avoid buying LED candles and holders separately without checking the fit. Bring measurements when shopping; saving on the holder is no bargain if the candle wobbles in it.
6. Split Grocery-Store Flowers Into Small Vases
A single bouquet can decorate more of the table when you divide it into small arrangements. White carnations or another modest bouquet look less like a last-minute bunch when the stems have room around them. Small vases are also easier to move when dinner arrives.
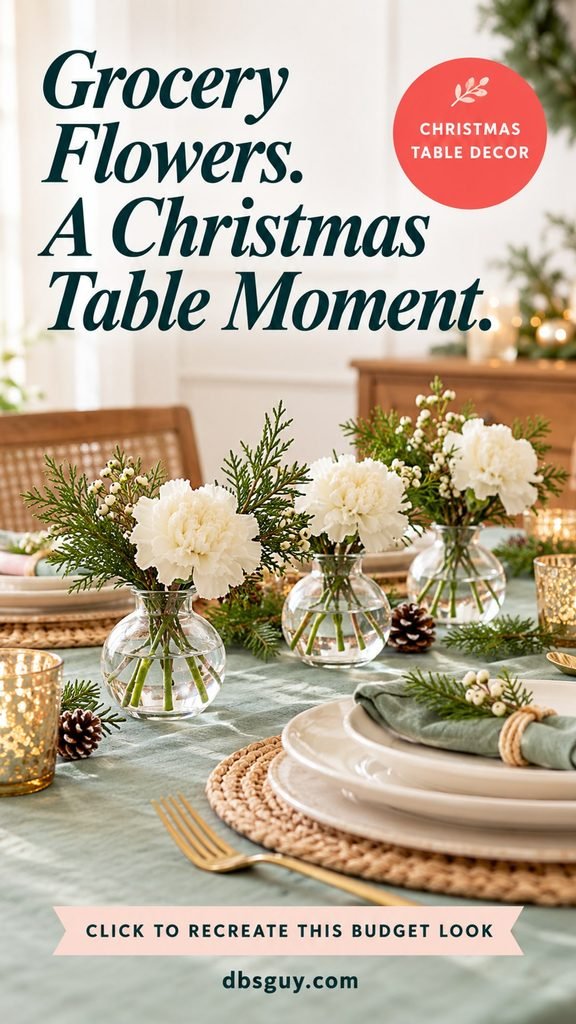
You will need: One bouquet, clean small vases or jars, water, and scissors suitable for stems.
How to style it:
- Choose one main flower color that fits the table. Remove leaves that would sit below the waterline.
- Trim the stems for the containers and divide the flowers among them. Keep the flowers low enough to see the person across the table.
- Space the vases in a loose line or small triangle, depending on the table shape. Leave gaps for water pitchers and serving dishes.
Budget tip: Use clean jars or drinking glasses you are not using at dinner. The containers do not need to be expensive for the flowers to look intentional.
For a narrow table, two little arrangements may work better than three. Set the flowers in water ahead of time, but keep the completed table out of a hot, sunny window that could dry them out.
7. Let Seasonal Fruit Bring the Color
Whole mandarins and pomegranates add rich color without pretending to be anything other than fruit. Against a green or cream runner, the oranges and reds feel festive. This is a good option when you would rather put money toward the meal than decorations.
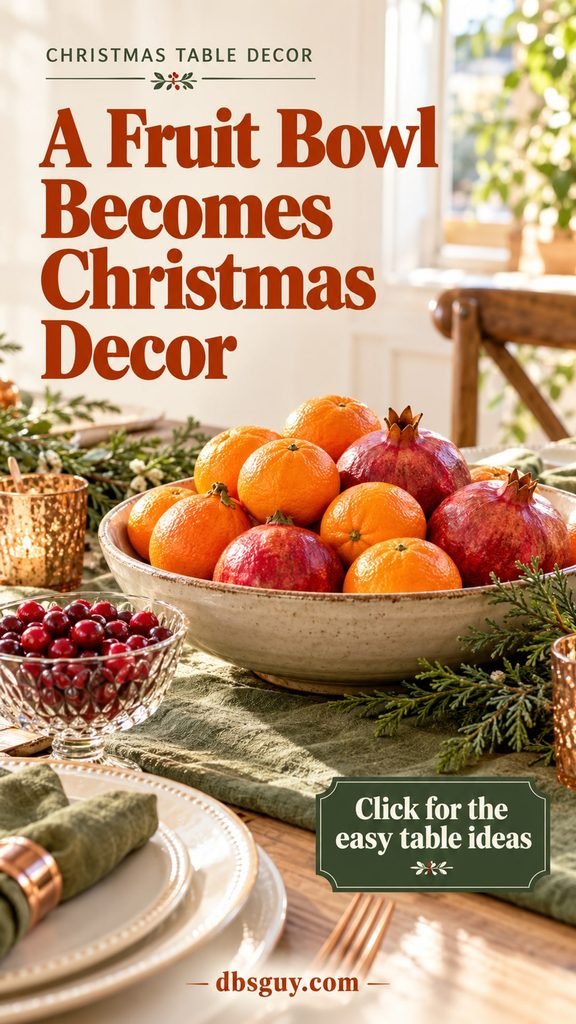
You will need: Whole fruit, a food-safe bowl or platter, and an optional separate small cup of cranberries.
How to style it:
- Choose fruit you will actually use, wash it appropriately, and dry the outside before arranging it.
- Keep the arrangement low and contained in a bowl or platter. Mix the larger fruit with smaller pieces for a relaxed shape.
- Place any greenery outside the food container. Keep fruit you plan to eat away from glitter, paint, floral supplies, and other craft materials.
Budget tip: Plan the fruit into breakfast, snacks, or recipes after the gathering. That gives the purchase another use instead of turning it into a single-night expense.
You do not need a huge pile. A modest bowl with breathing room looks better than a centerpiece that forces guests to balance a glass at the table edge.
8. Use Dried Orange Slices as Small Place-Setting Accents
Dried citrus gives a neutral table a warm amber accent. You do not need to cover a long garland with slices to get the effect. One slice beside each napkin, or a few tucked into a display, is enough to introduce the color and texture.
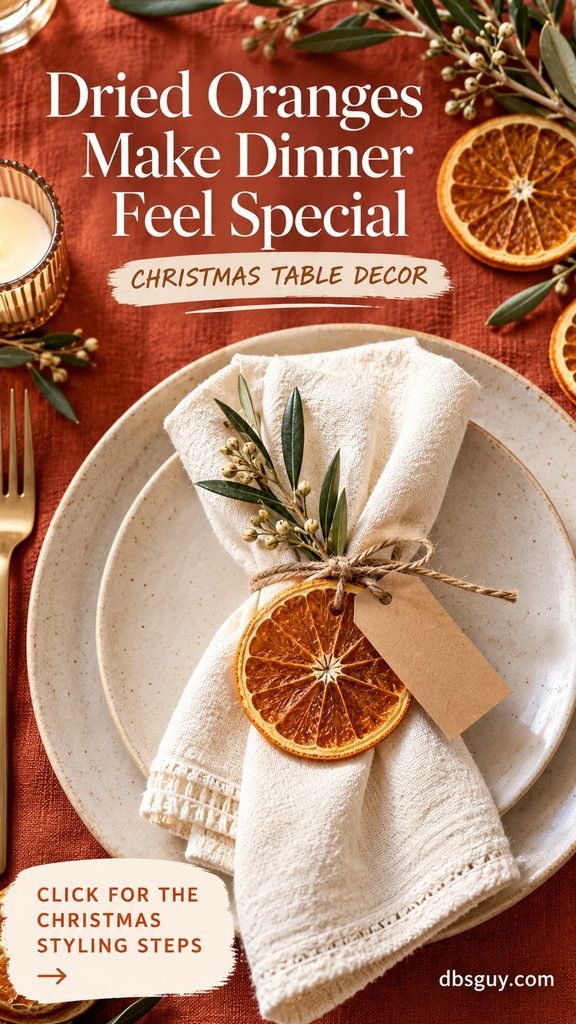
You will need: Fully dried orange slices, twine, paper tags, and clean napkins.
How to style it:
- Choose slices that are dry and firm rather than soft or sticky. If you are making your own, prepare them ahead of the day you set the table.
- Thread twine through a small opening near the rind and add a paper name tag. Tie the twine around a rolled napkin or lay the accent beside it.
- Repeat the orange tone with one other element, such as a terracotta runner or a small bowl of whole mandarins. Keep the rest of the setting simple.
Budget tip: Use a small quantity of slices and plain twine. An entire purchased citrus garland is unnecessary when the place settings already carry the look.
Treat slices handled with craft supplies as decorations. Let guests remove the accent easily, and do not leave a damp slice against fabric or a wood surface. A warm orange detail works especially well with cream, olive, or brown.
9. Turn Pinecones Into Place-Card Holders
Pinecones have enough shape to make a little paper card feel finished. They suit a woodland Christmas table and pair naturally with plaid, green napkins, and plain stoneware. Leave them brown for a quiet look rather than buying paint, glitter, and extra supplies.
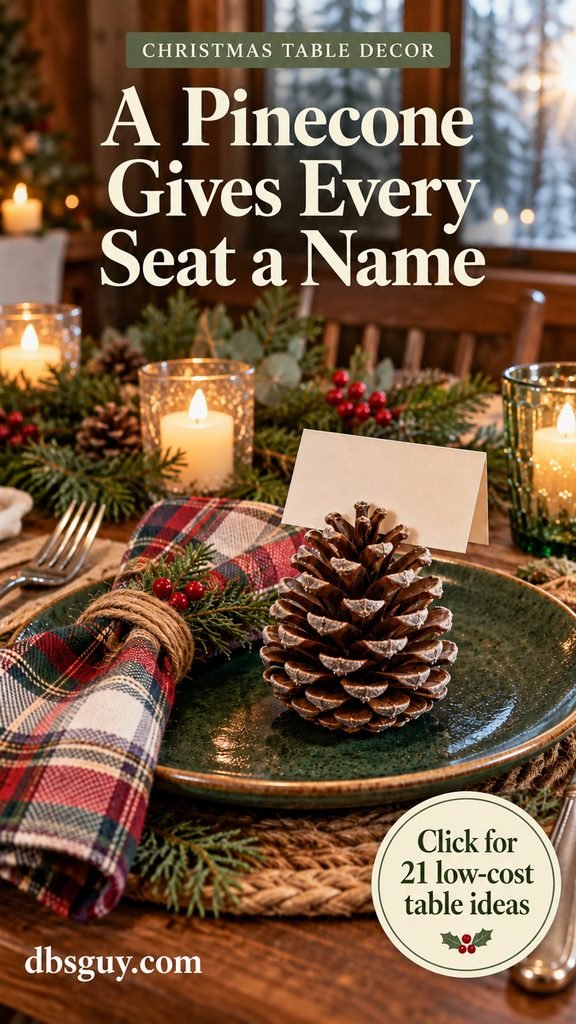
You will need: Clean dry pinecones that sit steadily, small cardstock cards, and a pen.
How to style it:
- Choose pinecones with a stable base and an opening between the scales that can hold a card. Lay a small protective paper circle underneath if needed.
- Cut the cards to the same size and write names before placing them in the cones. Make the lettering large enough to read from a seated position.
- Set one beside the plate or on a napkin, keeping it out of the area where food will be served. Gather the decorations before the meal starts.
Budget tip: Reuse pinecones from an existing wreath or decoration. A name card does not need a purchased metal holder to look thoughtful.
If a cone will not stand securely, let it lie on its side and lean the card behind it. Work with the shape you have rather than adding a complicated base to every seat.
10. Write Place Cards by Hand
A handwritten name is one of the least expensive ways to make a guest feel expected. The card can be plain; neat spacing and a little care do more than an elaborate font. You can also use this moment to tuck a short welcome note behind the name.
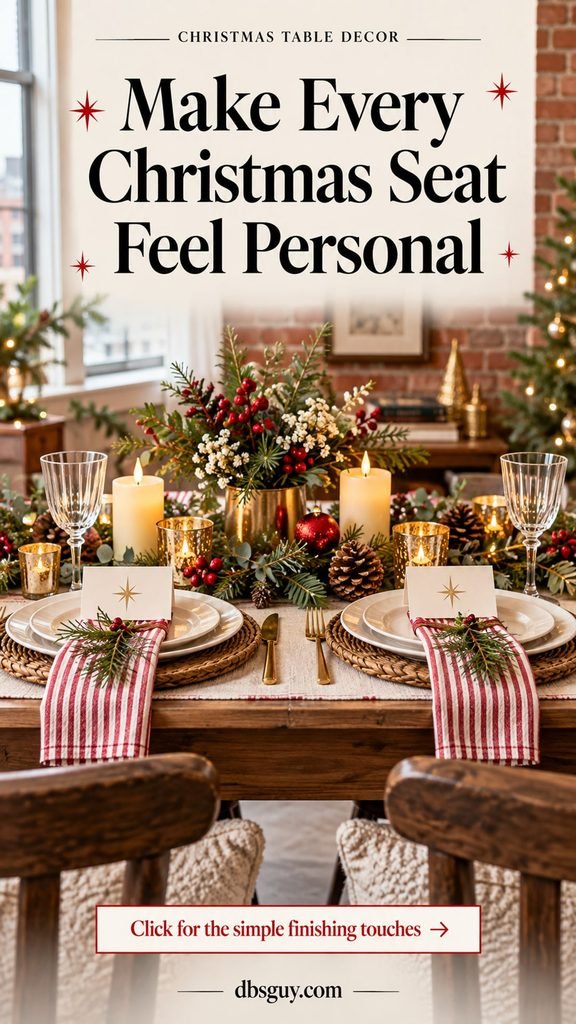
You will need: Cardstock or sturdy paper, a ruler, scissors, and one pen that writes clearly.
How to style it:
- Cut matching rectangles and fold each one in half to make a tent. Test the first card to make sure it stands without falling flat.
- Write first names with generous space around the letters. Add one tiny star, line, or dot pattern if you want a decorative detail.
- Put the cards in the same position at every seat. For a relaxed meal, leave the cards unassigned and let guests choose a place.
Budget tip: Use the blank back of clean leftover gift tags or offcuts of cardstock. Matching size and ink color can connect papers that are not perfectly identical.
If you dislike your handwriting, use clear block letters. Small, readable names are more useful than decorative lettering that makes someone lean over a glass to work out where they should sit.
11. Make a Small Forest of Paper Trees
Paper trees add height without the weight of a large floral arrangement. Green tones give them a traditional feel; white paper looks calmer against dark wood. Use a few small trees and leave space between them so the table does not turn into a craft display.
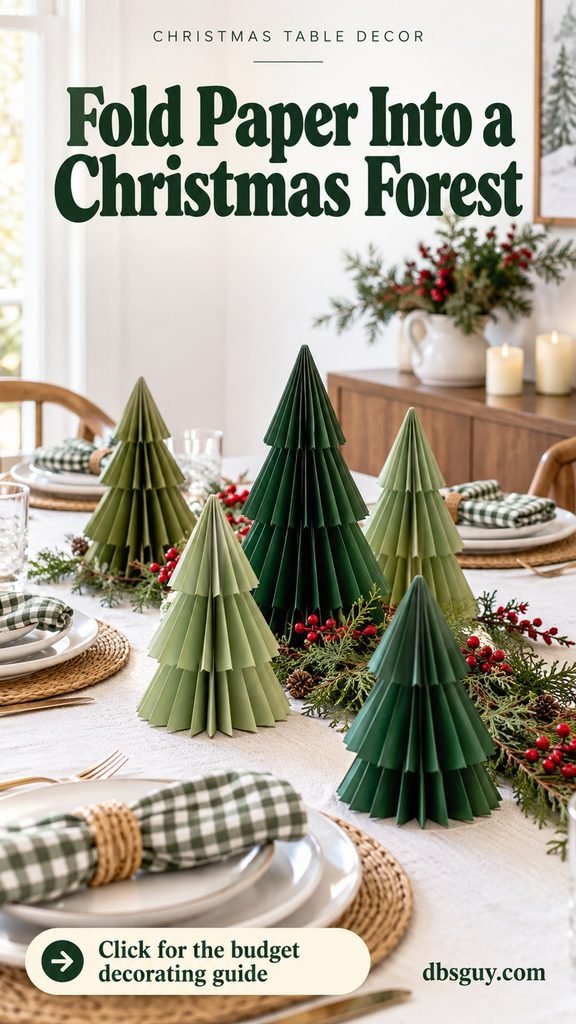
You will need: Cardstock, scissors, a pencil, and paper glue, or fold-out paper trees you already own.
How to style it:
- For a simple homemade tree, draw one shape with a flat bottom and use it as a template. Cut four matching shapes and fold each vertically down the middle.
- Glue the back of one folded half to the next, working around the center until the final half joins the first. Allow the glue to dry before standing the tree up.
- Make two or three sizes, then arrange them where they will not block faces. Keep the palette to a few related shades rather than using every sheet in the craft drawer.
Budget tip: Start with one paper tree to check the size and stability. You can build a pleasing grouping with three; you do not need a tree between every plate.
Fold-out decorations from previous years work too. If your table is narrow, move the tallest tree to a sideboard and use the smaller ones down the center.
12. Give a Cake Stand a Decorating Job
A cake stand can make a small collection feel like one centerpiece. The raised edge and base give the display a boundary, so you do not have to spread decorations over the whole table. Use a stand you already own or borrow one for the gathering.
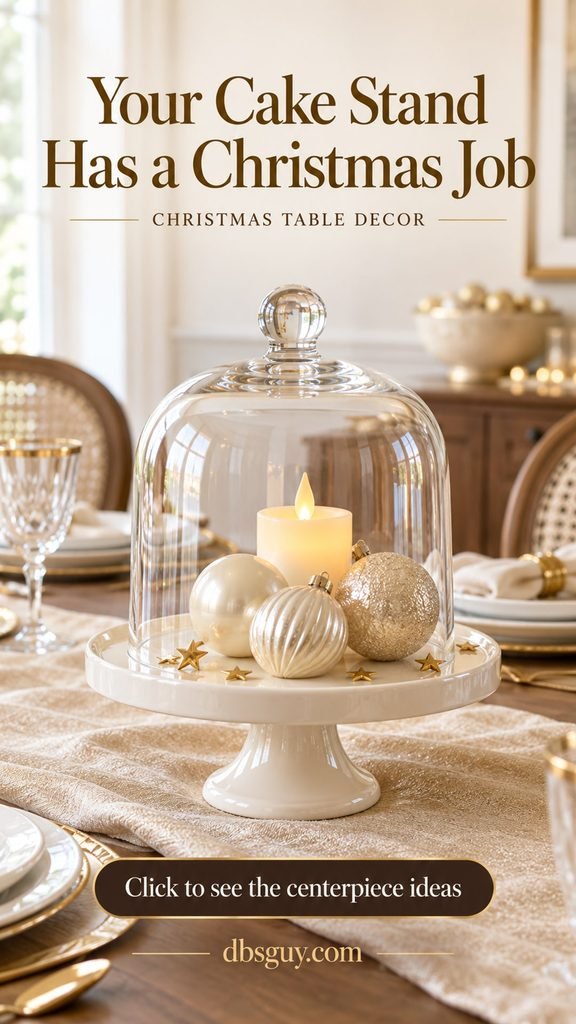
You will need: A stable cake stand, a few ornaments, and an optional cloche or flameless candle.
How to style it:
- Put the stand on the table empty and check its footprint. Choose a place where the base will not be bumped every time someone reaches for a dish.
- Arrange a few ornaments around one small focal piece. If you use a cloche, keep everything inside it short enough that the lid closes comfortably.
- Sit down to check the finished height. Move the display to a sideboard before dinner if it interrupts conversation or uses the serving space.
Budget tip: Skip the cloche if you do not own one. The stand itself already gives the decorations structure; buying a special cover would defeat the point of reusing it.
Put the display on a protective base if decorations might scratch the stand, and clean it before returning it to food service. This is particularly useful for a buffet table, where a low pedestal helps a small arrangement read as a focal point.
13. Arrange Greenery in Reused Glass Jars
Three clean jars can make a gentle centerpiece without a full bouquet. The clear glass keeps the arrangement visually light, and water gives fresh stems a place to stand. Blue napkins, twine, or a wood tray can make the ordinary containers feel part of the table.

You will need: Clean jars without labels, a few small greenery stems, water, and an optional narrow tray.
How to style it:
- Remove labels and residue, wash the jars, and check their rims for damage. Keep the jar shapes similar, or deliberately use a short, medium, and taller one.
- Add water and trim the greenery to fit. Remove foliage that would sit below the waterline, and use just enough stems to leave the glass visible.
- Arrange the jars on a tray if you want to lift the centerpiece away in one move. Turn the foliage so guests can see through or around it.
Budget tip: Use empty food jars instead of buying new vases. A small tie of twine is enough decoration; you do not need to paint them.
Check for leaks or drips before setting the jars on wood. Set water-filled containers on a suitable protective surface, and empty them after the gathering rather than leaving water standing on the dining table.
14. Use a Clean Plaid Scarf as a Runner
A plaid scarf can connect a Christmas table with the cozy textiles already in the room. It adds pattern without committing to a new tablecloth. This works best with a fabric that lies flat and is wide enough to sit neatly down the center.
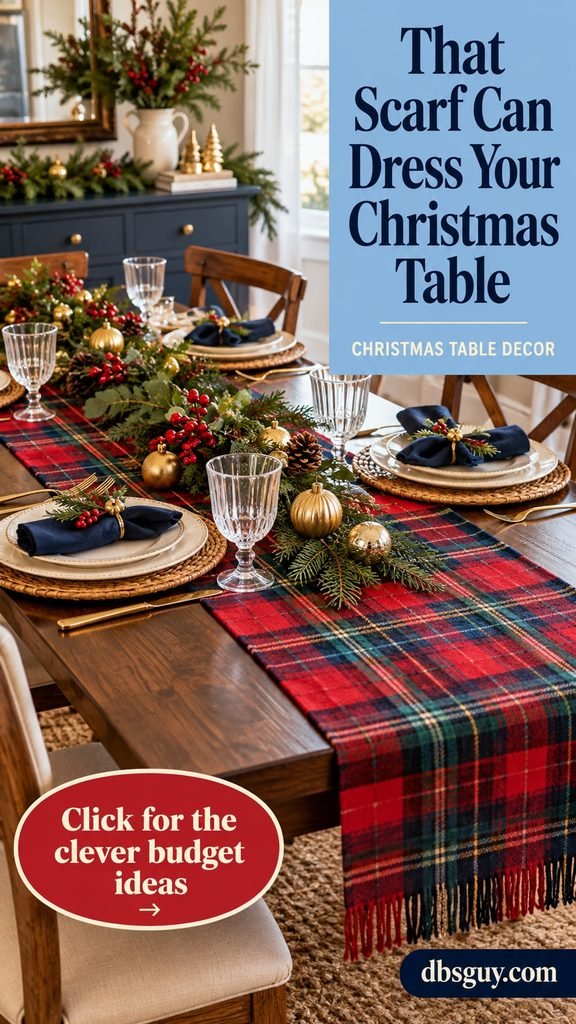
You will need: A clean washable scarf or narrow textile, everyday dishes, and napkins in one color from the plaid.
How to style it:
- Check the fabric for loose fibers, stains, and anything that would make it awkward beside food. Wash or clean it according to its care label.
- Lay it flat down the table and keep any fringe or trailing ends out of laps and walkways. Use a protective surface underneath where needed.
- Pull one color from the pattern for the napkins or ornaments. Let the plaid do the decorative work instead of layering another busy pattern over it.
Budget tip: Shop your closet or linen cupboard first. If the fabric would be ruined by a spill, choose another textile rather than making dinner feel tense.
A scarf is decoration, not a trivet or a food-contact surface. Keep hot dishes on appropriate trivets, and use flameless candles around loose fabric. Solid plates are especially useful here because they give the eye a rest from the plaid.
15. Make a Kraft-Paper Runner Personal
A kraft-paper runner is a good place to put the personality into a simple table. A few hand-drawn stars, guests’ names, or a tiny welcome message make brown paper feel chosen for the occasion. The paper does not have to look like a professional illustration.
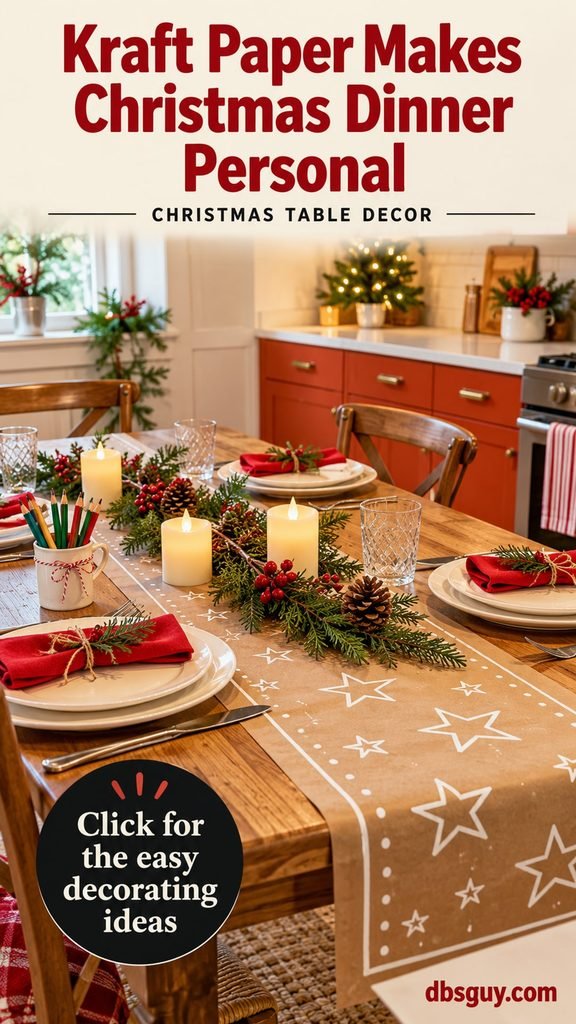
You will need: A roll of plain kraft paper, scissors, a pen or marker, and an optional washable table covering underneath.
How to style it:
- Cut a strip to fit the center of the table, leaving the place settings and serving spots clear. Flatten the paper before drawing on it.
- Make the first marks on a scrap. Then repeat one small motif, such as stars or a loose line of branches, with plenty of blank space between the drawings.
- Let the ink dry fully before setting the table. Pair the brown paper with one strong napkin color, then keep the centerpiece small.
Budget tip: Use clean leftover packing paper if it is flat, sturdy, and unprinted. A single roll can also supply matching place cards, so one purchase does more than one job.
For a family dinner, leave a small clear area for children to draw with age-appropriate pencils. Keep paper underneath decorations rather than using it as a food surface, and put hot dishes on proper trivets. Fold any portion you want to keep away before spills reach it.
16. Use Blue and White Dishes for a Winter Look
Christmas table decor can start with the colors already in your cupboard. Blue-and-white dishes look wintry beside cream napkins, small evergreen accents, and clear glass. You get a seasonal feeling without needing to introduce red or buy a Christmas-themed dinner set.
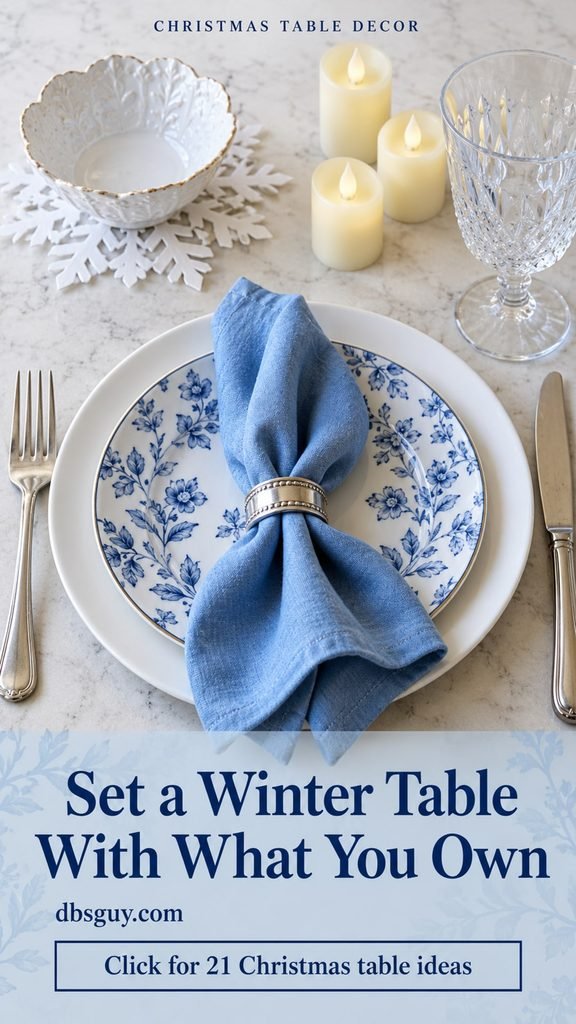
You will need: Existing white and blue dishes, blue or cream napkins, and a small coordinated centerpiece.
How to style it:
- Choose a mostly solid dinner plate as the base. Add a patterned salad plate only if you own one and the meal calls for it.
- Repeat the blue in a napkin, paper tag, or small ornament. Keep the other large elements neutral so the patterned dish remains easy to notice.
- Finish with a little greenery or a white centerpiece. Use your normal glassware and flatware to keep the look practical.
Budget tip: One blue detail at each seat can create the color scheme. If you own plain white plates, blue paper place cards or napkins can supply the accent.
When your patterned dishes are an incomplete set, mix them with solid pieces deliberately. Put the same basic arrangement at each seat, or alternate two arrangements around the table. A repeated plan makes the collection look considered, even when the dishes came from different places.
17. Make Mismatched Glassware Look Intentional
A table can feel collected and welcoming when the glasses have different shapes. The useful distinction is between a planned combination and a random jumble. An amber water glass beside a clear stemmed glass, repeated at every seat, gives an ordinary setting warmth and variety.

You will need: Enough clean glasses for the drinks you are serving, plus napkins in a color that connects the setting.
How to style it:
- Count the glasses you need before arranging them. Use one water glass per person, then add another only when the menu or drinks call for it.
- If you have two glass styles, repeat the same pairing at each seat. With a more varied collection, connect the glasses by color, material, or a similar size.
- Keep the glasses in the same position beside each plate. Check that stems and rims are easy to reach without leaning over decorations.
Budget tip: Use the collection you have or borrow a few glasses. Matching every glass is less useful than having enough comfortable, suitable ones for the meal.
Let colored glass be the decorative accent and keep nearby pieces quiet. Amber looks warm beside cream and brown; clear glass works with almost any palette. A beautiful water tumbler is enough for a casual meal, so you can free table space when a second glass would serve no purpose.
18. Build a Little Paper-House Village
White paper houses can bring a soft glow to the table without the cost of a ceramic village. Their clean shapes work especially well on a darker runner, where the outlines are easy to see. Keep the group small enough that it reads as one centerpiece.
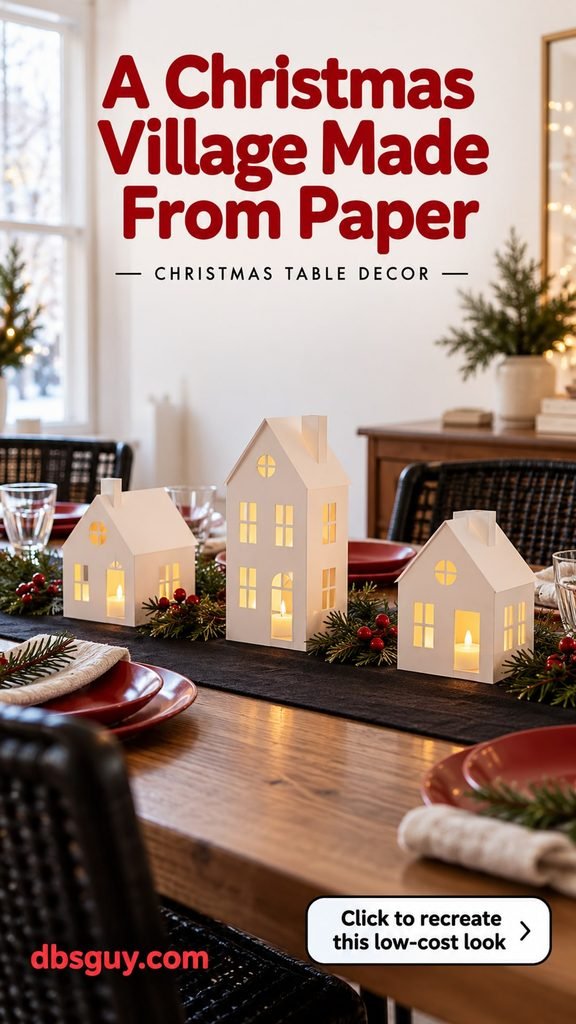
You will need: Cardstock, a ruler, pencil, scissors, paper glue or tape, and small battery-operated LED lights.
How to style it:
- Draw four wall panels in a row with a narrow joining tab at one end. Give the front and back panels triangular tops, and cut simple windows while the paper is still flat.
- Fold at the wall edges and join the tab to form an open-bottom house. Fold a separate rectangle in half for the roof and secure it over the two triangular ends.
- Let the house stand steadily before placing it over an LED light. Make a short group of houses and leave generous room around the display.
Budget tip: Start with one house using scrap paper to check the shape. Two or three homes in plain cardstock can create the village; extra glitter, paint, and miniature accessories are optional.
Use battery-operated lights only inside paper houses. Real flames do not belong in a paper display. Leave the bottoms open so the lights are easy to remove and switch off, and move the village to a sideboard if a guest cannot see across it.
19. Fold a Napkin Into a Christmas Tree
A tree-shaped napkin lets the place setting carry the Christmas theme. It is especially helpful on a small table because the decoration occupies space the napkin already needs. Green feels traditional, while cream or red can fit a different color scheme just as well.
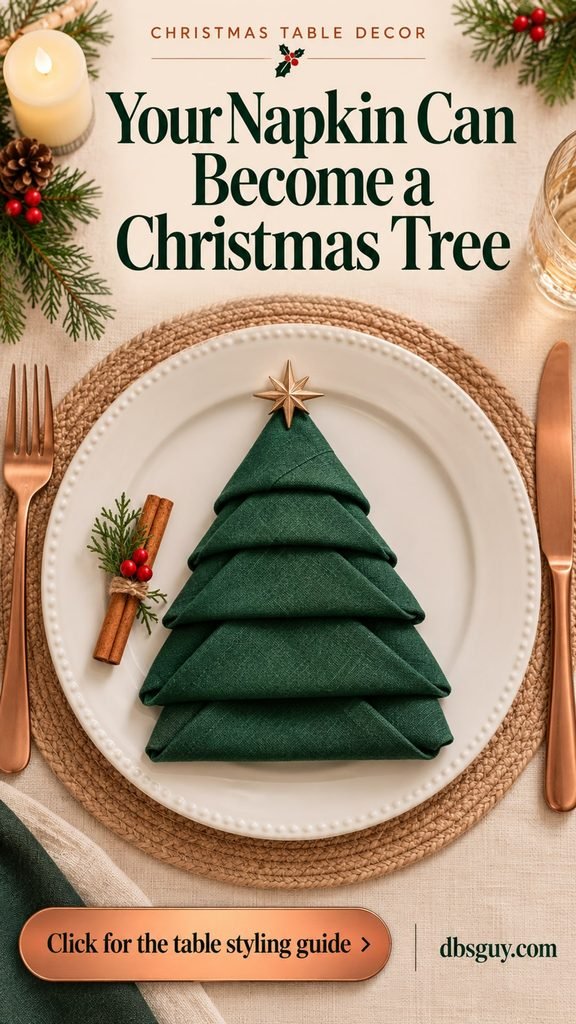
You will need: Clean square cloth napkins that hold a crease, a flat work surface, and an iron if the care label allows it.
How to style it:
- Fold a square napkin in half, then in half again to make a smaller square. Turn it like a diamond with the loose corners pointing toward you.
- Lift the loose corners upward one layer at a time. Leave a small, even gap between the tips to make a stack of stepped triangles.
- Hold the layers together and turn the napkin over. Fold the left and right corners inward, overlapping them to form a narrower shape.
- Turn it back over and rotate it so the narrow end is at the top. Fold the top flap upward, then fold each lower flap up and tuck its tip beneath the flap above.
- Smooth the finished tree and place it on the plate. Repeat with the remaining napkins, keeping the folds similar.
Budget tip: Practice with one napkin before preparing the whole table. A medium-weight cloth is easier to manage than a bulky or very slippery fabric.
If a fold will not stay put, simplify it to a neat triangular napkin and move on. The setting still gets the color and tree-like shape. Keep extra decorative pieces off the napkin so guests can unfold it easily. For a photo-by-photo example, see Paige Russell’s tree-napkin tutorial.
20. Move the Bows to the Chair Backs
When the table needs every inch for dinner, decorate the chairs. A ribbon on the back of a chair adds a visible Christmas detail while the tabletop stays open for platters and glasses. This is also a useful finishing touch when the centerpiece already feels complete.
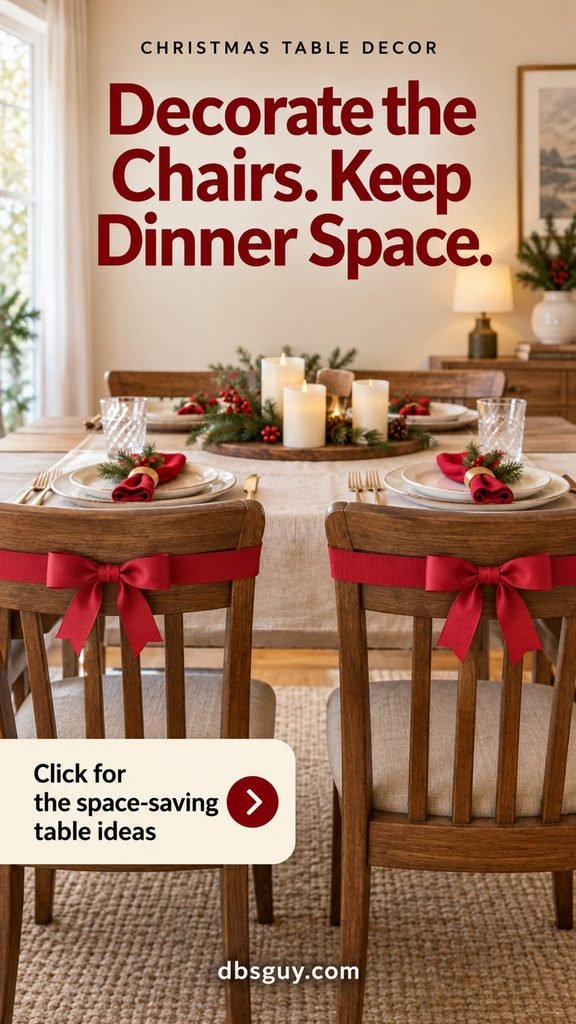
You will need: Ribbon or narrow fabric strips and chairs with a back that can hold a loose bow securely.
How to style it:
- Test a bow on one chair before cutting ribbon for the rest. Choose a position that sits on the back of the chair without bothering the person seated.
- Trim the tails so they stay clear of the floor, legs, and moving parts. Keep the knot easy to untie after the gathering.
- Repeat the ribbon color in one small table detail. If decorating every chair takes too much ribbon, use bows on the two end chairs or a pair of focal seats.
Budget tip: Use wrapping ribbon or fabric strips you already have. Two well-placed bows can carry the idea across the room without buying enough for every chair.
Check the bow while someone sits down, stands up, and slides the chair back. Skip ribbon arrangements that catch on clothing or make the chair awkward to use. A small, flat bow often suits a dining chair better than an oversized one that fills the whole back.
21. Group a Few Miniature Trees on a Tray
A few miniature trees can make a complete centerpiece when you give them a clear boundary. A tray keeps the arrangement together, and different heights give the group shape. Traditional green works, but cream, blush, or teal trees can echo decorations you already have elsewhere.
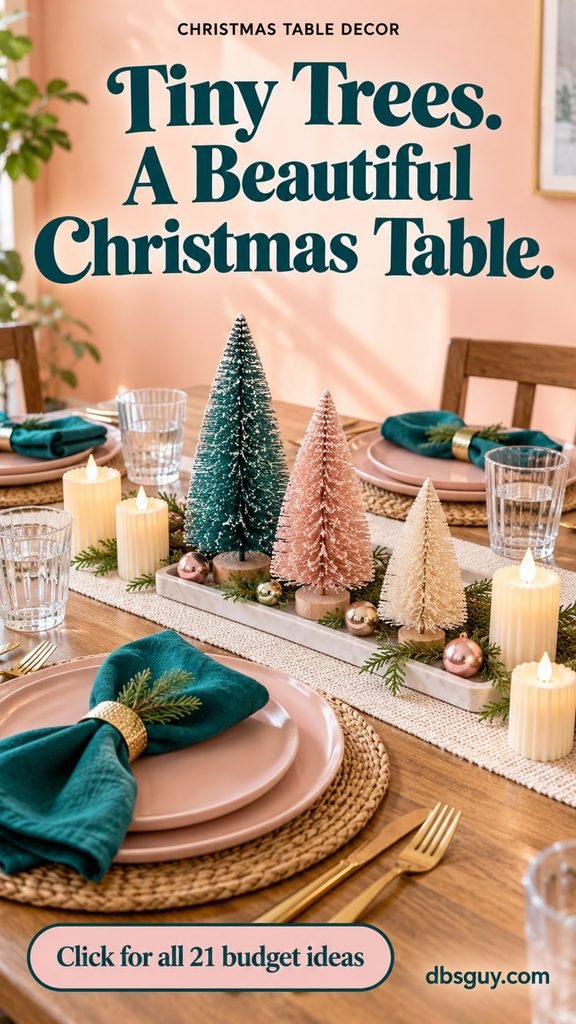
You will need: Two or three existing miniature trees and a small, stable tray or platter.
How to style it:
- Choose trees that suit the space available. Set them on the tray and check their height from a seated position before adding anything else.
- Arrange the tallest tree toward the back or slightly off center. Put the smaller trees beside it, leaving a little breathing room between the bases.
- Repeat one tree color in the napkins or a place card. Stop when the grouping looks balanced rather than filling every gap with ornaments.
Budget tip: Borrow a few trees from a mantel or shelf for the evening. Reusing a small part of a display is usually more economical than buying a separate dining-table set.
The tray makes this centerpiece easy to lift away when dinner arrives. If the trees shed glitter or fibers, keep them contained and clear of food. On a very small table, one tree beside a low bowl can be enough; let the available space decide the size of the display.
Put Together One Complete Look
You do not need to combine all 21 ideas. Choose a small group that shares a color or material, then leave the rest for another occasion. These combinations give you a starting point:
Classic and warm: Everyday white plates, burgundy ribbon napkins, and a shallow bowl of ornaments. Repeat burgundy in the bowl and keep the glassware clear.
Natural and relaxed: Cream dishes, pinecone name cards, and greenery in reused jars. Twine ties the materials together; a narrow tray keeps the jars movable.
Simple winter blue: White plates, blue napkins, and two or three cream miniature trees. Use your existing clear glasses and let the blue supply the strongest color.
Set one complete place before doing the others. That trial setting shows whether the ribbon is too long, the napkin color works, or a glass is competing with the centerpiece. It is much easier to change one seat than redo eight.
Before guests arrive, sit in a chair and look across the table. Reach for the water, check the space for the food, and move anything that gets in the way. A table feels expensive when the details belong together and the people around it feel comfortable.
Start with the pieces you enjoy using. Add one detail that makes them feel ready for Christmas, and give dinner room to happen.