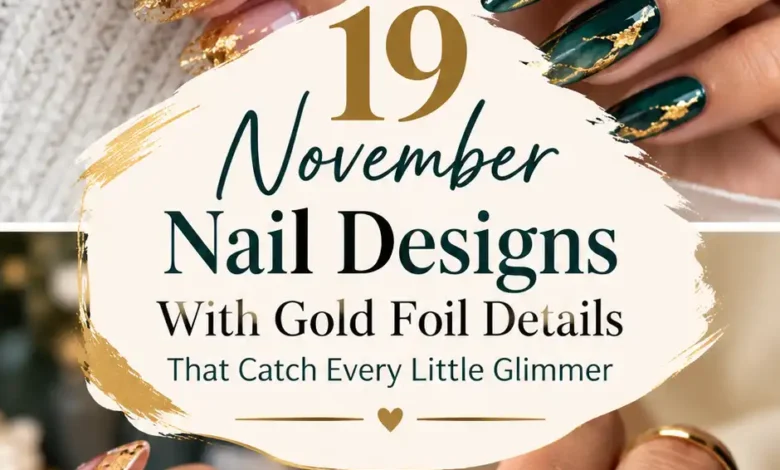
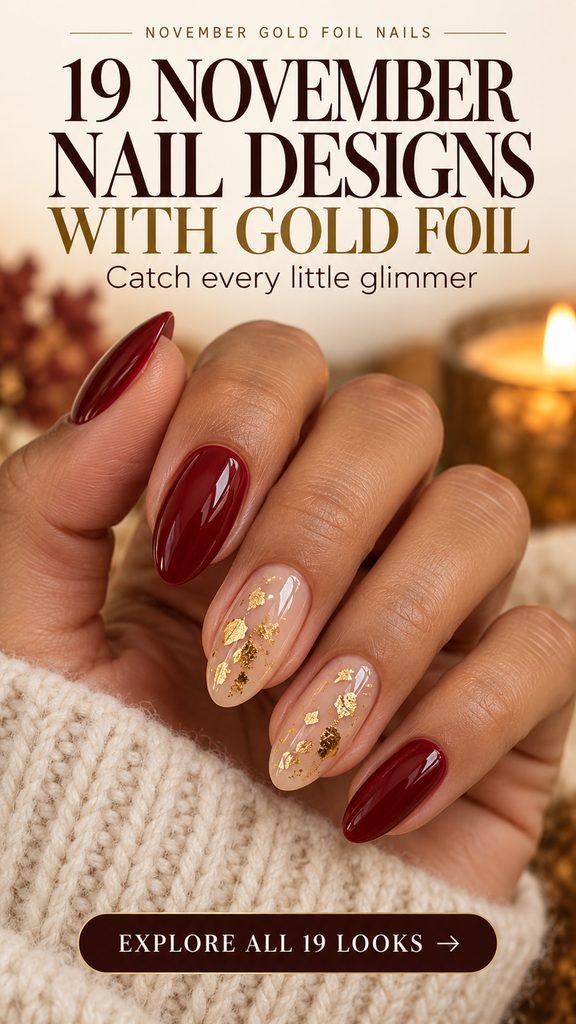
19 November Nail Designs With Gold Foil Details That Catch Every Little Glimmer

A tiny corner, a torn edge, a glimmer beneath smoky glass. Choose the gold detail you want to keep looking at.
Some manicures announce themselves from across the room. Others wait until you turn your hand. Gold foil can do either, which is exactly why it works so beautifully with November colors: a few bright fragments can wake up a quiet beige, soften the seriousness of oxblood, or give a dark green manicure a lighter place to look.
These 19 November nail designs with gold foil explore that small-detail approach. You will find a separate close-up for every look, along with advice on the placement, proportions, and finish worth discussing with your nail artist. There are very short nails in the mix, sheer options, and one bold gold accent for the days when a tiny glimmer does not feel like quite enough.
Choose the Foil Effect Before You Choose the Color
For the looks here, the appeal is the irregular metal: torn edges, little gaps, and individual pieces that catch the light. A continuous mirror finish gives a different visual effect. When you save a reference, notice whether you love the tiny scattered fragments, the broad distressed patch, or the narrow gilded border. That is a more useful starting point than simply asking for “gold nails.”
Loose flakes and transfer foil need different product instructions. The GelBottle’s Metallic Flakes guide describes placing its flakes onto a tacky gel layer, using tweezers for individual placement, and finishing with its specified top coat. Daily Charme’s gold transfer foil instructions instead use a dedicated transfer gel, a press-and-peel step, and the recommended sealing layers. Tell your artist which appearance you want and let the chosen nail system determine the method.
A distressed arrangement can be intentional: OPI’s Venetian Blue tutorial uses a light, random application of gold transfer foil as part of its design. For your own reference, decide how much base color should remain visible. A few fragments and a mostly gold accent ask for very different coverage, even when both use the same color palette.
One useful rule for this collection: give the gold a clear job. Let it highlight a corner, frame a shape, or become the one statement nail. You can always add more later in the design discussion; it is much harder to judge a small detail once every part of the nail is competing for attention.November gold foil nail design 01 / 19
1. Oat Milk with a Tiny Gold Corner
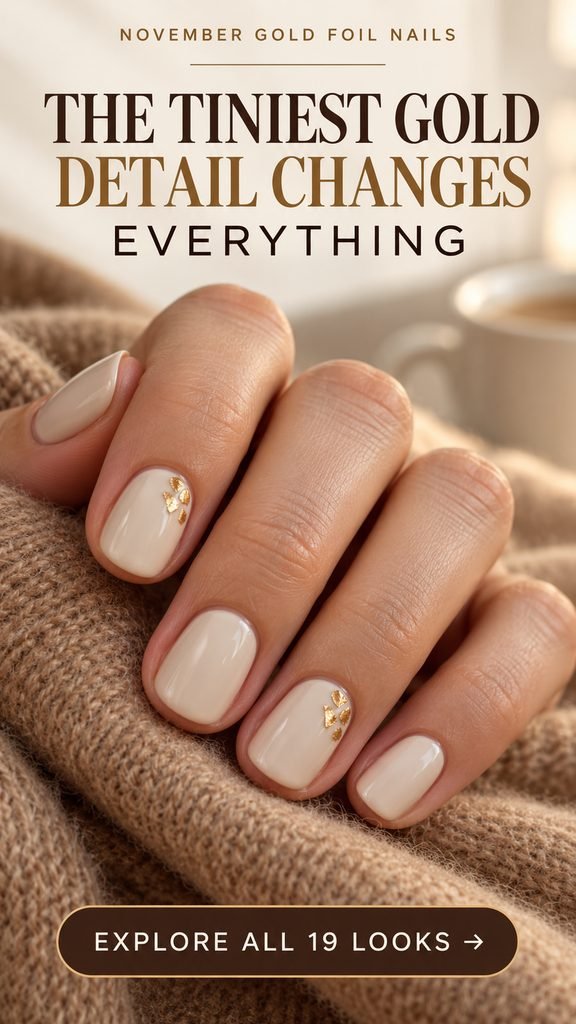
You know the kind of manicure that looks almost plain until you reach for your coffee? This is that manicure. The oat-milk base does most of the work, while a little cluster of gold tucked into the corner gives two nails something lovely to reveal. It feels right beside camel sleeves, cream knits, and the soft colors that tend to appear in a November wardrobe.
Keep the cluster small enough that you still notice the ivory first. On a short nail, a few separate fragments read more clearly than one thick patch. The corner placement also gives you room to keep the center completely quiet. If the creamy shade looks too yellow against your skin, try a pinker ivory swatch without changing the gold placement.
Salon note: Short rounded oat-milk nails; two upper-corner accents made from a few tiny gold foil pieces. Leave plenty of ivory around each cluster and keep the finished surface smooth.November gold foil nail design 02 / 19
2. Oxblood with Broken Gold Half-Moons
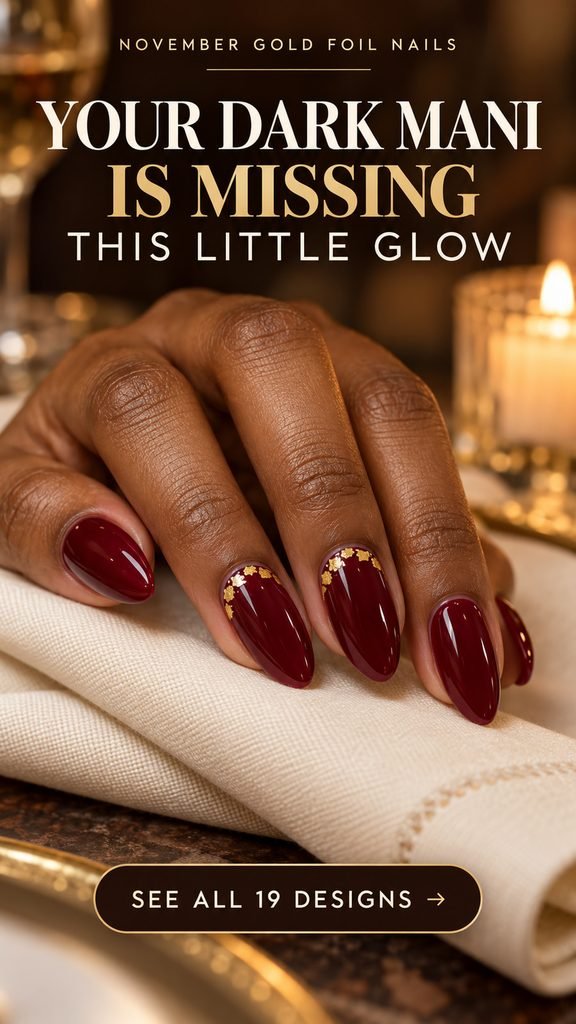
Deep red already has presence. Adding a broken gold half-moon near the base gives it a jewelry-like detail without covering up that rich oxblood color. The contrast is especially appealing here: polished red, irregular gold, and a curve that echoes the natural shape at the bottom of the nail. It is an easy design direction to picture with a dinner outfit.
The little gaps between the flakes are part of the look. A solid gold crescent would feel more graphic; this version is softer and less exact. Ask to keep a clean margin between the foil and the skin. For a shorter oval, make the crescent shallower rather than squeezing in smaller and smaller fragments. Two accented nails are enough to establish the idea.
Salon note: Glossy oxblood with narrow, interrupted gold foil half-moons on two nails. Follow the base curve, keep the center red, and leave a clean margin at the cuticle.November gold foil nail design 03 / 19
3. Olive with an Off-Center Foil Sweep
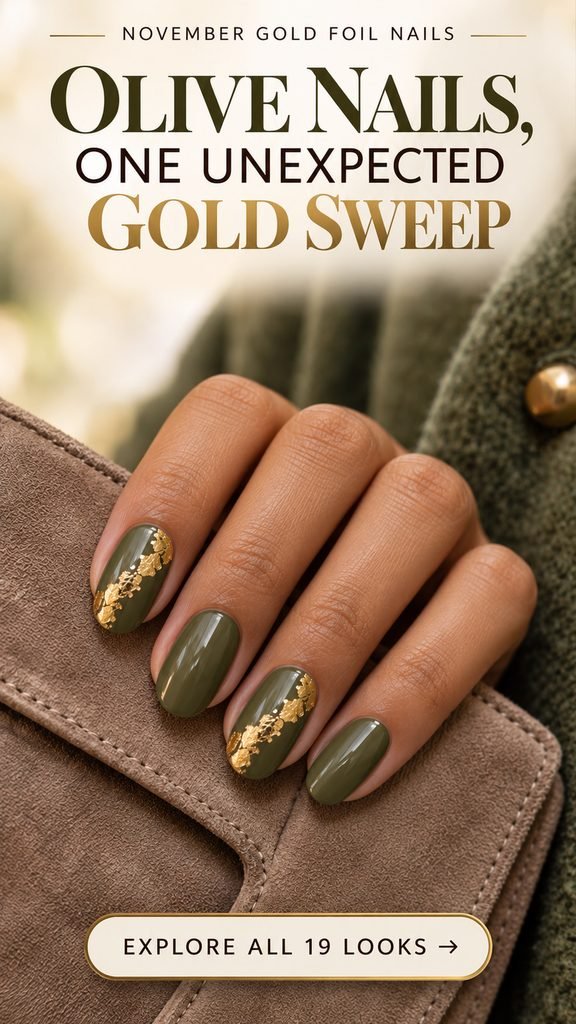
Olive can lean earthy, tailored, or a little unexpected depending on what sits beside it. This loose sweep of gold pushes it toward dressed-up without losing the muted green that makes it interesting. The foil travels across the nail at an angle, so the design has movement even though there are only two colors.
Resist making every fragment line up like a ruler-straight stripe. Let the sweep begin more narrowly and open into a few larger pieces toward the corner. That change in width is what gives it a relaxed, almost brushstroke quality. If you want the manicure to feel quieter, keep the foil to one accent nail and let the rest of the olive polish remain uninterrupted.
Salon note: Muted olive oval nails with two irregular diagonal gold foil sweeps. Keep green visible between the fragments; the sweep should feel tapered and organic, not like metallic striping tape.November gold foil nail design 04 / 19
4. Smoky Glass with Suspended Gold
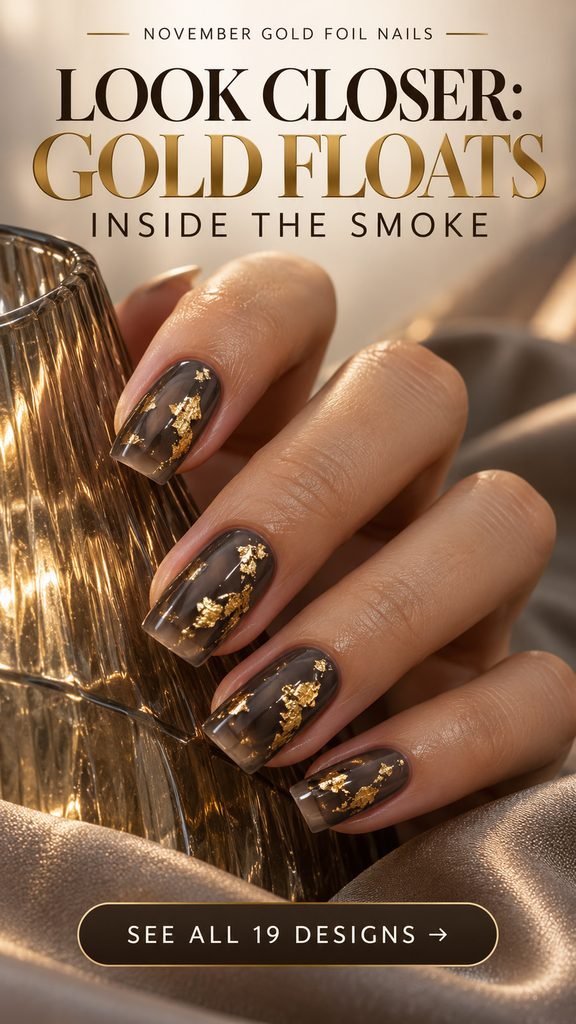
The attraction here is the space around the gold. A smoky grey jelly base lets the fragments look suspended beneath glass, with a softer mood than black polish and a different kind of depth from an opaque neutral. It is a good reference if you like dark colors but still want to see a little transparency through the nail.
Ask to see how sheer the grey looks on a finished sample before committing. Too much opacity changes the whole effect. The foil should remain sparse enough that you can see the smoky background between individual pieces, especially through the middle of the nail. A shorter soft square works, too; choose fewer fragments rather than packing the same amount of artwork into less space.
Salon note: Sheer charcoal-grey jelly with scattered gold foil through the central areas. Preserve visible translucency and a smooth glassy finish; avoid turning the base into solid grey or black.November gold foil nail design 05 / 19
5. Burnt Sienna with Torn Gold Tips
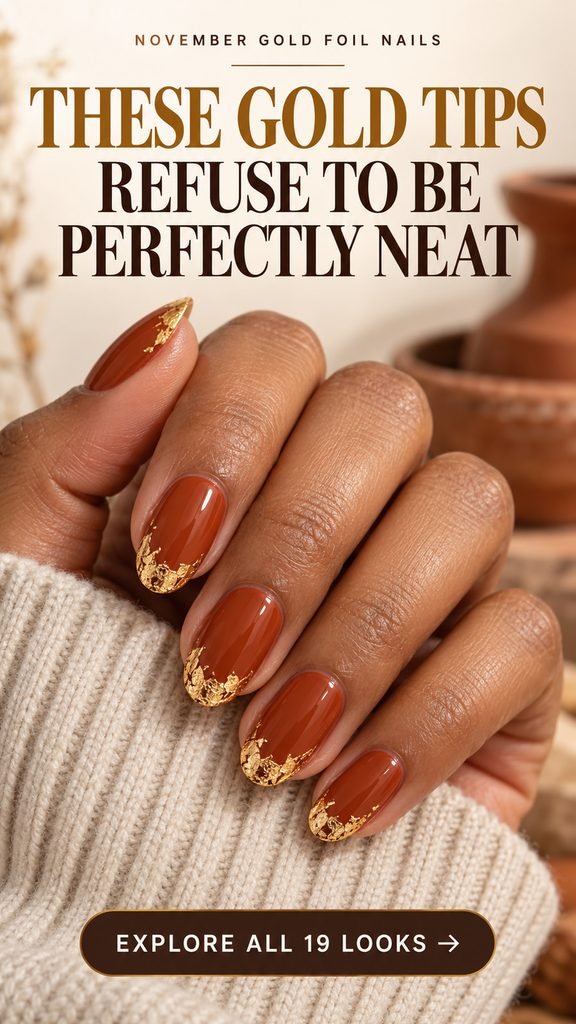
A neat French tip has its charms, but a torn gold edge gives burnt sienna a more relaxed finish. The reddish brown still takes up most of each nail. Gold gathers at the ends in little uneven pieces, almost as if the color has caught a few scraps of light. The combination feels warm without relying on a painted leaf or pumpkin.
Keep the gold band shallow. When it stretches too far down, the manicure starts to read as a gold nail with a small brown base instead. This layout can follow an oval, round, or soft-square edge; the foil itself does not need a perfect smile line. For a less decorated set, use the torn tips on two nails and leave the others completely sienna.
Salon note: Burnt-sienna nails with narrow, irregular gold foil tips. Preserve the torn inner edge, show small gaps of sienna, and keep the metallic coverage close to the tip.November gold foil nail design 06 / 19
6. Porcelain Clouds with Gold Islands
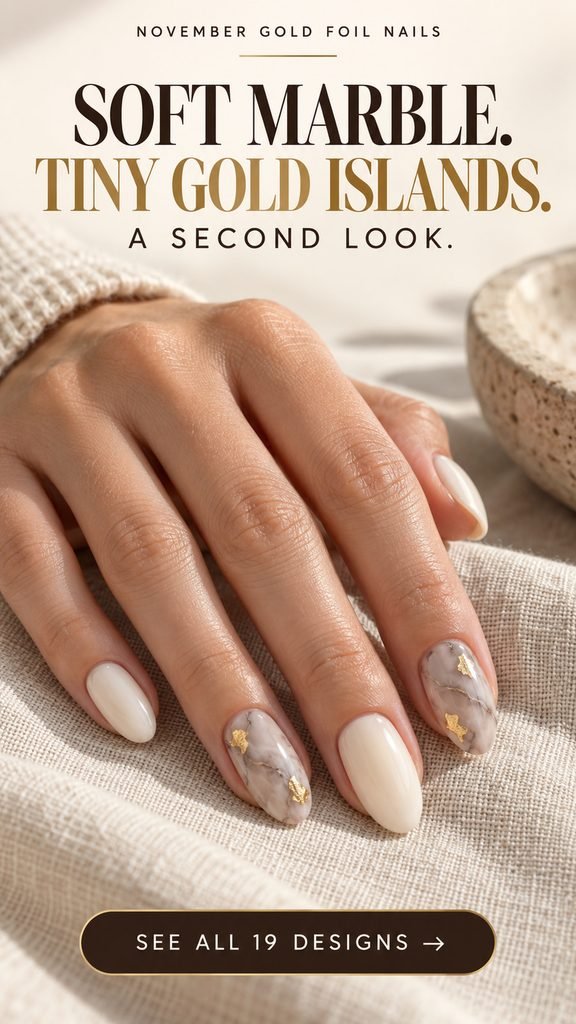
If bold marble feels like too much pattern, try this quieter version. Soft taupe-grey clouds drift through milky ivory, and a few gold islands sit apart from the fine veins. The result is airy rather than busy. It has the softness of a pale manicure with just enough detail to hold your attention up close.
The useful distinction to show your artist is that the gold does not outline every vein. Keep the marble faint, leave the plain nails creamy, and let two small foil patches become separate points of interest. On a narrow nail, one cloudy area and one gold island may be enough. Adding more veining is unlikely to help if you are trying to preserve this open, porcelain-like look.
Salon note: Milky ivory with two softly marbled accents, faint taupe-grey veining, and isolated gold foil islands. Keep the marble low contrast and avoid tracing every vein in gold.November gold foil nail design 07 / 19
7. Midnight Navy with Gold Constellations

Think of this as a night-sky mood rather than literal star nail art. The navy is deep, the gold pieces are tiny, and the little groupings leave dark space around them. You do not need moons, crystals, or a constellation diagram. The scattered fragments already give the eye something to find.
My preference for this version is a short squoval: the shape keeps the manicure grounded while the foil supplies the decorative detail. Make each cluster slightly different so the finish feels scattered rather than stamped into identical spots. If the navy reads black indoors, compare it with a slightly brighter blue sample. The blue undertone is part of what separates this look from the black statement manicure below.
Salon note: Short midnight-navy nails with small, uneven gold foil clusters on a few accents. Use torn fragments rather than star shapes, and preserve generous dark space around each group.November gold foil nail design 08 / 19
8. Mauve Color Blocks with a Gilded Patch
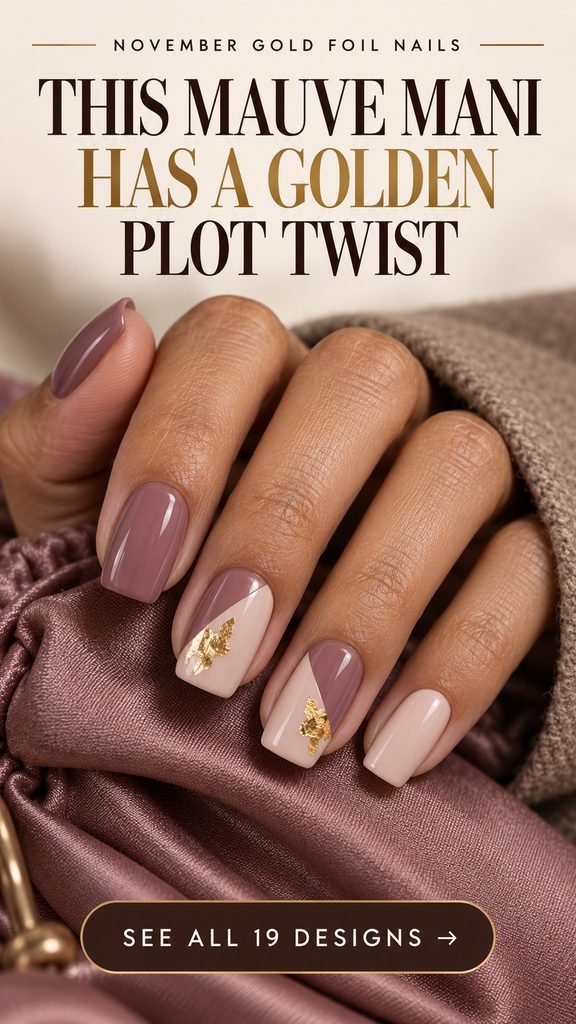
Dusty mauve and pale beige make an easy starting palette, but the small gold patch is what stops this manicure from looking predictable. Two diagonal color blocks give the foil a setting. Instead of decorating the dividing line, the gold sits inside the lighter half, like a little piece of collage placed on a blank page.
That placement is worth pointing out when you show the reference. A gold stripe along the diagonal would create a different design. Here, the pale block should remain large enough to surround the foil on every side. If you are choosing shades from a salon display, check that the mauve and beige still look distinct together; very similar values can make the split disappear from a normal viewing distance.
Salon note: Dusty mauve and pale beige with diagonal blocks on two accent nails. Place one small gold foil patch within the pale field, away from the dividing line. Keep the other nails solid.November gold foil nail design 09 / 19
9. Ink Black with One Foil Statement Nail
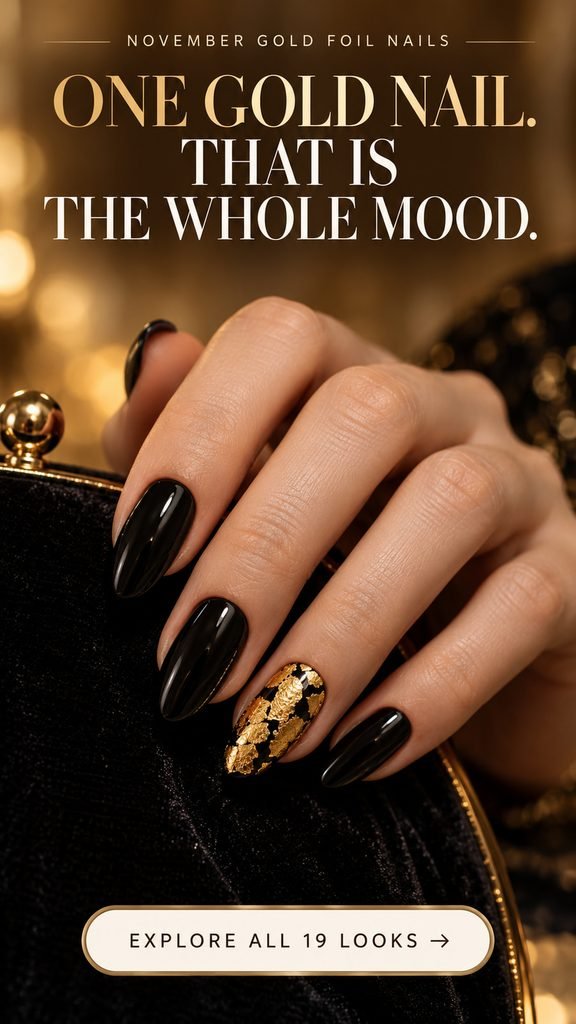
Sometimes the most convincing way to wear more gold is to put it all in one place. Glossy black gives this single foil nail a strong frame, while the rest of the manicure stays simple. The accent looks almost like a tiny piece of gilded artwork: bright patches, darker gaps, and a surface that changes as it catches the light.
Ask for visible foil fragments rather than an uninterrupted mirror finish. Those little black breaks are what distinguish this idea from a chrome accent. Because the gold is concentrated, you can skip extra decoration and still have a manicure that feels ready for an evening out. Prefer short nails? Keep the same one-accent layout; the color contrast provides plenty of impact without added length.
Salon note: Glossy black with one densely gilded foil accent. Leave small black gaps and an uneven dark border around the gold; the finished surface should be smooth, with the patchwork still visible.November gold foil nail design 10 / 19
10. Rose Beige with a Drifting Gold Ribbon
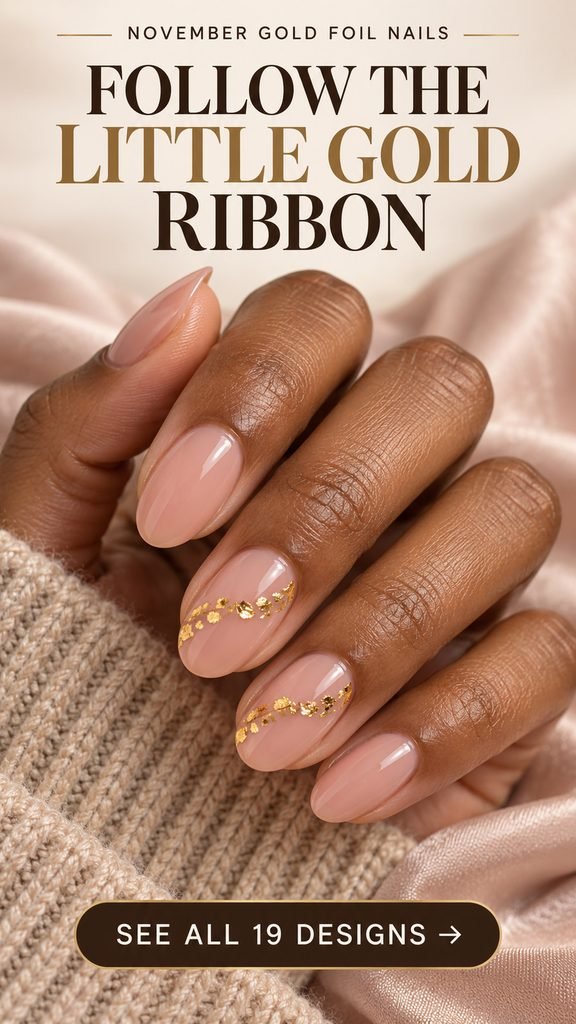
This is the soft-spoken option for someone who usually chooses a nude manicure. Rose beige gives you a familiar base, then a drifting gold ribbon crosses two nails. There is no sharp border or heavy block of metal. The line wanders gently, with little interruptions that make the foil feel light.
Choose a nude by how it looks beside your own skin, not by the name on the bottle. A rosier, warmer, or deeper beige can carry the same design. For a broad nail, give the ribbon a little curve instead of running it straight across like a belt. On a tiny nail, a short curved section can suggest the movement without trying to complete a full wave.
Salon note: A sheer rose-beige base with narrow, gently curving gold foil ribbons across two nails. Build the curve from small fragments, keeping gaps and plenty of visible nude around it.November gold foil nail design 11 / 19
11. Forest Green with Clear Gold Windows
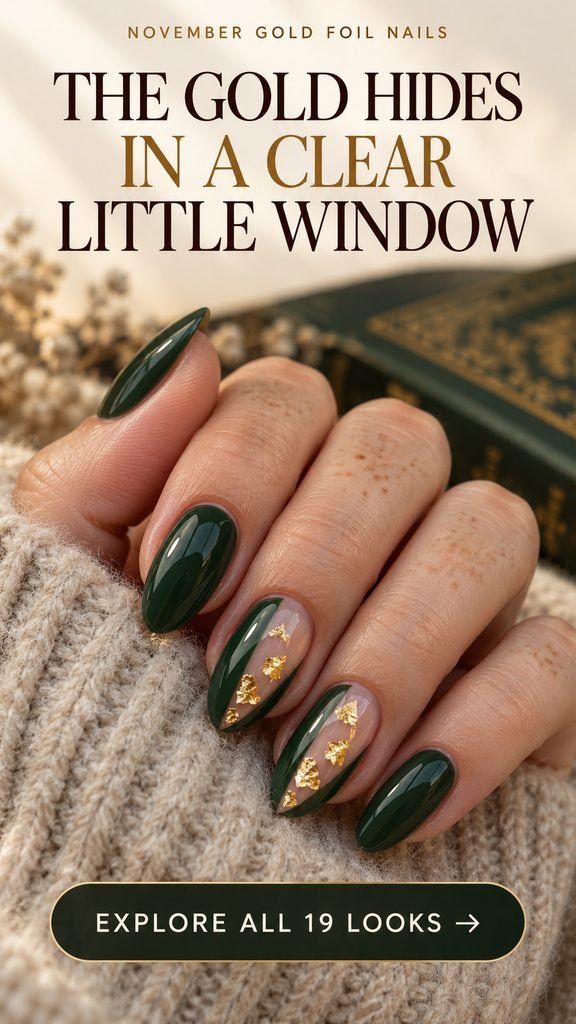
The clear window is the surprise. Forest green covers most of the nail, but a sheer diagonal opening gives a few gold fragments somewhere to float. You get the richness of a dark manicure and a lighter detail in the same design. It is particularly appealing if a full green set feels heavier than you want.
Show your artist the window shape before choosing the exact green. The opening needs enough width for the flakes and some untouched sheer space; a hairline cutout would lose the idea. A sheer tint can make the window more even in color while keeping it translucent. If you prefer a fully opaque manicure, swap the window for pale beige and keep the same placement, knowing the result will look more graphic.
Salon note: Deep forest green with two broad, sheer diagonal side windows. Place a few gold foil pieces inside each window and leave some of the transparent base visible around them.November gold foil nail design 12 / 19
12. Rust with Distressed Gold Patches
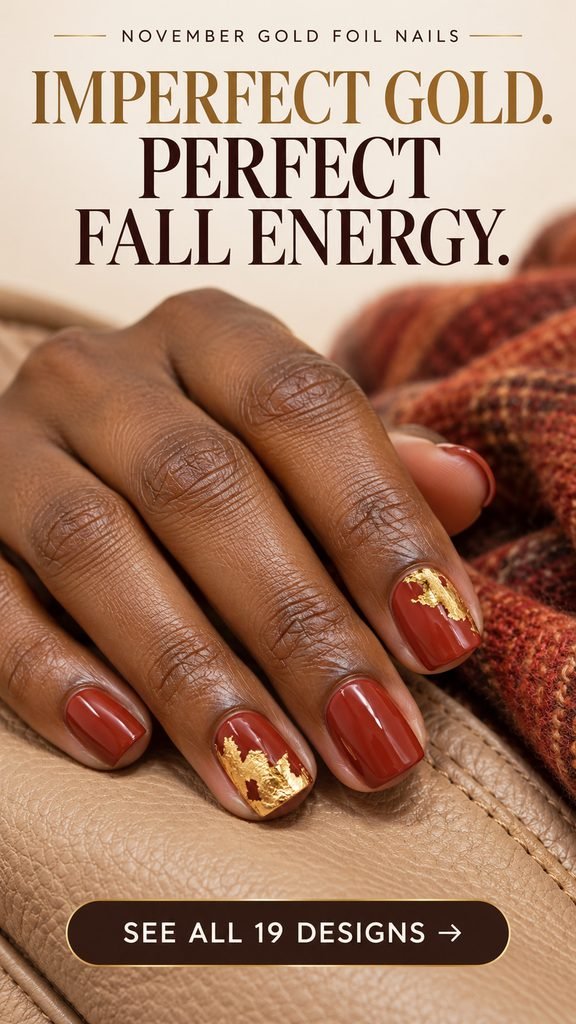
Rust and distressed gold have a warmth that suits simple November layers: a cream sweater, a worn leather bag, a plain dark coat. The larger foil patches make this version bolder than the tiny corner accents, but the irregular holes let the rust color show through. That slightly broken surface is the point.
Place the patches at different heights so they do not look like matching rectangles. One near a lower side and another toward an upper corner gives the set a looser rhythm. If your nails are very small, reduce the patch size until you can still clearly see rust around it. Describe the finish as distressed visually, not rough to the touch; the finished manicure should not rely on exposed, raised foil edges.
Salon note: Short rust-red nails with two uneven gold foil patches in offset positions. Let small openings reveal the rust underneath, and ask for a flat, smooth final surface.November gold foil nail design 13 / 19
13. Foggy Lilac with a Gilded Frame
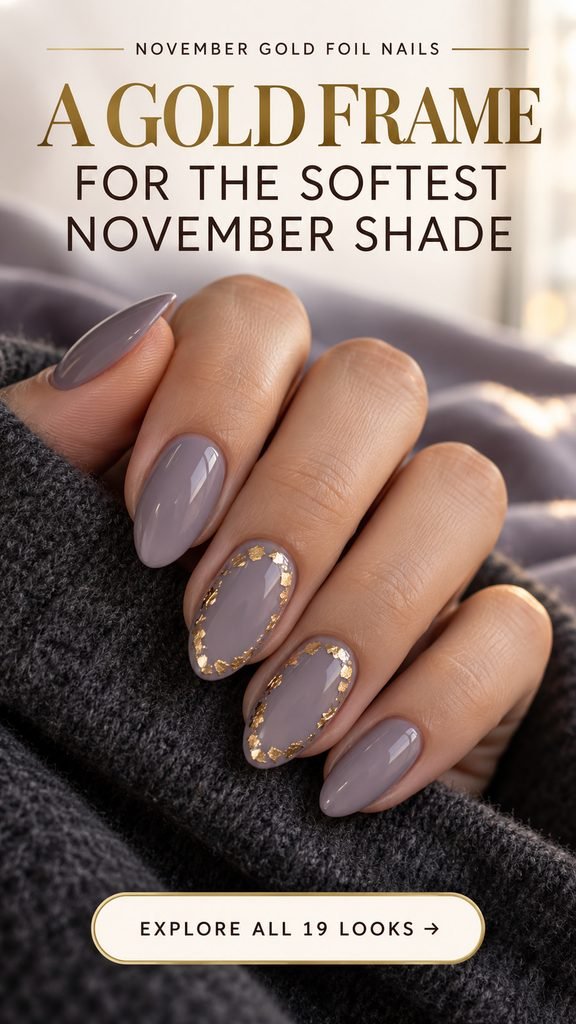
A foggy lilac is a lovely change of pace when your saved nail ideas are mostly brown and burgundy. The grey undertone keeps the color muted, while an incomplete gold frame brings some warmth to the edges. It feels delicate, but the placement is different enough to notice.
The frame needs to stay thin. If the gold becomes too wide, the lilac center starts to look like a small insert rather than the main color. Leave intentional breaks so the border feels made from foil instead of drawn with a metallic pen. A longer almond gives the outline more room, but a short oval can use just the side curves and leave the tip and base open.
Salon note: Grey-lilac nails with fine, interrupted gold foil frames on two accents. Keep a large untouched center, leave several gaps in the border, and keep every fragment inside the nail edge.November gold foil nail design 14 / 19
14. Cocoa-and-Cream Gold Terrazzo
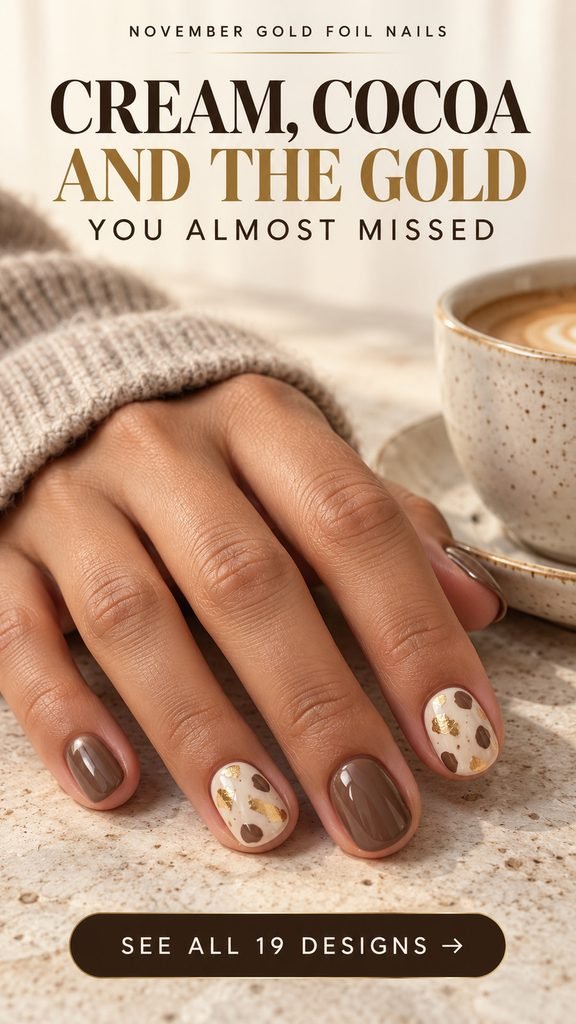
This is a good choice when you want a little pattern but do not want stripes, florals, or another French tip. Creamy accent nails hold irregular cocoa chips and gold fragments, while the plain brown nails give the eye a rest. The terrazzo effect feels playful at close range and fairly calm from farther away.
Vary the shape of the brown pieces as well as their size. Perfect circles would turn the design into polka dots, and evenly sized squares would make it feel more geometric. Let the gold appear as the smaller surprise among the cocoa marks. On a short round nail, an open arrangement with fewer chips will preserve the creamy background better than a tightly packed pattern.
Salon note: Light cocoa nails with two cream terrazzo accents. Mix irregular cocoa-colored marks with smaller gold foil shards, leaving the pieces separate and the cream background clearly visible.November gold foil nail design 15 / 19
15. Plum Aura with Gold Satellites
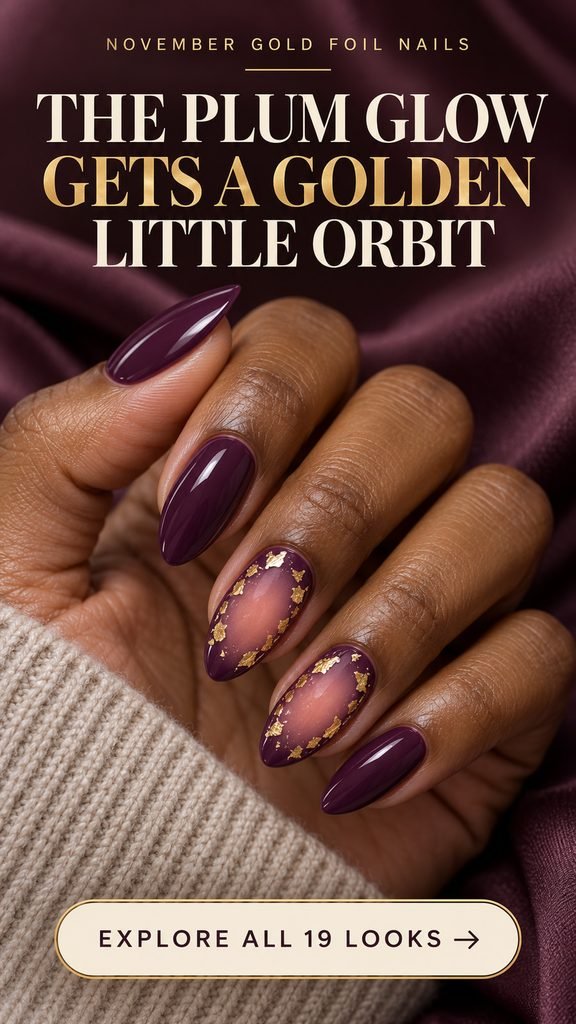
A soft rose glow inside plum polish already draws the eye toward the center. Adding a few gold fragments around that glow creates another layer to discover. Think of the flakes as loose satellites, scattered around the aura rather than forming a complete ring. The effect is rich enough for a dinner manicure but still has softness.
The fade matters more than the number of flakes. Ask to see a sample of the rose-to-plum blend, especially if your preferred plum is very dark. You want the center to look diffused, without a hard circular edge. If a full set of aura nails feels busy, keep the glow and foil on two accents and use the surrounding plain plum nails to make those details stand out.
Salon note: Plum nails with two soft rose-centered aura accents. Scatter a few small gold foil pieces around the outside of each glow, leaving gaps; avoid a complete metallic ring or a sharply defined center.November gold foil nail design 16 / 19
16. Greige with a Tiny Foil Bar
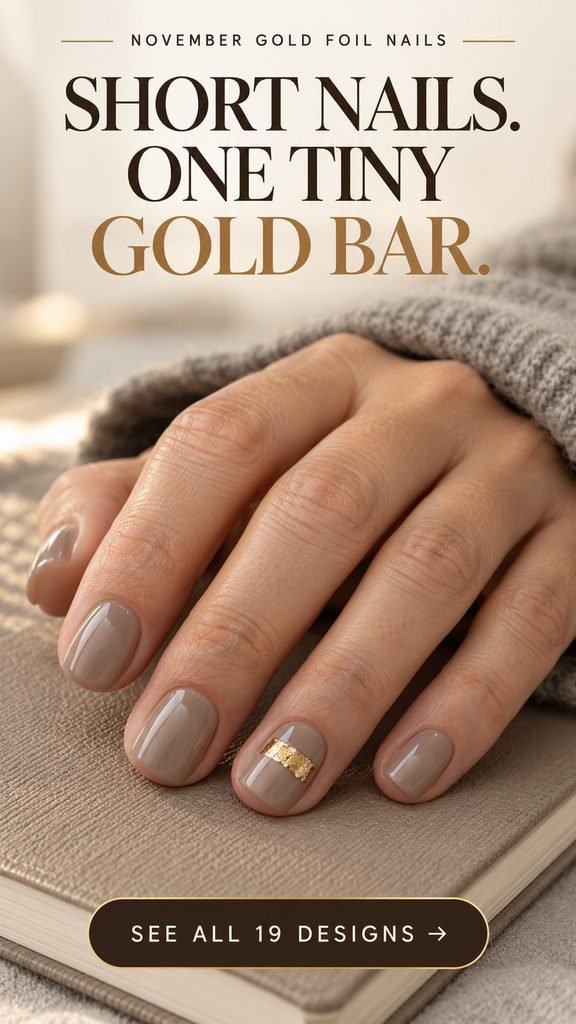
This little bar is proof that a design idea does not need much nail space. Mushroom greige stays understated, and a single foil accent gives the set a focal point. It is the manicure I would point to if your brief were simply, ‘I want something small that still feels special.’
The rectangle should look deliberately tiny, with greige surrounding it on all four sides. Keep the ragged edges of the foil instead of trimming it into a perfect strip; that slight irregularity gives the detail its character. You could choose a deeper neutral if pale greige feels flat on you. The useful feature to preserve is the proportion of the bar to the nail, not the exact shade in the picture.
Salon note: Very short greige squoval nails with one small horizontal gold foil bar on the ring nail. Make the bar narrow relative to the nail and preserve its slightly torn edges.November gold foil nail design 17 / 19
17. Chestnut with Gilded Cream Brushstrokes
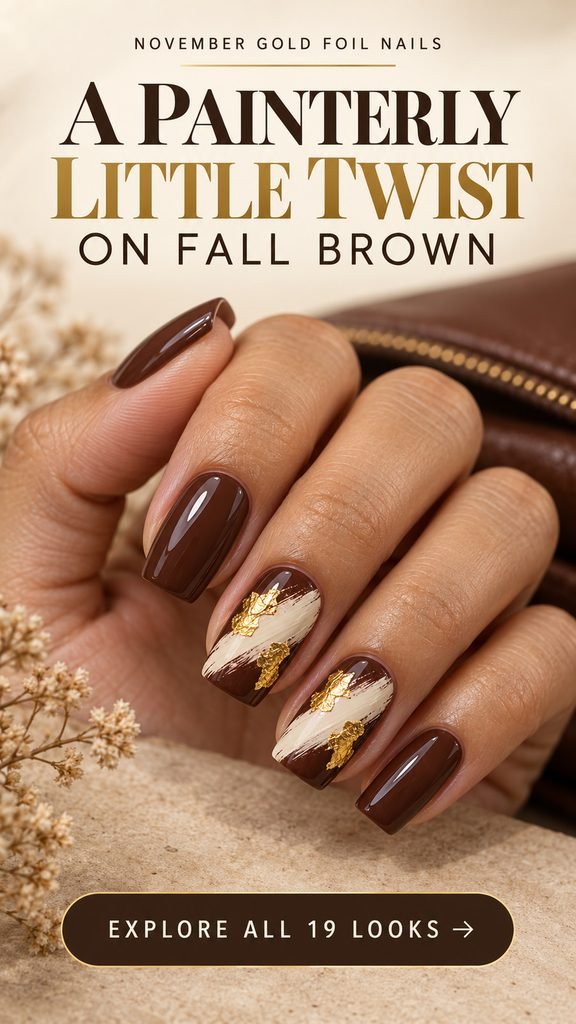
Chestnut, cream, and gold feel familiar together, but a broad painterly stroke makes the combination look less expected. The cream cuts across two brown nails, and a couple of foil patches overlap it. Because the brushstroke is intentionally uneven, the design has a relaxed, artful quality rather than the precision of a stripe.
Let the cream remain visible around the foil. If the metal covers the whole stroke, you lose the three-layer effect that makes this idea interesting. A soft square gives the broad mark a little space, while a shorter nail can carry a narrower diagonal. This is also a useful reference for someone who likes abstract art but wants a limited palette that will sit comfortably beside everyday clothes.
Salon note: Chestnut nails with broad, irregular cream brushstrokes on two accents. Overlap only small portions of the cream with gold foil, leaving brown, cream, and gold individually visible.November gold foil nail design 18 / 19
18. Peach Nude with a Foil Checker Accent
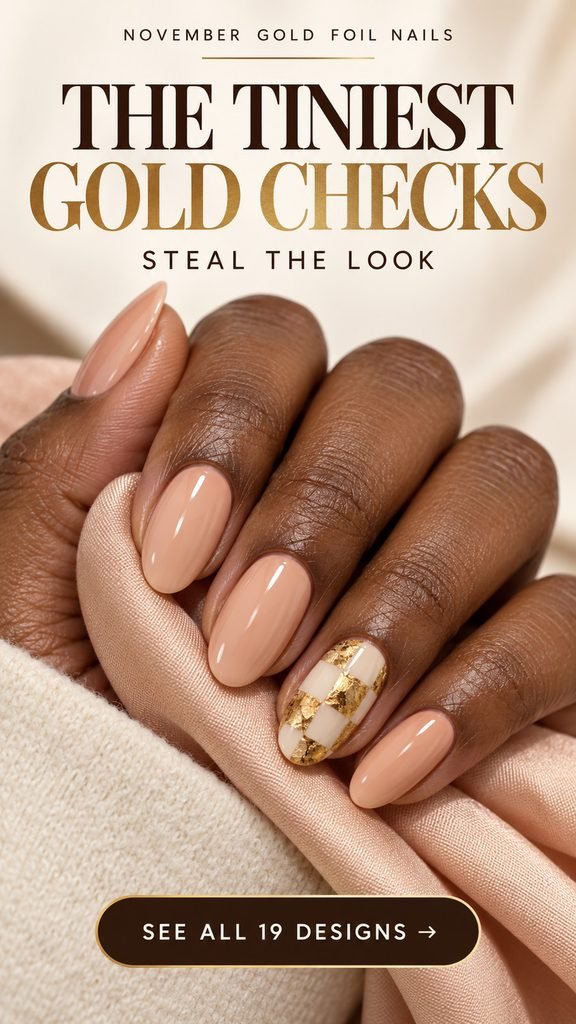
A foil checker accent brings a slightly playful note to a peach-nude manicure. The other nails stay plain, so the little grid becomes the one detail you notice. Alternating milky squares with gold also gives the foil a clear structure without requiring it to look like a perfectly smooth metallic sticker.
Choose a roomy check rather than trying to fit a miniature chessboard onto the nail. Your artist can reduce the number of squares to suit your width and length. The edges should be clear enough to read as checks, with a little foil irregularity inside them. For a quieter version, use the pattern on just the upper half of the accent and leave the rest peach nude.
Salon note: Peach-beige nails with one large-scale checker accent in milky ivory and gold foil. Use a small number of readable squares, preserving the fragmented foil texture within the gold areas.November gold foil nail design 19 / 19
19. The Five-Color Gilded Autumn Set
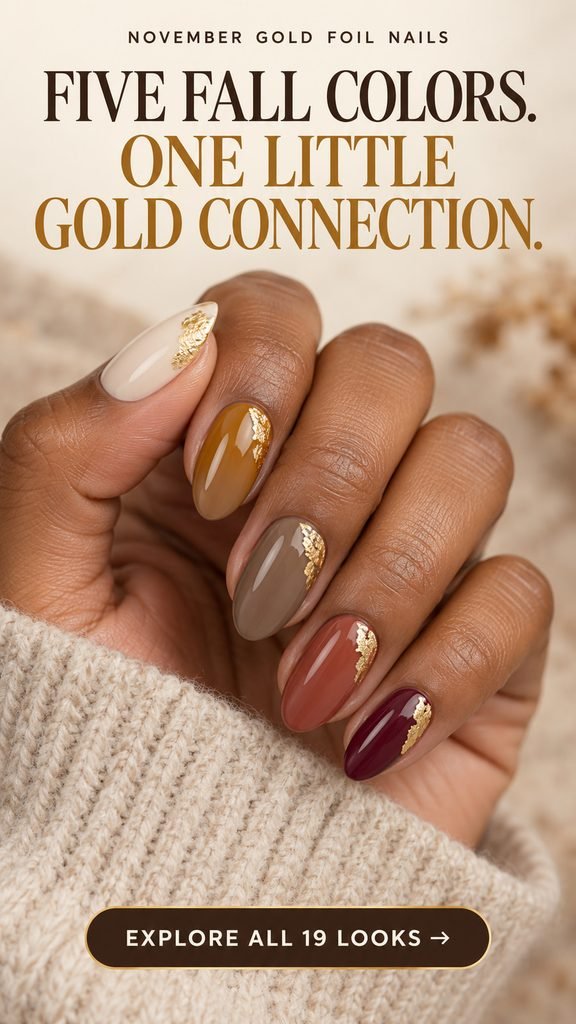
Cannot choose between a pale neutral, a warm autumn shade, and something deeper? Let them share the manicure. Ivory, ochre, taupe, terracotta, and berry create a five-color set, with small gold patches giving the shades a common detail. The colors do not have to match; they need to feel comfortable next to one another.
Line up the actual polish swatches before deciding on the order. A vivid yellow may dominate where muted ochre would blend, and a very bright red will change the mood of the berry nail. Keep the amount of foil roughly consistent from finger to finger so no single shade gets lost under metal. If five colors feel too busy, reduce the palette to three and repeat two of them.
Salon note: A muted five-color set in ivory, ochre, taupe, terracotta, and berry. Add a similarly small gold foil patch to each nail, varying the corner or side placement while keeping the coverage balanced.
Turn Your Saved Picture into a Clear Salon Request
Start with the part you would be disappointed to lose. Perhaps it is the transparency of the smoky glass nails, the small scale of the greige bar, or the dark gaps in the black-and-gold accent. Name that feature first. Your artist can then adapt the rest of the design to your nail length without accidentally removing the reason you saved it.
Next, agree on the actual amount of artwork. “Two gold accents” is much clearer than “a little foil,” particularly when you are discussing appointment time and pricing. Show your current nails alongside the reference, choose the polish from real swatches, and ask to see the foil with the intended finish on a sample tip if you are undecided.
A useful message is: “I like the scattered gold in this picture. I would like it on two short oval nails, with the other nails plain. Please keep the pieces small, leave the base visible, and use a smooth glossy finish. Can you quote for that layout?” Swap in your preferred shape, placement, and accent count.
A Few Gold Foil Questions, Answered
Which look should I choose if I usually wear plain nails?
The oat-milk corner and tiny greige bar are the easiest visual starting points in this collection: each keeps most of the manicure undecorated. For a little more movement, try the rose-beige ribbon. You can use your usual neutral shade underneath any of those layouts, so the change is mostly in the small gold detail.
Are foil flakes and a sheet of transfer foil interchangeable?
Do not assume they are. A loose fragment is positioned as a piece; transfer foil leaves its decorative layer behind when the backing is removed. Use the instructions for the exact foil, adhesive or gel, and finishing products you have. A tutorial for a different material may use a different application surface or sealing sequence.
Can I use gold foil with acrylic or regular nail polish?
Compatibility depends on the product. Young Nails lists its gold foil for use with its acrylic, Synergy Gel, and maniQ Color systems. For regular polish, choose a foil and adhesive or finishing method specifically described as compatible with air-dry lacquer. Do not copy the curing steps from a gel tutorial into a regular-polish manicure.
How do I stop foil from looking bulky or catching on things?
Make a smooth finish part of the brief from the start. The fragments should be laid flat and finished using the layers specified for the system. For example, Daily Charme’s transfer-foil method includes a sealing gel before the final top coat. That is a product-specific sequence, not a rule to improvise across every brand. Ask your artist to check for raised edges before the service is finished.
Does “gold foil” mean the nail art contains real gold?
In this guide, gold describes the appearance of the nail art. It is not a claim about precious-metal content. If the material matters to you, check the actual product description or ask the manufacturer; a photograph and a shade name cannot confirm it.
Choose the placement that makes you look twice, then make the colors your own. Sometimes a whole November manicure begins with one tiny piece of gold.