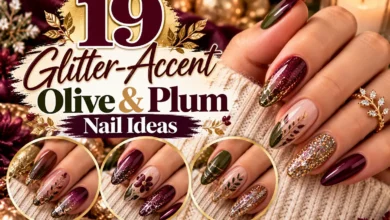
You have a red polish, a half-used glitter topper, and a December event coming up. That is already enough for a festive manicure. You do not need to begin with a miniature snowflake or a perfect French tip; one accent nail or a few well-placed dots can give a simple set plenty of personality.
These 17 easy December nail designs are built around regular, air-dry nail polish. Each includes supplies, three practical steps, and a tip to help you avoid a common frustration. Some need only the bottle brushes. Others use a dotting tool, a fine brush, or a flat sticker. The tree, wreath, and snowman take a little more practice, so you can choose a design that suits your confidence level.
Start with one accent nail if you are unsure. A small success on the ring finger is more enjoyable than trying to rescue complicated artwork on all ten nails.
Set Up Your Regular-Polish Kit
Choose air-dry colors and an air-dry top coat. Check the product directions rather than relying on the word “gel” in the name: some products describe a gel-like finish, while others require a curing lamp. These instructions are for regular polish that dries without a UV or LED lamp.
- The two or three colors needed for your chosen design, plus the base and top coats recommended for those products.
- A small dotting tool for dots, berries, and simple shapes. A clean, smooth, rounded bobby-pin end can be an alternative; avoid a sharp or damaged end.
- A fine nail-art brush for a stripe or triangle, if your chosen design needs one.
- A nonporous palette for a small fresh drop of polish, plus a protected work surface.
- Polish remover, lint-free pads, and a small cleanup brush or cotton swab.
Shape your nails to a comfortable length and remove old polish. Begin with clean, dry nails prepared according to your polish system. Work in a ventilated space and follow the product labels. Set out the tools before painting so you are not opening drawers with wet nails.
For ordinary color application, OPI’s lacquer guide describes starting down the center and then working along the sides, keeping polish from flooding the cuticle. Use that controlled approach for the base colors below. Let each layer dry as your products direct; the steps assume your base is ready before contrasting artwork goes on top.
1. Cherry Red With a Gold Accent Nail
A glossy red manicure with one gold nail feels ready for a holiday dinner before you draw a single line. The color contrast does the work, making this a useful first choice if your painting hand is still a little shaky.

You need: Cherry-red cream polish and a fine gold glitter polish with good coverage. Bottle brushes only.
Difficulty: Easiest: no detail tool.
How to recreate it:
- Paint the thumb, index, middle, and pinky nails red, using the number of thin coats your formula needs.
- Paint the ring nail with the gold polish. If your gold is a sheer topper, use it over a beige or gold-colored base instead of building a thick stack of glitter.
- Let the color layers dry as directed, then finish with a compatible regular-polish top coat.
Make it easier: Check the gold on a spare tip first. A sheer glitter topper and an opaque gold polish can look similar in their bottles but give very different coverage.
2. Cranberry and Pine Color Mix
Cranberry and pine make an ordinary color manicure feel seasonal. There is no artwork to line up and no small symbol to get right. It is a particularly forgiving option when you are painting with your non-dominant hand.
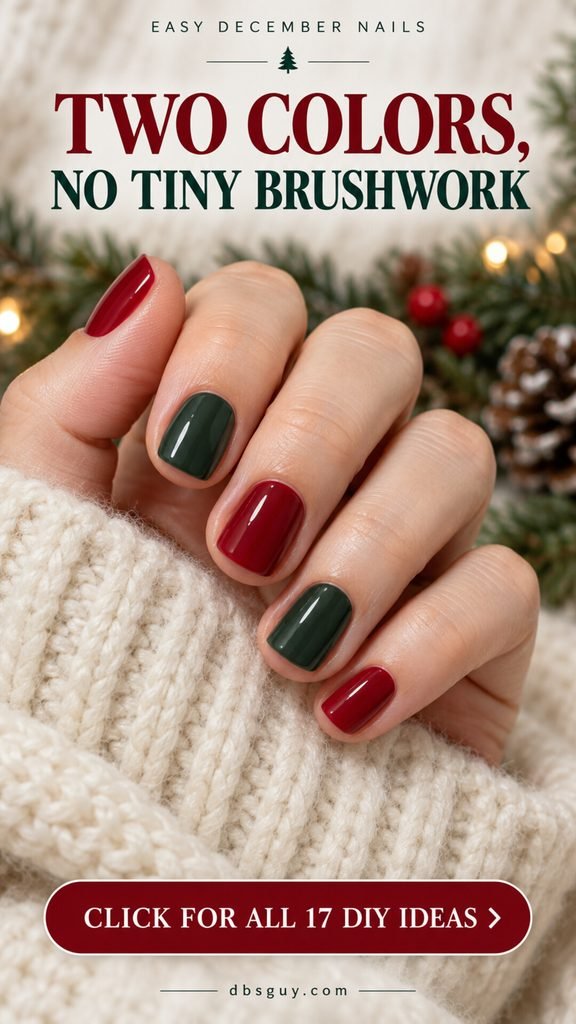
You need: Cranberry-red and deep-green cream polishes. Bottle brushes only.
Difficulty: Easiest: solid colors.
How to recreate it:
- Choose the color order before opening the bottles. Try red on the thumb, middle finger, and pinky, with green on the index and ring fingers.
- Paint all nails assigned to one color, then switch bottles. Build coverage in thin coats, following each product’s directions.
- Use the same order on the other hand, or reverse it deliberately. Finish once the layers are ready for top coat.
Make it easier: Choose two creams with a similar level of shine. Keeping the finish consistent makes the combination look intentional even when the shades are very different.
3. Midnight Snow-Dot Edges
A few white dots around navy edges suggest falling snow without asking you to paint a six-point snowflake. The mostly plain center keeps the design readable, and uneven spacing can actually make the snowfall feel more natural.

You need: Navy and white polish; a small dotting tool; a nonporous palette.
Difficulty: Easy: scattered dots.
How to recreate it:
- Apply the navy base and allow it to dry before adding art.
- Put a small fresh drop of white on the palette. Touch the dotting tool into it, then place a few dots near the nail tip and along one side. Lift straight up after each touch.
- Leave gaps and vary the dot sizes slightly. Repeat on as many nails as you like, allow the dots to dry, and seal gently.
Make it easier: Practice one dot on a spare tip before touching the nail. If it spreads into a puddle, pick up less polish rather than pressing harder.
4. Ice Blue Glitter Tips
Silver glitter fading over icy blue gives the impression of frosted tips. Because the edge is intentionally soft, you do not need the precise smile line of a French manicure. The shimmer works for the whole winter season, including the days after Christmas.
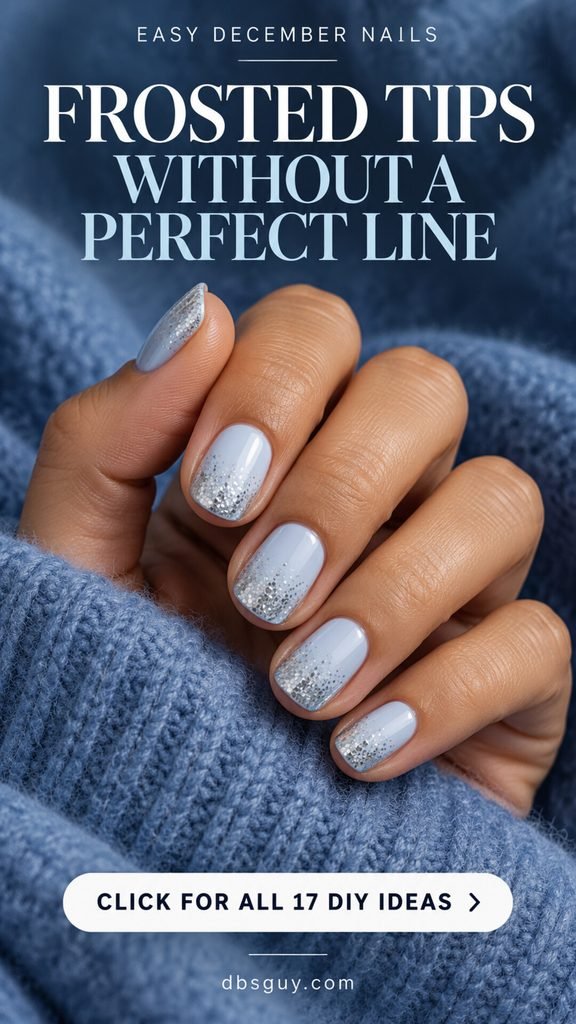
You need: Light-blue cream polish and a silver glitter topper with a clear base.
Difficulty: Easy: loose glitter placement.
How to recreate it:
- Paint the blue base and let it dry.
- Wipe some excess clear base from the glitter brush, then lightly dab a little glitter near the free edge. Keep the layer thin.
- Once ready for another layer, add a little more glitter at the very tip only. Leave the lower half mostly blue, then finish with top coat when directed.
Make it easier: If the glitter migrates across the entire nail, use fewer brush strokes. Place it where you want the sparkle instead of repeatedly brushing from base to tip.
5. One Tiny Triangle Tree
One little green tree can carry the whole Christmas theme. This version starts with a triangle, so you can skip individual branches and ornaments. Keeping the other nails milky ivory makes the accent easier to see and reduces the amount of detail painting.
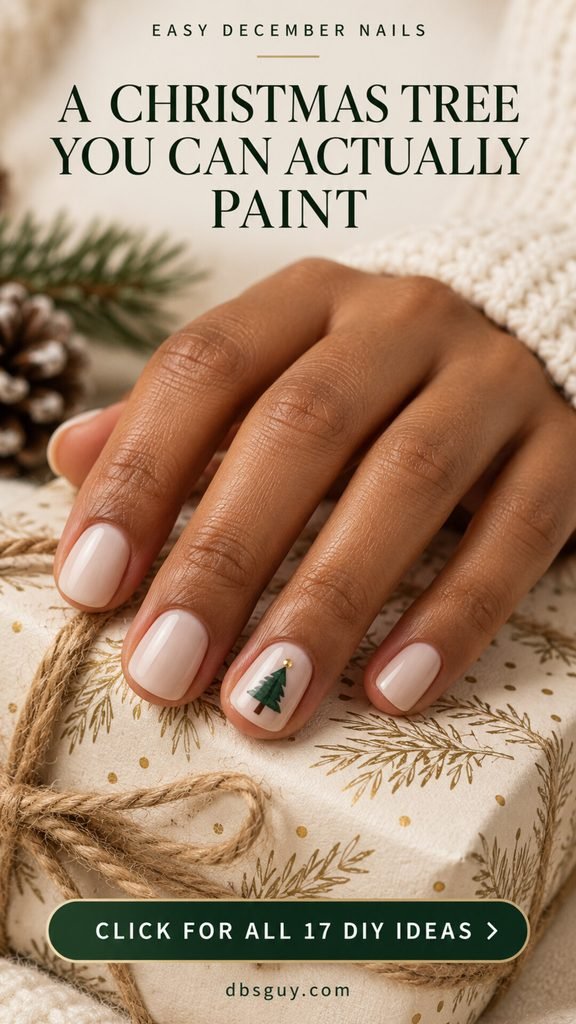
You need: Ivory, green, brown, and gold polish; a fine nail-art brush; a small dotting tool.
Difficulty: A little practice: one small shape.
How to recreate it:
- Paint an ivory base and let it dry. On the accent nail, mark a small triangle with its point facing the base of the nail, leaving space around all three sides.
- Use the fine brush to fill the triangle green. Add a short brown trunk below it, toward the free edge, while keeping all polish on the nail.
- When the green is dry, place one small gold dot above the point. Let the artwork dry before sealing.
Make it easier: The reference includes branch-like edges. Start with a plain triangle; add a couple of short outward strokes only if you feel comfortable. The tree still reads clearly without them.
6. Dotted Holiday Wreath
A dotted wreath is more about arranging small marks than drawing a perfect circle. A nude or cream background keeps the green visible, while a few red dots suggest berries. One wreath per hand is plenty for this look.
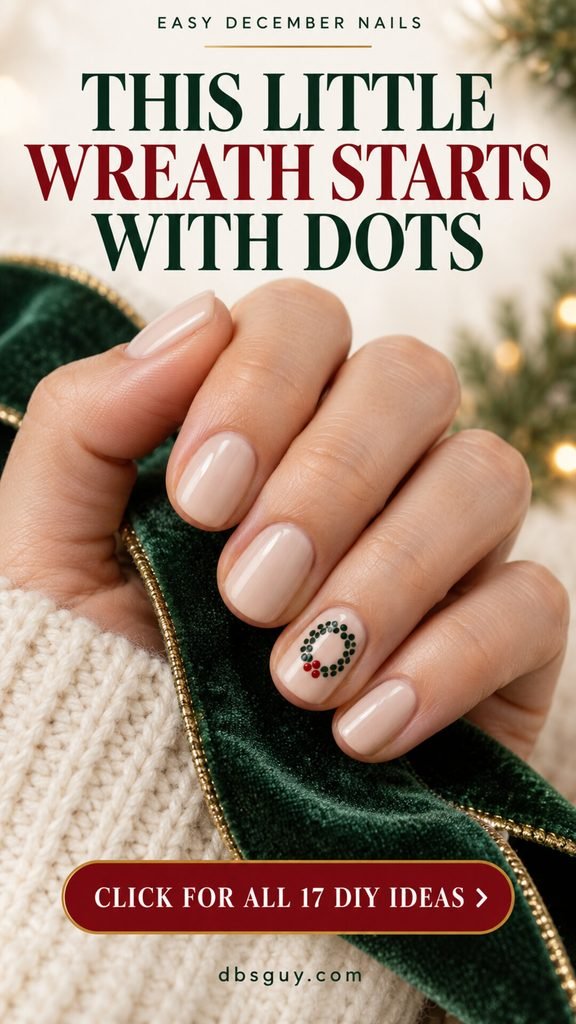
You need: Nude or cream, green, and red polish; a small dotting tool.
Difficulty: A little practice: controlled dot placement.
How to recreate it:
- Paint and dry the light base. Place four small green dots around an imaginary circle: top, bottom, left, and right.
- Add a few smaller green dots between them, keeping the center empty. Stop before the dots merge into one solid disk.
- After the green is dry, add two or three small red berry dots along the wreath. Allow the detail to dry, then top-coat gently.
Make it easier: Choose a wider nail, such as the thumb, if the ring finger feels cramped. A larger working area is easier than shrinking every dot to fit.
7. Peppermint Corner Tips
Red and white supply the peppermint mood even without a full set of candy-cane stripes. A red corner over a white base is a simpler shape to attempt than several parallel lines, and a slight difference between nails will not change the idea.
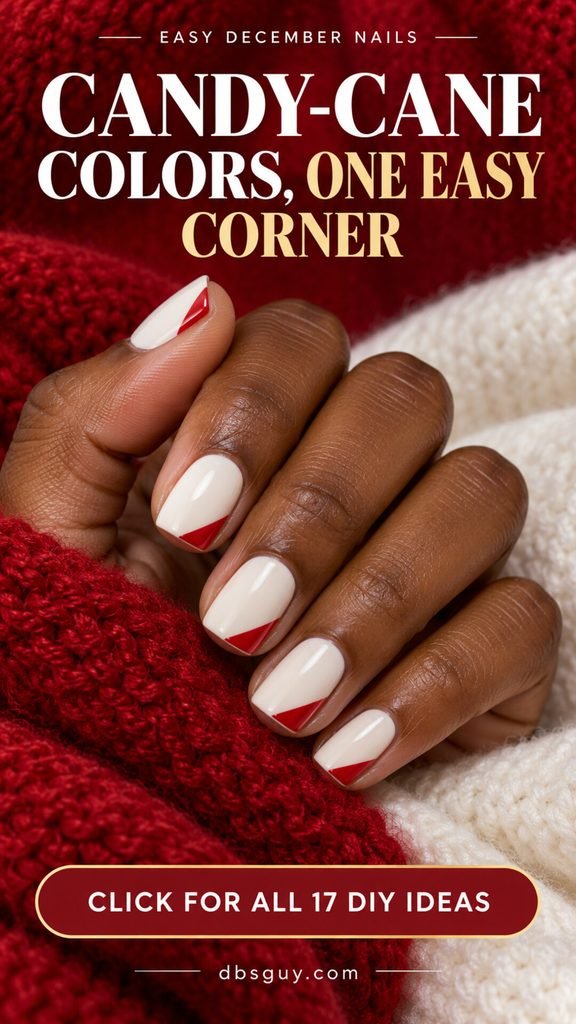
You need: White and red cream polish; the bottle brush or a small flat nail-art brush.
Difficulty: Easy: one diagonal corner.
How to recreate it:
- Apply the white base and let it dry completely before adding the contrasting color.
- Starting at one side near the tip, paint a short diagonal red edge. Fill the small triangular corner between that line and the free edge.
- Repeat in the same general direction on the other nails, or keep it to one accent. Let the red dry and seal with a light touch.
Make it easier: Begin with a small red corner. You can make it larger if necessary, but repeatedly correcting the boundary can turn a tiny accent into a half-red nail.
8. Evergreen Gold Stripe
Evergreen with one gold stripe feels festive without detailed Christmas imagery. Limiting the line to the ring finger makes it a manageable first striping project. It also gives you an easy fallback: the plain green nails already make a complete manicure.

You need: Deep-green cream polish, opaque metallic gold polish, and a fine striping brush.
Difficulty: A little practice: a straight line.
How to recreate it:
- Paint the green base and let it dry. Put a fresh small drop of gold on your palette.
- Load a fine brush lightly. Paint a short line down the center of the accent nail, starting a little away from the cuticle and ending before the tip.
- If one long stroke feels awkward, join two short strokes in the middle. Let the line dry before top coat.
Make it easier: Rest both hands on the table and turn the finger to a comfortable angle. If the line keeps widening as you correct it, switch to three gold dots instead.
9. Black and Silver Confetti
Black polish makes a scattered silver topper look bright and party-ready. This is a useful December option when you want sparkle but do not want to draw anything. The uneven glitter placement is part of the design, so every nail can be slightly different.

You need: Black cream polish and a sparse silver glitter topper with a clear base.
Difficulty: Easiest: a ready-made topper.
How to recreate it:
- Apply the black polish in thin coats and allow it to dry.
- Brush on one light layer of the silver topper. If one area looks empty, place a small dab there rather than coating the whole nail again.
- Keep some black visible between the particles. Finish with the top coat recommended for your polish once the topper is ready.
Make it easier: A dense silver glitter may hide the black base. Choose a scattered topper, or use your existing glitter on one accent nail instead of forcing it into a sparse finish.
10. Milky Pink Heart Accent
One burgundy heart on milky pink is small, sweet, and easy to keep wearing after the holiday season. It asks for a little more control than an ordinary dot, but you only need to complete one heart on each hand.

You need: Milky-pink and burgundy polish; a small dotting tool and fine brush.
Difficulty: A little practice: two dots joined into a point.
How to recreate it:
- Apply and dry the pink base. On the ring nail, place two tiny burgundy dots close together to make the rounded top of the heart.
- While those dots are still wet, use the fine brush to pull their lower edges toward one shared point. Keep the point close so the heart stays compact.
- Leave the remaining nails plain. Let the heart dry before adding top coat.
Make it easier: Try the heart on a spare tip first. If it becomes too large, reduce the starting dots; a long pointed tail usually makes the shape harder to recognize.
11. Christmas Sprinkle Dots
Red and green sprinkles over ivory make an easy holiday pattern without a strict layout. You can keep the dots widely spaced for a quiet look or add a few more for something playful. Slightly irregular placement suits the sprinkle effect.

You need: Ivory, red, and green polish; a small dotting tool.
Difficulty: Easy: loose dots.
How to recreate it:
- Paint the ivory base and let it dry.
- Add a few small red dots with visible space between them. Once the red is dry, clean and dry your tool before switching to green.
- Place green dots in some of the gaps, leaving ivory visible. Stop before the colors become a solid confetti layer, then dry and seal.
Make it easier: Do not keep filling every empty spot. The open background helps each dot look crisp and keeps the design from becoming harder than it needs to be.
12. Two-Dot Snowman
A tiny snowman can begin with just two white circles. Against pale blue, the simple silhouette feels wintry even without a carrot nose, hat, or scarf. This is one of the more detailed options here, so keep it on a single accent nail.
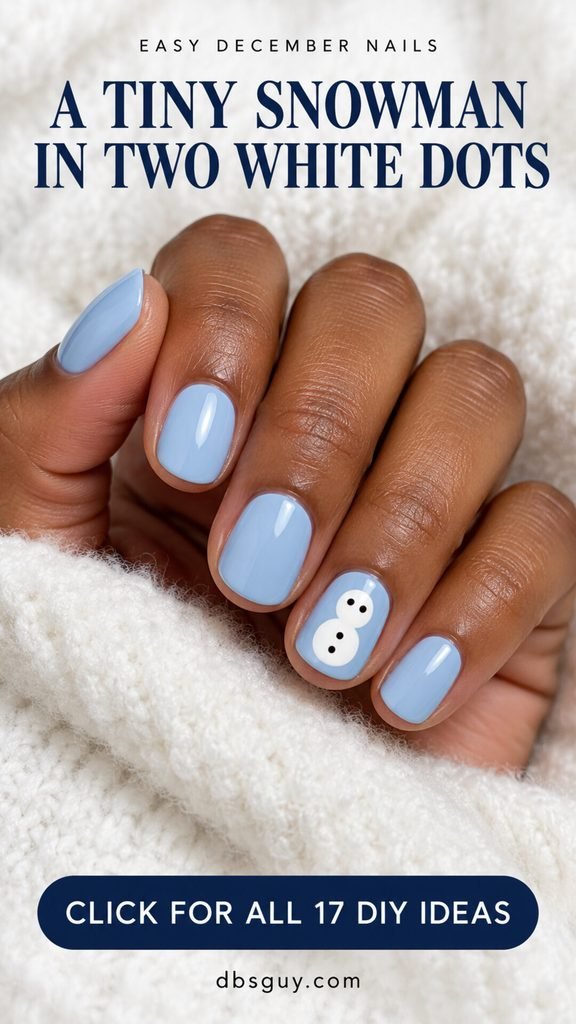
You need: Light-blue, white, and black polish; two sizes of dotting tool or one tool used with different amounts of polish.
Difficulty: A little practice: dots in two sizes.
How to recreate it:
- Paint and dry the blue base. Add a larger white dot for the body in the lower half of the accent nail toward the free edge.
- Place a smaller white dot immediately above it for the head, toward the base of the nail, leaving a gap from the cuticle. Let the two circles meet or slightly overlap, then allow the white to dry.
- Add two tiny black eyes and one or two buttons. Skip extra facial details, let the dots dry, and seal carefully.
Make it easier: Use a spare tip to compare the two white dot sizes first. If the eye dots feel too tiny to control, leave the snowman as a simple white silhouette.
13. Navy With a Glitter Crescent
A loose gold crescent near the base of one navy nail gives a dressy effect with forgiving edges. It is closer to a scatter of sparkle than a sharply painted half-moon. That softer boundary makes it a useful choice if crisp curves are not your favorite task.

You need: Navy polish, a gold glitter topper, and a small nail-art brush for placement.
Difficulty: Easy: one loose glitter accent.
How to recreate it:
- Paint the navy base and let it dry.
- Transfer a small amount of gold glitter topper to your palette. Use the small brush to place a few particles in a shallow curve near the base of the ring nail.
- Leave a gap from the cuticle and keep the center of the nail plain. Let the glitter layer dry, then finish with compatible top coat.
Make it easier: There is no need to make an unbroken gold line. A few separated flecks can suggest the curve while keeping the design lighter and easier to control.
14. Cocoa and Cream Polka Dots
Cocoa and cream dots feel like a cozy winter sweater in nail form. The warm brown makes the pattern less stark than black and white, while the simple repeated dots give you useful practice with a dotting tool.

You need: Cocoa-brown and cream polish; a small dotting tool.
Difficulty: Easy: repeated dots.
How to recreate it:
- Paint the cocoa base and let it dry.
- Place a few cream dots down the center of each nail, leaving generous gaps. Add one or two offset dots on each side where space allows.
- Refresh the polish on the tool as needed to keep the dots similar in size. Let them dry before sealing the manicure.
Make it easier: A pinky does not need as many dots as a thumb. Keep the spacing comfortable for each nail instead of trying to squeeze an identical count onto every finger.
15. Burgundy With a Star Sticker
A gold star over burgundy looks detailed, but the star is a flat nail sticker. That makes the decoration a placement task instead of a miniature drawing exercise. One small star leaves the rich base color in charge of the look.

You need: Burgundy regular polish; small flat nail stickers labeled suitable for use over regular polish; tweezers if helpful.
Difficulty: Easy: sticker placement.
How to recreate it:
- Paint the burgundy base and let it dry thoroughly before applying the sticker.
- Choose a star small enough to sit inside the nail edges. Following the sticker’s directions, position it on the ring nail and smooth its points down gently.
- Seal as recommended by the sticker and top-coat manufacturers, making sure the points lie flat. Keep the other nails plain.
Make it easier: A curled sticker corner will not always settle just because you add more top coat. Reposition or replace a poorly fitting sticker before sealing rather than burying it in thick layers.
16. Red With a Gold Diagonal Corner
A metallic gold corner gives a plain red manicure an easy party accent. The larger diagonal shape is less fiddly than a hairline French tip, and doing it on one nail keeps the project manageable.

You need: Red cream polish, an opaque gold metallic polish, and a small flat brush if your bottle brush feels too wide.
Difficulty: Easy: one diagonal color block.
How to recreate it:
- Apply the red base and let it dry.
- On the ring nail, paint a diagonal boundary across one small side corner near the base, leaving a gap from the cuticle. Fill the corner with a thin layer of metallic gold. You can place it at the tip instead if that feels easier.
- If the gold needs more coverage, wait as directed before adding another thin layer to that area only. Let the accent dry, then top-coat.
Make it easier: Use a metallic gold that covers well. A transparent gold glitter topper will create a speckled corner instead of the solid block shown here; that is a valid variation if it is the polish you own.
17. Champagne With a Red Dot Trail
Three red dots over champagne shimmer make a small, cheerful accent that still feels dressy. The polish supplies the sparkle, and the dots add the holiday color. It is a useful last option if you want nail art with a clear stopping point.
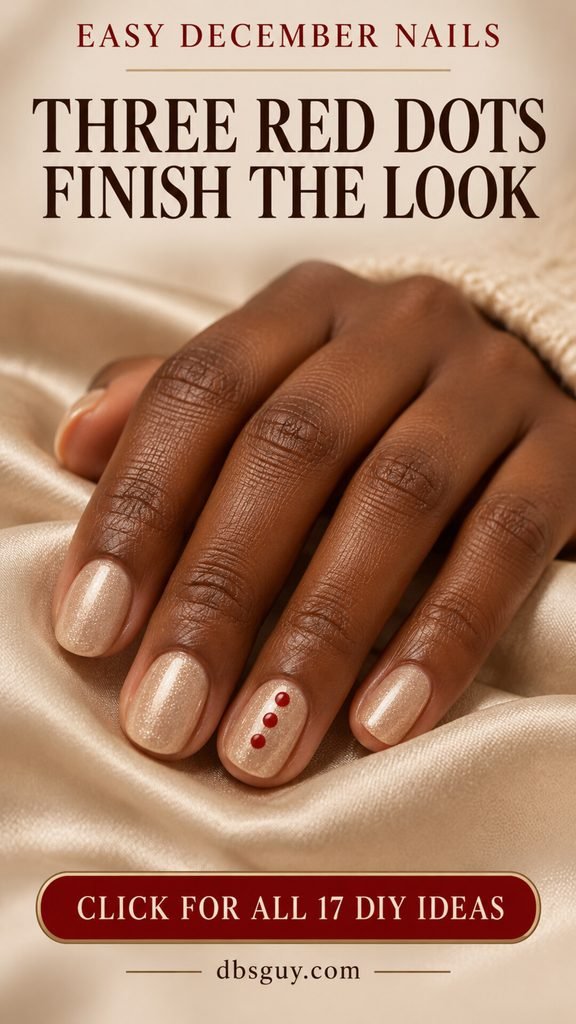
You need: Champagne shimmer polish, red cream polish, and a small dotting tool.
Difficulty: Easy: three spaced dots.
How to recreate it:
- Apply the champagne shimmer and let it dry.
- Place one small red dot near the middle of the ring nail. Add one above and one below it, leaving a visible gap between all three.
- Leave the other nails plain. Allow the dots to dry before finishing with top coat.
Make it easier: Center the middle dot first rather than starting at the cuticle. It is easier to judge the remaining space and avoid squeezing the final dot against the nail tip.
Small Fixes That Make DIY Nail Art Easier
If your dots turn into blobs
Pick up less polish and touch down more lightly. Practice on a spare nail tip so you can see the mark your tool makes. A larger dot is not automatically a mistake: it can work in a scattered pattern. The problem usually comes when you keep enlarging every other dot to match it.
If a second color drags the first
Stop and let the base dry longer before continuing. Most of these designs layer separate colors, so a wet base is not helpful. The heart is the small exception: its two red dots are joined while wet, but the pink underneath should already be dry.
If polish gets thick on your palette
Use a new small drop rather than fighting a sticky one. Close the bottle between uses and clean tools between colors according to their care instructions. Do not add remover to the polish bottle as an improvised thinner; follow the polish maker’s guidance for a thickened formula.
If top coat smears the detail
Give the artwork more drying time and follow the top coat’s application directions. Use a light touch and avoid repeatedly brushing the same area. Try the combination on a spare tip if you are working with new products. A dot can contain more polish than the surrounding color coat, so the two may not be ready at the same time.
If your non-dominant hand feels impossible
Rest both hands on the work surface and turn the finger you are painting to a comfortable angle. Keep the art to one nail, or use the alternating-color or glitter-topper design on that hand. Your two hands can share a palette without carrying identical artwork.
Choose a Design Around the Tools You Already Have
With only bottle brushes, start with red and gold, cranberry and pine, or black and silver confetti. If you have a dotting tool, try snow edges or the three-dot champagne accent before attempting a wreath. A fine brush opens up the stripe and triangle designs, but it is not a requirement for a festive manicure.
Do one practice version of the detail before starting a full set. You are checking its size, coverage, and spacing, not trying to produce a perfect miniature painting. Keep your preferred nail length and adapt the design to it. Fewer dots or one smaller accent are often all the adjustment you need.
Frequently Asked Questions
Can I really do December nail art with regular polish?
Yes. Dots, simple color blocks, glitter accents, and suitable flat stickers can all be used with regular air-dry polish. Essie’s beginner nail-art guide includes dot, heart, and glitter techniques using regular polish. The important distinction is using products meant for air drying throughout the manicure.
Which design is easiest for a complete beginner?
Try cherry red with one gold accent nail or the cranberry-and-pine color mix. Both use ordinary color application instead of fine detail work. A scattered glitter topper is another simple way to add interest without drawing a shape.
How long should I wait between layers?
Use the timing and application directions for your specific polish and top coat. Formula, layer thickness, and the amount of detail all affect drying. Do not assume that a surface that seems dry is ready for pressure, tight gloves, or a sticker. Leave yourself time after finishing rather than painting immediately before getting dressed.
Do I need a special dotting tool?
It helps with control, but it is not essential for every design. Essie’s technique guide suggests a rounded bobby-pin end as an alternative. Try the mark on a spare tip first and keep the tool on the nail surface without pressing into it.
Can I use these ideas on very short nails?
Yes. Choose fewer dots, one small sticker, or a color-only combination. Put a tree or wreath on the thumb if you need more space. The artwork should fit your nails; you do not need extensions to make the holiday colors work.
Can regular polish create every finish I see on Pinterest?
Not with the same products or steps. These designs avoid lamp-cured gels, powder chrome, and raised sculpted art. A regular metallic polish gives a metallic finish, and a glitter topper adds reflective particles. Choose a reference that matches the tools and formulas you actually plan to use.
What if I make a mistake on one nail?
If the mark is small, pause before correcting it. A stray dot may fit a scattered design. If the artwork has become thick or muddy, removing the polish from that one nail and starting again can be easier than adding more layers. The rest of the manicure can stay simple while you practice.
Start With One Festive Detail
Choose the idea that makes you think, “I could try that,” rather than the one with the most decoration. Red with a gold accent, blue with a few snowy dots, or a single sticker star already gives you a December manicure. Once that feels comfortable, try a wreath or a tiny tree on your next attempt.
Keep the layers light, allow drying time, and leave some plain nails if you want a simpler finish. A handmade manicure does not need identical dots on every finger to feel thoughtful and festive.
Sources and Image Note
Research reviewed October 1, 2026. The linked OPI and Essie guides support the basic application and nail-art techniques. Seasonal research also included Byrdie’s simple December nail-art roundup and public Pinterest listings for easy December nails. The combinations, difficulty labels, and adaptations here are editorial suggestions, not results of hands-on product testing or live Pinterest popularity rankings.
The 17 images are AI-generated design references created for dbsguy.com, not photographs of completed DIY manicures. Your lines, color coverage, and finish will vary with practice and products; follow the simpler steps where the reference shows finer detail.