21 Chocolate Brown November Nail Ideas That Make a Simple Manicure Look Expensive

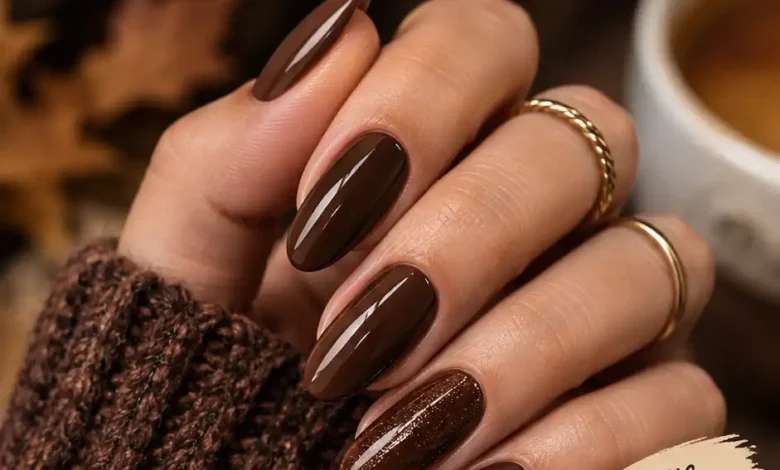
A well-chosen brown, a little space, and one detail that makes you look again.
The brown manicure you save is often the one with a detail you almost missed: a fine ivory stripe, a clear crescent, or a single accent that looks beautifully placed. Those small decisions can make a familiar color feel considered. You notice the shade first, then the reason the whole set works.
These 21 chocolate brown November nail ideas explore that balance through different shapes, finishes, and patterns. There are soft tonal sets, crisp graphic accents, and a few playful details tucked among the neutrals. Each idea includes a close-up reference and a salon note, along with the particular proportion or placement worth paying attention to.
Before choosing the artwork, put two or three brown swatches next to your hand. Notice which looks warmer, cooler, lighter, or deeper in that light. Then check it beside the accent color you want. A brown that looks lovely alone may need a slightly lighter cream or a stronger metallic detail to give the pattern enough definition.Chocolate brown November nail idea 01 / 21
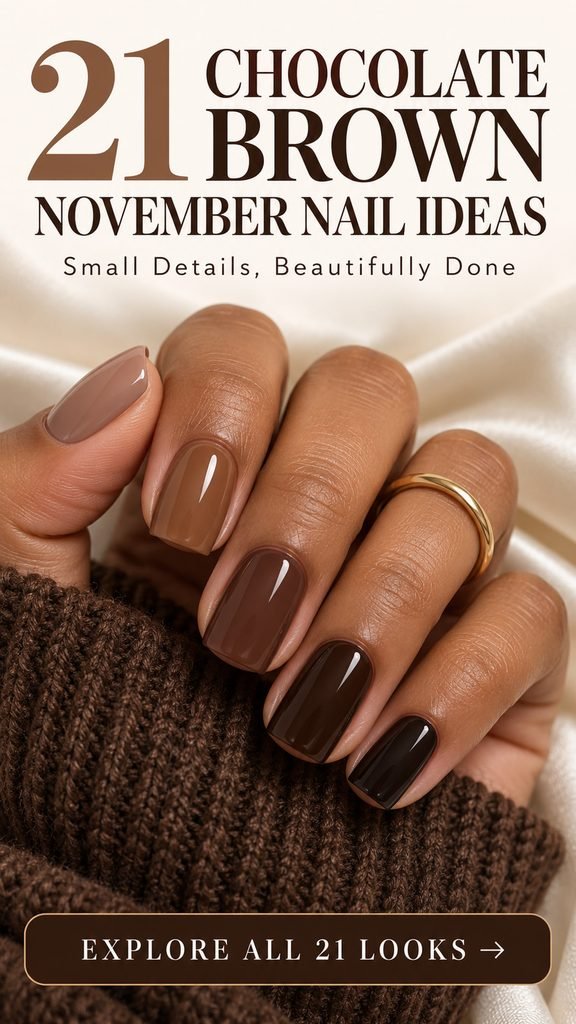
1. A Five-Shade Chocolate Manicure
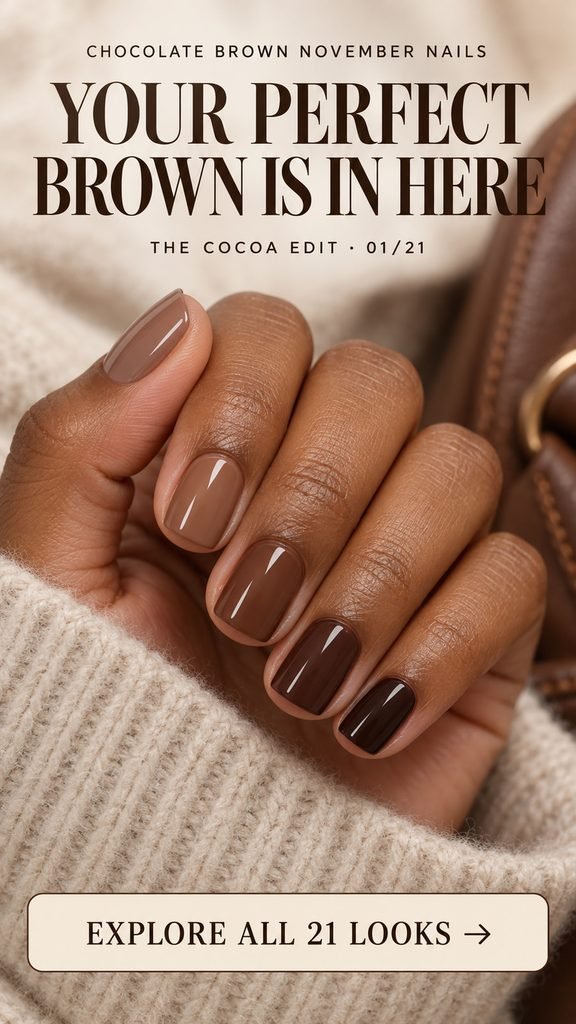
Two brown polish bottles can look almost identical until you put them side by side. This manicure makes those small differences the whole point. Moving from creamy cocoa to deep espresso gives every nail its own shade, while the shared brown palette keeps the hand looking beautifully coordinated.
Arrange the swatches from light to dark before choosing the order. Look for a gradual change in depth, and check whether one shade suddenly looks much pinker or more orange than the others. If you already own three browns you love, repeat the middle shades on two fingers; the same tonal idea still works.
Salon note: Five related browns arranged from light to dark, with one consistent glossy finish and the same softly squared shape throughout.Chocolate brown November nail idea 02 / 21
2. Espresso with Bare Half-Moons
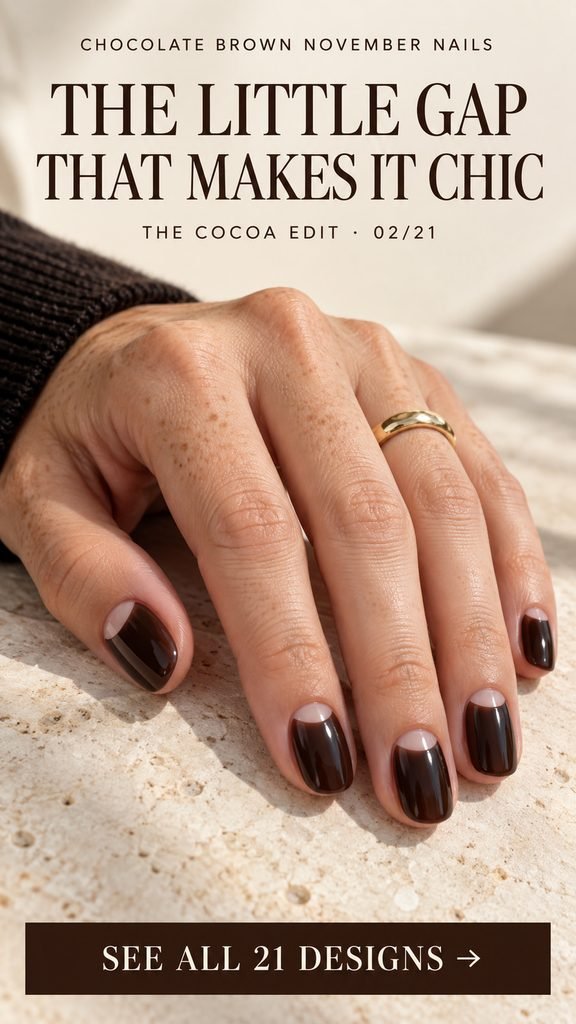
That little bare curve at the base gives espresso polish a surprisingly airy finish. Most of the nail stays dark and glossy, but the visible crescent creates a deliberate pause in the color. It is a particularly useful reference when you like deep brown and want a design that stays very simple.
The curve needs to follow the nail comfortably. On a smaller nail, keep it shallow so the dark area still has room to show. Tell your artist you want the crescent to look translucent and close to your natural nail color. A pale opaque patch would change the balance of this particular design.
Salon note: Deep espresso covering most of each nail, with a shallow, clear-looking half-moon left at the cuticle and a clean curved boundary.Chocolate brown November nail idea 03 / 21
3. Cocoa with a Fine Copper Cat-Eye
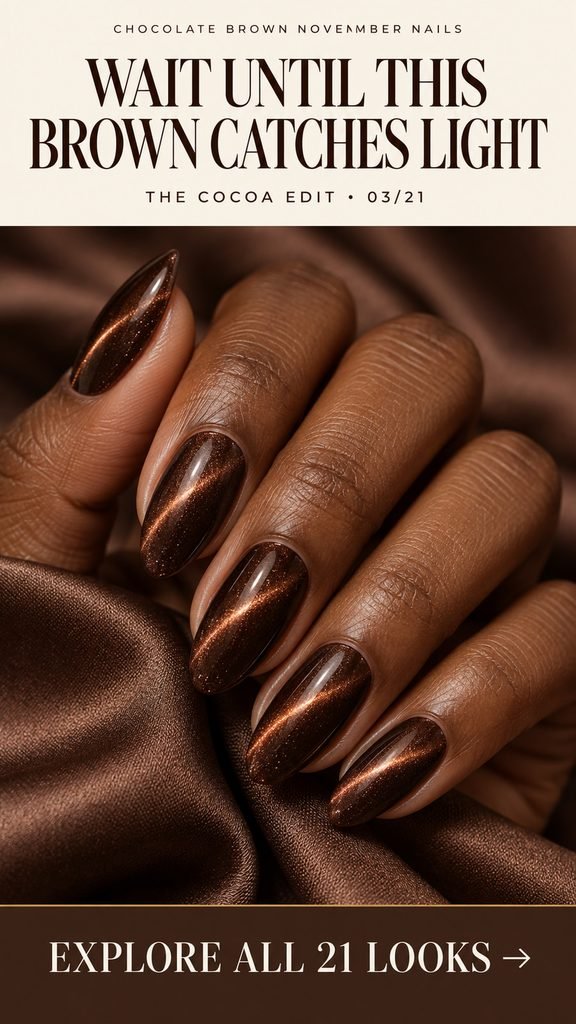
A fine copper line appears across the cocoa as the hand turns toward the light. The effect gives this manicure movement even though there is no painted pattern. Deep brown keeps the glow contained, so it feels easy to wear with an ordinary knit as well as a dressier outfit.
Be specific about the line when you show the reference: its narrow width and diagonal direction are the features to preserve. Magnetic finishes can look quite different depending on how the effect is arranged. Look at a finished sample from more than one angle before deciding how bright you want the copper to be.
Salon note: Dark cocoa magnetic polish with one narrow diagonal copper cat-eye line on each nail. Keep the surrounding brown deep and visible.Chocolate brown November nail idea 04 / 21
4. Floating Espresso Ovals
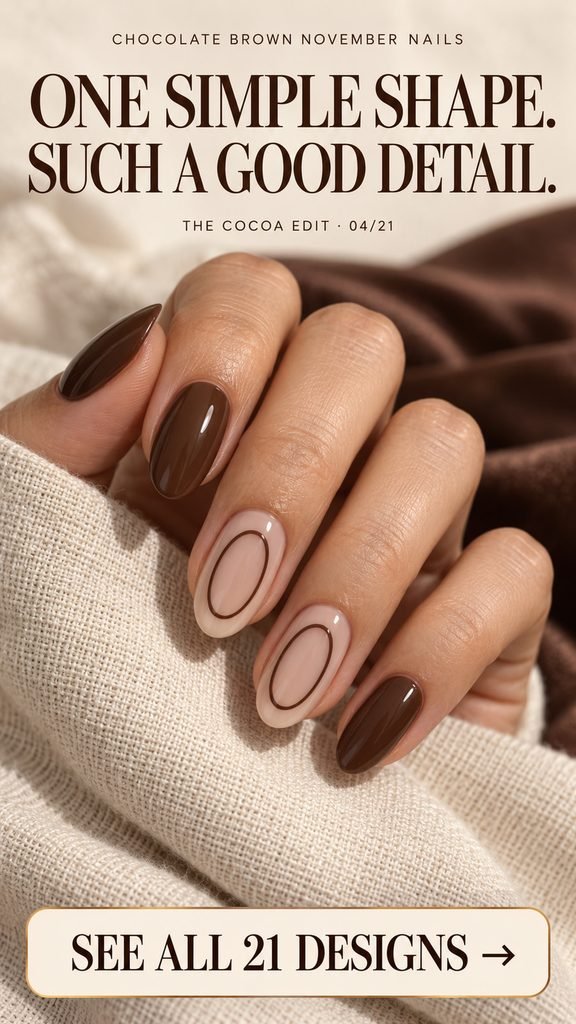
A floating oval is such a small idea, but it gives these chocolate nails a distinctive rhythm. The outlined shapes sit on two sheer accents, with plain brown framing them. There is something pleasing about being able to see the whole shape clearly, including the empty space inside it.
Leave a margin between each oval and the nail edge. That separation is what makes the line feel like a tiny drawing. On a short nail, make the oval a little rounder and keep its outline fine. A milky translucent base softens the contrast while allowing the espresso line to remain easy to see.
Salon note: Plain chocolate nails plus two sheer milky accents, each with one fine espresso oval outline placed fully inside the nail boundaries.Chocolate brown November nail idea 05 / 21
5. Cocoa Pinstripe Accents
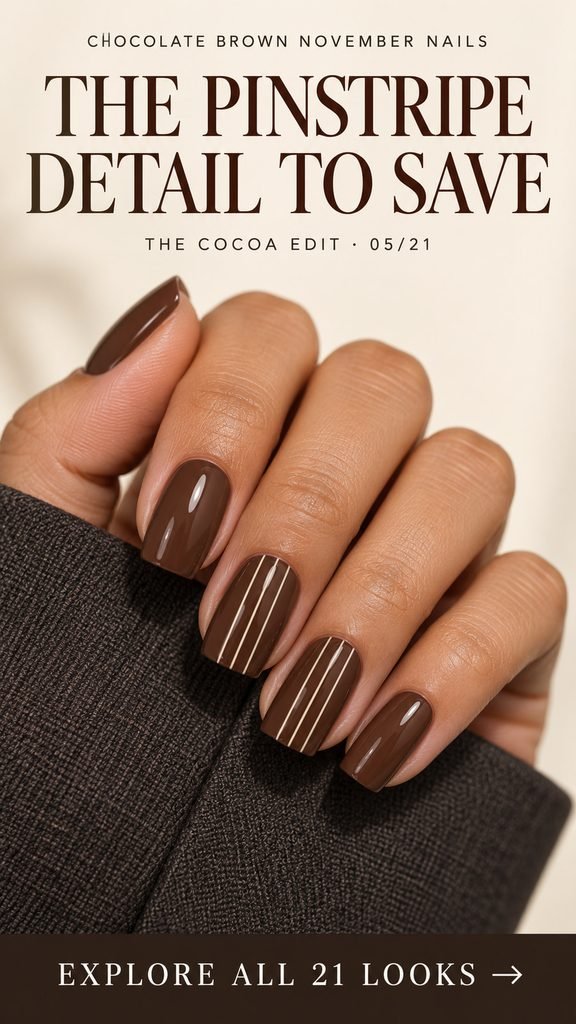
Pinstripes give cocoa polish the neatness of a well-cut jacket. Three fine ivory lines on each accent are enough to establish the pattern; the plain nails keep the result relaxed. This is an appealing choice if you enjoy graphic details and tend to wear solid-colored clothes.
Decide on the stripe spacing before adding more lines. On narrow nail beds, two lines may leave a cleaner amount of brown between them. Keep their width consistent from base to tip, and choose a soft ivory if bright white feels too sharp. The design gets its character from the precision of those few marks.
Salon note: Glossy cocoa with very fine, evenly spaced ivory pinstripes on two nails. Leave the remaining nails solid brown.Chocolate brown November nail idea 06 / 21
6. A Chocolate Herringbone Accent
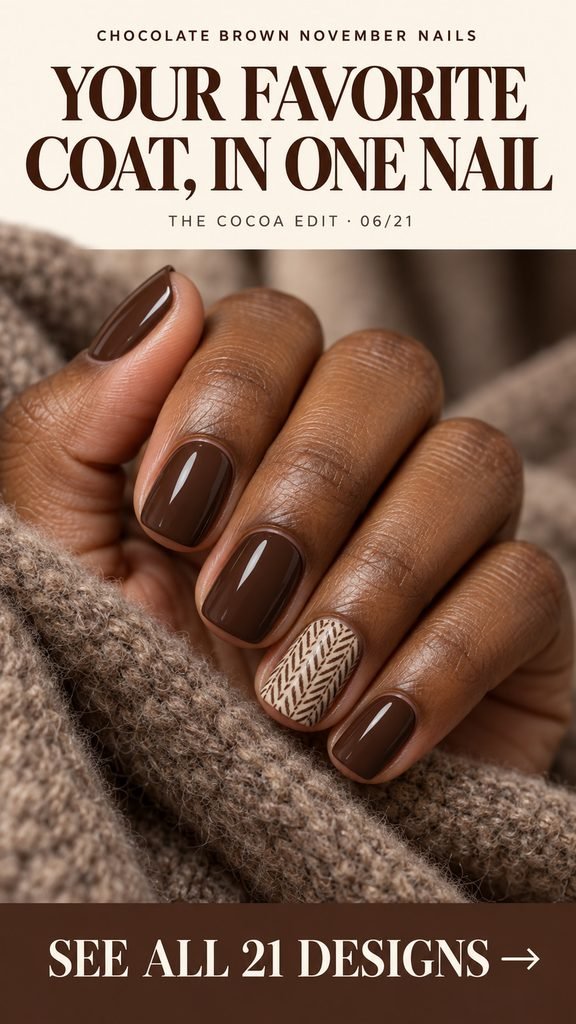
If a favorite wool coat could become one accent nail, this would be a lovely place to start. The angled herringbone strokes bring a little woven texture to a cream background. Four plain chocolate nails make the tiny pattern feel like an intentional finishing detail.
Show your artist a close view of the broken zigzags, especially if the word herringbone could be interpreted differently. A few readable repeats are enough. If the nail is too small for the full pattern, a narrow herringbone panel down the center preserves the idea and gives the linework more breathing room.
Salon note: One cream accent with fine brown herringbone strokes, surrounded by glossy chocolate nails. Keep the pattern crisp and lightly spaced.Chocolate brown November nail idea 07 / 21
7. Cocoa with Tiny Ivory Polka Dots
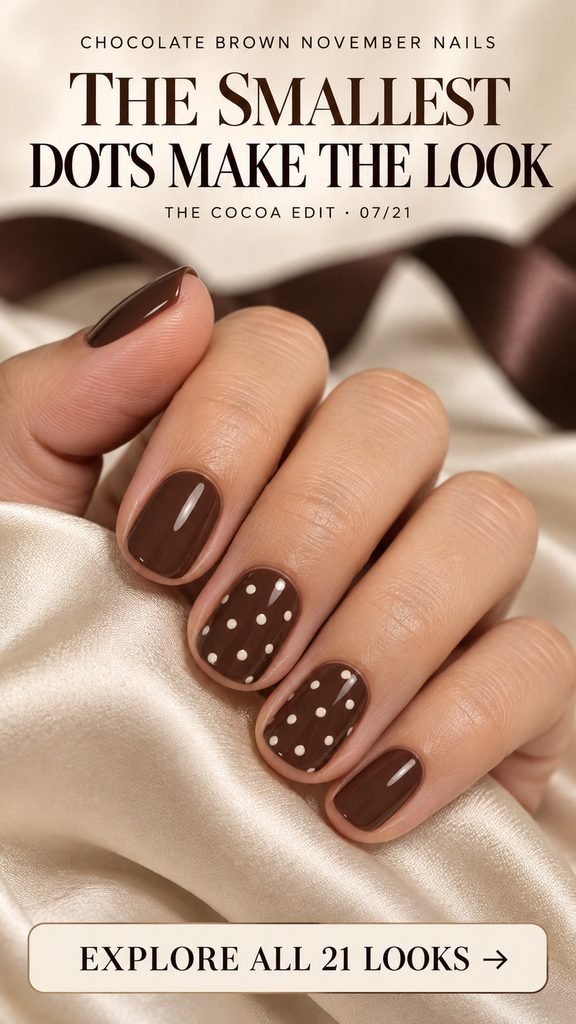
Tiny ivory dots give this cocoa manicure a soft, almost vintage charm. Their regular spacing makes the detail feel orderly, while the warm brown keeps the overall mood gentle. You get a visible pattern without needing several colors or a complicated illustration.
Think about dot size before dot count. Once the circles get too large, they become the main feature of the hand. Small, similarly sized dots let the brown stay prominent. Keep the pattern on two nails as shown, or choose just one accent if you want a more understated version.
Salon note: Cocoa polish with small, evenly spaced ivory polka dots on one or two accents. Keep all dots similar in size.Chocolate brown November nail idea 08 / 21
8. Espresso with Silver Corner Brackets
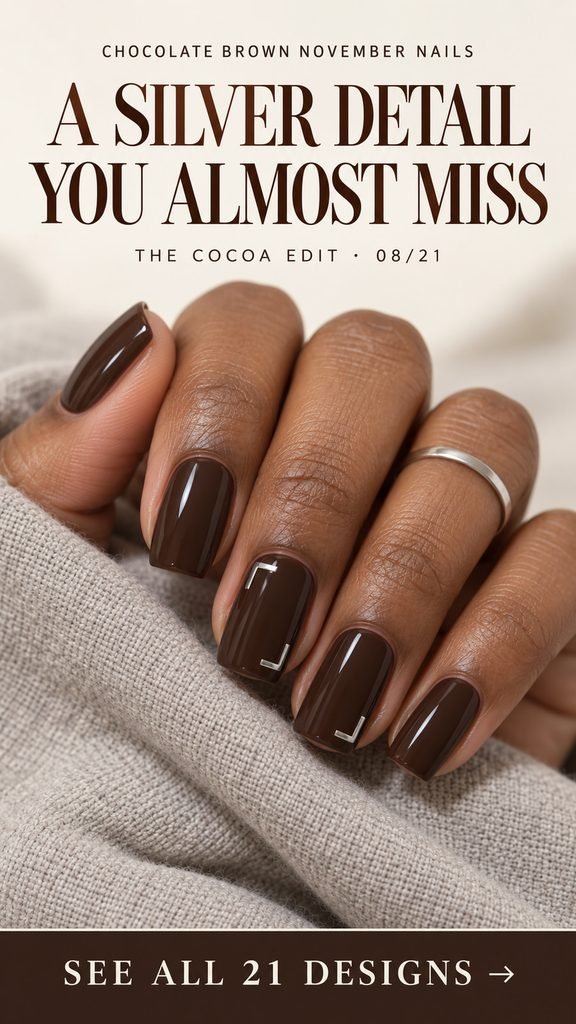
Silver brackets give espresso a cooler, more architectural detail. Each little corner mark suggests a frame, but the open sides leave almost the entire brown nail visible. It is a good option if your everyday jewelry is silver and you want your manicure to pick up that tone.
Place the brackets a small distance inside the nail edges so both arms of each L remain clear. Two opposite corners are enough. For a short nail, shorten the marks rather than joining them into a border; the open arrangement is what makes this look distinctive. Keep the metallic finish smooth and flat.
Salon note: Deep espresso with one or two tiny silver L-shaped marks near the corners of two accent nails, leaving most of each surface plain.Chocolate brown November nail idea 09 / 21
9. A Chocolate Houndstooth Accent
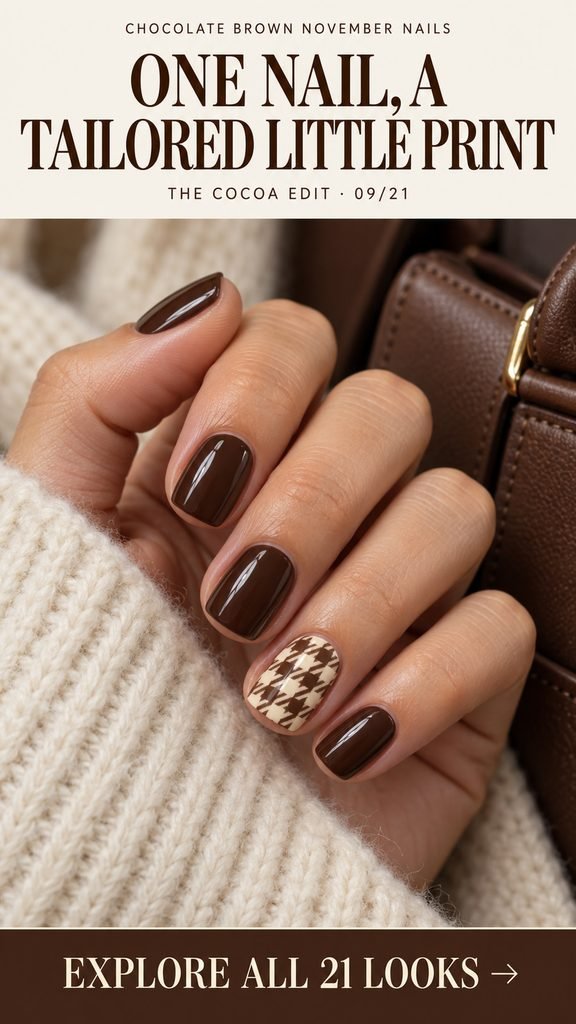
Houndstooth is the little print that makes this set feel tailored. Its irregular, pointed checks have enough character to carry a single cream accent, while the chocolate nails keep the palette tight. It looks especially at home with a crisp cuff or an uncomplicated sweater.
The shapes need to be large enough to recognize. A dense miniature pattern can become hard to read, so ask your artist to scale it to the width of your nail. A matching nail-art decal is another route to discuss if you want a very regular repeat. Either way, one patterned nail is plenty.
Salon note: One ivory accent with clearly defined chocolate houndstooth, plus four solid chocolate nails. Prioritize readable shapes over a high repeat count.Chocolate brown November nail idea 10 / 21
10. Espresso with Sheer Diagonal Cutouts
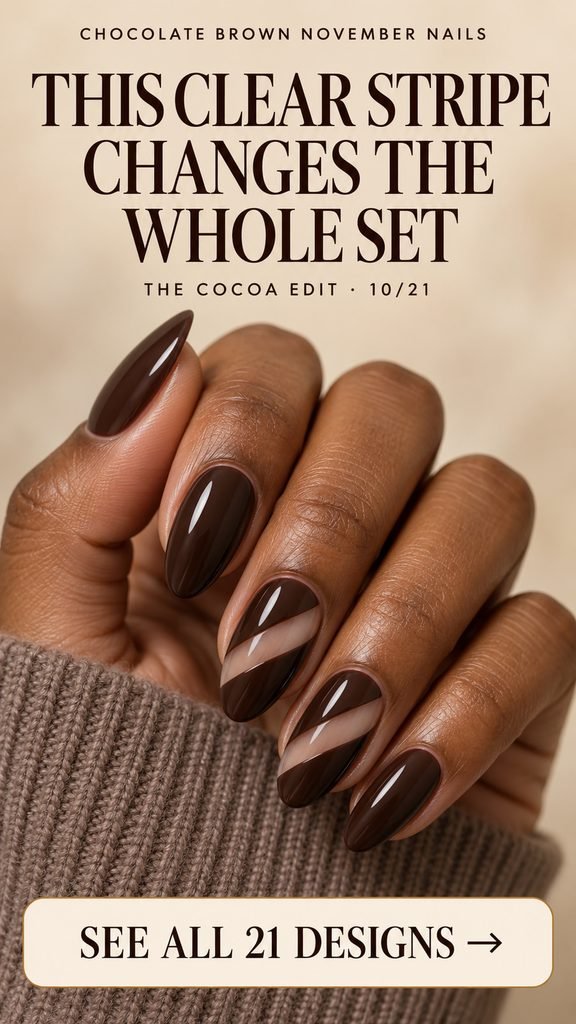
The sheer diagonal band gives these dark nails a clean break in the color. It is a striking detail up close, yet the palette stays limited to espresso and your base shade. Keeping the cutout on two nails also lets the uninterrupted brown remain the dominant part of the set.
Check the angle with your artist before the edges are painted. A steep diagonal feels different from an almost horizontal one, especially across two neighboring nails. Match their direction and approximate width for a coordinated result. A base close to your natural nail color helps the clear section retain its light, open feel.
Salon note: Espresso nails with one narrow sheer diagonal band across each of two accents. Keep the band edges crisp and their angles coordinated.Chocolate brown November nail idea 11 / 21
11. Espresso V-Cut French Tips
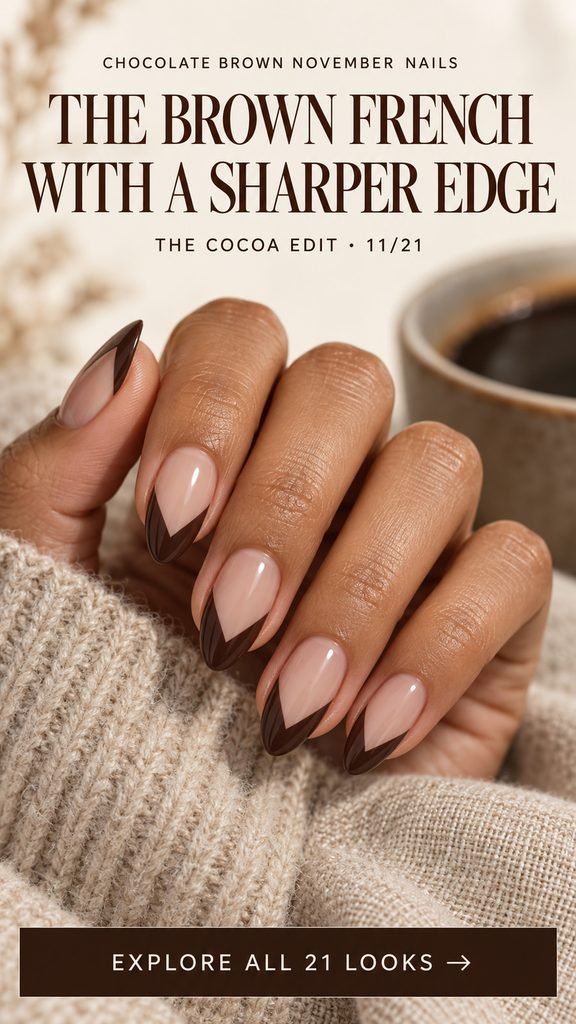
A V-shaped smile line gives the brown French manicure a more angular personality. The deep espresso tips frame the sheer base, with both sides meeting neatly in the middle. It is a strong reference for someone who likes almond nails and enjoys a clearly defined edge.
Choose the depth of the V to suit your nail bed. A very deep point uses more of the visible base, while a shallower V gives a quieter result. If you prefer shorter nails, your artist can soften the angle and narrow the brown sections. Symmetry between the two sides matters more than making the tip dramatic.
Salon note: Sheer blush-beige nails with symmetrical espresso V-cut tips, keeping the meeting point centered and the brown edges clean.Chocolate brown November nail idea 12 / 21
12. Mocha with One Smoky Crystal
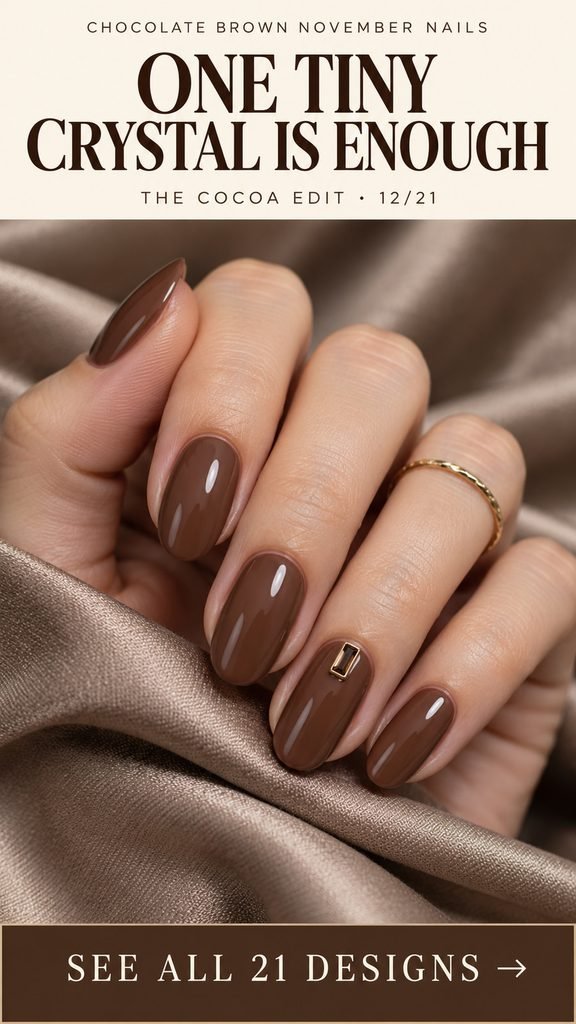
One smoky crystal gives warm mocha a small point of light. Its narrow rectangular shape sits neatly near the base of the accent nail, so the embellishment feels considered rather than scattered. The brown-toned stone also stays close to the polish color, which makes the effect gentler than a bright clear gem.
Try the size against your nail before the final placement. The reference relies on a very small piece with visible polish around it. If you prefer a completely flat finish, ask about a painted metallic rectangle in the same spot. Keep the other nails simple so the single accent remains easy to notice.
Salon note: Glossy warm mocha with one tiny smoky-brown rectangular crystal near a single cuticle. Check the scale and raised profile before placement.Chocolate brown November nail idea 13 / 21
13. Chocolate with a Cream Zebra Accent
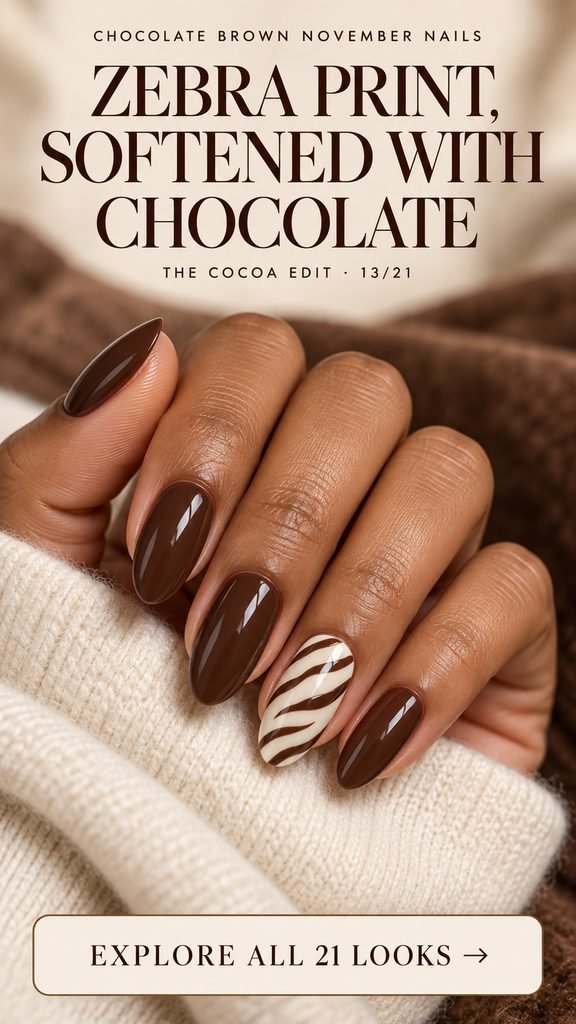
Chocolate softens the contrast of a zebra print while keeping its recognizable movement. The tapering stripes enter from opposite sides of a cream accent, drawing the eye across the nail. Framed by solid brown, the print feels like a small accessory within an otherwise straightforward manicure.
Ask for a few irregular stripes with clear cream channels between them. Perfectly parallel lines can make the pattern feel more geometric, so allow a little variation in thickness and direction. If you love the effect but want less of it, keep the stripes within the lower half of the accent.
Salon note: Four chocolate nails and one ivory zebra accent, with a few tapered brown stripes and generous cream spaces between them.Chocolate brown November nail idea 14 / 21
14. Cocoa with Tiny Ivory Diamonds
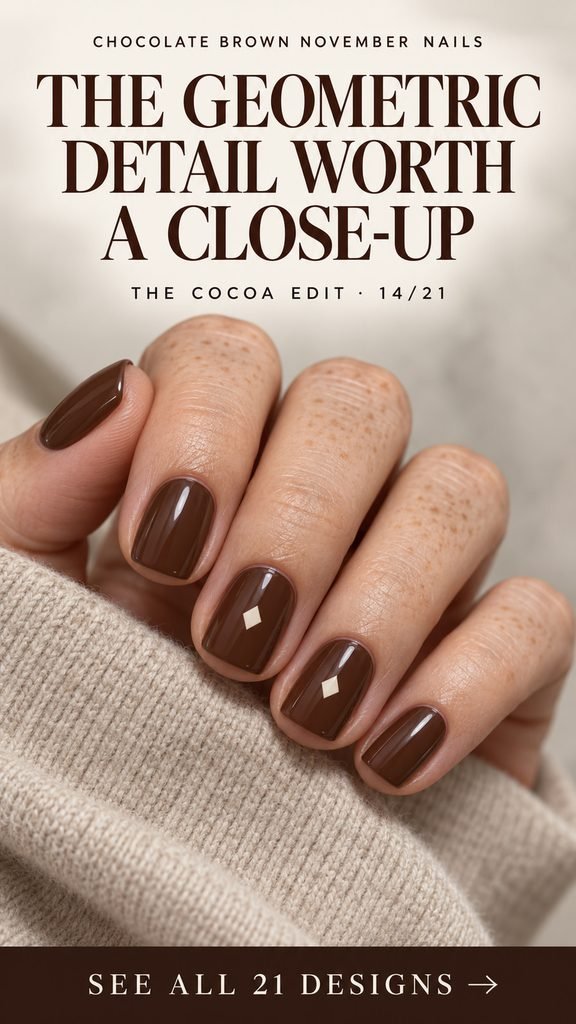
A tiny ivory diamond gives the cocoa a crisp point of contrast. Its four corners echo the tidy nail shape, and there is enough brown around it for the little mark to stand on its own. This is a pleasingly simple option if hearts and flowers feel too decorative for your taste.
Keep the diamond small enough to see all four edges at a glance. It is a flat painted motif, so a soft cream shade works well when you want a graphic accent without a raised element. Center the shape carefully, or agree on the same slightly offset position for both nails before painting.
Salon note: Glossy cocoa with one tiny filled ivory diamond on each of two accent nails. Keep the points clean and the placement consistent.Chocolate brown November nail idea 15 / 21
15. Chocolate Satin-Glass Nails
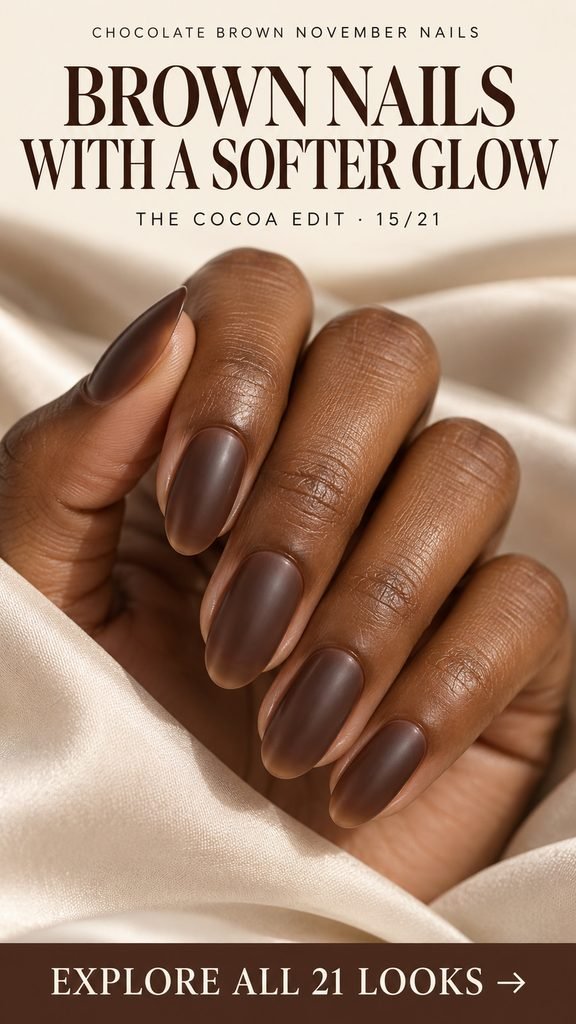
This brown has a softer presence: the translucent color and diffused finish suggest frosted glass. Light settles across the surface gently, allowing the cocoa shade to remain the focus. It is a useful direction to explore when you want a plain manicure with a finish that feels a little different.
Bring attention to both parts of the reference—the visible depth of the brown and the softened surface. Ask your artist to show a finished swatch, since an opaque base or a more reflective topcoat will change the result. Choose how sheer you want it after seeing the sample against your own nail.
Salon note: A translucent chocolate-brown base with a soft satin finish. Confirm the opacity and finished surface on a sample nail first.Chocolate brown November nail idea 16 / 21
16. Cocoa Brushstroke Accents
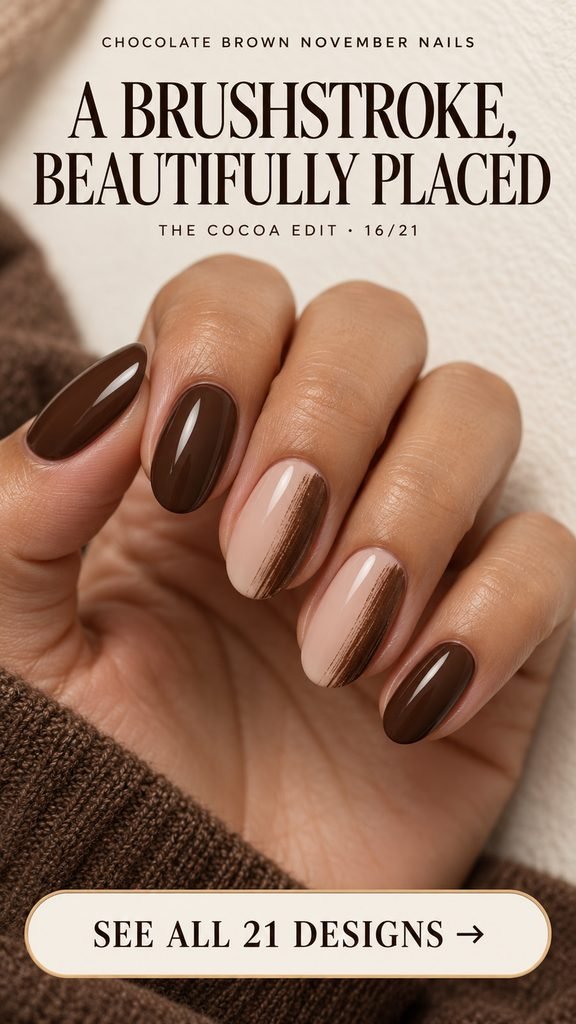
A single brushstroke gives the sheer accents a relaxed, artistic edge. The feathered sides are part of the design: they make the brown look like a deliberate mark on a small blank canvas. Plain chocolate nails alongside it provide a clear connection between the two finishes.
Choose which side of each accent will carry the stroke, then leave the opposite side mostly open. That empty area makes the texture readable. If you are trying a version at home with regular polish, a practice nail is a useful place to work out the stroke before attempting both accents.
Salon note: Chocolate nails with two sheer accents, each carrying one broad cocoa stroke along a side, preserving fine brush marks and visible empty space.Chocolate brown November nail idea 17 / 21
17. Espresso with Cream Accent Bars
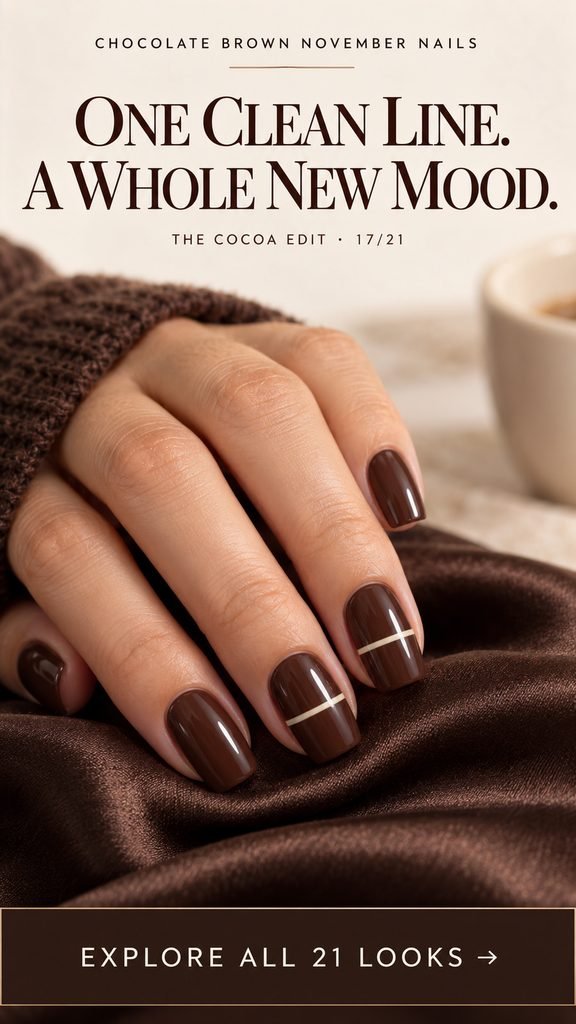
An ivory bar across deep espresso creates a very clean little interruption. The line sits away from the tip, so the brown continues on both sides of it. Two matching accents are enough to give the whole hand a graphic, coordinated look.
Pay attention to where the bars fall on neighboring nails. Their position should feel aligned across the hand, even if the nail beds have slightly different lengths. A narrow band keeps the detail light. Choose a warmer cream for gentler contrast, or a brighter ivory if you want the line to be the first thing you notice.
Salon note: Solid espresso with a slim horizontal ivory bar across two accents, positioned just below the midpoint and coordinated across the hand.Chocolate brown November nail idea 18 / 21
18. A Cocoa Domino Accent
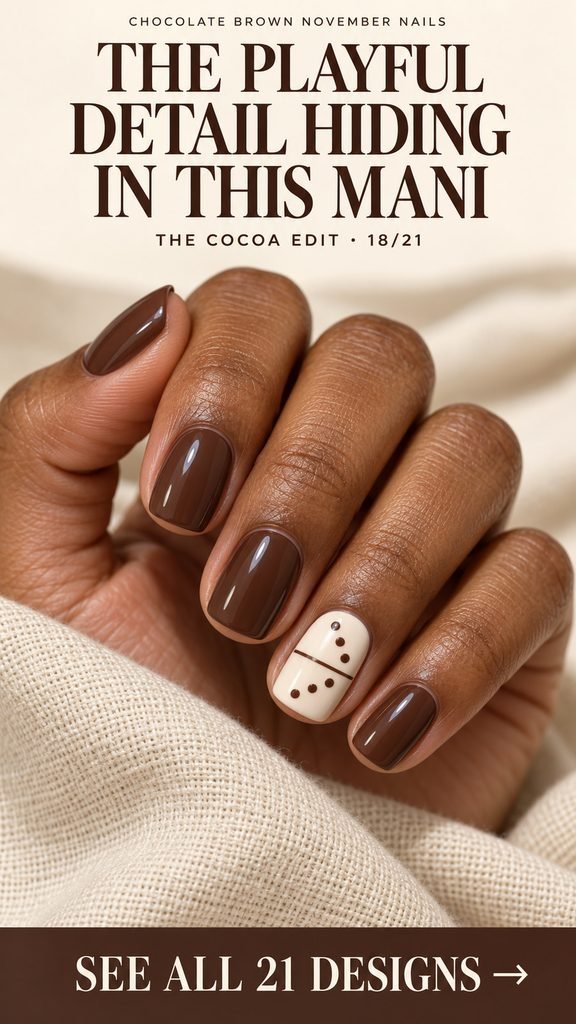
There is a small surprise hiding among these milk-chocolate nails: one cream accent arranged like a domino. The fine divider and two neat groups of dots turn a familiar object into a graphic detail. It has a little personality while staying within the same warm, limited palette.
Spacing does most of the work here. Leave a visible gap around the central line and keep the dots on each half balanced. The reference uses three dots on either side. If your nail is especially short, a two-and-two arrangement gives the miniature design more room without losing the domino idea.
Salon note: Milk-chocolate nails with one ivory domino accent: a fine brown center divider and two balanced groups of small brown dots.Chocolate brown November nail idea 19 / 21
19. Espresso with a Broken Gold Seam
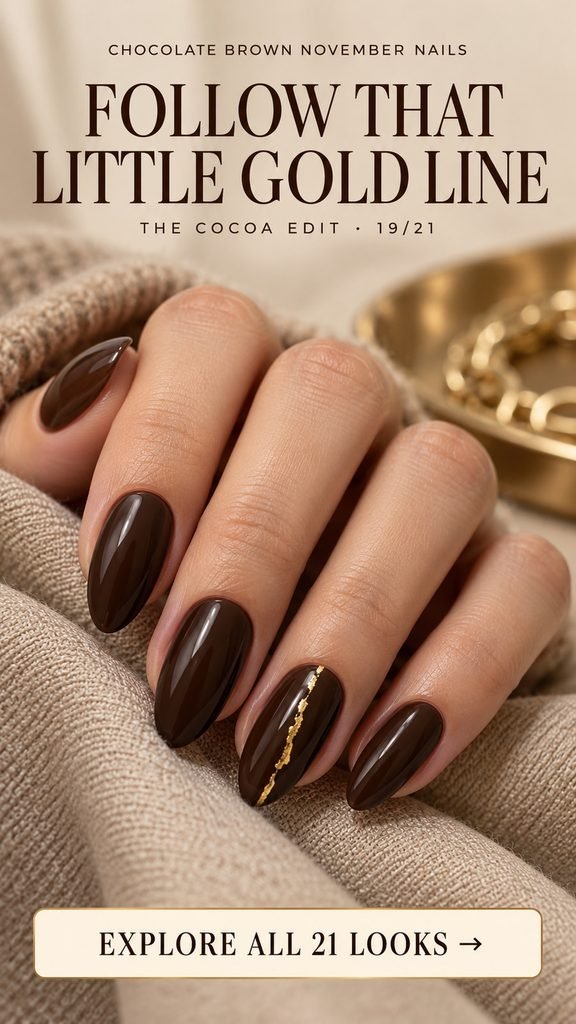
A broken seam of gold lets a single espresso nail catch the light. The small gaps and uneven edges make it feel more organic than a ruler-straight stripe. Because the metallic detail stays narrow, the rich brown still reads clearly from a distance.
Keep the seam to one accent if you like the restrained look shown here. Ask for small foil fragments arranged in a loose vertical line, with enough brown showing between them. A smooth finished surface matters for the look. If you want to change the metal, compare a silver sample against the espresso first.
Salon note: One espresso accent with a narrow, slightly irregular line of separated gold-foil fragments. Leave the surrounding nails plain and glossy.Chocolate brown November nail idea 20 / 21
20. Chocolate with an Oyster-Pearl Accent
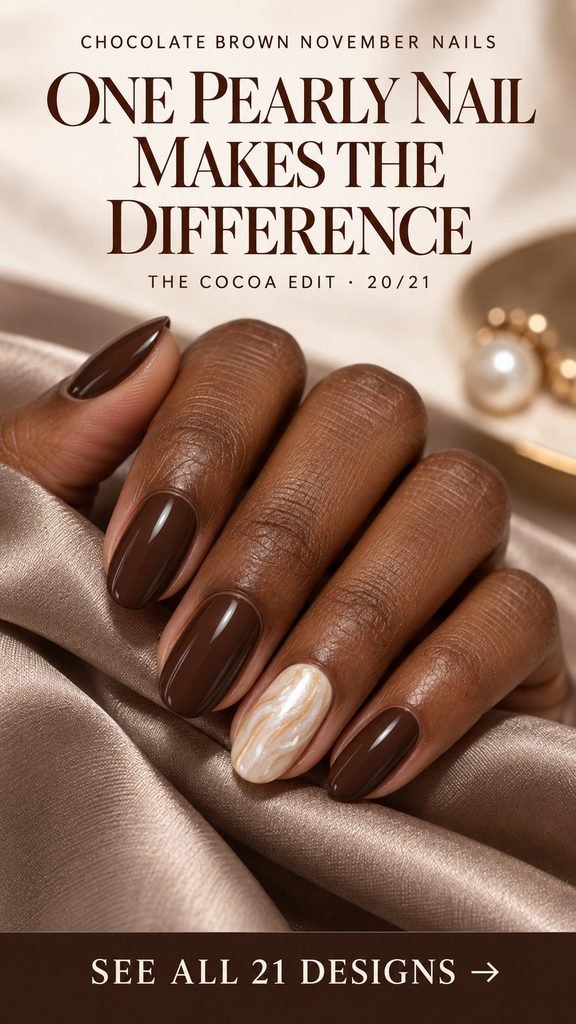
An oyster-pearl accent brings a softer kind of contrast to chocolate brown. Its pale shimmer and gentle ripples make that one nail interesting even before you notice the color difference. The rest of the set stays glossy and simple, letting the pearly finish have a little space of its own.
Compare the accent beside your chosen brown, not just on its own. A creamy pearl keeps the pairing warm; a cooler silvery pearl changes the mood. The reference suggests a smooth nacre effect with subtle color variation, so mention that you want the visual depth without a heavily textured surface.
Salon note: Warm chocolate nails with one smooth oyster-ivory pearl accent, showing gentle iridescence and soft tonal ripples.Chocolate brown November nail idea 21 / 21
21. Espresso Contour-Line Accents
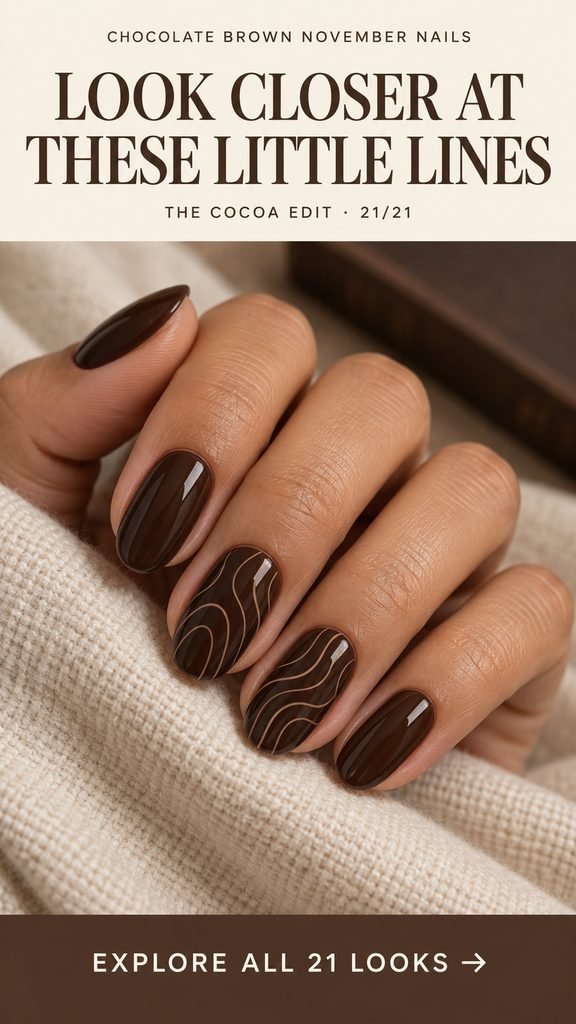
A few pale-brown contour lines are the detail you notice after the espresso color. Their gentle, nested curves have the quiet rhythm of a topographic map. Keeping the entire pattern within the brown family gives the manicure a subtle finish, with something extra waiting in the close-up.
Choose two browns that remain distinct when placed together. If the line color is too close to the base, the artwork can disappear in softer lighting. Start with a few open curves; your artist can adjust their number to suit the nail while preserving the flowing, noncrossing arrangement.
Salon note: Espresso nails with fine milk-chocolate contour curves on two accents. Use enough shade contrast to keep the lines visible and leave open areas between them.
Choose the Brown, Then Give the Detail Some Space
If several designs have caught your eye, compare what you like about them. You might be drawn to the clear space in the oval and cutout looks, or to the precise lines in the pinstripe and bracket designs. That preference is a useful clue. Choose one type of detail to carry through the set, and let the plain nails give it room.
Next, look at the manicure at ordinary viewing distance. A design can be beautiful in a close-up and still need a little adjustment on your hand. Make the line slightly stronger if it disappears, enlarge a tiny motif if its shape is hard to read, or remove an extra repeat if the pattern feels crowded. Small changes can preserve the idea you liked in the first place.
A consistent nail shape also helps the details feel connected. If you want two accent nails, agree on their placement and scale together. For a finish-led look such as the copper cat-eye or satin glass, spend that discussion on a finished swatch instead. The reference is the starting point; the version that suits your own nails is the goal.
Why does my brown polish sometimes look almost black?
A very deep espresso can appear much darker in dim light or in a photograph. If you want the brown to stay obvious, compare it with a medium chocolate swatch under the lighting where you usually see your hands. Check the actual polish sample as well as the inspiration photo; camera exposure can change how dark a shade appears.
Can chocolate brown nails work with silver jewelry?
Yes—silver and brown make a lovely pairing. The corner-bracket design is one way to bring a small silver detail into the manicure. You can also leave the nails entirely brown and let the jewelry provide the contrast. Try the brown swatch beside a ring you wear often to see whether you enjoy the combination.
How can I simplify a detailed design for my appointment?
Pick the one feature you would miss if it were removed. That could be the tooth shape in houndstooth, the feathered edge of a brushstroke, or the tiny divider in a domino. Ask your artist to retain that feature on one nail and use plain brown on the others. Discuss the time and quote for that version when you book.
Save the design that feels most like you—and make a note of the small detail you want to keep. That is the part worth bringing to your next manicure.