15 New Year Nails Simple Enough for a Quiet Countdown but Cute Enough for a Party

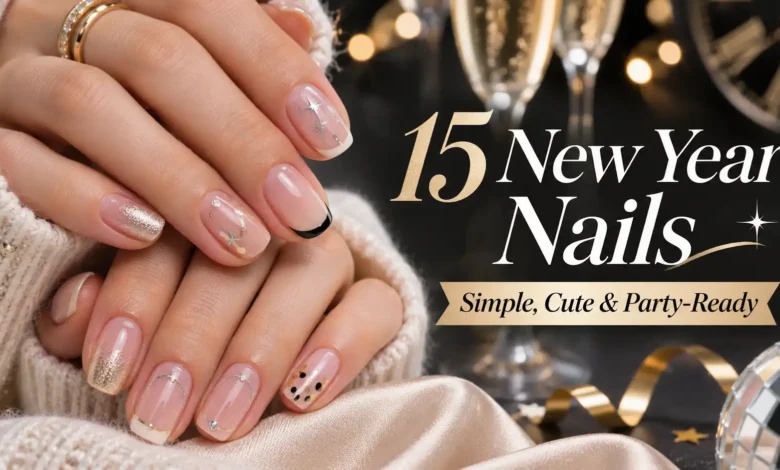
For simple New Year nails, choose a finish you can paint comfortably, then decide whether you want one small accent. Pink-beige pearl looks lovely with a sweater on the couch; black cherry gloss feels dressed up with no nail art at all. If the evening turns into a party, a little silver or a flat bow decal can carry the festive detail.
These 15 ideas keep the shapes short and the decoration manageable. Start with pearl, cherry gloss, or lilac holographic polish if drawing is the part you would rather skip. Choose dots or a small decal if you enjoy adding one detail; save the narrow French tips and curved cuffs for a steadier hand or a salon visit.
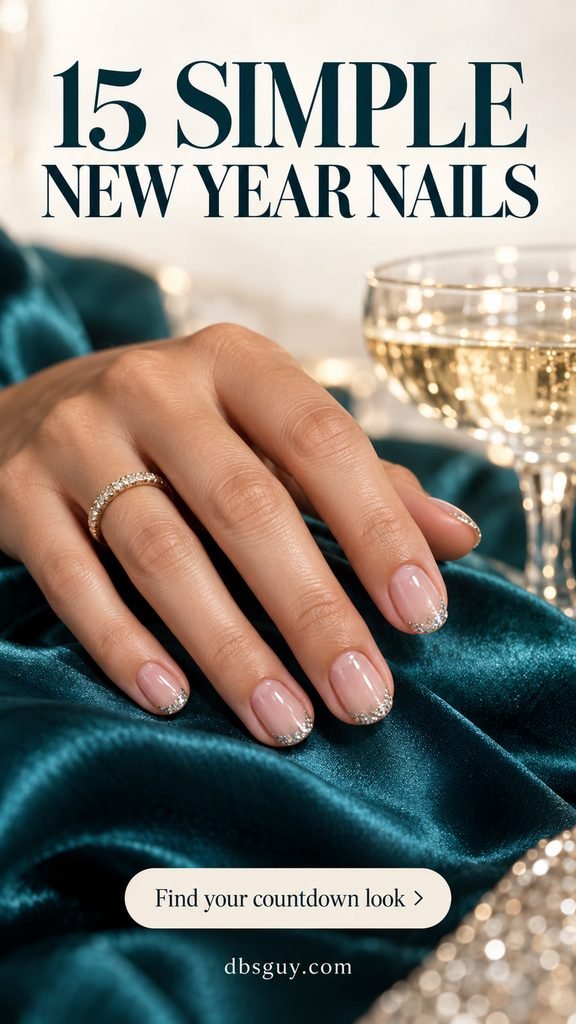
The images are AI-generated manicure concepts. Use them as references for color and placement; they do not document completed or tested manicures.
Choose Your Level of Detail First
- Polish only: Ideas 1, 2, and 9 let the finish do the work.
- One accent nail: Ideas 3, 4, 5, 6, 8, 11, 12, and 13 leave the rest of the hand plain.
- No glitter: Try black cherry gloss, a black bow, olive finish contrast, or ivory dots.
- A familiar French with a party detail: Choose smoky-blue silver tips or the final star-accent look.
For the regular-polish versions, gather your chosen color, its recommended base and top coat, and only the tool needed for your accent. A dotting tool, fine brush, or flat nail-art decal is enough for the corresponding design. Work in thin layers and follow your products’ drying directions. A sheer base should stay translucent; adding coats until it looks opaque changes the effect.
1. Pink-Beige Pearl With No Nail Art
A warm, translucent pink-beige pearl gives short rounded nails a soft glow without a separate design step. It is an easy starting point for a quiet countdown, especially if your outfit already has a little shine. Look for a pearlescent regular polish when you want this gentle finish.
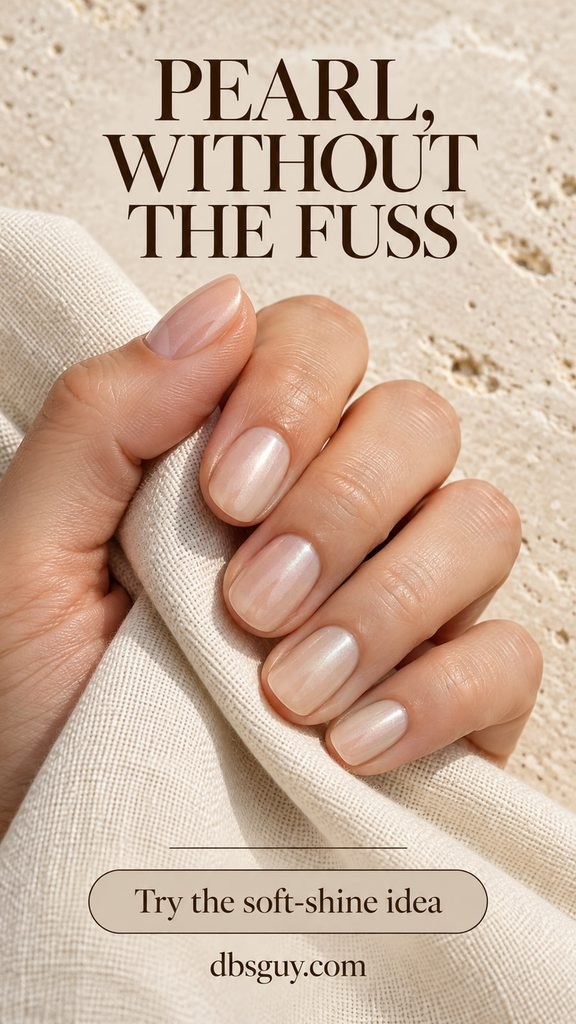
Brush in the same direction from base toward tip so the pearl looks orderly rather than swirled. Keep the layers thin and leave the slightly sheer result alone once coverage looks even. A mirror-chrome powder service would produce a different reflection; use the image to explain that you want a soft, creamy sheen.
2. Black Cherry Gloss, Without an Accent
Deep cherry is the option to choose when even one little sticker feels like an extra job. The color looks nearly black in the deepest areas, with wine-red showing around the edges. A short squoval shape keeps the dark manicure compact and crisp.
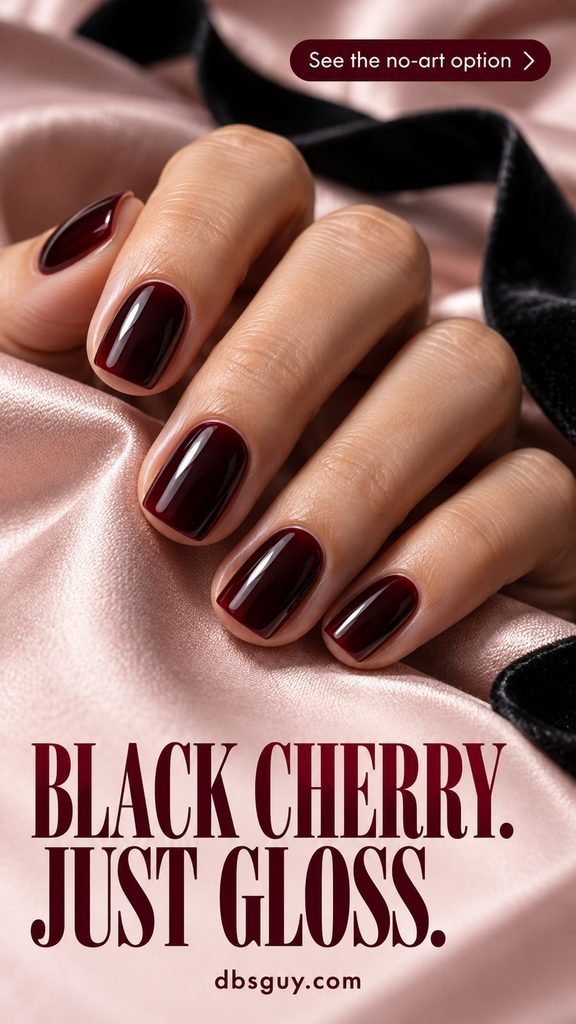
Choose the color by a painted sample if possible: a bottle can make a very dark red look indistinguishable from black. At home, concentrate on a tidy outline and thin, even color coats before the compatible glossy top coat. Skip glitter here. The uninterrupted dark surface is the point, and it can sit comfortably beside sequins, silver earrings, or a plain white shirt.
3. Sheer Pink With a Three-Dot Silver Accent
Three tiny silver dots give one blush nail a little jewelry-like detail. Put them in a shallow curve near the base of the ring nail, leaving pink space between each dot and a clean gap from the skin. Keep every other nail plain.
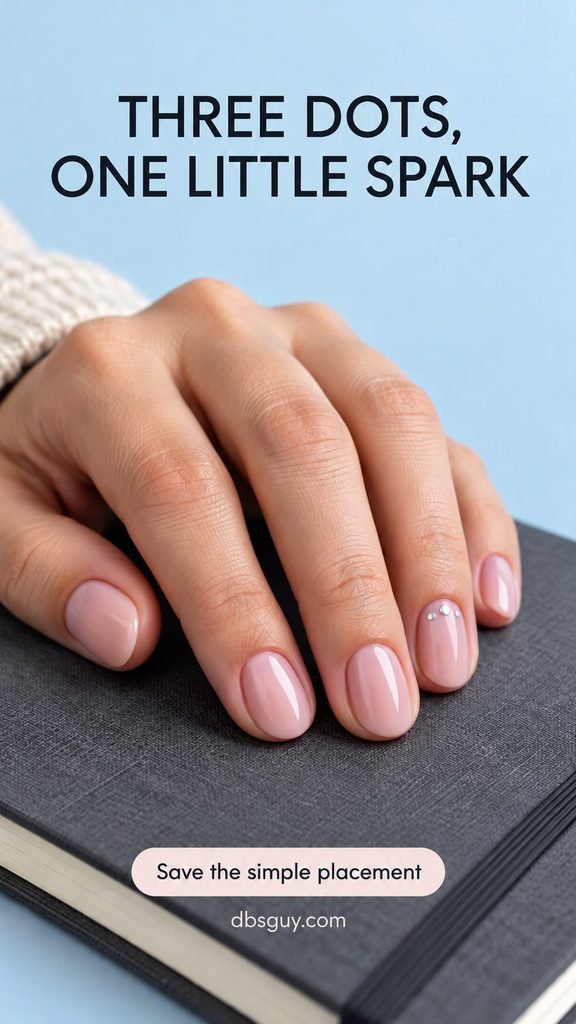
For a smooth home version, use metallic nail polish and a small dotting tool. Practice three separate touches on a spare nail tip first; a heavily loaded tool can turn the curve into a blob. Let the pink base dry as directed before adding the dots, then finish according to the polish instructions. There is no need to add raised studs to get the silver placement.
Also read: 21 Short December Nail Ideas That Make Tiny Details Stand Out.
4. Navy With One Gold Corner
A small gold triangle at the outer base corner of one navy nail creates a sharp, dressed-up contrast. The reference puts that patch on the ring finger; the other nails stay glossy midnight blue. It is a useful choice when you want gold sparkle without coating the whole hand in it.
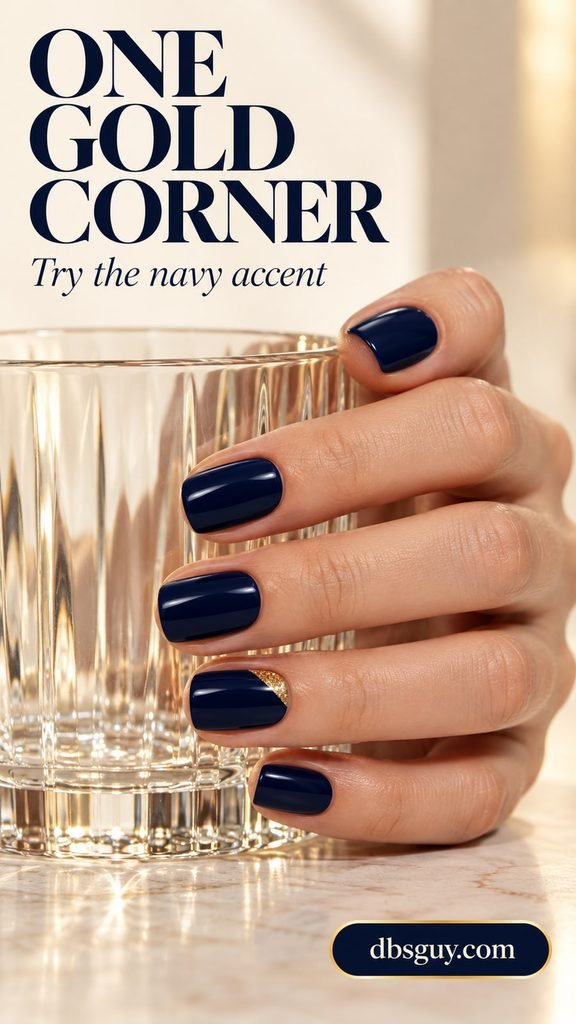
After the navy is ready for nail art, use a fine brush to dab nail glitter polish into a small corner patch. Keep it inside the nail margins and stop before it spreads across the base. A slightly soft glitter edge is easier to manage than a perfectly straight metallic border. Ask your artist for a corner accent rather than a full diagonal French tip.
5. Latte Beige With a Single Silver Stripe
Latte beige makes a thin silver stripe feel like a small piece of hardware on an otherwise quiet manicure. Run the line lengthwise down one ring nail, close to the center, while leaving the surrounding nails undecorated. The pale background keeps the detail visible without a dark contrast.
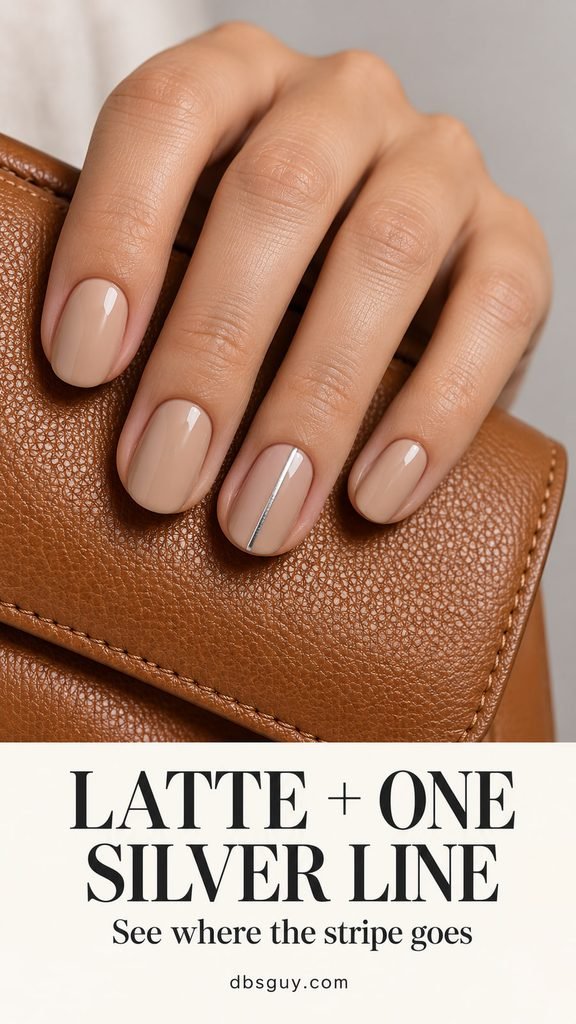
A narrow flat nail-stripe decal is an alternative to painting the line. Size it to fit fully inside the nail, apply it at the stage its instructions specify, and use the recommended finish. If you prefer a brush, anchor your working hand before drawing the stripe. Making the line wider to hide a wobble usually changes this look more than leaving a small imperfection would.
6. Peach Nude With a Tiny Black Bow
A small black bow on peach nude feels playful without turning into a full themed manicure. The black gives the loops and tails enough contrast to read clearly on one short ring nail. It also picks up the color of a black clutch or satin hair ribbon.
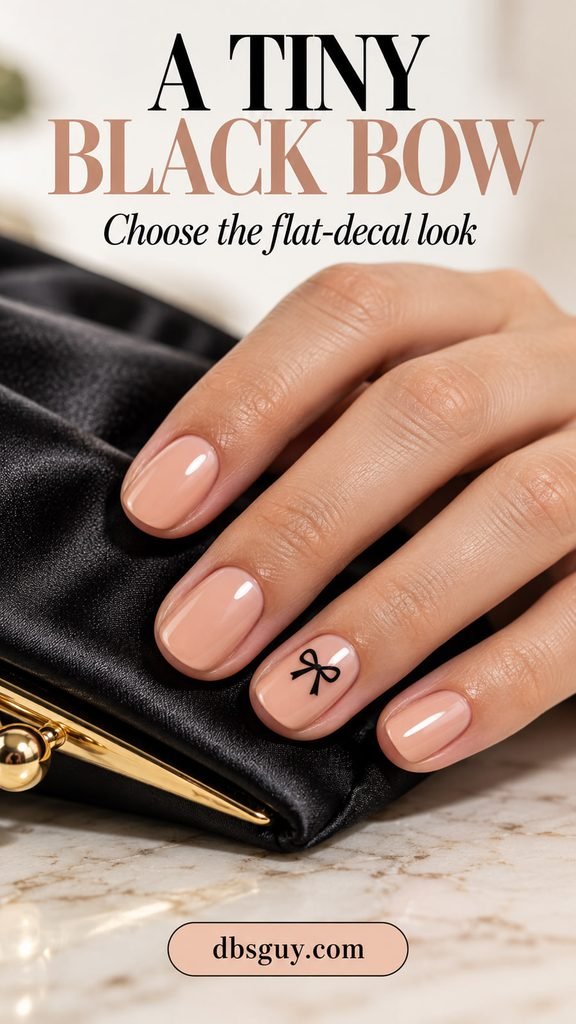
Use one flat nail-art bow decal if you do not want to draw the loops. Check the size against the nail before applying it: you should still see peach around the entire motif. Follow the decal’s application and top-coat directions, and keep the other nails plain. A large raised bow would add texture and bulk that this version does not need.
7. Smoky Blue With Slim Silver Tips
Slate blue and a narrow silver edge give a familiar French layout a cooler evening mood. Most of each nail stays blue, so the silver reads as an outline rather than a broad metallic band. Short squoval nails provide a clear edge for this version.
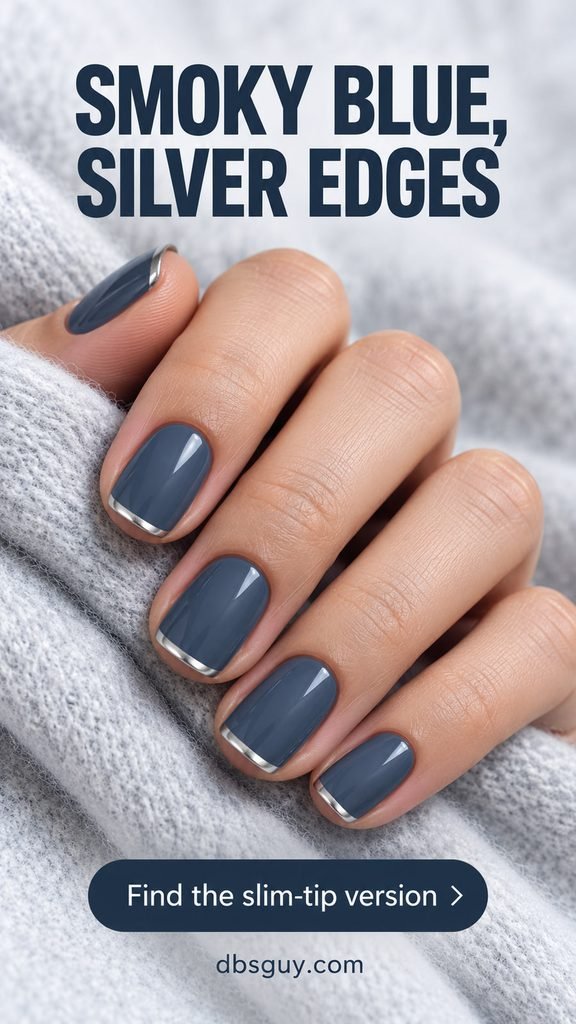
This is one of the more precise designs in the list. At home, try silver tips on the ring nails first, using a fine nail-art brush once the blue has dried sufficiently. At a salon, ask to see the tip width on one nail before the rest are painted. If there is very little free edge, keep the silver especially narrow instead of extending the band farther down the nail.
Also read: 21 Blue December Nails From Icy Pastel to Midnight Navy.
8. Cocoa With One Gold Half Moon
A small filled gold half moon gives cocoa polish a warm metallic accent. Place it at the base of the ring nail, with a clean margin from the cuticle, and let the brown occupy the rest of the nail. The filled shape makes this different from a fine glitter cuff.
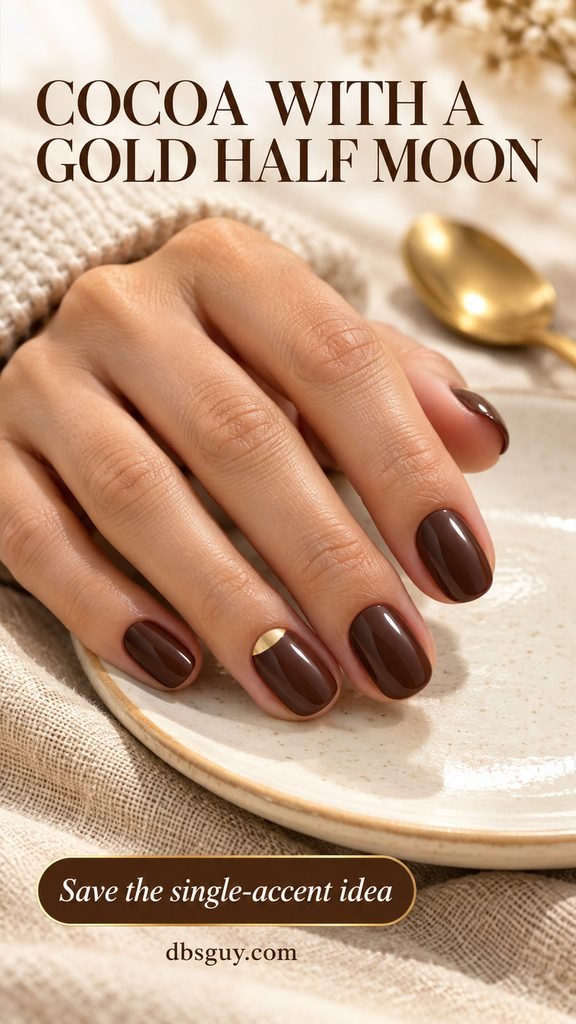
Choose a small flat semicircle nail decal for the simpler version. Position the rounded side toward the tip and follow its application instructions. If an artist paints it, ask for a shallow half moon rather than a large gold section. Keeping the accent small preserves the cocoa color and makes the design easier to adapt to a very short nail.
9. Lilac Holographic Polish, All Over
Lilac holographic polish is for the reader who likes a little more sparkle but would rather avoid detailed artwork. Fine rainbow flashes spread through the pale-purple finish, giving the whole manicure its decoration. You can keep your usual short oval shape.
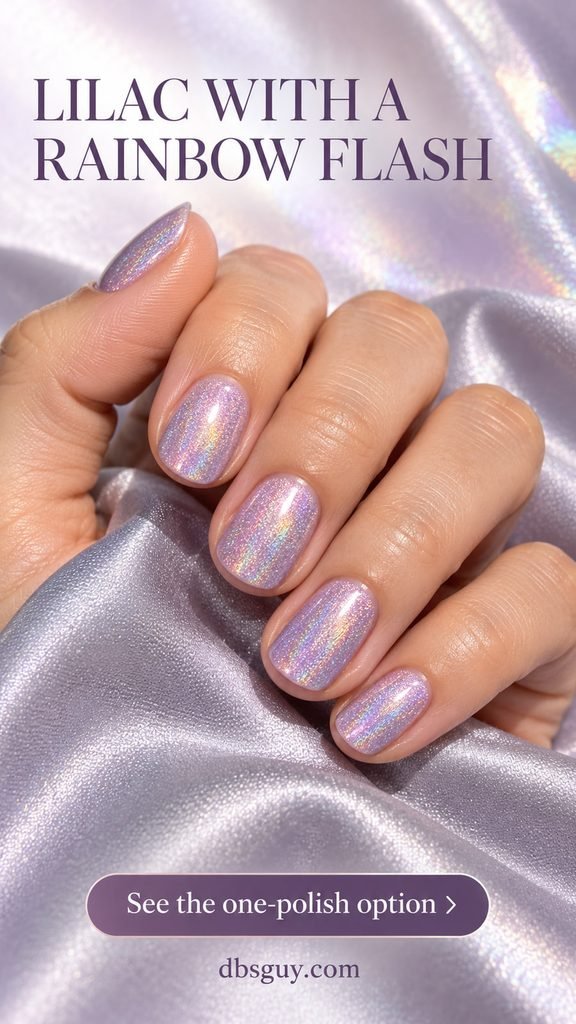
Look at a swatch in different lighting before choosing; the rainbow effect may be more obvious in direct light than in a dim room. Choose a fine holographic finish if you want the smooth visual texture shown here. Apply the polish according to its own system rather than adding several unrelated effect products. Large confetti pieces would create a much more scattered look.
10. Muted Olive With One Glossy Nail
This olive manicure uses finish contrast instead of glitter or drawing. Most nails have a matte surface; the ring nail keeps a clear glossy reflection. Because the color stays the same, the difference becomes noticeable as the hand moves.
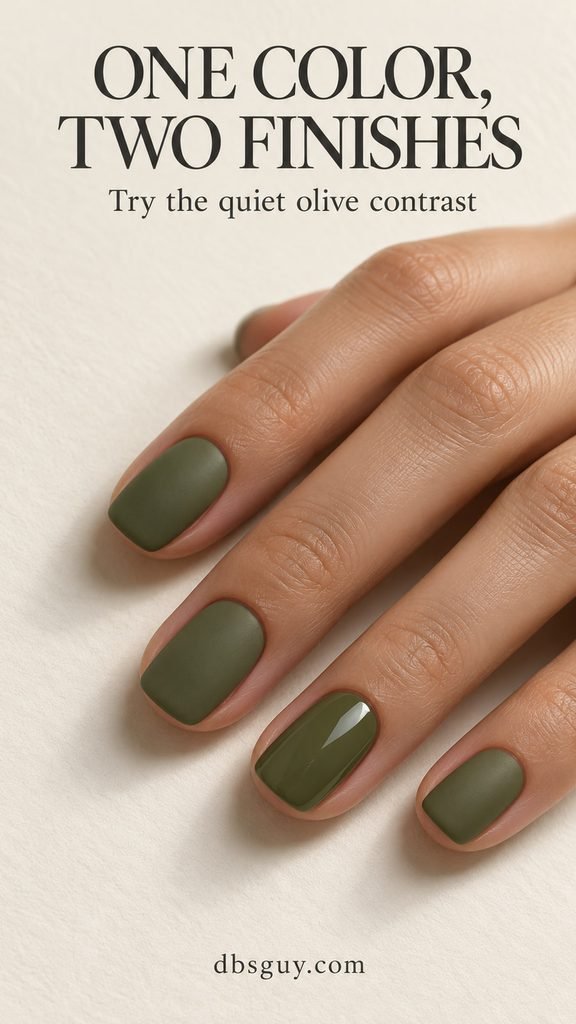
Paint the same olive color across the set, then use compatible matte and glossy top coats on the chosen nails according to their directions. Decide which nail will stay shiny before you start. Brushing a glossy top coat across everything at the end would remove the contrast. If glitter feels too festive for your everyday wardrobe, this is a quieter way to make the manicure feel considered.
Also read: 19 December Nails Green: Emerald, Forest and Festive Shine.
11. Dusty Mauve With a Silver Side Sweep
Silver sparkle following one side of a mauve ring nail leaves the center open and the color easy to see. The narrow curved trail has a softer feel than a straight stripe. Keep the remaining nails plain so the placement remains the focal point.
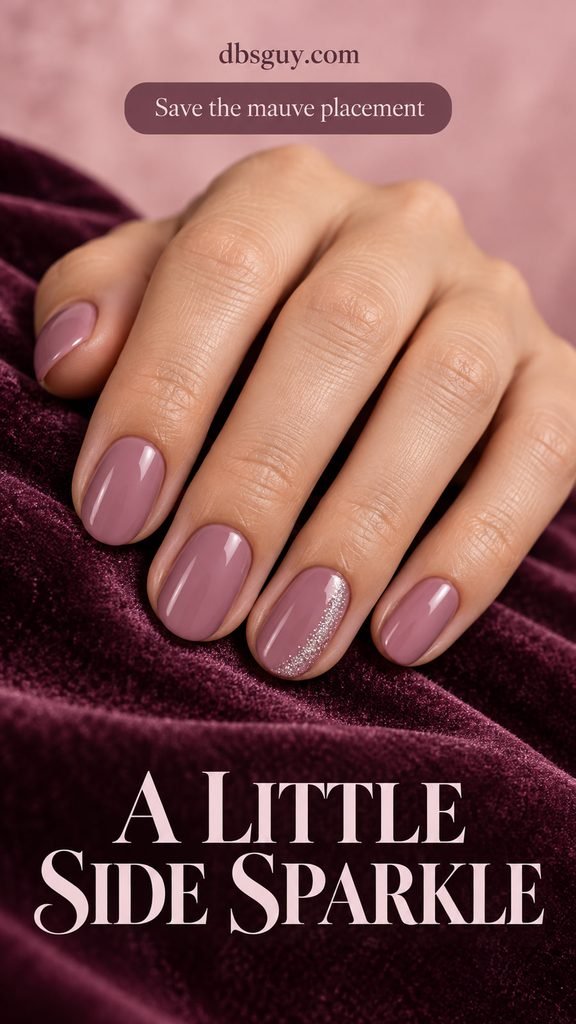
Use a small detail brush to place fine glitter polish along one side, keeping the product on the nail rather than against the skin. Begin with less than you think you need; you can build the trail without covering the mauve center. At a salon, show which side should hold the sparkle. A full glitter accent nail would give you a different balance.
12. Milky Ivory With Black Confetti Dots
Small black dots on one ivory nail suggest confetti without any metallic finish. The scattered arrangement feels playful, while the plain surrounding nails keep the set restrained. Choose this if you like a black-and-cream outfit and want the manicure to echo it.
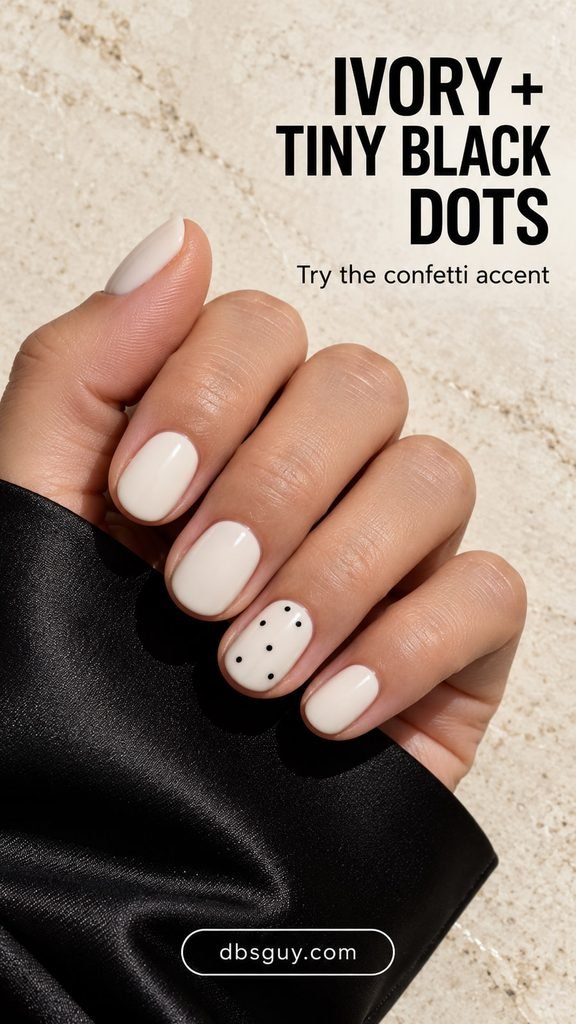
Once the ivory is ready for art, place a few small black polish dots at uneven intervals on the ring nail. Leave ample ivory between them instead of filling every blank area. Test the tool pressure first so the dots stay small. If one comes out larger, balance the spacing around it rather than making all the others larger too.
13. Rose Beige With a Rose-Gold Glitter Cuff
A slim rose-gold cuff follows the base curve of one rose-beige nail. It is warmer than the silver side sweep and leaves both the center and tip plain. The detail works especially well when you want the sparkle close to your rings rather than at the nail edges.
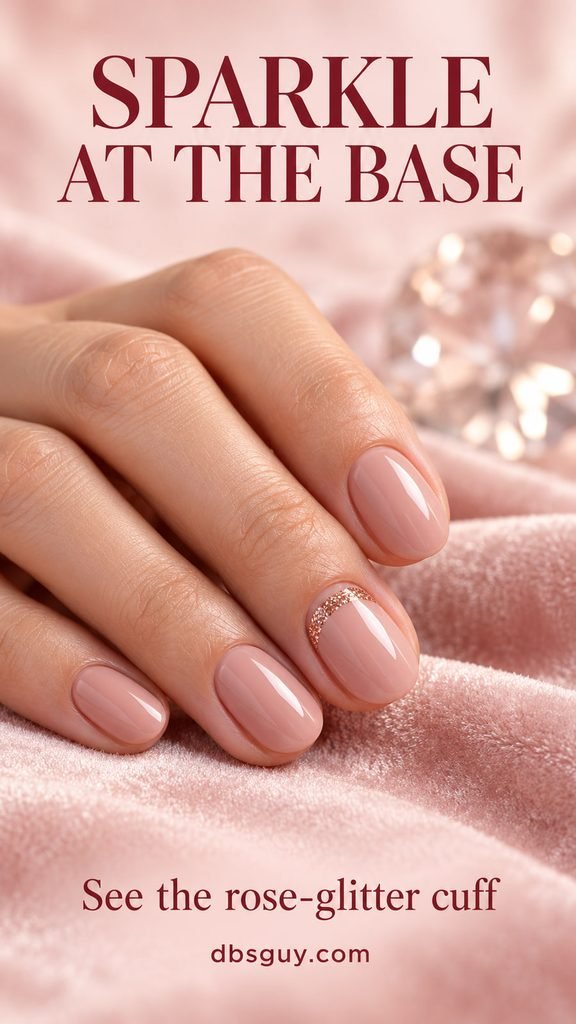
The curved line takes more control than dots, so try it on one ring nail before committing to both hands. With a fine brush, place a little nail glitter polish just inside the base curve and leave a visible gap from the skin. Do not flood the cuticle to complete the arc. For a salon request, specify a narrow glitter cuff, not a filled metallic half moon.
14. Plum Jelly With Soft, Submerged Sparkle
Translucent plum over a little fine silver glitter makes the sparkle look softened beneath the color. This layered effect has more depth than plain gloss but stays visually smoother than a dense glitter manicure. The reference uses a mulberry shade with the flecks still visible through it.
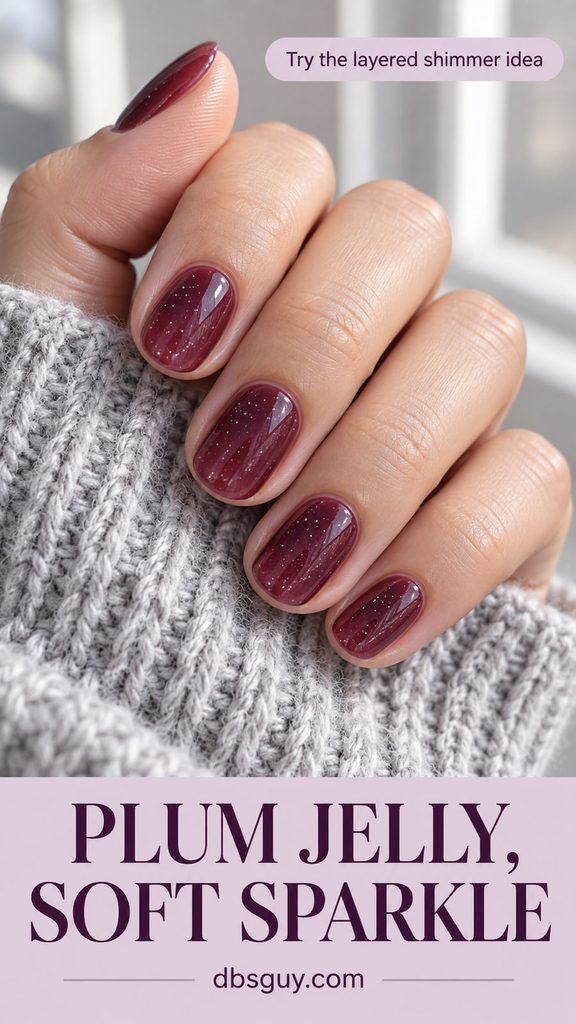
For a regular-polish interpretation, use compatible products: a thin sheer plum layer, a sparse glitter layer, then another thin sheer plum layer when each is ready to recoat. Finish as directed. Try the combination on a spare tip first. An opaque plum can hide the glitter completely, and piling on extra layers to reveal it only adds thickness. A premixed sheer shimmer polish is the simpler alternative.
15. White Micro French With One Silver Star
A small silver star gives a classic blush French manicure a countdown detail. Keep the white tips slim and place one flat star on the pink part of the ring nail. Leaving space between the star and the white edge helps both elements stay clear.
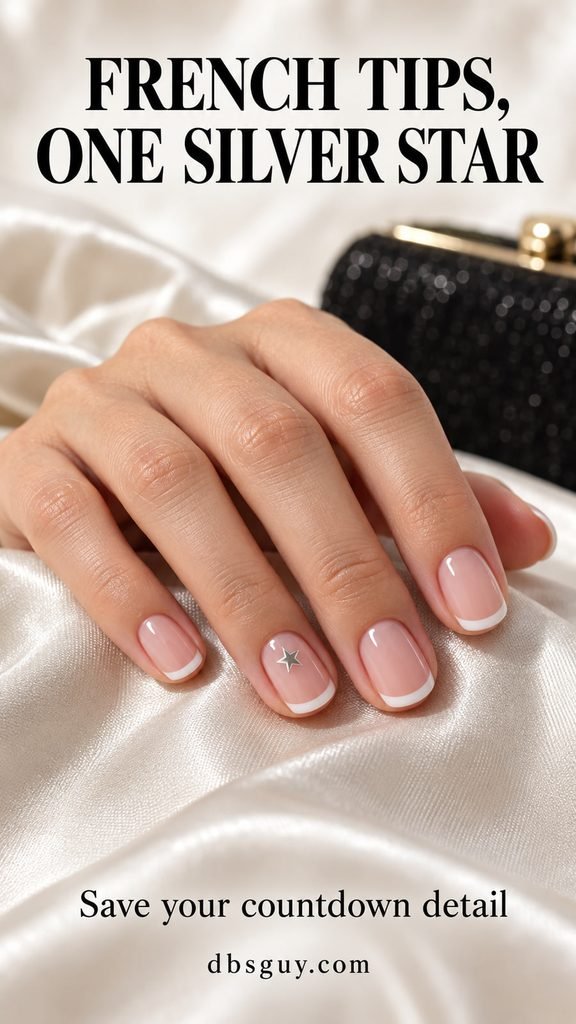
The least demanding route is to add a small nail decal to an existing French manicure in good condition, following the decal instructions. For a fresh set, ask for short oval nails, narrow white tips, and one silver star per hand. If your nails are too short to fit both details comfortably, keep the star and skip the white tip on that accent nail.
Also read: 21 New Year’s Nails to Ring In the Year Sparkling for more dramatic finishes and detailed salon options.
Keep the Home Version Manageable
Choose one accent method before opening your supplies. Dots need a dotting tool; a bow needs a correctly sized decal; the olive look needs two finishes. Buying tools for all fifteen looks will not make your chosen manicure simpler.
Leave room in your plans for the full drying process your regular polish requires. Surface-dry color can still mark if you press it against clothing or reach into a bag. Follow the product directions instead of assuming every quick-dry formula behaves the same way.
For basic nail care, the American Academy of Dermatology’s manicure guidance advises moisturizing nails after polish removal and avoiding cutting or forcefully pushing back cuticles. At a salon, ask how tools are cleaned. The looks here can be interpreted with air-dry polish; if you choose gel instead, follow that system’s application and removal requirements.
Questions Before You Pick Your New Year Nails
Which design is easiest if I cannot paint nail art?
Start with pink-beige pearl, black cherry gloss, or lilac holographic polish. All three use one color or effect across the whole nail. If you want a small motif, a correctly sized flat bow decal removes the need to draw its loops.
Can these ideas work on very short nails?
Yes. All-over finishes, a small corner patch, and one accent nail leave you flexibility. Size decals before applying them, keep tips narrow, and reduce the artwork if it crowds the nail. You do not need extensions for the layouts shown.
Do simple New Year nails need glitter?
No. Black cherry gloss, peach with a black bow, ivory dots, and the olive finish contrast all give you a dressed-up option without glitter. Choose the detail that fits your outfit rather than adding sparkle by default.
Can I do these without a curing lamp?
Yes, choose regular air-dry nail polish, compatible top coats, and decals intended for that use. Check the labels when shopping: a gel-style appearance does not tell you whether a product needs a lamp. Do not substitute air drying for the curing instructions of an actual gel product.
What if I only want to update my current manicure?
If the polish is intact, a small compatible decal or a single painted accent can change its mood. Follow the new product’s directions and check how it looks over your current color. If the base is chipped, repaint that nail before adding decoration; the accent will not repair the missing color.
Save the reference that fits your real nail length and the amount of detail you enjoy doing. For an uncomplicated choice, pearl needs no drawing, dots need only a few careful touches, and a single bow can supply the whole party mood.
Also read: 15 Simple December Nails That Look Polished With Minimal Effort.