15 Christmas Nails Ideas Simple: A Little Festive Detail for Your Cozy Christmas Plans


For simple Christmas nails, start with a color you already enjoy wearing and add one small seasonal detail: a cranberry dot, a little bow, or a single striped accent. You can keep your usual nail length and still have something festive to look at while you wrap presents or settle in for a Christmas movie.
These 15 ideas range from solid-color combinations to small motifs. If you are painting at home, begin with the dots, shimmer, or alternating colors. Fine French edges and miniature drawings look restrained, but they still take brush control; a flat nail sticker is a useful shortcut.
The images are AI-generated manicure concepts created for dbsguy.com. They illustrate color and placement, rather than photographed salon work or tested product results.

Choose the Detail That Fits Your Christmas Plans
- For a quiet evening in: try cranberry dots, soft shimmer, or cinnamon nails with one icing edge.
- For a family lunch or cookie exchange: choose a small bow, holly sprig, or tiny tree.
- For a dressier dinner: compare the gold star, champagne glitter cuff, and deep-green ribbon accent.
- For the least drawing: pick the cranberry shimmer or alternating red and green. The polish supplies the decoration.
A useful limit is one focal detail per nail. On very short nails, move a motif to the widest nail or remove a line rather than trying to squeeze in a smaller, fussier version.
1. Milky Pink With Tiny Cranberry Dots
A single red dot near the base of each nail gives a familiar milky manicure a small Christmas change. The translucent pink keeps the result light, while the repeated placement makes the dots feel deliberate. This is a good starting point if you want festive nails that still sit quietly beside a patterned sweater.
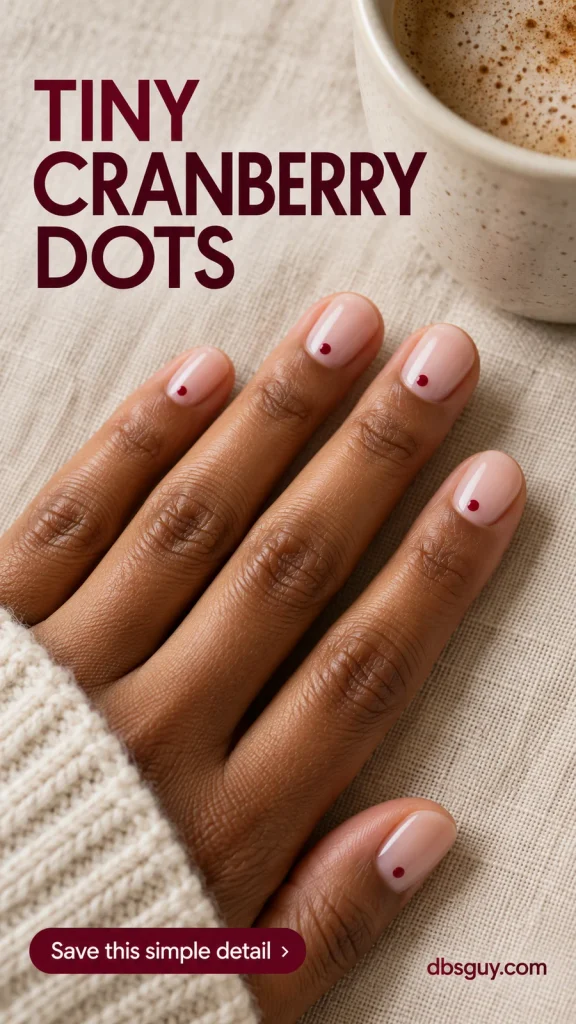
Let the base dry before touching down with a small dotting tool. Practice on a spare tip to judge how much polish makes the size you want, then leave a visible gap between each dot and the cuticle. If repeating the placement with your other hand feels awkward, decorate the ring fingers alone.
2. Evergreen Micro French Tips
Put forest green along the free edge and leave the rest of the nail sheer pink. You get the color of Christmas greenery without committing to a full dark manicure. The narrow curve works especially well when you want your nails to complement cream knits or a white button-down.

At the salon, ask to see the tip width on one nail before the full set is painted. A fine, even edge matters more here than adding length. For a home version, use a French-tip guide only on a thoroughly dry base and follow its directions; precise tips usually need more control than a dot design.
Also read: 19 December Nails Green: Emerald, Forest and Festive Shine.
3. One Candy-Cane Accent on Creamy Nails
Keep the set warm ivory and reserve the red stripes for one ring finger. The contrast supplies the candy-cane reference without mixing several patterns. Cream rather than brilliant white gives this version a softer look beside oatmeal sleeves and cozy scarves.
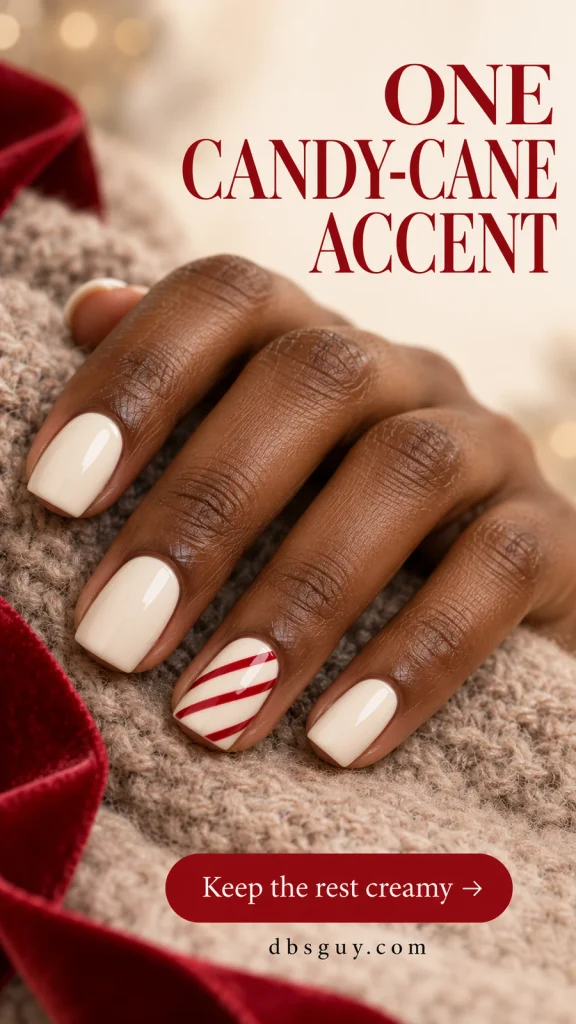
The reference uses three diagonal red bands with ivory showing between them. On a shorter nail, reduce that to two instead of crowding the space. A striped nail wrap can replace freehand painting; check the fit before application so the pattern sits on the nail rather than overlapping the skin.
4. A Little Red Bow on Blush Pink
One small bow is enough to suggest a wrapped present. Keep the surrounding nails glossy blush pink and let the ring finger carry the entire motif. It is an easy design to picture with a soft cardigan, even if you usually skip holiday nail art.
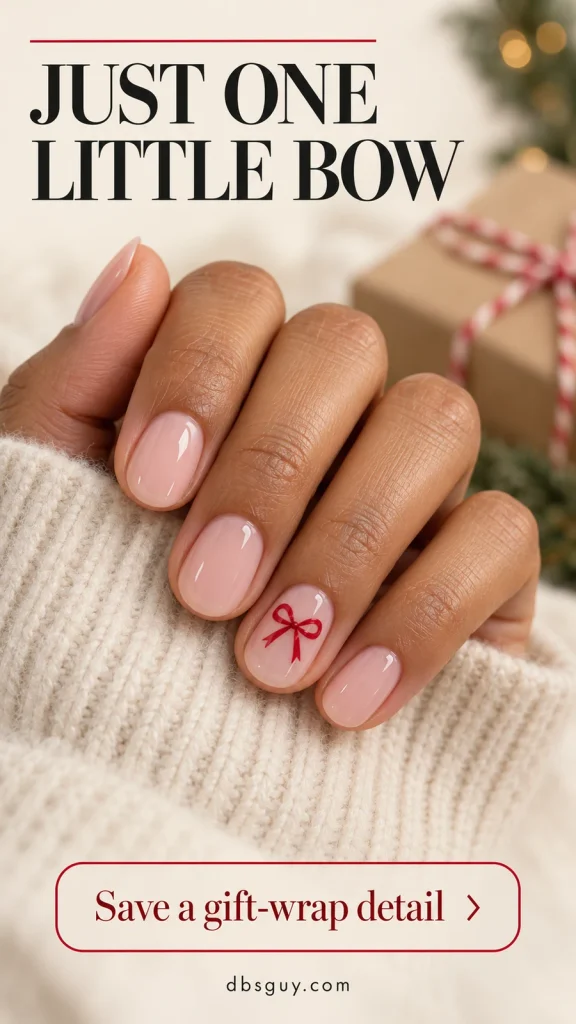
For the simplest adaptation, choose a flat bow sticker with two clear loops and short tails. Compare it with your actual nail before using it: pink should remain visible around the whole shape. If you prefer painted art, ask your technician for a small, flat bow with no additional ribbon lines or raised charm.
5. A Holly Sprig in One Corner
Creamy white nails make a tiny holly sprig easy to see. Two green leaves and a small cluster of red berries give you a recognizable Christmas motif while leaving most of the accent nail plain. The corner placement keeps it from feeling like a large illustration.
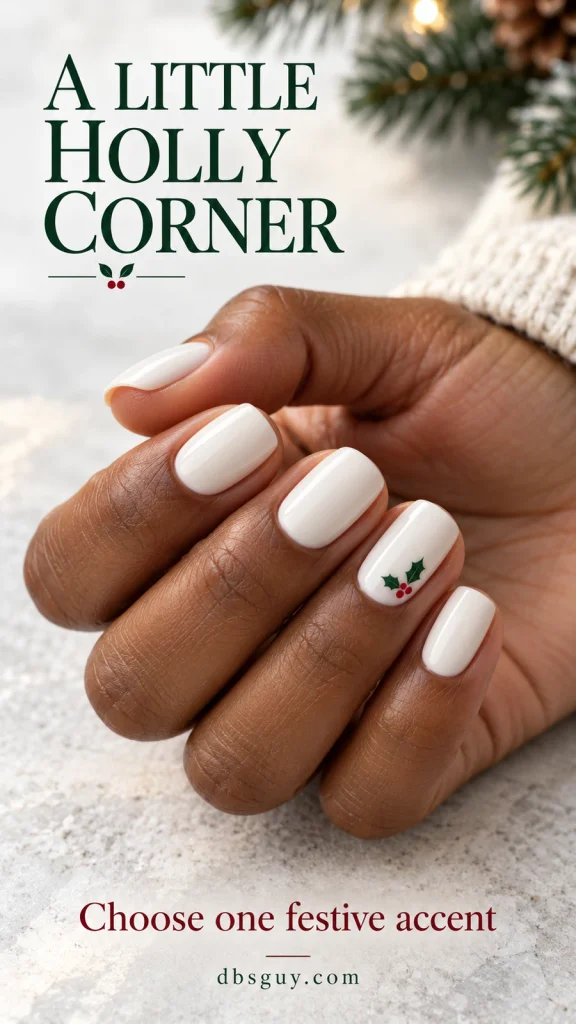
Use a small holly decal if pointed leaves are beyond the brushwork you want to attempt. When choosing one, look for separated leaves and berries rather than a dense patch of color. A slightly larger, clear motif on one nail will read better than several tiny, crowded sprigs.
6. Burgundy With One Gold Star
Deep burgundy and a single gold star suit a candlelit Christmas dinner. Here, the wine-colored polish does most of the work; the small star adds a tree-topper reference when you look closely. Leave the other nails undecorated so the accent keeps its impact.

Choose a compact flat star sticker or ask for a painted metallic star near one upper corner. Leave burgundy around all its points, especially on a narrow ring fingernail. A flat accent is the version to request if you want the look without the height of a metal charm.
7. Sage Nails With Snowfall Dots
Muted sage and a few white dots give Christmas nails a softer palette. The reference decorates the index and ring fingers, with the other nails plain. You still get a snowy detail, but there are no tiny snowflake branches to draw.

Vary the gaps between dots rather than making a rigid grid. Leave enough green visible that each white mark stays separate. If your first dots are larger than planned, stop after a few instead of filling the remaining space. For a cooler version, borrow the placement and switch the base to dusty blue.
Also read: 21 Short December Nail Ideas That Make Tiny Details Stand Out.
8. A Tiny Triangle Christmas Tree
A solid green triangle and a short brown trunk can suggest a Christmas tree without painted branches, ornaments, or a star. Set the small shape on a sheer peach-pink ring fingernail and leave the rest of the manicure plain.
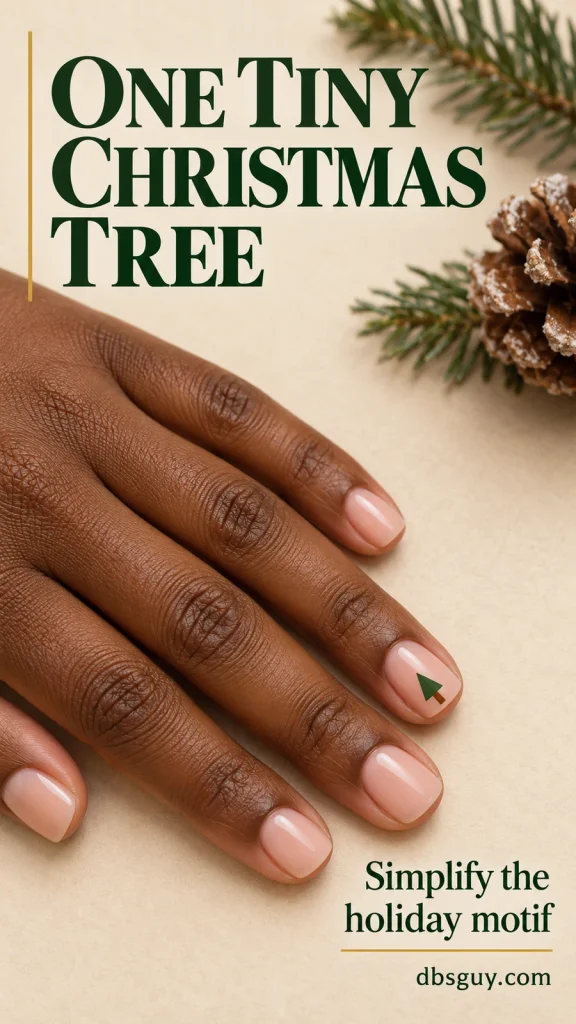
Keep the point facing the nail tip and leave a little base color beneath the trunk. If you are doing it yourself, a flat tree decal avoids having to make three clean edges with your less steady hand. At the salon, specify a simple triangle silhouette; a detailed evergreen would change this particular look.
9. One Tiny Red Bauble
A red circle becomes a Christmas ornament with a tiny gold cap and short hanging line. The nude base gives those small details room to show, so the design can stay confined to one nail. It is a sweet option when you want something more specific than a dot but less involved than a miniature scene.

Ask for a small, flat painted bauble rather than a domed charm. If you are painting it, form the circle first, let it dry, then add the cap and fine line. A ready-made ornament sticker is a practical alternative when keeping those details separate proves difficult.
10. A Champagne Glitter Cuff
Move the sparkle to the base of the nails. A narrow crescent of champagne glitter follows the cuticle curve, leaving the tips and most of the pale pink polish clear. It offers a dressier finish without drawing a Christmas symbol.
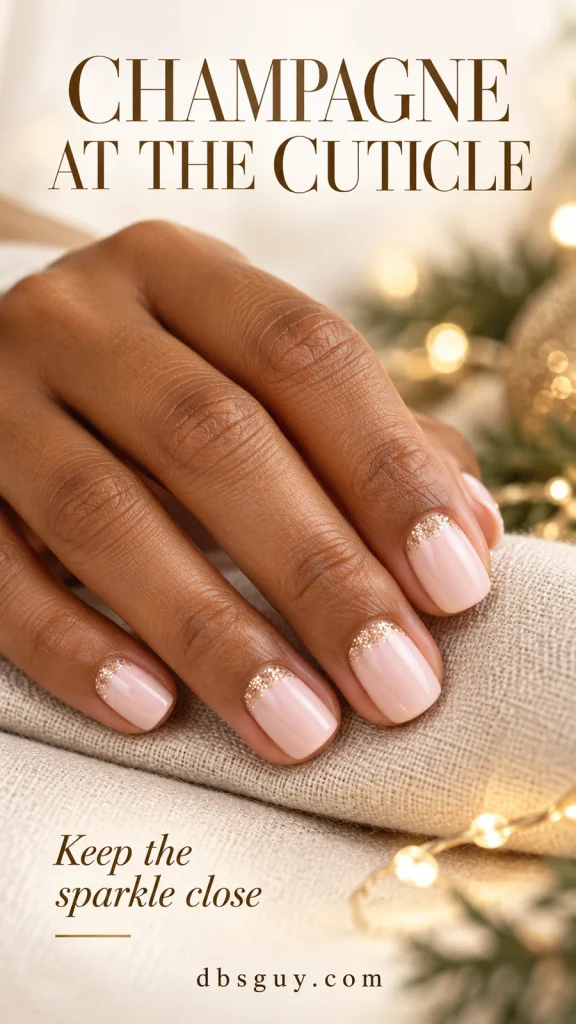
Use a fine glitter polish suitable for nail art and place it lightly along the base curve, keeping product off the skin. The reference is softly scattered rather than a solid metallic band. Start with less glitter than you think you need; a broad cuff will make the whole manicure look heavier.
11. Forest Green With a Gift-Ribbon Cross
Two ivory lines on one green nail suggest gift wrap without a bow. The crossing sits slightly off-center, giving the accent a different feel from a traditional French tip. Keep the neighboring nails the same deep green so the light lines stay easy to follow.
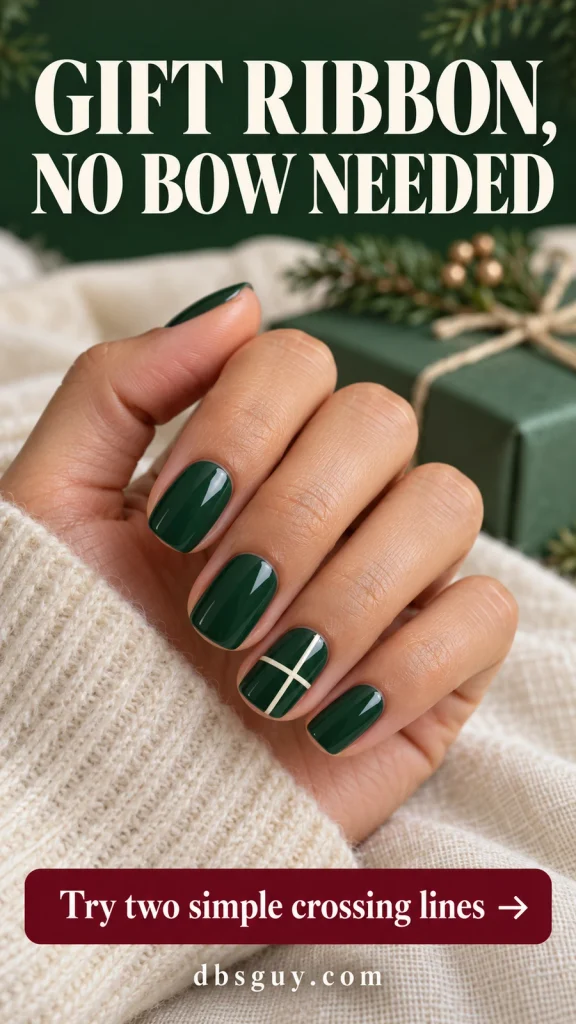
Ask for one lengthwise line and one crosswise line, both narrow enough that green remains the main color. A fine striping brush or an appropriately sized nail decal can create the detail. If you prefer to paint it at home, practice the crossing on a spare tip first; this is visually simple, but straight lines still take a steady hand.
12. Cranberry Polish With Fine Shimmer
When you want Christmas nails with no drawing at all, choose cranberry polish with a fine warm shimmer. The small reflective particles add interest as your hands move, while the red stays clear and familiar. Keep the nails short and rounded if that is your usual shape.

Look at a finished swatch in ordinary light. Fine shimmer gives a different result from chunky glitter, a sharp magnetic stripe, or mirror chrome. For this reference, choose a polish with an even, delicate sheen and use the maker’s coat and drying instructions. No accent nail is needed.
13. Cinnamon Nails With One Icing Edge
Warm cinnamon brown and a white scalloped edge borrow the colors of gingerbread without asking you to paint a tiny cookie character. Keep the icing on one ring finger and leave the surrounding brown nails plain. This is a cozy alternative when red and green do not appeal.

The accent uses three broad, rounded scallops near the free edge. Ask for flat painted icing, with a narrow white line rather than a thick white tip. For a home adaptation, a scalloped nail-art sticker can supply the outline. Skip extra sprinkles so the simple icing shape remains the feature.
14. Alternating Cranberry and Forest Green
Let two solid colors carry the Christmas theme. Alternating cranberry and forest green makes each nail part of the pattern, so there is no separate artwork to plan. The reference uses cranberry on the thumb, middle finger, and pinky, with green on the index and ring fingers.
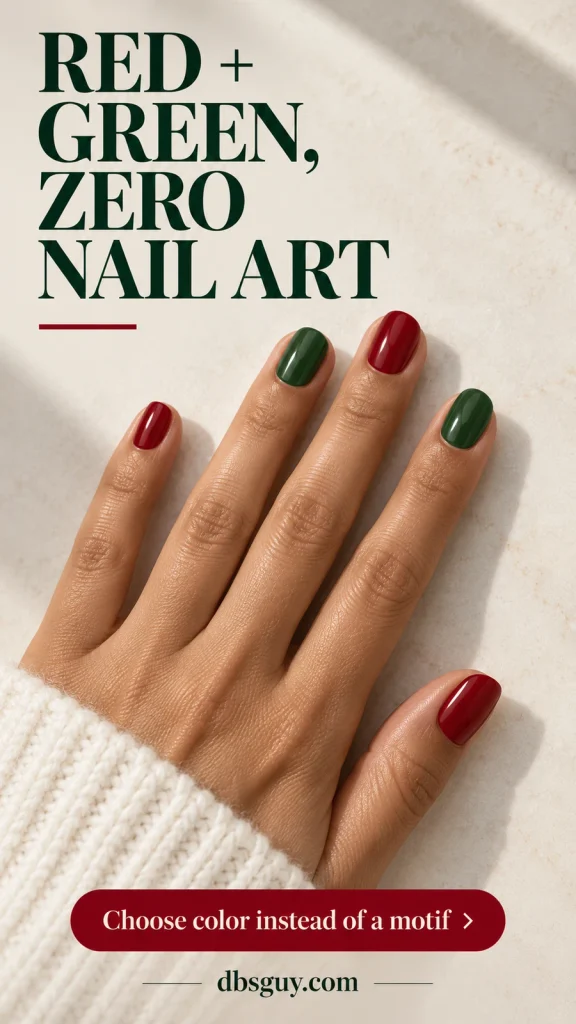
Choose both shades in the same cream finish if you want this smooth, coordinated result. Check them together beside your hand: a green that reads almost black in your room will give a moodier effect. Repeat the same order on the other hand, or make one hand red and the other green if you prefer larger blocks of color.
15. An Off-Center Plaid Accent
A small cluster of crossing ivory and pine-green lines gives cranberry nails the feeling of a Christmas scarf. The intersection sits toward one corner, with narrow lines extending along one side. Most of the accent nail remains red, and the other nails stay plain.

This is the most precise brushwork in the group. Ask your artist to keep the grid sparse rather than reproducing a full tartan fabric. For a home version, use a partial plaid nail wrap or simplify the accent to one ivory crossing. The important choice is the amount of pattern, not the number of miniature lines.
Before You Paint: Keep the Process Manageable
Choose the design before gathering supplies. Dots need a dotting tool; narrow stripes need a fine brush or a suitable guide; decals need a size that fits your nail and a compatible finishing method. You do not need to buy every tool for a manicure that uses just one accent.
For regular polish, follow the directions for your base coat, color, and top coat. Apply thin layers and allow the base color to dry before adding dots or placing guides. Essie’s nail-art guide explains those basic dotting and striping techniques. Give the artwork time to dry as directed before finishing so your top coat does not drag the colors together.
Leave a few nails plain if the design starts feeling busy. You can repeat a small motif on the other hand without making every finger identical. If you are booking a salon visit, send the reference in advance and specify your preferred length, the number of accent nails, and whether you want all details flat.
Simple Christmas Nails FAQs
Which of these designs is easiest for a beginner?
Start with the alternating solids in idea 14 or the fine shimmer in idea 12. Neither needs a drawing tool. If you want a small piece of nail art, try the single dots in idea 1 before attempting narrow French tips, bows, or plaid.
Can I use regular polish instead of gel?
These concepts focus on flat color, painted details, fine glitter, and decals that can be interpreted with regular polish. Choose decals and finishing products intended to work with your polish, and follow their instructions. A reference image cannot tell you which product system a salon will use.
What should I change for very short nails?
Reduce the number of elements. Try two candy-cane stripes instead of three, one star on a wider nail, or dots on just the ring fingers. For a bow or tree sticker, check its actual width rather than assuming the smallest design on the sheet will fit.
How do I stop small details from smearing?
Do not add artwork over a base that is still wet, and avoid using a large bead of polish for a tiny dot. Follow your products’ drying and top-coat directions, including any guidance for decals. A surface that feels dry is not a reason to rush straight into wrapping gifts or pulling on gloves.
Which idea works after Christmas, too?
Evergreen micro tips, cranberry shimmer, the gold star, and champagne cuffs can carry on without a specifically Christmas motif. Choose the look for the occasions you want it to suit, and refresh the manicure when needed rather than expecting one application to last through every holiday plan.
If you are torn between several ideas, save the simplest one you would enjoy seeing every day. Keep the color, accent placement, and finish with the reference so you can recreate the detail that caught your eye.