19 Valentine Cards for Kids That Make Classroom Exchanges Extra Fun

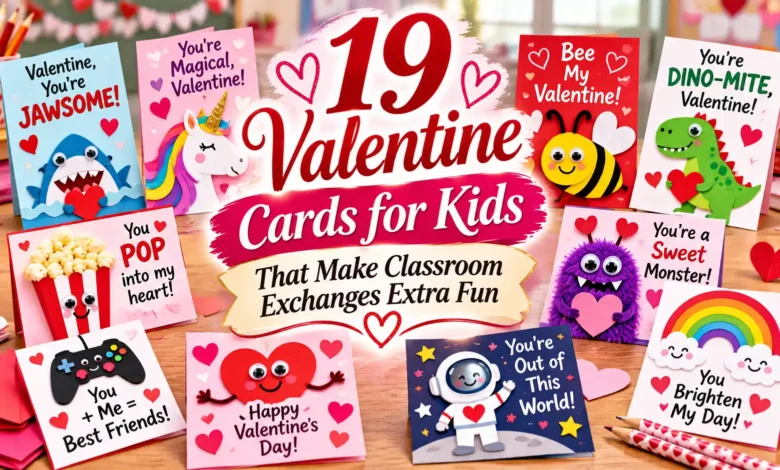
For a whole-class exchange, start with a card your child can help repeat: a washi-tape heart, an uncolored robot, or a pencil game. Choose one design, leave a generous space for a signature, and make the same kind of card for every classmate. A small activity can be the surprise; you don’t need a bag of gifts.

These 19 Valentine cards for kids include paper-only crafts, quiet puzzles, and a few useful supply holders. The measurements are suggested starting sizes, so adjust them to the teacher’s instructions and the classroom mailboxes. The images are AI-generated design concepts, not tested projects or ready-to-print card templates.
Before you make a whole class set
Ask the teacher whether the class is exchanging Valentines, how many to bring, and whether cards should have recipient names or only your child’s signature. Check rules for food, stickers, pencils, and other extras before buying supplies.
Every design below can be made without candy. FARE’s classroom Valentine guidance recommends planning with the teacher and considering non-food treats. That still leaves room for individual material restrictions; a paper card can be a complete Valentine on its own.
Use labeled, age-appropriate children’s art supplies and supervise cutting. An adult should handle interior window cuts and any tool a child cannot use comfortably. Draw faces instead of adding loose plastic eyes, and keep glitter, beads, and similar extras off cards for younger groups.
A quick way to choose: Start with cards 1, 3, or 11 for a simple batch. Choose 13–15 or 18 for a quiet pencil activity. Try 4, 6, or 16 when your child wants more of a craft project.
1. Make a striped washi-tape heart
Cover a scrap of cardstock with short, slightly overlapping strips of washi tape. Draw a heart on the plain back, cut it out, and glue it onto a 3-by-4-inch card. Cutting through the taped scrap gives the stripes one clean edge; it’s easier than trimming separate tape ends into a heart on each finished card.
This is a good choice when a child wants control over the colors but you need a repeatable design. Prepare the card bases first, then let them pick the stripes. Press down any lifting tape edges before stacking.
What to write: “Happy heart day!”

2. Send a sticker scene they can finish
Draw a hill and a couple of clouds on a 4-by-6-inch card, leaving most of the sky empty. Add a small sticker sheet so the recipient can finish the scene. Keep the stickers on their original release backing and attach the backing with one small tape tab; don’t tape across the peelable designs.
A sun-and-stars scene needs very little drawing, and the recipient gets to choose where everything goes. Count the stickers before dividing a larger sheet so each classmate receives the same amount. If stickers aren’t allowed, draw three outlined shapes for the child to color instead.
What to write: “Make a little sunshine!”

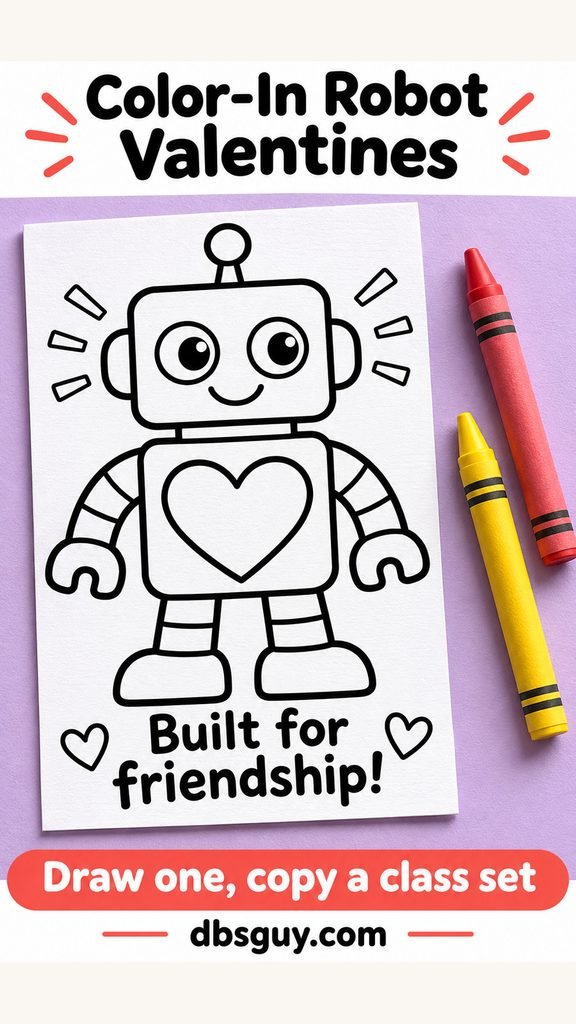
3. Draw a color-in robot
Build a friendly robot from a rectangle, a square head, simple arms, and a heart on its chest. Use a dark outline on a white 4-by-6-inch card and leave the shapes uncolored. Large open spaces give the recipient room to use crayons without working around tiny details.
For a class set, make one clean original, scan or copy it, and check a sample at the final size before making the rest. Leave a separate signature line so the sender’s name doesn’t become part of the coloring area. This one works with the recipient’s own supplies.
What to write: “Built for friendship!”
4. Put tissue paper behind a heart window
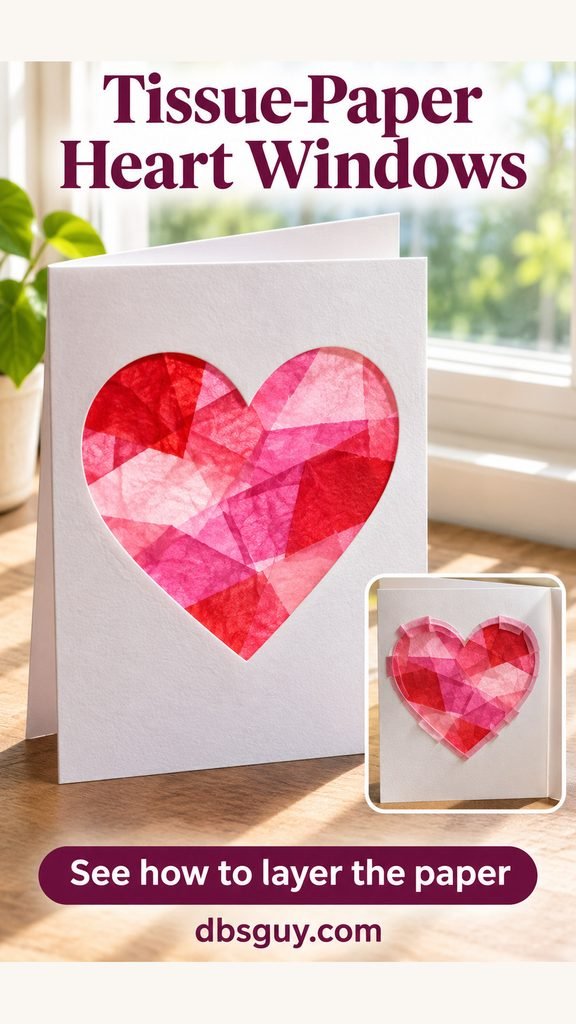
Fold a 6-by-8-inch piece of cardstock into a 4-by-6-inch card. Open it flat, and have an adult cut a heart out of the front panel, leaving a broad border. Glue small pieces of colored tissue paper around the opening from the back of that panel, overlapping them enough to cover the hole.
Keep glue on the cardstock border rather than soaking the tissue. Let the card dry open before folding it closed. The translucent window is the feature here, so place the message below it or inside. For a big class, an adult can prepare the openings while children choose the tissue colors.
What to write: “You brighten our class!”
5. Fold down a puppy’s paper ears
Use a 4-inch square of cardstock for the puppy’s face. Cut two broad paper ears with a short tab at the top of each. Fold the tabs, glue them behind the upper corners, and let the ears hang forward over the face. Add drawn eyes, a nose, and one paper heart.
The ears lift without needing a fastener, and all the pieces can stay flat in a mailbox. Make one ear pattern from scrap paper so you can trace the rest. If the message feels crowded below the face, write it on the back and leave the front for the puppy.
What to write: “Paws-itively glad we are friends!”

6. Fold an accordion caterpillar
Cut a 2-by-10-inch strip of paper and mark it every 2 inches. Fold back and forth at the marks to make five panels. Glue a paper caterpillar face onto the first panel, draw the features, and decorate the others with flat paper hearts.
Keep the face close to the panel’s size so it won’t catch when the strip folds shut. Write a short message across the panels or put the whole sentence on the back. This suits a child who enjoys folding; if you’re making many, mark the strips in a batch before starting the faces.
What to write: “So glad we’re in the same class!”

7. Hide a joke under a flap
Write a question near the top of a 4-by-6-inch card and its answer below. Cover only the answer with a paper square, then tape the square along its top edge. Leave the other three edges free so the recipient can lift it. A small arrow or the word “Lift” makes the interaction clear.
Try this gentle joke: “What does a slug call its friend?” Under the flap, write “A valen-slime!” A simple slug doodle helps explain the wordplay. Check the reveal before making the class set; a flap glued down on every side turns a surprise into a stuck card.
What to write: “Happy Valentine’s Day, friend!”

8. Tell a friendship story in three comic panels
Divide a 3-by-9-inch strip into three boxes. In the first, draw a character with a ball; in the second, another character arrives; in the third, they play together. A star and a heart are easy characters to repeat without drawing detailed faces or bodies.
The pictures can carry the story without speech bubbles, leaving room for a short caption underneath. Your child can make one original and copy it for the class, then sign each strip. Keep each scene simple enough to understand at a glance; tiny jokes and crowded lettering get lost on a small card.
What to write: “Better together!”

Also Read: 21 Valentine Card Ideas That Make a Simple Message Feel Personal for a separate card built around a shared detail with a grown-up.
9. Add a pocket for two crayons
Start with a 4-by-6-inch card and a paper rectangle wide enough to hold two full-size crayons side by side. Glue the rectangle’s bottom and side edges to the lower front, leaving the top open. Once dry, slide in the crayons with their wrappers on and add a few outline doodles above the pocket.
Use the actual crayons to check the pocket width before making more; a tight fit can split the glued edges. Count two crayons per classmate, and ask whether supplies are welcome. If the pocket is too loose, adjust its width or hold the wrapped crayons with a removable tape band for transport.
What to write: “Color a happy day!”

10. Turn a pencil into a paper rocket
Use a 3-by-9-inch card so a full-size pencil fits along the center. Glue two paper fins beside the lower part of the pencil and a small flame shape beneath its end. Attach an unsharpened pencil with two short tape bands, keeping the message visible on either side.
The flat card supplies the rocket details while the pencil becomes a useful extra. Choose tape that holds during transport but can be peeled from the pencil wrapper or barrel. Try one before assembling the rest, and keep the cards in a box deep enough that the pencils won’t bend the paper.
What to write: “You are out of this world!”

11. Make the Valentine a bookmark
Cut a 2-by-6-inch rectangle of cardstock. Draw a row of little book spines, add one heart, and leave the bottom for a signature. The bookmark itself is the card, so it doesn’t need a second folded piece or an attached gift.
Keep both sides flat, with marker drawings or thin paper decorations. Skip a tassel or thick embellishments that would press between book pages. This is a useful option when you want each child to receive something they can keep using without buying a class set of favors.
What to write: “A good friend is a great find!”

12. Print a little bunch of heart flowers
With washable paint intended for children, make two angled thumbprints that meet at the bottom to form a heart. Repeat for a small bunch, let the paint dry, and draw stems underneath. Try the first pair on scrap paper to see how much paint gives a clear print.
Put out only a little paint and follow its label for use and cleanup. A child who doesn’t like paint on their skin can use a washable heart stamp instead. Complete the printing stage for every card before adding words, so wet paint doesn’t smear across a finished message.
What to write: “A little kindness grows!”

13. Draw a heart-and-X tic-tac-toe card
Draw a large three-by-three grid on a 4-by-6-inch card. Explain that one player draws hearts and the other draws Xs, then leave a generous blank margin below for names. A single heart and X can demonstrate the game, but keep most squares empty.
The recipient can play with an ordinary pencil, so there’s no need for candy or loose counters. For more than one round, draw another blank grid on the back. Use a ruler for the first original if you plan to copy it; uneven squares can make a small board cramped.
What to write: “Your move, friend!”

14. Hide three friendship words in a tiny search
Make a five-by-five letter grid on a 4-by-6-inch card and list three words to find. For an early-reader version, use only left-to-right and top-to-bottom words. Keep the letters large and evenly spaced rather than squeezing in a long word list.
You can build a simple grid with these rows: FUNOS / BKIND / PRETA / ASLOB / LEMUP. Ask the reader to find FUN, KIND, and PAL. FUN begins the top row; KIND runs across row two starting at its second letter; PAL runs down the first column from row three. Put those answers on the back. Recreate the grid from this text rather than printing the concept image as a puzzle master.
What to write: “Find a little friendship!”

15. Make a maze that ends at a heart
Sketch a short route from a labeled Start to a large heart on a 4-by-6-inch card. Draw the corridor walls around that route, then add a few short dead ends. Keep the turns broad enough for a child to trace with a pencil.
Before copying it, solve your original from beginning to end and check that no wall closes the intended route. The pink route in the concept image demonstrates the path; leave that line off the recipient’s version, or put the answer on the back. Add a few branches for a harder puzzle. A simple route suits younger readers better than a dense maze shrunk to fit a card.
What to write: “Find your way to a happy heart!”

16. Weave a striped paper heart
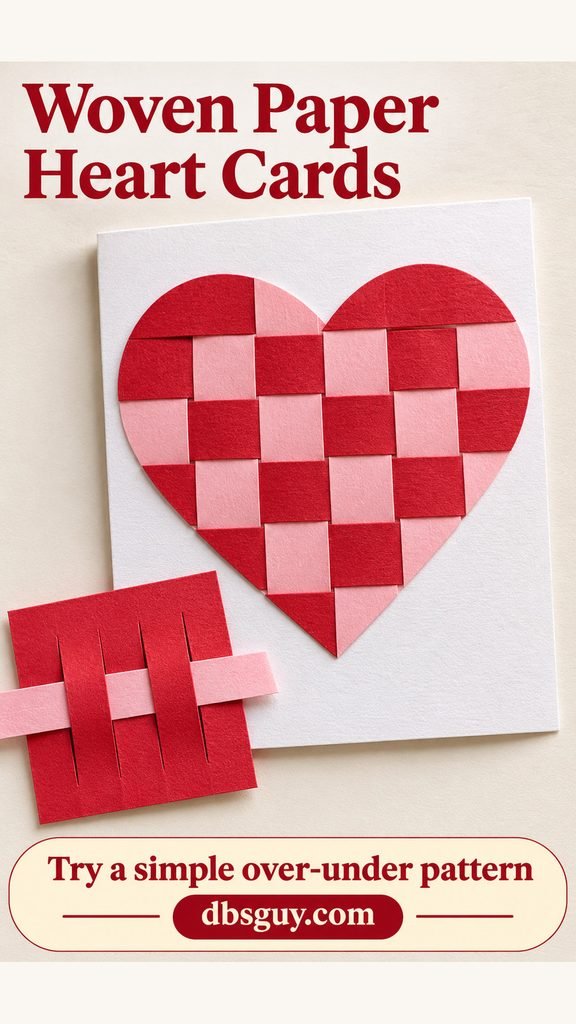
On a 4-inch square of colored paper, draw parallel lines about half an inch apart, stopping half an inch from both the top and bottom edges. An adult can start the interior cuts. Weave contrasting half-inch paper strips over and under the slits, reversing the pattern with each strip. Glue the strip ends down.
After it dries, draw a heart on the back, cut it out, and glue the entire heart flat onto a card to secure its cut edges. Wide strips keep the pattern visible and are easier to handle than narrow ones. This takes more preparation than the tape heart, so choose it for a child who enjoys the weaving itself.
What to write: “Our class is better together!”
Also Read: 25 Valentine Decor Ideas From Heart Garlands to Flower-Filled Tables for paper-heart decorations to make after the cards are finished.
17. Give a friendship ticket
Cut a 3-by-6-inch rectangle and draw a ticket border with rounded corners or short dashed lines. Label it “Friendship Ticket,” then add a friendly sentence and a signature. Skip tiny decorative cutouts if you’re making a large batch.
Use it as a playful card, with wording such as “Good for a friendly hello!” Avoid promising prizes, special access, or an activity the teacher hasn’t arranged. Older kids can add a serial number that matches the same design on every card; the fun is the ticket format, not giving different classmates different rewards.
What to write: “Good for a friendly hello!”

18. Write a message in a number code
For a reader who enjoys a puzzle, use A=1, B=2, and so on through Z=26. Write “2–5 / 11–9–14–4” across the front of a 4-by-6-inch card. It decodes to “BE KIND.” Print the complete letter-number key on the back, with spaces between entries so it’s easy to follow.
Add one worked example, such as “3 = C,” and leave a small answer line under the code. Check every number against the key before copying. This is a better fit for kids comfortable matching letters and numbers; for beginning readers, choose the coloring card or sticker scene.
What to write: “A kind message is hiding here!”

19. Fold a pocket-size kindness book
Fold a 3-by-6-inch piece of paper in half to make a 3-inch-square book with four writing surfaces. Put “Little Kindness Book” on the cover. Inside, add “A kind word…” and “I can help by…” as prompts; use the back for the sender’s name and a small drawing.
The recipient can finish the prompts at home, or the sender can fill them in before giving the card. Keep the pages attached by their fold, with no staples or binding needed. It feels like a tiny keepsake while using just one piece of paper, making it a useful choice when favors aren’t part of the exchange.
What to write: “Little words can make a good day!”

How to make the class set manageable
- Confirm the count and naming instructions. Use the class list if the teacher provides one, and include every participating classmate. Make a couple of spare unsigned cards for a missed count or a damaged one.
- Make one sample before cutting the full set. Check that a pencil fits, a flap opens, and the finished card will fit the classroom mailbox.
- Work in stages: cut all bases, add all decorations, then write the messages. Give your child a manageable job, such as choosing colors or signing a few cards at a time.
- Let paint and glue dry completely, then count the finished cards into a sturdy box. Keep game answers on the back and loose supply holders upright during transport.
Questions about classroom Valentine cards
What are the easiest Valentine cards to make for an entire class?
Choose the washi-tape heart if you want a handmade decoration, the color-in robot if you can copy one original, or the bookmark if you want a flat card with no moving pieces. Prepare the bases and let your child handle the part they can comfortably repeat.
Should classroom Valentines have each child’s name on them?
Follow the teacher’s directions. Named cards can be personal, while sender-only cards are simpler to distribute. If names are requested, use the supplied class list for spelling and keep the signature space separate from the message.
Do kids need to attach a gift or candy?
A card is enough unless the school has given different instructions. A coloring area, joke, or pencil game adds something to do without an attached favor. Check before adding any supplies, including non-food items.
Can I print the images as classroom card templates?
The images illustrate the ideas; they include branding and article text and aren’t printable masters. Make a clean card from the measurements and instructions, or draw one original and copy it. For the puzzles, use the written grid or a route you have checked yourself.
Also Read: More Valentine Day Ideas from DBSGuy.