15 Candy Heart February Nails With Pastel Colors and Tiny Sweet Messages

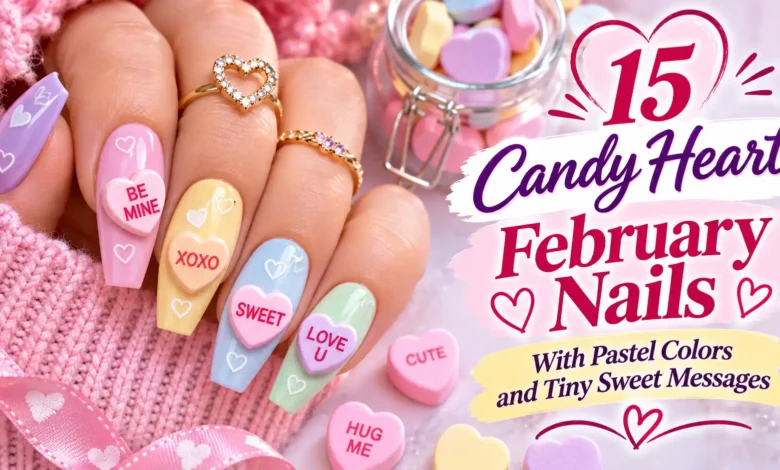
For candy heart February nails, start with a pale pink, mint, lavender, peach, or butter-yellow heart and give its tiny message enough contrast to read. Raspberry-red block letters keep the candy reference clear. If your nails are short, one XO or BFF accent is a useful starting point; you can leave the remaining hearts blank.
These 15 designs range from a single sweet note to patterned sets and longer stacked hearts. Choose the layout first, then decide which words fit your actual nail width.
The visuals are AI-generated design concepts for dbsguy.com. They illustrate color and placement, not completed salon work or tested wear results.
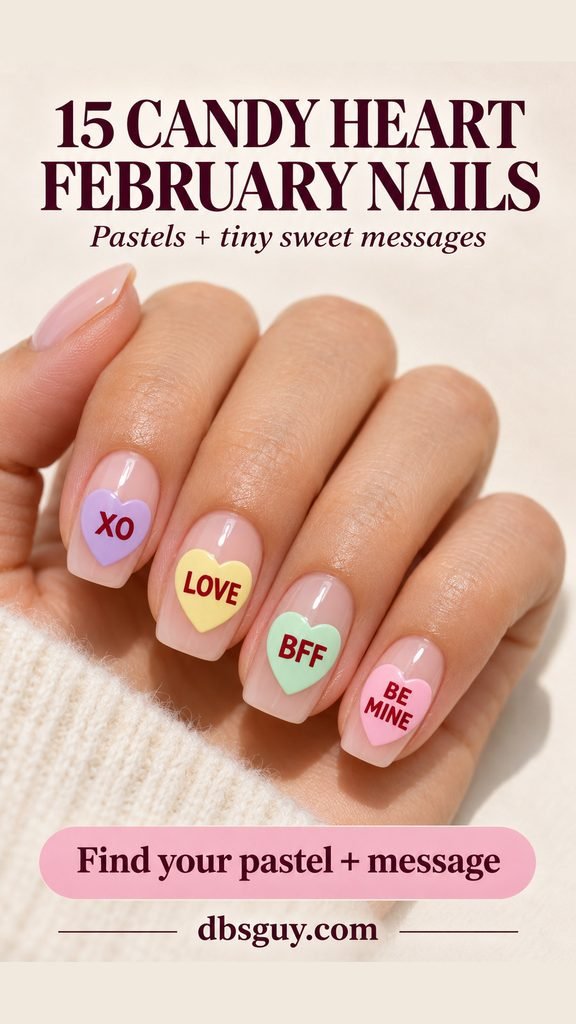
Choose a Message Before You Choose the Detail
Try XO, HI, BFF, or LOVE for a compact heart. BE MINE and HUG ME can sit on two lines, while SWEET or CUTIE needs a little more width. These are lettering choices, not fixed size rules: hold the decal beside your nail or ask your artist to sketch one accent before committing to the whole set.
Keep the letters darker than the heart. Pale pink lettering on a pale peach heart may look pretty in a close-up but lose its shape when you look at the full hand. Decide which way the words should face, too: toward you when you check your nails, or toward someone looking at your fingertips.
1. A Pastel Skittle of Conversation Hearts
Give each nail its own candy color while keeping the base sheer blush. Lavender, mint, yellow, and pink hearts create the variety; the same raspberry lettering ties them together. The reference uses XO, LOVE, BFF, and HI, with a visible border of blush around every heart.

This suits short squovals because you can change the heart size to fit each nail. Keep the pinky message shortest instead of squeezing a five-letter word into it. Ask for softly defined candy edges, or choose thin flat decals if you prefer less surface dimension.
2. One Lavender “BE MINE” Heart
A single lavender heart on a milky-white ring nail gives the words a quiet background. All the other nails stay white. It is a good choice when you want the candy theme without decorating every finger.
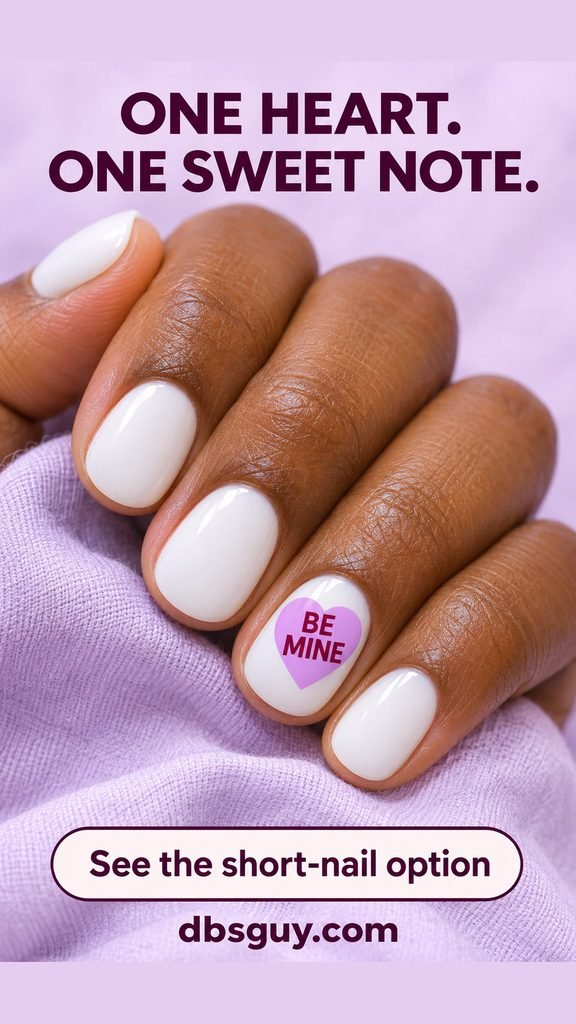
Put BE above MINE and leave space between the letters and the heart’s border. On a narrow nail, switch to XO before making the print smaller. A round or softly squared nail works here; extensions are not part of the design requirement.
Also Read: Minimalist Valentine Nails With Tiny Details and Plenty of Bare Space for more ways to keep one accent in focus.
3. Pastel French Tips With a Little “LOVE” Heart
Keep your usual French layout and change the edges to mint, yellow, pink, and lavender. A small pink LOVE heart sits below the ring nail’s mint edge, with a strip of sheer blush separating the two details.

The gap matters: without it, the heart and tip can merge into one busy shape. Ask your artist to keep the French edges shallow enough that the heart has its own space. If your nails are shorter than the reference, decorate only the ring nail and use two pastel tip colors across the set.
4. Tiny Corner Hearts on Mint
Opaque mint makes the whole manicure feel pastel, even though the hearts are small. Place a pink heart toward an outer corner near the free edge on each nail. Only one needs the tiny XO message; the blank hearts repeat the shape without adding more lettering.
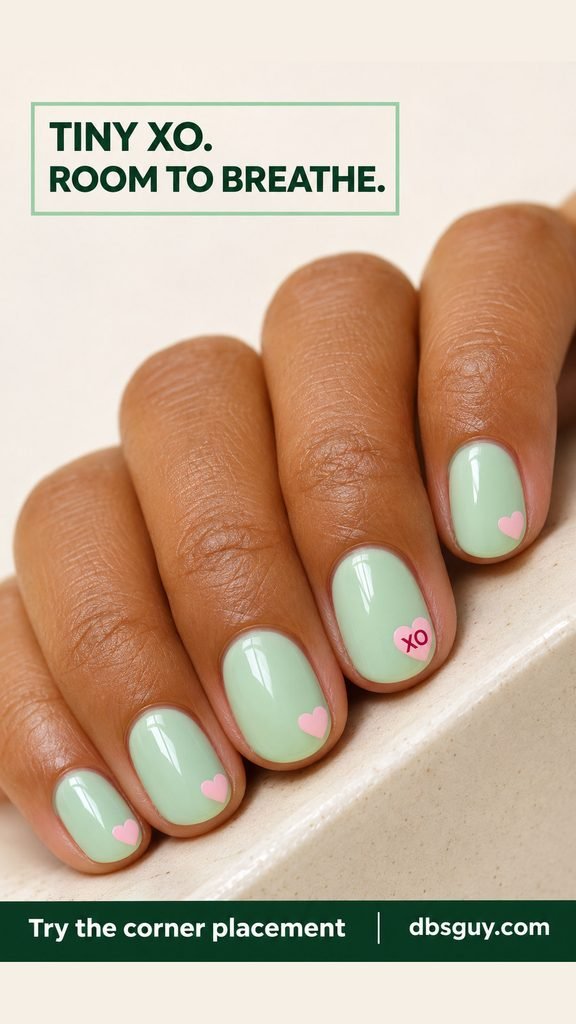
Keep a slim margin between each heart and the nail edge so both lobes remain visible. This is an option for short ovals when a centered, full-size candy heart would feel too dominant. Choose the corner on one nail first, then repeat that placement consistently.
5. Matte Pastels With Tonal Candy Hearts
For a softer candy finish, match each heart to its pastel base and define its edge with a slightly deeper shade. The shaded rim gives the heart a beveled appearance. Lavender with HUG ME and peach with CUTIE carry the messages, while the pink and mint hearts can stay blank.

Compared with the glossy skittle in idea 1, this set puts more emphasis on the heart’s edge and the powdery-looking finish. The matte effect can come from a compatible nail top coat; it does not require actual sugar or rough particles. For a smooth interpretation, ask for painted shading rather than a thick sculpted heart.
6. Two Stacked Notes on Coffin Nails
Long coffin nails give two separate hearts room to sit one above the other. Keep a mint HI heart above a lavender XO heart on the middle and ring nails. Plain peach on the neighboring fingers gives the repeated stack a clear boundary.

Ask for a visible gap between the hearts and for both points to stay inside the nail’s outline. If the stack only fits by crowding the cuticle or tip, reduce it to one heart. Choose the length you comfortably wear; this arrangement can also be adapted to a shorter set with one stacked accent per hand.
7. A Fine “BFF” Heart Outline on Blue
Powder-blue polish shows through a fine lavender double-heart outline on the ring nail. The center stays blue, with raspberry BFF lettering inside it. That open center makes this version feel more like a little candy stamp than a solid candy piece.

Keep the other nails plain blue so the outline is easy to notice. For a smaller nail, use one outline instead of two; preserving an open center matters more than preserving every line. Ask to see the line weight before the artist adds the letters.
8. Scattered Candy-Heart Confetti
Use two sheer accent nails as the space for scattered peach, mint, and lavender hearts. Let one larger heart hold SWEET; leave the smaller hearts blank. Solid lavender on the outer nails contains the busier pattern.

Vary the spacing instead of arranging every heart in a neat row. You still want a clear patch of blush between neighboring shapes. On short nails, two hearts on an accent may be enough. Remove one small heart if the message begins to compete with the rest of the artwork.
9. An “XO” Heart-Inspired French Tip
Move the candy detail to the end of the nail. This lavender French set has a scalloped, heart-inspired inner edge on the ring tip, with XO inside the colored area. The remaining tips keep a simple curved smile line.

Show your artist the inward scallops and the amount of blush left below them. The lavender should connect to the free edge, rather than become a separate heart near the cuticle. A medium almond gives the tip room; on a shorter nail, use the two-letter message and a shallower scallop.
10. A Mint “BFF” Heart Beside Lavender Checks
Split the set into patterned nails and message nails. Lavender-and-white checks go on the index and pinky; the middle nail stays pink, and the pink ring nail gets one mint BFF heart. The plain background behind the lettering is what keeps the design readable.

Request a few broad checks instead of a dense miniature checkerboard. The straight rows suit square nails, but the same arrangement can fit squovals. For a matching friendship manicure, keep this layout and let each person choose the pastel used for the heart.
11. Butter-Yellow Gingham With a “SWEET” Accent
Yellow gingham gives this candy-heart set a soft picnic feel. Use crossing pale-yellow bands over ivory on two nails, a plain yellow pinky, and one pink SWEET heart on an ivory ring nail. The overlapping bands distinguish gingham from the solid checks in idea 10.

Keep the gingham away from the message nail so the five letters have a calm background. If your ring nail is narrow, replace SWEET with HI and keep the heart comfortably inside the nail edges. Short squovals make a useful canvas for the small grid.
12. Peach-to-Pink Ombré With an Ivory “LOVE” Heart
Peach near the cuticle fades into pale pink at the tip, creating a background that is softer than a solid pastel. One ivory LOVE heart sits over the blend on the ring nail. The creamy heart and dark letters keep the message visible against both colors.

Ask for a smooth transition without a hard stripe through the middle. Keep the gradient visible around the heart, especially on either side. If the ombré and ivory seem too close in tone on your hand, choose a slightly deeper peach rather than adding an outline to every element.
13. Pastel Polish With Clear Heart Windows
Reverse the usual candy-heart layout: surround a translucent heart-shaped center with opaque pastel polish. Lavender, pink, mint, and yellow form the outer fields. A tiny red XO in one window supplies the message while the other centers remain open.

Explain that the heart should show a transparent pink base, rather than be filled with white polish. The window still has a smooth protective finish; it is a gap in the color, not a hole in the nail. On short nails, reduce the window before thinning the pastel border so much that it disappears.
14. One Raised Pink “LOVE” Candy
A single raised pink heart changes the silhouette of an otherwise plain lavender manicure. Keep the LOVE charm on the ring nail and leave the rest glossy and undecorated. This is the dimensional option for someone who wants the heart to look like a tiny candy piece.

Discuss the charm’s size, attachment, and removal with your nail artist. It should sit entirely within the nail edges. A raised piece can catch on fabric, so consider how you use your hands; a flat heart decal gives a similar color arrangement if you would rather keep the surface smooth. Use a charm intended for nails, not real candy.
15. A “LOVE YOU” Note Across Two Thumbs
Give the message its own pair of nails. A lavender heart says LOVE on one peach thumbnail, and a mint heart says YOU on the other. Keep the remaining fingers plain peach so the full sentence appears when you bring your thumbs together.

Check the word order and lettering direction with your hands in the position you want to photograph. Match the hearts’ visual size, allowing for any difference between your thumbnails. Splitting the phrase gives each word more space than a single tiny LOVE YOU heart would have.
How to Get Tiny Messages You Can Actually Read
Bring one full-hand reference and write down the exact words you want. A useful salon request is: “I want this pastel palette, raspberry block lettering, and this many decorated nails. Please show me one message at the size that fits my nail before repeating it.” Ask whether the artist prefers freehand lettering, a stamp they already own, or a suitable nail decal.
For an at-home version, idea 2 is a manageable layout to start with: milky polish and one ready-lettered candy-heart sticker on each ring nail. Choose a sticker that fits with a visible margin around it. For adhesive stickers used with regular lacquer:
- Apply your base coat and color according to their directions. Let the color become dry to the touch before placing the sticker.
- Use tweezers to position the sticker without touching its adhesive. Press it gently from the center outward until its edges lie flat.
- Seal over and around the sticker edges with a compatible top coat, following the product’s drying directions.
This sequence follows OPI’s guidance for encapsulating stickers with lacquer. Water-slide decals and gel systems have different application requirements, so follow the instructions for the products you actually use. Test your chosen lettering and top coat together on a practice tip before doing the full set if you are unsure whether the print will smear.
Also Read: How to Do Valentine Nails at Home With Regular Polish for the basic polish-and-heart method.
Questions Before You Pick Your February Set
Can I wear candy-heart art on very short nails?
Yes, but the message must fit the space you have. Start with one heart on the broadest accent nail and use XO or HI. Leave smaller hearts blank rather than shrinking every letter. Ideas 2 and 4 give you a clear starting layout.
Do these designs need acrylic or gel?
The color layouts do not require either. Regular polish and compatible nail-art stickers can create the simpler versions. Extensions, specialist finishes, and raised charms are separate service choices. If you choose gel, avoid picking it off; use the product’s removal directions or have your manicurist remove it. For lamp-cured manicures, the American Academy of Dermatology recommends broad-spectrum, water-resistant SPF 30 or higher on the hands, or dark opaque fingerless protective gloves.
Which finish looks most like conversation candy?
Matte pastels with crisp red print give the closest visual nod to a powdery candy surface. Glossy hearts look more polished and reflective. Choose the finish for its appearance; neither reference is a promise about how long your manicure will last.
How do I make the theme feel softer after Valentine’s Day?
Choose BFF, HI, or XO, keep the palette pastel, and limit lettering to one or two accents. The blue outline, yellow gingham, and peach ombré layouts all give you color and pattern that can carry the set beyond a specific date.