Sometimes a Christmas tree has plenty of ornaments and still feels as though something is missing. A bow can supply that last little detail: a softer shape between shiny baubles, a splash of color against the greenery, or a topper that finally feels right.
You can work with the ornaments you already own. These Christmas tree bow ideas change the look through fabric, loop shape, tail length, and placement—from one oversized velvet topper to a whole tree dotted with tiny bows.
Choose a style you like, make one sample, and hold it against the tree before cutting the rest of your ribbon. The right scale is easier to judge on a branch than on a kitchen table.
1. Oversized Velvet Bow Topper
One generous velvet bow gives the tree a clear focal point. Burgundy works beautifully with gold ornaments, but the shape matters just as much as the color: full loops above, two relaxed tails below.
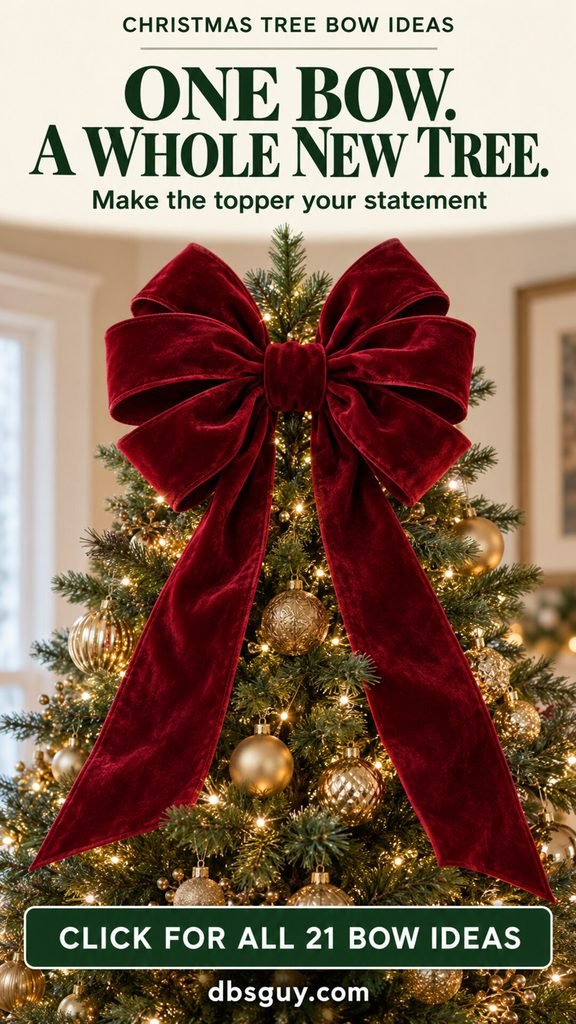
Make the look: Start with wired velvet around 2½–4 inches wide (6–10 cm). Form three loops on each side, secure the pinched center with a chenille stem—a fuzzy craft pipe cleaner—and fan the loops apart. Let the tails fall into separate spaces in the upper branches.
Attach it to the upper structure of the tree rather than balancing it on the topmost tip. If one branch cannot support it, reduce the bow’s size or use a second sturdy attachment point. Keep nearby ornaments smaller so the topper has room to stand out.
2. Small Red Velvet Bows Between Ornaments
Small red velvet bows bring a familiar Christmas feeling to a tree filled with mixed ornaments. Their repeated shape gives different baubles something in common without covering up the pieces you love.

Make the look: Use narrow velvet ribbon, roughly ½–1 inch wide (1–2.5 cm), and make simple two-loop bows with short tails. Try a few at the top, middle, and bottom before filling the spaces between them.
Stagger the bows across the visible sides instead of arranging them in straight rows. Turn some slightly toward the room and tuck others a little deeper. If a bow disappears behind an ornament, move it onto a neighboring branch rather than adding a larger bow over the same spot.
3. Tartan Multiloop Bows for a Cozy Tree
Tartan brings several colors into one ribbon, which makes it useful for connecting red ornaments, green branches, and darker accents. Rounded multiloop bows give that traditional pattern a softer outline.
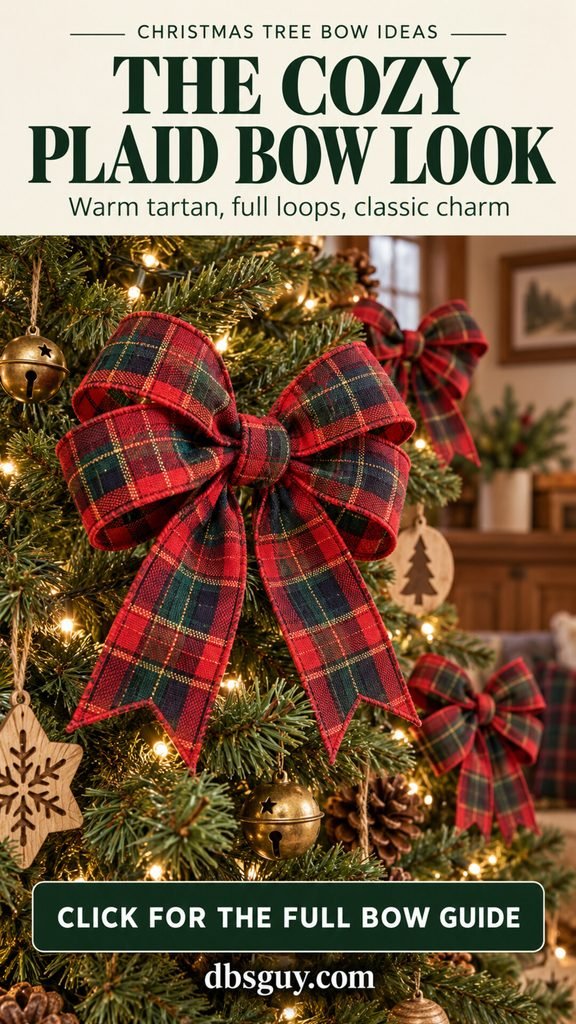
Make the look: Choose a wired tartan ribbon whose check remains visible when it bends into a loop. Make four or six loops, secure the center, and open each loop individually. A medium bow is usually easier to tuck among ornaments than a very wide one.
Pair the plaid with simple wood ornaments, plain baubles, or brass-colored bells. If the tree already has several strong patterns, use tartan in fewer places. A solid ribbon wrapped around the center can also give a busy bow a quieter finish.
4. Long-Tailed Satin Bows
A small bow with long satin tails has a different character from a full topper. The loops stay understated while the tails add a graceful vertical line through the branches.
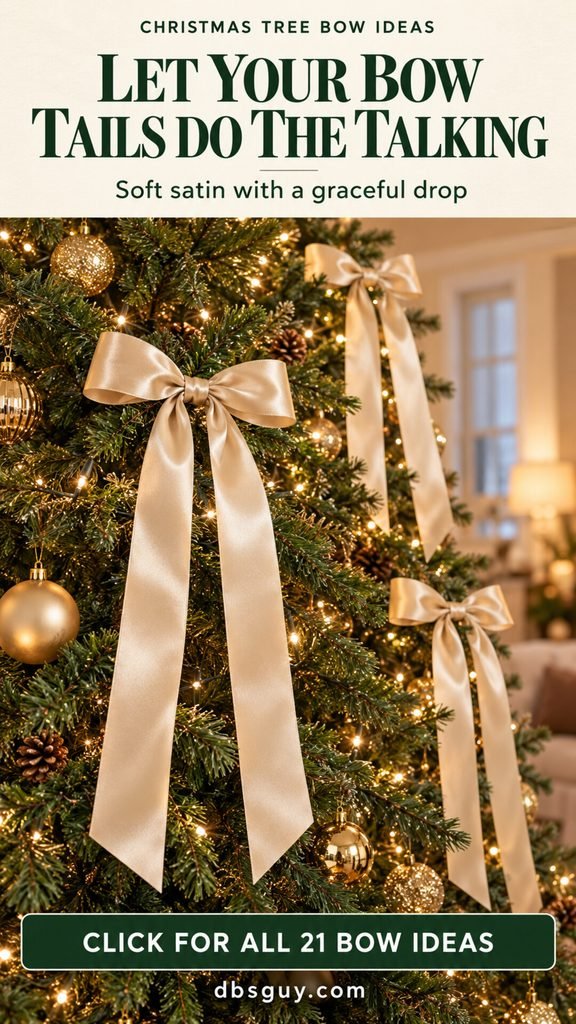
Make the look: Try champagne, ivory, or pale gold satin. For a starting proportion, let each tail extend about three times the finished bow’s width, then shorten it on the tree if needed. This is a styling choice, not a fixed cutting formula.
Place the bows where the tails can fall freely without hiding a favorite ornament. Soft, unwired satin gives a relaxed drape; wired satin offers more control. If two neighboring tails merge into one thick strip, separate their paths or move one bow a branch higher.
5. Double-Layer Bows With a Narrow Accent
Two ribbons can make a bow feel more detailed without introducing another ornament. An ivory base with a narrower gold accent is an easy combination because both layers stay visible against the greenery.
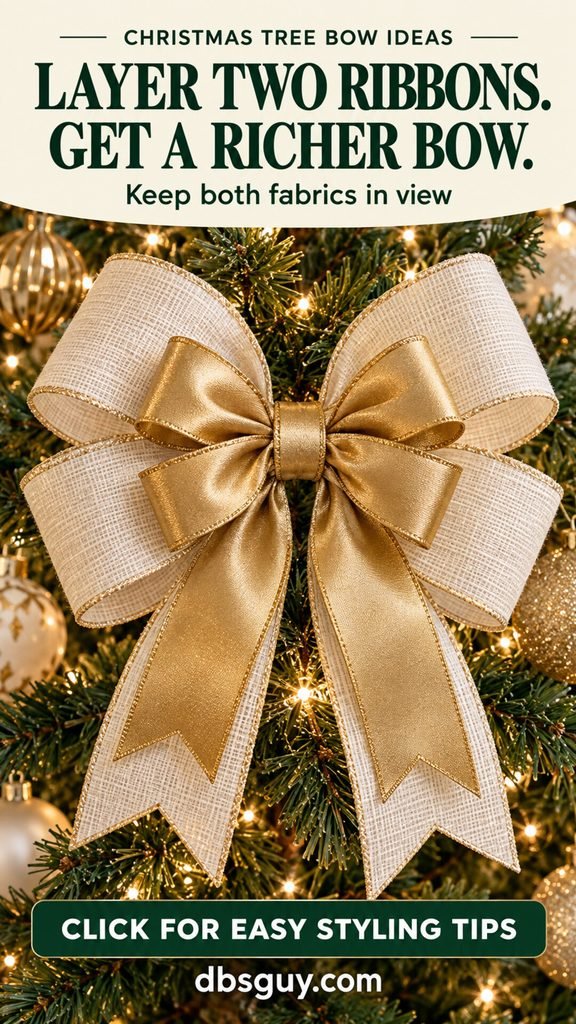
Make the look: Form a wide base bow, then a smaller bow from a narrower ribbon. Stack their centers, secure both with the same chenille stem, and finish the middle with a short ribbon band. Offset the upper loops slightly so they do not conceal the lower ones.
Trim the two sets of tails to different lengths. If the result feels thick or stiff, simplify the base to two loops instead of adding more. The useful detail here is the contrast between layers, so leave enough of the base showing to make that contrast clear.
6. Sheer Organza Bows on Snowy Branches
Sheer organza adds a bow shape while allowing some greenery to show through. On a flocked tree, its light texture works especially well beside clear ornaments and restrained silver accents.
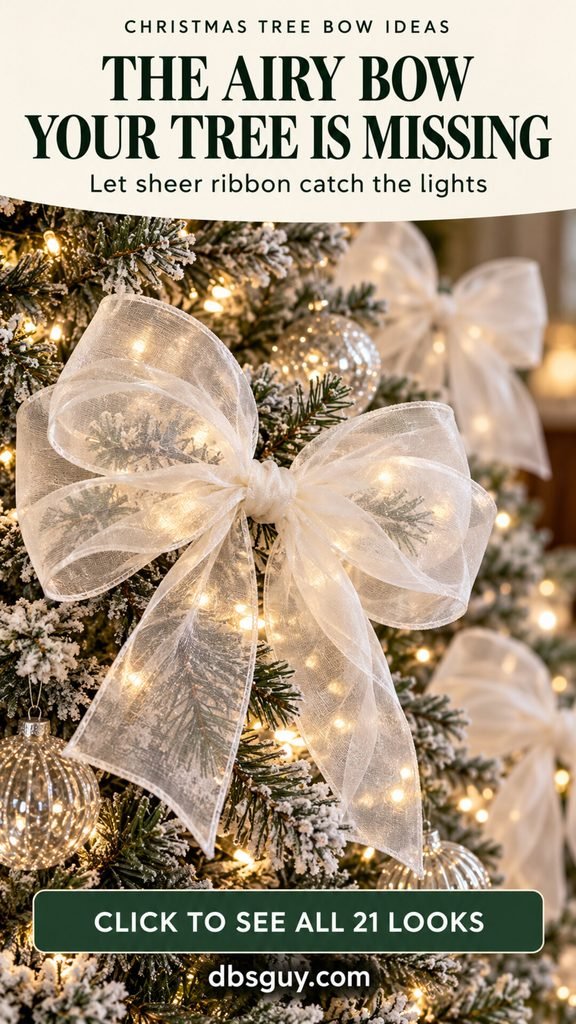
Make the look: Use wired organza for rounded loops that hold their shape, or use soft organza for smaller, gently draping bows. Spread the loops out rather than stacking them into a dense center.
White organza can blend into heavy flocking. Place it against a visible patch of green, or choose a subtle champagne tint for more definition. Keep the center tie narrow and discreet: a bulky dark knot is much more noticeable through sheer fabric. Reshape the loops after attaching the bow so they face the room.
7. Burlap Bows With a Lace Accent
Burlap and lace soften each other. The open weave gives the bow a rustic texture, while a narrow lace accent makes it feel more finished beside cream ornaments and wooden shapes.
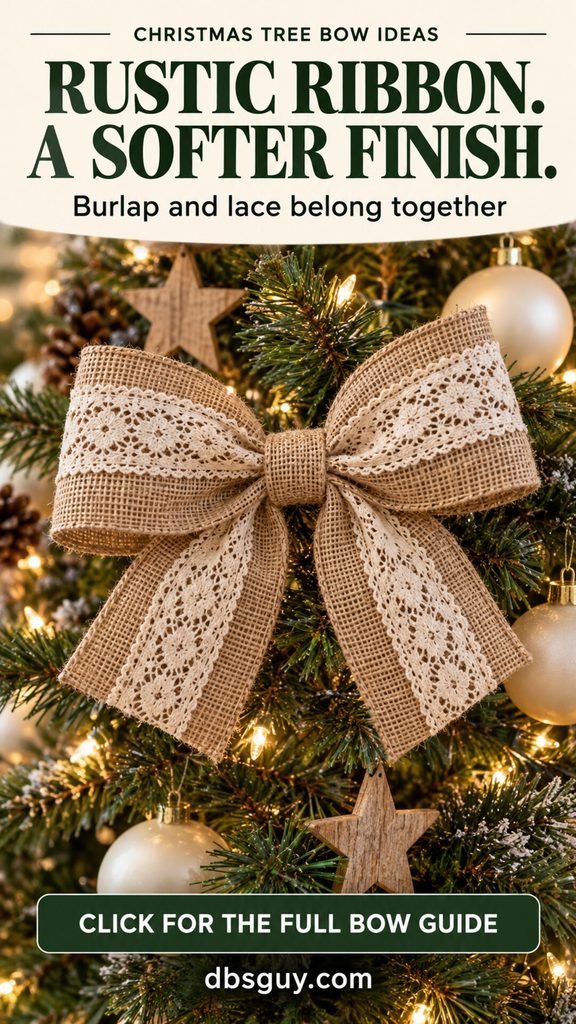
Make the look: Choose ribbon with finished edges rather than cutting strips from loose burlap cloth. Lay a narrower lace ribbon down its center, then form both layers into a simple two-loop bow. Secure the middle before adjusting the loops.
Keep the bow moderately sized; thick burlap can become bulky when folded many times. Leave some natural ribbon visible on both sides of the lace. If you already have a very textured tree, use a few of these bows as accents instead of placing one on every open branch.
8. Gingham Bows for a Country Christmas
Small black-and-white checks add a crisp detail to a warm, simple tree. Gingham looks particularly inviting with cream baubles, wood ornaments, and a few muted metal accents.
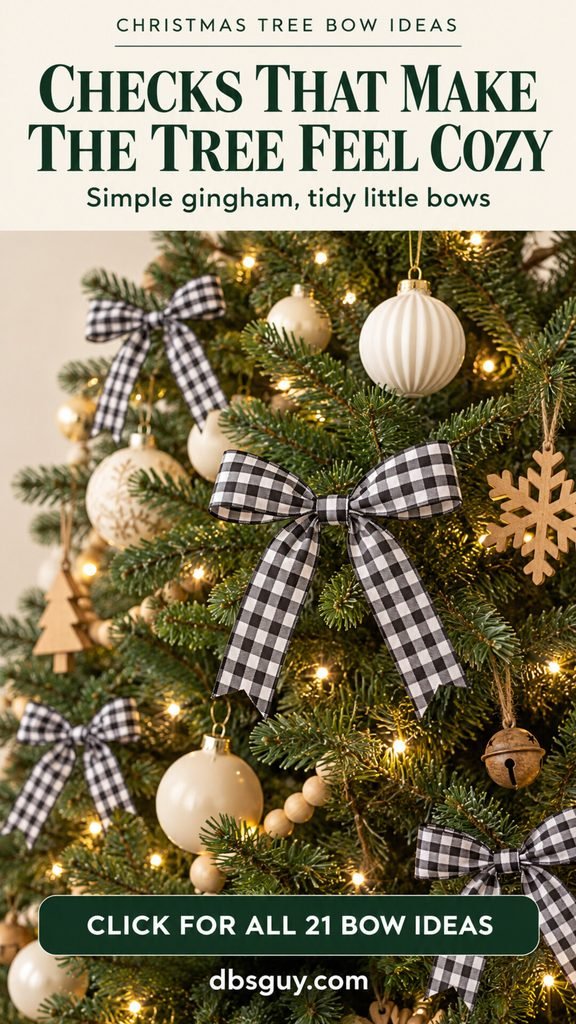
Make the look: Use a ribbon with checks small enough to repeat across each loop. A simple two-loop bow lets the pattern read clearly. Make the tails just long enough to show the checks below the knot.
Repeat the same gingham in several places and keep most nearby ornaments solid. You can use red-and-white checks for a brighter country look, too. Before choosing a roll, fold a small length into a bow: a large check can look quite different once most of the pattern is tucked into the center.
9. Metallic Mesh Starburst Bows
A metallic mesh bow adds shine with an open, airy texture. Short loops fanned around the center create a starburst effect, giving one section of the tree a little extra sparkle.
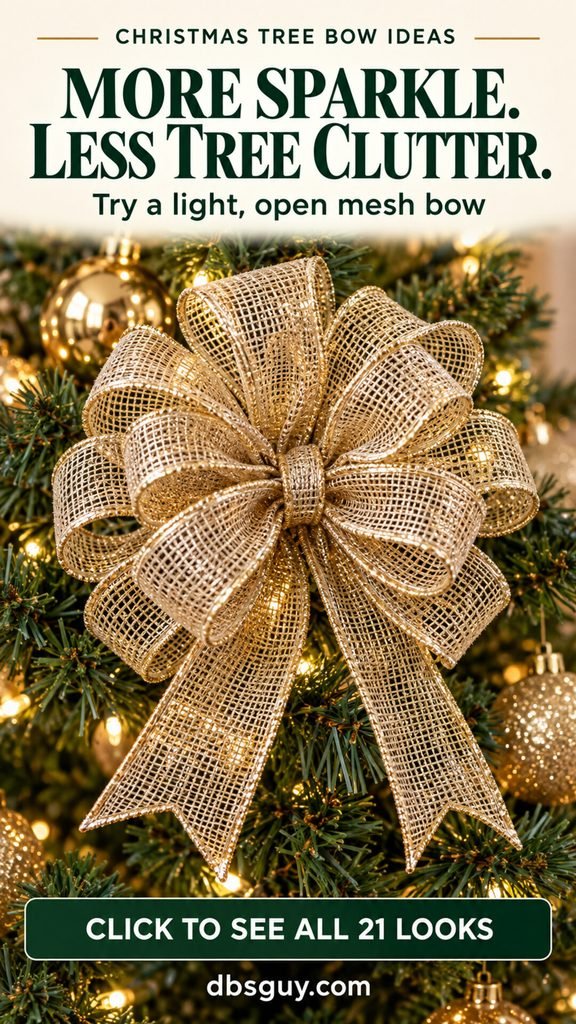
Make the look: Use wired metallic mesh ribbon intended for decorative bows. Form several short loops, secure their centers together, and spread them in different directions. Finish with two restrained tails so the bow remains easy to recognize.
Give the mesh room to open. Pressing it tightly between large ornaments defeats the airy effect. If the rest of your tree is very reflective, choose a softer champagne finish or use fewer mesh bows. Fold any exposed wire ends inward behind the center and handle cut edges carefully.
10. Tiny Bows on Ornament Hangers
Here is a small change that can refresh ornaments you already own: add a narrow bow just above the cap. Burgundy velvet looks lovely against gold glass, but any ribbon that coordinates with your tree can work.
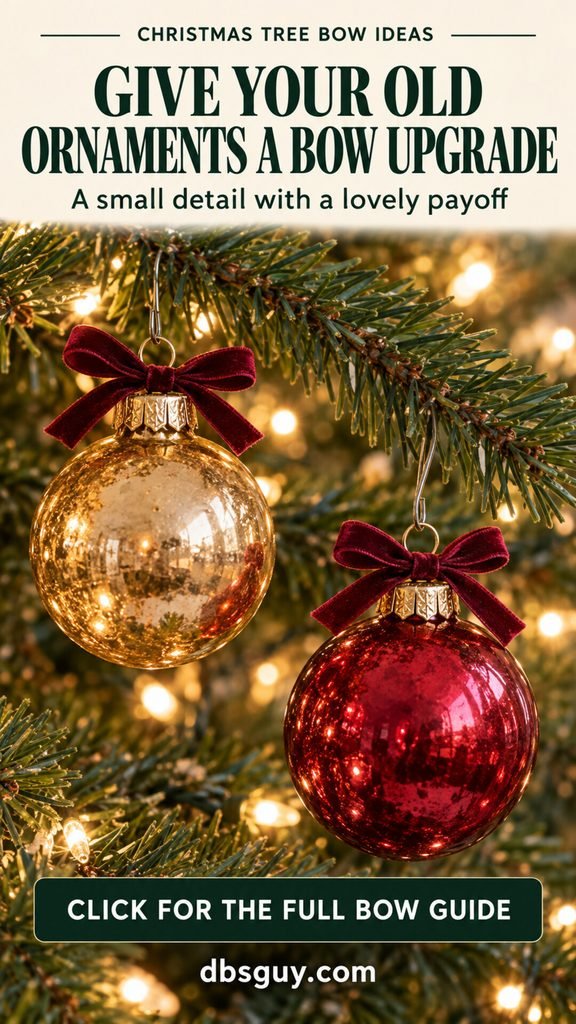
Make the look: Tie a tiny two-loop bow around the ornament’s hanging loop or around a separate decorative tie beside it. Keep the original hook or hanging cord in place to support the ornament; the bow is decoration.
Use this on a selected group of ornaments if you want a subtle effect. Short tails keep the bauble visible and reduce tangling when you pack it away. If a tiny bow is difficult to tie neatly, form its loops first and wrap the center with a narrow ribbon band.
11. Ivory Bows With a Pearl Center
A small pearl detail gives an ivory bow a dressier finish. It is a lovely choice for a tree with cream, clear glass, or soft gold ornaments where a strong new color would feel out of place.
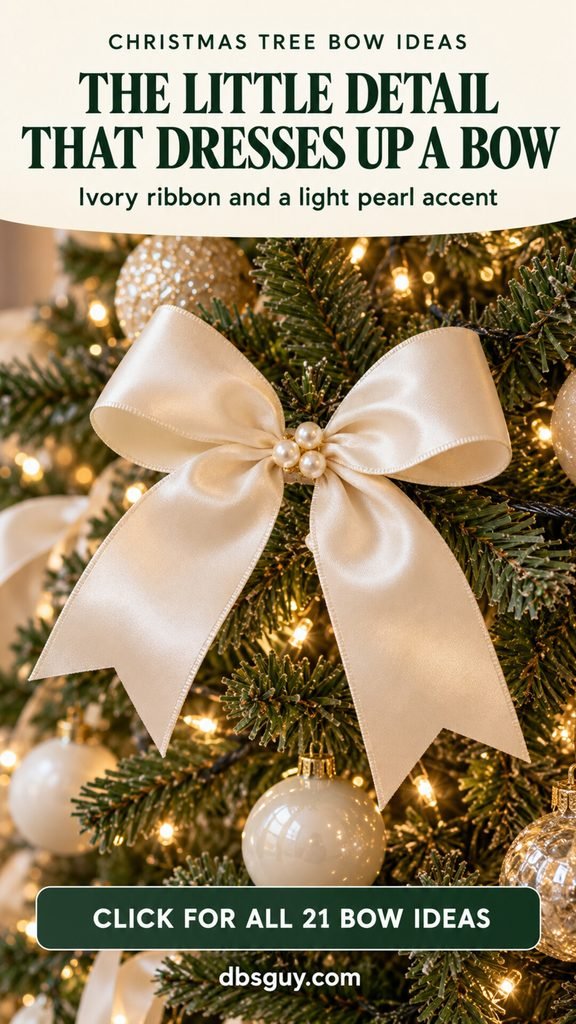
Make the look: Make a simple satin bow and stitch a few lightweight faux pearls onto its center band. Secure the band around the bow so the stitching sits behind it. Keep the embellishment small enough that it does not pull the loops downward.
A narrow pre-trimmed pearl ribbon around the center is another option. Avoid a heavy brooch on a soft bow, and keep loose beads out of reach of young children and pets. Shorter loops and tails will give the pearl center a tidy frame.
12. Four-Loop Ribbon Bows With a Playful Shape
Four open loops give striped ribbon a cheerful, almost candy-like appearance. The shape has more movement than a classic two-loop bow, without the fullness of a large multiloop topper.
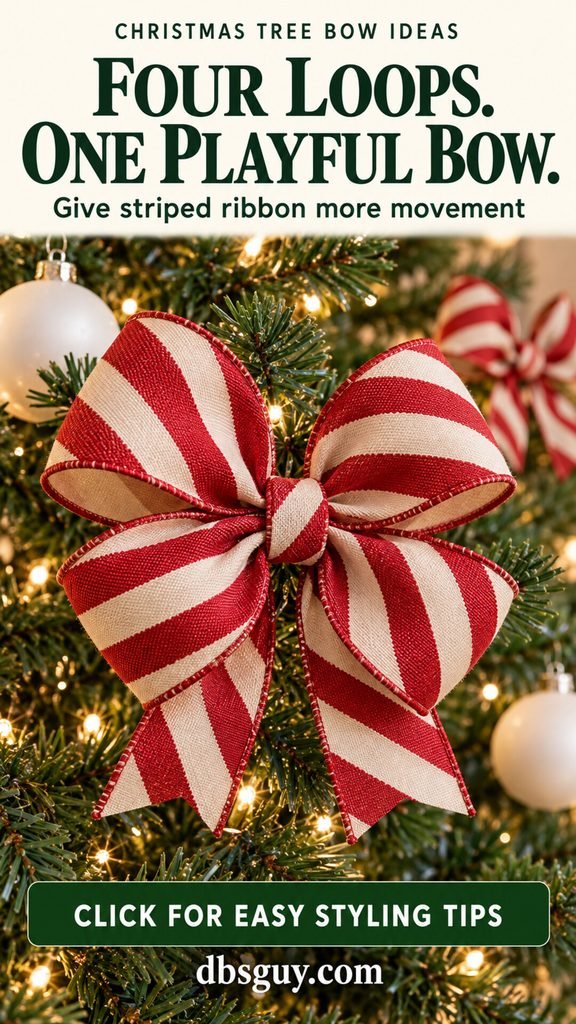
Make the look: Form two separate two-loop sections from wired ribbon. Stack their centers and rotate one section slightly so a loop sits in each diagonal direction. Secure the centers together, then add a separate strip folded in half for the two tails.
Open the four loops after attaching the bow; otherwise, two can hide behind the others. Keep the tails short enough that they do not become the main feature. Solid red, cream, or green ornaments give a striped bow a simple backdrop.
13. Tail-Free Butterfly Bows
A tail-free bow has a compact, bow-tie shape that leaves the branches below it visible. Navy grosgrain gives the outline definition and pairs nicely with silver or clear ornaments.
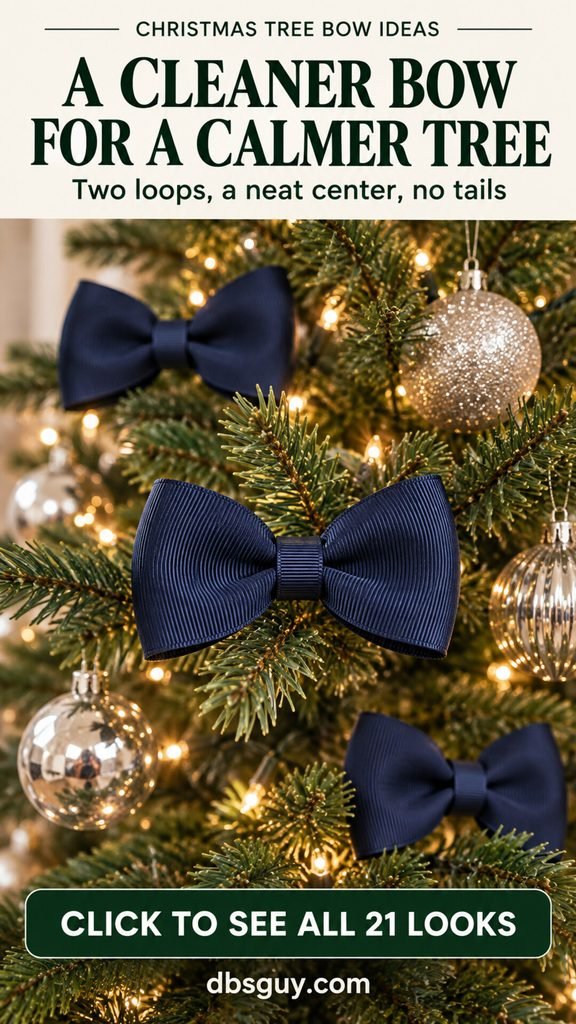
Make the look: Bring the two ends of a ribbon strip into the middle, overlapping them on the back. This creates a loop on either side. Pinch the middle into a few folds, secure it, and cover the join with a narrow ribbon band.
Tuck the attachment behind the band and angle the bow slightly upward so both loops remain visible. Grosgrain is useful for this flatter shape; it does not need to resemble a puffed wired bow. Try these where long tails would obscure small ornaments or crowd a slim tree.
14. Soft Felt Bows for a Handmade Tree
Soft felt bows have a lovely homemade character beside wood stars and simple baubles. Their matte surface is a welcome change if your tree already has plenty of shine.
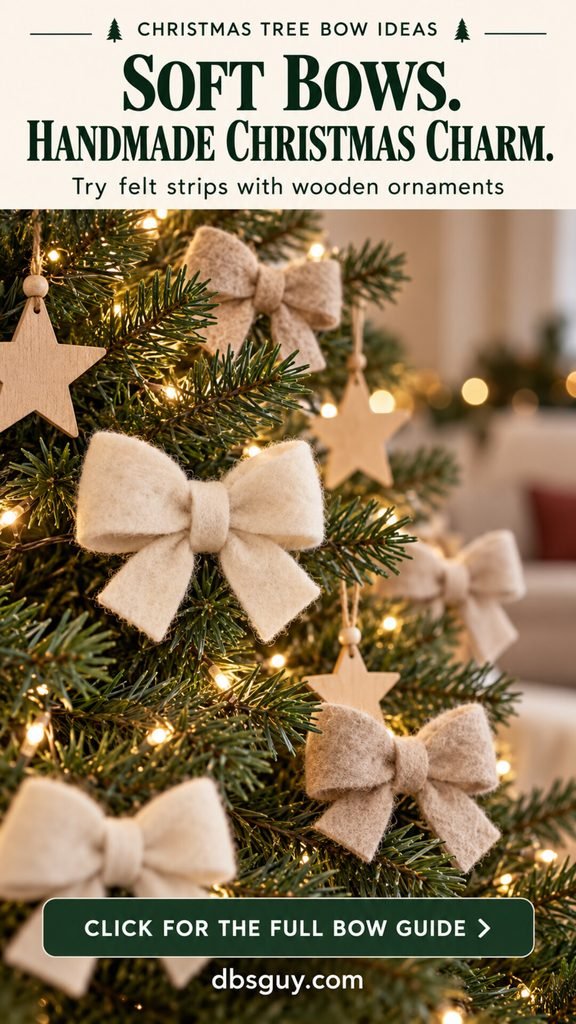
Make the look: Fold both ends of a felt strip toward the middle, pinch the center, and stitch the folds securely. Place a separate pair of short felt tails behind it, then wrap and stitch a narrow center band around the layers. Attach a hanging loop or chenille stem to the back.
Use felt that bends without becoming floppy, and keep the bow small if the material is heavy. Straight, blunt tail ends suit this simple shape. Cream and oatmeal feel understated; bright red or green works for a more playful handmade tree.
15. Single-Loop Half-Bows
A half-bow is a small, unexpected change: one rounded loop on one side, with two tails falling from the other. Sage ribbon keeps this unusual outline soft against green branches.
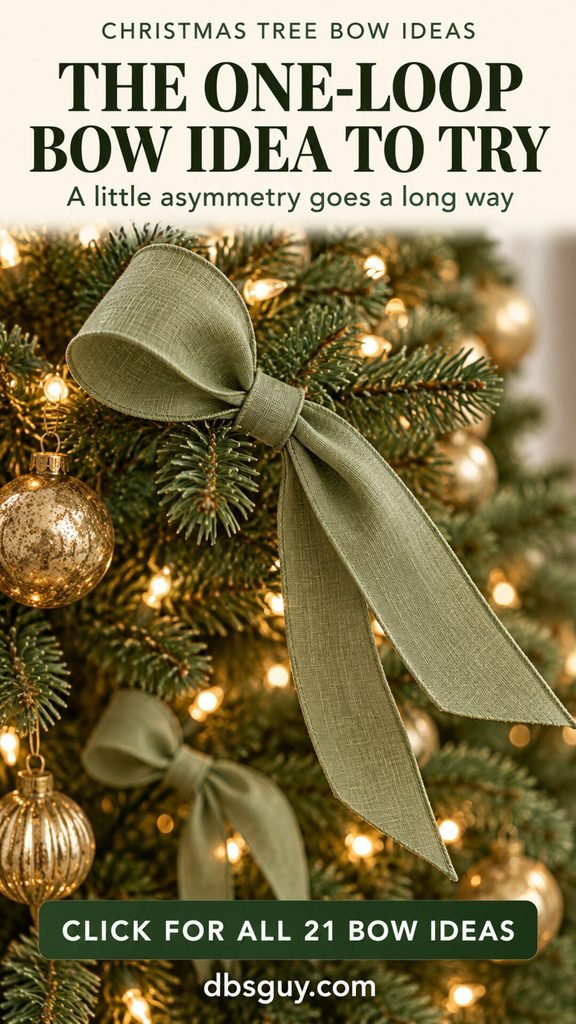
Make the look: Fold a wired ribbon strip into one loop and pinch its ends together at the base. Add a separate ribbon strip folded into two tails. Secure the loop base and tail fold together, then conceal the join with a center band.
Angle the loop upward and let the tails fall in the opposite direction. Repeat the shape loosely around the tree rather than making every bow point the same way. A half-bow works well beside a round ornament because the different outlines remain easy to see.
16. Velvet Bows Beside Pinecone Pairs
A velvet bow beside two pinecones brings together soft fabric and natural texture. Olive ribbon blends into the branches, letting the contrast in materials carry the detail.
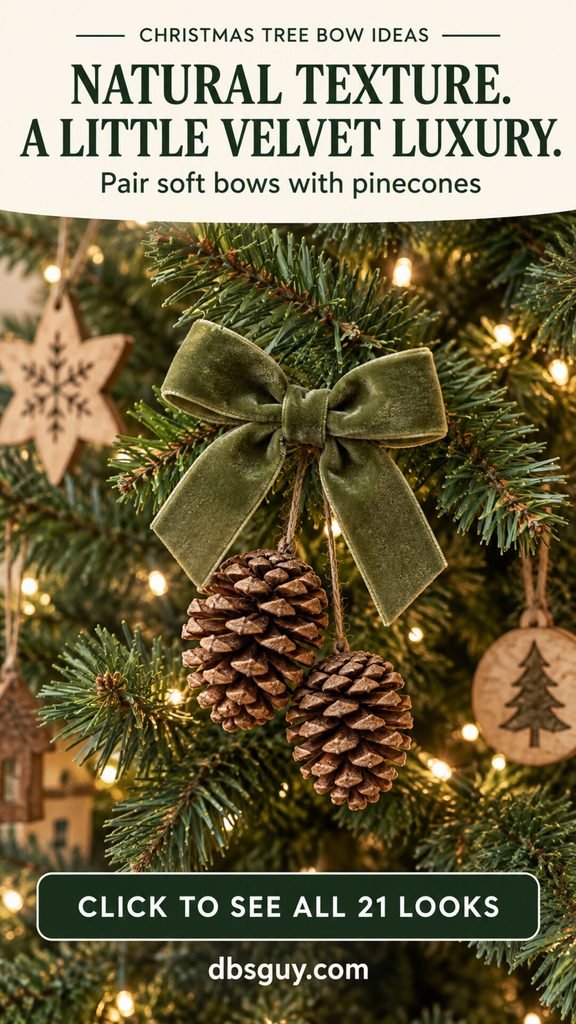
Make the look: Hang two lightweight pinecone ornaments from adjacent branches, then attach a small velvet bow nearby. Give each pinecone its own secure hanger rather than asking the ribbon bow to carry both.
Set one pinecone slightly farther back so the group has depth. Short bow tails help keep the pinecones visible. If olive disappears against your tree, try muted rust, burgundy, or warm ivory. You only need a few of these little groupings to introduce the texture; leave some surrounding branches open.
17. Asymmetric Bows With One Sweeping Tail
This bow keeps two loops but deliberately makes them uneven. One long tail adds a sweeping line, while a shorter tail stops the arrangement from feeling too symmetrical.
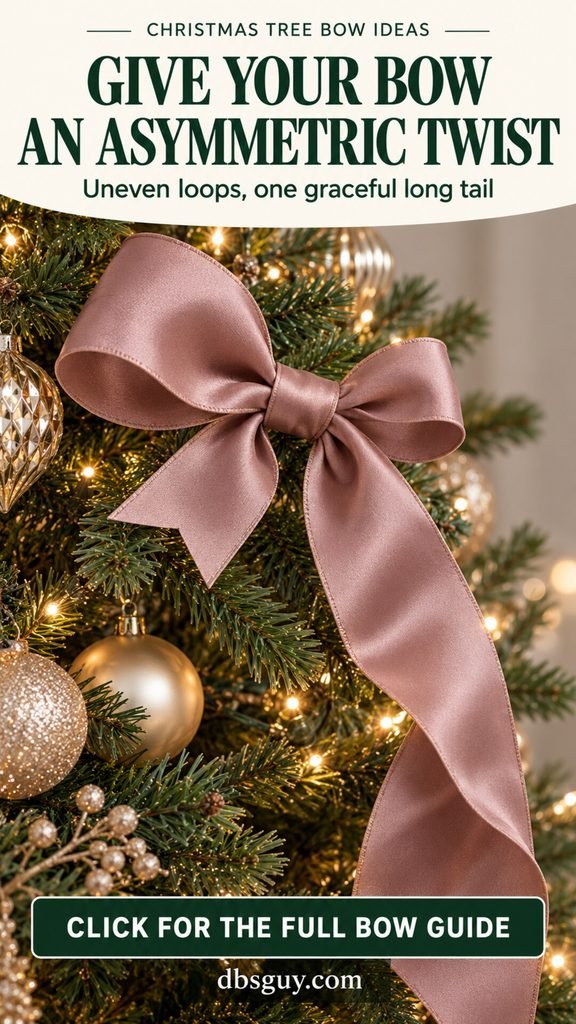
Make the look: Form one loop slightly larger than the other and secure the center before trimming the tails. Start with both tails long, hold the bow against the tree, and shorten one where it looks right. Dusty mauve or muted rose makes a gentle accent beside gold ornaments.
Place the longer tail toward an open area of greenery. If both loops sag, shorten them or switch to wired satin; asymmetry should come from the proportions you choose. Turn neighboring bows in different directions so the long tails do not create a rigid diagonal stripe.
18. Three Small Bows in a Loose Cluster
Three little bows can fill a broad visual gap without replacing it with one oversized piece. Blush velvet makes the group feel delicate, especially among pale ornaments.
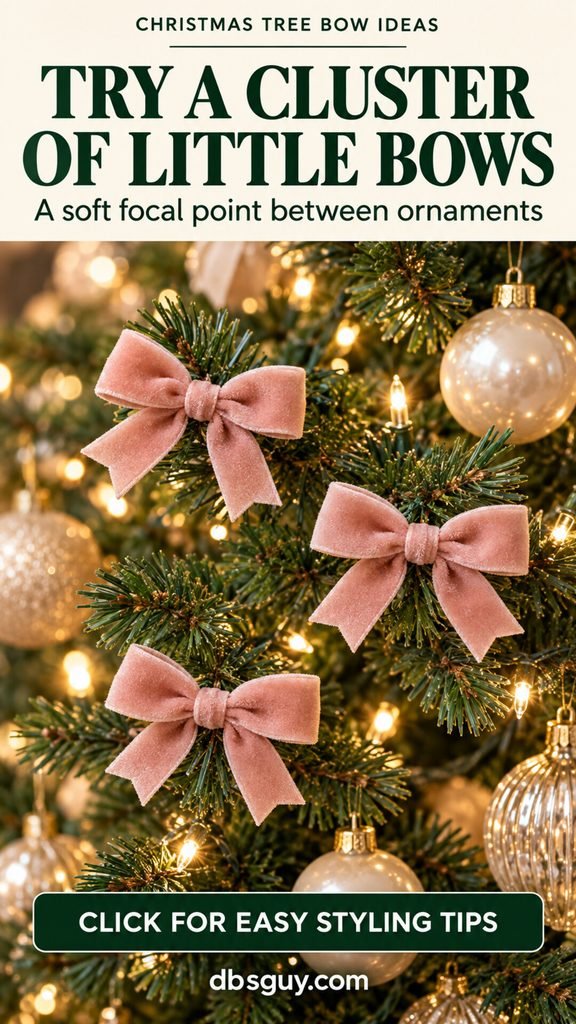
Make the look: Attach three separate bows to three neighboring branches. Position them in a loose triangle, with one slightly higher and another a little deeper in the tree. Leave greenery between their loops.
Stand back before adding another cluster. When all three bows touch, the group can read as a large ribbon flower rather than individual bows. Try one cluster first and repeat it only where the tree needs another focal point. The spaces between these small groupings help them feel intentional.
19. Mini Bow Garland Across the Branches
A garland of tiny bows joins several branches with a light, repeating detail. Red satin on a thin natural-colored cord brings a cheerful handmade touch without covering much greenery.
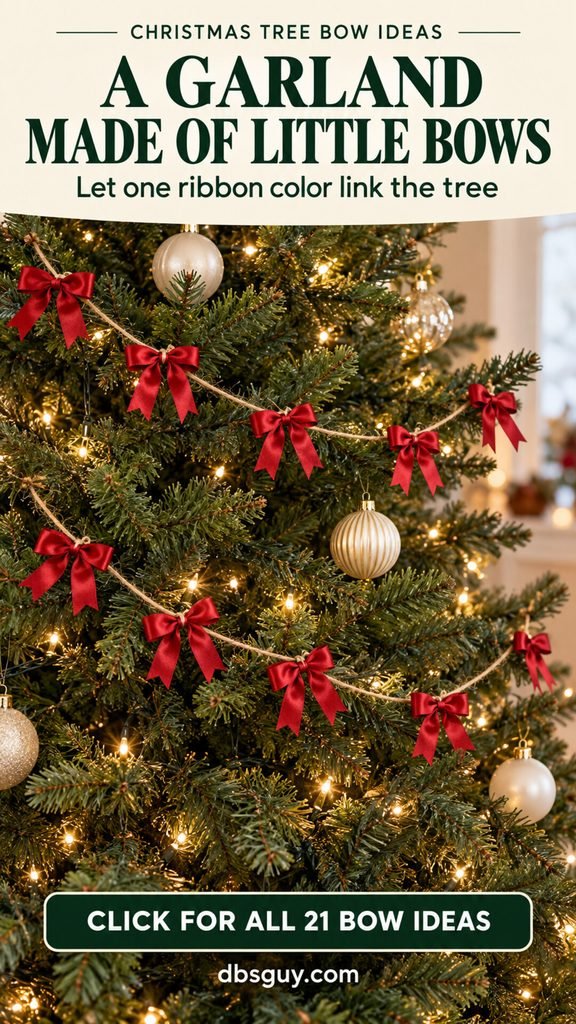
Make the look: Tie separate mini bows onto a cord, leaving enough space between them for each one to read clearly. Lay the cord across a section of the tree and support it at several points, creating shallow scallops.
Adjust the spacing on the tree before fixing every bow in place. A deep swag can catch ornaments below it; a shallower curve is easier to manage. Support the cord itself rather than pulling on the bow tails, and shorten the garland if its weight bends the branches. Store it loosely wound so the little loops keep their shape.
20. Graduated Bow Sizes From Top to Bottom
The widest part of the tree can usually accommodate a larger bow than its narrow upper branches. Using the same ribbon in three sizes makes that change look deliberate.
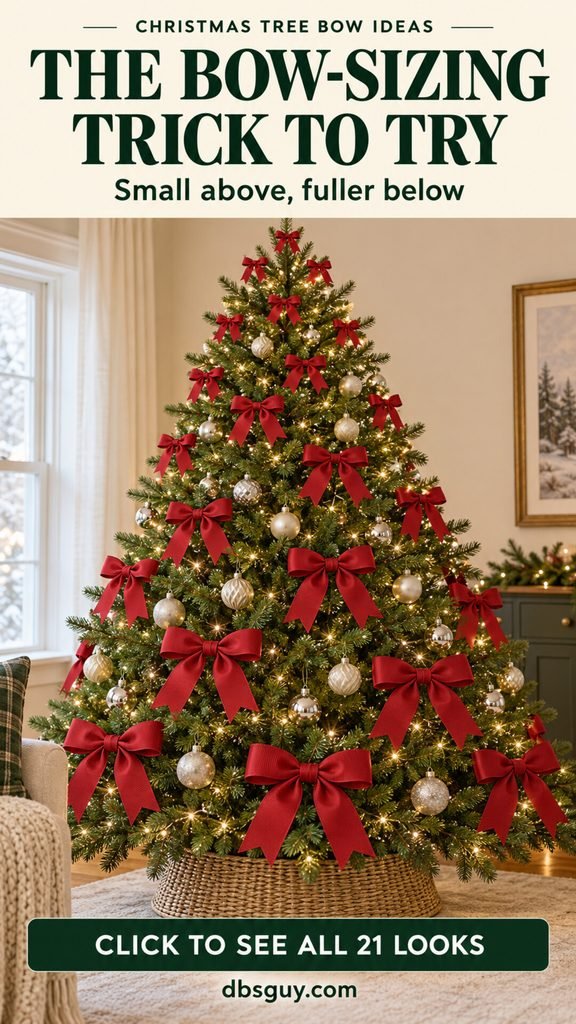
Make the look: Make a small, medium, and larger sample bow in one ribbon. Hold the smallest near the top, the medium one in the middle, and the largest on a lower branch. Adjust until each sits comfortably within the greenery.
Repeat the sizes loosely within those areas, varying their positions rather than creating strict horizontal bands. Keep the bow shape consistent so scale is the main difference. If a lower bow hides several ornaments or hangs beyond the tree’s outline, reduce it; the wider branches give you more room, not unlimited room.
21. A Minimal Bow-Only Christmas Tree
A tree with just lights and bows can feel wonderfully complete. Small ivory velvet bows let the green branches stay prominent, especially with a simple woven collar at the base.
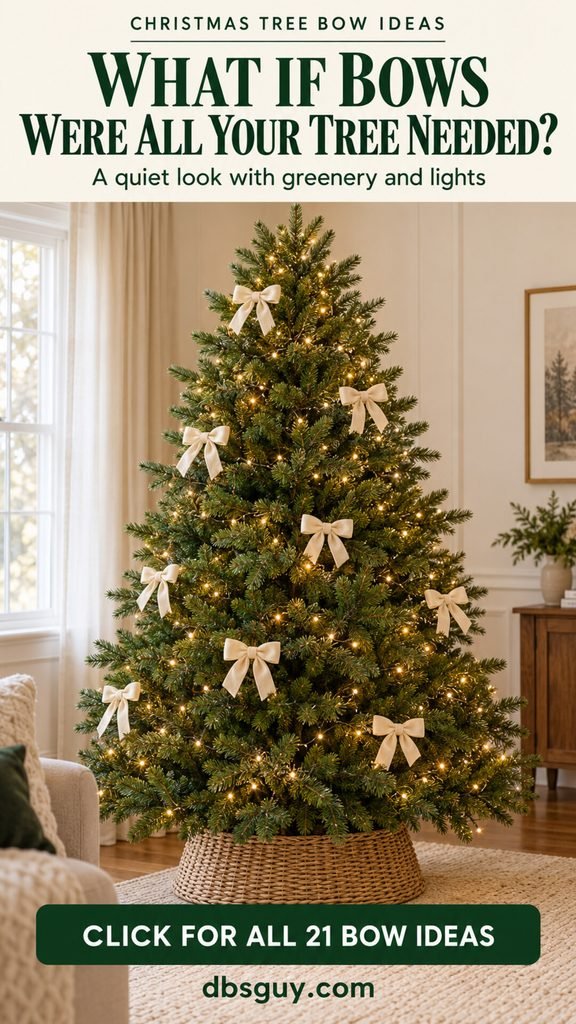
Make the look: Begin with a handful of matching bows and distribute them across the visible sides. Add them gradually, checking the tree from the doorway as well as up close. Some open greenery is part of this look.
Keep the tails short and the bow sizes similar for a restrained finish. You can leave the top bare or place one small bow there; a large topper would change the balance. If the tree seems uneven, reposition a bow before making more. Small adjustments are easier to notice when there are fewer decorations.
How to Make a Christmas Tree Bow That Holds Its Shape
The easiest method depends on the ribbon. A soft narrow ribbon can be tied like a gift bow. A wide, stiff ribbon is usually easier to shape into loops and secure at the center.
Before you begin, fluff an artificial tree and check the lights. Have scissors and color-matched chenille stems ready. Secure bows by their centers to sturdy branches, keeping fasteners away from light cords.
A simple tied bow for soft ribbon
- Leave a tail, make one loop, and pinch its base between your fingers.
- Wrap the working ribbon around the base of that loop. Push a folded section through the opening behind the wrap to make the second loop, as you would when tying a shoelace.
- Pull gently on the loops to tighten the center. Alternate between adjusting the loops and the tails until the size feels right.
- Trim the tails last. Slip a chenille stem behind the center knot if you need an attachment for a branch.
For tiny bows, make the loops slightly larger than needed while tying, then draw them smaller. Pulling hard on soft satin can create a tight, lumpy knot; adjust it gradually.
A formed bow for wired ribbon
- Leave a tail and fold the ribbon back to create your first loop. Hold the return point at the center.
- Make a matching loop on the other side and keep both bases pinched together. If the ribbon is patterned on only one face, twist it at the center as needed to keep that face outward.
- Continue alternating sides for a fuller bow. For a six-loop topper, make three loops on each side.
- Leave the second tail, then wrap a chenille stem firmly around the pinched middle. Twist it at the back, keeping its remaining ends available for attachment.
- Cover the middle with a short ribbon band if desired. Separate and round the loops after placing the bow on the tree.
Keep the center compressed and the loops open. If you squeeze the whole bow while fastening it, the wired edges can hold that flattened shape until you reshape them.
Choose Ribbon Width and Quantity Before Cutting
Use these widths as starting points, then judge a sample against your own tree. Ribbon stiffness, loop length, and the space between branches all affect the finished size.
- Mini bows and ornament accents: about ¼–¾ inch (0.6–2 cm) wide.
- Everyday branch bows: about 1–2½ inches (2.5–6 cm) wide.
- Full multiloop toppers: about 2½–4 inches (6–10 cm) wide, usually with wired edges for support.
For buying ribbon, measure the length used by one completed sample bow, including its tails and center band. Multiply that amount by the number of bows you plan to make. For layered bows, calculate each ribbon separately.
For example, a sample using 24 inches of ribbon multiplied by 12 bows requires 288 inches, or 8 yards. Adding a planning allowance of 15–20% gives you room for trimming and adjustments; at 20%, that example needs 9.6 yards. Round up to the roll size available. This sample-based approach is more useful than a fixed yardage rule based only on tree height.
If you are using ribbon left from gift wrapping, try the small tied bows, ornament accents, or mini bow garland first. Long-tailed bows and full toppers need more continuous ribbon and are less convenient for short offcuts.
Place the Bows Without Crowding the Tree
Start with your main bow—often the topper or one larger accent—then distribute the remaining bows across the upper, middle, and lower areas. Check from the places where people actually see the tree, such as the sofa and doorway.
For a branch bow, secure the center to a sturdy part of the branch just inside the outer foliage. Tuck the fastener behind it and fold any ends inward. The attachment should hold the bow without crushing it or cinching tightly into a real branch. Support a larger topper at more than one point if needed, following the tree manufacturer’s guidance.
Leave some bows farther back and others near the front for depth. If you can no longer see the ornaments or the greenery between bows, remove a few and reassess. When the tree sits in a corner, concentrate your detail on the sides visible from the room.
Keep ribbon and fasteners off electrical connections and light wires. Keep the tree at least 3 feet from heat sources, never use lit candles on it, and turn off tree lights before bed or leaving home. For a real tree, check the stand’s water level daily and keep it watered.
Fix the Bow Details That Make a Tree Feel Unfinished
- The loops look flat: Reshape wired edges after attachment. With soft ribbon, try shorter loops or a smaller bow instead of expecting it to stand upright.
- The bow tips forward: Move its center onto a stronger part of the branch or reduce its weight. Adding more decorations to hide a weak attachment will not fix it.
- The pattern faces inward: Twist single-sided ribbon at the center before forming the next loop, keeping the twist hidden behind the band.
- The tails cover too much: Separate them into open spaces or shorten one. Leave your favorite ornaments visible.
- The center looks bulky: Use fewer layers or a narrower center band. Keep the gathers under the band instead of piling material in front.
- The whole tree feels busy: Remove a few bows, especially around large ornaments, before changing the entire design. A little open greenery can make the remaining details easier to appreciate.
Christmas Tree Bow Questions
Can I add bows after the ornaments are already on?
Yes. Small branch bows and ornament-hanger accents are easy finishing touches. For a large topper, remove a few nearby ornaments first so you can reach a secure attachment point, then replace only the pieces that still have enough space.
Can I use unwired ribbon for Christmas tree bows?
Yes. Soft velvet, satin, and grosgrain work for small tied bows, compact tail-free bows, and draping tails. Choose wired ribbon when you want larger loops to hold a rounded, sculpted shape. Do not assume every ribbon labeled satin or velvet has wired edges; check the roll.
Which bow ideas suit a slim or pencil Christmas tree?
Try small velvet bows, tiny ornament accents, tail-free bows, or a few half-bows. Keep most of each bow within the tree’s outline and check that the tails leave neighboring ornaments visible. Make a scaled-down topper if you want a focal point above.
Can bows go on a real Christmas tree?
Yes, provided the branches can support them. Choose light bows and attach them loosely to sturdy branches. Avoid adhesive on bark or needles, keep the stand accessible for watering, and follow the same heat and lighting precautions you use for the rest of the tree.
How should I store bows for next Christmas?
Remove them by undoing the fastener rather than pulling on the loops. Store full bows loosely in a rigid container with a little tissue inside larger loops. Keep them dry, avoid stacking heavy ornaments on top, and expect to reshape wired bows when you unpack them.
Start With One Bow You Love
You do not need to use all 21 ideas on one tree. Choose a bow that works with your favorite ornaments, make a sample, and see how it looks in place. Repeat it where the tree needs that same touch, leaving space for the lights and branches to show.
Sometimes the finishing detail is a big velvet topper. Sometimes it is a tiny bow above an ornament you have hung for years. Start there, adjust the scale, and let the rest of the tree come together around it.