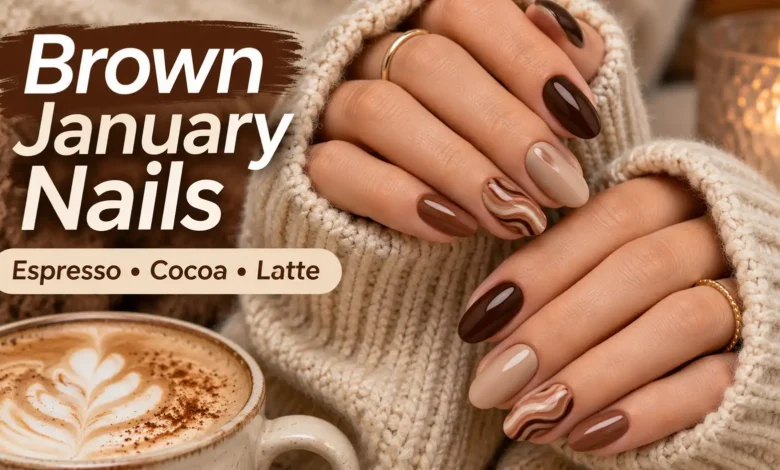
For brown January nails, start with espresso if you want a deep, defined manicure, cocoa if you prefer a softer middle brown, or latte if you want a light, creamy neutral. Then choose the finish: glossy color reflects the light, matte color puts the shade first, and a narrow French tip keeps most of the nail visibly light.
Brown looks especially at home beside oatmeal knits, camel wool and dark denim. It also gives you a January manicure you can keep wearing after the holiday decorations come down. These six looks cover solid color, a fine brown edge, a small amount of artwork and a full coffee-toned palette, with details to help you choose your version.
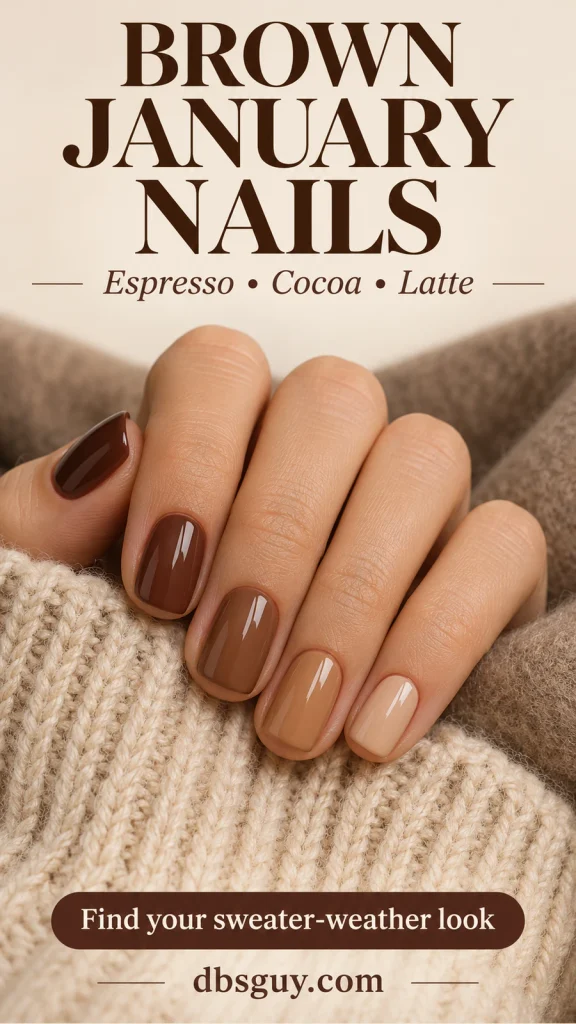
The images in this guide are AI-generated manicure concepts. They illustrate the colors, finishes and placement described here; they do not document completed salon services or wear testing.
Choose Your Brown Before You Choose the Design
Espresso, cocoa and latte are useful descriptions, but they are not standardized polish colors. One brand’s espresso may look reddish; another may appear almost black. Start with the finished swatch rather than trusting the bottle name.
- Espresso: Look for a deep roasted brown. Choose it when you want the strongest outline, especially with a glossy finish.
- Cocoa: Look for a medium chocolate brown with enough depth to stand apart from beige. It gives you visible brown color without going as dark as espresso.
- Latte: Look for a pale beige-brown softened with a creamy tone. Decide whether you want opaque coverage or a translucent tint; the shade name alone will not tell you.
Hold your two favorite swatches beside your hand in ordinary daylight if possible. Compare how much red, yellow or gray you see. A golden brown can feel warm beside a cream sweater; a taupe-leaning brown gives a quieter effect beside charcoal. Treat those pairings as starting points, then choose the contrast you like on your own hand.
If coverage is the part you cannot decide, our guide to January almond nails in sheer neutrals and winter darks explains how much difference that choice makes.
1. Glossy Espresso on Short Squoval Nails
A solid espresso manicure makes the color itself the detail. Keep the nails short, with a gently squared edge and rounded corners. That gives the dark polish a clear shape without needing a long tip or extra decoration.
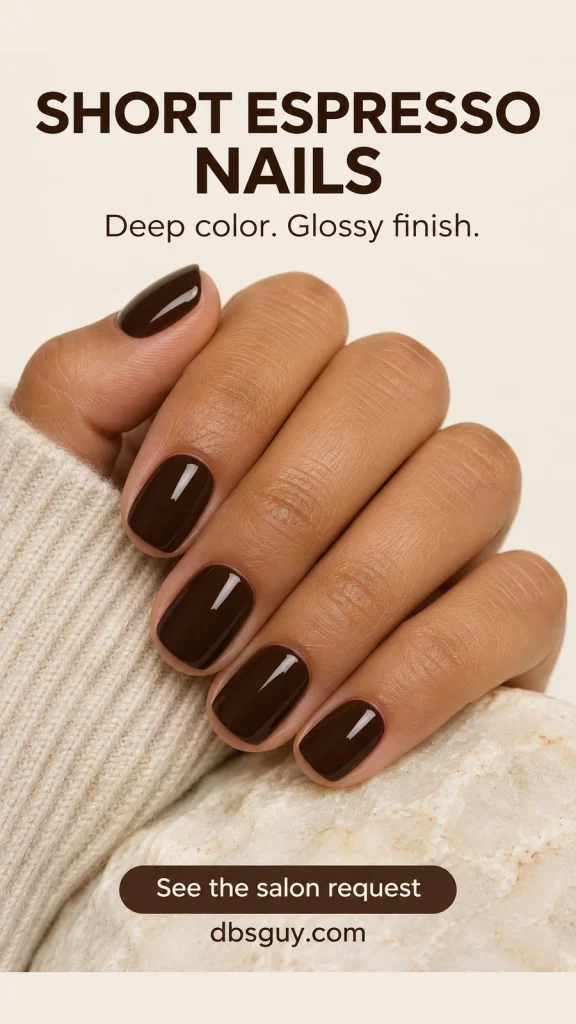
Choose a brown that still shows its warmth when you move away from the brightest salon lamp. If you like a nearly black effect, a very deep espresso makes sense. If you want people to notice brown immediately, compare it with the next lighter swatch before committing. A glossy top coat supplies the reflection; you do not need shimmer mixed into the color.
This is an easy look to pair with a textured sweater because the smooth surface and ribbed fabric give you different things to notice. Keep the finish consistent across all ten nails rather than adding an accent simply because the set is plain.
At the salon: “Short squoval, opaque espresso brown and a glossy finish. I want the color to read brown in regular room light, with no shimmer.” If your nails are already very short and rounded, keep that comfortable shape; the rich color does not depend on creating square corners.
2. Soft Matte Cocoa on Short Oval Nails
Matte cocoa is the option to compare when you like brown but do not want a reflective manicure. Use a medium milk-chocolate shade and a smooth oval shape. Without a bright glossy highlight, the brown becomes the main feature.
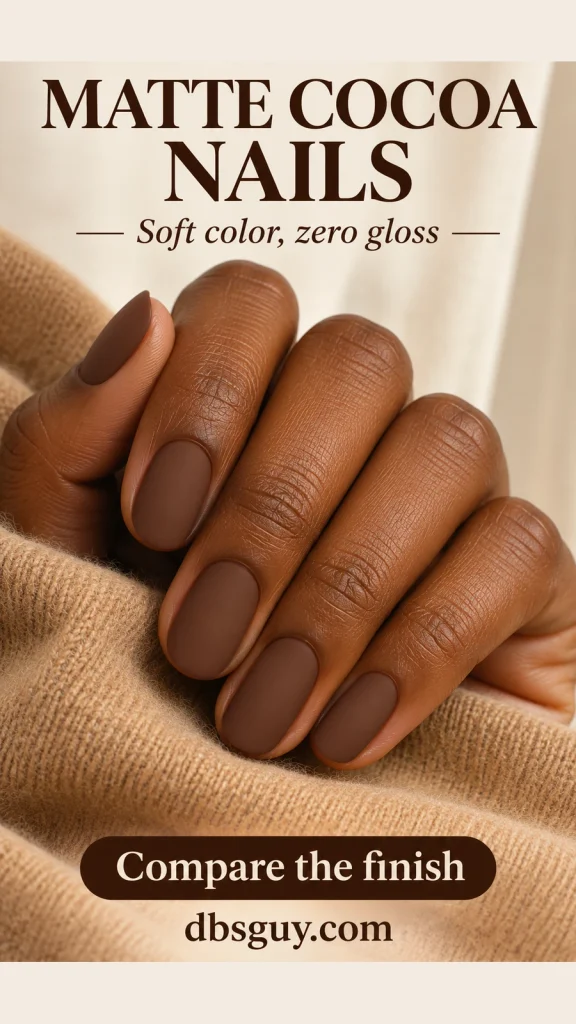
Ask to see the color with the intended matte top coat on a sample nail. A glossy display swatch does not show the finish you are booking. The surface should look smooth and evenly matte; “velvety” here describes its appearance, not a raised texture or a magnetic cat-eye effect.
Try this shade beside a camel or cream sleeve before choosing it. If the combination looks too similar for your taste, move the polish a little deeper rather than adding several new colors. That keeps the soft finish while giving the nails more definition.
The detail to specify: “Medium cocoa, fully opaque, short oval and smooth matte on every nail.” Matte is an aesthetic choice, so do not assume it will wear for the same number of days as another finish. Ask your artist about the particular products and their care instructions.
3. Creamy Latte on Short Round Nails
Latte brown works when you want a lighter manicure but still want a recognizable coffee tone. Choose a creamy beige-brown with enough color to distinguish it from ivory. A short round shape keeps the result simple and leaves no artwork to scale down.
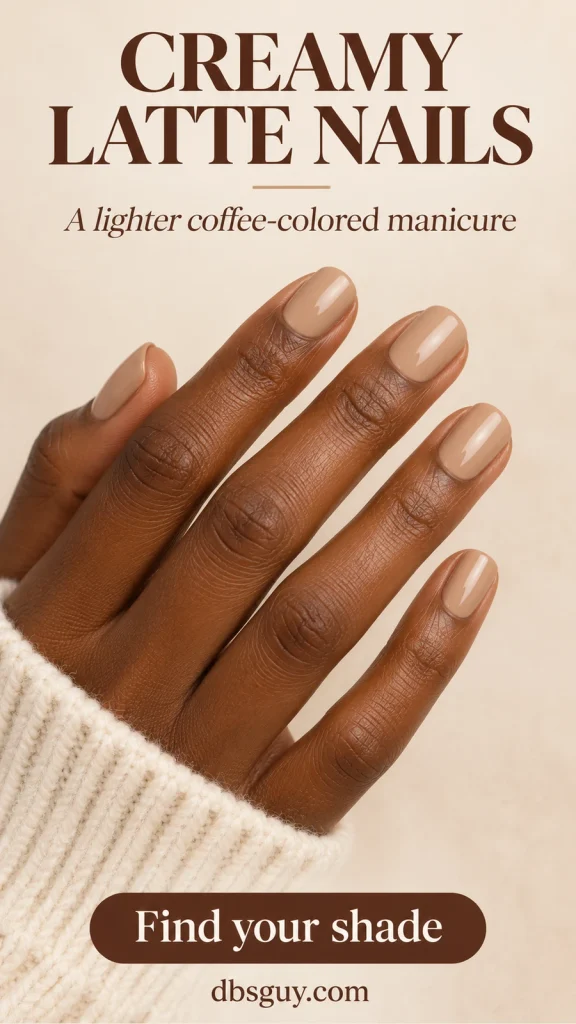
For this version, request opaque cream coverage with a glossy finish. “Milky” can mean a soft-looking color or a translucent polish, so it helps to say whether you want your natural white nail edge hidden. If you enjoy seeing that edge, tell your artist you want a sheerer adaptation instead.
A pale latte may contrast strongly with deeper skin and sit closer to lighter skin; neither effect needs correcting. Pick the amount of contrast you want. If a sample looks too yellow, compare a rosier or more taupe-leaning beige-brown instead of assuming every latte shade will look the same.
This is also a useful starting point for an at-home regular-polish manicure: one color, no fine borders and no separate artwork. Choose the coverage from the formula itself rather than piling on coats to make a sheer polish behave like an opaque one.
4. Fine Espresso French Tips With a Sheer Base
A fine espresso French gives you a dark edge while leaving the center of the nail light. Choose a sheer base you like against your skin and a slim, curved brown band. On a soft almond shape, the band follows the tapered end without turning into a heavy brown cap.
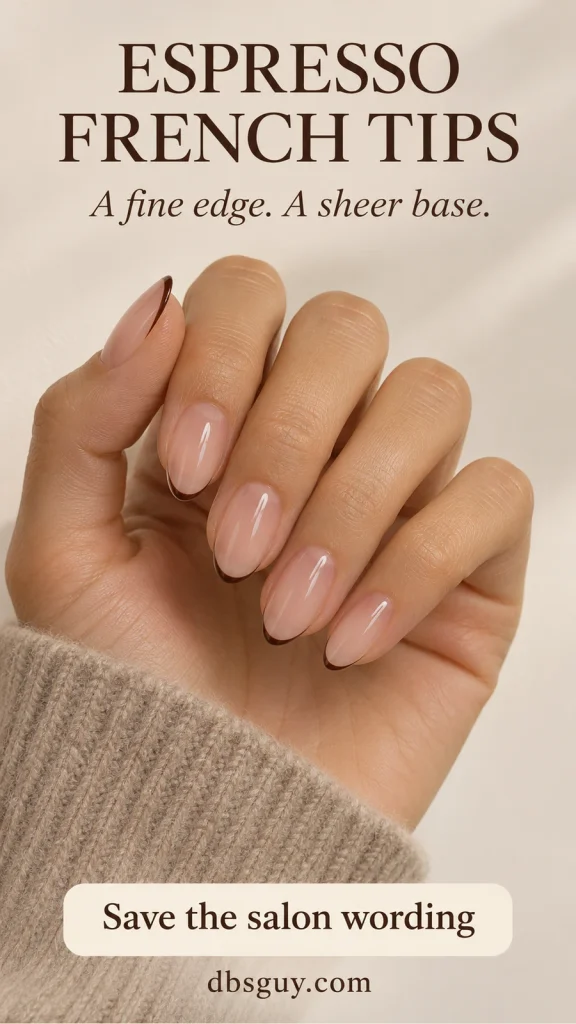
Settle the base first. Sheer rose, peach-beige or caramel can each change how the same espresso tip looks. Then approve the tip width on one nail. The useful question is how much base remains visible, particularly on your smallest nails.
For short nails, keep the brown line shallow and follow the existing edge. You do not need extensions simply to introduce a brown French. If almost no free edge is visible, ask the artist whether a fine painted outline can give you the effect at your current length.
Salon wording: “A sheer base with a very narrow espresso smile line, glossy throughout. Please keep most of each nail light.” A smile line is the curved boundary where the tip color meets the base.
For other ways to adjust the border, see 17 January French Tip Nail Ideas Beyond the Classic White Edge.
5. Cocoa Nails With Cream Swirls on Two Accents
Choose this look when you want artwork you can notice up close without covering the whole hand in pattern. Keep the thumb, index and pinky solid cocoa. On the middle and ring fingers, add a broad, flowing cream curve over the same brown base.
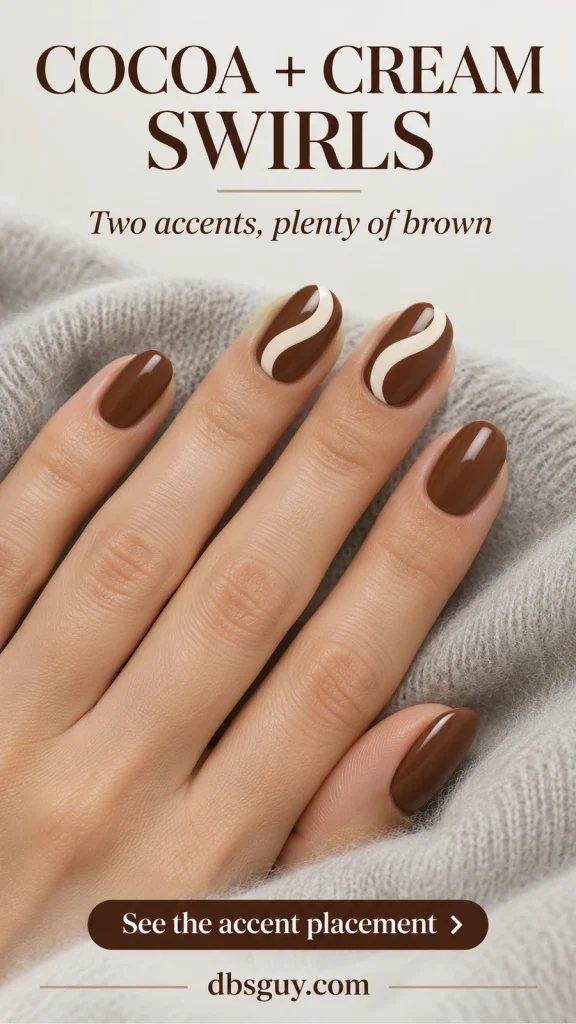
The contrast comes from two colors and a clear line. Leave enough cocoa visible around each curve so the accent still belongs to the set. The curves can bend differently from finger to finger; they do not need to become matching spirals.
For short oval nails, one cream sweep per accent is enough. A longer nail can give the curve more room to travel, but extra length is optional. Ask for the design to stay flat under a glossy finish, particularly if you want a smooth surface beside knitted cuffs.
Describe the pattern as separate painted curves if that is what you want. “Latte art” alone may suggest a blurred marble effect to your artist. Confirm the accent fingers, line thickness and whether the quoted service includes the artwork before painting starts.
If the movement of the lines interests you more than the color, our January swirl-versus-French guide offers more placement details for almond shapes.
6. An Espresso-to-Latte Tonal Gradient
Use a different solid brown on each finger when choosing just one coffee shade feels limiting. Keep the shape and gloss consistent so the color progression is easy to read.
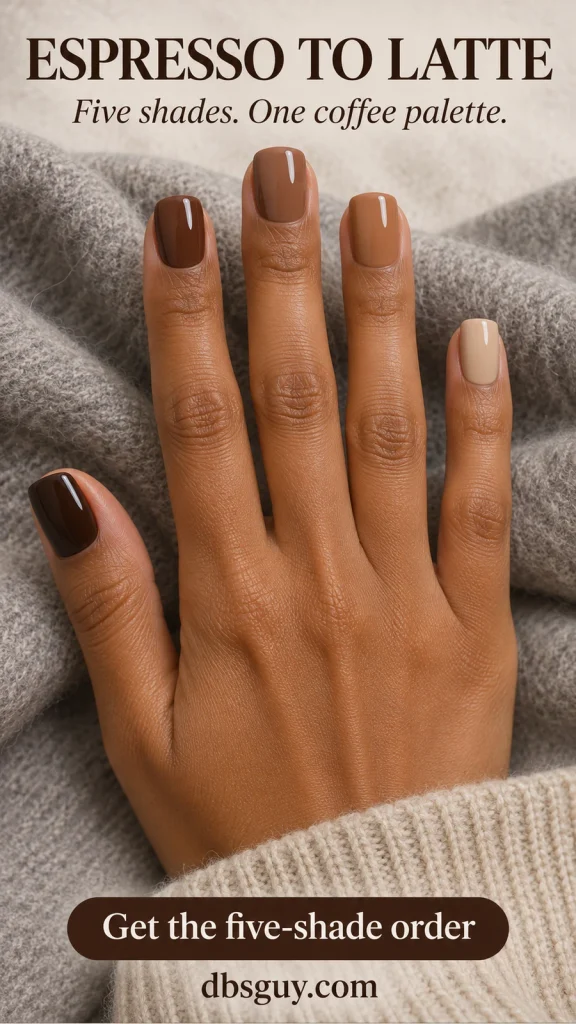
A useful order is deep espresso on the thumb, dark cocoa on the index, milk chocolate on the middle, muted caramel on the ring finger and creamy latte on the pinky. Repeat that same thumb-to-pinky order on the other hand. Every nail stays one color; this is a gradient across the fingers, rather than an ombré blend within each nail.
Lay out all five swatches before starting. Two adjacent browns that look different in their bottles may appear nearly identical on the nails. Look for visible steps from dark to light, and avoid one unexpectedly orange shade unless you want it to be the focus.
Short squoval nails give the set a consistent outline, but you can keep your usual shape. At home, label or arrange the bottles in finger order and finish one color on its matching fingers before moving to the next. Use separate polishes rather than improvising mixtures that may not apply or dry as expected.
Turn Your Favorite Look Into a Clear Appointment Request
Save the look name with four decisions: shade, coverage, finish and placement. That tells your nail artist more than “coffee nails” on its own. For example: “Medium cocoa, opaque, glossy, with cream curves on the middle and ring fingers only.”
Then discuss length and service. Brown is a color choice, not a nail system: regular lacquer, gel polish and an extension service are different bookings. Confirm which one you want, whether shaping or removal is included, and how the salon charges for accent artwork. There is no single price or appointment length that fits all six designs.
If you are choosing a new length, check how it feels when you hold your phone or put on your usual gloves. The artwork can be simplified around a comfortable length.
A Simple Regular-Polish Route at Home
The solid espresso, cocoa and latte looks are the simplest starting points. You need your chosen regular lacquer, its recommended base and top coats, and the time specified on their labels for application and drying.
- Remove old polish and follow your chosen system’s directions for a clean, dry nail surface. File only as needed to tidy the shape; do not cut the cuticles for a cleaner-looking border.
- Apply the recommended base coat. Use thin color coats according to the lacquer’s instructions; an opaque brown may be designed for two, while a sheer formula will give a different result.
- Finish with a compatible glossy or matte top coat, as appropriate for your look. Follow the product directions for coating the free edge and allowing layers to dry.
- Leave time before pulling on close-fitting gloves or handling knitwear. Use the polish’s drying guidance rather than assuming a surface that feels dry is ready for pressure.
For care between manicures, the American Academy of Dermatology’s manicure guidance recommends moisturizing nails, particularly after polish removal, and avoiding cutting or forcefully pushing back cuticles. Keep those habits separate from the design decision; a coffee-colored polish does not treat damaged nails.
Questions About Brown January Nails
Do brown nails work for January, or do they look too autumnal?
They work as a winter styling choice. If you want this particular sweater-weather mood, use the depth and finish to carry it: glossy espresso, soft matte cocoa or creamy latte. You do not need a seasonal motif to make the color suit your winter clothes.
Which brown should I choose for very short nails?
Any of the three can work. Espresso makes the outline stand out, cocoa gives you medium-depth color, and latte keeps the overall effect lighter. If you want artwork, scale down the French band or the number of curves rather than adding length just to fit the design.
What if espresso looks black on me?
Compare a slightly lighter brown in ordinary light. You can also ask for a shade with a more visible warm brown undertone. Judge the finished swatch beside your hand; the word espresso does not guarantee a particular depth.
Do I need gel to get these looks?
No. Solid colors, painted French borders, curves and different colors on each finger can be adapted to regular lacquer. The artwork takes different skills, but its appearance does not establish which products were used. Ask for the service you actually want.
Should my brown polish match my sweater exactly?
Only if you like that effect. A darker nail against a light sleeve makes the manicure easier to notice; a similar-depth brown gives a more blended result. Hold the swatch next to a sweater you wear often and choose the relationship you prefer.
Also Read
January Nail Ideas by Mood: Minimal, Cozy, Playful or Full Glam — compare other January directions if you are still deciding how much color or detail you want.