Light Pink Valentine Nails With Sheer Bases, Tiny Hearts and Pearl Details

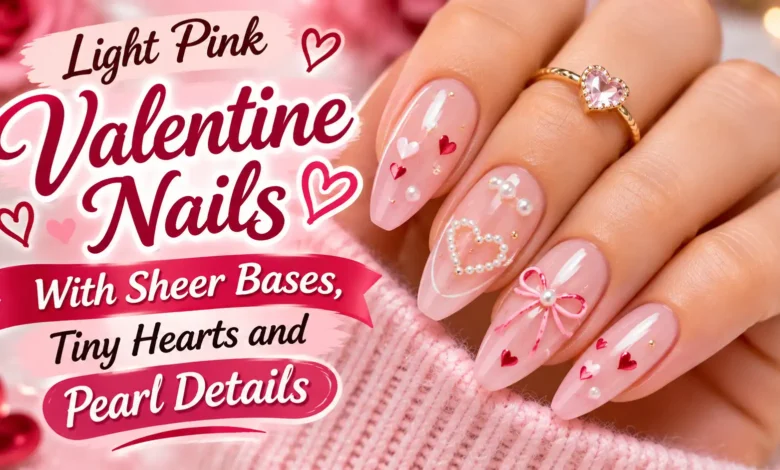
For light pink Valentine nails, start with a translucent pink base, then decide where you want the detail. One small raspberry heart gives a short manicure a clear focal point. White hearts keep the palette pale. A few ivory pearls add a raised finish when you want something a little more dressed up.
You do not need hearts and pearls on every nail. These six looks show different ways to place them while leaving plenty of pink visible. Choose the coverage first, then the shape and accent layout.
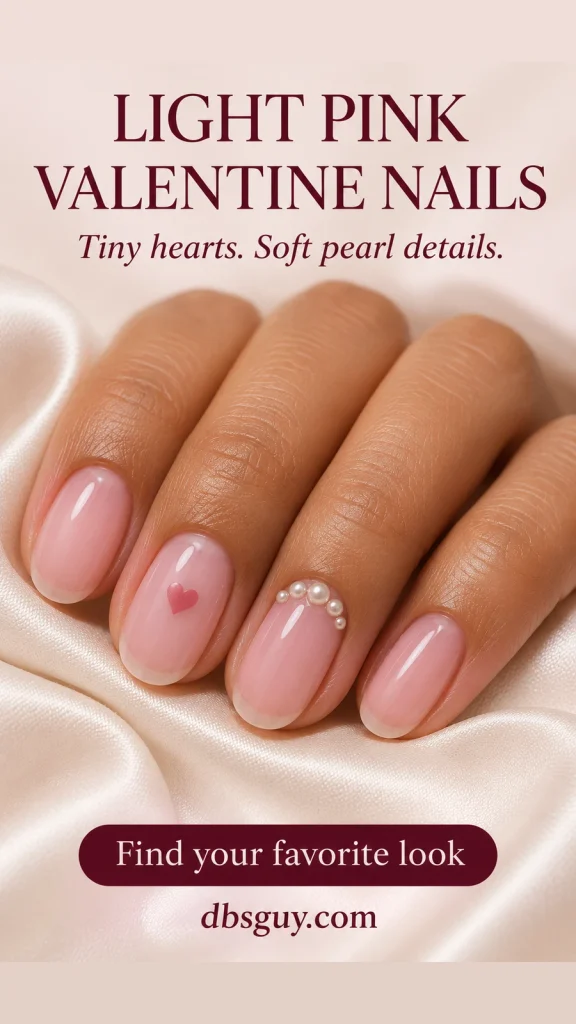
The images are AI-generated manicure concepts, not photographs of completed sets or exact polish swatches.
Choose the Pink Base Before the Nail Art
Sheer describes coverage. You can still see some of the natural nail through the color. A pale pink can also be fully opaque, so a bottle that looks light is not necessarily the translucent pink in your reference.
Ask to see the pink over a nail or a clear swatch tip. Look at the area above the natural free edge: do you want that lighter line to remain visible, look softly blurred, or disappear? For the looks here, keep it visible or gently softened. A milky tint can give that softened effect, but check the actual coverage rather than relying on the shade name.
Compare a rosy pink and a peachier blush beside your hand in daylight. Either can work; pick the one that gives you the pink you want to see. If the sample looks too white, try a more transparent or rosier shade before adding extra coats. Follow the polish directions for layering and drying.
For more help comparing the color families, see Valentine Nail Colors: How to Choose Between Blush, Cherry and Wine.
1. Sheer Pink With One Raspberry Heart
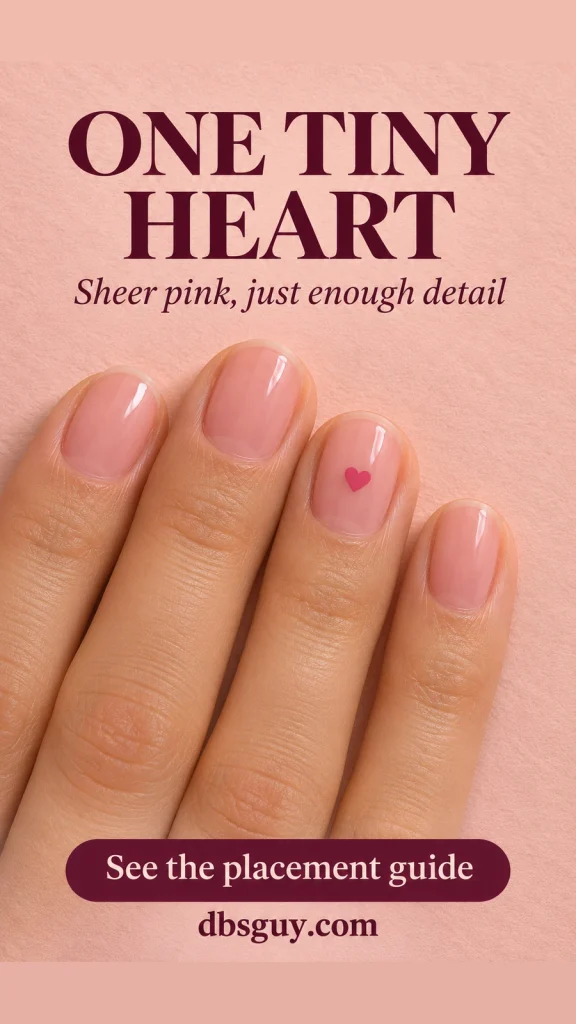
Keep all the nails the same warm, translucent pink and put one filled raspberry heart in the center of the ring nail. The deeper pink gives the tiny shape enough contrast without making red the main color of the manicure.
This is a useful starting point for short nails because the heart does not depend on having a long free edge. Leave pink around both lobes and the point. If the art looks like a dot at arm’s length, make the heart slightly wider or choose a deeper raspberry.
For an at-home version with regular polish, use a small heart decal on the dry pink base and seal it as the decal instructions specify. Check the size against your nail before applying it. A decal that looks tiny on its backing can take up more space than expected on a narrow ring nail.
Also Read: Round Valentine Nails With Tiny Hearts and Glossy Color
2. Two White Hearts on Each Accent Nail
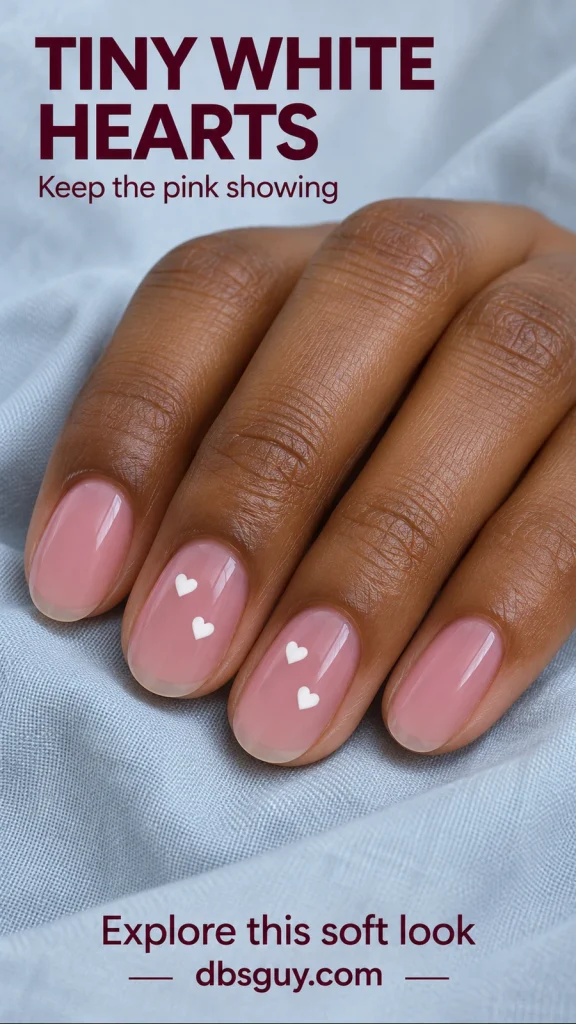
Use a slightly rosier sheer base for this look so the opaque white hearts remain easy to spot. Place two small hearts diagonally across each of the middle and ring nails, and leave the index and pinky plain. The pair of accent nails makes the artwork more noticeable than a single-heart manicure while keeping the color palette soft.
Keep a clear gap between the hearts. They should read as two separate shapes rather than one white patch. You can vary their angle a little, but keep their size similar so the placement feels deliberate.
If your nails are very short, reduce the design to one white heart per accent nail. If the white disappears into a pale tip, move it onto the pinker middle of the nail. Adding more hearts will not solve a contrast problem.
Also Read: Minimalist Valentine Nails With Tiny Details and Plenty of Bare Space
3. A Three-Pearl Arc With a Heart Beside It
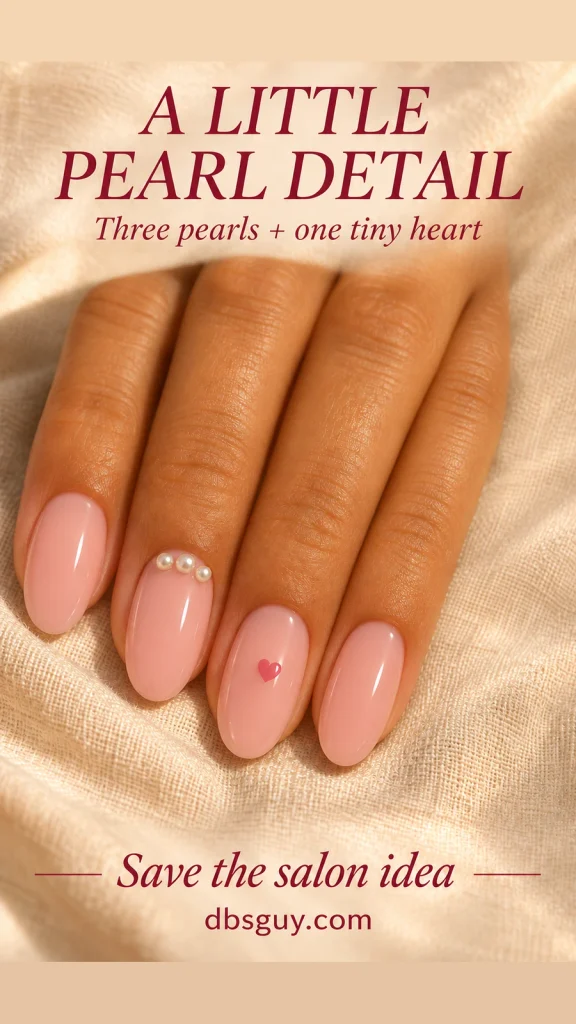
On the middle nail, arrange three small ivory half-round pearls in a shallow curve near the base. Put one rose-pink heart in the center of the neighboring ring nail. The pearls echo the cuticle curve, while the separate heart keeps the Valentine detail easy to read.
Ask to see the pearl layout before it is attached. All three pearls should sit on the nail plate, with pink visible between the arc and the skin. A small middle pearl with two slightly smaller outer pearls can help the curve fit; three equally tiny pearls also work.
Keep the rest of the nails plain pink so the arc has space around it. This is a good choice when you want to try raised nail art on just one finger. Tell your nail tech if you prefer the lowest-profile pearls available, and check the finished edge for anything that catches.
Also Read: BIAB Valentine Nails With Sheer Bases and Tiny Heart Details
4. Ballet-Pink Micro French With a Corner Heart
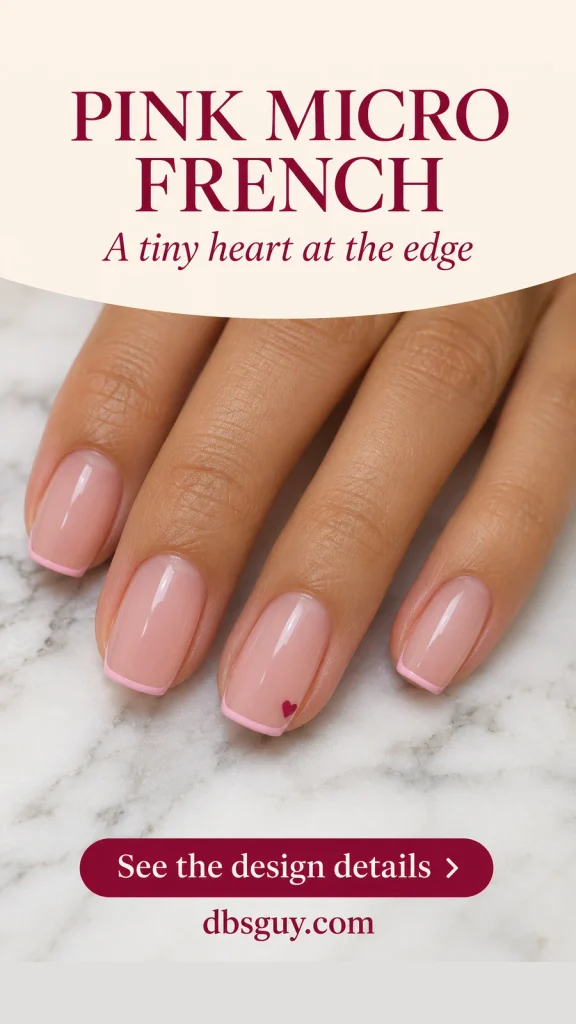
Pair a sheer rosy base with a narrow, opaque ballet-pink French tip. The two pinks should differ enough in coverage that you can see the edge without needing a white line. On the ring nail, add one raspberry heart just below an outer tip corner.
Leave a slim strip of sheer pink between the heart and the French line. That gap matters: if the shapes touch, the heart can look like an uneven part of the tip. Keep the heart entirely inside the nail edge, too, so both lobes remain visible.
The soft square reference makes the corner placement especially clear. You can adapt it to an oval nail by following the rounded edge with the tip line. At fingertip length, move the heart a little lower to preserve its outline rather than widening the French band.
Also Read: 15 Almond Valentine Nail Ideas With Heart Tips and Soft Curved Lines
5. A Pearl Trail Along One Side
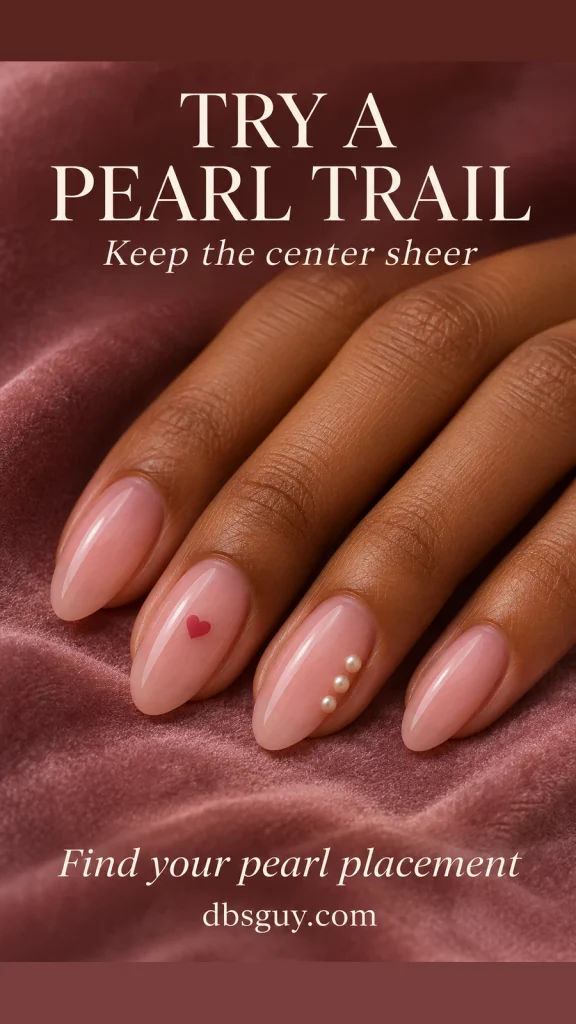
Place three small ivory pearls in a short line just inside one side of the ring nail. Keep the line around the lower-to-middle part of the nail, with a margin of pink between the pearls and the side edge. Add a small raspberry heart to the neighboring middle nail.
This arrangement changes the direction of the detail: the pearls run along the nail instead of following its base. A medium almond shape gives the trail room, but the same placement can be shortened for an oval nail.
Ask your tech to fit the pearl size to your nail width before attaching them. The center should remain mostly clear. On a narrow nail, use fewer or smaller pearls; do not squeeze the row against the sidewall just to keep a particular count. If raised side details would bother you, choose the flat hearts in the first two looks.
Also Read: Very Short Valentine Nails: Tiny Accents for Barely Any Free Edge
6. One Pearl Inside a Rose Heart
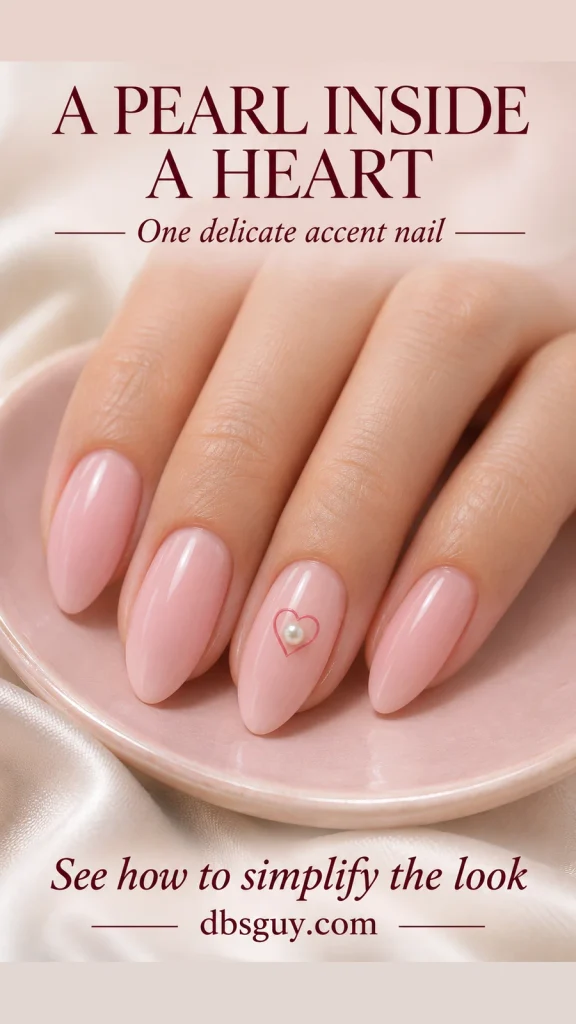
For one more detailed accent, outline a small rose-pink heart on the ring nail and place a single ivory pearl inside it. Leave the other nails plain sheer blush. The outline and pearl belong together on one nail, so there is no need to repeat either across the hand.
The heart will need to be a little larger than the filled hearts in the other looks. Its center must hold the pearl while leaving some pink visible around it. Ask your tech to show the outline and pearl size together before finishing the art.
If the pearl touches the outline or hides the notch between the lobes, choose a smaller pearl. For a very narrow nail, simplify the accent to the hollow heart alone. A medium almond or oval gives this small arrangement more room, but extensions are a separate service choice, not a requirement for wearing pale pink.
Also Read: Valentine Nails on Natural Nails: Simple Ideas Without Extensions
How to Keep the Pearl Details Practical
Choose flat-backed, half-round pearls intended for nail art, and check that your adhesive is suitable for your polish or nail system. Do not assume wet top coat alone will securely hold a raised pearl.
In OPI’s pearl nail-art tutorial, the lacquer method uses a small drop of nail adhesive, half-round pearls pressed into place, and a thin layer of top coat over the nail and pearls. Use the directions for the products you actually have, including any drying and removal instructions; that lacquer sequence is not a universal gel-curing guide.
Keep adhesive and embellishments on the nail, away from the surrounding skin. At a salon, mention that you want raised pearls when booking so the tech can plan the attachment and removal method. If a pearl catches during wear, follow the product’s removal directions or have the salon remove it rather than pulling it off.
What to Tell Your Nail Tech
“I’d like a light pink base with some natural nail still visible and a glossy finish. My favorite is look [number]. Can we check the pink coverage on one nail and the accent size before doing the set? I want the heart to stay small and the pearls to be low-profile.”
Show the image and point to the exact accent nails. Confirm whether you want regular polish, gel color, an overlay, or extensions when you book. The image shows the design; it does not identify a particular nail system. If you already have a product on your nails, tell the salon so it can advise on the service.
Frequently Asked Questions
Can I get these looks with regular nail polish?
Yes. The color and flat heart designs can be made with regular air-dry polish and compatible nail art. For the pearl looks, choose a nail adhesive and finishing method intended for your products. You do not need to book gel solely to get a light pink color.
Which design is easiest to adapt for very short nails?
Start with the single raspberry heart. It needs no French edge or pearl layout. Keep it small enough to leave pink around the whole shape, or try a wider nail if the ring nail feels cramped.
Will pearl accents feel smooth?
Half-round pearls still sit above the nail surface, even when they are small. Ask to see the size from the side before choosing them. If you want a flat finish, use painted hearts or flat decals and leave out the raised pearls.
How do I keep white hearts visible on a very pale base?
Try a rosier sheer pink and place the white art over the pinker part of the nail. Check the sample in ordinary light. If you prefer an almost-white base, a deeper rose heart will give you clearer contrast.
Do I need the same light pink as the image?
No. Use the image to choose the coverage and placement, then compare a real pink swatch beside your hand. Lighting and screen settings change how pale shades appear, and these concept images are not exact product color references.