25 New Year’s Nail Ideas With Chrome Finishes, Glitter Tips, and Star Art

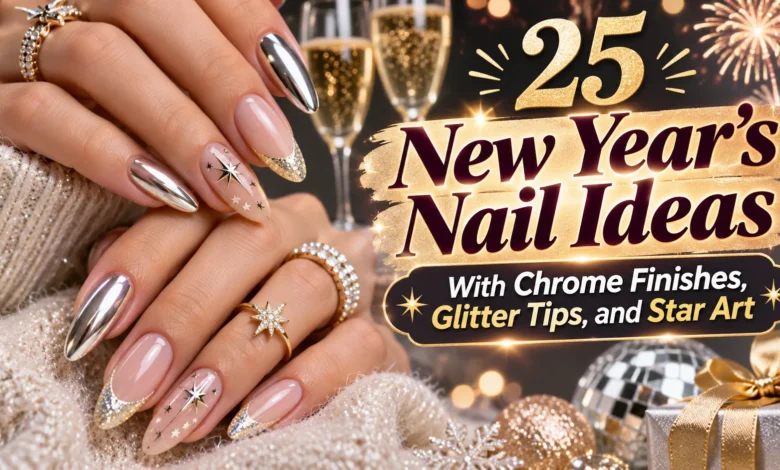
For New Year’s nails, start with the kind of shine you want: a smooth chrome reflection, glitter concentrated at the tips, or a small star that gives a plain color a party detail. You can get a festive look on short nails without putting every finish on every finger.
These 25 ideas give you a specific color, shape, and placement to save for your appointment. Some translate easily to regular polish and flat nail stickers; the mirror finishes and detailed linework are useful references to discuss with your nail artist.
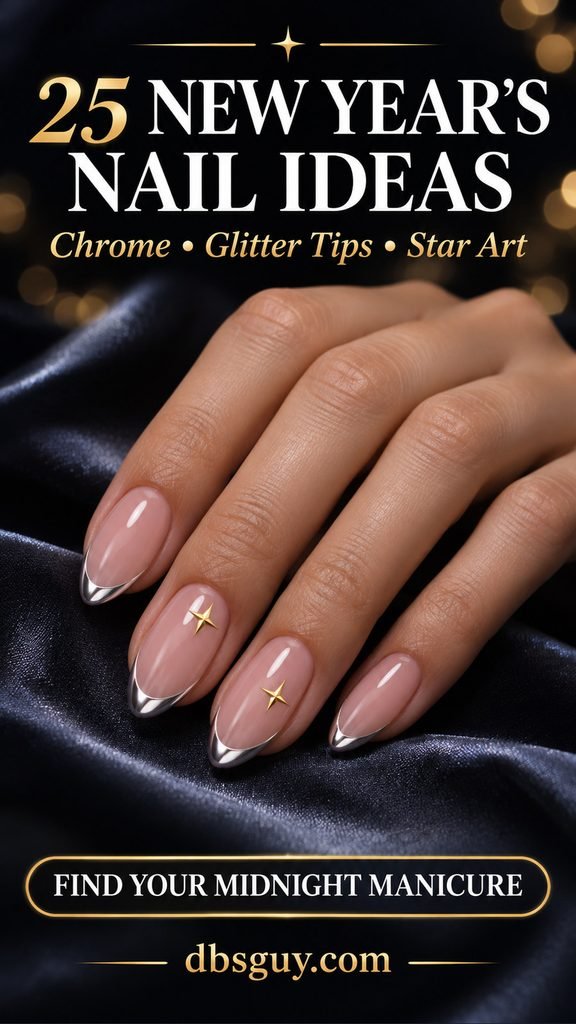
The visuals are AI-generated manicure concepts for dbsguy.com. Use them to discuss color and placement; they do not document completed salon work, product tests, or guaranteed results.
Choose Your Finish Before You Choose the Art
- Want the shine to be the whole design? Start with mirror silver, champagne pearl, cherry red, or icy-blue glaze in ideas 1, 2, 6, and 7.
- Want a small festive edge? Compare the gold micro French in idea 3 with the glitter fades, V-tips, and confetti edges in ideas 9–13.
- Want recognizable party artwork? Look at the stars, constellations, and fireworks in ideas 17–23.
Mirror chrome has a smooth, metal-like reflection. A pearl glaze gives a softer luminous sheen, while glitter shows separate reflective particles. Tell your artist which effect you mean rather than asking for “something shiny.” For help deciding on length and service first, read January Nails: How to Choose Your First Manicure of the Year.
1. Mirror Silver on Short Ovals
A full silver mirror finish makes the nail surface the focal point. Keep the outline short and oval so you can enjoy the reflective effect without adding dramatic length or competing artwork. This is a straightforward pairing for a black outfit, a gray sweater, or silver earrings.
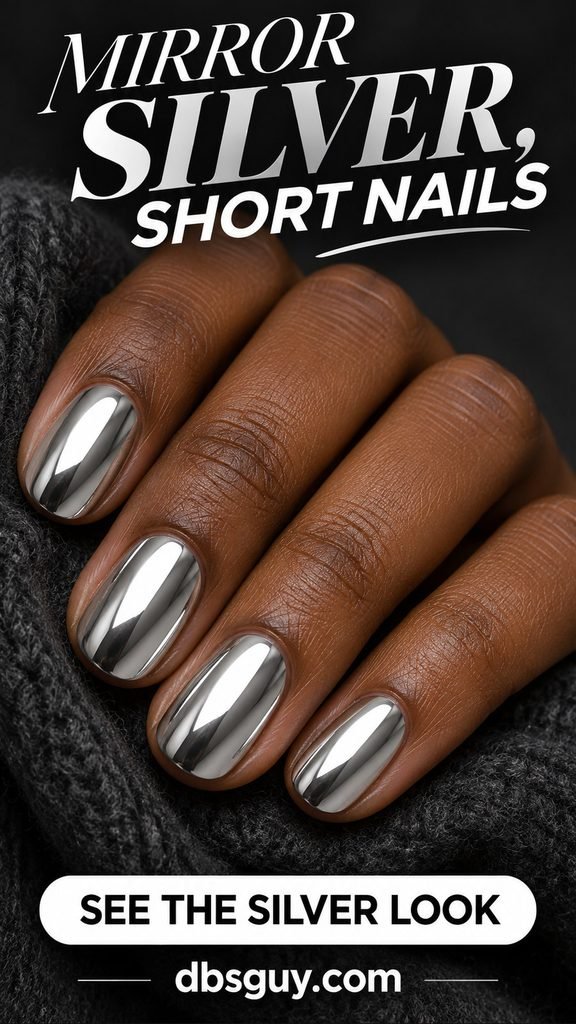
Ask to see a silver finish swatch before committing. A smooth mirrored surface and a sparkly silver polish are different looks. At home, metallic regular polish can suggest the color, but expect a brushed or shimmery result rather than assuming it will duplicate powder chrome.
2. Champagne Pearl Chrome
Choose champagne pearl when you like shine but want a softer finish than polished silver. A warm beige base beneath a pale pearl glaze gives the set a creamy, luminous appearance. The medium almond shape in the reference leaves room to see that gentle reflection.

Show your artist the base shade as well as the finish. An opaque pale-gold base will look different from a sheer beige one, even under a similar topper. If you wear shorter nails, keep the same finish across the set; it does not depend on a long tip or a large motif.
3. Gold Chrome Micro French
A narrow gold edge gives a sheer pink manicure a deliberate party finish. On a short soft-square shape, leave most of the nail translucent and keep the metallic band slender. The little straight section across the tip makes this feel different from a rounded glitter fade.

The useful salon request is “sheer pink with a very fine, smooth gold French edge.” Point out how little gold you want to see. If you are painting with regular metallic polish, practice the edge on one nail first; matching ten tiny curves takes more control than painting a full-color set.
4. Rose-Gold Diagonal Tips
A slanted rose-gold tip changes the direction of a classic French manicure. Instead of following the whole free edge in a smile line, the metal cuts diagonally across the end of the nail. A sheer rose base keeps that crisp angle easy to see.

Decide whether you want the slant repeated consistently or mirrored between hands, and show your artist a marked-up reference if needed. On shorter nails, make the metallic wedge shallower so it does not cover most of the base. This is a good option when you want geometry without black outlines.
5. Pewter Chrome With Black Frames
A thin black outline around pewter chrome turns each nail into a little framed surface. The medium coffin shape gives the border distinct corners at the tip. Keep the black line delicate; a heavy frame would take over the muted metal center.
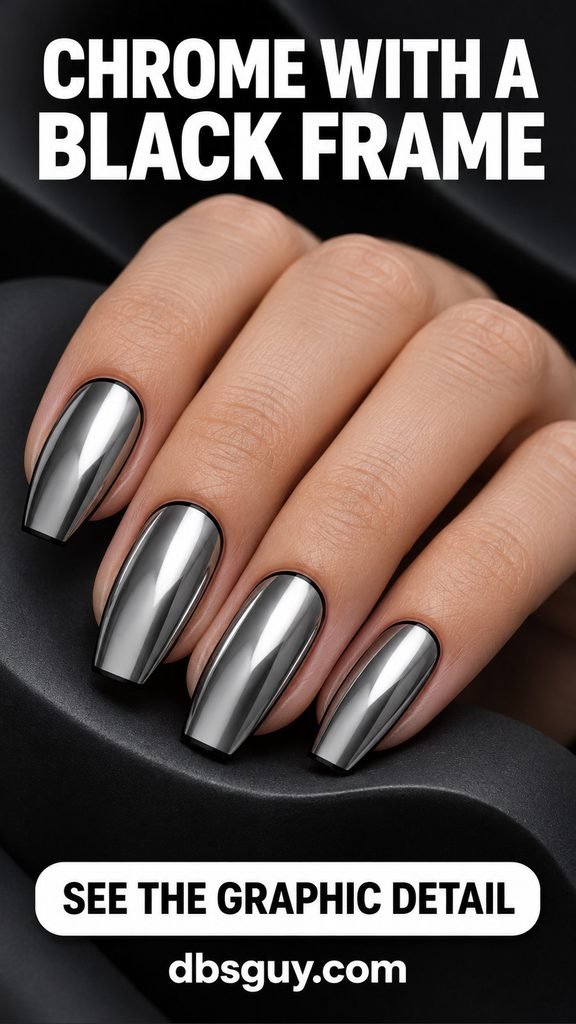
This is a precision design to discuss with a nail artist, especially around the base and sidewalls. The outline belongs on the nail, with a clear separation from the skin. If your nails are short, borrow the pewter color and use the frame on one accent nail rather than squeezing a thick border onto every finger.
6. Cherry-Red Mirror Chrome
Cherry-red chrome keeps the strong color of a red manicure and adds a smooth metallic reflection. Short ovals make it an option for someone who wants a bold finish without detailed artwork. Leave off stars and glitter so the red reflection stays clear.

Ask for a red chrome swatch beside a regular glossy red. Some combinations read pink, copper, or burgundy under different light, so choose the actual sample you like rather than relying on the shade name. If you prefer a simple home manicure, a red metallic polish offers a related effect with fewer finishing steps.
7. Icy-Blue Glazed Squares
A pale ice-blue base under a pearly glaze feels wintry without needing snowflakes. The softly squared outline gives the light color a clean edge. Ask for a luminous sheen rather than an opaque silver coating, which would hide the blue you chose.

Hold a blue swatch next to the sleeve you plan to wear. If it looks too white, deepen the blue base slightly; if it feels too bright, try a grayer blue. There is no need to add art to make this finish complete, and the same color plan works on a short rounded shape.
Also Read: 19 Silver Chrome December Nail Ideas for an Icy Mirror Finish
8. Alternating Silver and Gold Chrome
Alternating smooth gold and silver nails gives mixed-metal jewelry a matching manicure. Keep the shape and length consistent so the change in metal feels intentional. A short squoval outline leaves each reflective panel simple and easy to read.

Choose the finger order before application, including the thumbs that may not show in your saved photo. You can mirror the sequence on the other hand or continue alternating across both. Skip extra glitter here: the contrast comes from warm and cool reflections, which is different from alternating two glitter polishes.
9. Silver Glitter Fade Tips
Concentrate fine silver glitter at the free edge, then let it thin out toward the middle of a sheer blush nail. The soft boundary makes this different from a crisp French tip. Keep the lower half mostly clear so the fade has somewhere to go.

For a regular-polish version, use a nail glitter polish and a lightly loaded brush to place sparkle near the tips. Build the edge gradually instead of covering the whole nail in one pass. On very short nails, keep the fade shallow; scattering glitter all the way to the base changes it into an allover look.
10. Black Nails With Gold Glitter V-Tips
Two gold-glitter diagonal lines meeting at the tip make a pointed V over glossy black. Keep a small black triangle visible inside the V so the geometry reads clearly. Almond nails support the pointed arrangement without needing a large solid glitter cap.

Ask your artist to keep the two sides similarly fine and to show you the first finished nail before repeating it. For a home version, metallic gold striping polish can suggest the shape, but a dense glitter formula may be harder to draw into a narrow line. Try the design on just the ring nails if matching every V feels ambitious.
11. Burgundy With Champagne Glitter Tips
A slim champagne-glitter French edge warms up burgundy without covering its deep color. Short soft-square nails give the curved tip a compact frame. This combination makes sense beside cream satin, a wine-colored dress, or simple gold jewelry.

Choose fine glitter if you want a narrow, defined edge. Larger pieces can make that small boundary harder to control. Ask for a true curved tip rather than a fade, and decide how much burgundy you want left visible. If your nail lengths vary, the glitter bands do not need to cover the entire natural white edge to look balanced.
12. Confetti French on Clear Pink
Small iridescent confetti pieces along a clear-pink tip create a playful edge with visible space between the pieces. The reference uses short rounded nails and a sparse arrangement. Keep the center of the nail clear instead of turning the whole surface into a confetti mix.
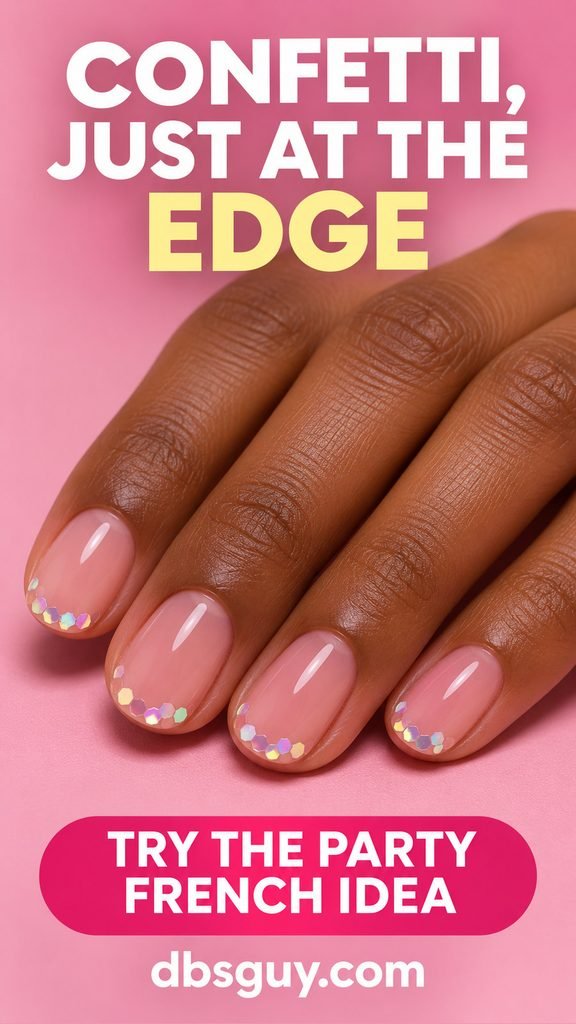
Use flat embellishments intended for nail art, and select pieces that fit inside the nail perimeter. A few carefully placed pieces give you more control than a crowded layer. Follow the product’s application and sealing directions; if the pieces sit awkwardly at a short free edge, use fewer or smaller ones rather than piling on more finishing product.
13. Black Glitter Micro French
A fine black-glitter rim gives milky pink nails a darker outline while leaving the rest of the manicure soft. This is a quieter choice than a full black base, especially on short ovals. The sparkle should sit inside the black edge rather than appearing as a separate silver stripe.

Compare a sample of black glitter with plain black polish before choosing. At this scale, the glitter can be subtle, so the design may read mostly as a black French manicure from a distance. Keep the base lightly milky rather than opaque white if you want the reference’s gentle contrast.
Also Read: 13 Easy January Nail Ideas Where One Small Detail Does the Work
14. Lavender With a Silver Side Sweep
A silver-glitter swoosh running along one side and into the tip gives lavender nails a sense of movement. Leave the opposite side plain so the curve remains visible. On almond nails, that long sweep follows the outline without becoming a full French band.

Show your artist which side you want decorated, and decide whether both hands should mirror each other. For a shorter version, keep the glitter close to the outer edge and shorten the curve. Avoid adding another stripe on the opposite side unless you want to change the look into a framed nail.
15. Espresso With Bronze Glitter Moons
Move the sparkle to the base with a slender bronze crescent over dark espresso polish. This reverse-French placement leaves the tips plain and changes the balance of the manicure. A short oval shape keeps the warm brown and bronze combination compact.
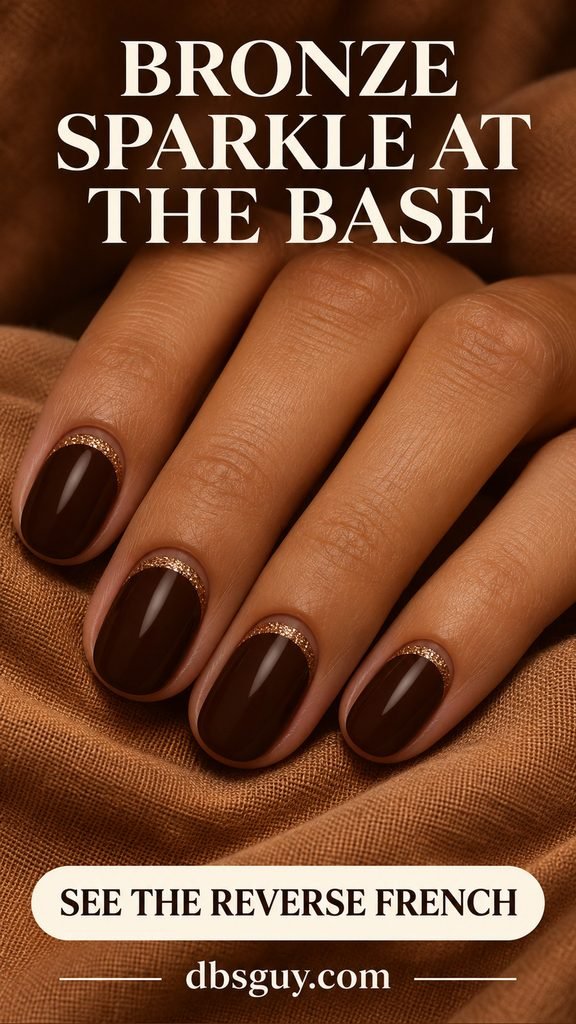
The crescent sits on the nail, with a visible margin of brown between the glitter and the skin. Ask your artist to keep that gap clear. If you are painting it yourself and the curve becomes too broad, switch to one accent nail instead of enlarging every crescent to match. Fine bronze glitter preserves more of the espresso base.
16. Navy With Split Silver Tips
A silver-glitter tip interrupted by a narrow navy slit creates a small split at the center. The gap is the point: it stops the silver from reading as one continuous French band. Keep the navy glossy and the rest of each nail free of artwork.

On medium almond nails, the two silver sections can angle toward the point without meeting. Ask your artist to leave enough blue in the split for it to remain visible. Very short nails have less room for this geometry, so use the split on one or two accent nails and keep the others plain navy.
17. One Gold Star on Red
One small gold star on a red ring nail gives a classic manicure a party detail without changing every finger. Choose a flat five-point star that leaves red visible around all its points. Short ovals work well because the motif does not depend on a long free edge.

A nail-art sticker is a useful option if you do not want to paint the shape. Check its size against your nail before placing it; a star that reaches both sidewalls can overwhelm a short nail. Leave the other fingers plain so the single accent remains the obvious focal point.
18. Midnight Constellations
Fine gold dots joined by delicate lines turn navy nails into an abstract night-sky design. Place the little constellations on the middle and ring nails, then leave the others plain. This offers more detail than a single star while keeping the set from becoming crowded.

You do not need to reproduce a zodiac chart. Sketch a few dots and short connections for your artist, leaving plenty of navy around them. For shorter nails, reduce the number of points and lines rather than making them so tiny that the pattern becomes hard to distinguish.
19. Tiny Silver Starbursts on Blush
Small four-point silver starbursts scattered one per nail give sheer blush a light, graphic finish. Shift the placement slightly from finger to finger so the set feels airy. A short square shape provides enough space for the motif without requiring a long tip.
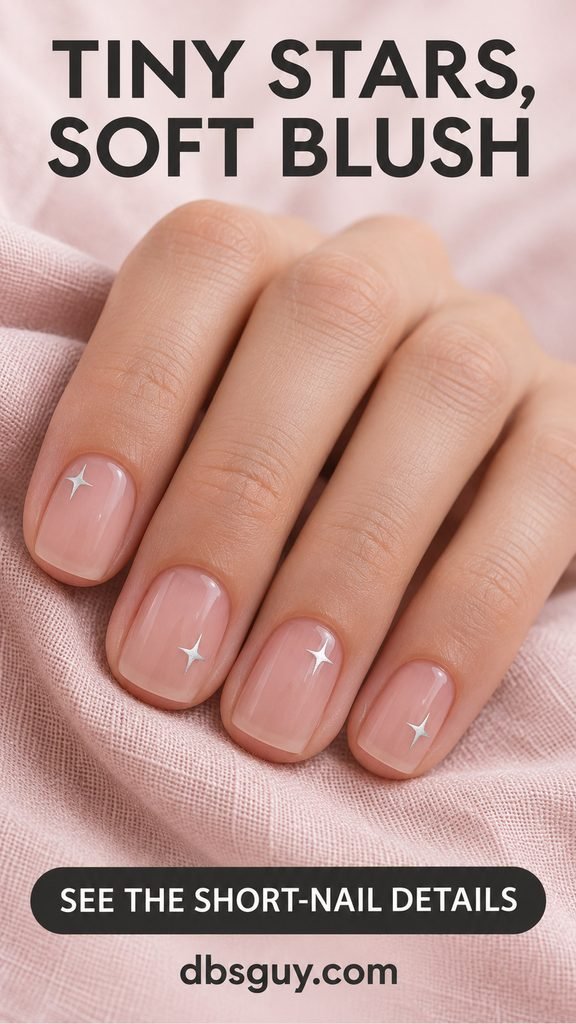
Keep the starbursts flat and fine. A painted cross with tapered arms gives a different result from a chunky five-point sticker or a raised crystal. If ten tiny stars feel like too much drawing, put them only on the ring nails and keep the same blush base across the rest of the set.
Also Read: Extra-Short January Nail Designs With Tiny Details That Fit
20. Black Stars With Open Centers
Thin black star outlines over a milky nude base create contrast without filling the motif. Keep the center of each star the same color as the surrounding nail. On medium almonds, the open shape can sit on the middle and ring fingers while the rest stay plain.

Show your artist an outline reference, because a solid black star changes the weight of the design. Flat outline decals offer another route if you find the shape difficult to draw. On a short nail, use one smaller star with a clear border of base color rather than cropping several points off at the sides.
21. A Gold Shooting Star on Cobalt
A shooting star gives a bright cobalt manicure one moving line instead of an allover scatter. Place a small gold star toward the upper part of the ring nail, with fine tails sweeping behind it. Leave the other nails solid cobalt to preserve the strong blue color.

The tails need more room than a lone star, so decide the placement before choosing the star’s size. On shorter nails, use a smaller star and one shorter trail. Ask for painted or flat details if you want the surface to stay free of raised charms.
22. Lilac Chrome With White Stars
A pearly lilac chrome base brings a soft reflection, while small white stars supply a crisp shape over it. Put the stars on the middle and ring nails and leave the remaining nails glazed. The medium coffin outline in the reference adds a straighter edge than an almond set.

Ask your artist to show the white detail against the actual lilac finish. If the base is so pale that the stars disappear, choose a slightly deeper lilac rather than automatically making the stars larger. Keep the artwork flat; raised white decorations would create a different texture.
23. Gold Firework Lines on Black
Fine gold lines spreading from a small point near the base suggest a firework without covering the nail in glitter. Add a few little dots around the burst and limit the artwork to the middle and ring nails. Glossy black leaves the thin gold lines easy to see.

This is a useful salon reference if you like detailed brushwork. Ask for a small fan of separate strokes with dark space between them, rather than a solid gold patch. On short squovals, a burst opening upward from the base gives the lines room without needing to fill the whole nail.
24. One Disco-Tile Accent Nail
A single silver mosaic nail brings the disco-ball idea into a simple blush manicure. Arrange small square silver nail-art tiles in a tidy grid on the ring nail, leaving fine seams between them. The other nails stay pink so the tiled surface gets the attention.

Ask your artist about flat materials and the finished surface before choosing this detail. The tiles should fit within the nail edges without sticking out. If the squares available are too large for your short nail, use smaller nail-art decals or a painted metallic grid instead of forcing an oversized tile arrangement.
25. Silver Chrome Tips With Gold Stars
This combination brings the title’s metallic finish and star art into one restrained set. Use sheer blush as the base, slim silver-chrome French tips across the nails, and a tiny gold four-point star on the middle and ring fingers. Keep the stars above the tip rather than touching it.

The balance depends on scale: narrow silver bands, small gold stars, and visible blush between them. Tell your artist which two nails should carry the stars before work begins. If you want to simplify it for short nails, keep the silver tips and place a gold star on only one ring nail.
Turn Your Saved Image Into a Clear Salon Request
Bring one main reference and identify the parts you want to keep: the base color, finish, shape, and placement. “Short ovals, cherry-red mirror chrome, no additional art” is more useful than “red party nails.” If you like the artwork but want a shorter shape, say that before the appointment starts.
For chrome, ask the artist to show a finished swatch in the intended color. The base and the chrome product work together, and a powder described as silver or pearl does not guarantee the same appearance over every base. Application steps, compatible finishing products, and curing instructions belong to the specific system being used; do not borrow a curing time from an unrelated tutorial.
For glitter or flat decals at home, follow your polish and embellishment directions and let the base reach the recommended stage before adding details. A flat sticker, a fine glitter fade, and a precise chrome border involve different amounts of placement work. Pick the technique you are comfortable doing, or bring the design to a professional.
A Few Care Details Before the Party
If you choose a gel service, the American Academy of Dermatology recommends broad-spectrum, water-resistant SPF 30 or higher on the hands before the manicure, or dark opaque gloves with the fingertips removed. Its gel-manicure care guidance also advises against picking off gel and cutting or pushing the cuticles. Ask how your chosen service will be removed when you book it.
Give regular polish the drying time its formula requires, and plan painting around getting dressed and handling bags. If you intend to remove the design soon after the celebration, discuss that when choosing the service rather than assuming every shiny finish has the same removal process.
Questions About New Year’s Nails
Which design is easiest to try at home?
A single flat gold star over regular red polish in idea 17 avoids repeated linework. The silver glitter fade in idea 9 is another option if you prefer using a polish brush. A micro French, outlined star, or fine constellation takes more control, even though the finished design looks minimal.
Can I get a similar look without gel?
Yes. Regular polish, metallic polish, nail glitter polish, and compatible flat nail-art stickers can create many of the color and placement ideas here. A metallic polish may look shimmery or brushed rather than giving the exact mirror reflection in the chrome concepts. Choose the effect you actually like and follow that product’s directions.
Do these ideas need extensions?
No. The short silver ovals, gold micro French, burgundy glitter tips, and single-star red set all show ways to use a small nail surface. For an extra-short version, reduce the number of details and leave base color around the artwork. You can borrow a long set’s palette without copying its length.
How do I choose between gold and silver?
Compare the finish beside your outfit and any jewelry you plan to wear. Gold with warm beige or burgundy gives a different mood from silver with navy or icy blue. If you enjoy both metals, idea 8 alternates them and idea 25 uses a small gold star above a silver tip. Your preference is more useful than a rigid undertone rule.
What should I simplify if the reference looks too busy?
Keep one feature: the reflective finish, the decorated tip, or the star. For example, make idea 25 a silver French without stars, or keep one gold star and leave every other nail sheer. Removing a detail is usually clearer than shrinking several decorations until you can barely see them.