A dinosaur announcing “You’re dino-mite!” is a good place to start. So is a smiling taco with a compliment tucked above its shell. These funny Valentine cards for kids pair a silly line with a character you can draw, color, or build from a few paper shapes.
For a whole-class batch, choose the pickle, cat, or whale: each works as a simple drawing. For a craft afternoon, try the layered bee, frog, or robot. All 15 messages below work without adding candy or a gift.
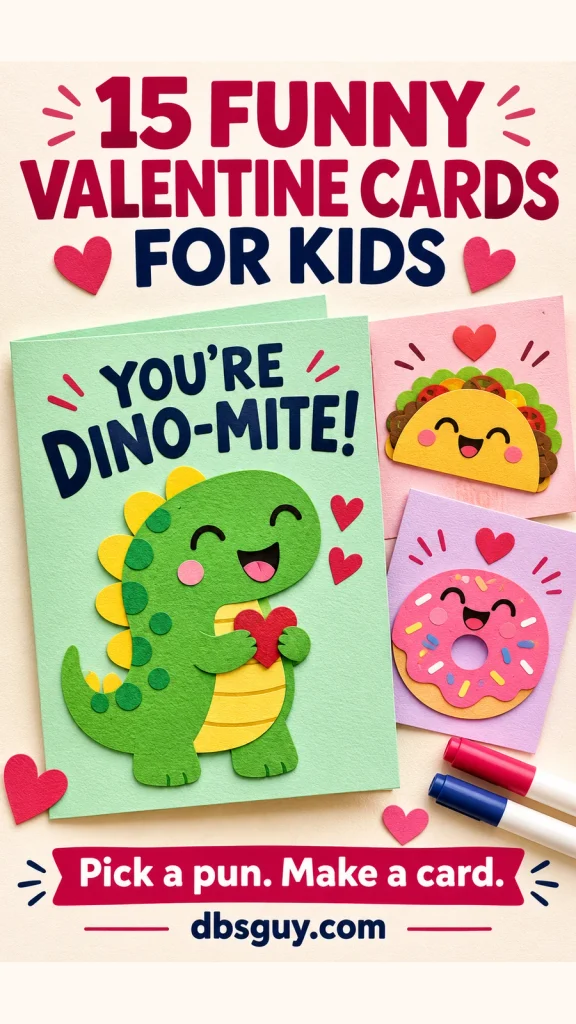
The images are AI-generated card-design concepts to help you picture each idea. Use the messages and making instructions below to create your own cards.
Start with a card your child can finish
You’ll need cardstock or construction paper, a dark marker, coloring supplies, a glue stick, and scissors suited to your child’s skills. An adult can cut the smaller shapes ahead of time.
For a roomy, flat card, divide an 8½-by-11-inch sheet into four equal rectangles, each 4¼ by 5½ inches. That gives the character, joke, and signature their own space. Write the message lightly in pencil before coloring so the last word doesn’t get squeezed into a corner.
Check the teacher’s exchange instructions before making classroom valentines, including how many to bring and whether to add recipients’ names. Leave a “From” line at the bottom; add “To” only if requested. The ideas here are drawing and craft inspiration. If you need a ready-made printable instead, PBS KIDS has downloadable character Valentine cards.
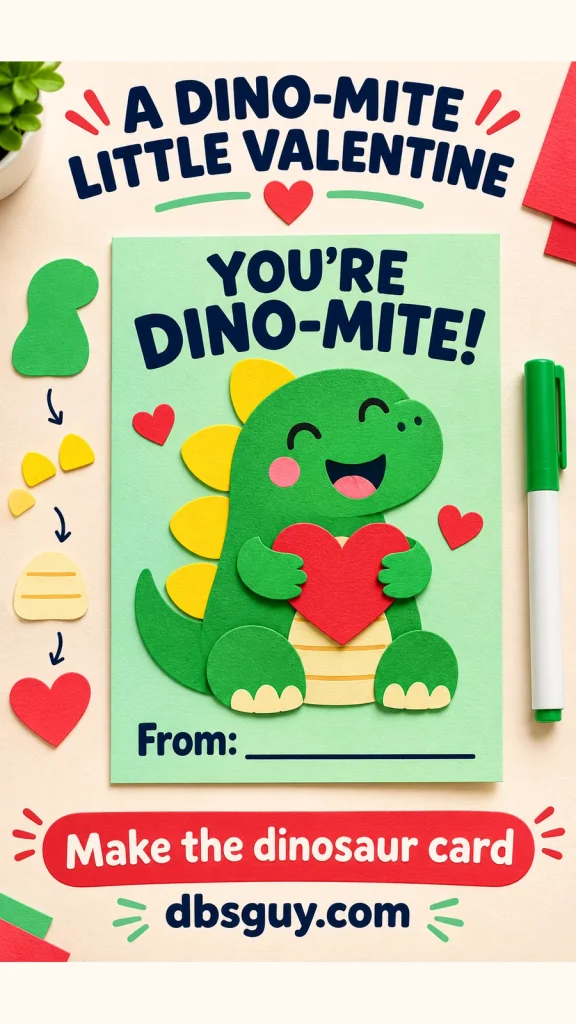
1. A dinosaur with a dino-mite compliment
Write on the card: “You’re dino-mite!”
Give a green dinosaur a big, round head, a curved body, and a row of yellow back plates. Two short arms can overlap a red paper heart. Keep the face friendly, with a smile rather than a mouthful of pointed teeth.
For a batch, trace one dinosaur outline onto several cards and let your child color each one. If you’re building the paper version, glue the back plates behind the body first, then add the belly, heart, and arms. Put the short message across the top where it’s easy to read.
2. A taco with something nice to say
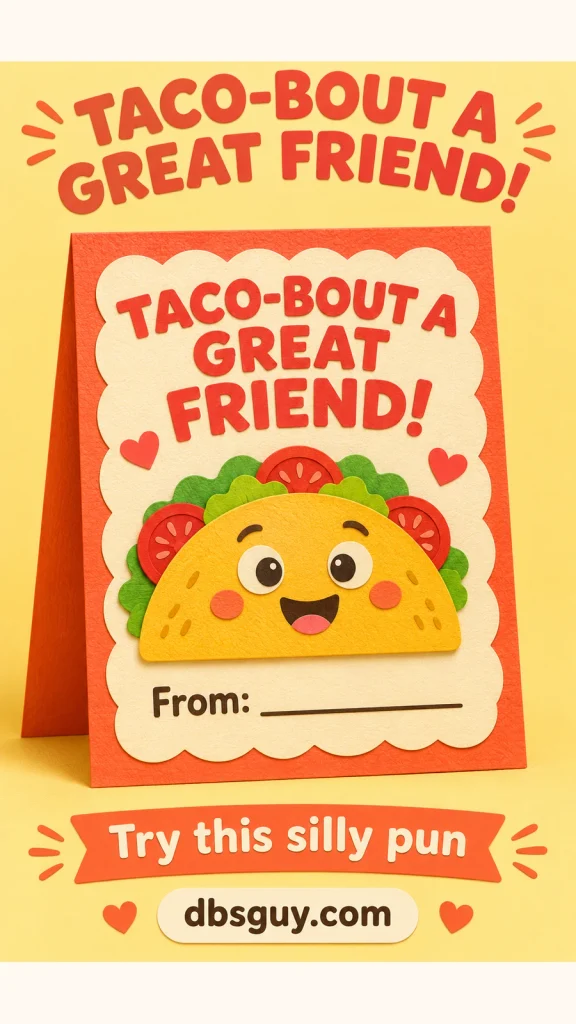
Write on the card: “Taco-bout a great friend!”
A yellow half circle makes the shell. Tuck a wavy strip of green paper and a few red circles behind its straight edge, then draw eyes and a grin on the front. The fillings can be uneven; that’s part of this little character’s charm.
Keep the taco in the lower half of the card so there’s room for the longer joke above it. This food-themed Valentine works entirely on paper, so there’s no need to find a matching snack. A cream panel on an orange card helps dark lettering stand out.
3. A bee that believes in its buddy
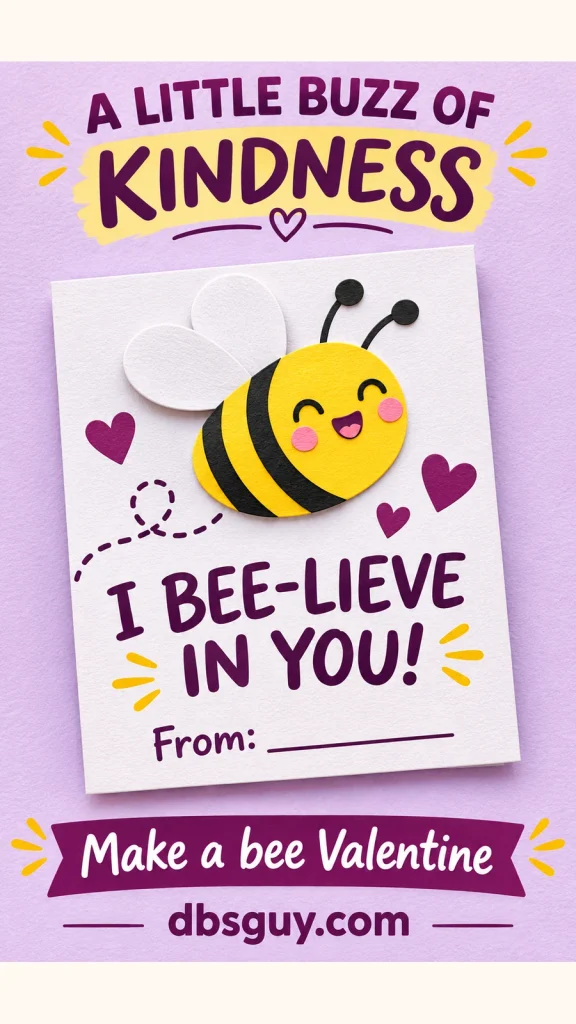
Write on the card: “I bee-lieve in you!”
This bee carries encouragement instead of a romantic message. Make its body from a yellow oval, add black stripes, and glue two white paper wings behind the top edge. Draw the face and antennae with a marker.
A dotted flight path gives the small character somewhere to go without adding more pieces to cut. Place the bee above the wording, with the dots curving around the side. If you’re making several, color the stripes directly onto the yellow paper rather than cutting individual black strips.
4. A donut with a sweet reminder
Write on the card: “Donut forget you’re awesome!”
Draw a big ring, then add a wavy icing edge and colorful sprinkles. A small smile just above the hole turns the donut into a character. Pink icing on a lavender card gives the drawing plenty of color without needing extra decorations.
For a paper version, make a tan ring and a slightly smaller pink icing layer. An adult can help cut the center holes; a younger child can simply color the center to match the background. Draw the sprinkles if gluing tiny paper pieces would slow down a class set.

5. A kitten for a purr-fect pal
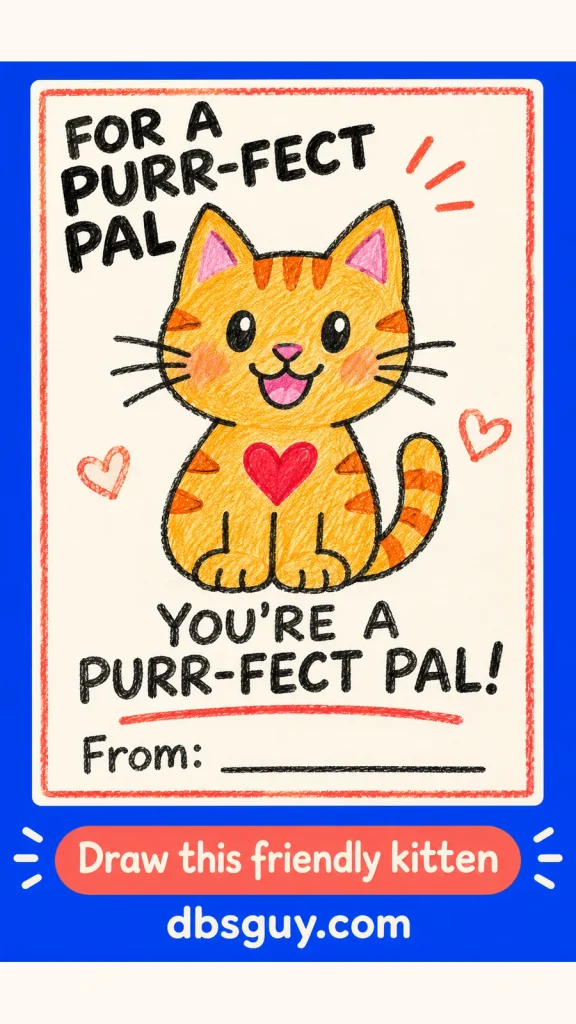
Write on the card: “You’re a purr-fect pal!”
Two triangle ears, a round head, and an oval body are enough to get this kitten started. Add whiskers, a curled tail, and a little red heart on its chest. Orange stripes are optional, so your child can make a gray, black, or rainbow cat instead.
This is a useful pick when you want to skip cutting and gluing. Draw the outline on a plain card and let your child handle the coloring. Leave the whiskers inside the card’s edges, and put the message below the paws so the face stays clear.
6. An owl cheering from its branch
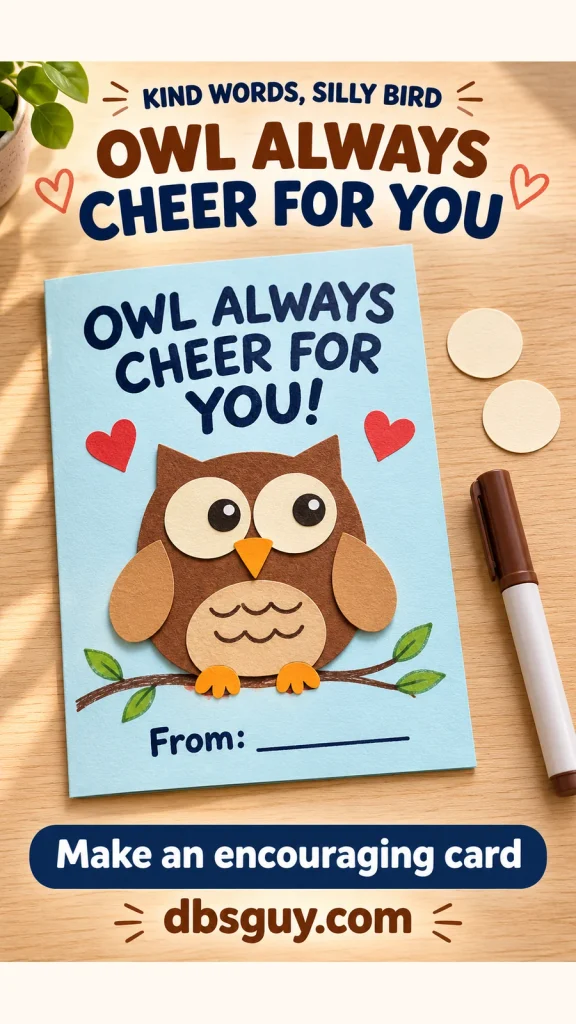
Write on the card: “Owl always cheer for you!”
The owl stands in for “I’ll” in this encouraging little joke. Give it two oversized cream eye circles, a tiny orange beak, and rounded wings. A brown body against light blue paper keeps the eyes and lettering easy to see.
Draw a branch across the lower part of the card and place the owl above it. To simplify the layered version, draw the belly feathers and feet rather than cutting them out. This message also leaves room on the back for a specific kindness, such as “Thanks for helping me find my pencil.”
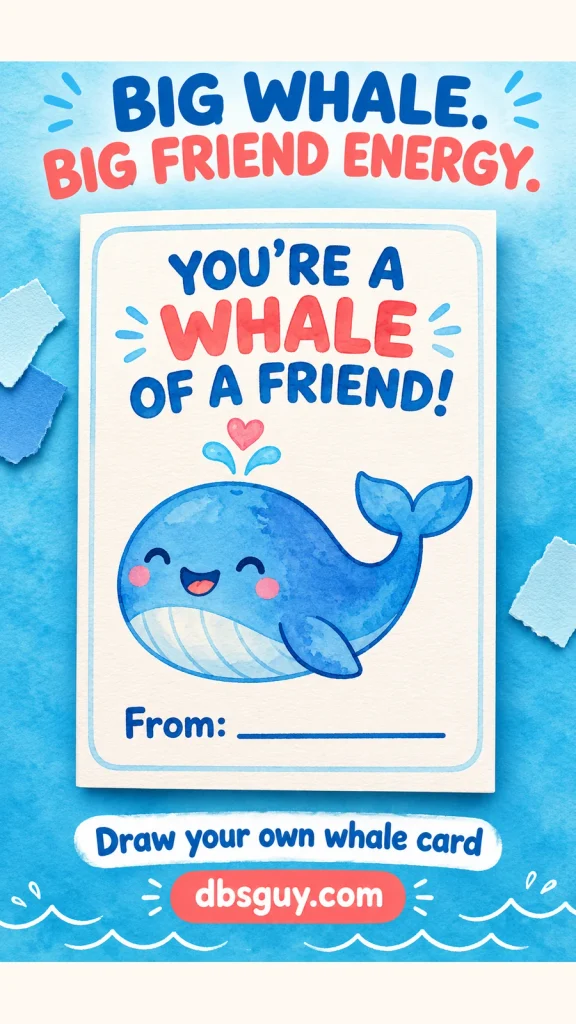
7. A whale of a friend
Write on the card: “You’re a whale of a friend!”
Start with a wide blue oval, curve one end upward into a tail, and add a side fin. A white belly and pink cheeks make the whale readable even with a very simple outline. Place a tiny heart above its head as part of the splash.
Use crayons or washable markers for a version that doesn’t need drying time. Keep the surrounding water to a few blue lines near the bottom; a full ocean scene can crowd out the message. The large body is also a forgiving shape for a child who likes coloring broad spaces.
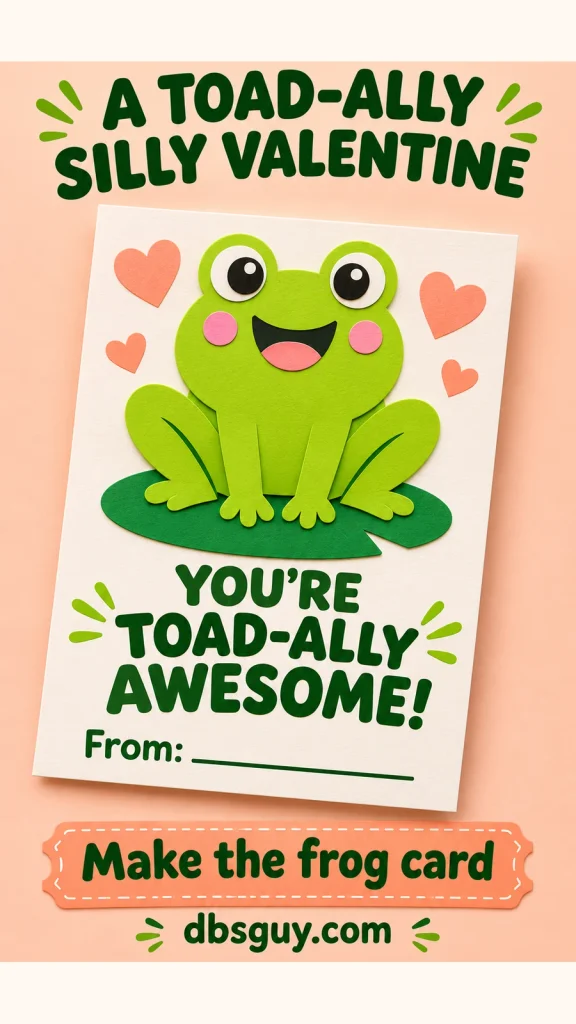
8. A frog with a toad-ally silly message
Write on the card: “You’re toad-ally awesome!”
Make a cheerful green frog sitting on a lily pad. Two raised eye circles and broad bent back legs give it its shape. Draw the pupils and smile, or use flat paper circles for the eyes.
In the cut-paper version, glue the lily pad down first, followed by the body, legs, and eyes. Keep all the pieces within the card’s border so they won’t catch when the cards are stacked. Peach hearts give the green character a Valentine detail, but one heart is enough if you’re making a lot of them.
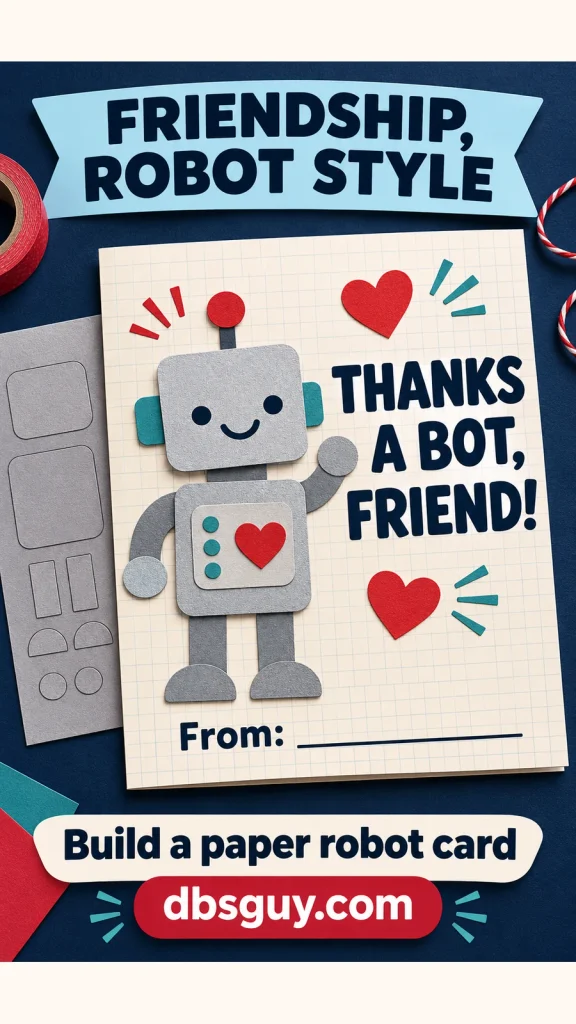
9. A robot saying thanks a bot
Write on the card: “Thanks a bot, friend!”
Squares and rectangles do most of the work here. Give the robot a square head, a smaller rectangular body, and short arms and legs. Put a red heart on its chest as a pretend control button.
Arrange the shapes before gluing, leaving a clear area beside the robot for the message. Plain gray paper works; you don’t need metallic materials to get the idea across. This is a good choice for a child who enjoys building characters from shapes. On the back, they can add one thing they appreciate about the recipient.
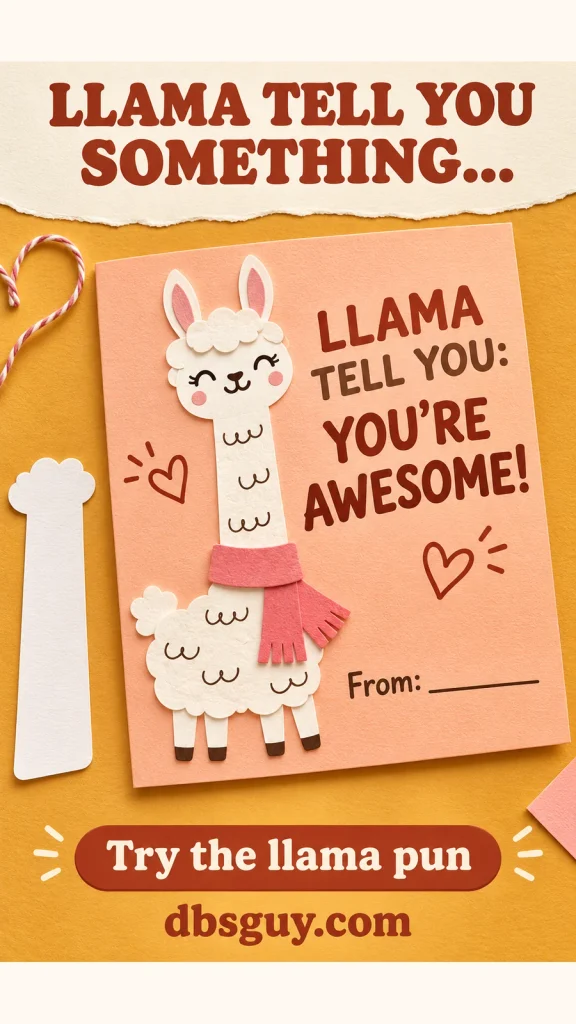
10. A llama making an announcement
Write on the card: “Llama tell you: you’re awesome!”
Say the line aloud so your child can hear the “let me tell you” joke. Give the llama an extra-long neck, two tall ears, and a small fluffy body. A pink scarf adds color without covering its face.
The long neck makes a narrow character, leaving space for the message down one side of the card. For a simpler drawing, use one continuous outline and add a few curly marks for wool. In a paper version, draw the curls on white paper rather than cutting a complicated scalloped edge.
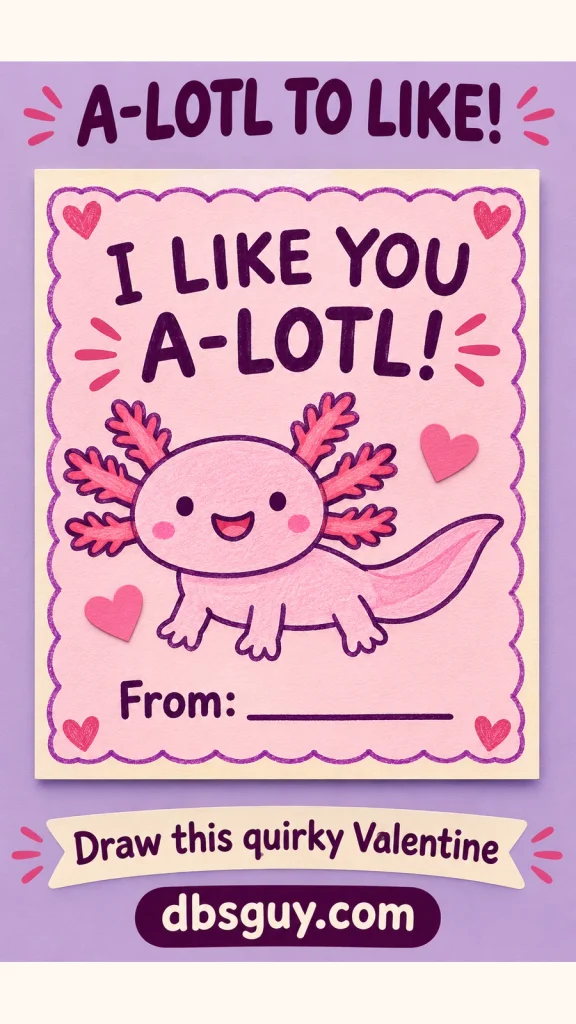
11. An axolotl you like a-lotl
Write on the card: “I like you a-lotl!”
Choose this one if your child already recognizes the pink, frilly-faced character. Draw a wide oval head, a small body, four short legs, and a tapering tail. Add three branching gills on each side of the head to give the axolotl its recognizable silhouette.
The “a-lotl” ending plays on “a lot.” Let your child read the message aloud before committing to a whole batch. Keep the body pale pink and outline the gills in a darker shade so they remain visible. A simple crayon drawing avoids lots of delicate paper cutting.
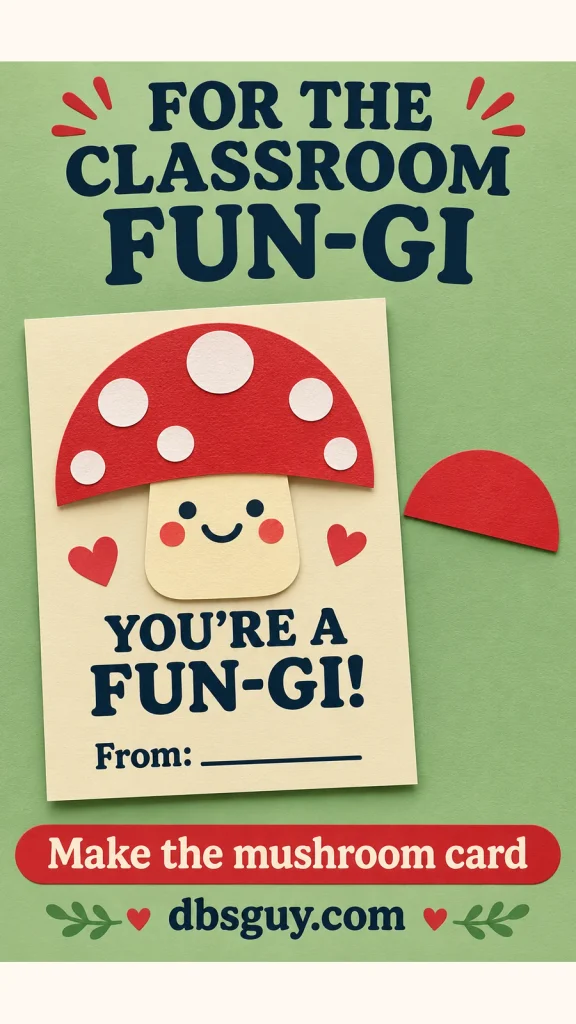
12. A mushroom for a fun-gi
Write on the card: “You’re a fun-gi!”
Read “fun-gi” as “fun guy” for the joke. A wide red cap over a short cream stalk makes a mushroom character from just two main shapes. Add white spots to the cap and a smile to the stalk.
Put the face below the cap so the expression doesn’t disappear among the spots. The flat design is easy to repeat: trace the same semicircle for every cap, then let your child choose where the white circles go. If the wordplay needs too much explaining for your group, pick the dinosaur or cat instead.
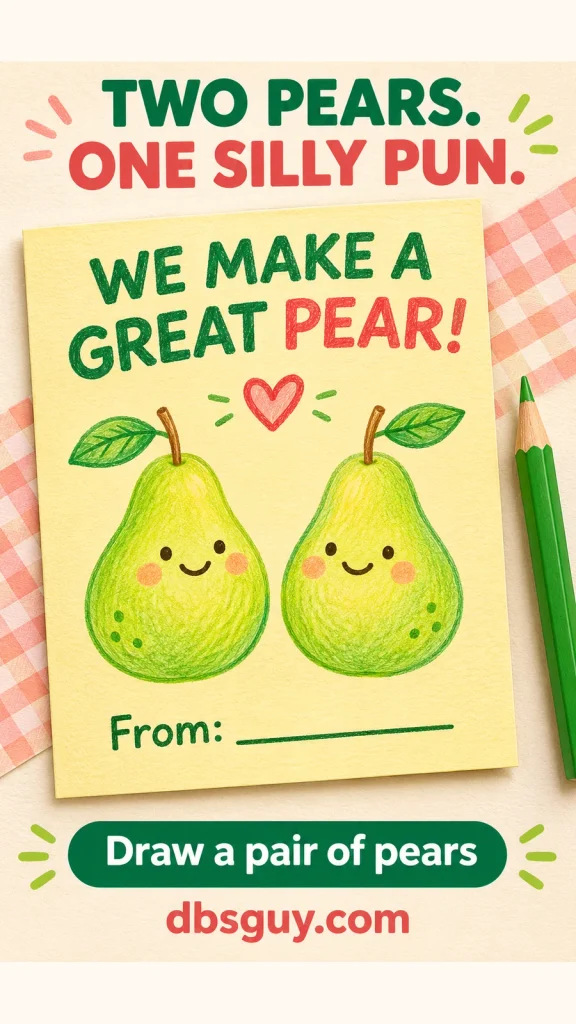
13. Two pears that make a great pair
Write on the card: “We make a great pear!”
Draw two green pears side by side, each with a narrow top, round base, and little stem. Add a face to both so the joke has two characters to point to. They can have different expressions or slightly different shades of green.
This is an easy wordplay card to explain: there’s a pair of pears right on the front. Leave a small gap between the fruit so the two silhouettes stay distinct. Put the message above them and the signature below. It suits a friend your child likes working or playing with.
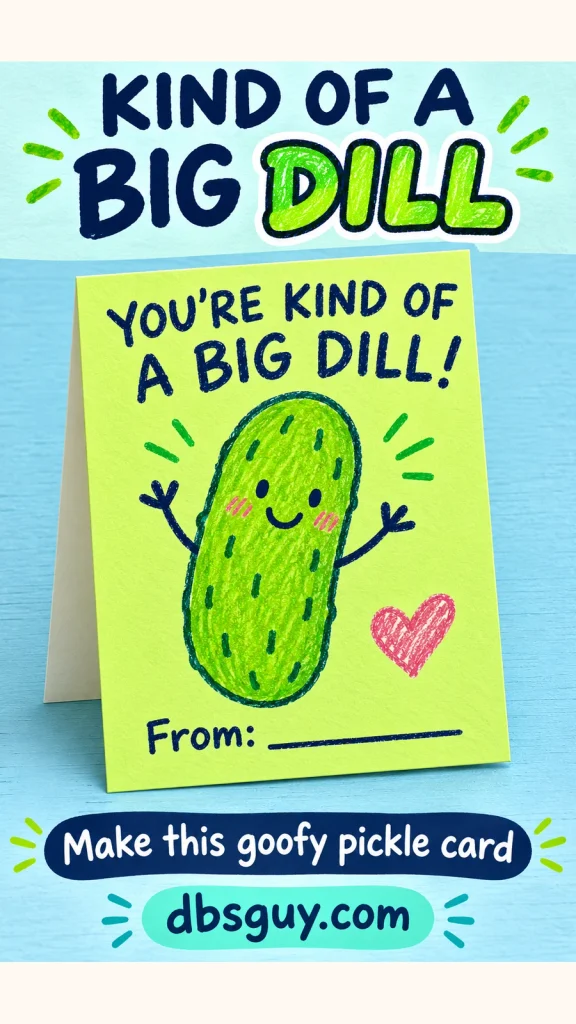
14. A pickle who’s kind of a big dill
Write on the card: “You’re kind of a big dill!”
A tall, wobbly green oval becomes a pickle with a few dark dash marks, two dot eyes, and a grin. Stick arms give it a wave. This is one of the simplest designs to draw repeatedly because the outline doesn’t need to be even.
Explain that “dill” is taking the place of “deal” in the compliment. Use a dark blue or black marker for the words, especially on bright green paper. Let your child add a silly eyebrow or a differently tilted smile to each pickle without changing the basic card.
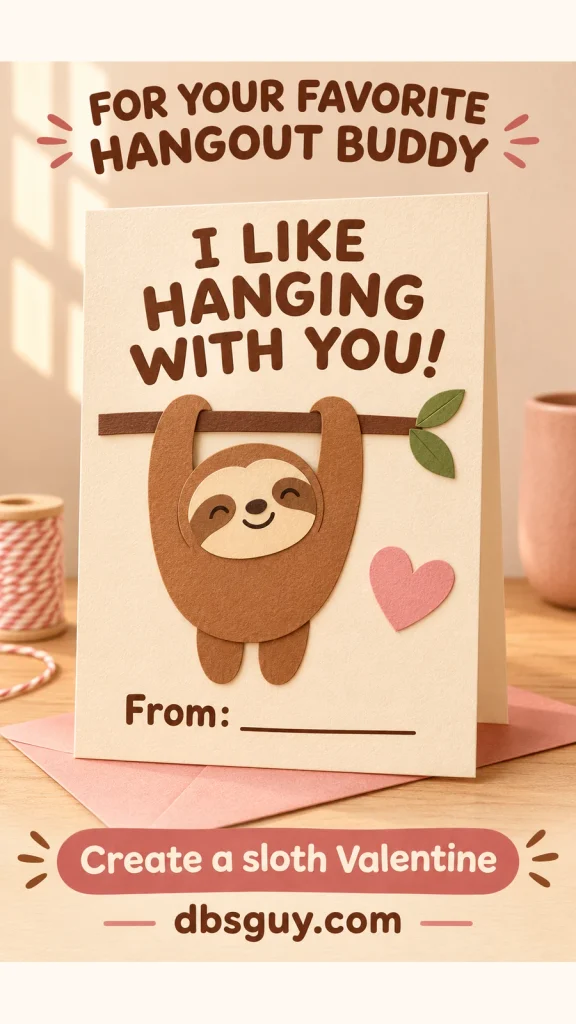
15. A sloth who likes hanging out
Write on the card: “I like hanging with you!”
Place a brown sloth beneath a horizontal branch, with two long arms reaching over it. A cream oval face and two darker eye patches make the expression clear. Keep the branch short enough to sit completely inside the card.
For the paper version, glue the branch first, then the body and curved arms. For a drawing, sketch the branch and hanging pose before adding the face. The message connects directly to the picture, so it works even when a child hasn’t learned the word “pun.” Add one pink heart beside the sloth.
Make a classroom batch without starting over 24 times
Choose one design your child actually wants to repeat. Make a sample, then check that the message and signature both fit before cutting the rest of the cards. A set of 24 flat, quarter-sheet cards takes six letter-size sheets; keep an extra sheet handy for a fresh start.
Work in stages: cut the blanks, add all the messages, draw or attach the characters, then sign. Let glued cards dry before stacking them. If writing every pun is too much, an adult can handle the wording while the child colors and signs.
For individual cards for grandparents, siblings, or teachers, add a sentence on the back that names something kind they do. You’ll find more ways to build a card around a personal detail in 21 Valentine Card Ideas That Make a Simple Message Feel Personal.
Questions about funny Valentine cards for kids
Which cards are easiest for younger children to make?
The pickle, cat, and whale can all be drawn with a few broad shapes. An adult can write the message first, leaving the character area for coloring. For a cut-and-glue activity, prepare the large pieces ahead of time and let the child arrange them.
What if a child doesn’t understand the pun?
Read it aloud and point to the picture. Explain the one swapped word, such as “pear” for “pair.” If the joke still feels confusing, choose another character together. The card should be something the child enjoys giving.
Do Valentine cards need candy attached?
No. The character, message, and child’s signature make a complete card. If you want to add something, check the teacher’s classroom instructions first rather than assuming treats or small gifts are allowed.
Should classroom valentines say “love”?
A friendly compliment is enough. Messages about being a great pal, cheering someone on, or enjoying their company let your child join the exchange without writing a romantic note.