21 Valentine Classroom Ideas for Festive Corners and Hands-On Activities

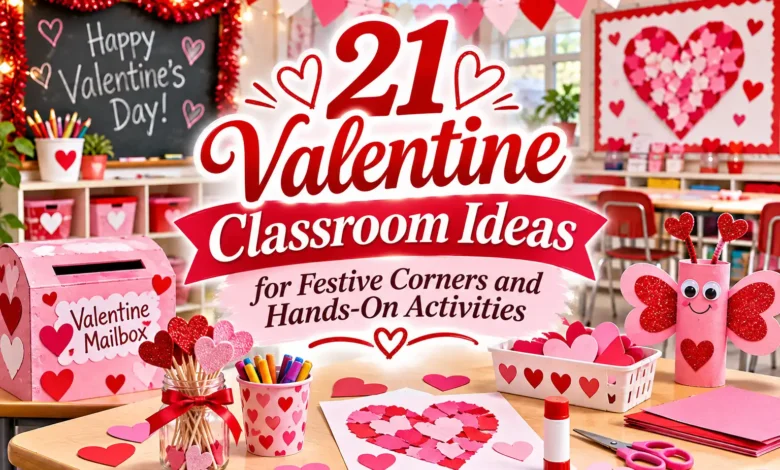
Start with one inviting corner and a few activities students can actually use. A book basket with heart-shaped recommendations, a class mail station, and a paper-building challenge can make February feel festive without covering every wall.
These 21 Valentine classroom ideas combine decorations with reading, writing, art, math, and teamwork. They are aimed mainly at kindergarten through third grade; choose the tasks that fit your students’ current skills. For the quickest plan, pair the reading corner in idea 1 with the postcards in idea 10 and the counting mats in idea 14.
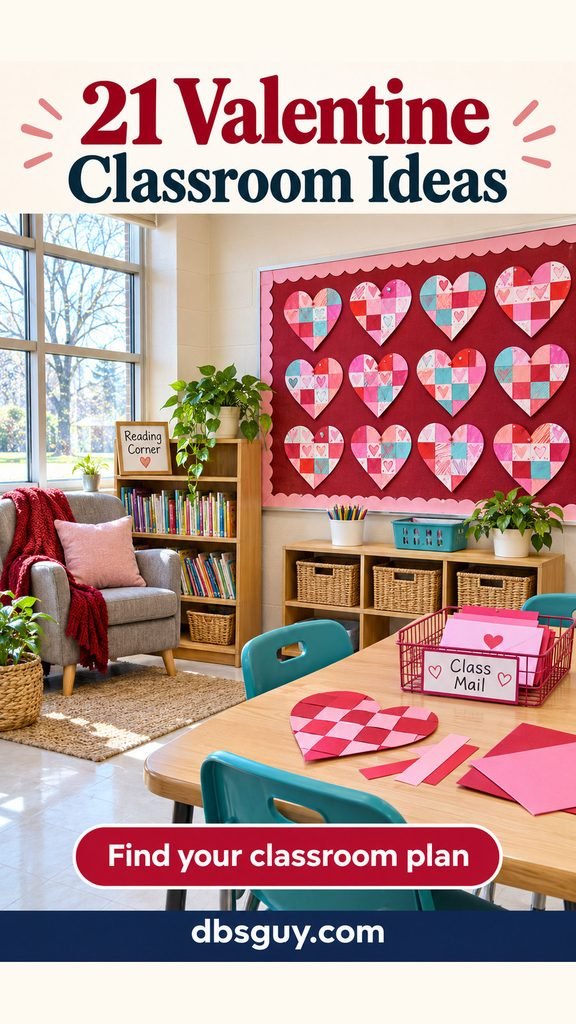
The images are AI-generated classroom concepts, not photographs of projects tested in a real classroom.
Set up a celebration everyone can join
Check your school’s celebration and display rules before choosing a day or attaching decorations. Keep doors, exit routes, windows needed for visibility, and teaching displays clear. Use existing tables and approved bulletin-board space rather than hanging items from ceilings or fixtures.
Make friendship, helpful actions, and belonging the focus. Supply the materials at school, offer drawing or dictation alongside writing, and let students choose a neutral book or art task if they do not participate in the holiday. If you hold a card exchange, plan one card for every classmate and provide extras so participation never depends on a purchase from home.
For crafts, choose age-appropriate supplies intended for children, read their labels, and supervise their use. Keep food and drinks away from the art area and have students wash their hands afterward. The CPSC’s Art and Craft Safety Guide explains material selection and classroom precautions. The activities below use paper rather than edible counters; follow each child’s existing support and allergy plans when choosing supplies.
Festive corners that have a job to do
1. Add a book-recommendation pocket to the reading corner
Pull a small selection of books about friendship, helping, or people caring for one another from your existing library. Face a few covers outward and put a paper pocket on the side of the bookcase. Students can drop in a heart-shaped note naming a book and explaining who might enjoy it.
Model a useful recommendation: “Try this one if you like animal stories.” Beginning writers can draw a favorite scene and dictate the title. Keep the usual seating arrangement and add only the pocket and a small sign, so the corner still works for everyday reading.

2. Turn a table into a class post office
Arrange equal-sized paper mail bags in shallow trays, one for each student, with names or familiar classroom symbols facing forward. Leave a clear writing space beside them with scrap paper, pencils, and a class name list. Open any folded bag tops before delivery begins.
Give mail carriers a small batch to sort while other students write. Review messages before distribution and check that everyone receives mail. For a class that is still learning names, add the same symbol to the recipient’s bag and the delivery list. The station can stay open for friendly notes after the celebration.

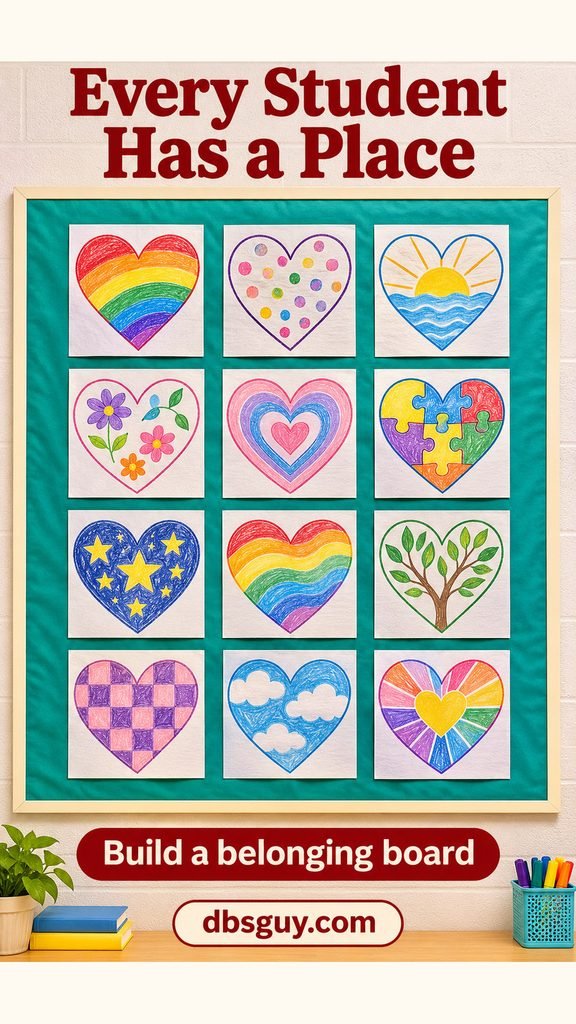
3. Build a patchwork belonging board
Give every student the same-sized square of paper—6-inch squares are a workable starting point—and invite them to fill a heart outline with patterns, favorite colors, or something they enjoy. Arrange the squares in a grid with equal gaps.
The shared shape brings the display together while each square keeps its own character. Include every student’s contribution without sorting by neatness. Offer a blank square without a heart for anyone who prefers it, and reserve a space for absent classmates to add their work later.
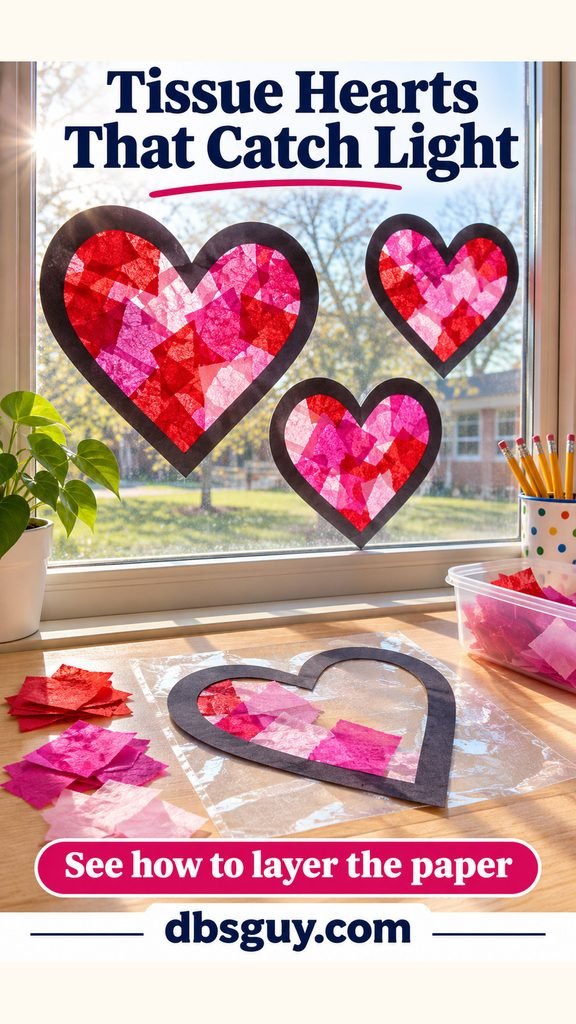
4. Put tissue-paper hearts on an approved window pane
Prepare a cardstock heart frame and a slightly larger piece of clear self-adhesive film for each student. Lay the film sticky side up, press the frame onto it, and fill the opening with torn tissue paper. Overlapping pieces create darker patches when light comes through.
Cover the sticky side with a second sheet of film, smooth it, and trim around the outside of the frame. Adults can prepare the frames and film for younger students. Attach the finished pieces flat to a school-approved pane with approved removable tape, leaving handles and required sightlines clear.
5. Make a kindness choice board
Post three large action cards: “Help,” “Invite,” and “Listen.” Add a simple drawing under each one, such as helping gather dropped supplies or inviting someone to join a game. Place blank paper hearts below the board.
During a class discussion, ask students to suggest a specific action for one category. Write “Ask if someone wants help carrying books” rather than “Be nice.” Add examples without naming or scoring children. This keeps the display focused on choices students can practice rather than a public competition for recognition.

6. Offer a quiet drawing corner
Set out paper with open heart outlines, plain paper, and a cup of crayons at an ordinary desk in your line of sight. Students can fill a shape with slow lines, draw something they care about, or simply sketch.
Introduce it as an available activity, not a reward or a punishment. Follow the classroom’s usual break and supervision routines, and keep a plain-paper option within reach. A small, uncluttered drawing area gives children a way to take part without joining the busiest table.

Also Read: 25 Valentine Decor Ideas From Heart Garlands to Flower-Filled Tables for more paper-based styling inspiration to adapt within your school’s display rules.
Hands-on art, reading, and writing activities
7. Weave strips through a flat paper heart
Use a large paper heart with several parallel slits, leaving a generous uncut border around the outside. Adults should prepare the slits if students cannot make them safely. Cut contrasting strips slightly narrower than the gaps between the slits.
Feed one strip over and under the paper bands, then reverse the sequence on the next strip. Slide the strips gently together and glue only their ends once the weaving is settled. Broad bands are easier to handle than narrow ones. If a heart tears, tape the back and continue; the repair does not have to disappear.

8. Reveal a folded symmetry painting
Fold a sheet of sturdy paper in half and open it again. Put a few small dabs of washable children’s paint on one side near the crease. Close the sheet, press lightly, then reopen it to see the print on the opposite side.
Ask students to find matching colors and shapes on either side of the fold. A heart can be the starting idea, but an abstract result is fine. Too much paint makes a puddle rather than a clear print, so begin with a small amount. Let paintings dry flat before adding them to a display.

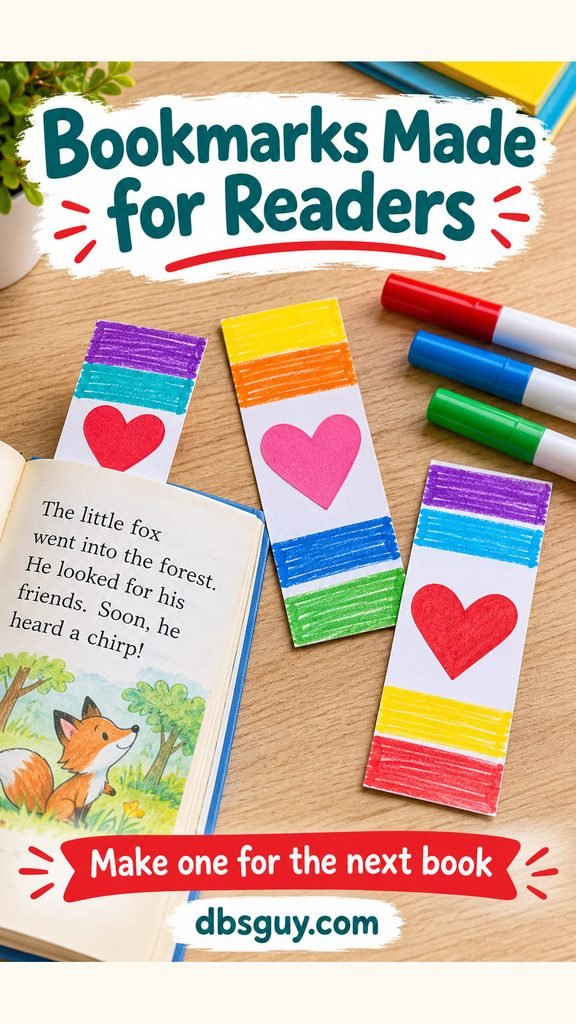
9. Design bookmarks for the next reader
Cut cardstock into strips about 2 by 7 inches. Students can add flat paper hearts, marker stripes, or a tiny drawing inspired by a book they recommend. Keep glued pieces within the bookmark’s edges so they do not catch on pages.
On the back, invite a short message such as “There’s another good part ahead.” Leave out beads and bulky tassels. Each child can keep a bookmark or place one in a shared basket; making a gift should remain a choice rather than an assignment to pick a favorite classmate.
10. Write thank-you postcards to school helpers
Make postcards from half sheets of cardstock. On one side, students draw a school helper’s work: shelving books, preparing lunch, fixing a classroom problem, or helping at the office. On the other, they complete “Thank you for ___ because ___.”
Encourage an observed detail: “Thank you for finding my library book because I wanted to finish the story.” Students may dictate or label a picture instead. Arrange a suitable delivery time with staff, and use school roles or names without home addresses. For more ways to pair a drawing with a message, browse these Valentine card ideas.

11. Draw a three-panel friendship comic
Divide a sheet into three boxes. Give students a small fictional classroom problem: someone drops a box of crayons, a game needs another player, or two characters want the same marker. The panels show the problem, a helpful response, and what happens next.
Stick figures and a few labels are enough. Ask, “Does the middle panel show something the character actually does?” That question moves the story beyond a vague happy ending. Use imaginary characters rather than asking children to illustrate a real classmate’s difficult moment.

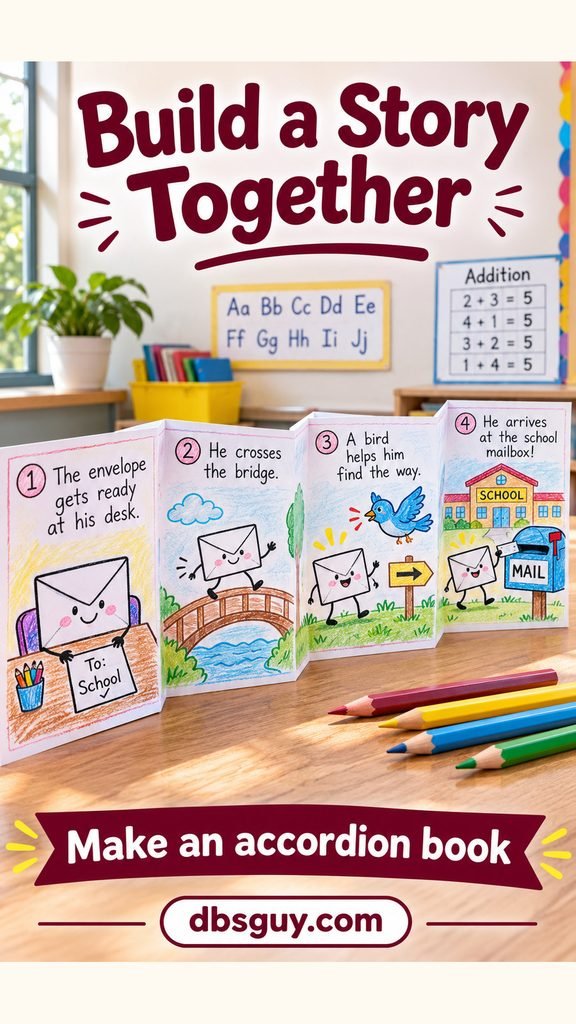
12. Make an accordion story in a small group
Fold a long strip of paper into four connected panels. Give a group a shared character, such as a paper envelope trying to reach a classroom mailbox. Agree on the beginning before anyone starts drawing.
Use the panels for a beginning, a problem, some help, and an ending. Each child adds a panel, checking the previous one so the character and story still connect. With larger groups, pair an illustrator with a writer. Open the finished book along a shelf for reading, then fold it for storage.
13. Fill a heart with torn-paper color
Draw a large heart outline on sturdy paper and offer scraps in a few contrasting colors. Students tear the scraps into pieces, arrange them inside the outline, and glue them down. Small gaps can stay visible; the picture does not need to look like a perfectly fitted tile floor.
For children who find tearing difficult, offer larger precut shapes and a glue stick with an easy grip. Older students can plan a light-to-dark band or repeated color area before gluing. Keep a scrap tray in the center of the table so the smallest pieces do not spread across the room.

Also Read: 21 Valentine Card Ideas That Make a Simple Message Feel Personal.
Math, building, and cooperative learning centers
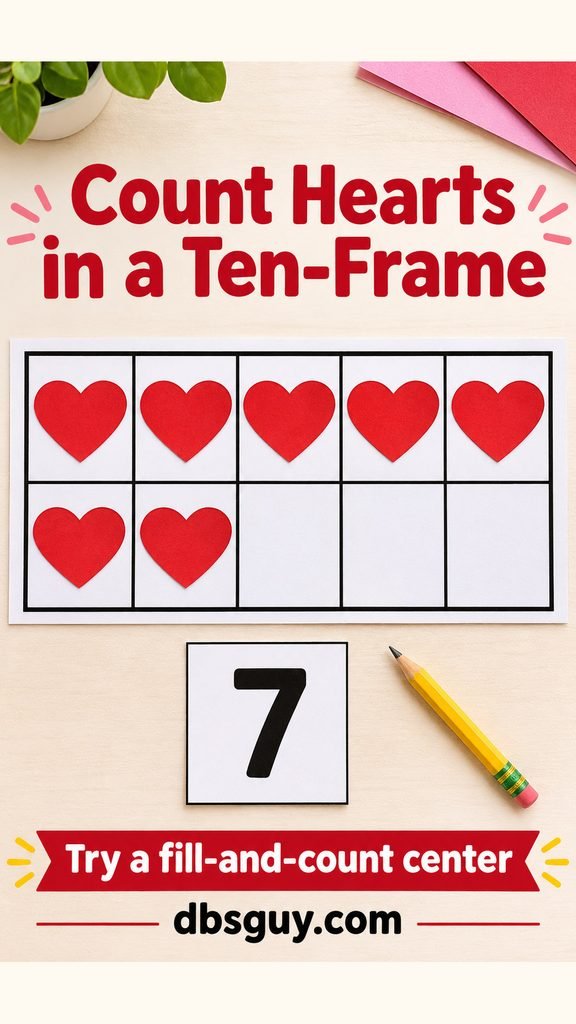
14. Count paper hearts in a ten-frame
Draw a rectangle with two rows of five spaces and provide ten large paper hearts per mat. A student chooses a number from 0 to 10, places one heart in each space from left to right across the top row first, and tells a partner how many spaces are filled.
For seven, the first row is full and the second row has two hearts. Ask, “How many more would fill the frame?” A five-space strip suits students working with smaller quantities; two ten-frames extend the task to numbers through 20. Keep numeral cards separate so children can reuse the mats.
15. Build a class color graph
Label three columns red, pink, and purple. Give each student one equal-sized paper heart in their chosen color. Add each vote to the matching column, starting on the same baseline and placing one heart in each row space.
Count the columns together and compare them: Which has more? How many more? Include written color names so color is not the only cue. If space is tight, graph one group’s votes at a time. Discuss the results as preferences, without describing one color or its voters as the winners.

16. Continue a repeating heart pattern
Put large red and pink paper hearts on long paper strips. Begin with an AB pattern—red, pink, red, pink—then offer AAB: red, red, pink, red, red, pink. Leave room at the end for students to continue.
Before gluing, have a partner point to the smallest part that repeats. A sequence that merely alternates for a few pieces may be a lucky guess; identifying the repeating unit makes the thinking visible. Use different drawn symbols on the hearts as well as colors, or let students create a pattern for someone else to finish.

17. Match broken-heart number pairs
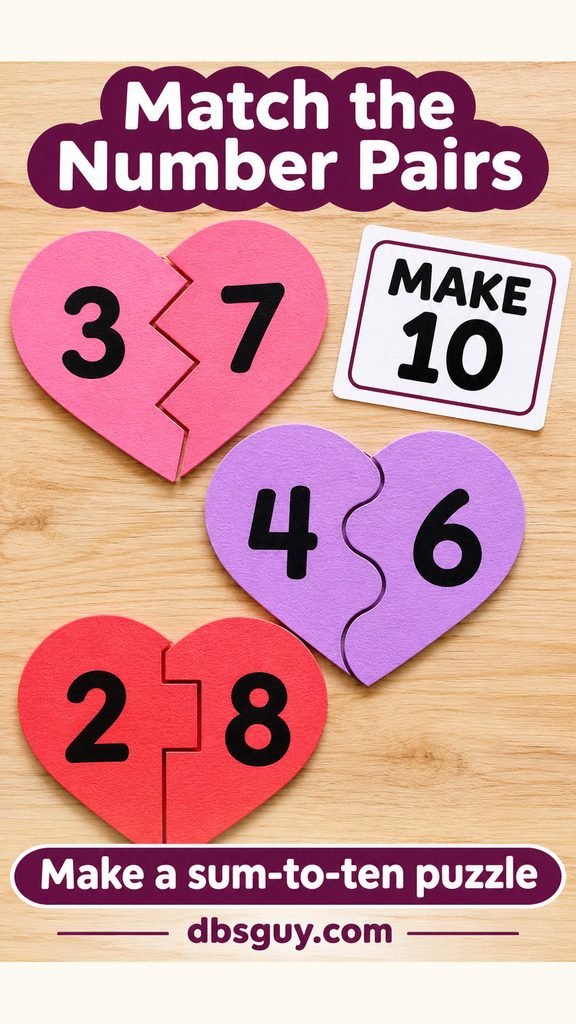
Write two numbers that total 10 on opposite sides of a large cardstock heart, then cut it apart with a distinctive zigzag. Make several pairs, such as 3 and 7, 4 and 6, and 2 and 8. Mix the halves and ask students to find the partners.
Have them explain or check the sum with a ten-frame before using the cut edge to confirm the match. Use a target of 5 for an easier version. Once students understand the task, put the same pairs on ordinary rectangular cards so they rely on the numbers rather than the puzzle shape.
18. Build a paper bridge for classroom blocks
Place two stable supports about 6 inches apart and give each pair one sheet of paper. Their task is to span the gap and hold a few identical classroom blocks. Begin with flat paper, then let students try folds, including an accordion shape.
Keep the support gap and test blocks the same when comparing designs. Add blocks one at a time and record the number held before the paper bends or slips. The photograph concept shows one possible design, not a promised result. Keep the test low on a clear table and choose blocks appropriate for your class.

19. Compare two surfaces on a heart-slide ramp
Make two low, equal-height cardboard ramps, one covered with smooth cardstock and the other with felt. Use matching stiff cardstock hearts as sliders. Place each heart flat at a marked starting line and release it without a push.
Ask students to predict whether each heart will move, then repeat the releases. A heart staying in place is a result worth recording. Keep the incline, heart size, and starting position the same while comparing the surfaces. Use a shallow tray at the bottom and avoid raising the ramps so high that materials scatter off the table.

20. Build words that describe helpful actions
Make large paper letter tiles for words such as KIND and HELP. Place them beside simple picture cues and a writing strip. Students arrange the letters, read the word with support, and suggest an action that fits it.
Choose words that match the phonics and vocabulary you are teaching; the holiday theme does not make every word equally easy to decode. Offer a printed model for matching or remove it for students ready to spell. Partners can take turns arranging the tiles and explaining the picture.

21. Follow a cooperative trail of heart clues
Prepare three or four numbered paper hearts at accessible classroom locations. Hand each group a picture clue for the first stop. At each stop, students find the next clue and record the heart’s number or symbol on their sheet.
For example, a bookcase picture leads to the bookcase, where a pencil-cup picture points to the writing table. Test the entire route yourself before starting. Stagger groups, keep walking routes clear, and place clues within reach without climbing. Offer the same picture sequence at a table for students who need a seated version. Finish with a shared message rather than a prize for the fastest group.

Choose a manageable classroom plan
For an everyday February setup, choose one working corner and rotate a single activity through the week. The recommendation pocket, post office, and quiet drawing desk can use spaces your students already know.
For a class celebration, a sample 50-minute rotation for 24 students is four groups of six visiting four stations. Choose bookmarks, ten-frames, word building, and reading. Allow five minutes to explain and demonstrate, four eight-minute rounds, three two-minute transitions, and seven minutes to clean up. Those are planning estimates; adjust them to your class, available adults, and room layout. A station needs materials and usable space for all six students.
Prepare one sample per station, put shared supplies in shallow trays, and mark a place for unfinished work. Wet painting and film assembly are better scheduled separately if you cannot give them the supervision or drying space they need.
Questions teachers may have
How can I do this with almost no decorating budget?
Start with the books, paper, crayons, and trays already in the room. A recommendation pocket, drawing desk, pattern strip, or word-building tray needs little beyond those supplies. Skip projects that require buying film, paint, or extra display materials just to match a picture.
What works for students who need help cutting or writing?
Offer large prepared shapes, broad paper strips, an accessible work surface, and the tools specified in students’ support plans. Let students point, draw, dictate, or work with a partner. Keep the learning choice with the child even when an adult helps with preparation.
Can I keep the theme without holding a card exchange?
Yes. Use the belonging board, helpful-action words, school-helper postcards, or friendship comics. Students can make something for the classroom without exchanging possessions or choosing a recipient.
How can I adapt these ideas for older elementary students?
Add reasoning rather than extra decoration. Ask students to justify a book recommendation, explain a bridge redesign using their observations, or write a paragraph comparing the graph’s results. Keep the materials simple while increasing the thinking the task requires.