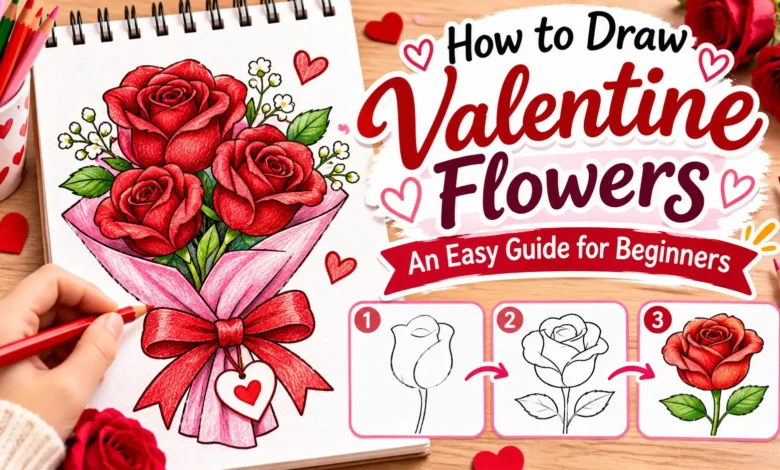
Start with a circle for a daisy, an open cup for a tulip, or a small spiral for a rose. Each shape gives you a place to put the next line. Draw one bloom in the corner of a Valentine card, or sketch all three and gather their stems into a ribbon-tied bouquet.

The finished drawing examples are AI-generated illustrations. The numbered diagrams show the strokes to practice.
What You Need to Start
Use a regular pencil, an eraser, and plain paper. Pink, red, yellow, and green colored pencils are enough to color the flowers shown here. If you’re making a folded card, practice once on scrap paper, then fold your cardstock before sketching so you can see exactly where the front panel ends.
Press lightly at first. On the diagrams, pink lines show the strokes added in each panel. On your paper, use the same pencil throughout and darken the outlines when the shapes look right.
1. Draw a Daisy From a Circle
A daisy is the easiest bloom to start with because every petal meets the same little circle. Leave about twice the width of the circle around it so there’s room for the petals.
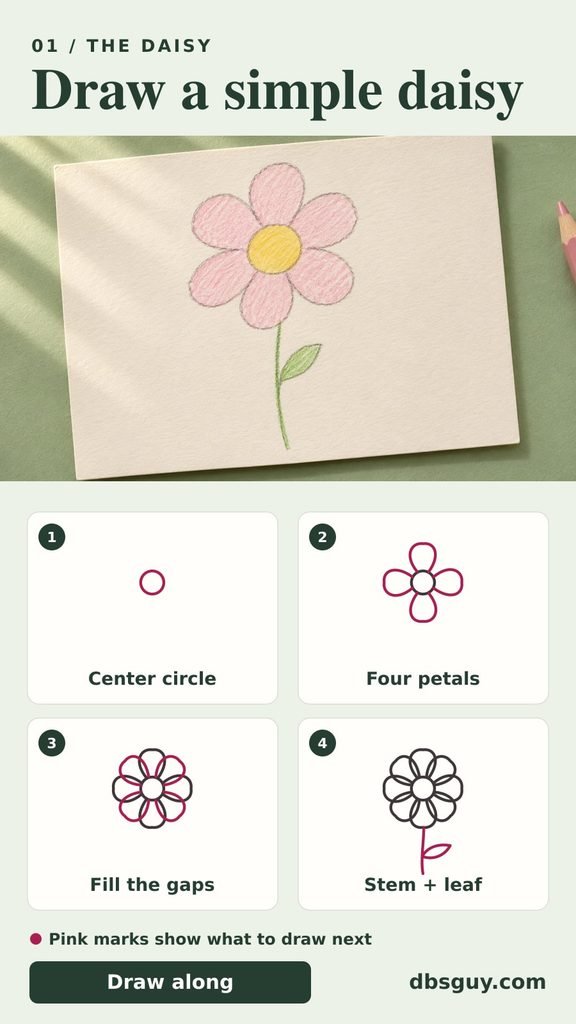
- Draw a small circle for the center. On a card, aim for roughly the width of your pencil’s eraser.
- Add four rounded petals at the top, bottom, left, and right. For each one, start at the rim of the circle, curve outward, and bring the line back to the rim a short distance from where you started.
- Fit another rounded petal into each diagonal gap. Make these a little narrower if space is tight. The illustration above the diagram shows how a daisy can also work with fewer petals.
- Start a slightly curved stem at the tip of the bottom petal. Add a leaf by drawing two curves from the same spot on the stem and bringing them together at a point.
For a Valentine palette, try pale pink petals with a yellow center. To keep the petals readable at a small size, leave the center free of extra lines and dots.
2. Sketch a Tulip With a Cup and a Point
Picture the flower as a small bowl seen from the front. The lower curve makes it look cupped, and the pointed petal peeking out behind it gives the flower its tulip shape.
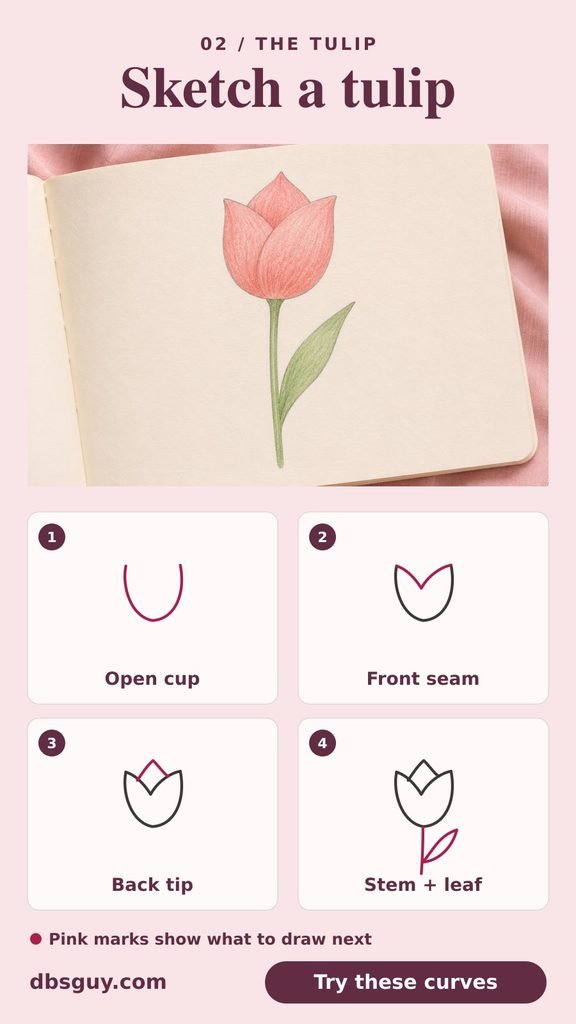
- Draw a wide U with a rounded base. Leave the top open, with both tips roughly level.
- Connect the open tips with two inward curves that meet in a shallow V. This line is the top edge of the front petal.
- From partway down one side of the V, draw up to a point above the cup and back down to meet the other side of the V. That makes the back petal look tucked behind the front one.
- Draw a slim stem down from the base. Give it one long leaf that curves up beside the stem and tapers to a point below the flower.
If the tulip looks like a crown, soften the lower corners of the U. For color, shade the back petal a little darker than the front one so the overlap stays visible.
3. Build a Rose Around a Small Spiral
Keep the middle compact and give the outside petals more room. That change in scale makes a rose recognizable even with a handful of lines.
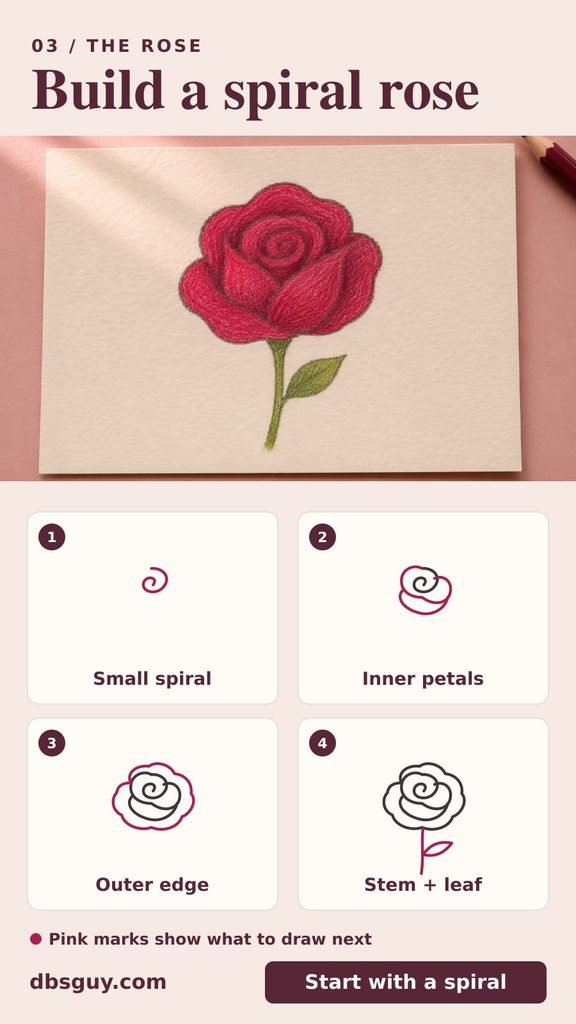
- Draw a small, loose spiral, about one and a half turns. Leave a visible gap between the turns so it stays clear after you color it.
- Wrap a few broad C-shaped curves around the spiral. Start the curves in different places and let some ends meet a neighboring curve. The joins suggest where one petal tucks behind another.
- Enclose those curves with a wider, softly scalloped outline. Give the scallops different widths and let the bottom edge dip a little under the center.
- Draw a slim stem from the bottom of the bloom. Add a pointed leaf on one side, then color the rose if you like.
If the head looks like a target, erase one ring and replace it with two shorter curves of different lengths. A touch of burgundy along a few of the inner curves will give a red rose more depth. For another way to practice petal overlap, see Krystal Whitten Studio’s flower-drawing lesson.
4. Put the Three Flowers Together on a Valentine Card
Use the front of a folded card or a fresh page. Place the rose a little higher than the other blooms and leave room below for the bow. If you want a message on the front, pencil in its space before you draw the bouquet.

- Lightly mark where each flower head will go. Put a round guide for the rose near the upper center, a smaller circle lower on the left for the daisy, and an upright oval lower on the right for the tulip. Mark one small dot below the group where the ribbon will sit.
- Sketch the three blooms over the guides, using the same shapes you practiced. If two guides overlap too much, move one now. Darken the petals and erase the placement guides.
- Draw a stem from each flower toward the ribbon dot. Carry the stems a little below that point and let the outer two fan back out, like the ends of a real bunch.
- Put two ribbon loops and two short tails over the tie point. Erase any stem lines that show through the loops or knot, then color the ribbon. A tiny heart beside the blooms is enough if you want one more Valentine detail.
Pink and red work well together when one flower gets the strongest color. Try a raspberry rose, light pink tulip, and cream or blush daisy. If you’re drawing in the margin of a note, use the daisy on its own and skip the bow to leave room for writing.
Also Read 17 Valentine Flower Ideas for a Bouquet That Feels Personal
Frequently Asked Questions
What’s the easiest Valentine flower to draw small?
Use a daisy with a circle and five or six rounded petals. A short curved stem is plenty. If you can cover the center with your pencil tip, enlarge it slightly so it still shows after coloring.
Can I draw Valentine flowers with a pen?
Yes. Sketch lightly in pencil, trace the lines you want to keep, and let the ink dry before erasing. Try the pen on a scrap of the same paper first, especially if you’ll color over it.
What if my bouquet looks too crowded?
Move the smallest bloom down and outward, leaving a sliver of paper between it and the next flower. On a small card, the ribbon and one little heart can fill the remaining space on their own.
Also Read 21 Valentine Card Ideas That Make a Simple Message Feel Personal