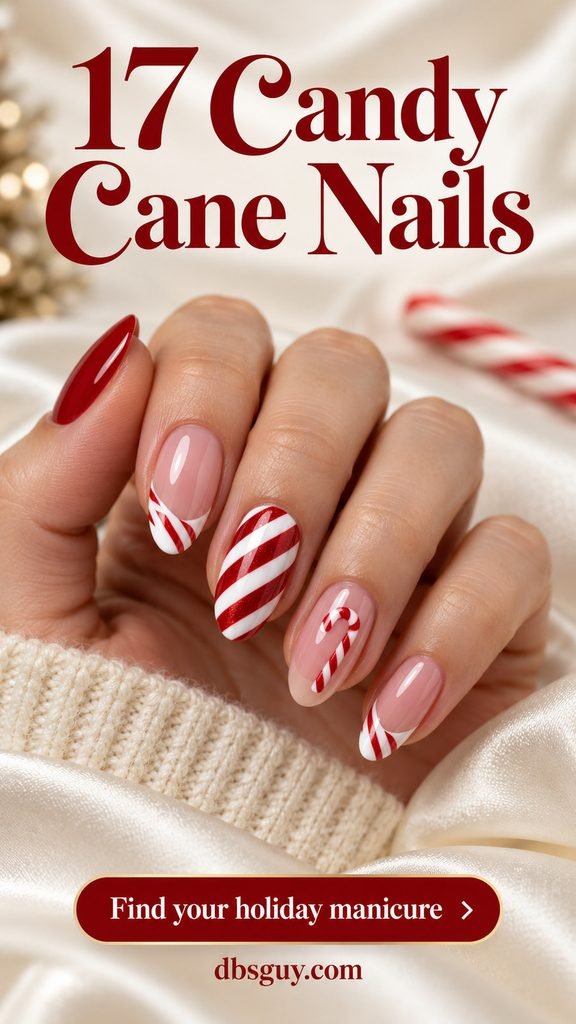
Candy cane nails can make a holiday manicure feel festive with just one striped accent, a peppermint French edge, or a tiny painted cane. Start by choosing how much pattern you want to wear: a full red-and-white set makes a statement, while a small detail leaves more of your everyday manicure visible.
These 17 ideas show different placements, color pairings, and finishes, with practical details to help you adapt each one to your nails. You can keep your usual length; a simpler version of the artwork is often more useful than copying a longer reference exactly.
- For short nails: start with the single accent in idea 2, the tiny corners in idea 4, or the miniature canes in idea 5.
- For a lighter look: compare the French tips in idea 3, floating ribbons in idea 7, and open-center frames in idea 14.
- For a party: look at the gold detail in idea 12, silver glitter in idea 13, and ruby velvet in idea 17.
The visuals are AI-generated manicure concepts, not photographs of completed or tested salon work. Use them to discuss shape, placement, and finish with your nail artist; actual color and reflections will vary.
1. Classic Candy Stripes on Short Squares
Bright red bands over an opaque white base give you the most recognizable candy-cane look in the collection. A short, softly squared shape gives the diagonals a tidy edge, while the glossy finish supplies that polished-candy shine. Choose this one when you want the pattern to be the whole manicure.
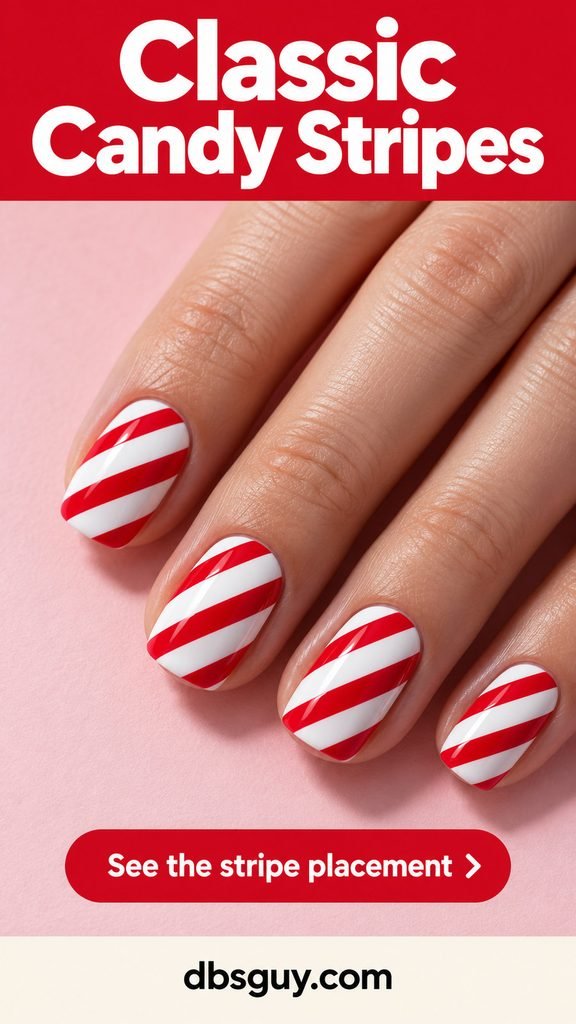
Keep the stripes traveling in the same general direction across each hand, with enough white between them to read as separate bands. On a small pinky nail, use fewer stripes instead of squeezing in the same number as the middle finger. If you are painting at home, practice the spacing on a spare tip first; a loaded detail brush can turn a narrow line into a much wider band.
2. One Striped Accent With Cherry Red
One ivory-and-red ring nail gives a plain cherry manicure a small holiday surprise. The short round shape feels relaxed, and the surrounding solid color makes the striped nail noticeable without adding art to every finger. It is a useful starting point if you like festive nails but usually wear one polish color.
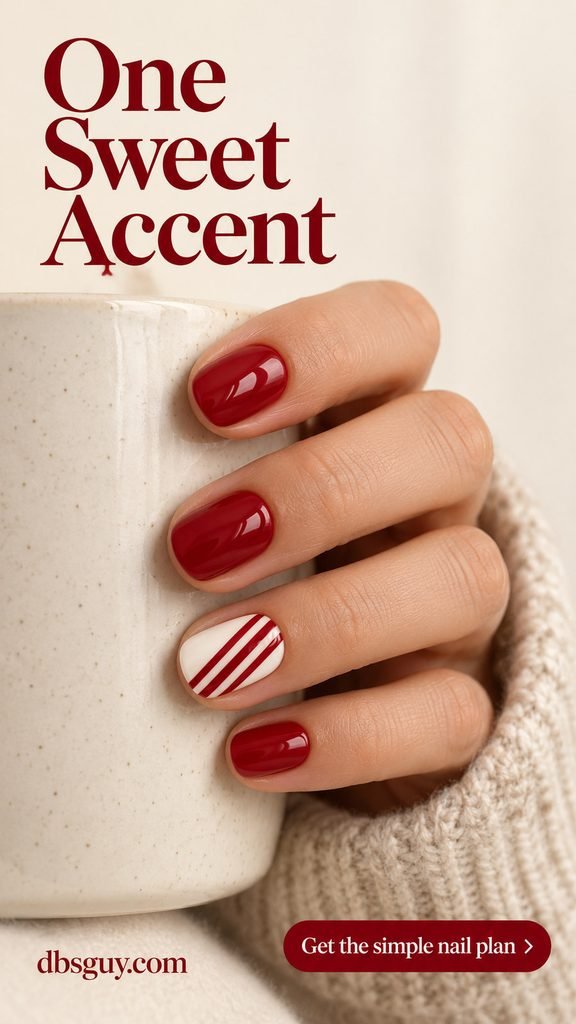
Ask for the red in the stripes to match the red on the other nails. If doing both hands feels ambitious, begin with one accent on your nondominant hand and keep the rest solid. Leave the accent free of gems and snowflakes: the clean change from solid color to stripes is what makes this particular combination work.
3. Peppermint French Tips on Almond Nails
A sheer rose base and striped white tips put the peppermint pattern at the ends of the nails. The almond outline gives the curved French edge room to show, so the manicure feels lighter than full stripes while still looking unmistakably festive.
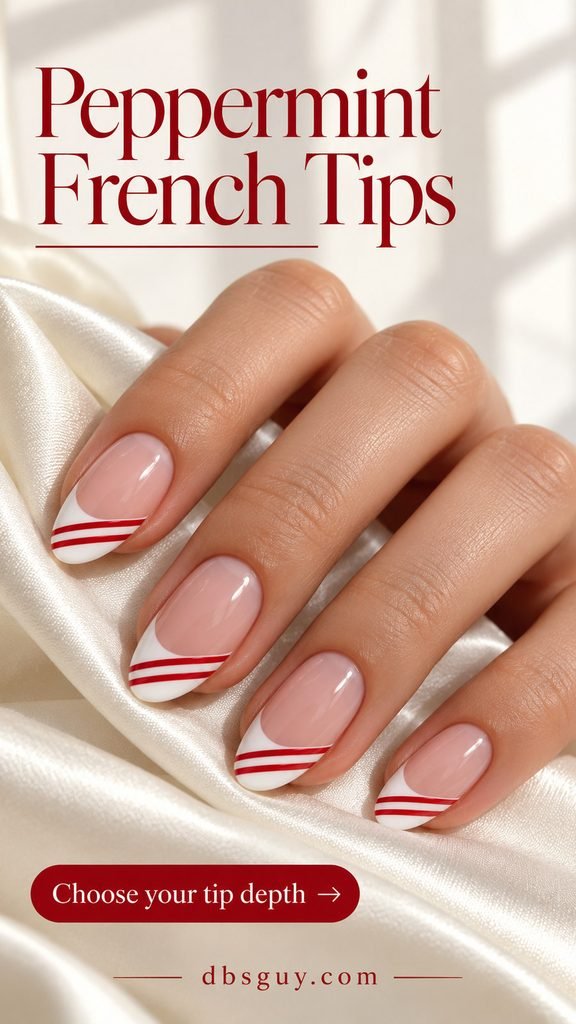
Show your artist how much white tip you want before the red details go on. The illustrated tips use several fine, sweeping red lines; the pink nail beds stay clear. On shorter nails, reduce the line count and keep a visible white gap between the red marks. A tip so shallow that the colors merge will lose the candy-cane effect.
4. Tiny Candy Corners for Short Nails
A little striped corner is enough when you want a very small Christmas detail. Here, a white wedge sits at one corner of each short squoval nail, with tiny red marks inside it. Most of the rosy nail remains visible, so there is no need to create a deep French tip.
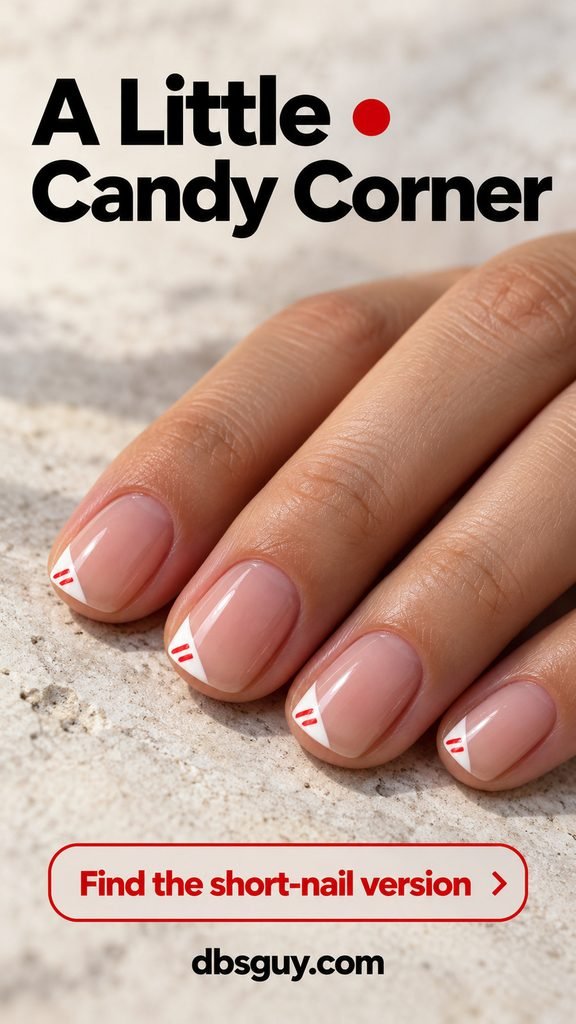
Choose the same corner placement across the set and keep the wedge compact. Two clear red marks can communicate the pattern on a tiny nail; adding more may simply fill the white space. At the salon, point out that you want an angled corner accent rather than a band running across the whole free edge.
For more compact artwork, see our 21 Short December Nail Ideas That Make Tiny Details Stand Out.
5. Mini Candy Canes on Sheer Nude
Tiny hook-shaped candy canes feel playful without needing a full patterned base. A translucent nude lets the white stems and little red bands stand apart. The short oval nails in this concept keep the scale small, with one cane placed slightly off center on each nail.
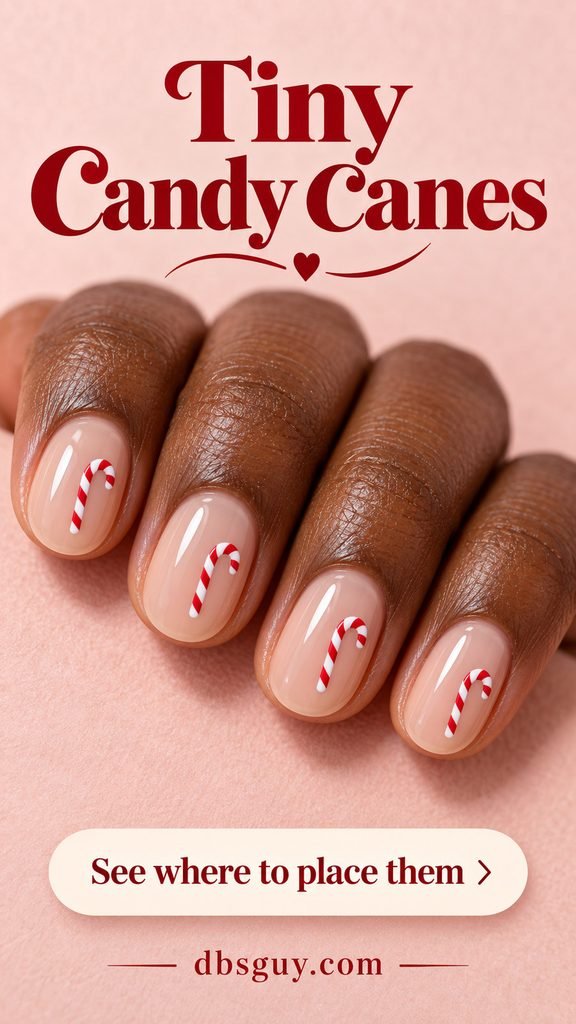
Make the white hook recognizable before worrying about the red stripes. Leave space around its curved top and straight stem so it does not read as a striped dash. If your nail beds are especially narrow, put the cane on the thumb or ring finger and leave the other nails sheer. A small flat decal is another option; check its size against your nail before committing.
6. A Heart Made From Two Candy Canes
Two mirrored candy canes create a heart-shaped accent that feels especially sweet for a holiday date or a gift exchange. An ivory ring nail makes the outline clear, while the other nails stay glossy red. The empty center matters as much as the striped outline.

Ask for the hooks to bend inward at the top and the lower ends to angle together at the bottom. If the canes overlap too much, the heart becomes hard to recognize. A medium square or oval accent gives the paired shapes more room; on a short nail, simplify the red banding before shrinking the whole heart. Keep this detailed motif to one nail per hand.
7. Floating Candy Ribbons Across the Nail
A striped ribbon through the middle of a sheer nail changes where the pattern sits. Unlike a French tip, this narrow band leaves nude space on both sides. The diagonal placement gives the design movement without covering the entire almond shape.
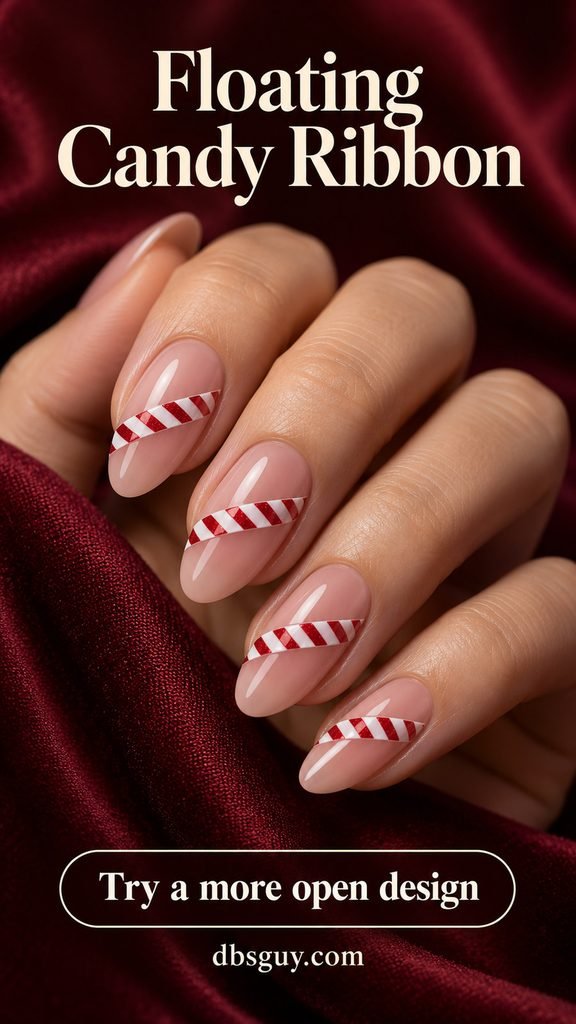
Describe it as a slim white ribbon with short red cross-stripes inside it, rather than red lines floating separately across the nail. Keep the band away from both the cuticle and the free edge so the open-space effect survives. For an easier interpretation, place the ribbon on two accent nails and wear a sheer base on the rest.
8. A Peppermint Swirl Accent
A peppermint wheel brings a different candy-shop shape into the mix. The curved red-and-white wedges create a pinwheel on one oval nail, framed by plain red neighbors. It is a good choice if straight diagonal stripes feel a little too predictable for you.
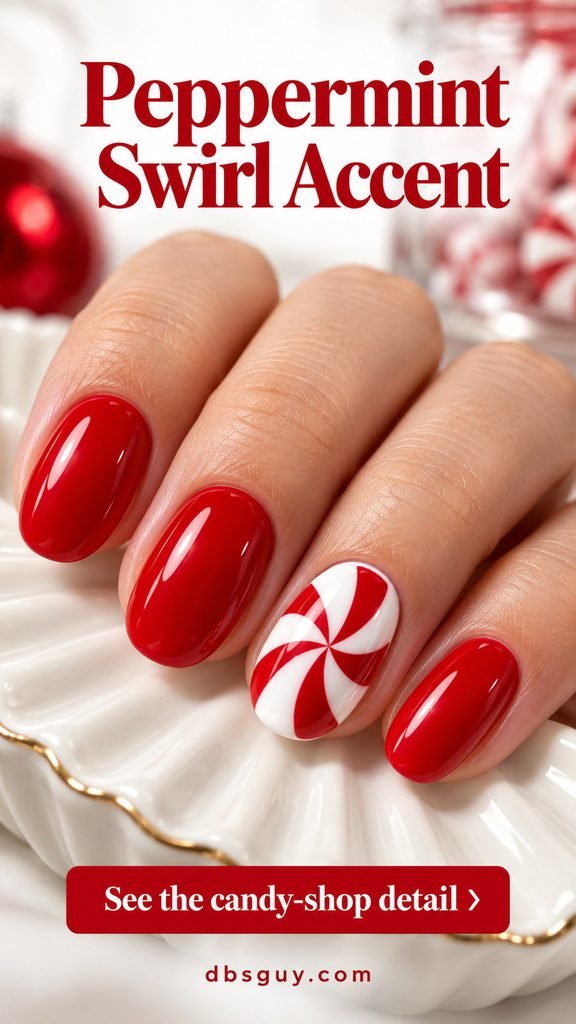
The swirl needs a clear center and white space between its red wedges. Ask for a flat painted design, with the surrounding red nails left undecorated. If the spiral is beyond your home-painting comfort level, use a suitably sized swirl decal rather than trying to squeeze a large one onto a small nail. Check that the center sits where you want it before sealing the artwork.
9. Raspberry Stripes With Ballet Pink
Pink candy cane nails are a softer color direction, especially if bright Christmas red is not your favorite. Deep raspberry stripes over ballet pink preserve the contrast that makes the pattern readable. Two patterned nails alternate with plain pink, so the color change feels intentional across the hand.

Compare the two pinks side by side before painting: the raspberry needs to be distinctly deeper than the base. Pale pink stripes over another pale pink can disappear at a glance. Keep both accent nails in the same diagonal direction and repeat the light base on the solid nails. This palette pairs easily with gray knitwear or a cream holiday outfit without requiring matching pink accessories.
10. Evergreen With a Peppermint Accent
Deep forest green makes the tiny candy cane feel like a decoration on a Christmas tree. Most of this short square manicure stays green; one small red-and-white cane supplies the holiday motif. It is a richer color option without the busyness of several Christmas illustrations.
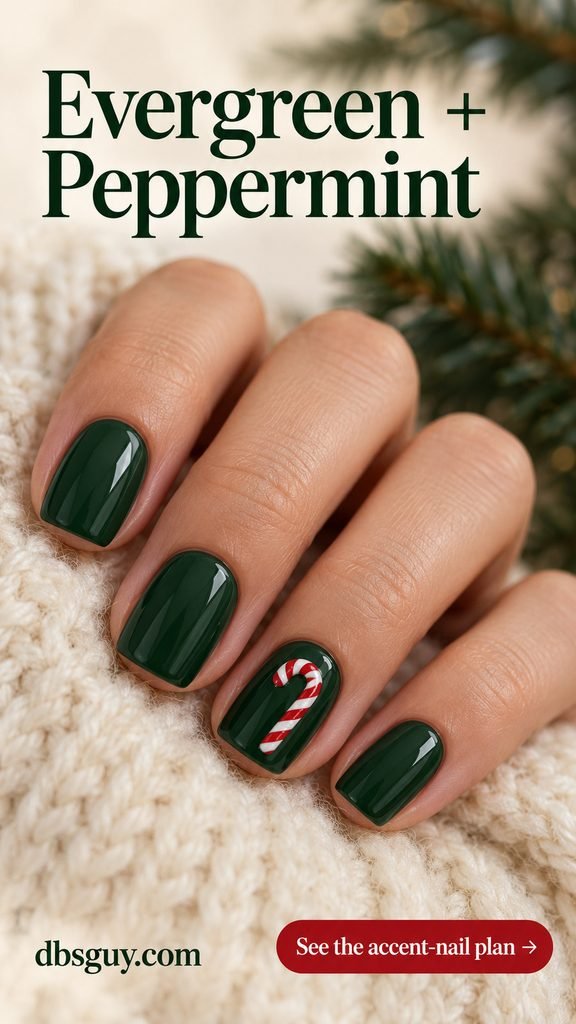
Keep the cane’s white shape opaque enough to stand out against the dark base, and leave green visible all around it. Ask to see the green swatch in ordinary room light if you want it to stay visibly green rather than look nearly black. Skip extra leaves on the accent nail—the background color already makes that connection.
11. Cocoa Nails With One Candy Cane
Chocolate brown gives the peppermint detail a warm, cocoa-inspired setting. The short oval nails stay glossy and simple, with one white-and-red cane interrupting the brown. This is a particularly useful choice if your winter wardrobe is mostly camel, oatmeal, cream, and denim.
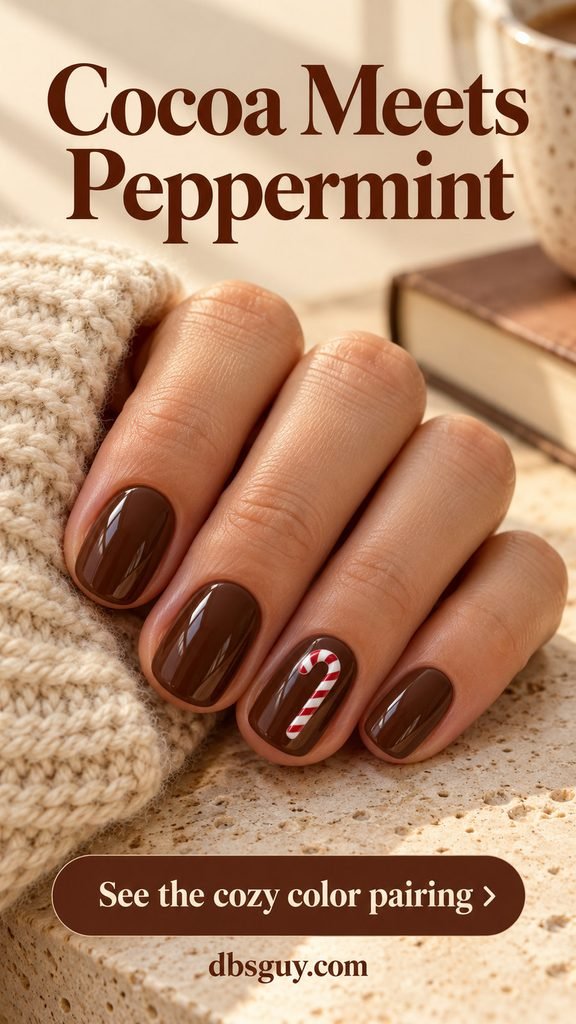
Choose a brown that still looks like chocolate beside the red in the artwork. A very reddish brown can shift the whole set toward burgundy. Keep the cane small but give its white hook enough width to show against the base. If you want less contrast, change the surrounding nails to a lighter milk chocolate while keeping the accent background deep enough for the white to stand out.
Also Read: 19 Neutral December Nail Ideas That Go With Every Holiday Outfit.
12. Candy Stripes With a Gold Edge
A little gold makes a striped accent feel dressed for dinner. The ring nail combines ivory, red diagonal bands, and slim metallic lines, while the other almond nails stay cherry red. The gold adds a separate glint without turning the whole manicure into a metallic design.
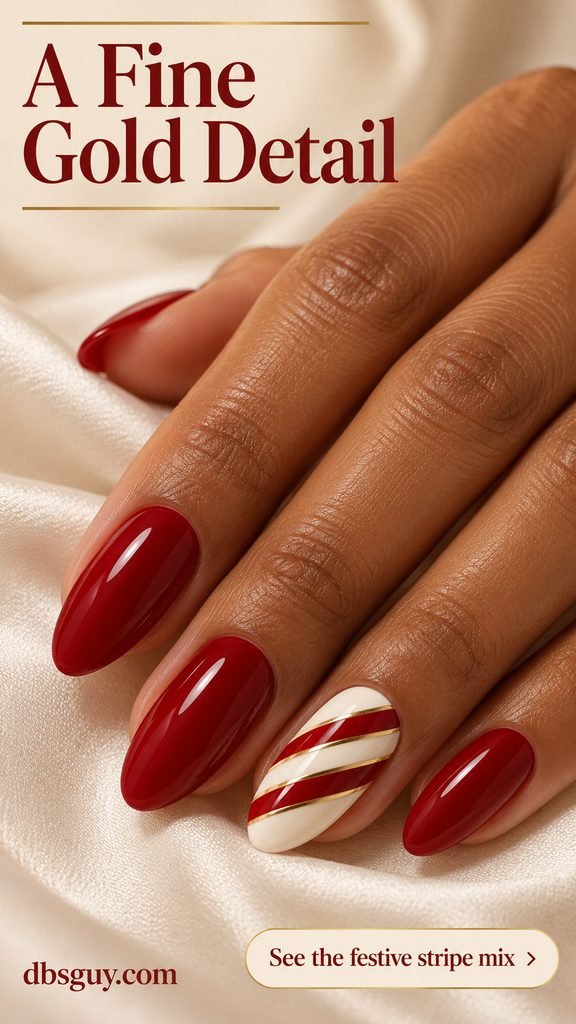
Ask for a fine gold line along one edge of each red band, leaving plenty of ivory between the stripes. Broad gold bands would change the balance into a three-color pattern. Painted metallic detail keeps this version flat; raised foil or stones would add a different texture. Use the color of your favorite gold jewelry as a reference if you want a warmer or paler metallic finish.
13. Silver Glitter Tips With a Striped Accent
Fine silver glitter and one striped nail bring two different kinds of holiday detail together. The glitter gathers at the ends of sheer pink square nails, while the ring nail stays opaque white with red bands. Leaving glitter off the striped nail keeps its pattern crisp.
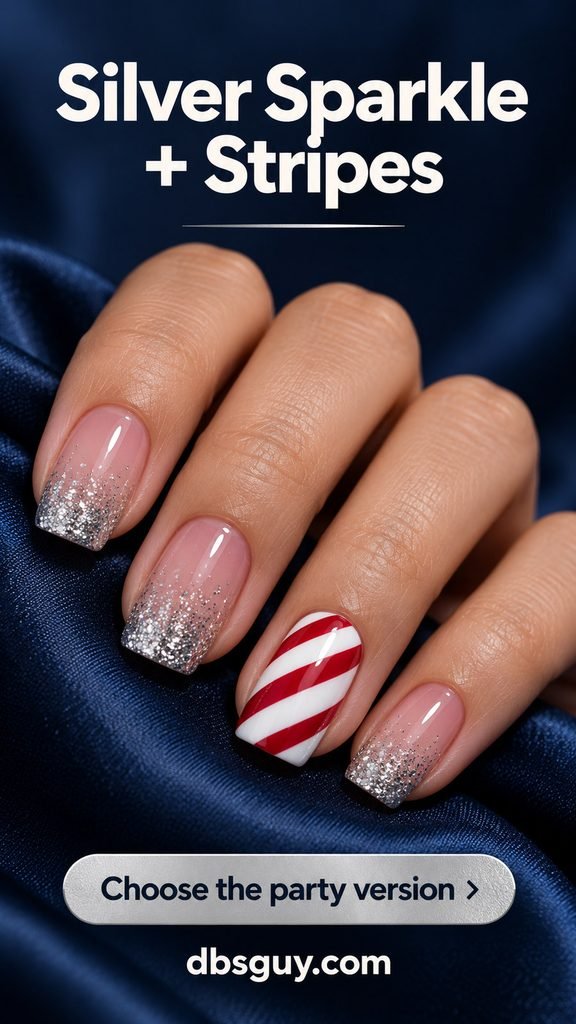
Ask for a fade with more silver at the tip and less toward the center, rather than an equally dense glitter coat from base to edge. The surrounding pink should remain visible. If the party version feels too busy, keep silver on just the middle nail and make the remaining nails sheer. The striped ring nail can still be the focal point.
14. Candy Cane Frames With Open Centers
A red-and-white outline turns the nail’s perimeter into the design. The center stays sheer rose, while a slim striped border follows the almond shape. It has a more graphic look than a single tiny cane and a much more open feel than full-nail stripes.
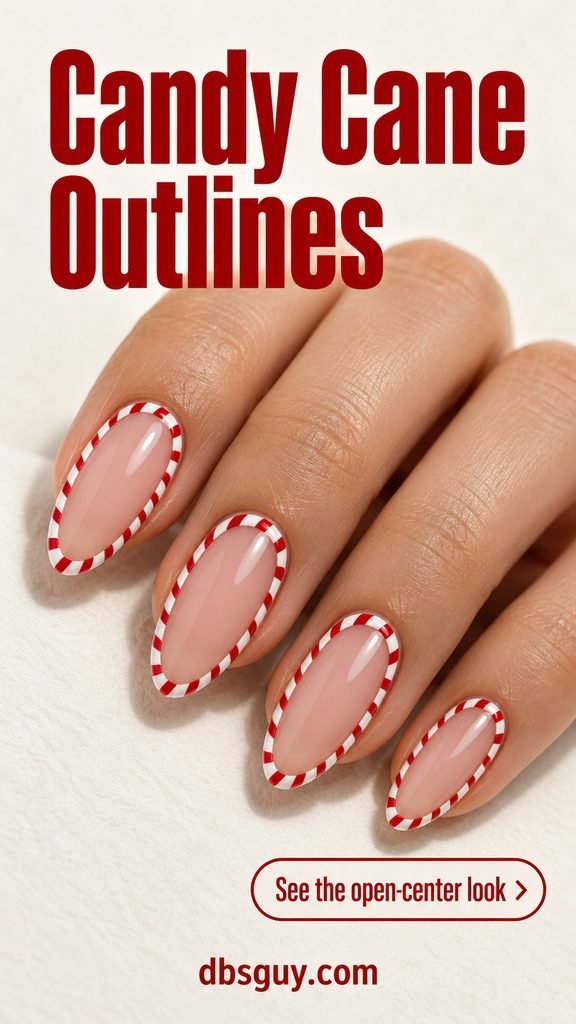
This is precise linework, so bring the reference when booking rather than describing it only as a French manicure. The border should sit on the nail with space from the skin. On shorter nails, use fewer red crossbars so the frame does not become a solid red outline. If your nail beds are narrow, request the frame on one accent instead of all ten nails.
15. Matte Cranberry and Ivory Stripes
Matte cranberry takes the candy-cane pattern into a deeper, quieter palette. Ivory bands soften the contrast compared with bright white, and a tapered coffin shape gives the full-nail stripes a longer sweep. The finish is the defining choice: both colors have a soft surface rather than a candy-like gloss.
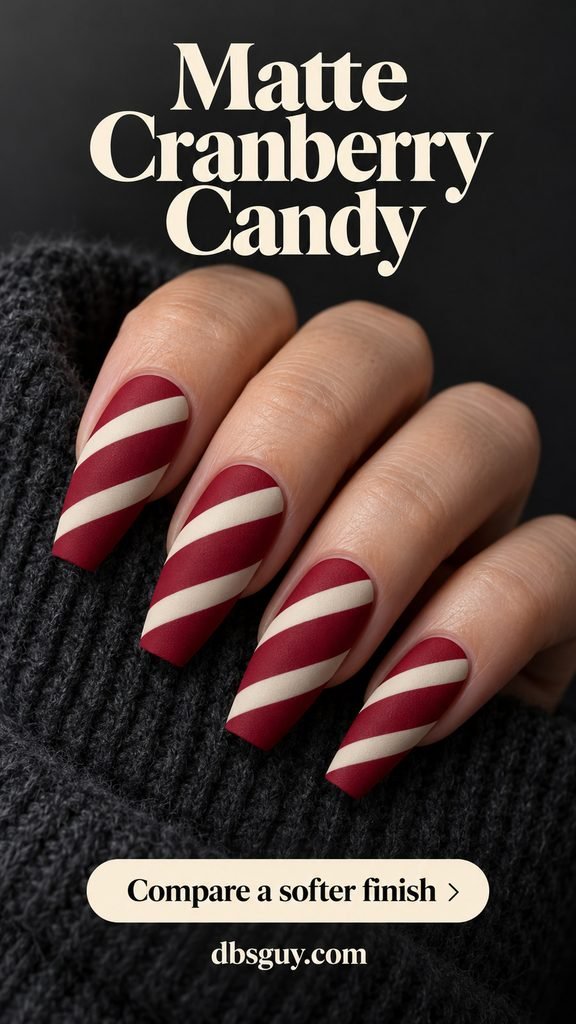
Specify a matte finish over the complete design, including the ivory stripes. A glossy top coat would change the look. You can keep your usual short square shape and use fewer bands if you prefer less length; the cranberry-and-ivory palette still works. Request a sample if you are unsure about the finish, because a softly matte surface and a satin sheen can look quite different.
16. Peppermint Tips With a Flat Red Bow
A small painted bow gives striped French tips a gift-wrap connection. The ring nail keeps a plain blush base for the bow, while the other nails carry the red-and-white edges. Separating the motifs gives each detail room instead of stacking a bow on top of stripes.

Ask for two small loops, a center knot, and short tails in the same red as the tip stripes. The bow in this concept is flat artwork, so make that preference clear if you do not want a raised charm. On a shorter nail, keep the bow on the ring finger and reduce each neighboring tip to a couple of red marks.
17. Ruby Velvet With a Candy-Striped Ring Nail
Ruby velvet brings a luminous red finish to the nails around a simple striped accent. The magnetic reflection gives the red a sense of depth, while the ivory ring nail provides a clear place for the candy-cane bands. It is the dressiest option here without needing gems or raised decorations.
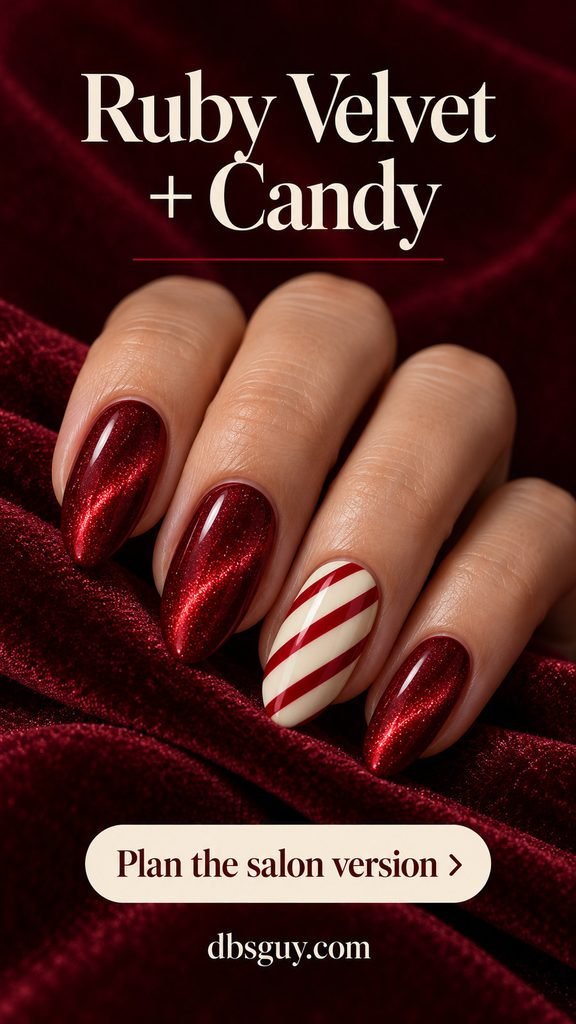
Ask your artist for a ruby magnetic finish and show the kind of red glow you want. The velvet effect is reflected light inside a smooth polish surface, not a fuzzy texture. A red shimmer lacquer offers a simpler color-and-sparkle alternative, but it will not create the same moving magnetic reflection. Keep the striped accent free of extra shimmer so it remains easy to read.
Also Read: 21 Velvet Cat-Eye Nail Ideas for December That Catch the Light Beautifully.
Make Your Chosen Look Work on Your Nails
Save one main reference and decide which detail you would be willing to simplify. For short nails, that usually means fewer stripes, a smaller accent, or artwork on fewer fingers. You do not have to change your natural shape just because the reference uses almonds or coffins.
Before booking, tell the salon whether you want full stripes, tiny painted motifs, a metallic line, or a magnetic finish. Ask how that artwork affects the service time and price rather than assuming every design is included in a basic manicure. Specify which fingers get accents and whether the decoration should feel flat.
A useful brief sounds like this: “Keep my short round shape. Cherry red on the plain nails, one ivory ring nail with three diagonal red stripes, and a glossy finish. No raised decorations.” For a different idea, swap in its colors, placement, and finish.
Frequently Asked Questions
Which candy cane nails are easiest to try at home?
The single striped accent in idea 2 is a sensible place to begin because most nails need only one solid color. Regular red and white polish, your usual base and top coats, and a fine detail brush can create that version. Let the base and artwork dry as directed by the products before layering over them. Keep the first attempt to a few well-spaced lines rather than a dense pattern.
Do I need gel or acrylic for candy cane nail art?
No. The striped pattern and small painted motifs can be interpreted with regular polish on natural nails. Extensions change the available length and shape; they are not required by the theme. Magnetic, powder, and other specialty finishes need appropriate products and technique, so discuss those separately with your artist.
How do I keep red stripes from looking muddy over white?
Keep the white base opaque and let it dry according to its directions before adding red. Use a small amount of polish on the detail brush so the line does not spread into the neighboring gap. If repeated full-nail stripes are difficult, switch to one accent or a few marks inside a white corner. With gel products, follow the specific system’s application and curing instructions rather than borrowing a universal cure time.
Can I wear the design without traditional Christmas colors?
Yes. Raspberry and ballet pink in idea 9 keep the diagonal candy pattern while changing the palette. Cocoa in idea 11 uses the little striped cane as the holiday cue. Preserve clear contrast between the bands or motif and the background so the detail remains recognizable.
What should I remember if I choose a gel manicure?
The American Academy of Dermatology’s gel manicure guidance recommends broad-spectrum, water-resistant SPF 30 or higher on the hands before a gel service, or dark, opaque gloves with the fingertips cut out. Do not pick or peel off gel polish; arrange proper removal. If you have persistent nail changes or irritation, get advice from a board-certified dermatologist.
Choose the look you would enjoy seeing during an ordinary December day as well as at a party. If you are torn between two designs, keep the base from one and the single accent from the other—then show your artist exactly which details you want to keep.