
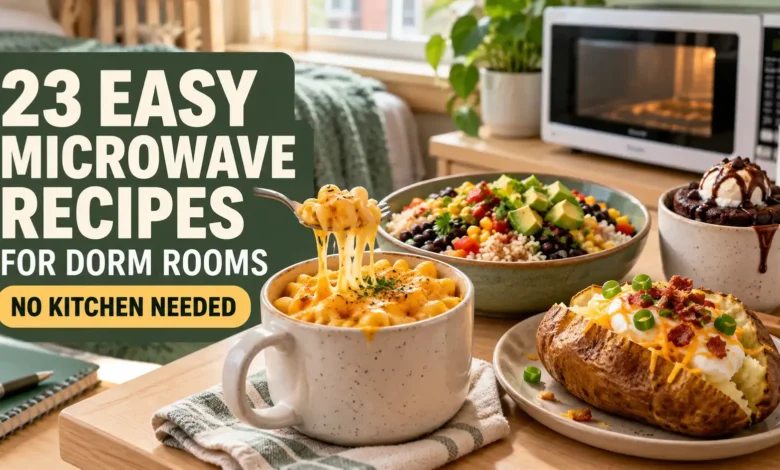
A microwave, a roomy bowl, and a few everyday ingredients can cover breakfast, lunch, dinner, and a late-night sweet craving. These 23 easy microwave recipes for dorm rooms include full single-serving quantities and steps, so you can pick a meal and start cooking.
Start here: choose peanut butter banana oatmeal for breakfast, a broccoli cheddar potato for a filling lunch, or a chicken burrito bowl for dinner. Only have pantry ingredients? Try tomato chickpea couscous or peanut butter ramen.
No stove, oven, toaster, blender, or electric kettle is needed. Some recipes do need refrigerated ingredients or frozen vegetables; the pantry notes below explain the alternatives.

The visuals are AI-generated recipe concepts, not photographs of kitchen-tested results. These recipes have not been kitchen-tested; heating times are starting estimates, and package directions and doneness checks take priority.
What You Need for Microwave Cooking in a Dorm
Check your residence hall’s microwave rules first. Start with a 16-ounce microwave-safe mug, a 4-cup bowl, a 1½-quart bowl, a plate, and a vented lid or splatter cover. The big bowl matters for pasta, soup, and noodles: a regular coffee mug is too small for bubbling cooking liquid.
Add a fork, spoon, measuring cups and spoons, a can opener for cans without pull tabs, an oven mitt or thick dry towel, and an instant-read food thermometer. A small knife and cutting board help with the potato and apple recipes; clean kitchen scissors can tear up spinach and bread. Wash produce and use a proper sink and soap for cleanup.
Read the Timing Notes Once
All recipes make one serving. Estimated total times include basic prep and the stated rest. Microwave settings below mean HIGH in an approximately 1,000-watt microwave unless a product’s label says otherwise. A lower-wattage dorm microwave may need more bursts; start at the shorter time and check rather than leaving it unattended.
Stir mixed foods from the bottom and edges toward the middle. Leave a vent in covers, open lids away from your face, and use a mitt for hot dishes. Let hot meals stand for 3 minutes, or longer if the package requires it. Do not put metal, foil, sealed containers, or ordinary takeout packaging in the microwave; use containers specifically labeled microwave-safe.
For the egg dishes in this guide, use a conservative microwave target of 165°F throughout. Reheated leftovers and chicken mixtures also need 165°F, checked in several spots. Remove the bowl before using a regular instant-read thermometer. See the USDA’s microwave cooking guidance for more on uneven heating, temperature checks, and standing time.
A Small Pantry That Works Across the Recipes
- Shelf-stable basics: oats, microwave-ready cooked rice or quinoa, instant couscous, microwave-compatible ramen, peanut butter, flour, cocoa, oil, and a few seasonings.
- Cans and jars: black beans, chickpeas, cooked lentils, white beans, tomatoes, corn, salsa, marinara, pesto, and fully cooked chicken or tuna. Unopened shelf-stable does not mean shelf-stable after opening; follow the label.
- Mini-fridge picks: eggs, milk, shredded cheese, yogurt, spinach, and fruit. Small packages take less space and reduce unfinished leftovers.
- Freezer picks: peas, broccoli, and mixed vegetables, only if you have a compartment that actually maintains a safe freezer temperature. Otherwise buy ready-cooked canned vegetables, drain them, and warm them with the meal.
You do not need to buy this whole list. Pick two or three recipes with shared ingredients before shopping. One typical 15-ounce can of drained black beans supplies roughly the combined amounts for recipes 6, 12, 17, and 20; measure what your can yields and refrigerate the opened portion promptly.
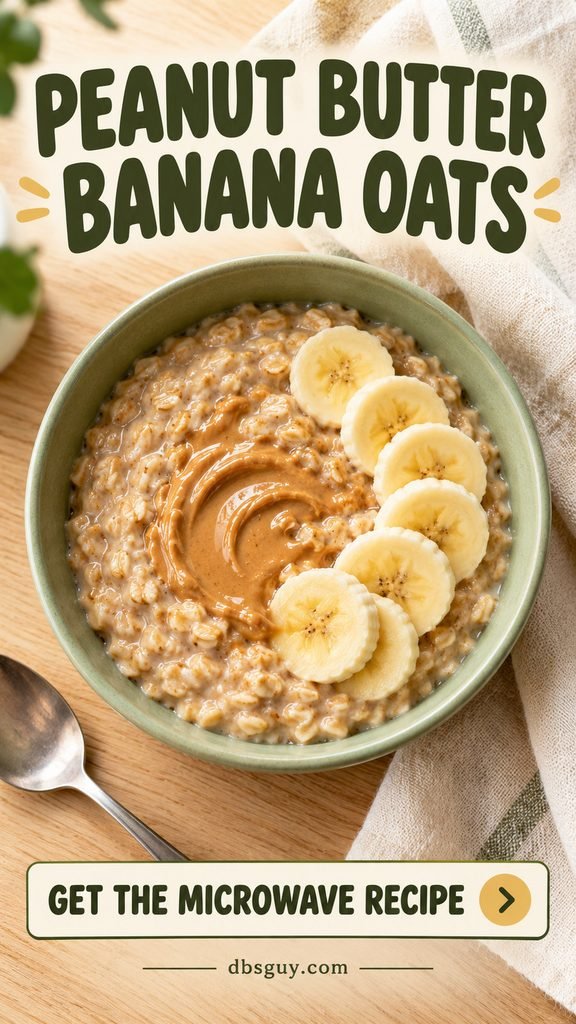
1. Peanut Butter Banana Oatmeal
Serves: 1 · Estimated total: 7–9 minutes · Use: 4-cup microwave-safe bowl
This is the breakfast to start with if your dorm pantry is mostly oats and peanut butter. The banana adds sweetness, so taste before reaching for sugar.
Ingredients
- ½ cup old-fashioned rolled oats
- 1 cup water or milk
- 1 tablespoon peanut butter
- ½ banana, sliced
- ⅛ teaspoon cinnamon; pinch of salt
Microwave Steps
- Stir the oats, liquid, cinnamon, and salt in the bowl. Leave it uncovered so you can watch for foaming.
- Microwave on HIGH for 2½–3 minutes, pausing to stir after 90 seconds. Stop if the oats approach the rim; let them settle before continuing. Follow your oats’ package if its directions differ.
- Let stand for 3 minutes. Stir in the peanut butter and top with the banana. Add a splash of liquid if the oats have thickened too much.
Dorm tip: Use sunflower-seed butter if you need a peanut-free option, and check your residence hall’s allergy rules.
2. Cheddar Spinach Scrambled Eggs
Serves: 1 · Estimated total: 7–9 minutes · Use: 16-ounce microwave-safe mug or small deep bowl
Two eggs, a handful of spinach, and cheddar turn one mug into a warm breakfast. Short bursts help the curds stay softer than one long blast.

Ingredients
- 2 large eggs
- 1 tablespoon milk or water
- ¼ cup loosely packed baby spinach, torn
- 2 tablespoons shredded cheddar
- ¼ teaspoon oil for greasing; pinch of black pepper
Microwave Steps
- Grease the mug. Beat the eggs and milk thoroughly with a fork, then stir in the spinach and pepper. Cover loosely with a microwave-safe lid, leaving a steam vent.
- Microwave for 30 seconds. Stir from the edges toward the center, then continue in 15–20-second bursts, stirring each time. Expect roughly 1–2 minutes of heating; the actual time varies.
- Stir in the cheddar near the end and heat again as needed. Check several spots with a food thermometer: use 165°F for this microwave egg dish. Let stand covered for 3 minutes.
Dorm tip: Keep the mug less than half full before cooking; eggs puff as they heat. Never microwave eggs in their shells.
3. French Toast in a Mug
Serves: 1 · Estimated total: 9–11 minutes · Use: 16-ounce microwave-safe mug
Expect soft, cinnamon-scented bread pudding rather than crisp skillet French toast. Slightly stale sandwich bread holds its shape better than very fresh, squishy slices.

Ingredients
- 1 large egg
- 3 tablespoons milk
- 1 teaspoon maple syrup, plus 1 teaspoon for serving
- ¼ teaspoon cinnamon
- 1 slice sandwich bread, torn into roughly 1-inch pieces
- ¼ teaspoon oil for greasing
Microwave Steps
- Grease the mug. Beat the egg, milk, 1 teaspoon syrup, and cinnamon until evenly combined.
- Fold in the bread and let it soak for 1 minute. Cover loosely with a vented microwave-safe lid. Heat for 45 seconds, gently turn the bread pieces with a fork, and heat another 30 seconds.
- Continue in 15-second bursts until the egg mixture is set and measures 165°F in several places, including the center. Total heating may take 1½–2½ minutes. Stand covered for 3 minutes, then add the remaining syrup.
Dorm tip: Do not pack extra bread into the mug. A dense center takes longer to heat and can leave the outside rubbery.
4. Blueberry Muffin Mug
Serves: 1 · Estimated total: 7–10 minutes · Use: 16-ounce microwave-safe mug
This small egg-free muffin is handy when you want something bakery-inspired without buying a whole box. Its microwave-cooked top stays pale; doneness comes from the crumb, not a golden crust.

Ingredients
- ¼ cup all-purpose flour, spooned and leveled
- 1 tablespoon sugar
- ¼ teaspoon baking powder; pinch of salt
- 3 tablespoons milk
- 1 tablespoon neutral oil
- 2 tablespoons fresh blueberries, rinsed and dried
- ⅛ teaspoon vanilla extract, optional
Microwave Steps
- Stir the flour, sugar, baking powder, and salt in the mug. Add the milk, oil, and optional vanilla. Mix into the bottom corners until no dry flour remains.
- Fold in the blueberries. The batter should fill no more than half the mug. Microwave uncovered for 60 seconds, then add 10–15-second bursts as needed, usually another 15–45 seconds.
- The center should be fully set, with no liquid batter, and a toothpick should come out without wet batter. Split the middle to check if needed and cook longer if it is wet. Cool for 3 minutes before eating.
Dorm tip: Do not taste the raw batter; egg-free batter still contains raw flour. A large mug prevents a blueberry-stained overflow.
If you want a drink alongside breakfast, see this easy iced coffee recipe.
5. Broccoli Cheddar Baked Potato
Serves: 1 · Estimated total: 13–18 minutes · Use: microwave-safe plate plus a small covered bowl
A medium russet potato makes a substantial base with almost no prep. The skin will be soft rather than oven-crisp, while the middle should fluff easily with a fork.

Ingredients
- 1 medium russet potato, about 8 ounces
- ½ cup small frozen broccoli florets
- 1 tablespoon water
- ¼ cup shredded cheddar
- 1 tablespoon plain Greek yogurt, optional; salt and pepper to taste
Microwave Steps
- Scrub the potato and pierce it 6–8 times with a fork. Put it on the plate and microwave for 3 minutes. Turn it over with a towel or mitt, cook another 2–3 minutes, then add 1-minute bursts until a fork slides easily into the center.
- While the potato rests, put the broccoli and water in the bowl. Cover with a vented microwave-safe lid and cook according to the broccoli package. Carefully drain any excess water.
- Split the potato, fluff the inside, and add broccoli and cheddar. Heat in 20–30-second bursts until the cheese melts and the filling is hot throughout. Stand for 3 minutes; add yogurt and seasoning.
Dorm tip: Larger potatoes can take much longer. Start with one medium potato instead of doubling the time for two.
6. Black Bean Salsa Sweet Potato
Serves: 1 · Estimated total: 12–17 minutes · Use: microwave-safe plate plus a small bowl
Sweet potato, black beans, and salsa make a filling lunch with a short shopping list. Choose a medium potato with a fairly even shape so the narrow end does not overcook first.

Ingredients
- 1 medium sweet potato, about 8 ounces
- ½ cup canned black beans, drained and rinsed
- 3 tablespoons salsa
- 1 tablespoon water
- 1 tablespoon plain yogurt, optional; small pinch of cilantro, optional
Microwave Steps
- Scrub the sweet potato and pierce it 6–8 times. Microwave on the plate for 3 minutes, turn it, and heat another 2–3 minutes. Add 1-minute bursts until it is tender through the center.
- Mix the beans, salsa, and water in the bowl. Cover loosely, microwave for 1 minute, stir, and continue in 30-second bursts until hot throughout, aiming for 165°F.
- Let the hot foods stand for 3 minutes. Split the potato carefully, loosen the flesh with a fork, and spoon the beans inside. Finish with optional yogurt and cilantro.
Dorm tip: Use the remaining beans in recipe 12, 17, or 20; refrigerate them promptly in a covered container after opening.
7. Creamy Microwave Mac and Cheese
Serves: 1 · Estimated total: 13–18 minutes · Use: at least a 1½-quart microwave-safe bowl
Dry elbow pasta can cook right in its water, but it needs a roomy bowl and frequent checks. This is a creamy stovetop-style result, without a baked cheese topping.

Ingredients
- ½ cup dry elbow macaroni
- ¾ cup water to start, plus more as needed
- 3 tablespoons milk
- ⅓ cup shredded cheddar
- 1 teaspoon butter; pinch of salt
Microwave Steps
- Combine the macaroni, water, and salt in the large bowl. Set it on a microwave-safe plate to catch splashes. Microwave uncovered for 2 minutes, stir, then continue in 1-minute bursts.
- Check the pasta after each burst. If it looks dry before it is tender, add 2 tablespoons water. Depending on the pasta and microwave, cooking can take roughly 6–10 minutes. Keep about 1 tablespoon starchy water; carefully spoon off a large excess rather than handling a boiling bowl to drain it.
- Stir in the milk, butter, and cheddar. Heat for 20 seconds, stir, and repeat only as needed until smooth and hot. Let stand for 3 minutes. Loosen with another tablespoon milk if necessary.
Dorm tip: A mug is usually too small for this quantity of bubbling pasta water. A large bowl saves cleanup.
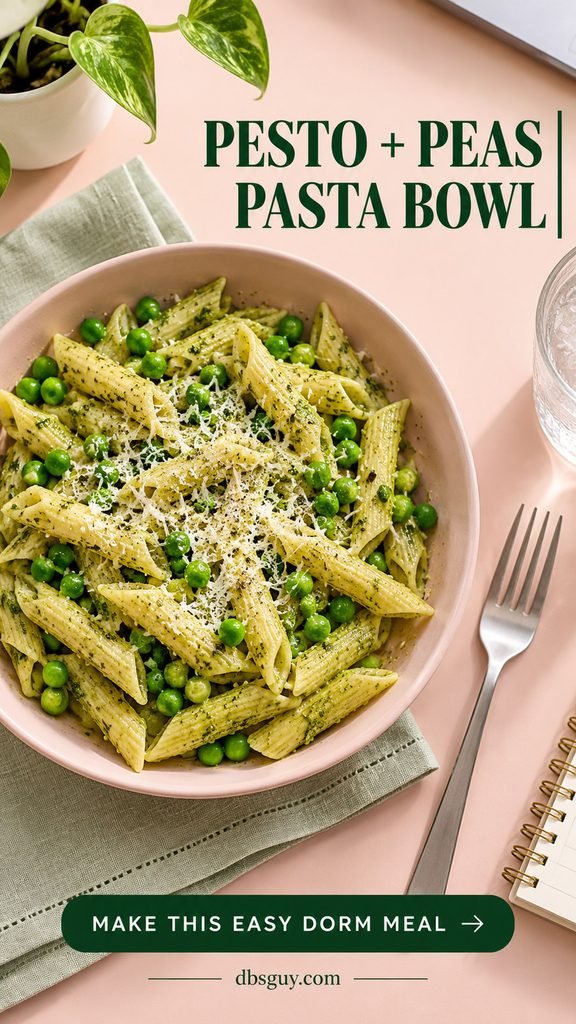
8. Pesto Pea Pasta Bowl
Serves: 1 · Estimated total: 8–11 minutes · Use: 4-cup microwave-safe bowl
Use fully cooked, ready-to-heat pasta for this one, so you can skip draining. A small amount of pesto coats the pasta without requiring a separate sauce.
Ingredients
- 1 cup fully cooked ready-to-heat penne
- ½ cup frozen peas
- 2 tablespoons water
- 1 tablespoon prepared pesto
- 1 tablespoon grated Parmesan
Microwave Steps
- Prepare the peas according to their package’s microwave directions in the covered bowl. Keep the lid vented.
- Add the cooked penne and water. Cover loosely and heat according to the pasta package, stirring midway when practical. Add 30-second bursts as needed until the mixture is hot throughout, aiming for 165°F.
- Stir in the pesto and Parmesan, and let stand covered for 3 minutes. Add a teaspoon or two of water if the pasta seems dry.
Dorm tip: This quantity is for cooked pasta, not 1 cup dry pasta. Pesto commonly contains nuts and dairy; check the label if needed.
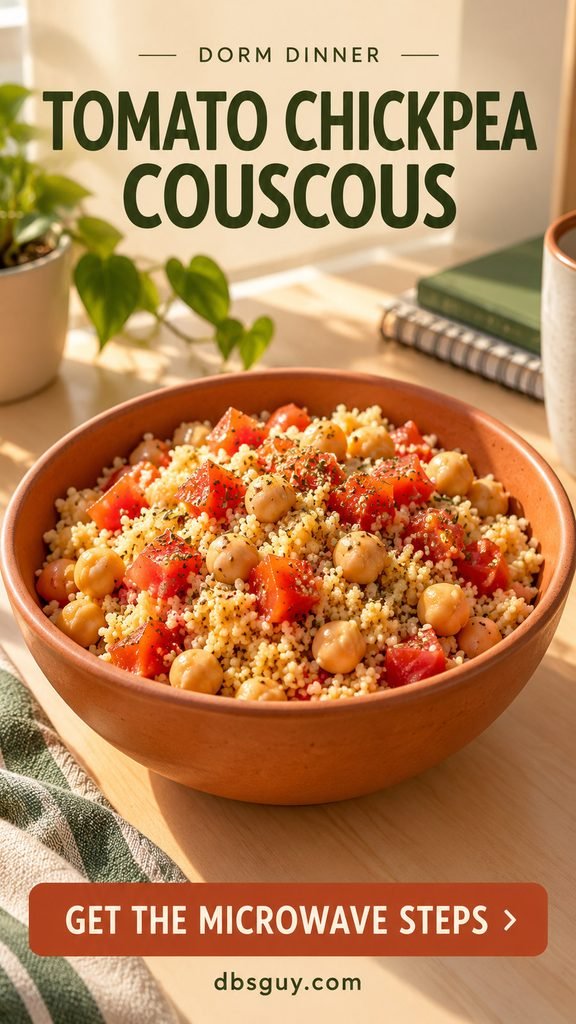
9. Tomato Chickpea Couscous
Serves: 1 · Estimated total: 12–15 minutes · Use: 4-cup microwave-safe bowl with a loose-fitting lid
Instant couscous softens by absorbing hot liquid, which makes it useful in a dorm. Buy the small, quick-cooking kind; pearl couscous needs a different method.
Ingredients
- ⅓ cup dry instant couscous
- ⅓ cup water or low-sodium broth
- ½ cup canned chickpeas, drained and rinsed
- ⅓ cup canned diced tomatoes with their juices
- 1 teaspoon olive oil
- ¼ teaspoon dried Italian seasoning; pinch of salt
Microwave Steps
- Combine the water, chickpeas, tomatoes, oil, and seasoning in the bowl. Cover loosely and heat for 90 seconds. Stir, then heat in 30-second bursts until the liquid simmers and the mixture is hot throughout.
- Carefully stir in the couscous. Cover and let it absorb the liquid for 5 minutes, or the time specified on its package. Package liquid ratios take priority if they differ.
- Fluff with a fork. If the grains are firm, add 1 tablespoon water, heat for 30 seconds, and let stand for 3 minutes. Season to taste.
Dorm tip: Do not microwave a sealed lid. Open it away from your face because steam can escape quickly.
10. Teriyaki Chickpea Rice Bowl
Serves: 1 · Estimated total: 9–12 minutes · Use: 4-cup microwave-safe bowl
Chickpeas take the place of raw meat in this easy rice bowl. The sauce stays glossy and loose; microwaving will not create a caramelized stir-fry coating.

Ingredients
- 1 cup fully cooked microwave-ready rice
- ½ cup canned chickpeas, drained and rinsed
- ½ cup small frozen broccoli florets
- 2 tablespoons water
- 1½ tablespoons teriyaki sauce
- ¼ teaspoon sesame seeds, optional
Microwave Steps
- Cook the broccoli with the water under a vented microwave-safe lid, following the vegetable package’s directions.
- Add the rice, chickpeas, and teriyaki sauce. Stir well, cover loosely, and microwave for 90 seconds. Stir from the bottom, then continue in 30-second bursts until the center and edges reach 165°F. Honor any longer rice-package heating directions.
- Let stand covered for 3 minutes. Stir again and add the optional sesame seeds.
Dorm tip: Start with less sauce if your teriyaki is especially salty or thick. Thin with 1 tablespoon water instead of adding more sauce.
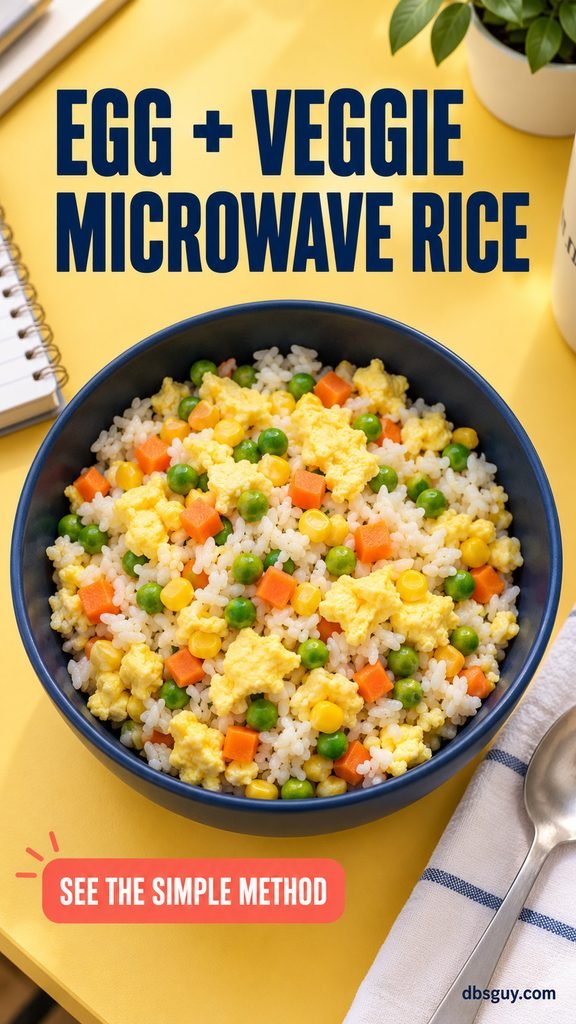
11. Egg and Veggie Rice Bowl
Serves: 1 · Estimated total: 10–13 minutes · Use: 4-cup microwave-safe bowl
Think of this as a soft, fried-rice-inspired bowl. Cooking the egg first helps avoid hidden pockets of raw egg inside a dense mound of rice.
Ingredients
- 1 large egg
- 1 teaspoon oil
- 1 cup fully cooked microwave-ready rice
- ½ cup frozen peas, carrots, and corn
- 1 tablespoon water
- 1–2 teaspoons low-sodium soy sauce
Microwave Steps
- Grease the bowl with the oil and beat the egg in it. Cover loosely. Microwave for 30 seconds, stir, and continue in 15-second bursts until fully set and 165°F. Transfer to a clean plate with a clean fork.
- Cook the frozen vegetables with the water in the same bowl according to their package. Add the rice and soy sauce, cover loosely, and heat according to the rice package, stirring midway.
- Fold in the cooked egg. Heat further in 20–30-second bursts until the combined bowl is 165°F throughout. Let stand covered for 3 minutes, then fluff.
Dorm tip: Use an unopened rice pouch or promptly refrigerated cooked rice. Reheating does not rescue rice that has been left out too long.
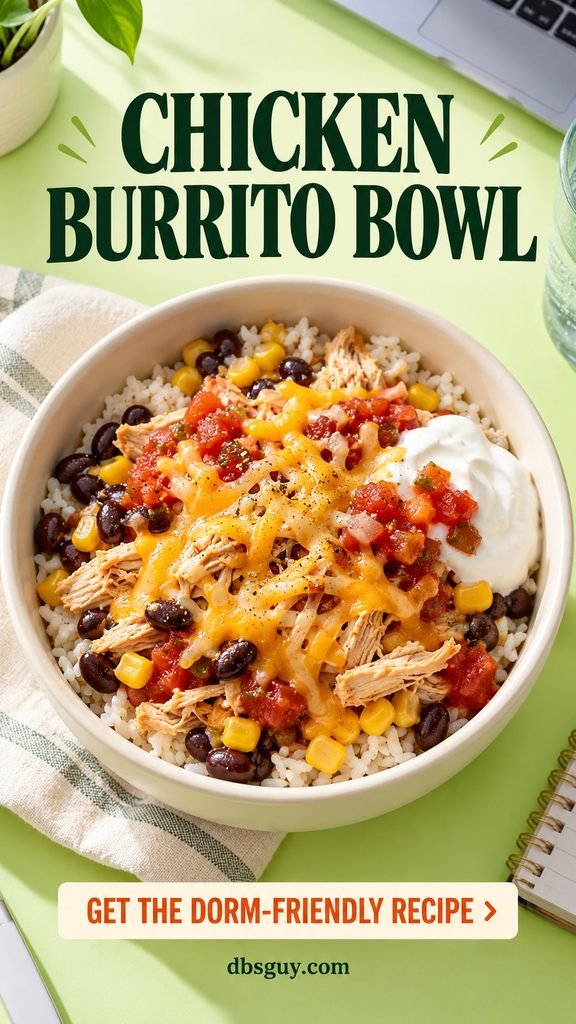
12. Chicken Burrito Bowl
Serves: 1 · Estimated total: 9–12 minutes · Use: 4-cup microwave-safe bowl
Canned cooked chicken makes this a true dorm meal without a cutting board full of raw poultry. Flake it before mixing so the pieces heat evenly.
Ingredients
- ¾ cup fully cooked microwave-ready rice
- ½ cup canned cooked chicken, drained and flaked
- ⅓ cup canned black beans, drained and rinsed
- ¼ cup canned corn, drained
- 3 tablespoons salsa
- 2 tablespoons shredded cheddar
- 1 tablespoon water; 1 tablespoon plain yogurt, optional
Microwave Steps
- Combine everything except the cheddar and yogurt in the bowl. Spread into an even layer and cover with a vented microwave-safe lid.
- Microwave for 90 seconds, stir thoroughly, and continue in 30-second bursts until several spots reach 165°F. Follow any longer rice-package directions. Add the cheddar and heat another 15–20 seconds if it needs help melting.
- Let stand covered for 3 minutes. Top with optional yogurt.
Dorm tip: Only use chicken labeled fully cooked or ready to eat. Frozen breaded chicken can be raw even when its coating looks cooked.
13. Spinach Feta Quinoa Bowl
Serves: 1 · Estimated total: 8–11 minutes · Use: 4-cup microwave-safe bowl
A quinoa pouch gives this bowl a different texture from the rice meals. Baby spinach wilts into it, while feta and lemon add flavor at the end.

Ingredients
- 1 cup fully cooked microwave-ready quinoa
- 1 cup loosely packed baby spinach, torn
- ⅓ cup canned chickpeas, drained and rinsed
- 1 tablespoon water
- 2 tablespoons crumbled feta
- 1 teaspoon olive oil; 1 teaspoon lemon juice
Microwave Steps
- Put the quinoa, spinach, chickpeas, and water in the bowl. Cover loosely and microwave according to the quinoa package, stirring once during heating.
- Continue in 30-second bursts as needed until the mixture reaches 165°F throughout. Break apart any compact clumps of quinoa when you stir.
- Stand covered for 3 minutes, then fold in the feta, olive oil, and lemon juice.
Dorm tip: Look for plain cooked quinoa, not dry quinoa. No microwave directions on the pouch? Transfer it to the bowl and follow its label’s heating guidance rather than guessing that the packaging is microwave-safe.
14. Coconut Lentil Curry Soup
Serves: 1 · Estimated total: 10–13 minutes · Use: 1½-quart microwave-safe bowl
Use canned cooked lentils so there is no long simmering step. Coconut milk and curry powder make a richer, spoonable dinner that works with a torn piece of bread.

Ingredients
- ¾ cup canned cooked lentils, drained and rinsed
- ½ cup canned diced tomatoes with juices
- ⅓ cup canned coconut milk, stirred before measuring
- ⅓ cup water or low-sodium broth
- ½ teaspoon mild curry powder
- ¼ cup baby spinach, torn; salt to taste
Microwave Steps
- Stir all the ingredients except the spinach in the large bowl. Cover with a vented microwave-safe lid.
- Heat for 2 minutes, stir well, and continue in 30–45-second bursts until the soup bubbles throughout and reaches 165°F. Stir in the spinach and heat another 20–30 seconds to wilt it.
- Let stand covered for 3 minutes. Stir, taste, and adjust the salt. Add water a tablespoon at a time if you prefer a thinner soup.
Dorm tip: Dry lentils are not interchangeable here. Refrigerate leftover coconut milk in a covered container and follow its label after opening.
15. White Bean Tomato Soup
Serves: 1 · Estimated total: 10–13 minutes · Use: 1½-quart microwave-safe bowl
Mashing a few cannellini beans thickens the broth without a blender. Leave the rest whole for a chunky tomato soup that feels different from the coconut lentil version.

Ingredients
- ¾ cup canned cannellini beans, drained and rinsed
- ½ cup canned diced tomatoes with juices
- ½ cup low-sodium vegetable broth
- 1 teaspoon olive oil
- ¼ teaspoon Italian seasoning; ⅛ teaspoon garlic powder
- 1 tablespoon grated Parmesan, optional
Microwave Steps
- Mash about ¼ cup of the beans in the bowl with a fork. Stir in the remaining beans, tomatoes, broth, oil, Italian seasoning, and garlic powder.
- Cover loosely and microwave for 2 minutes. Stir, then continue in 30–45-second bursts until bubbling and 165°F throughout.
- Let stand covered for 3 minutes. Add the optional Parmesan and a splash of water if the soup has thickened more than you like.
Dorm tip: Use a large bowl even though this is one serving: tomato broth can spit and foam near the rim.
16. Peanut Butter Ramen
Serves: 1 · Estimated total: 10–14 minutes · Use: 1½-quart microwave-safe bowl
A spoonful of peanut butter turns plain noodles into a creamy savory bowl. Use ramen with microwave directions; the seasoning packet is optional and is not needed for this sauce.

Ingredients
- 1 package instant ramen noodles, about 3 ounces, seasoning packet set aside
- Water amount specified for microwave preparation on the noodle package
- 1 tablespoon peanut butter
- 1 teaspoon low-sodium soy sauce
- ½ teaspoon hot sauce, optional
- 1 teaspoon sliced green onion, optional
Microwave Steps
- Cook the noodles in the bowl with the package-specified water and microwave directions. Do not microwave the retail cup or wrapper unless its label explicitly permits it.
- Carefully spoon 2 tablespoons hot noodle water into a small bowl. Mix it with the peanut butter, soy sauce, and optional hot sauce. Keep your face away from the steam.
- Use tongs or a fork to transfer noodles into the sauce, or carefully spoon off most of the water before stirring sauce into the large bowl. Add noodle water as needed for a creamy coating. Let stand for 3 minutes; finish with optional green onion.
Dorm tip: For a peanut-free version, use sunflower-seed butter. Do not add a raw egg at the end and assume the noodles will cook it.
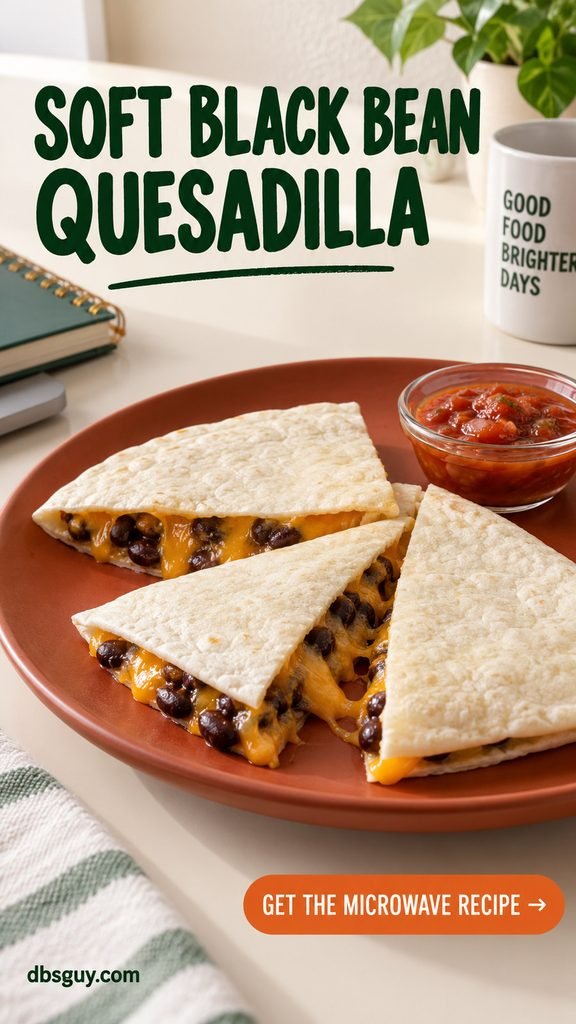
17. Soft Black Bean Quesadilla
Serves: 1 · Estimated total: 7–10 minutes · Use: microwave-safe plate plus a small bowl
This quesadilla is soft and cheesy, so it is easiest to eat after a short rest. It will not have the crisp brown spots of a skillet quesadilla.
Ingredients
- 1 medium flour tortilla, about 8 inches
- ⅓ cup canned black beans, drained and rinsed
- ¼ cup shredded cheddar
- 1 tablespoon salsa, plus 1 tablespoon for dipping
- 1 teaspoon water
Microwave Steps
- Mash the beans with 1 tablespoon salsa and the water in the bowl. Cover loosely, heat for 45 seconds, stir, then use 15-second bursts until hot throughout, aiming for 165°F.
- Spread the bean mixture over half the tortilla on the plate. Add the cheese, fold the tortilla over, and cover loosely with a microwave-safe cover. Microwave for 30 seconds; check and add 10–15-second bursts until the cheese melts and filling is hot.
- Let stand for 3 minutes. Cut into wedges and serve with the remaining salsa.
Dorm tip: Drain the beans well and keep salsa modest inside the tortilla. Extra liquid makes the folded bottom soggy.
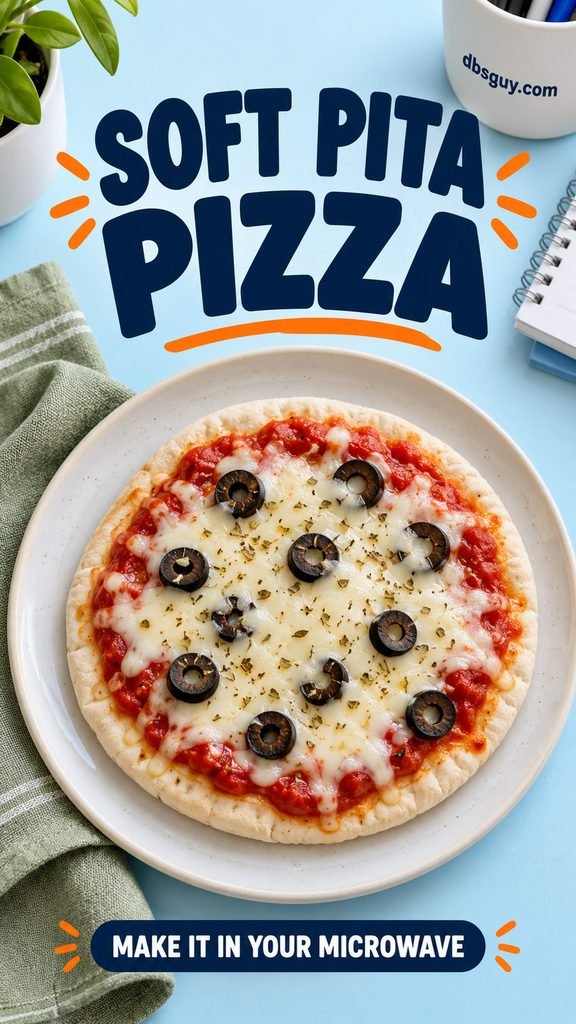
18. Soft Pita Pizza
Serves: 1 · Estimated total: 7–9 minutes · Use: microwave-safe plate
Pita gives pizza toppings a convenient base, but a microwave cannot crisp the crust. Keep the sauce thin and the toppings light for a warm, foldable snack.
Ingredients
- 1 small fully baked pita, about 6 inches
- 2 tablespoons marinara sauce
- ¼ cup shredded mozzarella
- 1 tablespoon sliced canned black olives
- ⅛ teaspoon dried oregano
Microwave Steps
- Set the pita on the plate. Spread the sauce in a thin layer, leaving a narrow rim. Sprinkle on the mozzarella, olives, and oregano.
- Cover loosely with a microwave-safe splatter cover. Heat for 30 seconds, rotate the plate if needed, and continue in 15-second bursts until the cheese melts and the sauce is hot throughout.
- Let stand for 3 minutes before slicing; the sauce under melted cheese can be much hotter than the bread.
Dorm tip: Use a fully baked pita, never raw pizza dough. Skip watery raw toppings that need longer cooking than the cheese.
19. Open-Face Tuna Melt Muffin
Serves: 1 · Estimated total: 8–11 minutes · Use: small microwave-safe bowl and plate
An English muffin catches the warm tuna filling neatly, even without toasting. This is a soft open-face sandwich; a small batch helps keep the bread from soaking through.

Ingredients
- 1 English muffin, split
- 1 tuna pouch, about 2.6 ounces, or an equivalent amount of drained canned tuna
- 1 tablespoon mayonnaise
- 1 teaspoon mustard
- 2 tablespoons shredded cheddar
- Pinch of black pepper
Microwave Steps
- Mix the tuna, mayonnaise, mustard, and pepper in the bowl. Cover loosely and microwave for 30 seconds. Stir and continue in 15-second bursts until 165°F throughout.
- Place the muffin halves on the plate, spoon the tuna onto them, and add cheddar. Heat in 15-second bursts until the cheese melts.
- Let stand for 3 minutes before eating. The muffin should remain soft and the filling should be hot.
Dorm tip: Open a fresh pouch for the meal and refrigerate any unused tuna promptly. Use the shared microwave’s splatter cover and clean up afterward.
20. Black Bean Corn Nachos
Serves: 1 · Estimated total: 7–10 minutes · Use: small bowl and a wide microwave-safe plate
Spread the chips out rather than piling them into a mountain. A shallow layer lets the cheese melt quickly, with fewer bare chips hiding underneath.

Ingredients
- About 1½ cups tortilla chips
- ⅓ cup canned black beans, drained and rinsed
- ¼ cup canned corn, drained
- ⅓ cup shredded cheddar
- 2 tablespoons salsa
- 1 tablespoon plain yogurt, optional
Microwave Steps
- Put the beans and corn in the bowl with 1 teaspoon water. Cover loosely, heat for 45 seconds, stir, and continue in 15-second bursts until hot throughout, aiming for 165°F.
- Spread the chips in a shallow layer on the plate. Add the warm beans and corn, then scatter cheddar evenly. Microwave for 20–30 seconds and add 10-second bursts only until the cheese melts.
- Let stand for 3 minutes. Spoon salsa and optional yogurt over the top just before eating.
Dorm tip: Keep wet toppings off the chips until the end. These are best eaten immediately after the brief rest.
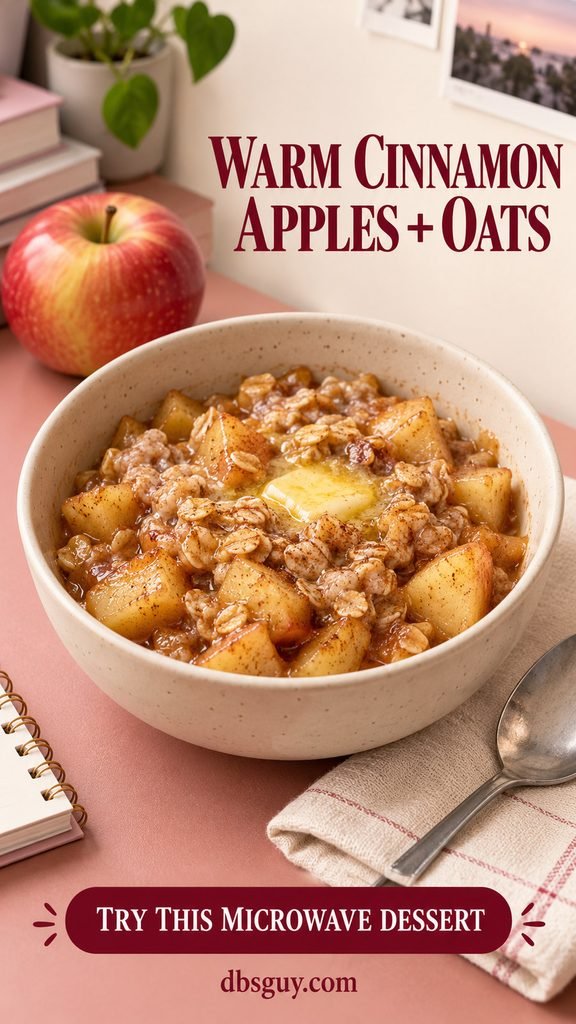
21. Cinnamon Apples with Soft Oat Topping
Serves: 1 · Estimated total: 10–14 minutes · Use: 4-cup microwave-safe bowl
This is a warm apple dessert with a soft oat topping, not a crunchy oven crisp. Small, even apple pieces cook more predictably than large wedges.
Ingredients
- 1 medium apple, cored and cut into ½-inch pieces
- 1 tablespoon water
- ¼ teaspoon cinnamon
- 1 teaspoon brown sugar
- 2 tablespoons quick oats
- 1 teaspoon butter
Microwave Steps
- Mix the apple, water, cinnamon, and sugar in the bowl. Cover loosely and microwave for 90 seconds. Stir, then add 30-second bursts until the pieces are nearly tender, usually another 1–2 minutes.
- Stir in the oats and dot with butter. Cover loosely and heat for another 30–60 seconds, until the oats soften. Add 1 teaspoon water if the mixture looks dry.
- Let stand covered for 3 minutes. Check an apple piece before eating because the juices can be very hot.
Dorm tip: Use a small cutting board and knife for the apple, or buy ready-cut apple slices and cut them smaller with clean kitchen scissors.
22. Chocolate Mug Cake
Serves: 1 · Estimated total: 7–10 minutes · Use: 16-ounce microwave-safe mug
This small cocoa cake uses no egg, so you do not have to divide one for a single serving. Cook the middle all the way through rather than aiming for a raw-batter lava center.

Ingredients
- 3 tablespoons all-purpose flour, spooned and leveled
- 1 tablespoon unsweetened cocoa powder
- 1½ tablespoons sugar
- ⅛ teaspoon baking powder; pinch of salt
- 3 tablespoons milk
- 1 tablespoon neutral oil
- 1 teaspoon chocolate chips, optional
Microwave Steps
- Whisk the flour, cocoa, sugar, baking powder, and salt in the mug with a fork. Add the milk and oil; scrape the bottom corners until evenly mixed. Sprinkle on the optional chips.
- Microwave uncovered for 60 seconds. Add 10–15-second bursts as needed, typically another 15–45 seconds, until the center is set. A toothpick should have cooked crumbs rather than wet batter; split the center to check if uncertain.
- Let cool for 3 minutes. If a wet patch of batter remains in the middle, cook longer before eating. Do not taste the raw batter.
Dorm tip: Melted chocolate chips can stay glossy after the cake is done. Check the surrounding cake crumb rather than using the chips as your doneness test.
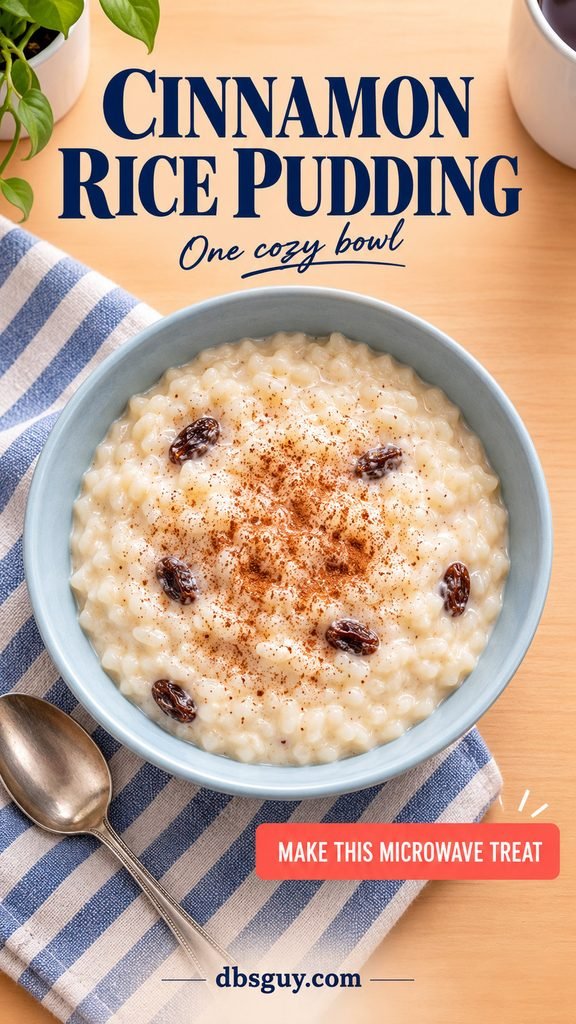
23. Creamy Cinnamon Rice Pudding
Serves: 1 · Estimated total: 10–14 minutes · Use: 4-cup microwave-safe bowl
Already-cooked rice makes a small, egg-free pudding without a saucepan. The texture is softer and looser than long-simmered rice pudding, and it thickens as it rests.
Ingredients
- ½ cup fully cooked plain white rice
- ½ cup milk
- 2 teaspoons sugar
- ⅛ teaspoon cinnamon
- ⅛ teaspoon vanilla extract, optional
- 1 tablespoon raisins, optional
Microwave Steps
- Combine the rice, milk, sugar, cinnamon, and optional raisins in the bowl. Break up rice clumps. Use an unopened ready-to-heat rice pouch or rice that has been promptly refrigerated.
- Microwave uncovered for 1 minute, stir, and continue in 30-second bursts, watching closely for rising milk. Heat until the mixture is gently bubbling and 165°F throughout, roughly 2–4 minutes total. Follow any longer rice-package directions.
- Stir in optional vanilla. Let stand for 3 minutes, then stir again. For a thicker pudding, heat in additional 20-second bursts with stirring; for a thinner one, add a splash of milk.
Dorm tip: Do not substitute dry rice. Eat this serving warm, or refrigerate promptly rather than leaving milk and rice on your desk.
How to Keep Dorm Meals Simple and Safe
Cook the portion you plan to eat. If you save some, put it in a shallow covered container and refrigerate promptly at 40°F or below, within 2 hours of cooking—or within 1 hour when the room or outdoor temperature is above 90°F. Use most cooked leftovers within 3–4 days, or sooner if an ingredient’s label calls for it.
Cooked rice needs the same care as other perishable leftovers. Start with an unopened rice pouch or properly refrigerated cooked rice. Throw away rice that has sat out too long; reheating is not a reset button. If your mini-fridge cannot reliably stay at 40°F or below, make only what you will eat and avoid storing perishables.
Keep raw egg and flour off ready-to-eat foods. Wash the fork used to beat raw eggs before using it to eat, and never taste uncooked mug-cake batter. For fully cooked packaged foods and frozen vegetables, follow the package’s microwave instructions, including any standing time.
Microwave Dorm Cooking FAQs
Can I make these recipes in a 700-watt microwave?
Yes, but expect longer heating. Use the shorter listed time as your first check, stir, then add small bursts until the food is done. Do not use a wattage conversion alone to decide whether eggs, chicken mixtures, or leftovers are safe; use the temperature checks in the recipes.
Which recipes work without a mini-fridge?
For immediate eating, try oatmeal with water and peanut butter, tomato chickpea couscous, or peanut butter ramen. A potato or sweet potato with a freshly opened can of beans is another option. Mug cakes can use a newly opened single-serving shelf-stable milk carton. Leave out refrigerated toppings, buy portions you can finish, and do not keep opened perishables at room temperature.
Can I use dry rice or dry quinoa instead of a pouch?
Not with the quantities and times listed here. Those bowls start with fully cooked grains. Dry grains need different liquid ratios, longer cooking, and a different-sized vessel. Ready-to-heat grains are the shortcut that keeps these particular recipes manageable.
Why did my mug cake overflow or turn rubbery?
A small mug, too much batter, or excess baking powder can cause overflow. Use a 16-ounce mug, measure the ingredients, and keep it no more than half full before heating. Long uninterrupted cooking can dry out the edges. Use short finishing bursts, but still cook all batter through.
Will microwave pizza, quesadillas, and tuna melts be crispy?
No. These methods warm the bread and melt the cheese, giving you a soft result. The recipes and visuals reflect that texture. If you want a crisp crust, you would need different equipment and a different method.
Can I double a recipe for my roommate?
It is easier to cook separate servings, especially for eggs, mug cakes, and potatoes. Doubling ingredients changes depth, bubbling, and heating patterns; simply doubling the time can overcook the edges while leaving the middle cold.
How can I make substitutions for allergies or dietary needs?
Sunflower-seed butter can replace peanut butter, and an unsweetened milk alternative can work in many of the sweet recipes, though texture will vary. Check pesto for nuts and dairy, soy sauce and noodles for wheat, and shared utensils for cross-contact. Cheese alternatives melt differently, so adjust in short bursts rather than promising the same result.
For your next grocery trip, choose one breakfast, one savory bowl, and one treat from the list. A small rotation is easier to keep stocked than 23 separate ingredient collections.
Also Read
- 25 Easy & Healthy Breakfast Sandwiches — more breakfast ideas for days when you have the equipment each recipe needs.
- Easy Iced Coffee Recipe at Home for Perfect Refreshment — a drink to pair with breakfast.
- 30 Cozy Soup Recipes That’ll Warm You Up All Season Long — more soup inspiration for access-to-a-kitchen days.





One Comment