
For a Christmas candy box with a little of everything, choose one creamy fudge, one crunchy bark or brittle, and one bite-size candy. These 21 Christmas candy & fudge recipes include complete ingredient lists and steps, so you can pick a few favorites and start cooking without chasing recipe links.
Short on time? Start with chocolate peanut clusters, white chocolate pretzel bark, or classic chocolate walnut fudge. For an old-fashioned candy-making afternoon, save the peanut brittle, butter almond toffee, and cream caramels for when you can watch a thermometer.

A note before you start: These are research-informed recipe formulations, not recipes kitchen-tested by dbsguy.com. Times and yields are estimates. The images are AI-generated serving concepts, not photographs of tested batches; your finished candy may look different.
Choose Your Christmas Candy Project
- No candy thermometer: recipes 1–17. Most need melting, mixing, and chilling rather than a cooked sugar syrup.
- Oven shortcut: recipe 18, saltine cracker toffee.
- Thermometer required: recipes 19–21: brittle, butter toffee, and cream caramels.
- For a chilled dessert tray: chocolate cookie truffles and cocoa-dusted ganache truffles.
- For a crisp gift-box element: peanut brittle, peanut clusters, or pretzel bark. Check ingredients and label allergens.
A Few Details That Make Candy Easier
Read the full recipe and prepare your pans before heating anything. Use US measuring cups and spoons; chocolate ounces are weights. Line fudge pans with parchment handles, and use sturdy, rimmed metal pans for hot candy. Keep bowls and utensils completely dry when melting chocolate.
Sweetened condensed milk is thick and sweet; evaporated milk is not an equal substitute. For white chocolate fudge, use the specified amount of real white chocolate rather than swapping in dark chocolate or reducing the quantity. The two types set differently.
Candy coating is a convenient choice for dipped candies and bark because it sets without tempering; follow the directions on your package. Where a recipe uses ordinary melted chocolate, it is not tempered and may soften or show pale streaks at room temperature. Keep those candies refrigerated as directed.
For brittle, toffee, and caramels, check your thermometer in boiling water before starting. If it reads below 212°F at your elevation, lower the candy target by the same difference, allowing for thermometer calibration. Keep the probe away from the pan bottom. Hot sugar clings to skin: keep children away from the stove and never taste syrup until completely cool.
1. Classic Chocolate Walnut Fudge
Start here for a familiar chocolate square with a little crunch. The condensed-milk method skips boiling a sugar syrup, making it a useful first candy project.

Makes: 36 small squares. Hands-on/cooking: about 15 minutes. Additional setting time: 3 hours chilling.
Ingredients
- 18 oz semisweet chocolate chips
- 1 (14-oz) can sweetened condensed milk
- 1 tsp vanilla extract
- 1/4 tsp fine salt
- 3/4 cup chopped toasted walnuts
How to Make It
- Line an 8-inch square pan with parchment, leaving handles. Put the chocolate, condensed milk, and salt in a heavy saucepan.
- Warm over low heat, stirring and scraping the bottom, just until smooth. Remove from heat; fold in vanilla and walnuts.
- Spread into the pan. Refrigerate about 3 hours, until firm through the center. Lift out and cut into 36 squares.
Useful tip: Use sweetened condensed milk, not evaporated milk. Stop heating when the chocolate melts; boiling is unnecessary.
Storage: Refrigerate airtight; plan to enjoy within 1 week for best quality.
2. White Chocolate Cranberry Pistachio Fudge
Ruby cranberries and green pistachios give these ivory squares a Christmas palette without food coloring. Tart dried fruit helps balance the sweet white chocolate.

Makes: 36 squares. Hands-on/cooking: about 15 minutes. Additional setting time: 4 hours chilling.
Ingredients
- 24 oz real white chocolate, chopped
- 1 (14-oz) can sweetened condensed milk
- 1 tsp vanilla extract
- 1/8 tsp fine salt
- 1/2 cup dried cranberries, chopped
- 1/2 cup shelled roasted unsalted pistachios, chopped
How to Make It
- Line an 8-inch square pan with parchment. Reserve 1 tablespoon each of cranberries and pistachios.
- Heat white chocolate, condensed milk, and salt over very low heat, stirring continuously. Remove as soon as smooth; add vanilla and the remaining fruit and nuts.
- Spread in the pan; press reserved toppings onto the surface. Chill at least 4 hours until firm, then cut.
Useful tip: Choose white chocolate containing cocoa butter. Different white baking chips can melt and set differently.
Storage: Keep airtight in the refrigerator and use within 1 week for best texture.
3. Peanut Butter Swirl Fudge
A tan peanut butter ribbon makes each chocolate square look a little different. The swirl stays near the surface so the chocolate base can set cleanly.

Makes: 36 squares. Hands-on/cooking: about 15 minutes. Additional setting time: 3 hours chilling.
Ingredients
- 18 oz semisweet chocolate chips
- 1 (14-oz) can sweetened condensed milk
- 1 tsp vanilla extract
- 1/8 tsp fine salt
- 1/3 cup conventional creamy peanut butter
- 2 oz white chocolate, chopped
How to Make It
- Line an 8-inch square pan. Melt semisweet chocolate, condensed milk, and salt over low heat, stirring. Remove from heat and stir in vanilla.
- In a separate dry microwave-safe bowl, warm peanut butter and white chocolate in 15-second bursts, stirring until smooth.
- Spread chocolate mixture in the pan. Dot peanut butter mixture over it and draw a knife through in a few broad passes. Chill 3 hours before cutting.
Useful tip: Use a smooth, no-stir peanut butter rather than an oily natural variety. Too much swirling muddles the pattern.
Storage: Refrigerate airtight; enjoy within 1 week.
4. Gingerbread White Chocolate Fudge
Warm spices and crisp gingersnap crumbs bring a cookie-box flavor to creamy fudge. This version uses dry spices instead of extra liquid molasses.

Makes: 36 squares. Hands-on/cooking: about 15 minutes. Additional setting time: 4 hours chilling.
Ingredients
- 24 oz white chocolate, chopped
- 1 (14-oz) can sweetened condensed milk
- 1 tsp ground ginger
- 1 tsp ground cinnamon
- 1/8 tsp ground cloves
- 1/8 tsp fine salt
- 1 tsp vanilla extract
- 1/2 cup finely crushed crisp gingersnap cookies
How to Make It
- Line an 8-inch square pan. Combine white chocolate, condensed milk, spices, and salt in a heavy saucepan.
- Stir over very low heat just until smooth. Remove from heat and stir in vanilla and half the cookie crumbs.
- Press into the pan; scatter remaining crumbs over the top and press lightly. Chill 4 hours or until firm before slicing.
Useful tip: Use crisp cookies, not soft gingerbread. Crumbs add a speckled finish rather than a thick cookie crust.
Storage: Refrigerate airtight; use within 1 week. The topping softens during storage.
5. Cookies and Cream Fudge
Chunky chocolate sandwich cookies make bold dark flecks in a white chocolate base. Leave some pieces coarse so the finished slices have visible texture.

Makes: 36 squares. Hands-on/cooking: about 15 minutes. Additional setting time: 4 hours chilling.
Ingredients
- 24 oz white chocolate, chopped
- 1 (14-oz) can sweetened condensed milk
- 1 tsp vanilla extract
- 12 regular chocolate sandwich cookies, roughly chopped
How to Make It
- Line an 8-inch square pan with parchment. Set aside a small handful of cookie pieces.
- Melt white chocolate with condensed milk over very low heat, stirring gently. Remove from heat; add vanilla, then fold in cookies with only a few strokes.
- Spread into the pan and press reserved cookies on top. Chill 4 hours until firm; cut with a clean knife.
Useful tip: Regular sandwich cookies work better here than extra-filled versions, which add more soft filling.
Storage: Store airtight in the refrigerator; use within 1 week for best quality.
6. Rocky Road Fudge
Marshmallows and almonds turn this into the most textured fudge on the tray. Wait briefly before adding the marshmallows so they stay in distinct white pockets.

Makes: 36 squares. Hands-on/cooking: about 15 minutes. Additional setting time: 3 hours chilling.
Ingredients
- 18 oz semisweet chocolate chips
- 1 (14-oz) can sweetened condensed milk
- 1 tsp vanilla extract
- 1/8 tsp fine salt
- 1 1/2 cups mini marshmallows
- 3/4 cup chopped toasted almonds
How to Make It
- Line an 8-inch square pan. Melt chocolate, condensed milk, and salt over low heat, stirring until smooth.
- Remove from heat and stir in vanilla. Let cool about 5 minutes, until warm rather than hot. Fold in almonds and marshmallows quickly.
- Press into the pan with a lightly greased spatula. Chill 3 hours until firm before cutting.
Useful tip: Check marshmallow ingredients if serving guests who avoid gelatin. Do not add the marshmallows while the pan is still on the burner.
Storage: Refrigerate airtight; plan to use within 1 week.
7. Layered Peppermint Bark
Thin dark and white chocolate layers give you a crisp bite with candy-cane crunch. This is a good option when you want a festive candy without measuring a syrup temperature.
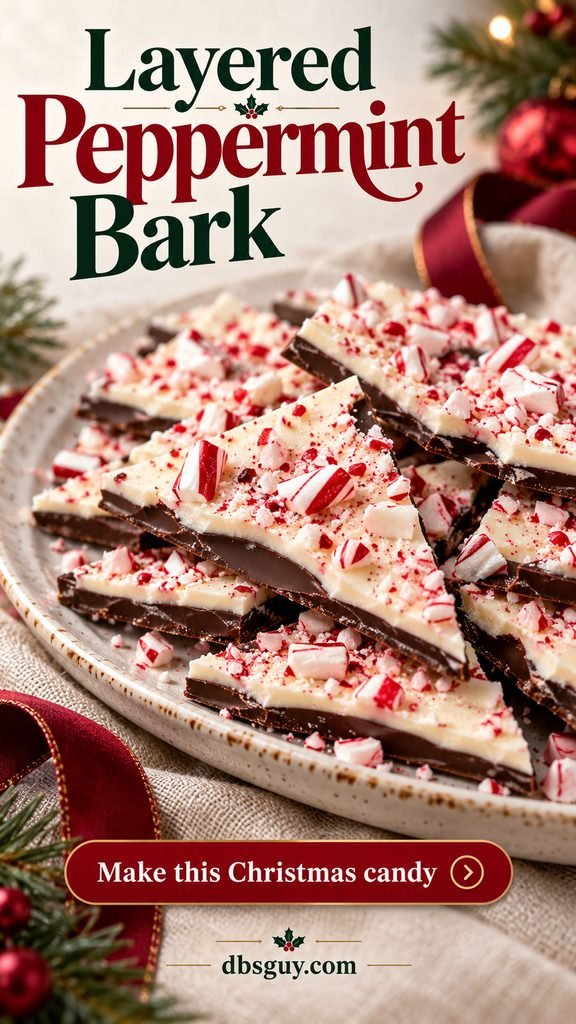
Makes: About 24 shards. Hands-on/cooking: about 20 minutes. Additional setting time: 45–60 minutes setting.
Ingredients
- 10 oz dark chocolate candy coating
- 10 oz white vanilla candy coating
- 1/3 cup crushed candy canes
How to Make It
- Line a baking sheet with parchment. Melt the dark coating according to its package directions and spread into a roughly 9-by-12-inch rectangle.
- Let stand until the surface is matte and just set but not cold. Melt the white coating as directed and spread gently over the dark layer.
- Scatter crushed candy canes over the wet top. Let harden completely in a cool room, or refrigerate briefly if needed, then break into shards.
Useful tip: Compatible candy coatings are easiest for beginners. A fully chilled bottom layer may separate when the warm top goes on.
Storage: Keep airtight in a cool, dry place; aim to serve within 1 week. Moisture makes candy canes sticky.
8. Dark Chocolate Orange Almond Bark
Toasted almonds and fresh orange zest give this bark a quieter holiday flavor than peppermint. A thin sheet makes it easy to break into small after-dinner pieces.

Makes: About 20 pieces. Hands-on/cooking: about 15 minutes. Additional setting time: 45 minutes chilling.
Ingredients
- 12 oz dark chocolate, chopped
- 3/4 cup toasted sliced almonds
- 1 tsp finely grated orange zest, from a washed and thoroughly dried orange
- 1/4 tsp flaky sea salt
How to Make It
- Line a baking sheet with parchment. Melt chocolate in a dry microwave-safe bowl at 50% power in 20-second intervals, stirring after each.
- Spread into a 9-by-12-inch rectangle. Scatter almonds, orange zest, and salt over the surface; gently press the almonds into the chocolate.
- Refrigerate about 45 minutes until firm. Break into pieces and pack with parchment between layers.
Useful tip: Use only fine colored zest, not bitter white pith. Do not squeeze orange juice into the chocolate; water can make it seize.
Storage: Refrigerate airtight and enjoy within 5 days for the freshest zest flavor. This untempered chocolate softens in a warm room.
9. White Chocolate Pretzel Bark
Salty pretzels keep this sweet white bark from feeling one-note. Red and green sprinkles make it party-ready with very little decorating.

Makes: About 24 pieces. Hands-on/cooking: about 15 minutes. Additional setting time: 45–60 minutes setting.
Ingredients
- 16 oz white vanilla candy coating
- 1 1/2 cups mini pretzels, roughly broken
- 2 tbsp red and green sprinkles
How to Make It
- Line a baking sheet with parchment. Melt coating following the package instructions.
- Fold in 1 cup of the pretzels. Spread into a roughly 10-by-12-inch sheet and scatter remaining pretzels and sprinkles on top.
- Press toppings in gently. Let set completely, then snap into serving pieces.
Useful tip: Keep the pretzel pieces small enough for a comfortable bite, but do not crush them to powder.
Storage: Store airtight in a cool, dry place; use within 1 week for best crunch.
10. Chocolate Peanut Clusters
These little mounds are all about a high nut-to-chocolate ratio. They portion easily into paper candy cups and take less hands-on work than rolled truffles.

Makes: About 24 clusters. Hands-on/cooking: about 15 minutes. Additional setting time: 45 minutes setting.
Ingredients
- 12 oz dark chocolate candy coating
- 2 cups roasted lightly salted peanuts
How to Make It
- Line two trays with parchment. Melt candy coating according to its package directions.
- Stir in peanuts until evenly coated. Drop heaping tablespoonfuls onto the trays, leaving space between mounds.
- Let set in a cool room until the bottoms release cleanly. Place in mini paper cups if gifting.
Useful tip: Use roasted nuts; raw peanuts will not develop a roasted flavor just from contact with melted coating.
Storage: Keep airtight, cool, and dry. Plan to enjoy within 2 weeks for best quality.
11. Pecan Caramel Turtles
A small pecan fan underneath chewy caramel gives each turtle a distinct shape. Store-bought soft caramels keep this a melting-and-assembly recipe.

Makes: 24 candies. Hands-on/cooking: about 25 minutes. Additional setting time: 1 hour chilling.
Ingredients
- 2 cups toasted pecan halves
- 11 oz soft chewy caramel candies, unwrapped
- 1 tbsp heavy cream, plus up to 1 tbsp if needed
- 8 oz dark chocolate candy coating
- 1/8 tsp flaky sea salt
How to Make It
- Arrange 24 groups of 3–4 pecan halves on parchment-lined trays.
- Warm caramels and 1 tablespoon cream over low heat, stirring. Add only enough extra cream to make the caramel spoonable. Spoon a small mound over the center of each pecan group.
- Chill 20 minutes. Melt coating as directed, spoon over the caramel centers, and add a little salt. Garnish with a few finely chopped pecans from the measured amount if desired. Chill until set.
Useful tip: Keep some pecan tips exposed. Too much cream makes the caramel flow instead of holding a mound.
Storage: Refrigerate airtight and enjoy within 1 week; let soften briefly before serving.
12. Chocolate-Dipped Pretzel Rods
Long pretzel rods add height to a candy jar or dessert tray. Leave a plain handle so guests can pick them up without touching the coating.

Makes: 18 rods. Hands-on/cooking: about 25 minutes. Additional setting time: 45 minutes setting.
Ingredients
- 18 pretzel rods
- 8 oz dark chocolate candy coating
- 8 oz white vanilla candy coating
- 1/4 cup holiday sprinkles
How to Make It
- Line two baking sheets with parchment. Melt the two coatings separately according to package instructions.
- Pour a little coating into a narrow heat-safe cup. Dip each rod about two-thirds of the way, tap off excess, and place on parchment.
- Add sprinkles before the coating sets. Use a fork to drizzle some rods with the contrasting coating. Let harden completely.
Useful tip: Work in small batches so the coating stays fluid. Avoid laying wet rods on a cooling rack, where they can stick.
Storage: Keep airtight in a cool, dry place. Enjoy within 1 week for best crunch.
13. Chocolate Peanut Butter Balls
A creamy peanut butter center gives these a familiar candy-shop feel. This filling uses no raw flour and is firm enough to roll after a short chill.

Makes: About 30 balls. Hands-on/cooking: about 30 minutes. Additional setting time: 1 hour chilling, divided.
Ingredients
- 1 cup conventional creamy peanut butter
- 4 tbsp unsalted butter, softened
- 2 cups powdered sugar, sifted
- 1 tsp vanilla extract
- 12 oz dark chocolate candy coating
- 2 tbsp finely chopped roasted peanuts, optional
How to Make It
- Beat peanut butter, butter, and vanilla until smooth. Mix in powdered sugar until a thick, moldable dough forms.
- Roll into 30 roughly 1-inch balls and chill on parchment for 30 minutes.
- Melt coating as directed. Dip each ball with a fork, tap off excess, and return to parchment. Drizzle with leftover coating and add optional chopped peanuts before the shell sets. Chill until set.
Useful tip: If the dough is too soft to roll, chill it before adding more sugar. Natural peanut butter can make the filling oily.
Storage: Refrigerate airtight and use within 1 week for best quality.
14. Coconut Snowball Truffles
These no-bake coconut candies stay snowy white without a chocolate shell. A fine coconut coating gives them a softer look beside the dark candies on your tray.

Makes: About 24 balls. Hands-on/cooking: about 20 minutes. Additional setting time: 1 hour chilling.
Ingredients
- 3 cups finely shredded sweetened coconut, divided
- 2/3 cup sweetened condensed milk
- 1/2 cup powdered sugar
- 1 tsp vanilla extract
- 1/8 tsp fine salt
How to Make It
- Reserve 3/4 cup coconut in a shallow bowl. Combine remaining coconut with condensed milk, sugar, vanilla, and salt.
- Refrigerate 30 minutes. Scoop and firmly compress tablespoon-sized portions, then roll into balls.
- Roll in reserved coconut. Chill another 30 minutes until firm enough to lift.
Useful tip: Use finely shredded coconut so the balls hold together. If your coconut is very coarse, pulse it briefly before measuring.
Storage: Refrigerate airtight; enjoy within 5 days. These are soft candies, so keep them chilled until serving.
15. Chocolate Cookie Truffles
A dark cookie-and-cream-cheese filling makes a tender center under a crisp chocolate shell. Serve these chilled rather than packing them in an unrefrigerated gift basket.

Makes: About 48 small truffles. Hands-on/cooking: about 30 minutes. Additional setting time: 1 hour 10 minutes chilling.
Ingredients
- 36 regular chocolate sandwich cookies, plus 2 extra for topping if desired
- 8 oz brick cream cheese, softened
- 16 oz dark chocolate candy coating
How to Make It
- Crush cookies, filling included, into fine crumbs. Beat or pulse with cream cheese until no pale streaks remain.
- Roll into 48 roughly 1-inch balls. Freeze 10 minutes to firm the surface.
- Melt coating as directed. Dip balls with a fork, set on parchment, and drizzle with leftover coating. Sprinkle with crumbs from the extra cookies if using. Refrigerate 1 hour.
Useful tip: Use brick cream cheese instead of whipped spread. Take only a few cold balls out at a time while dipping.
Storage: Keep refrigerated at 40°F or below; use within 3 days as a conservative make-ahead plan.
16. Cocoa-Dusted Chocolate Truffles
For a quieter, grown-up box of sweets, try dark chocolate ganache with a cocoa finish. These have a creamy center rather than the crunch of a dipped shell.

Makes: About 24 truffles. Hands-on/cooking: about 25 minutes. Additional setting time: 3 hours chilling.
Ingredients
- 12 oz semisweet chocolate (about 55–60% cacao), finely chopped
- 1/2 cup heavy cream
- 1 tbsp unsalted butter, softened
- 1/2 tsp vanilla extract
- 1/3 cup unsweetened cocoa powder
How to Make It
- Put chocolate in a heat-safe bowl. Heat cream just until small bubbles appear at the edge; pour over chocolate and leave undisturbed for 3 minutes.
- Stir from the center outward until smooth, then stir in butter and vanilla. If bits remain, warm over barely simmering water, keeping water out of the bowl.
- Refrigerate about 2–3 hours until scoopable. Form small balls and roll in cocoa. Chill again until firm.
Useful tip: Scoop first, then roll quickly with cool hands. If the ganache smears, chill it again rather than adding cocoa to the center.
Storage: Refrigerate airtight at 40°F or below; plan to enjoy within 5 days.
17. Peppermint Cream Patties
Cool peppermint filling and a thin chocolate shell make these especially welcome after a rich dinner. Shape small discs so each bite has a balanced amount of chocolate.

Makes: About 24 patties. Hands-on/cooking: about 35 minutes. Additional setting time: 1 hour chilling, divided.
Ingredients
- 2 1/2 cups powdered sugar, plus a little for dusting
- 1/3 cup sweetened condensed milk
- 1/2 tsp peppermint extract
- 12 oz dark chocolate candy coating
- 1 tbsp finely crushed candy cane, optional
How to Make It
- Mix sugar, condensed milk, and peppermint extract into a stiff dough. If sticky, knead in powdered sugar a tablespoon at a time until moldable.
- On a lightly sugar-dusted surface, pat to about 1/4 inch thick. Cut 24 small discs, rerolling scraps. Chill 30 minutes.
- Melt coating as directed. Dip each disc using a fork and set on parchment. Sprinkle with optional candy cane pieces while the coating is wet. Chill until the shell is firm.
Useful tip: Use peppermint extract, not spearmint. Measure carefully; a small excess can overwhelm the filling.
Storage: Refrigerate airtight and use within 1 week for best quality.
18. Saltine Cracker Toffee
This shortcut candy layers salty crackers, a bubbling butter-sugar topping, and chocolate. It is a baked cracker candy rather than a thermometer-cooked hard toffee.

Makes: About 40 pieces. Hands-on/cooking: about 20 minutes. Additional setting time: 1 hour chilling.
Ingredients
- About 40 saltine crackers
- 1 cup unsalted butter
- 1 cup packed light brown sugar
- 2 cups semisweet chocolate chips
- 1/2 cup finely chopped toasted pecans, optional
How to Make It
- Heat oven to 400°F. Line a rimmed 10-by-15-inch metal pan with foil and butter the foil. Fit crackers in one layer.
- Bring butter and brown sugar to a full boil in a saucepan, stirring. Boil 3 minutes, stirring steadily; carefully pour over crackers and spread. Bake 5 minutes, until bubbling across the surface.
- Remove pan and scatter chocolate chips over the top. Wait 3 minutes, then spread. Add pecans if using. Cool until the pan is no longer hot, then refrigerate until firm and break apart.
Useful tip: Use a rimmed metal pan and watch closely near the end of baking. Hot butter-sugar syrup can cause serious burns.
Storage: Store airtight in the refrigerator and enjoy within 1 week for best crunch.
19. Classic Peanut Brittle
Thin amber shards and plenty of peanuts make this the crispest candy in the collection. Choose a dry day and have the pan ready before the syrup finishes.

Makes: About 1 lb; 24 pieces. Hands-on/cooking: about 35 minutes. Additional setting time: 45–60 minutes cooling.
Ingredients
- 1 cup light corn syrup
- 1 cup granulated sugar
- 1/4 cup water
- 2 tbsp butter
- 1 1/2 cups roasted lightly salted peanuts
- 1 tsp baking soda
How to Make It
- Lightly grease a 10-by-15-inch rimmed metal pan and a metal spreading spatula. In a heavy 3-quart saucepan, heat corn syrup, sugar, water, and butter, stirring until dissolved.
- Attach a candy thermometer with its tip in the syrup, clear of the bottom. Cook without stirring to 280°F. Add peanuts carefully; stir frequently and continue to 300°F.
- Remove from heat and stir in baking soda; the mixture foams. Immediately pour onto the pan and spread thinly. Leave until completely cold, then break.
Useful tip: Do not omit the baking soda: it adds tiny air pockets. Never touch or taste the hot syrup.
Storage: Store airtight in a cool, dry place; use within 2 weeks for best crunch. Keep away from humid refrigerators.
20. Butter Almond Toffee
A buttery candy layer, chocolate cap, and toasted almonds give this a different bite from peanut brittle. A thermometer is much more useful than judging the color alone.

Makes: About 30 pieces. Hands-on/cooking: about 40 minutes. Additional setting time: 3 hours cooling.
Ingredients
- 1 cup butter
- 1 cup plus 2 tbsp and 2 tsp granulated sugar
- 3 tbsp water
- 1 tbsp light corn syrup
- 3/4 cup chopped toasted almonds, divided
- 1 cup semisweet chocolate chips
How to Make It
- Butter a rimmed 10-by-15-inch metal pan. Heat butter, sugar, water, and corn syrup in a heavy 3-quart saucepan, stirring until butter melts.
- Cook at a steady moderate heat, stirring occasionally, until a candy thermometer reads 300°F; this can take 20–35 minutes. Keep the probe clear of the pan bottom. Remove from heat and stir in 1/2 cup almonds.
- Pour into the pan and spread thinly. Add chocolate chips, wait 5 minutes, then spread melted chocolate. Scatter remaining almonds. Cool fully, about 3 hours, before breaking.
Useful tip: Avoid sudden heat changes and do not rush the syrup over high heat. The candy must be fully cool before you pack it.
Storage: Store airtight in a cool, dry place; plan to enjoy within 2 weeks for best quality.
21. Sea Salt Cream Caramels
Soft rectangles wrapped in parchment bring a chewy option to the box. This is the recipe to make when you can give a saucepan your full attention.

Makes: About 48 small caramels. Hands-on/cooking: about 40–50 minutes. Additional setting time: 2–3 hours cooling, plus 1 hour chilling.
Ingredients
- 1 cup granulated sugar
- 1/2 cup packed brown sugar
- 1/2 cup butter
- 1/2 cup 2% milk
- 1/2 cup heavy cream
- 1/2 cup light corn syrup
- 1/2 tsp vanilla extract
- 1/4 tsp flaky sea salt
How to Make It
- Line an 8-inch square pan with parchment and butter it. Put both sugars, butter, milk, cream, and corn syrup in a heavy 3-quart saucepan.
- Cook over medium heat, stirring frequently and scraping the base, until the mixture reaches 244°F on a candy thermometer. Keep the probe immersed but off the bottom; use temperature rather than the estimated time.
- Remove from heat, stir in vanilla carefully, and pour into the pan. Add salt when the surface starts to set. Cool completely, then chill 1 hour. Cut into 48 rectangles and wrap separately in food-safe parchment.
Useful tip: Check thermometer accuracy before starting. At higher elevations, adjust the target by how far your local boiling-water reading is below 212°F.
Storage: Keep individually wrapped in an airtight container in the refrigerator; plan to enjoy within 1 week. Let soften briefly before eating.
Make a Christmas Candy Box That Travels Well
Pick three contrasting textures rather than making five similar fudges. A small box of chocolate walnut fudge, peanut brittle, and peppermint bark feels varied without requiring a large baking schedule. Cut fudge small; rich candy works well in one- or two-bite portions.
Let everything set completely before packaging. Put sticky or strongly flavored candies in separate food-safe bags or cups, and keep peppermint apart from other flavors. Use parchment between layers, and label each batch with its name, the date made, and ingredients or allergens. These recipes commonly include milk, soy, wheat, peanuts, tree nuts, and coconut; check every package and avoid cross-contact when cooking for someone with an allergy.
Keep refrigerated candies cold during transport. Cream-cheese cookie truffles and cream-based ganache are better handed over in person with a cold pack than mailed in an ordinary box. For unrefrigerated shipping, use a separately validated shelf-stable recipe and packaging plan rather than assuming any homemade candy is safe to mail.
For packaging inspiration, see 30 DIY Christmas Gift Basket Ideas That Are Perfect for Anyone. Keep decorations outside the food packaging, and choose a box that will not crush thin bark.
A Simple Make-Ahead Plan
- A few days ahead: make brittle and toffee on a dry day, then pack airtight after completely cooling.
- One or two days ahead: make fudge and the dipped candies you plan to refrigerate. Leave enough space for trays to sit flat while they set.
- The day before serving: make cream-cheese truffles and assemble gift boxes, keeping chilled items refrigerated.
- Before guests arrive: put out small portions and replenish from the refrigerator as needed. Keep mint candies on their own plate.
If the candy tray is part of a holiday dinner, pair it with Christmas table decor that looks expensive on a small budget. Leave a clear area for serving utensils and keep candles away from paper wrappers.
Christmas Candy & Fudge FAQs
Why did my condensed-milk fudge stay soft?
First, check the milk label, the chocolate weight, and whether you used the specified kind of chocolate. Extra liquids and oily nut butters can change the set. Give it the full chilling time before slicing. If it still will not hold a square, keep it chilled and serve it as a spoonable dessert rather than packing it as firm candy.
Can I freeze Christmas fudge?
Plain chocolate fudge is a reasonable candidate for a short make-ahead freeze, but these particular batches have not been freezer-tested. Try a few pieces before freezing a whole gift batch. Wrap tightly, put in an airtight freezer container, and thaw in the refrigerator while still wrapped to reduce surface condensation. Cookie crumbs, candy canes, and marshmallows may change texture.
How long can I leave a Christmas candy tray out?
There is no single rule for every candy. Dry brittle differs from a truffle made with cream cheese. For candies that require refrigeration, follow the FDA food-storage guidance: keep the refrigerator at 40°F or below and limit time out to 2 hours, or 1 hour above 90°F. Put out small portions and replenish rather than leaving the full batch out.
Why does bark separate into layers?
A cold, fully hardened lower layer can bond poorly with the top layer. Add the second layer when the first is just set, and avoid large temperature differences. Break the finished bark into pieces only after both layers have set.
Which recipes are easiest to make with children?
Children can help add sprinkles to pretzel rods or roll chilled coconut snowballs with clean hands. An adult should handle melting and all hot pans. Brittle, cooked toffee, and caramel are adult stove projects because the sugar gets much hotter than boiling water.
Can these recipes be called nut-free or gluten-free?
Only after checking every ingredient label and your preparation area. Some recipes contain obvious nuts or wheat, while coatings, cookies, sprinkles, and shared equipment can introduce allergens too. A swap is not enough to guarantee a batch is safe for a particular guest.