
A brush, a small surface, and one good tree shape are enough to start. These 15 DIY painted Christmas tree ideas include canvas art, wooden shelf decorations, ornaments, gift wrap, and a fabric tote. Each one has its own supplies and step-by-step instructions, so you can make the look you clicked for.
For a first project, choose the taped triangle canvas or the cotton-swab tree. For a decoration you can bring out every December, try a wooden cutout. If you are making gifts, the wood slice ornament and watercolor card are easy to personalize without painting a whole scene.
The images are AI-generated craft concepts that illustrate the designs, rather than photographs of projects made or tested by the author. Use the suggested dimensions as starting points and follow the instructions on your actual paints and finishes.

Gather the Basics Before You Paint
You do not need to buy supplies for all 15 projects. Pick one surface first, then gather the colors and tools listed for that idea. Most of the indoor wood and canvas projects use water-based acrylic craft paint.
- A small paint palette: dark green, white, brown, red, and yellow cover several designs. Add navy, sage, or metallic gold only when your chosen project needs it.
- Three useful tools: a 1/2-inch flat brush for backgrounds, a small round brush for branches, and a fine brush for detail. A ruler and pencil help with geometric trees.
- Basic setup: a covered work surface, water cup, paper towels, scrap paper for practice, and a place to leave the project undisturbed while it dries.
- The right surface: buy pre-primed canvas and ready-cut wood blanks if you want to concentrate on painting. For paper, watercolor, and fabric, use the materials specified in those sections.
Lightly smooth rough unfinished wood with fine sandpaper, then remove the dust before painting. Keep the slot of a wooden stand clear so the tree still fits after painting. If your paint calls for a primer or sealer on that surface, apply it first. The preparation in Plaid’s painted wooden tree instructions also emphasizes smooth wood and dry coats before adding a pattern.
Drying matters: a coat that feels dry may still need more time before taping, sealing, packing, or washing. Use your paint and finish labels for recoat and cure times. Plan gift projects before your wrapping day, especially when fabric paint or raised texture needs additional drying.
1. Paint a Snowy Evergreen on Canvas
A blue background helps the dark branches and white snow stand apart. This is a good choice when you want a recognizable Christmas painting with a little more detail than a triangle. The tree shape comes from short brushstrokes that grow wider as you move down.

Supplies: one pre-primed 8 × 10-inch canvas, light blue, dark green, medium green, brown, white, red, and yellow or gold acrylic paint; a flat brush; a small round brush; and a detail brush.
- Paint the background light blue and let it dry. Leave about an inch around the future tree so its outer branches do not touch the canvas edges.
- Lightly draw a center line about 6 inches tall. Paint a short brown trunk beneath it.
- Start near the top with tiny dark-green strokes pointing outward and slightly down. Work down the center line, making each pair of branches longer. Leave a few blue gaps between branch groups.
- Use medium green to add lighter strokes over selected branches. Keep some of the dark layer visible through the middle.
- Once the green dries, dab white along the upper edges of a few branches. Paint a small snow bank beneath the trunk.
- Add red and gold dots for ornaments and a small yellow star. A white highlight on a dry ornament dot gives the painted circle a rounded look.
Keep the snow light. Painting every branch solid white hides the evergreen you just built. Practice one snowy branch on scrap paper before working on the canvas.
2. Make a Taped Triangle Christmas Tree
This tree is about a clean outline and plenty of quiet space. Painter’s tape gives the green triangle its edges, so you can focus on smooth coverage rather than drawing dozens of branches.

Supplies: an 8 × 10-inch canvas or smooth primed art panel, cream, forest-green, brown, and gold acrylic paint; low-tack painter’s tape suitable for the surface; a ruler; and a flat brush.
- Paint the surface cream. Let the base coat reach the tape-safe stage specified for your paint, then test a short piece of tape at an inconspicuous edge.
- Mark a top point and two bottom corners to make a triangle about 6 inches tall and 5 inches wide.
- Place tape just outside the three lines. Press the inner tape edges down gently.
- Brush a thin coat of the cream base color along the inside edges of the tape and let it dry. This can help close small gaps before the green goes on.
- Paint the exposed triangle green in thin coats. Follow the tape maker’s removal guidance and peel slowly back over itself.
- Paint a small brown rectangle below the triangle and a gold star above it. Let both dry before displaying.
A smooth panel usually makes the taped edge easier to manage than heavily textured canvas. If a little green creeps under an edge, let it dry and touch up with the cream background.
3. Give a Wooden Tree a Nordic Branch Pattern
Muted sage, natural wood edges, and a simple cream branch pattern suit a narrow shelf or a small mantel display. The pattern stays readable because it uses one center line and only a few branching tiers.

Supplies: one ready-cut wooden evergreen about 8 inches tall with a compatible slot stand, sage and cream acrylic paint, a flat brush, a fine brush or paint pen suitable for painted wood, and a dotting tool.
- Prepare the wood and check the fit in its base. Remove it from the stand for painting.
- Paint the front sage in thin coats. Leave the edges natural if you like the contrast in the concept.
- On the dry front, draw a thin cream line down the center, stopping above the trunk.
- Add short paired lines sloping outward and downward from the center. Make the lower pairs longer than the upper ones.
- Dot a few cream circles between the branch lines. Let the details dry, then put the tree into its stand.
Rest the side of your hand on the table while drawing the branches. Slightly uneven lines are fine; consistent spacing does more for this design than perfect symmetry.
4. Paint a Red-and-Black Buffalo-Check Tree
Large checks turn a plain wood blank into a flannel-inspired decoration. The trick is to use three visible values—red, dark red, and black—so the pattern looks like crossing bands rather than a two-color checkerboard.

Supplies: a 10-inch wooden tree with stand, red, dark burgundy, and black acrylic paint; a ruler; a pencil; a flat brush; and optional low-tack tape.
- Paint the tree red and let it dry sufficiently for your chosen marking or taping method.
- Draw a grid of roughly 1-inch squares. Start at the center so partial checks at the outside edges look balanced.
- Paint every other vertical band dark burgundy. Let it dry.
- Paint every other horizontal band dark burgundy, retaining red squares between the crossing bands.
- Paint the squares where the horizontal and vertical bands intersect black. Touch up the red and burgundy areas if needed.
- Paint the trunk and base black, let everything dry, and fit the tree into the stand.
Test a small three-by-three grid on paper first. Checks that are too tiny can disappear on a small tree. If you want the room to echo the same pattern, borrow a restrained accent from these cozy plaid Christmas tree ideas.
5. Blend a Mint-to-Forest-Green Ombre Tree
Ombre is a useful option when you want the paint itself to be the decoration. A pale top and deeper base make the shape feel softly shaded without any ornaments or lettering.

Supplies: a 10-inch wooden tree blank with stand, white, medium green, and dark green acrylic paint; a broad flat brush; and a clean soft brush for blending.
- Mix three small puddles: mint using green and white, medium green, and deep forest green. Mix enough for the whole face before starting.
- On the prepared wood, paint the upper third mint, the middle third medium green, and the lower third dark green.
- While the adjoining colors are still workable, brush gently across each boundary with the clean blending brush. Work in short passes rather than scrubbing.
- Wipe the brush between the light and dark transitions so the top does not become muddy.
- If coverage needs another coat, let the first dry and repeat the bands and blending. Keep the trunk and base natural or paint them cream.
If your acrylic dries before the blend forms, try a smaller blank or use a compatible blending medium as directed. Adding lots of water is not a reliable substitute for longer working time.
6. Make a Candy-Stripe Wooden Tree
Red diagonal bands on ivory give this tree a peppermint look. A small gold star makes the top feel finished while the striped face remains the main detail.

Supplies: a 9-inch wooden tree and stand, ivory and red acrylic paint, low-tack tape, a flat brush, and a small wooden star, gold paint, and wood-compatible craft glue for the raised accent shown.
- Paint the tree ivory and allow the base coat to become ready for tape.
- Lay parallel diagonal tape bands across the front, leaving exposed gaps about as wide as the tape.
- Press down the edges and paint the exposed bands red in light coats.
- Remove the tape according to its directions. Touch up small leaks once the paint dries.
- Paint the trunk and stand red. Paint the separate star gold.
- When the paint is dry, glue the star near the top and allow the adhesive to set before standing the tree up.
You can paint a flat star instead if you want to skip the glue. Keep the stripes at one angle across the entire tree; restarting the diagonal on each branch tier makes the pattern harder to follow.
7. Add a Folk-Art Leaf and Berry Pattern
White leaves and mustard accents show clearly against navy. This version is more detailed than the Nordic tree, but the pattern still comes from repeating a simple teardrop shape. The raised red berries in the concept are optional painted wooden half beads.

Supplies: a wooden tree about 10–12 inches tall with stand, navy, cream, red, and mustard acrylic paint; a fine round brush; a pencil; and optional small wooden half beads and compatible glue.
- Paint the front navy and let it dry. Lightly mark a center stem and a few outward-curving stems.
- Paint the stems cream with a fine brush. Keep the lower stems longer than the upper ones.
- For each leaf, press a loaded round brush down to make the wider end, then lift as you pull toward the stem. Practice the motion on paper.
- Repeat leaves in pairs, leaving navy space around them. Add small mustard dots and a few mustard leaves near the tip.
- Paint red berry circles, or paint half beads red and glue them in small clusters after the painted background dries.
- Repeat a few mustard dots on the stand if desired. Let paint and any adhesive dry before assembly.
Fill the lower half last. It is easier to add a few leaves to an open area than to remove an overcrowded pattern. Small detachable embellishments make this an adult decorative project.
8. Paint a Wood Slice Christmas Tree Ornament
The natural bark border frames a little painted evergreen. One slice can become an ornament, a gift tag, or a small keepsake with the year written on its back.

Supplies: a dry, ready-sanded craft wood slice about 3–4 inches wide with a predrilled hanging hole, green, brown, red, yellow, and white acrylic paint; a small round brush; and twine.
- Choose a slice with secure bark and enough smooth space below the hole. Remove dust from the face.
- Sketch a small triangle, leaving an unpainted border and clearance around the hanging hole.
- Paint a brown trunk, then build green branches with short strokes. Add a few lighter-green strokes for definition.
- Let the tree dry. Add red ornament dots, a yellow star, a little white ground beneath the trunk, and sparse white snowfall dots.
- If you want a protective finish, use one compatible with the paint and wood after the required drying period. Allow the finish to cure before threading and tying the twine.
Hang it from a branch that can support its weight. For a gift, write the recipient’s name on the back rather than trying to fit it into the tiny painted scene. Pair it with another idea from these handmade Christmas gifts if you want a small coordinated package.
9. Paint a Mini Christmas Tree on a Rock
A navy oval on a smooth stone becomes a tiny night sky. The snowy tree makes a cheerful indoor shelf accent or a small desk gift; you do not need to fill the rock’s entire surface.

Supplies: one clean, dry, palm-size craft stone with a smooth face, navy, green, brown, white, red, and yellow acrylic paint; a small brush; and a dotting tool.
- Wash away dirt and let the stone dry thoroughly. Use a purchased craft stone or one collected where removal is allowed.
- Paint a navy oval on its face, leaving the outside edge natural. Add another thin coat if needed.
- Paint a white snow bank near the bottom. Above it, paint a small brown trunk and widening green branches.
- After the green dries, dab white snow onto selected branch tops. Add red and yellow ornaments and a little yellow star.
- Scatter white dots around the tree for snowfall. Let the paint dry before any optional compatible indoor protective finish.
Hold the dry rock in your palm to plan the tree, then set it securely on the table to paint. Keep this version indoors; ordinary craft paint and an indoor finish do not establish outdoor weather resistance.
10. Paint a Gold Christmas Tree Silhouette
A charcoal background gives metallic gold room to stand out. This canvas suits a console or a shelf where you want a Christmas accent with one strong color rather than a busy winter scene.

Supplies: an 8 × 10-inch pre-primed canvas or art panel, charcoal acrylic paint, metallic gold acrylic paint, a small flat brush, a fine brush, and a pencil.
- Paint the background charcoal and let it dry. Make a second thin coat if the coverage looks patchy.
- Lightly sketch a tree about 6 inches tall, with stepped branch edges and a short trunk.
- Fill the tree with gold paint, following the branch direction. Let each coat dry before deciding whether it needs another.
- Use the fine brush to extend a few slender branch tips. Preserve dark gaps along the outline.
- Paint a small gold star above the tree. For the embellished concept, add a few gold ornament circles and fine hanging lines beside the branches.
Some metallic paints look translucent over a dark base. Test your gold on a charcoal scrap first and build coverage in thin layers. Check the finish in daylight before adding more; the shine changes with the angle of the light.
11. Dab a Christmas Tree with Cotton Swabs
Dots make the outline, branches, trunk, and star. This is a forgiving way to paint a tree when long brushstrokes feel awkward, and the visible white gaps keep the result bright.
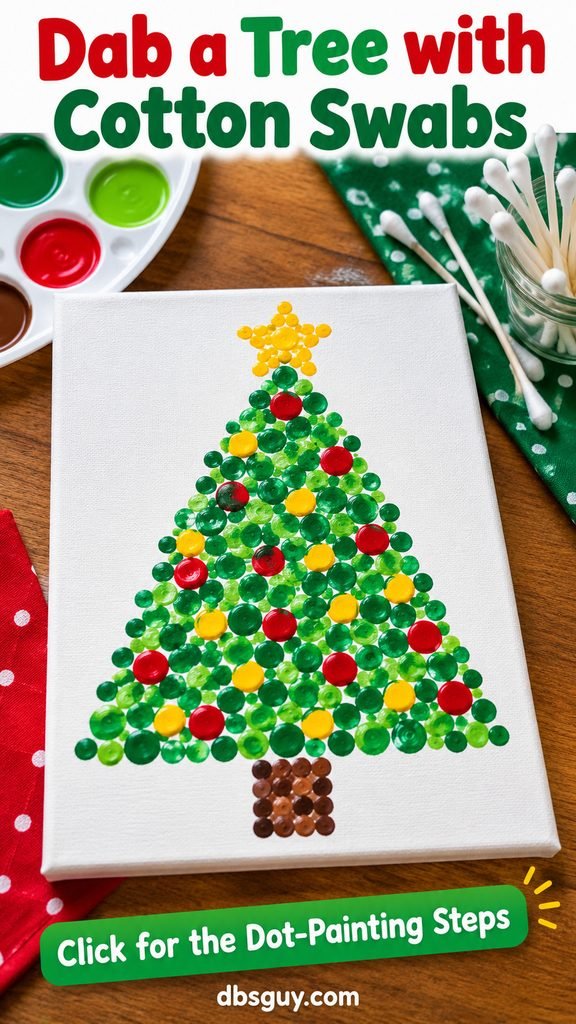
Supplies: an 8 × 10-inch white canvas or sturdy mixed-media paper, dark green, light green, red, yellow, and brown paint suitable for the painter’s age, cotton swabs, and a pencil.
- Draw a faint triangle about 6 inches tall. Add a small trunk guide and a star guide above the tip.
- Use a swab to dab dark-green dots inside the triangle. Begin at the top and widen the rows toward the bottom.
- With a separate swab, add light-green dots between the dark ones. Leave small white spaces and let the dots dry.
- Make the trunk from brown dots and the star from closely spaced yellow dots.
- Add red and yellow ornament dots over a few of the dry green areas. Use a larger dotting tool or a round brush if you want a few bigger baubles like the concept.
Dip only the tip, then press and lift vertically. Dragging a swab creates smears instead of circles. Supervise children, use age-appropriate materials, and keep small tools out of mouths.
12. Paint a Watercolor Christmas Tree Card
Transparent green layers make this card feel light and loose. Watercolor paper matters here: it gives wet brushstrokes more support than ordinary printer paper.
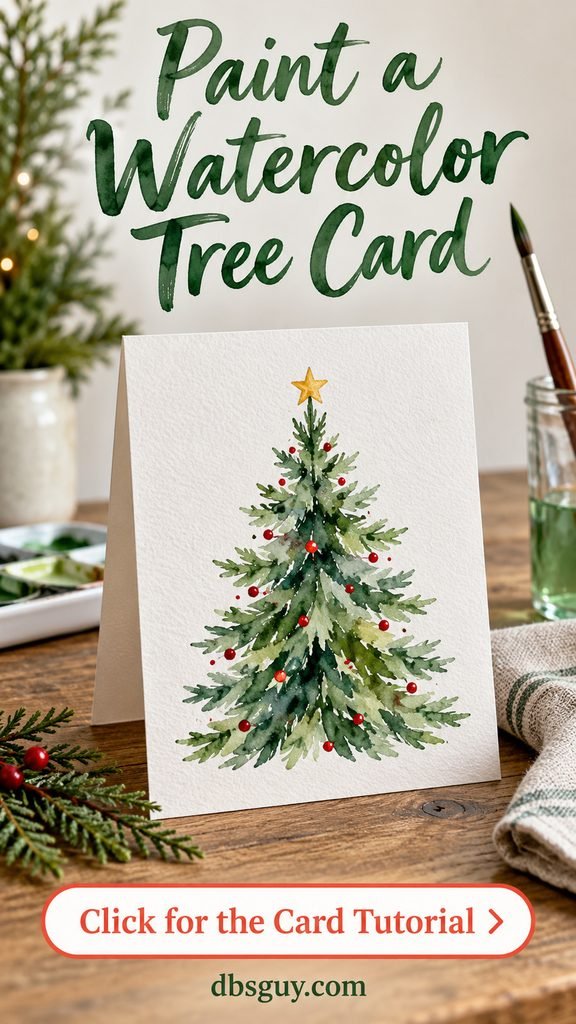
Supplies: one 5 × 7-inch folded watercolor-paper card or a 10 × 7-inch sheet folded in half, preferably around 140 lb/300 gsm; green, red, and yellow watercolor; a pointed round brush; clean water; and a pencil.
- Place the card flat and lightly mark the top and bottom of a tree on the front. Keep a generous white border.
- Mix a pale green puddle. Paint small loose strokes at the top, widening them as you work downward and leaving bits of white paper showing.
- Let the pale layer dry. Add a few darker-green strokes through the middle and beneath selected branch groups.
- On dry paper, add tiny red dots and a yellow star. Use a drier brush for these small details so the colors do not run.
- Let the card dry flat before writing inside and placing it in an envelope.
If a branch spreads more than you intended, stop brushing and let it dry. Repeatedly working a wet area can lose the soft shapes. A simple tree with fewer branches is still a lovely card.
13. Stamp Christmas Trees onto Kraft Gift Wrap
A repeating tree stamp gives plain kraft paper a handmade pattern. Do the painting while the paper is flat, then wrap the gift after the paint dries.

Supplies: kraft paper, a ready-made tree craft stamp or craft foam, scissors, a flat scrap block for mounting foam, suitable craft glue, green and brown acrylic paint, a foam brush, and optional burgundy ribbon.
- If making a stamp, cut three small overlapping triangular tiers from craft foam. Glue them to the block in a tree shape and let the adhesive set. Use a separate small foam rectangle for the brown trunk.
- Spread the paper on a protected table. Brush a thin, even layer of green paint onto the tree stamp.
- Test on a scrap. Press straight down and lift without rocking the stamp.
- Stamp staggered rows, leaving roughly 1–2 inches between trees. Reapply paint as needed.
- Stamp or brush a small brown trunk beneath each tree. Let the sheet dry completely, then wrap the gift and tie the ribbon.
Too much paint fills the stamp’s gaps and makes slippery prints. A lightly textured impression is part of the handmade look. Use the leftover paper for small tags, or coordinate the package with these DIY paper Christmas decorations.
14. Stencil a Christmas Tree onto a Cotton Tote
A simple painted tree turns a plain tote into reusable holiday packaging. The concept uses stacked green tiers, a brown trunk, and a red star, with no lettering needed.

Supplies: a plain cotton tote, fabric paint labeled for that fabric or acrylic paint with its compatible textile medium, a reusable tree stencil, low-tack tape, a foam pouncer or stencil brush, and cardboard.
- Prepare and prewash the tote as directed by the fabric and paint instructions. Let it dry and smooth out wrinkles.
- Insert cardboard to stop paint transferring to the other side. Position and secure the stencil away from seams.
- If using a textile medium, mix it with the specified paint at the ratio on its label.
- Load the pouncer lightly and dab straight down inside the green tree areas. Build thin coats rather than flooding the stencil.
- Add the brown trunk and red star with separate stencil openings or a small brush. Lift the stencil carefully without dragging it across wet paint.
- Allow the design to dry and complete any curing or heat-setting required by your product. Follow its care directions before washing or gifting.
Do not assume ordinary craft acrylic alone will stay flexible or wash well. Test the paint system on a fabric scrap first, and include a short care note if you give the tote away.
15. Make a Textured White Christmas Tree Painting
Raised white branches catch side light and make a quiet, snowy design. This project needs more drying time than the flat paintings, so it is a better choice when you can leave the surface undisturbed.
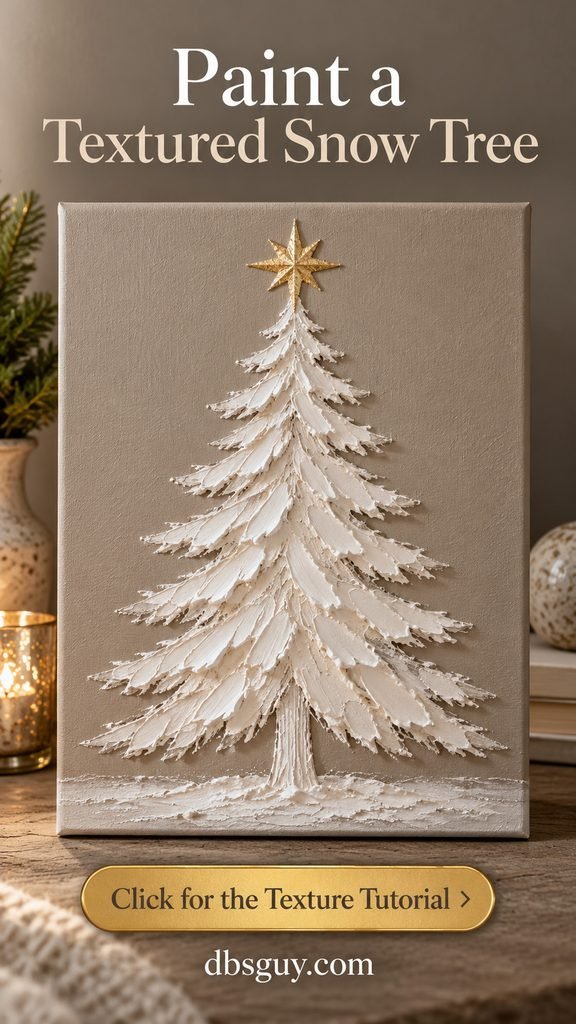
Supplies: an 8 × 10-inch rigid canvas panel or primed art board, taupe, white, and gold acrylic paint, an acrylic modeling paste suited to your support, a small palette knife, and a fine brush. For stretched canvas, choose a paste specifically suitable for flexible supports.
- Paint the background taupe and let it dry. Lightly sketch a tall triangular tree and short trunk.
- Use the palette knife to spread a thin base of paste within the tree outline.
- Beginning near the bottom, pull small amounts of paste outward and downward to form branch ridges. Make shorter strokes as you move toward the top.
- Add a short textured trunk and a little snowy ground. Keep the relief shallow; build additional texture in thin layers, allowing each to dry.
- Let the paste dry throughout according to its instructions. A dry skin on top does not mean the thicker areas are ready for painting.
- Paint the dry tree white and add a gold star above it. Let the paint dry before display or any compatible finishing treatment.
A rigid support is a practical starting point for this design. Avoid a large mound of paste in the center, and do not use household filler as though it were an interchangeable art medium. Leave space around the ridges when storing the painting.
Fix the Small Problems Before Adding More Detail
- The tree looks like a green blob: let it dry, then reopen a few spaces between branch groups with the background color. Add only a few lighter-green strokes.
- The paint is streaky: allow the current coat to dry before adding another thin coat. Do not keep brushing paint that has started to set.
- The tape lifts the background: stop and repair the base coat. Allow more drying time and test a lower-tack tape before continuing.
- The pattern is crowded: cover selected details with the base color after they dry. Bigger, fewer accents usually read more clearly on a small surface.
- The stand no longer fits: check whether paint has built up at the slot or tab. Prevent this by masking the mating surfaces before painting.
Questions About DIY Painted Christmas Trees
What is the easiest painted Christmas tree for a beginner?
The taped triangle is a manageable first brush project, especially on a smooth panel. The cotton-swab tree is useful if you prefer dots to drawing. Both make the overall shape more important than fine branch detail.
What paint should I use on wooden Christmas tree blanks?
Use an acrylic craft paint that lists wood among its suitable surfaces. Prepare the blank, apply any primer the product requires, and build thin coats. If the wood already has a glossy finish, follow the paint maker’s guidance for that coated surface instead of treating it as bare wood.
Do painted Christmas trees need to be sealed?
A display canvas may not need the same finish as a frequently handled wood ornament. Choose a protective finish only when it suits the paint, surface, and use. Let the paint reach the required drying or curing stage first, and test the finish on a sample because it can change color or metallic sheen.
Can I use these projects outdoors?
The designs here are planned as indoor crafts. To adapt a wooden decoration for outdoor use, choose a suitable substrate and a complete exterior-rated paint and finish system. An indoor acrylic paint plus an arbitrary clear coat does not guarantee weather resistance.
How do I store painted decorations for next year?
Wait until paints, adhesives, and finishes have cured. Pack pieces separately so twine, beads, and hard edges cannot rub their painted faces. Give raised textures their own space and keep the box in a dry indoor storage area.
Choose the idea that matches the surface you already have. Make one tree, give each layer time, and stop when the design feels clear. A small handmade piece does not need every possible detail to become part of your Christmas decorating.