

The centerpiece you want might be sitting beside the pasta sauce, tucked in the mixing-bowl cabinet, or waiting in the ornament box. A good Christmas display often starts with a familiar container and one clever way to use it.
These DIY Christmas table centerpieces give you 17 different ways to begin. You can float cranberries in jars, make a dry little snow globe, hide a flower vase inside a bowl, or give a baking pan a decorating job. Each idea includes the supplies, assembly steps, and a detail that helps the finished piece work at dinner.
Choose one project that fits your table and the materials you already have. A centerpiece feels welcoming when it leaves room for the food and lets the people across from each other keep talking.
Before You Make Your Centerpiece
Before crafting, set the empty serving dishes on the table. The space left between them tells you how large the centerpiece can be. Put a trial arrangement on a tray if you will need to move it before dinner, and check its height while seated.
Wash reused containers, remove labels, and check glass rims for chips. Keep ornaments, glue, and craft fillers separate from anything you plan to eat. The lighted ideas below use battery-powered LEDs. NFPA recommends flameless candles; they are particularly useful around paper, ribbon, and greenery.
1. Make a Cranberry-Water Jar Trio
Cranberries give clear water a bright red accent, and the glass lets that color show from every side. Three short jars can spread the effect along a table without creating a single bulky arrangement. This version uses greenery and berries on their own, so there is no flame to watch.
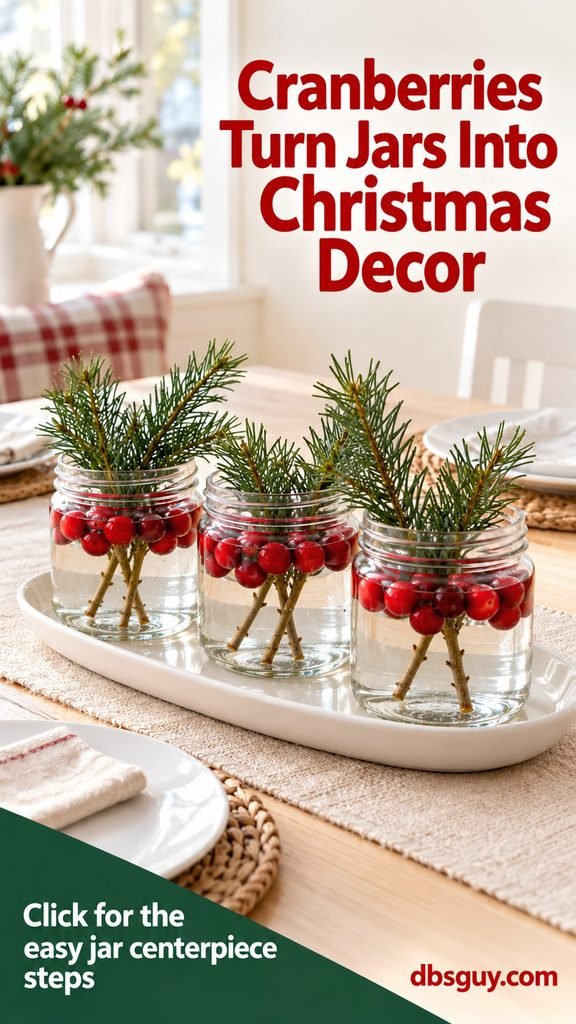
What you need: Three clean short jars, fresh cranberries, a few purchased evergreen stems, water, and a low tray or platter.
How to make it:
- Arrange the empty jars on the tray first. Use containers of similar height and leave a little space between them.
- Trim the greenery to suit each jar. Remove foliage that would sit below the waterline, then add a few stems and enough water to support them.
- Add cranberries in small handfuls. Let them gather at the surface rather than packing the jars so tightly that the greenery disappears.
- Dry the outsides and set the tray down. Turn the stems until the display looks balanced from both sides of the table.
Finishing tip: Keep the berry layer light and make the arrangement close to the gathering. A few clear gaps make the water and glass part of the look.
Make the jars low enough for conversation. After the meal, empty them and discard decorative berries rather than leaving the water display standing for days.
2. Build a Dry Snow Globe in a Jar
A dry snow globe gives you the miniature winter scene without water, floating glitter, or a leaking lid. One small tree under clear glass is enough to make the jar feel special. The trick is checking the fit before anything gets glued.

What you need: A wide-mouth jar with a screw-on lid, a miniature tree, a small amount of dry salt or craft snow, and adhesive suitable for the tree base and lid.
How to make it:
- Stand the miniature tree on the inside of the lid and lower the empty jar over it. Check that the tree clears the opening and does not brush the glass.
- Secure the tree base to the inside of a dedicated craft lid. Follow the adhesive’s instructions and allow it to cure fully.
- With the jar upright, add a shallow layer of dry salt or craft snow. Screw on the lid with the attached tree.
- Turn the closed jar over slowly so the lid becomes the base and the snow settles around the tree. Place it on a flat, protected surface.
Finishing tip: Keep the snow below the lowest branches. A deep layer can hide the tree and make the scene look buried.
Treat the altered lid and craft filler as decorating supplies. Let the jar stand rather than shaking it, and store it dry after the holidays. A reused jar does not need to become a complicated glitter project.
3. Use a Hidden Filler to Make an Ornament Bowl Look Full
A deep bowl can swallow a surprising number of ornaments. Raising the bottom lets a smaller collection sit where you can see it. From the outside, you notice the color and shine near the rim rather than an empty-looking bowl.

What you need: A mixing bowl, a smaller stable ramekin or inverted small bowl, a clean soft liner, and shatterproof ornaments.
How to make it:
- Place a small ramekin upside down in the center of the large bowl. Choose one that sits steadily and leaves space around the sides.
- Drape a clean cloth or soft paper over the support to cushion the ornaments. Keep the liner below the rim.
- Add larger ornaments around the support, then fill the visible gaps with smaller ones. Point hanging caps inward where possible.
- Stop when the bowl looks balanced. Check that no ornaments can roll over the edge when the bowl is lifted.
Finishing tip: Choose two main colors and one quieter accent. Matte ornaments beside shiny ones give the display depth without needing a bigger pile.
Keep the hidden support low enough that the arrangement remains stable. Remove all craft materials and wash the bowl before it returns to food service.
4. Layer Fairy Lights Through an Ornament Jar
A clear ornament jar changes character when small lights sit between the baubles. It can look simple in daylight and give the room a warm glow after dark. A loosely packed jar lets you see both the ornaments and the light points.
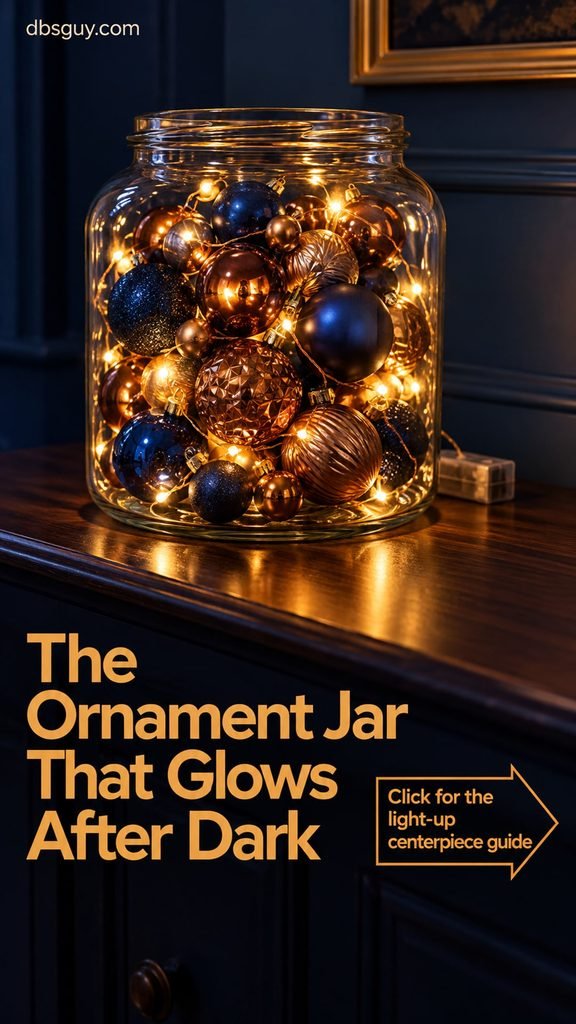
What you need: A clean dry wide-mouth jar, small shatterproof ornaments, and a short battery-operated micro LED strand intended for this type of indoor display.
How to make it:
- Test the light strand and read its instructions before arranging it. Keep the battery pack outside the jar and easy to reach.
- Add a few ornaments, then loosely loop part of the light strand around them. Continue in layers rather than putting every light at the bottom.
- Leave space between ornaments and keep the jar open. Avoid pinching the wire under a lid or pulling it tight around sharp edges.
- Place the battery pack behind the jar where it stays dry. Turn the lights on and adjust any large dark gaps.
Finishing tip: One short strand can look better than a long tangled one. You want a few clear points of light rather than a jar filled mainly with wire.
This is a dry display. Ordinary battery lights and their battery packs do not belong in water. Follow the product’s operating instructions and switch the lights off when the display is unattended.
5. Turn a Ribbon-Wrapped Jar Into a Flower Vase
A ribbon band gives a plain food jar a finished edge. It also lets you connect the flower arrangement to your napkins or other Christmas decorations. You can make one little vase or repeat the same band around a pair of jars.
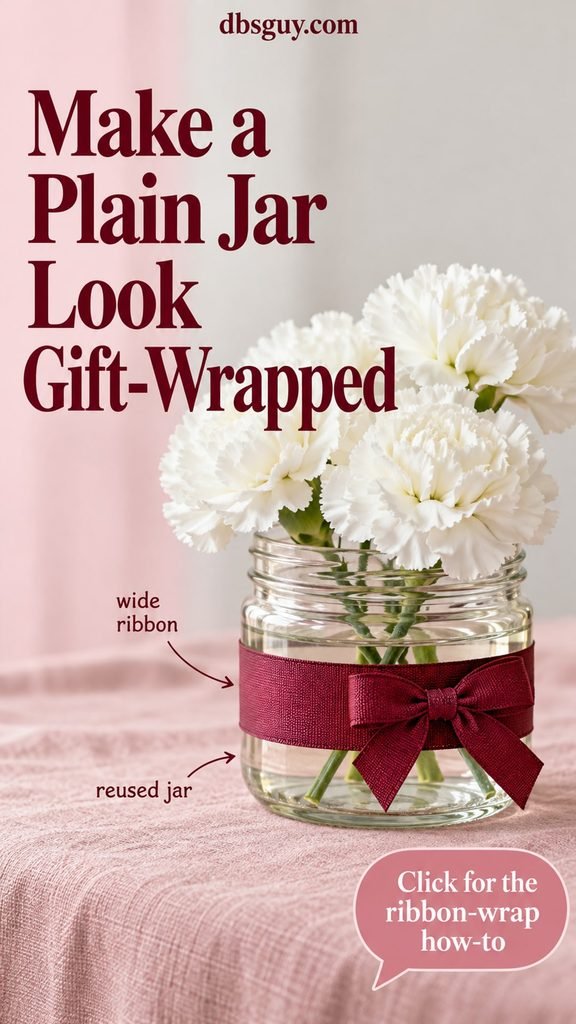
What you need: A clean jar, wide ribbon, scissors, a removable ribbon fastener if needed, water, and a few fresh flowers.
How to make it:
- Wash and dry the jar, including its outside. Wrap the ribbon around it once to measure the band and bow before cutting.
- Tie a neat bow or secure the ribbon to itself with a removable fastener. Position the band where it does not interfere with the jar standing flat.
- Trim the flower stems to make a low arrangement. Remove leaves that would sit underwater, then fill the jar and add the flowers.
- Turn the bow toward the most visible side. Wipe away drips before placing the finished vase on a protective base.
Finishing tip: A wide ribbon can hide the last stubborn patch of label residue, but the jar still needs to be clean. Choose one solid ribbon color when the flowers are already busy.
Keep the ribbon dry while filling and topping up the vase. A water stain across the front of a carefully tied bow is an avoidable distraction.
6. Plant a Tiny Winter Forest in a Dessert Bowl
A footed dessert bowl can give miniature trees a small stage. A gathered white napkin suggests snow without loose glitter or filler spilling across the table. This is a gentle way to reuse trees from a shelf or mantel for dinner.

What you need: A small stable dessert bowl, a clean white napkin or fabric scrap, and two or three miniature trees with flat bases.
How to make it:
- Set the bowl on the table empty and check its height. If the footed bowl is tall, choose especially small trees or use the display on a buffet.
- Nestle the cloth inside the bowl without letting it trail over the rim. Leave flat spots where the tree bases can rest securely.
- Place the tallest tree slightly off center and add smaller trees beside it. Keep the bases supported rather than perching them on steep fabric folds.
- Look from a seated position and adjust the spacing. A little visible cloth between the trees helps the tiny forest feel airy.
Finishing tip: Use miniature decorations you already have. A green tree, an ivory tree, and a smaller second green one can make a complete grouping.
Test the bowl and trees before carrying the display. If the fabric makes a tree wobble, smooth the fold underneath it or remove that tree from the grouping.
7. Gather Three Small Bowls on One Tray
A tray can connect bowls that were never part of a set. Each bowl gets a simple job, and the shared base makes the collection read as one centerpiece. This is particularly useful when your ornament leftovers are several different colors.
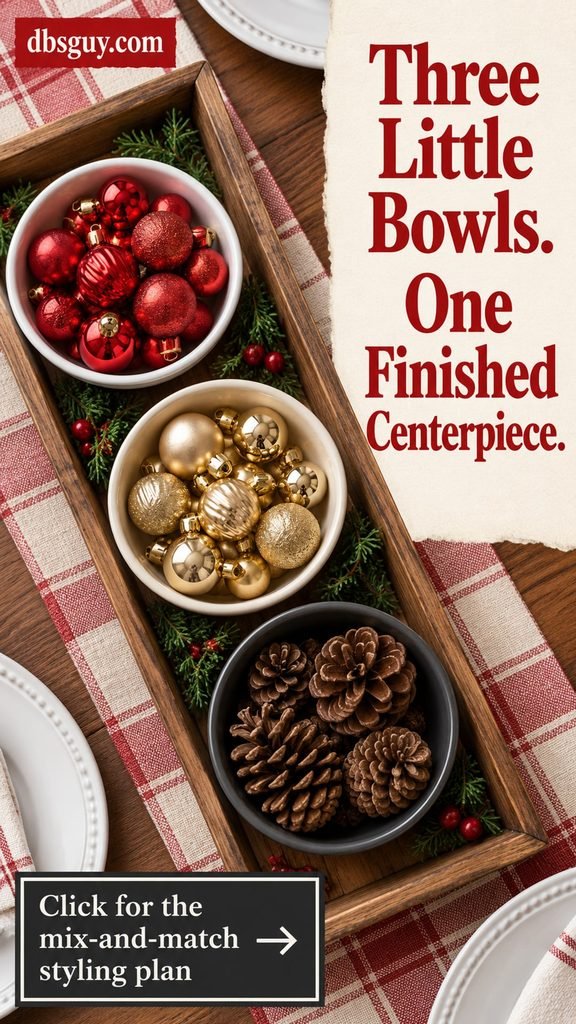
What you need: A narrow tray, three small bowls, a handful of ornaments, and clean dry pinecones.
How to make it:
- Set the empty bowls on the tray and check the overall footprint. Leave enough room that the rims are not pressed against one another.
- Give each bowl one main material: red ornaments in one, gold ornaments in another, and pinecones in the third. The separate groups keep the colors clear.
- Keep the filling below or just above the rims. Turn ornaments so the colors you want to emphasize face outward.
- Place the tray between the serving spots. Lift it carefully from underneath if it needs to move before dinner.
Finishing tip: A charcoal bowl, a white bowl, and a cream bowl can work together when the contents share the same Christmas palette. You do not need a new matching set.
Keep the tallest items toward the center of the grouping, and avoid a heavily packed tray that is awkward to lift. The practical benefit of the tray is being able to move the whole display at once.
8. Fill a Rustic Bowl With Dried Oranges and Pinecones
Dried orange slices add warm color beside the rough texture of pinecones. Cinnamon sticks make a simple third shape, so the bowl has more interest than a pile of one material. Leave the natural surfaces visible and let the color do the decorating.

What you need: A shallow bowl, clean dry pinecones, fully dried orange slices, cinnamon sticks, and optional twine.
How to make it:
- Choose a shallow container that lets the materials show. Put the larger pinecones in first to give the arrangement its shape.
- Tuck orange slices into the spaces, keeping several faces visible instead of stacking every slice flat.
- Tie two or three cinnamon sticks loosely with twine and place the bundle slightly off center. Adjust the surrounding pieces so it does not disappear.
- Set the bowl on a protective base and check the color from across the table. Add another orange slice only where the grouping needs a brighter spot.
Finishing tip: Reuse dried citrus from a previous decoration if it is still clean and sound. For homemade slices, prepare them ahead of time; this drying tutorial shows the preparation.
Use fully dry materials. Damp citrus can mark a surface or spoil in storage. Keep craft-handled ingredients out of the meal, and pack only clean, completely dry decorative pieces away afterward.
9. Put Mini Ornaments in Three Stemless Glasses
Small ornaments can give ordinary glasses a decorating job when you have limited table space. Three short glasses on a little tray make a compact focal point, and the clear sides keep the arrangement visually light. This works especially well with a restrained winter palette.

What you need: Three short stemless glasses, a small tray, and miniature shatterproof ornaments that fit through the glass openings.
How to make it:
- Test the largest ornament against the opening before filling any glasses. It should go in and come out without force.
- Place a few ornaments in each glass. Mix sizes lightly, but keep the main colors consistent across all three.
- Arrange the glasses in a small triangle on the tray. Turn the most attractive ornament faces toward the open sides of the table.
- Check that the glasses remain easy to lift and that the tray leaves room for the dinner dishes.
Finishing tip: Use the miniature ornaments left after decorating a small tree. Ice blue, white, and silver make an easy winter combination, but one repeated red ornament in each glass works too.
Keep the glasses for decorating rather than mixing them among guests’ drinking glasses. Remove the ornaments and wash the glasses before using them for drinks again.
10. Use Upside-Down Wine Glasses as Mini Display Domes
An upside-down wine glass turns its bowl into a little cover for ornaments. Its flat foot can hold a lightweight LED tealight, which gives the familiar glass an unexpected shape. Choose short, sturdy glasses and use this display where reaching arms will not disturb it.
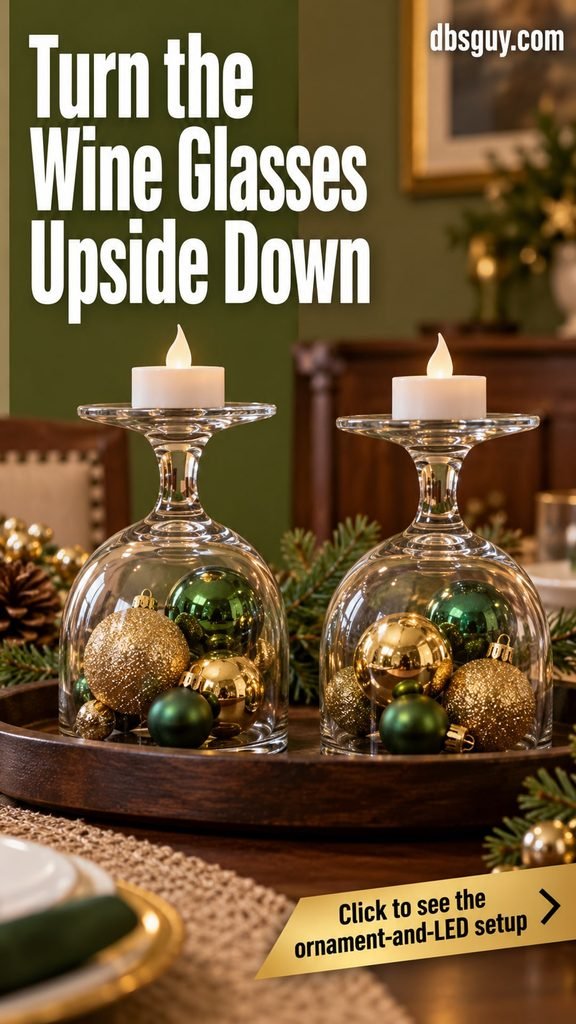
What you need: Two sturdy short wine glasses, a wide stable tray, small shatterproof ornaments, and lightweight battery-operated LED tealights.
How to make it:
- Check the glasses for chips, then test them upside down on the tray. The rims must rest flat; skip any glass that rocks.
- Place a small ornament or two on the tray and lower one glass over them. Keep the contents clear of the rim so the glass sits evenly.
- Center a lightweight LED tealight on the upward-facing foot. The light needs to fit fully on that surface without overhanging it.
- Repeat with the second glass and test the arrangement gently. Use the tray on a buffet or sideboard if the dining table will be busy.
Finishing tip: The glass shape supplies the interest. One or two ornaments under each bowl are enough, so you can use a small collection of favorite colors.
Use LED tealights only, and move the display away from places where children, pets, or serving hands could knock the glasses. A beautiful arrangement still needs a sensible place to stand.
11. Make a Floating Cranberry Bowl With Water-Rated LED Lights
A clear bowl gives floating cranberries more space to spread out than a jar. A few purpose-made floating LED lights can add a soft glow while the berries supply the red color. The useful detail here is choosing lights designed for water from the start.
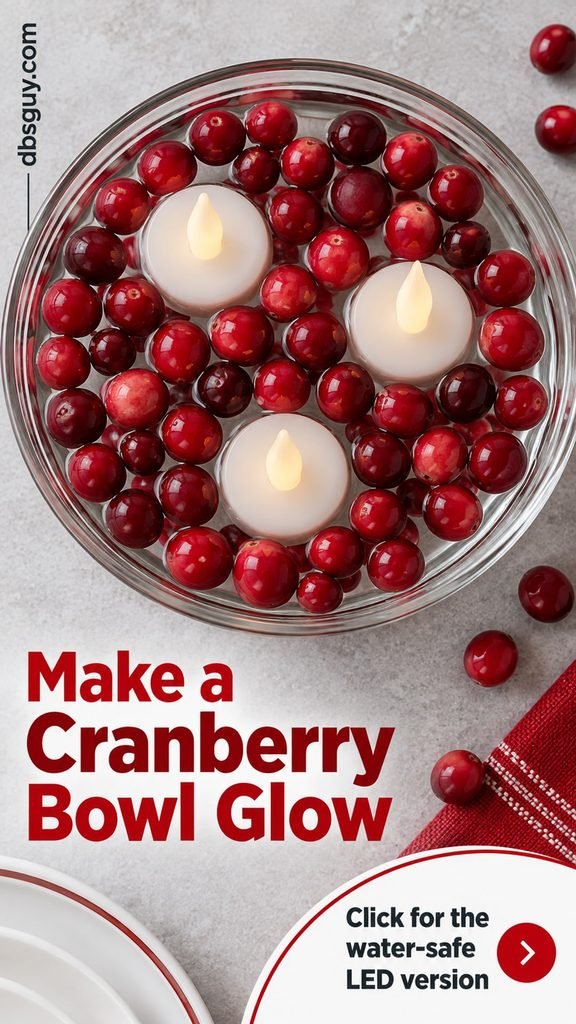
What you need: A shallow stable glass bowl, water, fresh cranberries, and waterproof floating LED candles used according to their product instructions.
How to make it:
- Place the empty bowl on a protective base in its final position. Add water, leaving enough room below the rim to avoid sloshing.
- Add a modest layer of cranberries. Leave open water between the berries so the lights will have room to float.
- Prepare the floating LEDs exactly as their instructions require, checking any battery closure or seal. Place them gently in the clear spaces.
- Look across the bowl and spread out crowded patches. Keep the display low and leave a dry landing spot nearby for serving dishes.
Finishing tip: The cranberries can carry the whole idea if you do not own floating LEDs. A simple red-and-clear water bowl still looks festive in daylight.
Ordinary LED tealights are not a substitute for waterproof floating lights. Keep electrical accessories and battery packs that are not rated for water completely dry, and dismantle the fresh-water arrangement after the gathering.
12. Suspend One Ornament Inside a Wide-Mouth Jar
One hanging ornament can look more interesting than a jar packed to the top. The empty space around it makes the shape easy to notice. A ribbon and a craft stick give you a simple way to hang the ornament without gluing anything to the glass.
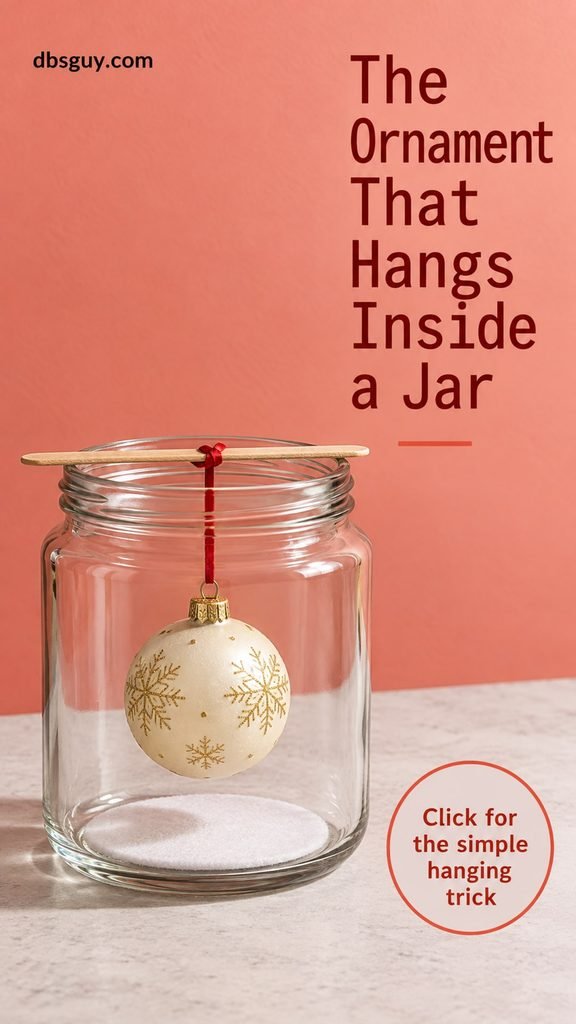
What you need: A wide-mouth jar, one lightweight shatterproof ornament, ribbon, a sturdy craft stick longer than the jar opening, and an optional felt disk.
How to make it:
- Place the ornament inside the empty jar to check the width. It needs room to hang without pressing against either side.
- Tie ribbon securely through the ornament’s hanging loop, then tie the other end to the middle of the craft stick.
- Rest the stick across the jar opening, with both ends supported on the rim. Adjust the ribbon so the ornament hangs partway down and clears the bottom.
- Add a small felt disk at the base if you want a quiet snowy background. Set the jar where the ornament can remain still.
Finishing tip: Choose an ornament with a shape or finish you enjoy looking at. A single ribbed cream bauble or small gold star can be enough for this display.
Use a stick with a comfortable amount of support on both sides of the opening. Avoid heavy ornaments, damaged hanging loops, or a span that can easily slip into the jar.
13. Fill a Bundt Pan With an Ornament Ring
The fluted shape of a Bundt pan gives ornaments a ready-made boundary. Its center tube naturally turns the arrangement into a ring, so the display has a clear shape before you start styling. A copper-toned pan can bring warmth; a plain metal one works too.
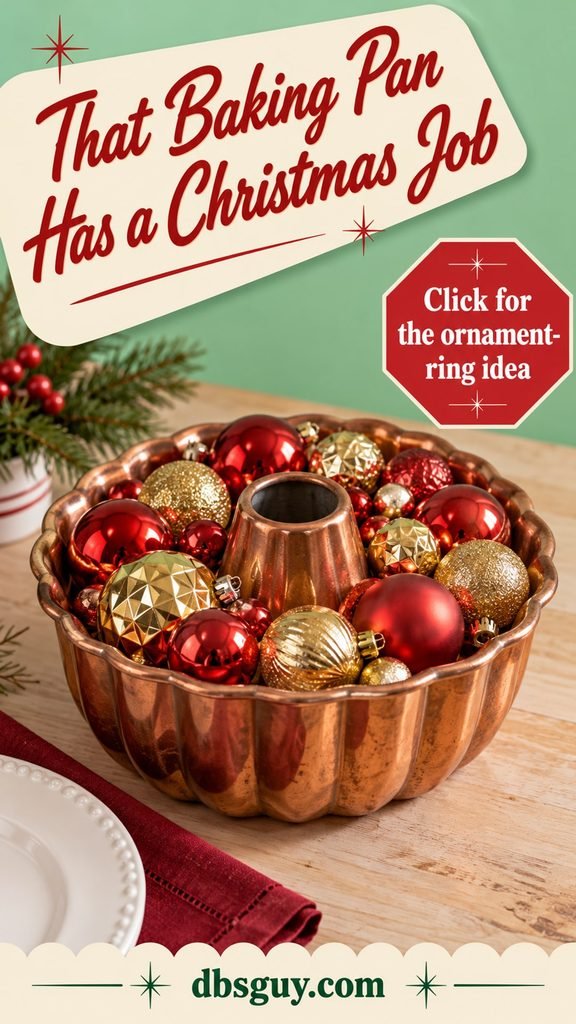
What you need: A clean Bundt pan, a soft removable liner if needed, and small or medium shatterproof ornaments.
How to make it:
- Set the pan upright on a stable surface. Add a soft liner inside if you need to protect the finish, keeping it out of sight.
- Place larger ornaments around the center tube, then tuck smaller ones into the spaces between them.
- Keep the ring below a height where ornaments could roll out. Leave the center opening visible so the baking-pan shape is easy to recognize.
- Turn the pan until the best colors face the room. Place it on a tray or protective mat for the table.
Finishing tip: Choose ornaments that suit the pan finish. Red and gold feel warm against copper, while white and silver can brighten a darker pan.
Remove every decoration and liner before the pan returns to baking, then wash it according to its care instructions. Keep loose glitter out of cookware you plan to use for food.
14. Hide a Flower Jar Inside an Ornament Bowl
A small jar can hold flower water while a larger bowl gives the centerpiece its finished shape. Dry ornaments surround the jar and conceal most of it. You get flowers and Christmas color in one compact arrangement while keeping the two materials separate.
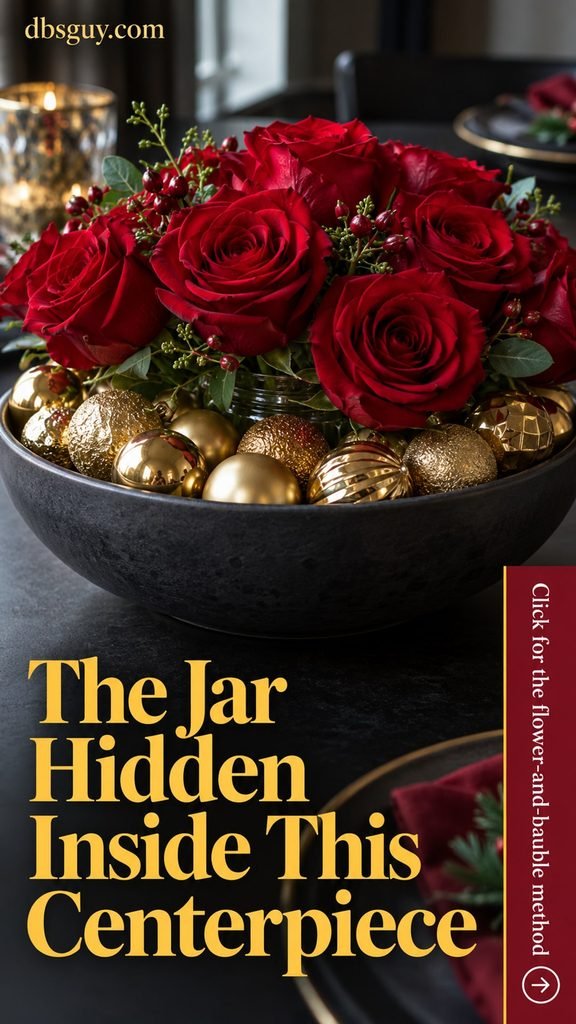
What you need: A low bowl, a smaller stable glass jar, a few fresh flowers, water, and small shatterproof ornaments.
How to make it:
- Put the empty jar in the bowl and check the fit. The jar should stand flat, leave a ring of space around it, and stay below or close to the bowl rim.
- Fill the jar with water, wipe away drips, and trim the flowers to make a low cluster. Remove leaves that would sit underwater.
- Add dry ornaments to the space around the jar. Use larger ones first and smaller ones to hide gaps near the rim.
- Look from both sides and adjust the flowers. The bowl should look like one arrangement, with enough breathing room to see the ornament colors.
Finishing tip: Use a small part of a grocery-store bouquet. A few roses or carnations can be enough when the bowl and ornaments already supply much of the display.
Pour water into the inner jar rather than the outer bowl. When topping it up, use a small spouted container so painted ornaments and decorative finishes stay dry.
15. Make a Paper-Sleeve Jar Lantern
A paper sleeve can hide the label-shaped outline of a reused jar and turn its glow into a small Christmas detail. Simple star cutouts let the light show through. You can remove the sleeve after the gathering and use the jar again.
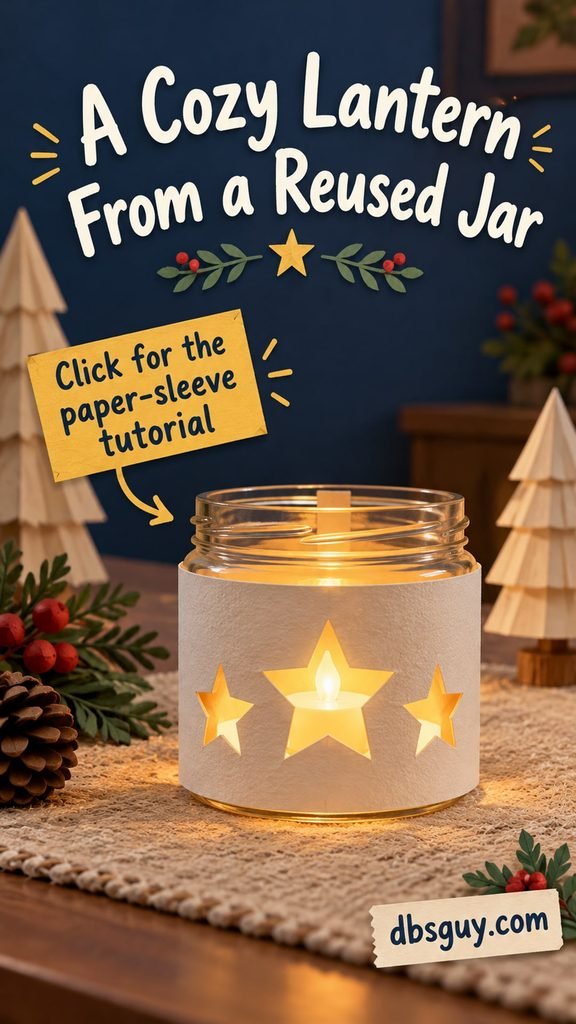
What you need: A clean dry jar, plain paper or thin cardstock, a pencil, scissors, tape, and a lightweight battery-operated LED tealight.
How to make it:
- Wrap paper around the jar to measure the sleeve, allowing a small overlap at the back. Mark its height so the paper sits neatly above the base.
- Draw a few simple stars or diamonds while the paper is flat. Cut them out carefully, keeping enough paper between openings for the sleeve to hold together.
- Tape the joining overlap to itself rather than sticking the whole sleeve to the glass. Slide it over the jar and check that it stands neatly.
- Place the LED tealight inside, switch it on, and turn the joining edge away from view. Set the lantern on a flat, dry surface.
Finishing tip: Make one sleeve before cutting paper for several jars. That first version tells you whether the openings are large enough to show the glow.
Use an LED tealight only in a paper-wrapped lantern. Keep the paper clear of the light’s controls and make the candle easy to remove when the display is finished.
16. Wrap a Jar With Candy Canes Without Glue
Wrapped candy canes make a jar festive before you add anything inside. Their stripes supply the pattern, and a ribbon hides the elastic holding them in place. A few flowers finish the top.
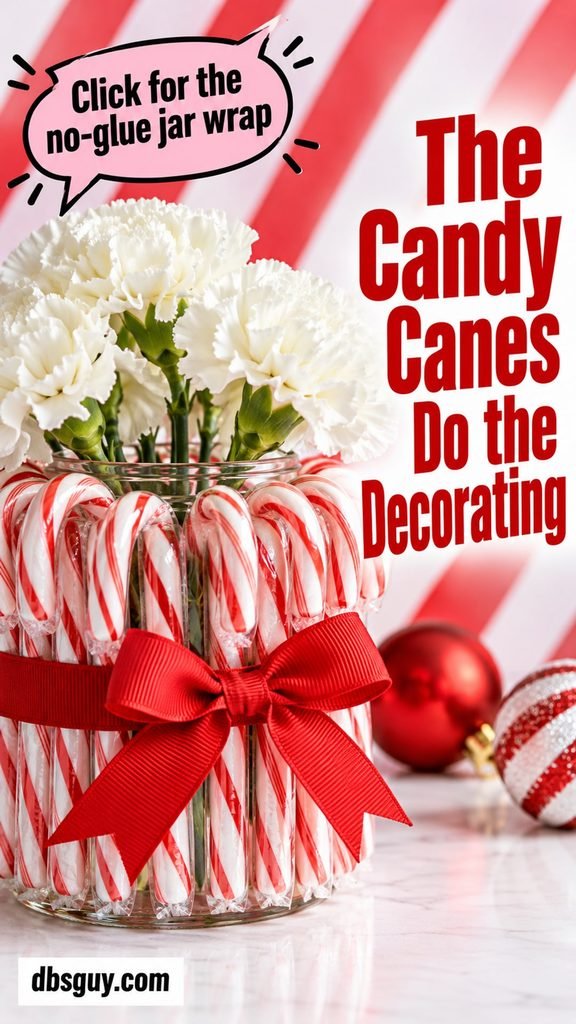
What you need: A jar slightly shorter than the candy canes, individually wrapped candy canes, a snug elastic band, ribbon, and optional flowers.
How to make it:
- Place the elastic around the jar’s middle, then slide wrapped candy canes behind it with their straight ends level at the base.
- Continue around the jar, turning the hooked ends outward. Keep the wrappers intact.
- Tie ribbon over the elastic and trim the bow. Add water carefully if you are using fresh flowers, keeping the outside dry.
Finishing tip: Use a narrower jar to reduce the number of candy canes. Carol Speake’s no-glue candy-cane vase tutorial shows the elastic method.
Carry the jar from underneath to keep the candy-cane layer undisturbed. Check that the elastic holds the canes securely before moving the finished vase.
17. Make a One-Branch Ornament Tree in a Jar
A bare branch gives a few favorite ornaments their own little stage. The outline is airy, which can suit a table that already has patterned dishes or a busy runner. A weighted jar keeps the base compact, and the empty space between ornaments does much of the styling.
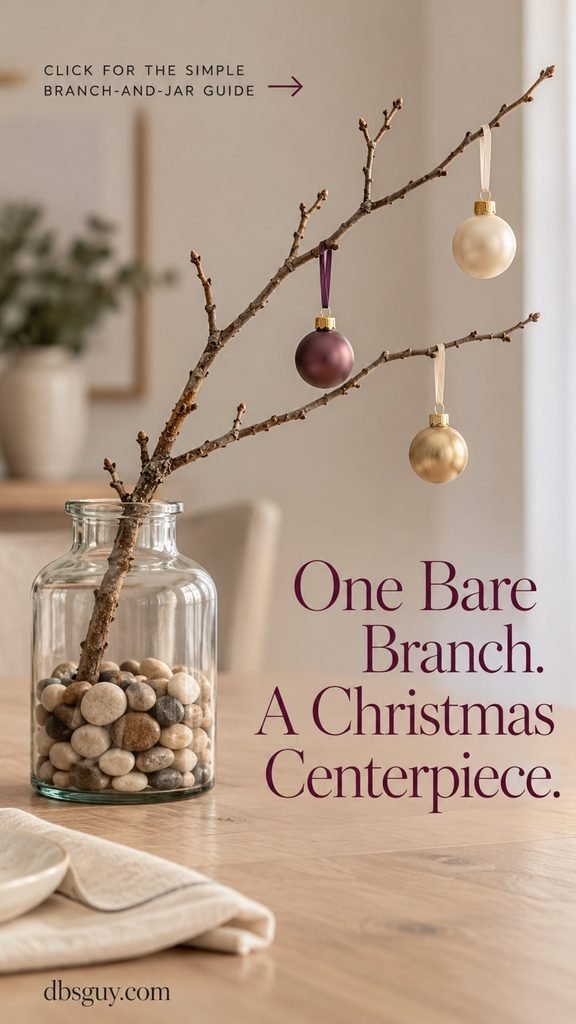
What you need: A short narrow-neck jar, clean small pebbles, one dry branching twig, lightweight shatterproof ornaments, and narrow ribbon.
How to make it:
- Choose a sound branch with a few useful tips and trim it to a modest height. Test the outline in the jar before adding ornaments.
- Add pebbles to the jar and settle the branch firmly between them. The jar should stay level and the branch should resist gentle movement.
- Hang a few light ornaments from separate branch tips. Spread their weight around the branch rather than loading one side.
- Place the jar on a protective base and look from the chairs. Move it to the buffet if the branch crosses faces or a busy serving route.
Finishing tip: Three ornaments can be enough for a small branch. Repeat one color from the napkins, then let the other pieces stay quiet.
Keep the base stable and the hanging ribbons short. Choose another branch or container if the finished piece leans; the centerpiece should feel comfortable to sit beside.
Choose the Centerpiece That Fits Your Dinner
If the meal will be served family-style, start with a low ornament bowl, a small glass trio, or a tray you can lift away. For a buffet or sideboard, the dry snow globe, upside-down glass display, or little branch tree has more room to be noticed.
Do the dry arranging ahead of time: fit the jars, check the ribbons, test the lights, and choose the ornaments. Add fresh water displays and flowers closer to the gathering, then wipe every base before it touches the table.
One finished centerpiece is enough. Let its main color appear in a napkin, a dish, or a small place-setting detail, and give the food clear landing spots. The display has done its job when Christmas dinner feels ready and everyone can settle in.




