
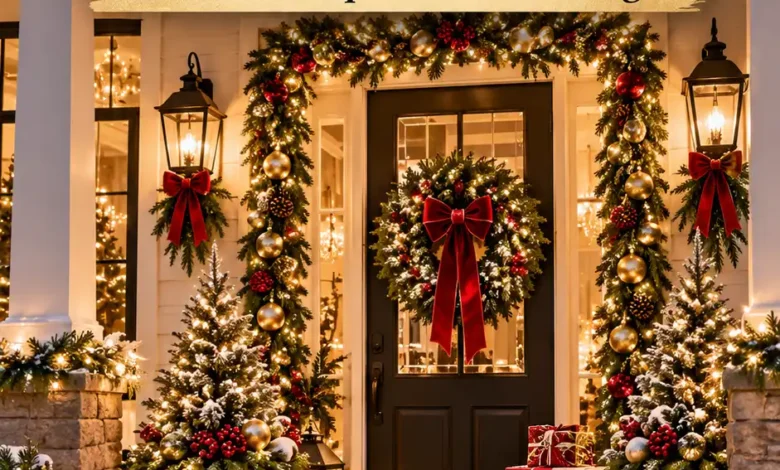
A beautiful Christmas porch can start with a garden cage, a leftover board, or the planter that has been empty since fall. The trick is choosing a simple project and finishing it well: hide the ties, repeat a color, and give the decoration enough room to be noticed.
These DIY outdoor Christmas decorations use everyday materials to create a more polished entrance, porch, or garden. You’ll find projects you can tie together without power tools, a few paint makeovers, and wood crafts that are easier when you use precut pieces.
You do not need to make all 21. Choose one decoration for the door, one for a nearby corner, and one detail that shows up after dark. A full wreath, a winter planter, and a pair of glowing cage trees can feel like a complete display without filling every inch of the yard.
Start With What You Have, Then Choose Your Finish
Before shopping, gather your old wreaths, planters, ribbon, garden supports, ornaments, and usable wood offcuts. Put them together where you can see them. A decoration that looks tired on its own may work beautifully once it shares a color with something else.
Choose two main colors and one light color. Burgundy, evergreen, and cream give these projects a traditional feel. Black, natural wood, and warm white suit a quieter porch. Red and white are an easy starting point for the peppermint decorations. Repeating the same ribbon or paint across several pieces helps inexpensive materials look considered.
Spend where the finish will show. A generous bow can improve an old wreath more than a handful of tiny ornaments. The right primer is a better purchase than replacing a painted project that starts peeling. Prices vary by store and by what you already own, so compare the total supplies before choosing a craft that needs several new tools.
Check the location before you build. A covered porch still gets damp, and it can receive wind-driven rain. Keep fabric, delicate frames, and small wood crafts under shelter. For an exposed yard, choose materials and coatings intended for that exposure, use secure attachments, and take lightweight decorations in before severe weather.
Use an exterior finish that lists your material on its label, including any required primer and cure time. For example, Rust-Oleum’s guidance for its outdoor brush-on paint recommends priming bare wood and metal. Plastic needs a coating compatible with that particular surface; a wood paint is not automatically suitable.
For anything that lights up, use intact lights and cords labeled for outdoor use, follow the product’s connection limits, and use GFCI protection. Keep cords out of walking routes, snow, and standing water. The Electrical Safety Foundation’s outdoor decorating guidance also advises securing lights without damaging their insulation and turning decorations off before leaving home or sleeping.
1. Refresh a Thin Wreath With Layered Greenery
A sparse wreath often needs better layering rather than more ornaments. Mixing a few longer branches with shorter, fuller pieces gives it depth and makes the outer edge feel softer.

Gather: an old wreath with a sound frame, outdoor faux greenery or fresh fir and cedar, floral wire, wire cutters, a broad outdoor ribbon, and a few pinecones. Wear gloves when handling cut wire and tuck every sharp end toward the back.
Lay the wreath flat and decide which side will be the top. Place small bundles of greenery around the frame, with the tips traveling in the same direction. Wire each bundle to the frame itself, covering its binding with the next bundle. If the original wreath already looks full in places, fill only the gaps.
Lift it upright before adding the bow. This is when you will notice a bare patch or a branch that sticks out too far. Wire one generous bow onto the lower side, then add a small pinecone cluster nearby. Leave some uninterrupted greenery so the wreath keeps its shape.
Where the budget pays off: keep the original frame and spend on one good ribbon. Match the finished wreath to the door, checking that the handle remains usable. Fresh greens will need replacing as they dry; outdoor faux stems make this a reusable project.
2. Turn an Empty Planter Into a Fresh Evergreen Porch Pot
An empty flowerpot is already a useful foundation for Christmas decorating. A few upright branches, some softer greenery at the rim, and a taller accent can make it look deliberately arranged.

Gather: a stable, frost-resistant planter with drainage, potting mix, fresh conifer branches, several decorative twigs, pruners, and optional outdoor ribbon. Buy cut greens or use appropriate trimmings from your own property; get permission before taking branches elsewhere.
Work with soil that is unfrozen and easy to insert stems into. Give the branch ends a fresh cut, then place the tallest branches toward the back or center. Add fuller greens through the middle and softer pieces around the edge. Turn the pot as you work so it looks good from the direction visitors will approach.
Add a few bare red twigs for height, then water the arrangement. University of Minnesota Extension’s winter greenery advice explains that porch pots may need more water during prolonged above-freezing weather. Check the soil during mild spells instead of assuming one watering will last the season.
Make it look finished: use a few kinds of greenery rather than every branch you can find. Move the pot into its final position before it becomes heavy or freezes. In a warm climate, a shaded spot and regular moisture checks are more useful than expecting a cold-weather arrangement to behave the same way.
3. Make Glowing Trees From Tomato Cages
A tomato cage has the outline of a Christmas tree hiding inside it. Once the broad ring becomes the base, a simple spiral of lights makes the garden support look surprisingly elegant after dark.
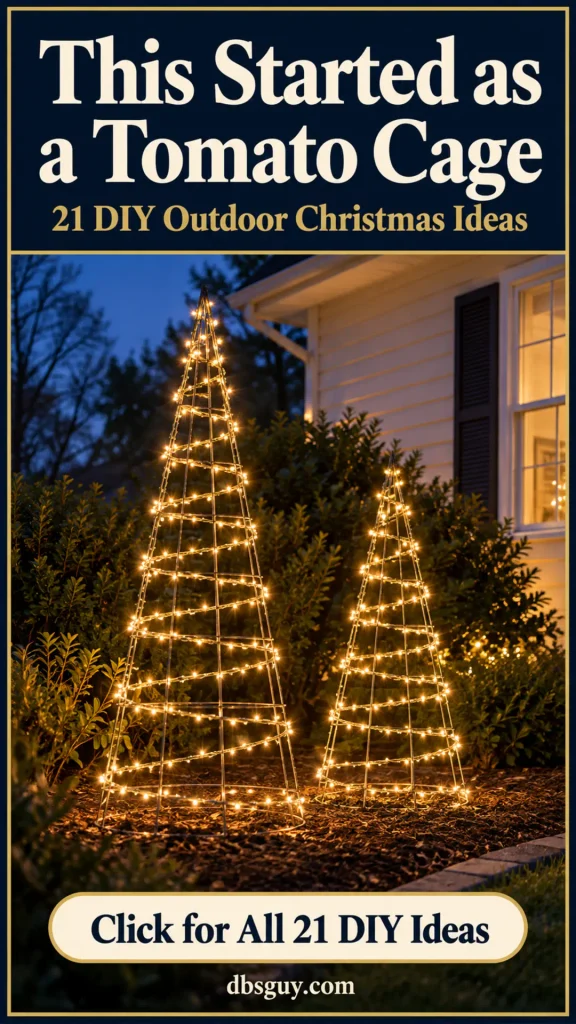
Gather: sound round tomato cages, outdoor LED light strings, suitable light clips or loose outdoor ties, protective covers for exposed wire ends, and a way to anchor each cage. Two different cage sizes make a more interesting pair.
Turn a cage upside down on a flat work surface. Bring its narrow free ends together carefully and secure them into a rounded top, covering any sharp ends. Check that the broad lower ring sits evenly. If a cage is badly bent or rusty, choose a better one rather than trying to hide the damage.
Test the lights first, then unplug them while wrapping. Follow the cage rings with a gentle spiral, attaching the string without pinching or cutting its insulation. Keep the spacing consistent from top to bottom. Route the power lead at the base toward the outlet without crossing a path.
The detail that matters: anchor the cages to suit the ground and expected wind; their broad rings alone may not hold them steady. Place them away from foot traffic. Use lights you already own if they are in good condition, and keep the design open instead of buying fabric to cover it.
4. Paint Scrap Wood Blocks Into Porch Presents
Painted wood presents give a covered porch a cheerful focal point without relying on wrapping paper. Their simple shapes are easy to coordinate with a wreath or door bow.

Gather: clean, sound wood offcuts with broad, flat bases, sandpaper, appropriate exterior primer and paint, painter’s tape, and optional reusable bows. Avoid wood with nails, loose splinters, unknown coatings, or questionable contamination.
Have the blocks cut to usable lengths if needed, then smooth the edges and remove sanding dust. Prime and paint according to the product instructions, including the bottoms and cut ends where appropriate. Let the base color cure before masking a vertical and horizontal ribbon stripe.
Paint the stripes in cream, gold, or a second color from your porch palette. Remove the tape as directed by the paint instructions. A small fabric bow adds texture, but painted stripes alone still read as gift wrap from a distance.
Keep the arrangement simple: group the blocks at varied heights, standing each on its own stable base. Don’t make a loose tower. Place them under shelter and away from the door swing. Using leftover compatible paint can keep this affordable; buying several full cans just for tiny accents usually won’t.
5. Build a Flat Christmas Tree From Wood Slats
A flat slat tree is useful when you want height without the footprint of a full artificial tree. The spaces between the boards let the porch wall show through, giving the piece a lighter feel.
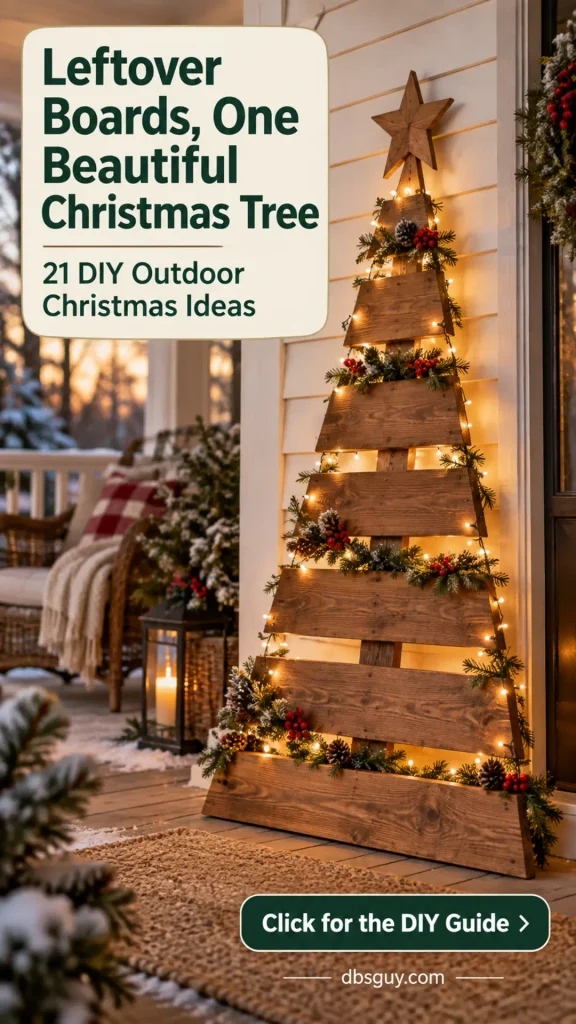
Gather: a straight central support board, several smooth slats, suitable exterior screws, a drill, an exterior finish, and a stable base or approved wall attachment. A small wood star and outdoor lights are optional.
Lay the support on a work surface. Arrange the longest slat near the bottom and progressively shorter slats above it. Keep the gaps similar and center each board on the support. Use sound, dry wood and choose screws that will hold securely without protruding through the back.
Predrill as appropriate for the wood, fasten the slats, then finish the piece according to the coating instructions. If cutting boards is beyond your tool setup, use precut lengths or have the cuts made for you. Follow tool directions and wear the appropriate protection when cutting, sanding, or drilling.
For a polished result: choose one wood finish and a simple top detail. Secure the finished tree so it cannot slide or tip; leaning it against a wall is not an anchor. Keep it under cover and use any lights as a removable layer, never stapling through the wire.
6. Tie a Large Star From Straight Twigs
A twig star brings a natural texture to a plain wall. It works especially well when the rest of the porch uses greenery, wood, and a little ribbon.
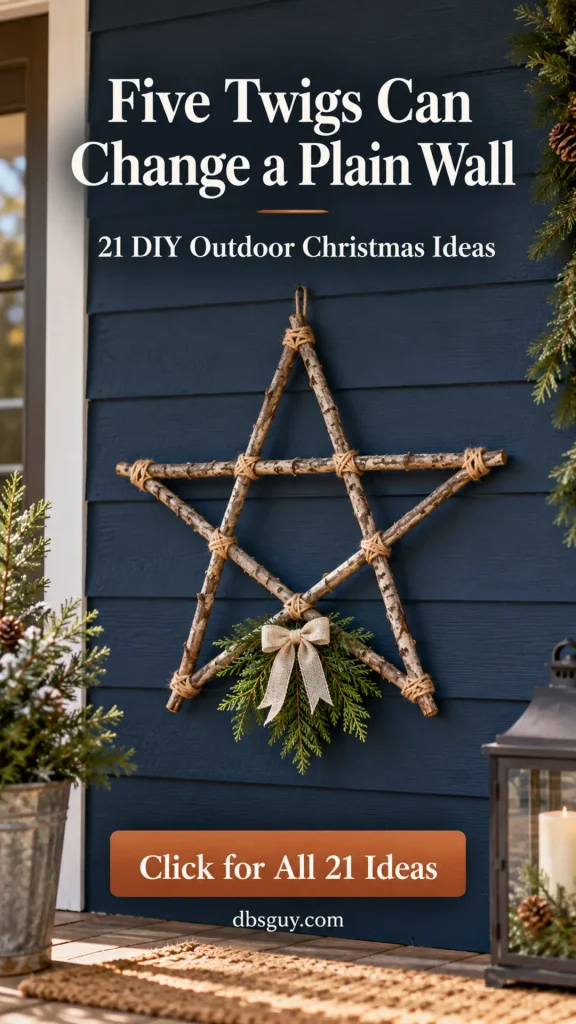
Gather: five sound, fairly straight twigs of similar thickness and length, outdoor cord, pruners, and optional greenery. Start with a tabletop size so you can adjust the shape before making a larger version.
Arrange the twigs into a five-point star: each stick runs between two points, and the sticks cross through the middle. Shift the ends until the outline looks balanced. Tie the outer joins first, wrapping each firmly several times, then tie the interior crossings so the shape cannot slide.
Lift the star gently and check every joint. If it twists or collapses, tighten the bindings before adding anything decorative. A small greenery sprig and bow at one point are enough; a heavy cluster can pull the lightweight shape out of balance.
Best spot: hang it flush against a sheltered porch wall using a suitable attachment. Keep sharp twig ends away from people passing by. The charm comes from the natural material, so there is no need to buy a spray finish or cover every binding with embellishments.
7. Turn Plastic Nursery Pots Into a Bell Cluster
Inverted nursery pots have a flared silhouette that can suggest old Christmas bells. A bronze finish and staggered hanging lengths help the little pots feel like a coordinated decoration.

Gather: three small, intact plastic pots with drainage holes, a plastic-compatible exterior coating, outdoor cord, small washers or other suitable cord stops, three lightweight wooden balls, and outdoor ribbon.
Clean the pots and let them dry fully. Prepare and paint them following the coating’s plastic instructions, testing a hidden area first. A muted bronze or aged gold looks more convincing here than a very bright glitter finish.
Invert each pot and thread a cord through a bottom drainage hole. Secure the cord inside with a stop larger than the hole, so the pot cannot slip off. Hang a small ball on a separate short cord inside the opening to suggest a clapper. Check the stops and knots with a gentle tug, then gather the three suspension cords at different lengths.
Placement tip: hang the lightweight cluster beside the entrance on a covered wall, using a hook rated for the whole arrangement. Keep it out of reach of the door and away from overhead visitor space. These are decorative bells; don’t expect plastic pots and wooden balls to produce a metal bell sound.
8. Make an Oversized Ornament Arrangement in an Urn
Large ornaments can turn an ordinary urn into a Christmas feature with very little crafting. The arrangement looks strongest when the balls sit in a low, full grouping rather than a tall stack.

Gather: a stable outdoor urn, lightweight shatterproof ornaments intended for outdoor display, outdoor faux greenery, wire or suitable ties, and a removable support grid that fits inside the urn.
Fit the support securely below the rim. Cover it with a loose nest of greenery, then arrange the largest ornaments first. Fill a few gaps with smaller ones, limiting the colors to the palette already used at your door.
Secure each ornament individually through its sound hanging point to the support beneath it. A removable cap may not carry the weight of a suspended ornament safely, so avoid hanging a heavy ball by a loose cap. Keep this arrangement seated in the urn rather than dangling from it.
Save on the right thing: reuse balls that already coordinate before buying oversized replacements. If you want to repaint plastic ornaments, check coating compatibility and allow the required cure time. Keep the urn stable and its drainage clear, and bring the arrangement in when strong wind could loosen pieces.
9. Make Matching Bows for a Plain Porch Railing
A row of matching bows can make a plain railing look festive without a long garland. Repetition does the decorating work, especially when the ribbon color also appears at the door.
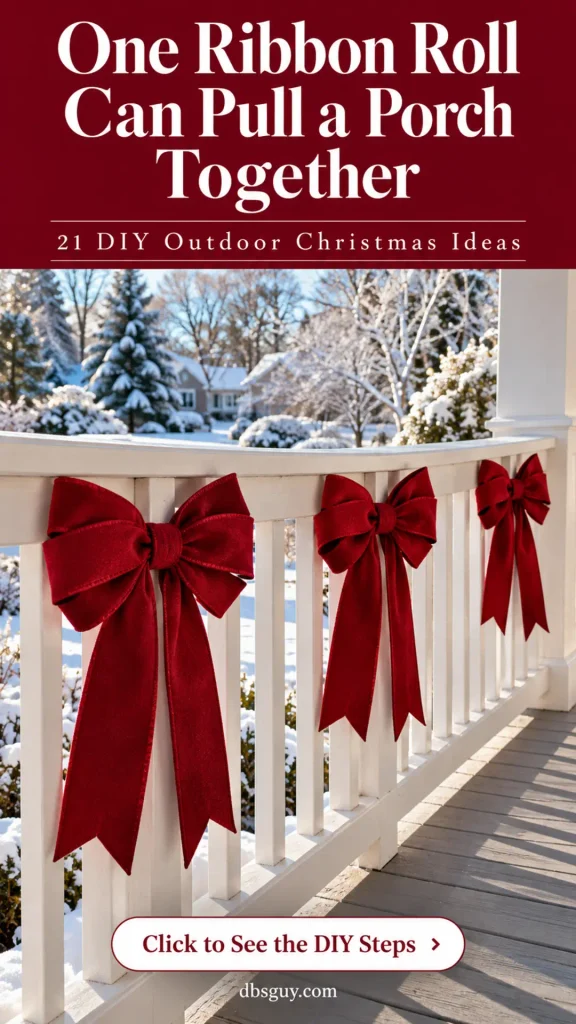
Gather: outdoor-suitable ribbon, scissors, a tape measure, and soft outdoor ties. Wired ribbon is easier to shape, but choose a product suited to the moisture and sun it will receive.
Make one bow first. Form equal loops, pinch the center, and secure it with a tie. Add the tails separately if that helps you control their length. Hold the finished bow against the railing and check its size from the sidewalk.
Use the first bow as the pattern for the others, matching loop size and tail length. Tie them to fixed balusters below the handrail at even intervals. Keep the top rail easy to grip and trim the tails so they cannot brush the deck or tangle around a gate.
A useful budget move: measure ribbon for the trial bow before buying a full roll. Fewer generous bows usually read more clearly than many tiny ones. Check the ties after windy weather, and use a protective layer where a tie could rub a painted finish.
10. Bundle Pinecones Into a Long Door Swag
A pinecone swag is a good alternative when you want a narrow door decoration. Its long shape adds texture while leaving more of the door color visible.
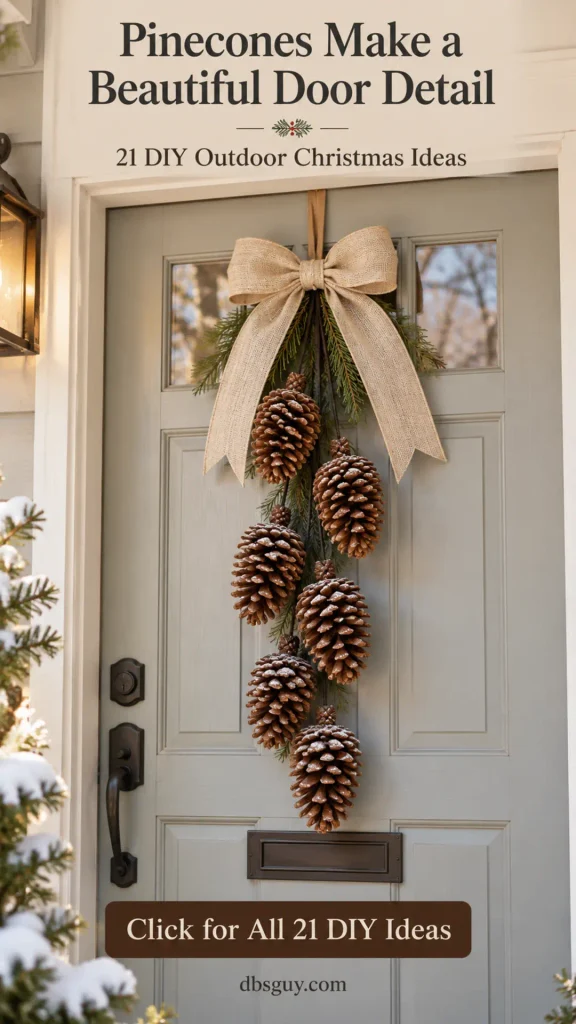
Gather: clean, dry pinecones, fine floral wire, outdoor cord, wire cutters, and a broad ribbon. Choose purchased cones or ones you are allowed to collect, and check them for insects and loose debris before bringing them inside.
Wrap wire securely around the base of each cone, working it between the lower scales. Make a small attachment loop and tuck the wire ends in. Tie each cone to its own length of cord, then hold the cords together to see how the cluster falls.
Adjust the lengths so the cones overlap loosely without becoming one heavy lump. Tie the cords together at the top, cover the binding with a bow, and add a small evergreen tip if you like. Test the hanging assembly over a work surface before putting it on the door.
Why this stays affordable: natural texture provides most of the interest, so extra ornaments aren’t necessary. Use a suitable hanger for the finished weight and keep the cluster under shelter. Make it short enough that opening the door does not swing the cones into the handle or glass.
11. Tie an Evergreen Swag Instead of Buying a New Wreath
A branch swag gives you a generous door decoration without needing a circular frame. It is especially attractive on a tall door where the greenery can fall into a relaxed fan.
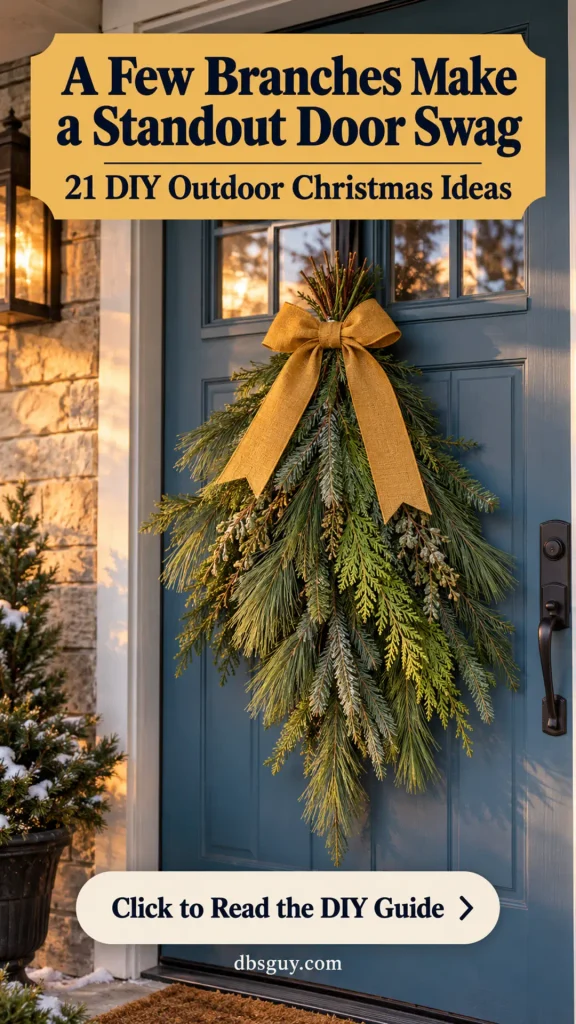
Gather: a few fresh conifer branches or outdoor faux branches, floral wire, pruners, outdoor ribbon, and a hanger suitable for the finished bundle.
Arrange the longest branches at the back with their tips pointing down. Layer shorter, fuller branches in front, keeping their stem ends together at the top. Lift the bundle occasionally; a design that looks balanced on a table may fall differently when it hangs.
Bind the stems firmly and create a secure hanging attachment around the bound bundle. Cover the top with a generous bow, then trim stray stems and wire ends. Keep the arrangement light enough for its hanger rather than continuing to add branches just for fullness.
Make it suit the door: measure the available width before cutting. The foliage should clear the lock, handle, and moving edges. Fresh cut conifers suit a winter display, but they will dry at different rates depending on species and weather. In a warm, sunny location, use outdoor faux greenery or plan to refresh the bundle.
12. Make Simple Half-Hoop Wreaths for Your Windows
A partially decorated metal hoop has an airy look that suits smaller windows. Making a matching pair adds rhythm to the front of the house without covering the glass with full wreaths.

Gather: two metal craft rings suited to the location, outdoor faux greenery, floral wire, narrow outdoor ribbon, and compatible exterior hangers. Use rings small enough to leave the windows readable from the street.
Place greenery along roughly one-third of the first hoop, allowing its tips to follow the curve. Wire the stems to the ring in several places and conceal the ties with overlapping foliage. Finish with a small bow at the base of the green section.
Make the second wreath using the same amount of greenery and ribbon. Hang both at matching heights on accessible windows, following the hanger’s directions for the surface and weight. Keep window operation and catches unobstructed.
Don’t skip the mounting check: Command’s outdoor mounting guidance calls for outdoor products and suitable surfaces; its ordinary indoor strips are not intended for exterior windows. Other hangers have their own limits. Avoid reaching from an unstable position just to match an upstairs window.
13. Stencil a JOY Sign on an Exterior Wood Board
A narrow sign adds height to a small Christmas arrangement. Large letters and a restrained palette make it easier to read than a busy board filled with several messages.

Gather: a smooth exterior-suitable board with a stable base, appropriate primer and paint, large letter stencils, painter’s tape, and a secure placement attachment. Choose the board size for your porch, not for the empty space in the store aisle.
Prepare and coat the wood according to the product instructions. Mark the center line lightly, then lay out J, O, and Y with similar spacing. Step back before painting: the top and bottom margins should feel balanced when the board stands upright.
Hold each stencil flat and apply a small amount of paint, building color carefully instead of flooding the stencil edge. Allow the letters to dry, then add only one small greenery detail if the sign needs it.
Budget and placement: use leftover compatible paint in a color already present on the porch. Secure the board against tipping and keep it out of the entry path. A leaning sign needs an anchor, even when it feels heavy. Store it dry after the season so the work you put into the finish lasts longer.
14. Refinish a Wood Crate Into a Christmas Display
A wood crate can create a little Christmas scene where a full tree would be too much. Refinishing it helps the crate become part of the display instead of looking like leftover storage.
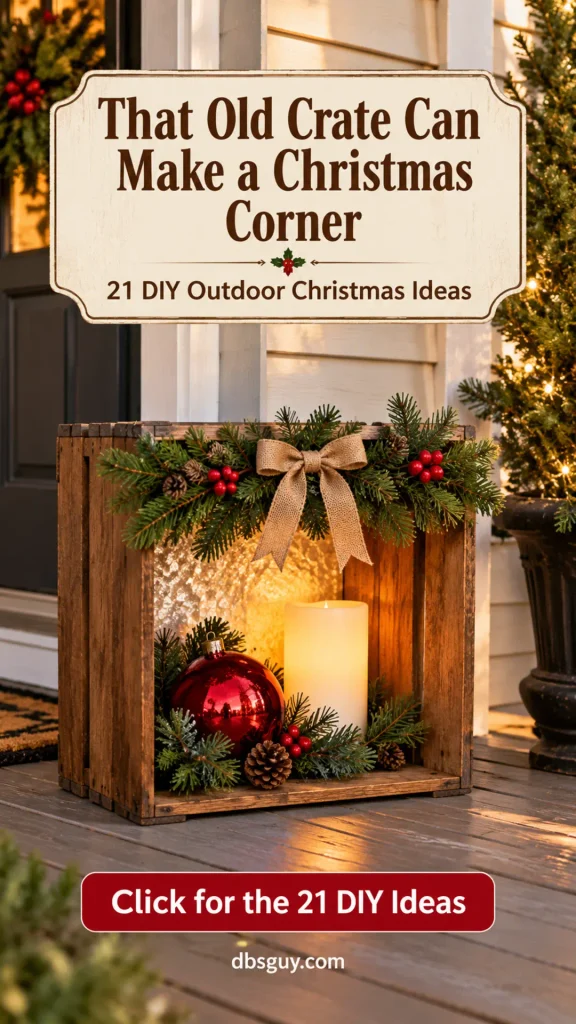
Gather: a sturdy crate, sandpaper, an exterior-compatible wood finish, short outdoor faux greenery, suitable ties, one shatterproof ornament, and an outdoor-rated flameless candle.
Check the crate for loose boards and protruding fasteners before smoothing rough areas. Finish the wood as directed, allowing it to cure fully. Stand the crate on its broad bottom; there is no need to stack several crates to make the corner interesting.
Tie a short greenery section to the upper front edge. Place the candle and ornament inside, securing lightweight pieces so a draft cannot knock them out. If the inside is very dark, a small finished backing board in a lighter color can help the candle show up.
Give it room: keep the crate under shelter and away from the walking route. Leave battery controls accessible. A single attractive object beside a warm light is enough here; filling every corner can hide the very crate you just refinished.
15. Paint Wood Circles Into Oversized Peppermints
Large peppermint shapes make a playful fence or porch accent. Smooth wood circles give you a clean surface for the pattern and avoid the need to improvise with fragile foam.
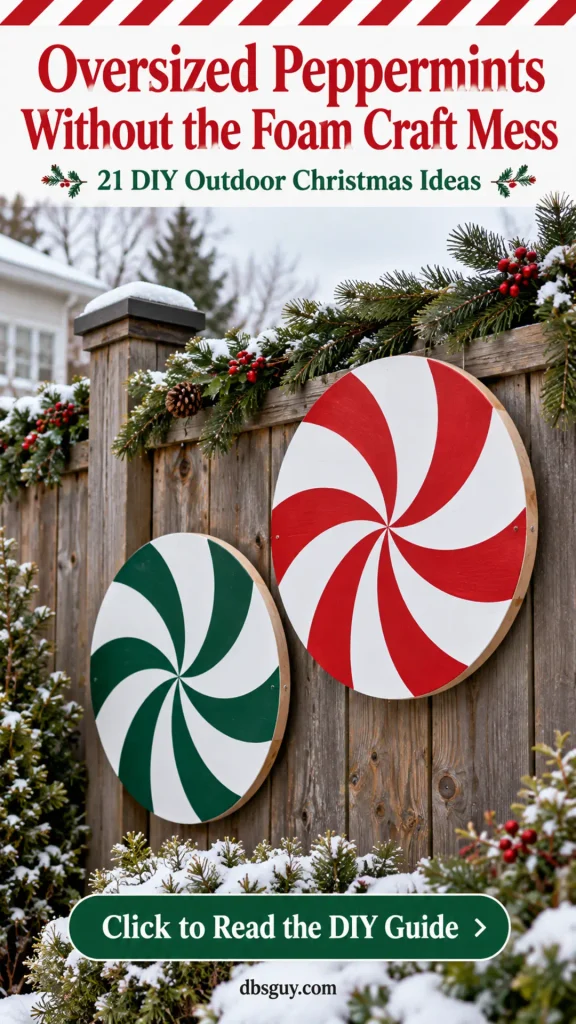
Gather: exterior-suitable plywood circles or suitable wood discs, primer, white and red exterior paint, a pencil, paper for a pattern, small brushes, and hardware appropriate to the weight and mounting surface.
Use precut circles if you don’t have the tools to cut them. Smooth the edges, then prepare and coat the front, back, and edges according to the finish instructions. Once the white base is ready, lightly mark the center and divide the circle into equal sections.
Sketch gently curved wedges from the center toward the rim. Paint alternating sections red, leaving white between them. Practice the pattern on paper first; that is easier to correct than a large painted disc. A second peppermint in green and white can stay within the same festive palette.
Mount them thoughtfully: attach through suitable back hardware to a sound support, keeping sharp hardware and heavy discs away from passing people. Exterior plywood and paint are not a promise of indefinite weather resistance. Inspect the finish, protect exposed edges, and take the pieces down before severe weather.
16. Shape an Evergreen Gnome Around a Tomato Cage
If you want a playful character without buying a large lawn figure, an evergreen gnome is a charming option. The greenery creates its body while a hat and nose give it a simple personality.

Gather: a sound tomato cage, fresh or outdoor faux conifer branches, suitable ties, an outdoor-suitable cone-shaped cap, and a lightweight wooden bead or ball with a secure attachment point.
Invert and anchor the cage with its broad ring at the bottom, then secure and cover the narrow wire ends. Tie branches to the frame with their tips falling downward. Add enough greenery to conceal the support without making the decoration too heavy.
Fit the cap over the joined top, fastening it to the frame so it cannot blow away. Secure the wooden nose beneath the brim; it should not depend on a dab of glue alone. Check that the cap, nose, and greenery remain in place when you move the cage gently.
Keep it practical: display the gnome in a sheltered corner and bring it in for rough weather. A reusable wooden nose avoids a perishable food prop, and outdoor faux branches reduce seasonal rebuilding. If you use fresh branches, remove dry or shedding pieces as the display ages.
17. Give a Thrifted Lantern a Holiday Makeover
A secondhand lantern can be one of the most useful porch finds. A refreshed finish and a restrained bow make it festive while allowing it to return to everyday use later.
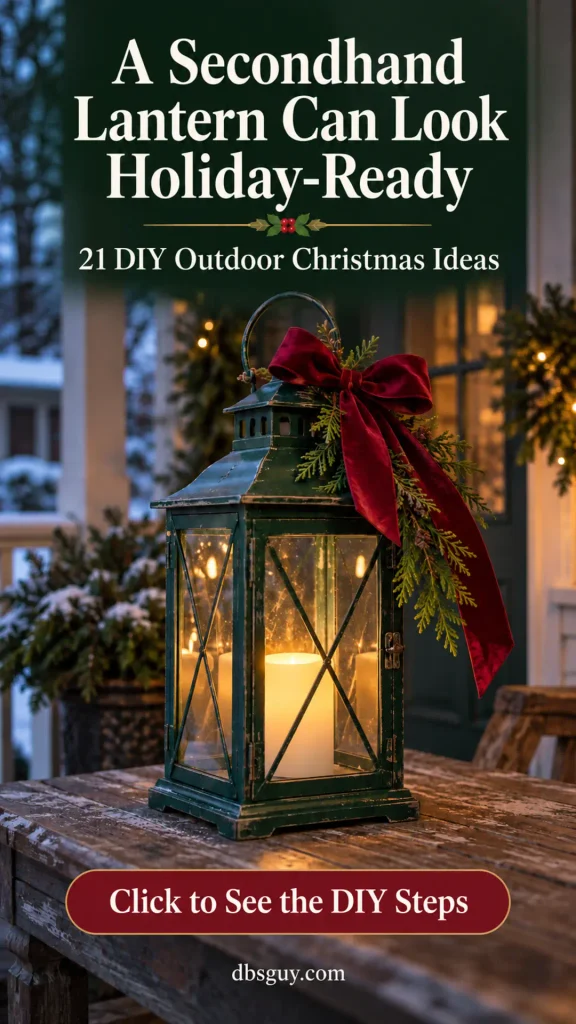
Gather: a sound metal lantern with intact glass, a coating system suitable for that metal and outdoor location, outdoor ribbon, a small greenery sprig, and an outdoor-rated flameless LED candle.
Choose a lantern without broken panels, sharp rusted edges, or loose parts. Follow the coating directions for cleaning and preparation. Remove or mask the glass as appropriate, protect the interior where necessary, and paint the metal with the required primer and finish.
After curing, place the LED candle inside with its controls accessible. Tie a small bow and sprig to the outside handle, keeping them clear of the candle compartment. Leave any existing electrical components unmodified; this project is a surface makeover.
A good place to save: use one lantern as the main light detail instead of buying a matched set. Check the candle’s outdoor rating separately from the lantern’s material. Ordinary indoor battery candles are not made outdoor-safe by sitting behind glass, and a covered porch can still get wet.
18. Dress an Empty Picture Frame With Greenery
An empty frame can make a simple greenery cluster feel like a finished piece of wall decor. It works well when you want something different from another wreath.

Gather: a sound solid-wood frame with the glass and artwork removed, a compatible finish suitable for the location, outdoor faux greenery, floral wire, ribbon, and mounting hardware for the finished weight.
Inspect the joints and back of the frame before decorating. Skip pieces with loose corners, damaged coatings, or swelling fiberboard. Prepare and finish a suitable frame following the product directions, then let it cure.
Wire a small greenery cluster to one corner, wrapping around the frame without damaging its finish. Add a single bow and tuck the wire ends away. Leave most of the opening empty so the shape remains clear against the wall.
Use it under cover: a decorative picture frame is not automatically built for outdoor exposure, even after painting. Mount it on a sheltered wall using suitable hardware, away from a door that could strike it. If the frame feels too delicate for that location, keep it indoors and choose one of the sturdier projects for the porch.
19. Paint Mismatched Pots Into a Coordinated Christmas Pair
Two planters don’t have to be identical to look like a set. A shared color and similar greenery can connect different shapes, which is useful when you already own pots worth keeping.

Gather: intact outdoor planters, a coating compatible with their material, the required preparation supplies, and optional accent paint. For plastic or resin, verify the coating directions rather than assuming any exterior paint will bond.
Empty the pots as needed and clean them thoroughly. Let them dry, then prepare and paint as directed. Keep drainage holes open and avoid coating growing surfaces unless the product is intended for that use.
Choose one body color for both pots. If you add a contrasting rim, make it a narrow repeated detail rather than a second full pattern. Let the finish cure before handling heavily or adding greenery.
Keep the total cost honest: buying primer, two paint colors, and new plants may cost more than expected. This idea works best when you already own suitable pots and can use the paint for another project. Add matching outdoor faux greenery or appropriate seasonal plants, then position the pair where the different shapes look intentional.
20. Build a Tiny Village From Painted Wood House Shapes
A little wood village adds a quiet Christmas detail to a covered porch shelf. Repeating the same finish keeps the houses charming rather than visually crowded.

Gather: simple wood house silhouettes of varying heights, a broad stable wood base, suitable fasteners, exterior-compatible paint, a small brush, and optional outdoor micro-LED lights.
Use ready-cut shapes or have them cut from suitable wood if you don’t have the tools. Lay out the houses on the base before finishing, leaving small gaps between them. Prepare and paint every piece as directed, including the edges.
Add a few painted windows and doors instead of cutting tiny openings. Secure each house to the base with suitable hardware that doesn’t protrude. If using lights, clip a tested outdoor string behind the houses so it creates an edge glow without requiring any wiring changes.
Keep it believable and sturdy: simple silhouettes are enough; fragile miniature roofs and dozens of accessories add cost and work. Place the village on a sheltered, stable surface, secure it against tipping, and keep the cord and battery pack positioned according to their instructions. Make sure the finished display can be lifted as one piece for storage.
21. String an Ornament Garland Along a Garden Fence
A fence can carry a Christmas accent without needing lights along its entire length. A restrained row of ornaments brings color into the garden and connects it to the porch.

Gather: outdoor-suitable shatterproof ornaments, outdoor cord, ties, and compatible attachment points on a sound fence. Check ornament caps and hanging loops before relying on them to hold each piece.
Measure the section you want to decorate and arrange the ornaments on a work surface first. Repeat your colors in a simple sequence, leaving enough space for each ball to show. Tie the ornaments individually to the cord so they won’t all slide to the middle.
Attach the cord at intervals along the fence, keeping the drape shallow and away from gates, catches, and walking routes. Use attachments that suit the fence and won’t abrade its finish. The cord should support the ornaments; their caps should not be asked to carry the whole garland.
Finish with less: a little greenery at each end is enough. Skip glass ornaments outdoors, inspect the ties after wind, and remove the garland before severe weather. Start with the fence section closest to your entrance rather than buying enough ornaments for the whole yard.
How to Combine a Few DIY Projects Without Making the Porch Busy
Choose a main feature first. If the door wreath is full and colorful, let nearby pieces be simpler. If the door is plain, a tall slat tree or JOY sign can provide the height the entrance needs.
For a traditional porch, combine the layered wreath, one evergreen pot, and a few railing bows in the same red. For a quieter look, try the twig star, matching dark planters, and one lantern. A playful display can pair the wood presents with peppermint discs, keeping the rest of the greenery plain.
Check the arrangement from the sidewalk in daylight and after dark. If the small detail disappears, move it closer to the entrance instead of buying more. If several decorations compete for attention, remove one and give the strongest piece more space.
Take a quick photo once everything is set up. A photo often reveals a crooked bow, uneven spacing, or a pot that looks isolated. Fixing those details can do more for the finished porch than adding another decoration.
Questions That Come Up Before Starting
Which DIY outdoor Christmas decorations are easiest for beginners?
Start with the railing bows, an evergreen door swag, or the ornament urn. They let you adjust the arrangement before committing to it and don’t require wood cutting. If you enjoy painting, wood block presents are a straightforward next step when you have clean, precut blocks.
How can I make cheap Christmas decorations look more expensive?
Repeat a small color palette, use a clear shape, and hide the fasteners. Give bows consistent proportions and paint projects the preparation time they need. Choose one generous accent instead of adding many tiny ones that are difficult to see from the street.
Can I use hot glue for outdoor Christmas crafts?
Only where the adhesive is suitable for both the materials and exposure. Gorilla’s hot glue specifications, for example, describe the product as water resistant and advise against continual water exposure. Use wire, ties, or appropriate hardware for hanging assemblies and pieces exposed to wind. Glue is not a substitute for a secure mounting method.
Do I need to make every project weatherproof?
Choose the project for its location. A sheltered frame or wood village still needs sensible materials and protection, but it shouldn’t be treated like a permanent yard fixture. For exposed displays, follow the materials’ outdoor instructions, maintain the finish, and bring vulnerable pieces inside when conditions call for it. No single clear spray makes every craft suitable for rain and snow.
What should I buy first if the budget is tight?
Finish your inventory first, then choose one project that uses what you own. Buy only the missing essentials for that project, including secure attachments and a compatible finish. After it is complete, decide whether another decoration would improve the space. That pause helps prevent a small craft budget from becoming several bags of unrelated supplies.
Make One Piece You’ll Enjoy Bringing Out Next Christmas
Start with the empty pot, the old wreath, or the spare garden cage already waiting for a second use. Give it a clear purpose, finish it carefully, and let it set the direction for the rest of the porch.
The most satisfying display is one that fits your home and is manageable to put up, care for, and store. A handful of thoughtful DIY outdoor Christmas decorations can give the entrance warmth without turning December into a shopping project.




