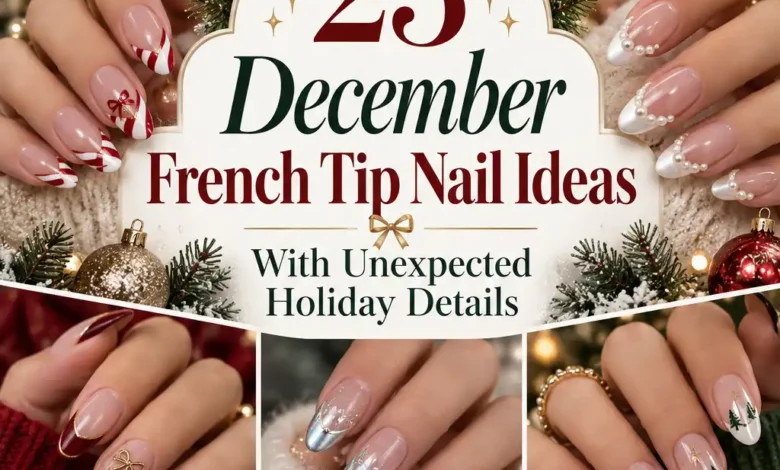
A French manicure can feel completely different with one small change: a gold line under a cranberry tip, a bow on a single nail, or a little snow along an icy blue edge. You still get that clean, open base—just with something worth looking at twice.
These 23 December French tip nail ideas range from tiny touches of holiday color to luminous party finishes. Each look includes a clear salon request and a way to adjust the detail to your nail length or painting confidence. There are Christmas French tips here, but also winter designs you can happily wear after the wrapping paper is gone.
Choose the detail you love first, then decide how much space it needs. A small dot or narrow border can work on a short nail; a plaid pattern or double arc needs enough room to stay readable. You do not need longer nails for every idea, and you do not need every detail on every finger.
1. Cranberry Tips With a Fine Gold Border
Cranberry French tips already have that dressed-for-dinner feeling. A fine gold border makes the color look more deliberate, like a narrow metallic trim on a favorite evening bag. Keep the base sheer enough that the two colors remain the focus.

Ask for a rosy nude base, cranberry tips, and a gold line following the inner curve of each tip. That curved border is the smile line. Make the gold noticeably thinner than the red section; if both bands are equally wide, the look becomes a bolder two-color French.
On short nails, choose a shallow red tip and put the gold border on just the ring fingers. A metallic nail-art polish can give you the color contrast at home. For a reflective chrome border, show your nail artist the reference and ask which finish their system can achieve.
2. Evergreen Tips With White Stitch Marks
Tiny white dashes give evergreen tips the feeling of stitched fabric. The design is festive without needing a tree, ornament, or full plaid pattern, and it looks especially at home beside an oatmeal sweater.
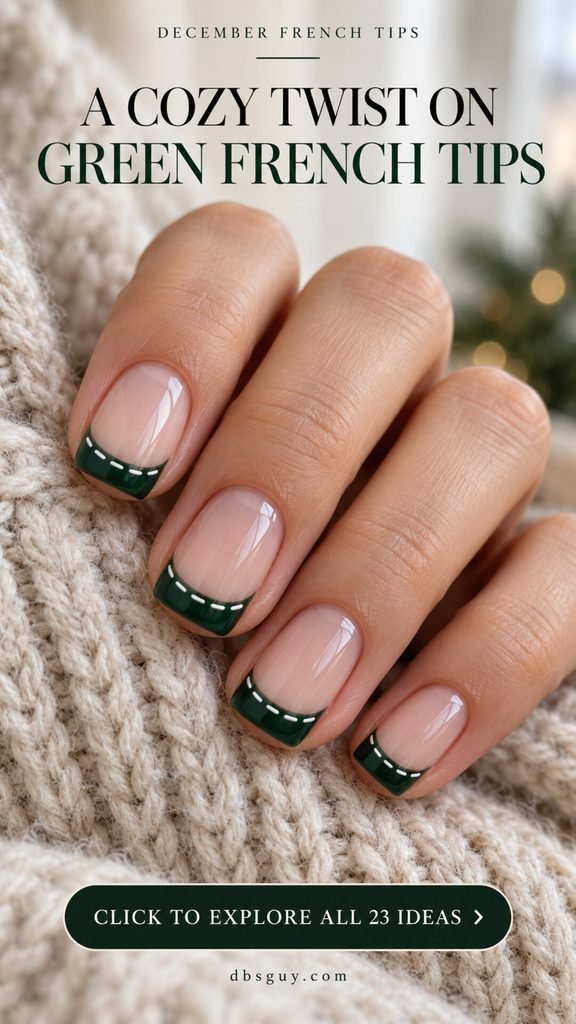
The salon brief is simple: short squoval nails, a sheer base, deep green tips, and separated white stitches along the inner edge. Ask for visible green between the dashes. A continuous white band will read as a double French instead of stitching.
For a smaller nail, three little dashes can be enough. If you are painting with regular polish, finish the green shape first and let it dry before adding the white marks with a detail brush. Practice the spacing on a spare nail tip rather than trying to squeeze in one more stitch at the end.
3. White French Tips With One Holly Corner
You can keep almost everything about a classic white French manicure and still give it a Christmas detail. Here, a small holly accent sits at one corner of the ring-finger tip, leaving the rest of the set beautifully simple.
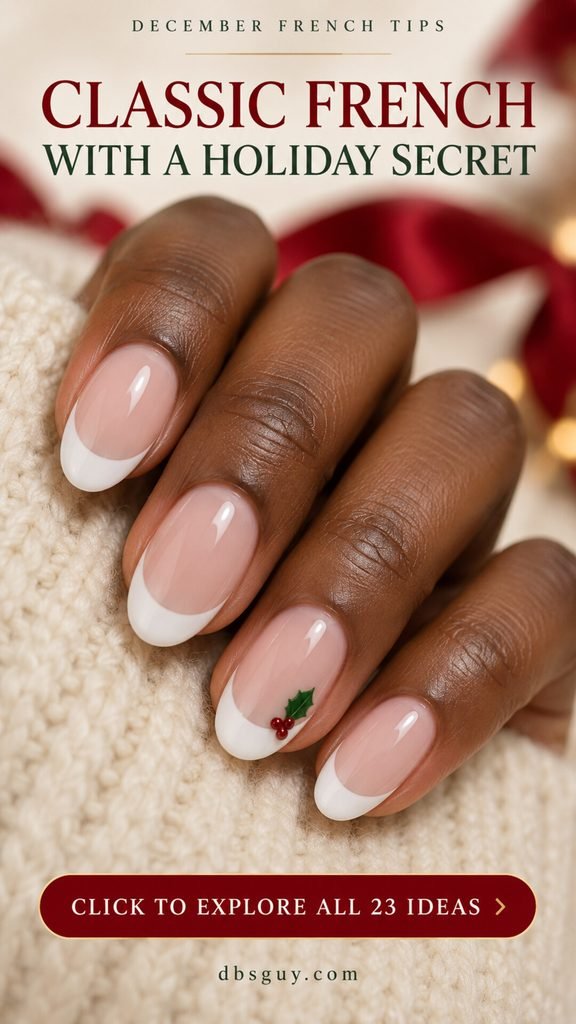
Ask for white tips with a green holly leaf and a small cluster of red berries beside one smile-line corner. A second leaf is optional if your nail has room. Positioning the accent off-center lets the white curve remain visible instead of covering it with a large motif.
For a flatter everyday version, request painted leaves and berry dots rather than a raised charm. A small nail decal is another option if its size fits the tip. This is a lovely choice when you want something festive for family photos but still want your manicure to feel familiar.
4. Split Peppermint French Tips
Peppermint colors do not have to mean a whole set of candy-cane stripes. Splitting each tip into a red section and a white section gives you the same cheerful palette with a much cleaner pattern.
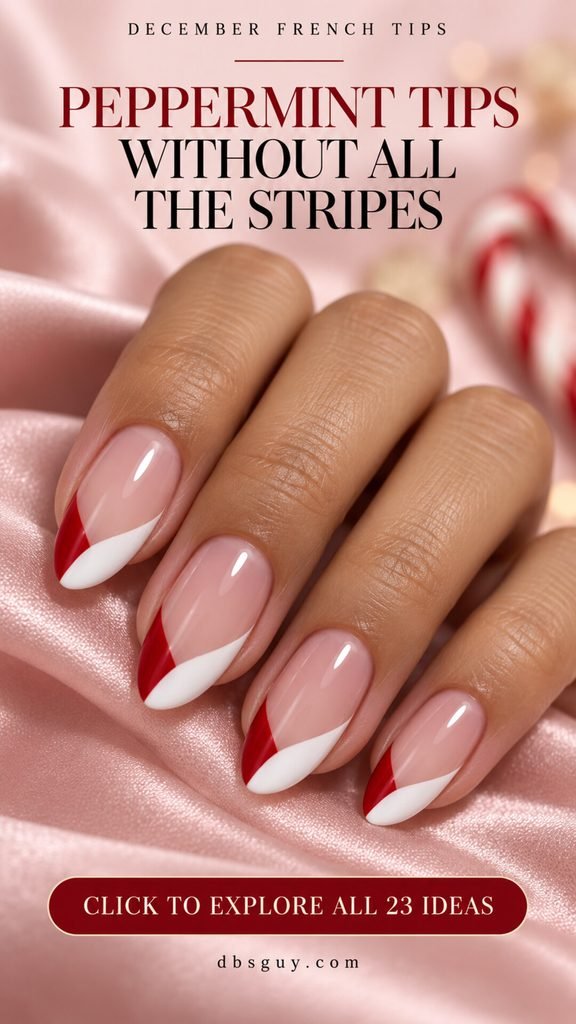
Ask for two diagonal color sections meeting across the tip, with plenty of sheer pink showing below. The division can lean to one side; it does not need to split the tip into mathematically equal halves. What matters is that both colors stay recognizable on each nail.
On shorter nails, let one color occupy most of the tip and use the second as a smaller corner. At home, map out the white shape first, let it dry, then add the red portion with a fine brush. Avoid repeatedly correcting the join while the layers are still wet.
5. Midnight Blue Tips With Tiny Silver Stars
Midnight blue tips bring a winter-night mood to a French manicure. A small silver star gives the dark color a focal point, especially if you like holiday nails that do not depend on red and green.
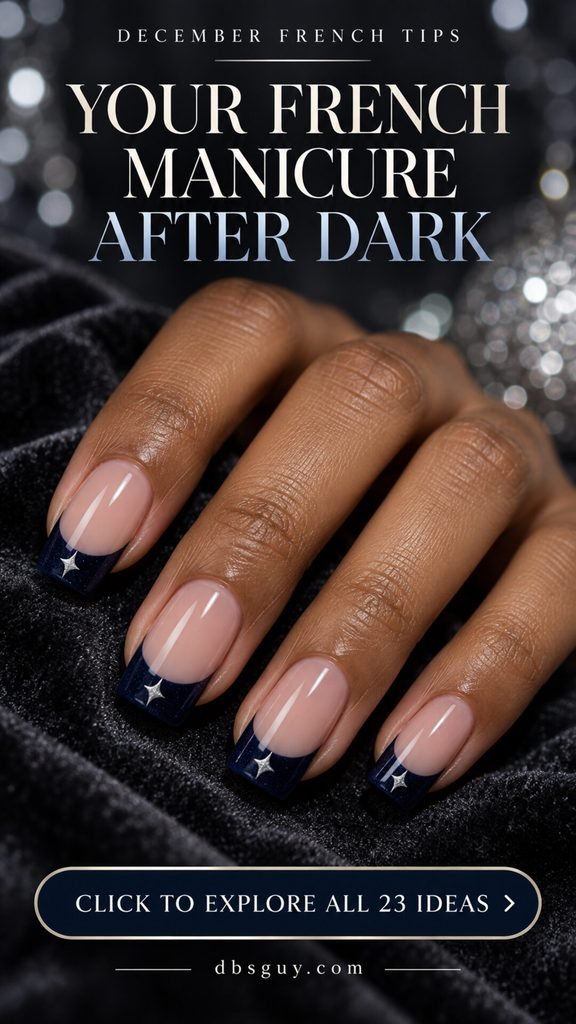
Ask for a deep navy French with one small silver star inside each tip. A soft square shape provides a convenient little canvas, but oval nails work too. Check that the blue still looks blue in ordinary room light if you want a visible difference from black.
If the tip is too narrow for a recognizable star, put the star on one ring finger and keep the other tips plain. Flat decals can simplify the detail. Pair the set with silver earrings or a charcoal sweater, and let the navy do most of the work.
6. Silver Mirror Tips With an Open Double Arc
The interesting part of this silver French is the space between its lines. A mirror-like tip sits above a second, fine silver arc, leaving a slim strip of the nude base visible between them.
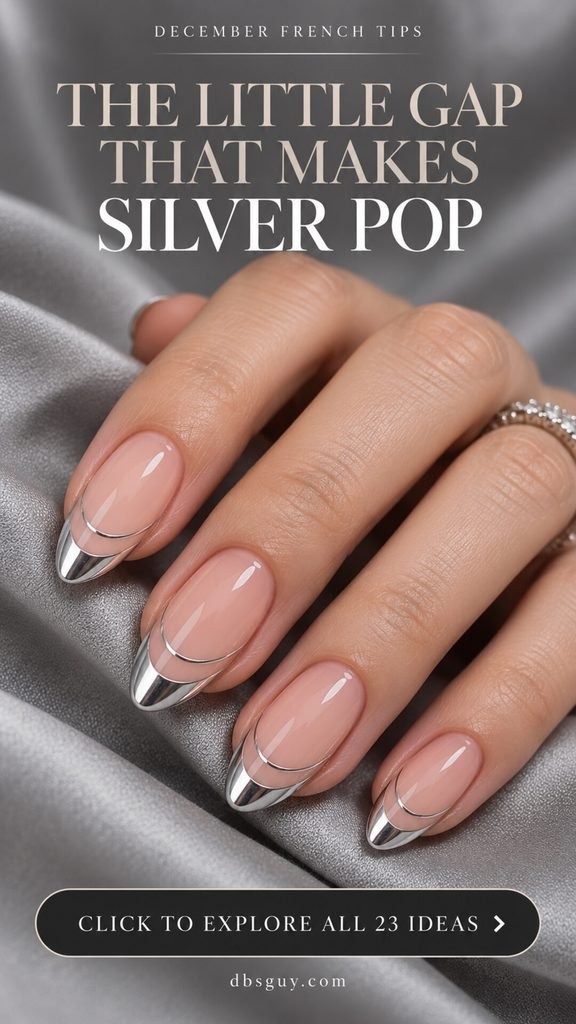
Ask your nail artist for a silver tip and a separate parallel outline beneath it. Show the gap clearly in the reference: it is an intentional part of the design. If the two silver sections touch all the way across, you lose the airy double-arc effect.
This is easiest to appreciate on a nail with a little length. For shorter nails, use the extra arc on just one or two fingers. A silver metallic polish can recreate the arrangement, but its sheen will usually look different from the mirror finish illustrated here. Choose the layout and finish separately.
7. Burgundy Velvet French Tips
Burgundy velvet tips are for the person who wants the light to be the detail. The color looks rich at a glance, while a luminous band inside the tip adds depth as the hand changes angle.
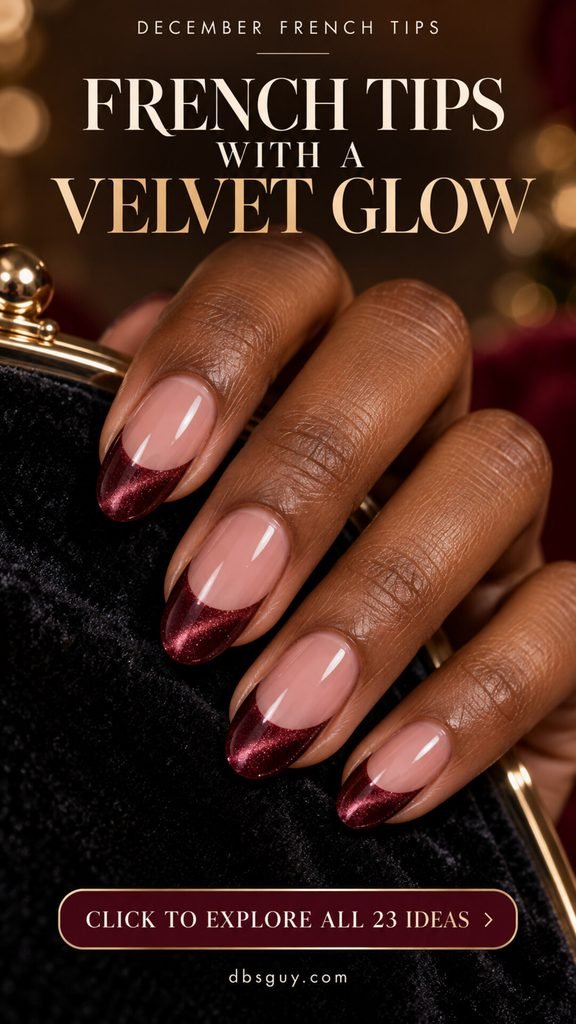
At the salon, ask for a sheer base and burgundy magnetic French tips with a softly spread velvet effect. Request a sample if you can: magnetic finishes can look quite different under a salon lamp and in daylight. The surface should be smooth; “velvet” describes the visual effect, not a fuzzy coating.
This is a technique-focused salon option. A regular burgundy shimmer polish is a simpler alternative, but it will not reproduce the same magnetic light pattern. On short nails, give the colored tip enough width to show the finish and skip extra bows, stars, or borders.
8. Pearl White Tips With a Painted Bow
A little burgundy bow makes pearl white tips feel gift-wrapped without turning every nail into a present. The soft shimmer keeps the white from looking too stark, while the single darker accent gives the eye somewhere to land.
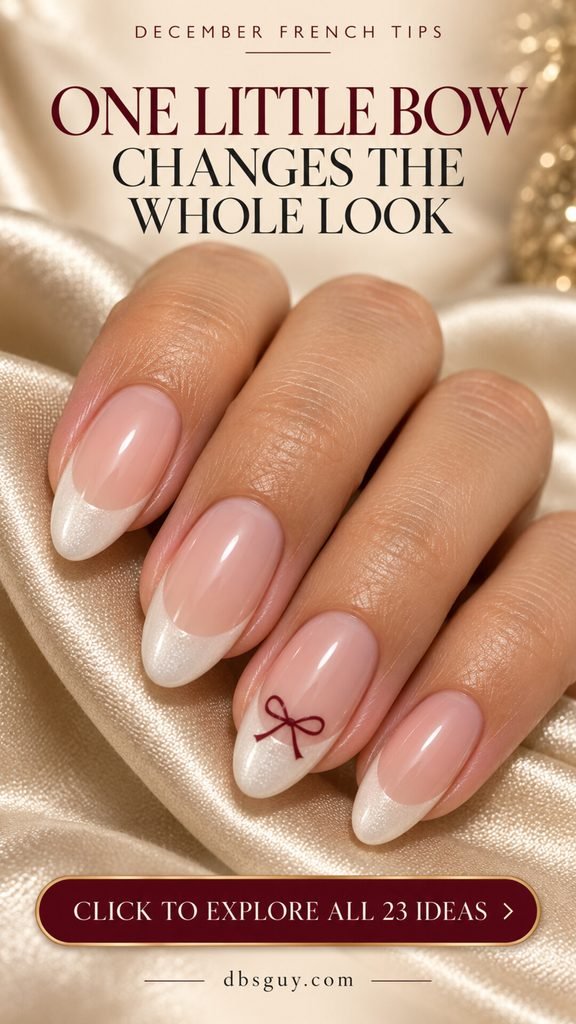
Ask for pearlescent white French tips and one small painted bow near the ring-finger smile line. Keep the loops slim and the tails short enough that the bow does not take over the nail. A flat painted design is the version to request if you do not want a raised ornament.
For short nails, move the bow slightly onto the nude area and reduce its tails. At home, a tiny bow decal can be more manageable than freehand loops. Try this with cream satin, a burgundy cardigan, or simple gold jewelry.
9. Champagne Glitter V-Tips
Changing the tip shape can make familiar gold glitter feel new. These champagne V-tips leave a pointed nude center between two angled glitter sections, giving the manicure a sharper outline.
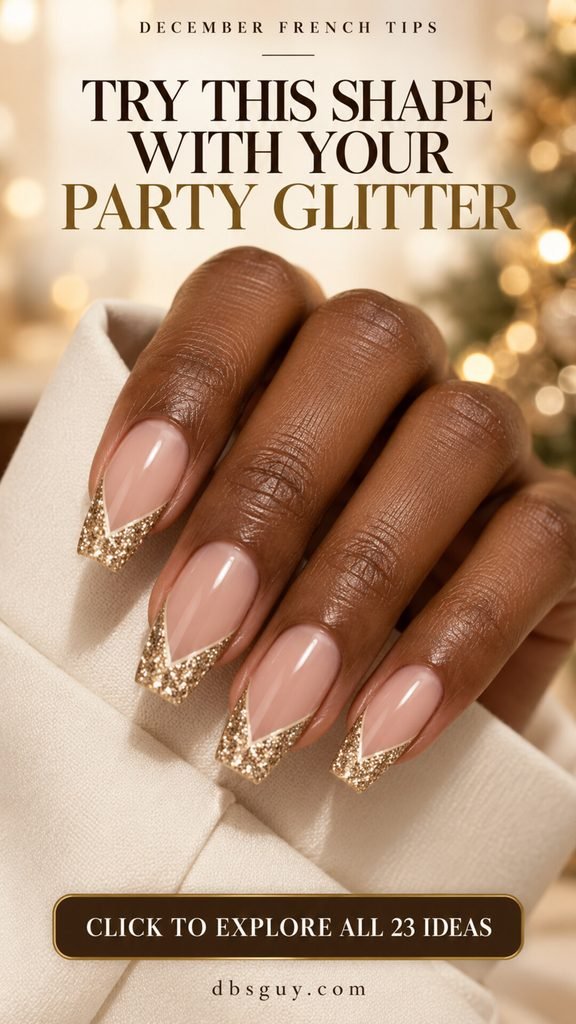
Ask for a symmetrical V-shaped French rather than a rounded smile line. The center point should align with the center of the nail, and the two sides should feel balanced. Fine glitter keeps the geometry easier to read than very large pieces clustered along the border.
A tapered square shape shows the angles clearly. For a shorter nail, choose a shallow V instead of letting the glitter climb far down the sides. If you are recreating it with polish, sketch the two edges with a detail brush before filling them in. This is a good match for a party outfit that already has plenty of texture.
10. Icy Blue Tips With a Frosted White Edge
Pale blue tips with a scattered white border look as though snow has settled along the curve. The irregular edge is the charm here; you are not aiming for a perfectly even second stripe.
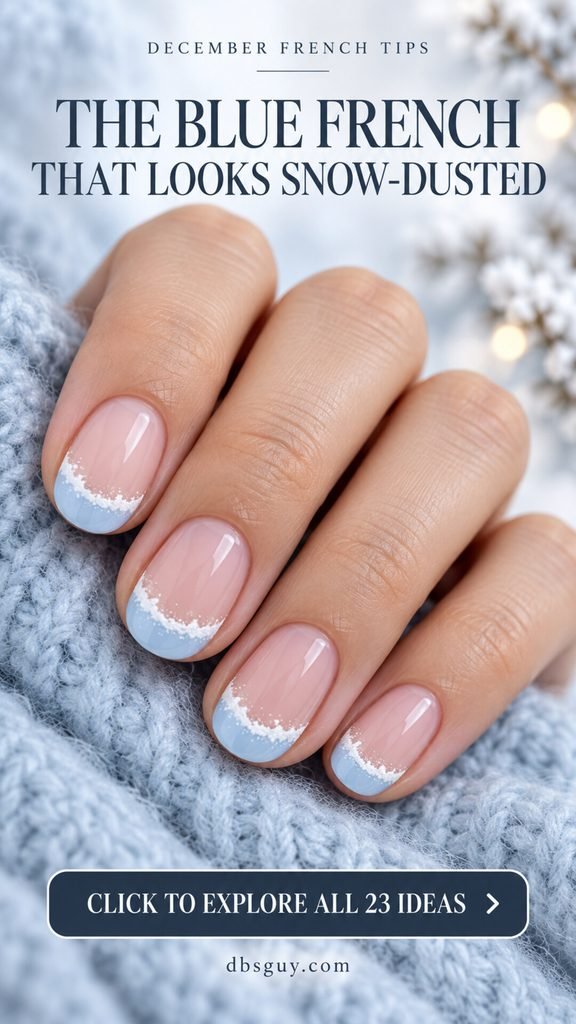
Ask for an icy blue French with tiny white speckles concentrated around the inner smile line, as shown. Leave enough blue exposed at the free edge so the tip still reads as blue. A few smaller specks can drift slightly onto the sheer base without filling the whole nail.
This design adapts nicely to short oval nails. For regular polish, let the blue dry, then place a light scattering of white dots with a small detail tool. Stop while the marks still look separate. A thick white layer can overwhelm the delicate frosted effect.
11. Cocoa Tips With Tiny Cream Dots
Cocoa tips and cream dots borrow the colors of a winter café without needing a painted mug or marshmallow. The tiny repeating detail feels playful, but the brown palette keeps the overall look easy to wear.
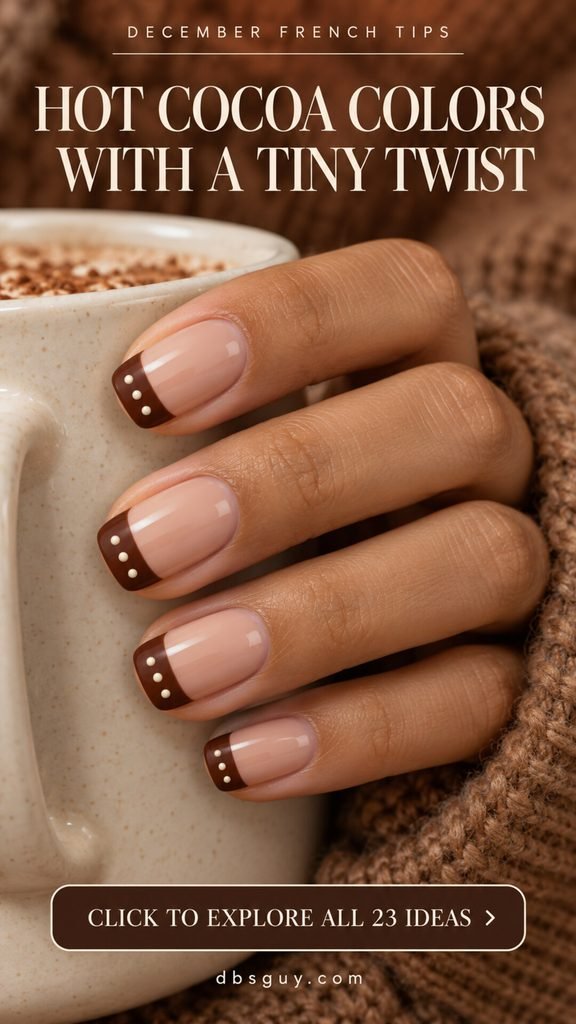
Ask for warm cocoa French tips with a small row of cream dots inside each colored section. Three dots are a useful starting point, not a rule: on a narrow pinky, two smaller dots may fit better. Leave brown visible around every dot so the pattern does not turn into an uneven cream band.
Short squoval nails suit this compact arrangement. For a smooth version, request small polish dots rather than pearl embellishments. A dotting tool makes it a reasonable at-home option if you are already comfortable painting a basic French tip.
12. Alternating Red and Green Micro Tips
Sometimes the smallest amount of red and green is enough. Alternating micro tips give you both holiday colors while keeping almost the entire nail soft and neutral.
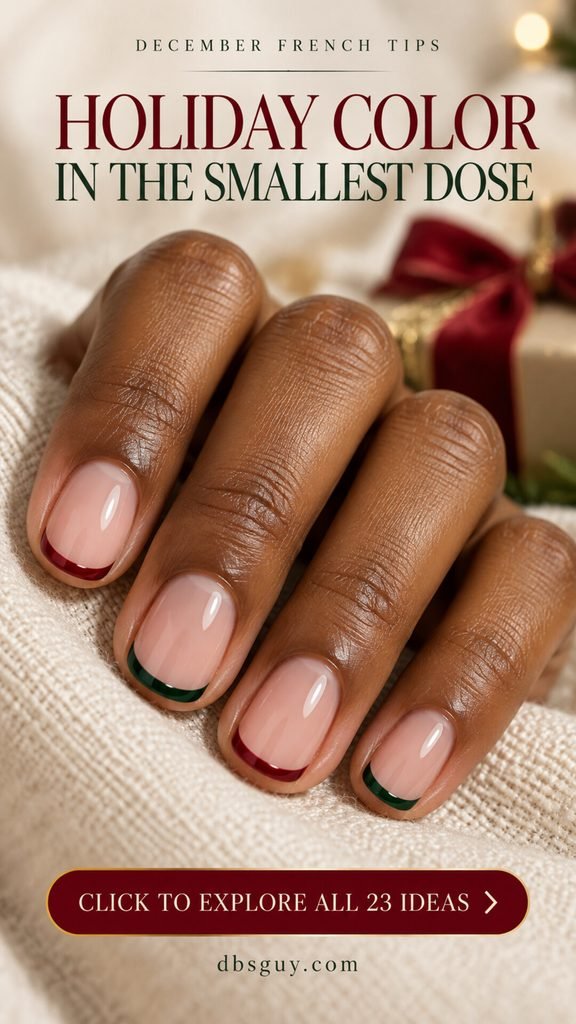
Ask for a very narrow French edge, alternating cranberry and forest green from nail to nail. Use the same sheer base across the whole set so the color changes feel connected. The width of the tips matters more than making the color sequence identical on both hands.
This is one of the easiest looks here to adapt to short natural nails. Keep the band narrow relative to your nail bed and follow the shape of the free edge. If you prefer an even quieter version, use green on most nails with a single red tip on each hand. There is no need to add a motif.
13. Ivory Tips With One Gold Arc
An ivory French with one gold arc is a small upgrade you notice up close. The warm white keeps the set gentle, while the ring-finger border gives it a little jewelry-like detail.
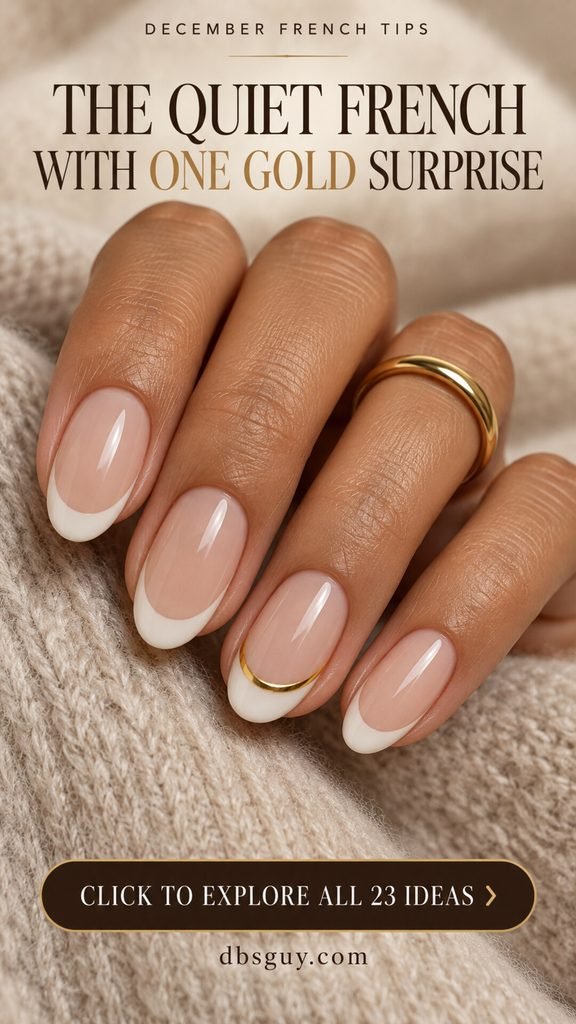
Ask for creamy ivory tips and a single gold curve tracing the ring-finger smile line. Unlike the open silver double arc earlier in this list, this gold line can sit right against the ivory. Keep it fine enough that the white remains the dominant part of the tip.
Try a neutral beige or softly rosy base against your own skin before settling on the shade. If the ivory looks too similar to the base, choose a little more contrast. Short oval nails work well with a slim tip; longer nails can carry a deeper curve without needing extra decoration.
14. Clear-Look Tips With Scattered Gold Foil
Gold foil gives a French tip an irregular, almost confetti-like edge. Leaving space between the pieces makes the finish feel light, and the transparent-looking tips add something different from a solid metallic band.
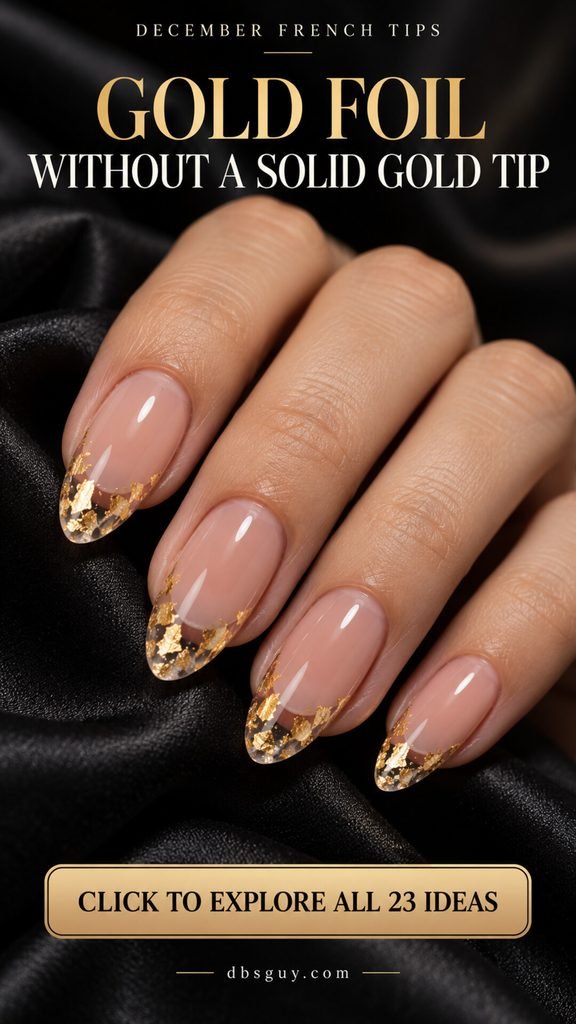
Ask your nail artist for scattered gold foil concentrated toward the free edge, with a smooth finish and a sheer nude base. Explain whether you want the clear extension effect shown here or simply the foil placement on your natural nails. Those are different requests: natural free edges will still have their own visible color beneath sheer polish.
For a simpler interpretation, use a clear polish containing gold flakes over a sheer base and concentrate it at the tips. It will suggest the same arrangement without promising a glass-clear result. Keep the flakes small enough to lie within the nail surface.
15. Sugar-Plum Shimmer Tips
Muted plum shimmer is a softer alternative to a traditional red holiday French. A fine rose-gold border adds warmth, making the lilac-plum color feel especially pretty with mauve velvet or cream knitwear.
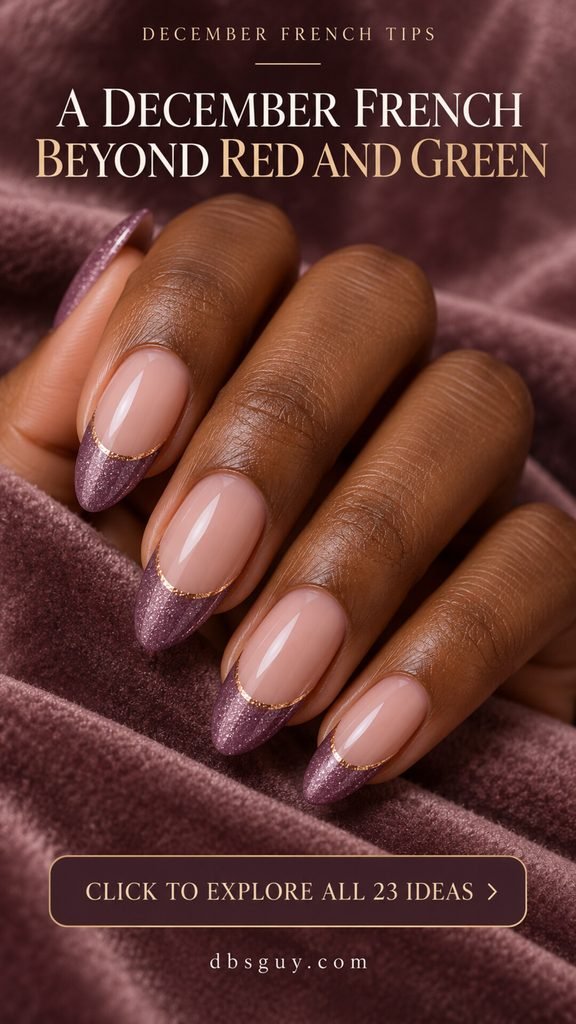
Ask for a sheer blush base, plum shimmer tips, and a very narrow warm metallic smile line. Choose a shimmer with visible color rather than one that looks almost silver under bright lighting. The plum should still be the main event when you see the manicure from arm’s length.
If you have short nails, skip the border on the smallest nails and let the shimmer carry the look. This is also a good design to simplify with ordinary shimmer polish: you do not need a magnetic product unless you specifically want a moving band of light.
16. Taupe Tips With a Flat Knit Pattern
A tiny knit pattern changes taupe French tips from plain to cozy. The repeated ivory marks give you a sweater reference while leaving the nude part of the nail open and glossy.
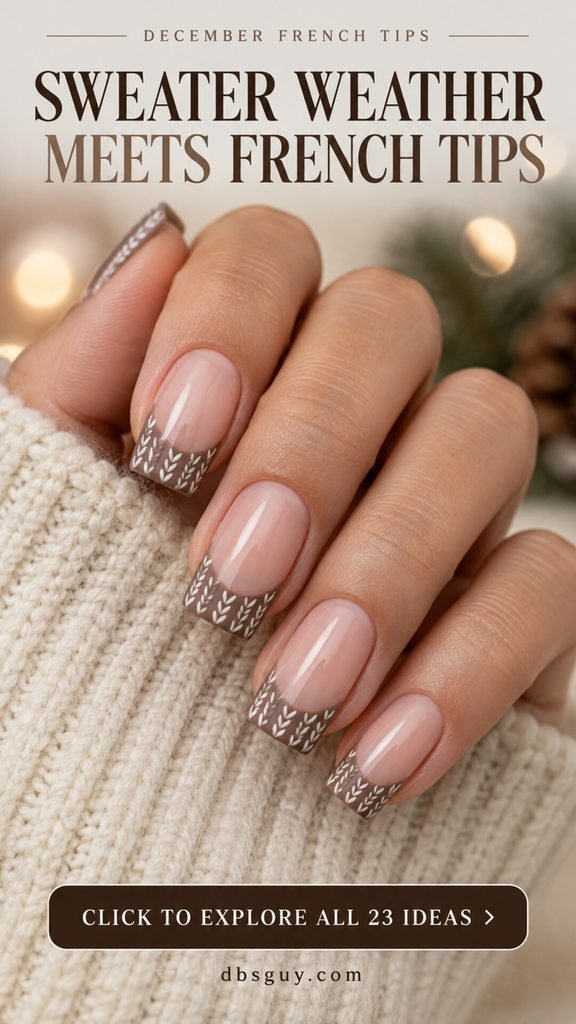
Ask for taupe tips with fine, flat, V-shaped stitches arranged in short columns. Be specific about “flat” if you do not want a raised sweater texture. The illustration uses a painted pattern; a sculpted knit manicure would be a separate technique and a different finish.
Medium square or squoval nails give the pattern some width. On a short nail, choose one stitch column or reserve the knit detail for the ring fingers. If every tiny mark blends together at normal viewing distance, simplify the pattern rather than making the tip deeper just to fit more art.
17. One Plaid Tip in a Burgundy Set
One plaid tip can make an entire burgundy French set feel seasonal. The plain tips create breathing room, so the small checked section stands out without becoming a full set of holiday pajamas.
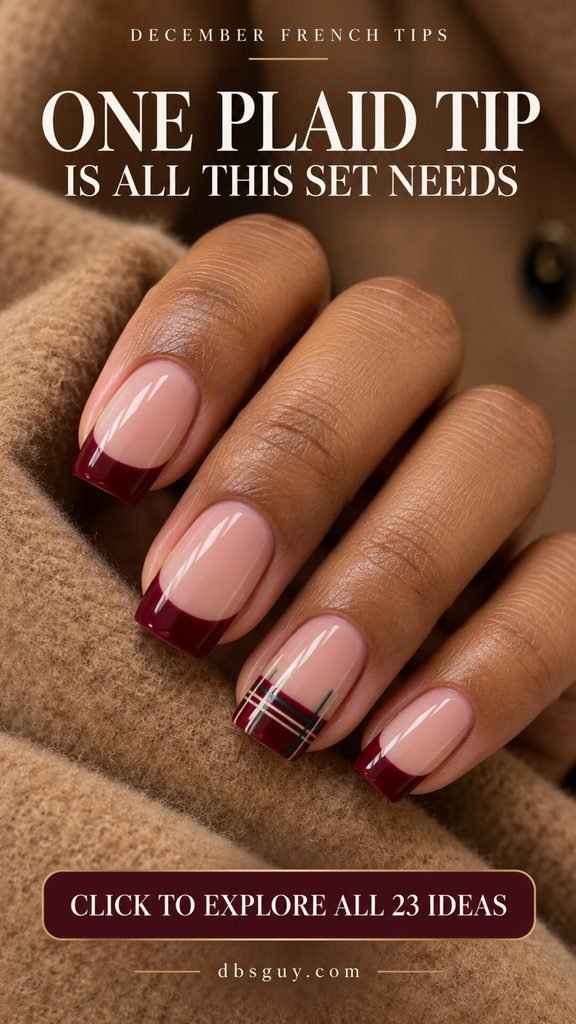
Ask for burgundy tips on every nail and a few fine ivory and green crossing lines on one accent tip per hand. The lines can extend slightly onto the nude area, as in the image, but keep most of the pattern near the tip. That placement keeps the French structure recognizable.
On shorter nails, one vertical line and one horizontal line may be enough to suggest a check. This is a detail-brush design rather than a quick beginner manicure. If you are booking it, show the image in advance so the salon can account for the extra linework.
18. Black Tips With One Gold Crescent
A black French manicure can still feel right for December. The small gold crescent at the ring-finger tip adds a winter-night detail without relying on a Christmas character or a bright festive palette.
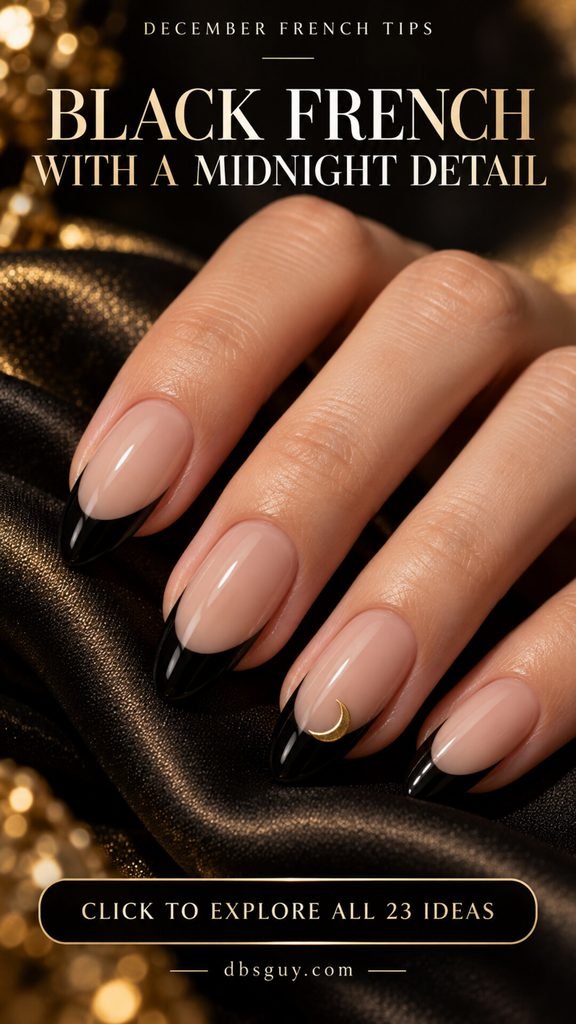
Ask for glossy black tips with one gold crescent sitting at the smile line. In the reference, part of the moon overlaps the nude area; that overlap makes the shape easier to see. Leave the remaining tips plain so the dark curves stay crisp.
For a flatter version, choose a painted crescent or a thin nail decal rather than a raised charm. On shorter nails, place the moon mostly on the base beside the tip. This look works particularly well if your December wardrobe is mostly black, camel, or cream and you want the manicure to follow suit.
19. White Tips With One Silver Snowflake
A single silver snowflake gives white French tips a winter detail while leaving the rest of the manicure calm. It is the sort of design that can suit a December dinner and still make sense in January.
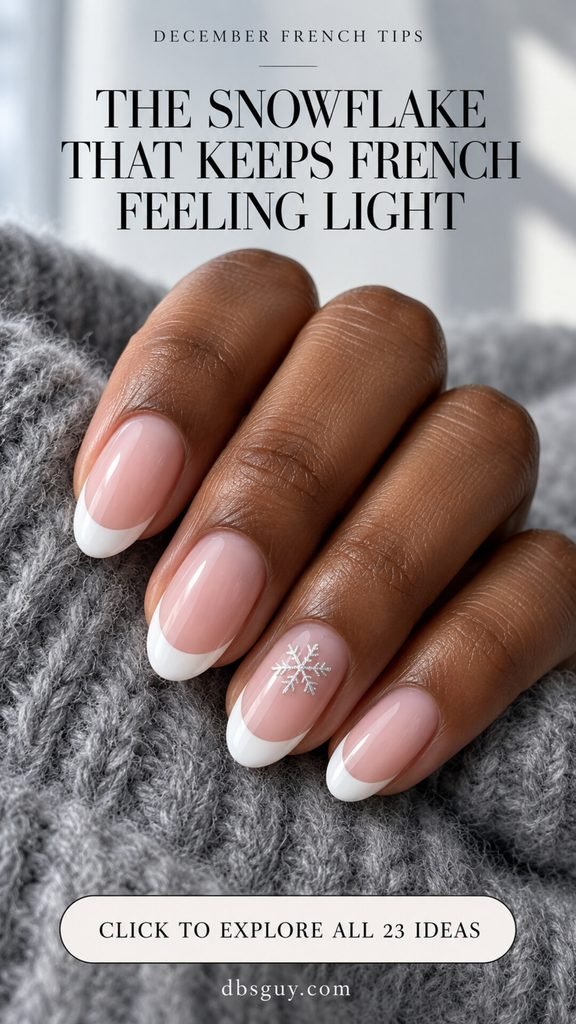
Ask for classic white tips and one delicate silver snowflake on the nude area of the ring finger. Leave a visible space between the snowflake and the white tip so its branches do not disappear into the border. A small metallic decal is a useful alternative to intricate hand painting.
For a short nail, choose a simpler snowflake with fewer tiny branch details rather than shrinking a complicated one until it becomes a silver dot. Keep the other nails plain. That contrast is what gives the small accent room to be noticed.
20. Gingerbread Tips With an Icing Scallop
Cinnamon-brown tips with a white scalloped edge suggest gingerbread icing without a single painted character. The curve is sweet and slightly playful, while the sheer base keeps the set from feeling crowded.
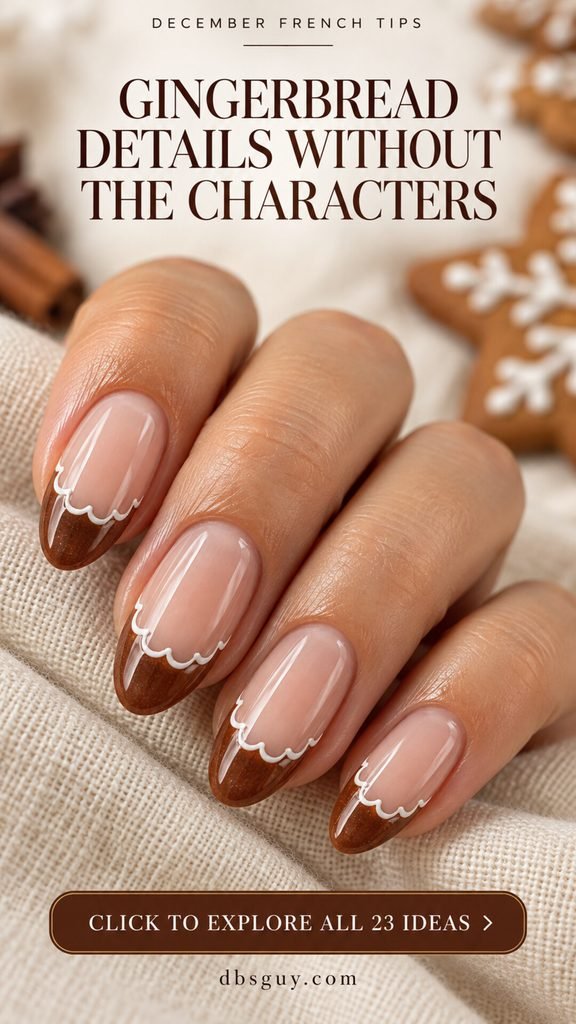
Ask for warm brown French tips and a thin white scallop following the smile line. The scallops should be small enough to read as trim, with plenty of brown left below them. A tiny amount of shimmer in the brown is optional; the color pairing works with a plain cream finish too.
On shorter nails, reduce the number of scallops instead of squeezing them tightly together. If you are trying regular polish, practice linked little curves on a spare tip first. Keep the icing detail on one or two nails if repeating the pattern feels too fiddly.
21. Diagonal Emerald Tips With Gold Edging
An angled green tip gives the familiar emerald-and-gold combination a different shape. The color sweeps up one side instead of forming a symmetrical smile, while a fine gold edge makes the diagonal easy to see.
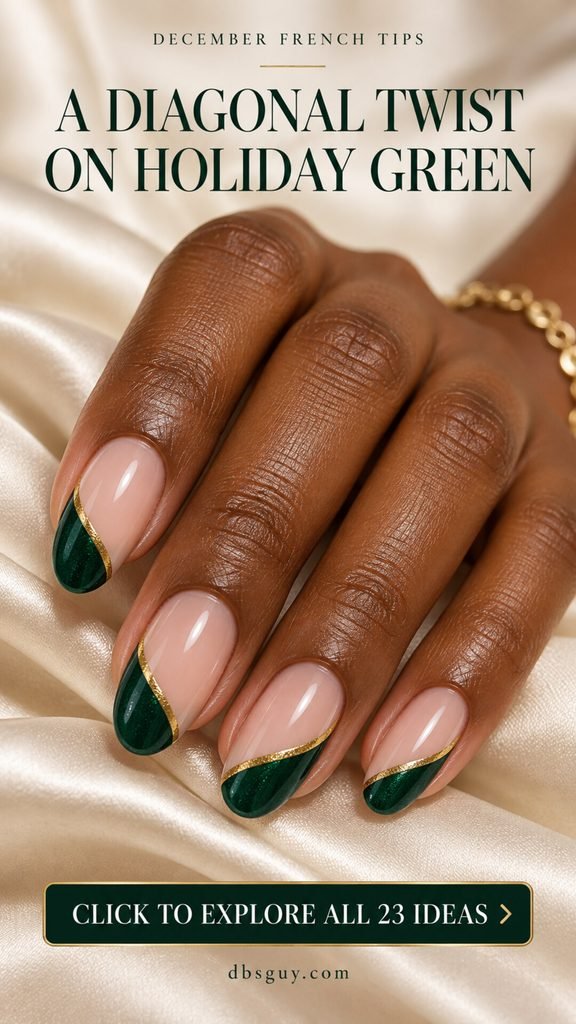
Ask for an asymmetrical emerald French with a narrow gold border along its inner edge. You can have all the diagonals lean the same way or mirror their direction across the hand. Choose that arrangement before painting begins so the variation feels intentional.
For short nails, keep the green concentrated near the free edge rather than letting it take over half the nail. A small detail brush helps define the diagonal when using regular polish. The green can be glossy or subtly shimmery; you do not need a mirror finish for the geometry to stand out.
22. Blush Tips With a Red Ribbon Stripe
Blush French tips get a holiday hint from one slender red stripe. The combination feels like ribbon against pale wrapping paper, but the result is simple enough to wear with everyday pinks and neutrals.
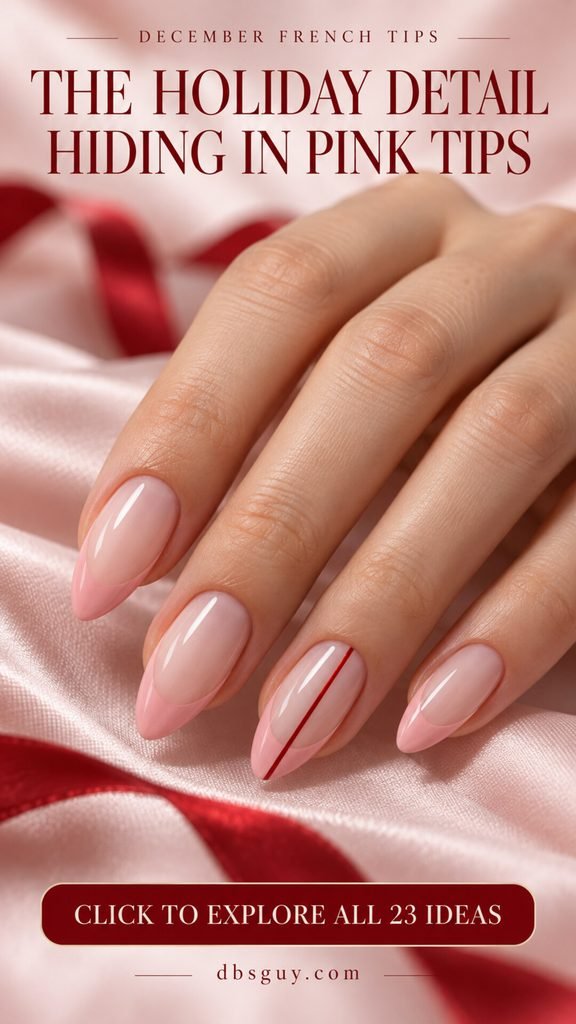
Ask for a milky pink base, slightly deeper blush tips, and one fine red line running lengthwise down the ring fingernail, as pictured. Leave a neat margin at the cuticle and carry the line through the pink tip. Keep the other nails free of stripes and bows.
For a more discreet version, stop the ribbon at the smile line and paint it only within the colored tip. Short nails can wear either version if the red line stays narrow. Test the two pink shades together first: a little contrast makes the French visible without turning it into a bright color-blocked set.
23. Silver Confetti French Tips
Silver glitter tips scattered with a little gold confetti can take the same manicure from a Christmas gathering to New Year’s Eve. Mixing the metals also makes it easier to wear whichever jewelry you reach for that night.
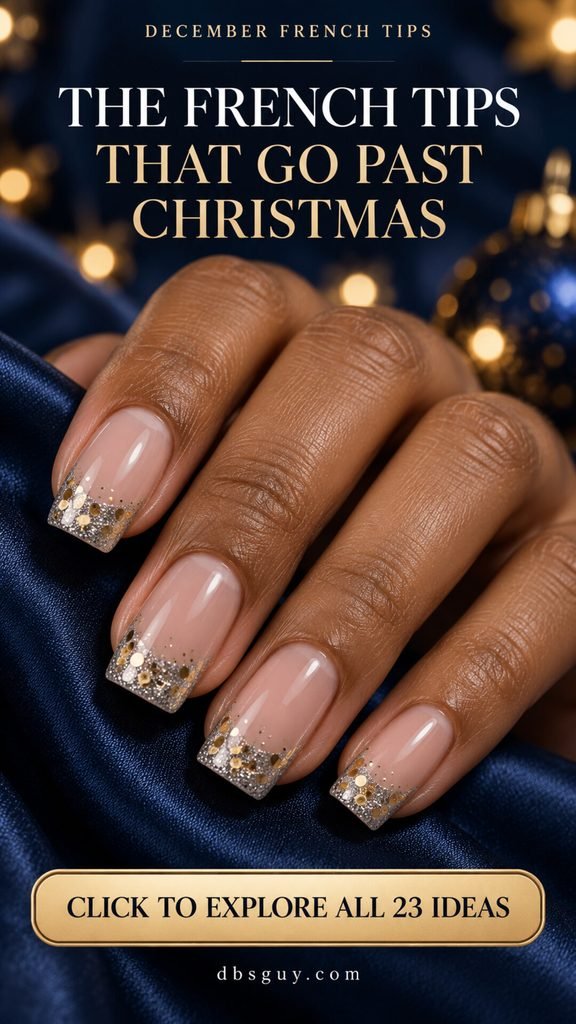
Ask for fine silver glitter concentrated at the tips, with a few flat gold confetti pieces distributed through it. Keep the base mostly clear of glitter, allowing just a soft scattering at the border if you like the less rigid edge shown here. The nail should still read as a French manicure from a distance.
On shorter nails, use smaller confetti pieces and fewer of them. If you want to recreate the idea with regular polish, choose a topper with particles that fit comfortably inside the tip area. A finish that looks smooth and intentional matters more than packing in maximum sparkle.
How to Choose a French Tip That Fits Your Nails
Start with the space you actually have. Look at your shortest nail when choosing the amount of detail. A narrow red-and-green edge or a small gold border can translate to a compact nail. Plaid, knit stitches, and an open double arc need more room. You can always borrow the colors from a design and reduce the pattern.
Choose the base against your skin. “Nude” is a range, not one bottle of pale pink. Ask to compare a sheer rose, beige, or warm peach on a nail before committing. The goal can be a close match, a soft contrast, or a milky finish—whichever makes the tip color look the way you want.
Decide what gets the attention. Pick one main feature: the tip shape, the finish, or the tiny motif. A metallic double arc already has plenty of detail. A plain white French has room for a bow or snowflake. If you are unsure, start with an accent on one nail per hand.
What to Tell Your Nail Artist
Bring the design image and describe four things: your preferred length and shape, the base coverage, how wide you want the tip, and whether the accent should be flat or raised. For example: “Short oval nails, a sheer rosy base, thin white tips, and one small flat silver snowflake on each ring finger.” That gives your artist a much clearer starting point than “holiday French.”
For magnetic velvet, mirror silver, or clear-looking foil tips, ask whether the finish can be achieved with the service you booked. Those effects may involve a different product system or extensions. Send detailed art references before the appointment and ask about the additional time and cost; neither is the same at every salon.
Painting a Simpler Version at Home
Start with a regular-polish French you feel comfortable making. A clean base, a small detail brush, your tip color, and a compatible top coat are enough for many of the flat painted interpretations here. Follow the directions for your actual products, including base coat requirements and drying time.
Define the edge of the colored tip before filling it in. OPI’s two-tone French tutorial uses a detail brush to draw and refine the tip shapes, allowing the layers to dry before finishing. That is a useful approach for the split peppermint and diagonal green layouts. Add one decorative element only after the underlying color is dry enough to work over.
If a line is difficult, simplify it: replace a bow with a decal, a plaid tip with one crossing pair of lines, or several stitches with three dashes. Ordinary shimmer polish can suggest the color of a velvet design, but the magnetic effect needs an appropriate magnetic product and technique. For gel finishes, follow the complete product system’s application and curing directions rather than borrowing a curing time from an unrelated tutorial.
December French Tip Nail Questions
Can French tips work on very short nails?
Yes. Keep the colored band narrow relative to the nail bed and simplify the decoration. The red-and-green micro tips, stitched evergreen tips, and cocoa dots are useful starting points. Essie’s baby French guide shows a fine tip over a sheer base; the exact width is something you can adjust. You do not need to force an almond shape onto a nail that is too short to support it.
Do these designs require gel or acrylic?
No. Many of the color combinations and flat details can be interpreted with regular polish on natural nails. A French manicure describes the look, not a single product system. The mirror silver, magnetic velvet, and transparent-looking foil examples are more useful as salon references when you want a close match to the illustrated finish.
Are velvet tips textured?
The velvet effect described here is visual. OPI’s magnetic gel explainer describes fine magnetic shimmer that is arranged with a magnet to create changing reflections. It is different from adding a raised knit pattern or a fuzzy material to the nail.
Which looks feel festive after Christmas?
Try midnight blue stars, silver double arcs, burgundy velvet, sugar-plum shimmer, black-and-gold crescents, or silver confetti. Their colors and finishes feel dressed up without depending on a Christmas-specific motif. Snowflakes also suit the wider winter season if that is the mood you want.
What if I like the colors but not the nail shape in the image?
Keep the palette and change the proportions. Ask your artist to sketch the idea on your preferred shape or show a sample before repeating the detail across the set. A rounded French can become a shallow V, and a full pattern can become one accent nail. The reference is a starting point, not a requirement to change your usual length.
If you are torn between two ideas, picture them with the clothes you expect to wear most this month. Choose the one whose small detail you would still enjoy on an ordinary day. That is often the manicure you will be happiest seeing every time you reach for your coffee.
About the images and guidance: The images are AI-generated design inspiration, not photographs of completed salon work. Colors, proportions, and finishes may look different on real nails. Styling suggestions are editorial; technique references are linked above. This guide does not claim hands-on testing of the illustrated manicures.