23 Vintage Christmas Tree Decorating Ideas That Bring Back Childhood Christmas


Sometimes one little detail brings the whole season back: a colored bulb, a striped glass ornament, or a paper star with slightly uneven edges. That is the charm of a vintage Christmas tree. The decorations have personality, and the finished tree feels like it has a story.
These vintage Christmas tree decorating ideas combine retro-inspired shapes, handmade touches, and family keepsakes. Start with the detail you love most, then build around it. Sound older ornaments can sit beside new reproductions; familiar colors can connect pieces from different years. You can create a lovely, nostalgic tree with a thoughtful selection rather than a perfectly matched collection.
1. Bring Back the Big-Bulb Multicolored Glow
Red, blue, green, and amber lights can set a nostalgic mood before you hang the first ornament. The larger, rounded bulb shape becomes part of the decoration itself.

Look for modern retro-shaped LED strings intended for your tree and location. C7-style bulbs are one option when you want a more noticeable outline than tiny lights. Check the actual bulb size and the product instructions before choosing a set.
Build the look: test the lights, distribute their colors through the visible branches, and view the tree from your usual seat. Add a modest mix of shiny ornaments that leaves the bulbs easy to see.
If the colors feel too busy, simplify the ornaments instead of adding several garlands. A steady glow can give the tree plenty of character. Use current, suitably tested lighting for the display; a familiar bulb shape can provide the retro feeling without relying on an old electrical set.
2. Build a Collected Glass-Ornament Tree
A mixture of spheres, bells, and pointed ornaments gives a tree the pleasure of discovery. You notice a different little shape each time you look at it.

Lay the ornaments on a soft surface and identify colors that already repeat. Ruby, emerald, magenta, blue, and silver can make a cheerful jewel-toned collection. New glass-style reproductions can help connect a few sound older pieces.
Arrange the favorites first: give distinctive ornaments visible, supported branches, then distribute simpler round pieces between them. Vary the heights and depths so the tree feels collected rather than divided into separate color patches.
You do not need to fill every gap. Leave enough greenery around a special shape to appreciate it. Set aside pieces with cracked glass or loose caps, and use lightweight unbreakable versions wherever fragile decorations would be unsuitable. For this look, a few recurring colors matter more than having every ornament from the same maker or period.
3. Give Reflector Ornaments Room to Sparkle
Reflector ornaments have indented centers that make their shape especially interesting. A fluted silver or gold recess can become a small focal point among ordinary round ornaments.
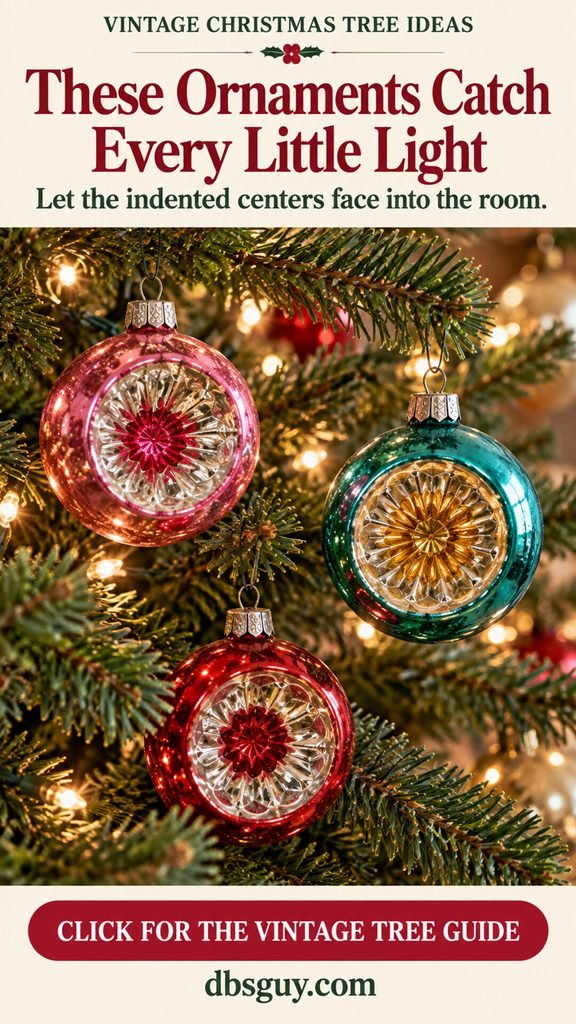
Choose a few retro-style reflectors and hang them with their decorated centers facing into the room. Check that the hanging loop holds that orientation comfortably; avoid forcing a fragile cap or bending an unsuitable attachment.
Let the detail show: place each ornament where branches will not cover its center. Nearby lights can help you appreciate the surfaces, but keep ornaments and lighting arranged according to the products’ instructions.
Use simple balls in related colors around them. If every neighboring ornament has a strong pattern, the reflector’s lovely indentation can disappear in the mixture. A modern lightweight reproduction is an accessible way to try the shape. When buying an older piece, inspect its condition and seller information instead of assuming that a familiar reflector design establishes its age or origin.
4. Repeat Painted Stripes Around the Tree
Horizontal bands on round ornaments give the tree a clear repeated pattern. They can connect a mixed collection while still leaving each ornament’s color visible.
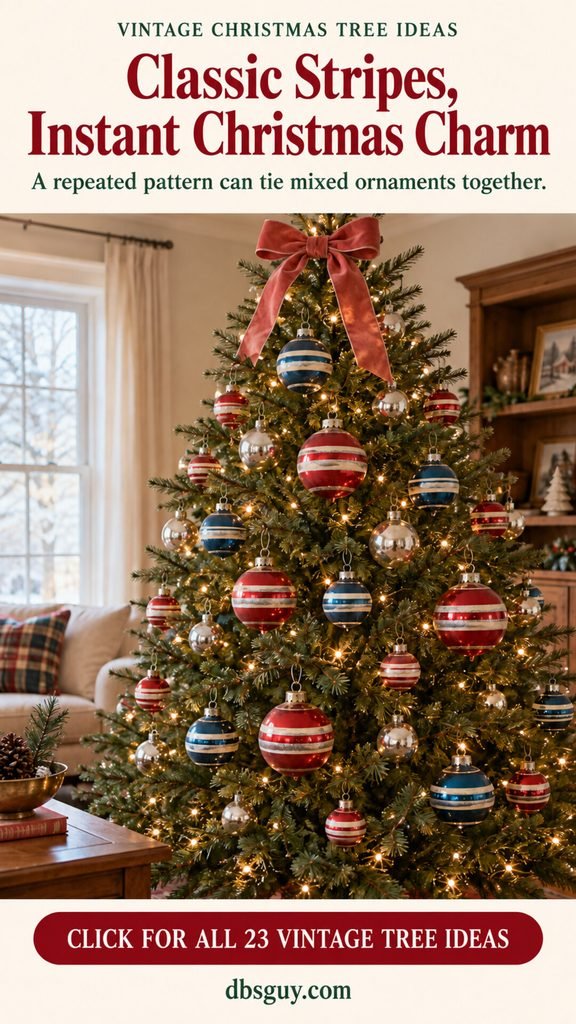
Try striped red ornaments with ivory and silver bands, then repeat one of those colors in plain ornaments nearby. A few blue striped pieces can add another cheerful note if they suit your existing collection.
Spread the pattern: place striped ornaments at different heights and around the visible sides. Step back before adding more. The pattern should travel through the tree rather than becoming one dense cluster.
New painted ornaments or lightweight printed versions can deliver the look. Keep fragile originals in their existing finish rather than trying to repaint or polish them. If the tree feels busy, leave the ribbon simple and reduce other patterned decorations. Repeated stripes already give the eye something to follow, so the surrounding pieces can be quieter.
5. Hang Long Finials Where They Can Show
Long pointed ornaments introduce a different silhouette among round baubles. Their hanging shape adds an elegant, old-fashioned detail without needing a large ribbon display.

Choose elongated finial or teardrop ornaments that your branches can support. Before hanging a piece, check both its weight and the distance from its attachment point to the tip.
Find a clear pocket: use a sturdy branch above an open space so the ornament hangs freely. Shorten an adjustable loop if that improves the fit, and keep the pointed end clear of the branch below.
Repeat a few long shapes through the tree instead of concentrating them along the bottom. Smaller round ornaments can occupy tighter spaces nearby. If a finial pulls the branch down, move to a suitable supported position or use a lighter reproduction. The beautiful length is the point of this idea; hiding the lower half behind foliage removes the effect you are trying to create.
6. Add Frosted Fruit Ornaments for an Old-Fashioned Detail
Pear, apple, and orange-shaped ornaments bring a softer texture to a shiny tree. A lightly frosted surface can sit beautifully beside plain gold or warm red decorations.
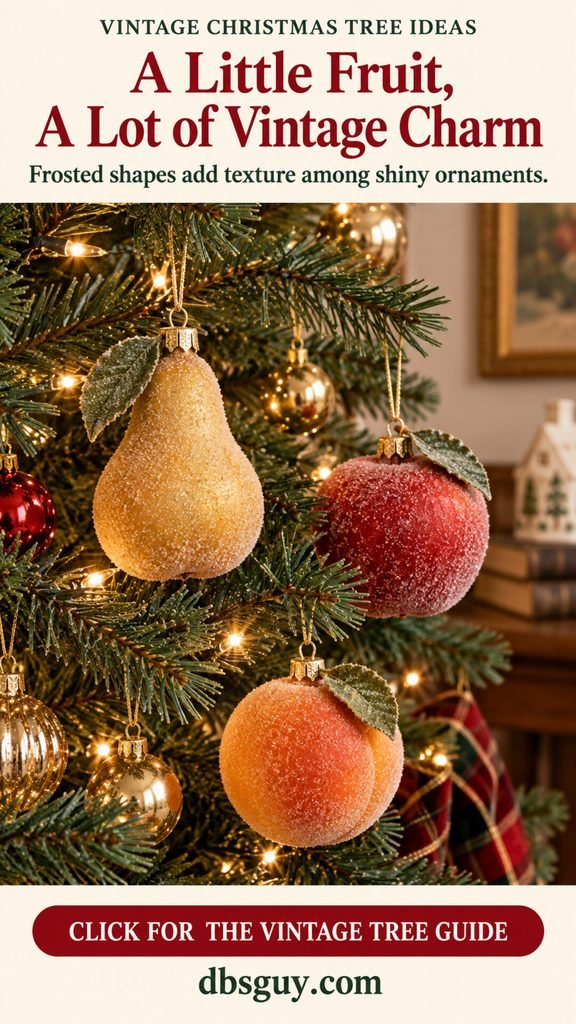
Choose decorative fruit ornaments made to hang, with suitable caps or secure loops. Mix a few related shapes and tones rather than scattering many unrelated food motifs through the tree.
Balance the textures: place a frosted pear near a plain round ornament so you can appreciate the difference in their surfaces. Give heavier pieces a supported branch and keep the hanging length short enough for the space.
A newly made, lightweight ornament can provide this detail without requiring a fragile collectible. Check that the finish is sound and does not shed heavily. In homes with young children, food-shaped decorations may be unsuitable because they can be mistaken for something edible; choose ordinary non-food shapes for that display instead. The idea is a decorative texture and shape, with materials appropriate to your household.
7. Tuck Clip-On Birds Onto the Branches
A little bird perched among the greenery gives the tree personality. It also changes the arrangement: some decorations sit on a branch while others hang below it.

Look for lightweight decorative birds with clips designed for tree branches. Ivory, muted gold, or red can connect them with a traditional ornament collection.
Give them a perch: select a supported branch, attach the clip as intended, and turn the bird toward the room. Leave space around its tail so it does not catch a hanging ornament or disappear into a garland.
Start with just a few birds in separate parts of the tree. Their different positions should feel like small discoveries. If a clip rotates or slides, choose a better-supported branch or a more suitable ornament rather than tightening it against a delicate piece. A modern reproduction makes this look easier to try; the charm comes from the perched shape and thoughtful placement.
8. Pair Red Ornaments With a Little Silver Tinsel
Red ornaments and silver shimmer make a lively, recognizable holiday combination. A little tinsel garland can connect the branches while leaving plenty of green visible.

Choose new plastic or clearly non-leaded tinsel rather than using an unidentified old package. A garland is one way to create the shimmering effect without applying loose individual strands throughout the tree.
Keep the swags relaxed: start with a small section, place it across supported branches, and let it curve gently between them. Add red ornaments around the curves, with enough separation that neither detail covers the other.
Follow the decoration and lighting instructions, keeping connections accessible. If tinsel is unsuitable for a home with children or pets who may pull or ingest it, use a soft silver-colored fabric ribbon for the color effect. You can also leave the tinsel out and combine red ornaments with reflective silver pieces. The finished tree should fit the people and animals who live around it.
9. Drape a Shiny Bead Garland in Gentle Swags
Small shiny beads give the tree a repeated line with a different texture from ribbon or tinsel. Gentle curves can make a mixed ornament collection feel more connected.
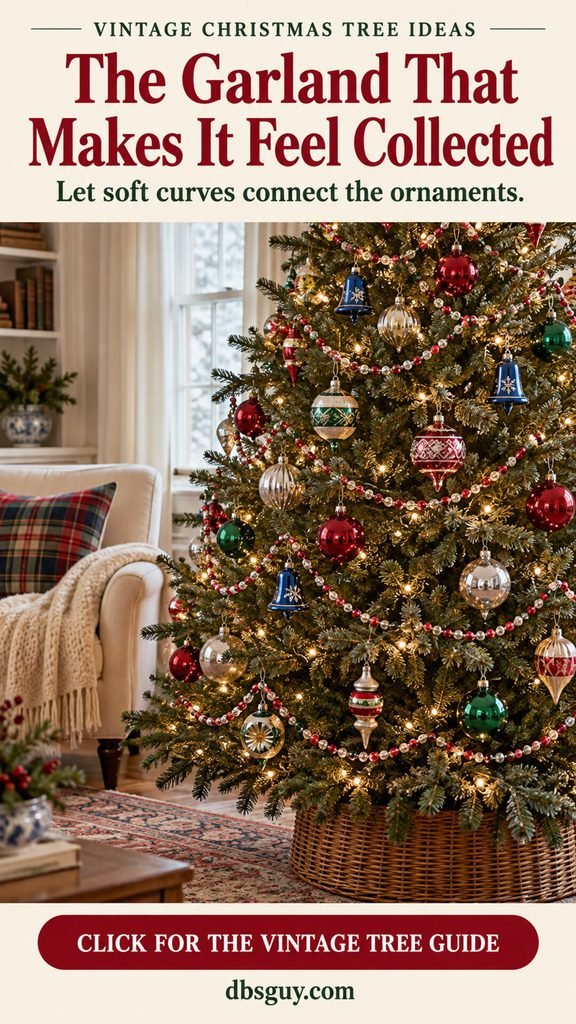
A new red-and-silver bead garland is an easy starting point. If you have an older glass-bead strand, check for broken beads and weak or damaged threading before considering it for display.
Shape one curve at a time: support the strand on suitable branches and let the section between them form a shallow swag. Adjust the span to the tree’s width; do not pull the garland tight to reach farther.
Hang the main ornaments after placing the garland so their loops and shapes have room. If the beads hide a favorite piece, move the curve around it. Use fewer swags on a small tree, and keep loose ends out of reach where they could be pulled. A lightweight contemporary strand can deliver the visual rhythm while keeping treasured older beads stored safely.
10. Fold a Paper Chain for a Handmade Holiday
A paper chain has a wonderfully simple charm. Repeated red, cream, and green loops can carry the tree’s color story with only a few supporting ornaments.

For an unlit craft tree, cut suitable cardstock into consistent narrow strips. Form the first loop, secure its ends, then pass the next strip through that loop before closing it. Continue the linked pattern in the colors you chose.
Test the scale first: make a short sample and drape it on the tree before creating a long chain. Small loops tend to leave more branch detail visible. Support the finished chain in several places so it is not hanging from one paper join.
Use materials appropriate for holiday decorations, and keep paper clear of heat, flames, bulbs, and electrical connections. An unlit tree in a bright room makes the handmade colors easy to enjoy. If the chain tears at a join, replace that link and give the surrounding section more support.
11. Use Popcorn-Style Beads for a Cozy Garland
A cream bead garland brings back the handmade feeling of a popcorn chain in a form you can use again. Slightly irregular felt beads give it a soft, homespun appearance.

Choose a ready-made felt garland or craft beads intended for stringing. Cream beads with an occasional red accent create a simple color rhythm; wooden beads are another option if you prefer a firmer shape.
Build a short sample: thread a few beads on suitable cord using their intended openings, check the length on the branches, and secure the ends before adding more. Support the garland in gentle curves rather than hanging its whole weight from one tip.
Keep beads and loose cords out of reach where they could be pulled or swallowed. On an unlit tree, the creamy texture can be the main detail, with a few felt hearts or wood stars nearby. The reusable version is especially useful when an edible garland would attract pets or create extra cleanup.
12. Give Felt Ornaments Their Own Cozy Theme
Felt mittens, hearts, and stars give a tree a softer look than an all-glass collection. Simple stitching adds enough detail that the rest of the arrangement can stay quiet.
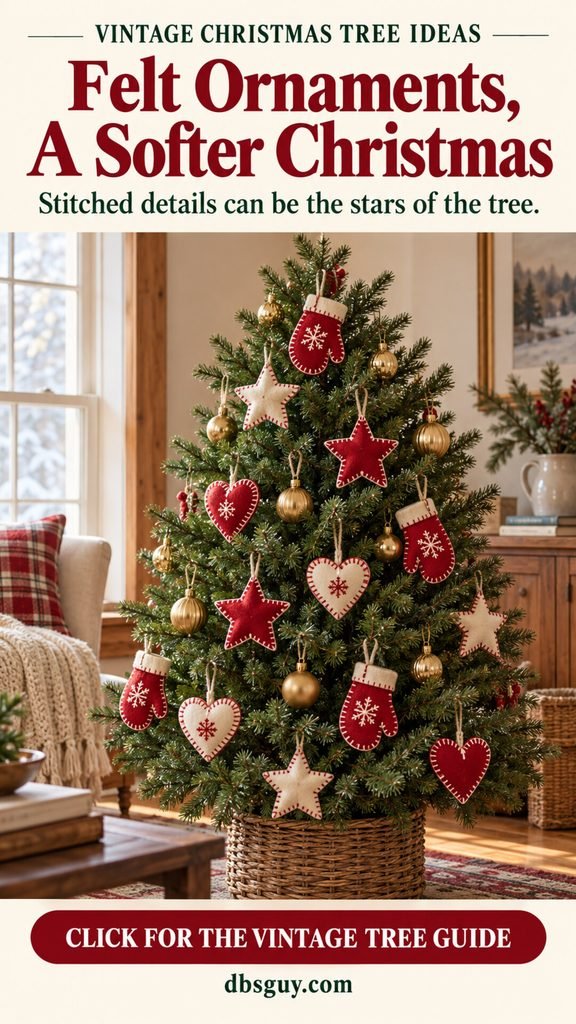
Gather lightweight felt ornaments in two or three connected colors. Red and cream are a cheerful starting point, especially when the stitches or hanging loops repeat one of those shades.
Let the fabric lead: distribute different shapes through the tree and add plain ornaments only where the arrangement needs a little contrast. Keep the felt outlines visible rather than putting them behind thick garland.
If you are making new ornaments, create one sample before repeating the shape. A firmly attached hanging loop and neat edges matter more than elaborate decoration. Use materials suited to the display and keep textiles away from heat and electrical connections. A small unlit tree can show the stitched details beautifully, particularly in daylight beside a comfortable chair.
13. Hang Paper Fans for a Festive Folk Look
Small pleated fan rosettes create a strong shape against green branches. They bring handmade character while looking different from paper chains and flat stars.
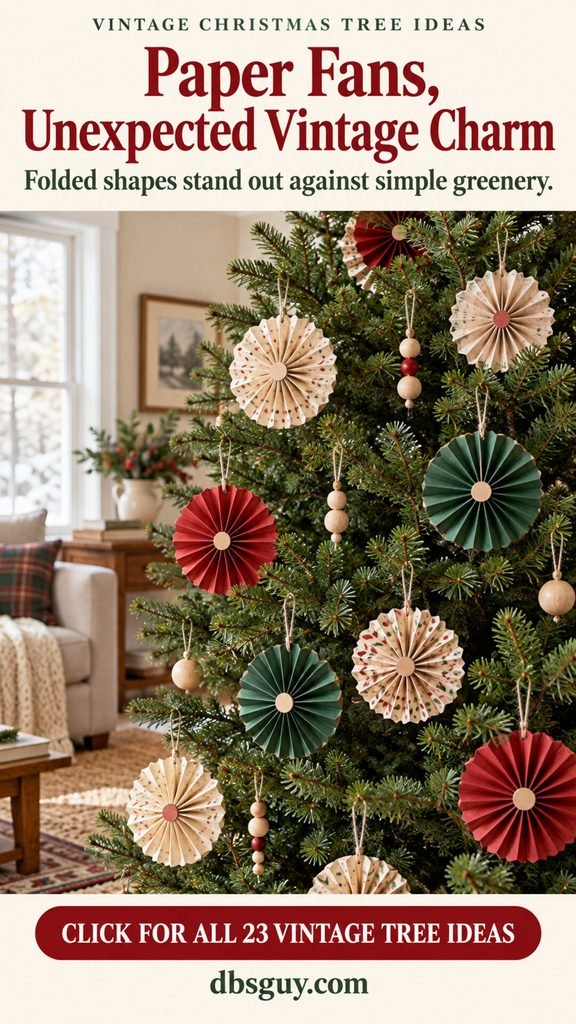
Use ready-made hanging paper decorations or fold suitable paper into even accordion pleats. Bring the folded sections into a fan or rosette and secure the joins with a hanging loop that supports the finished shape.
Leave room around each one: place the fans in separate branch pockets, with smaller plain decorations between them. Cream, muted red, and green can make a calm folk-inspired palette.
Try one on the tree before making a whole set. If it hides an entire section of greenery, reduce the size or choose a more open position. An unlit tree is a simple way to enjoy these paper details; keep paper away from heat, flames, and electrical connections. Store reusable fans without crushing their pleats, following the maker’s instructions if they are designed to fold flat.
14. Create a Little Wooden Toy Tree
Rocking horses, spinning tops, and tiny drums give the tree a playful, old-fashioned theme. Painted wood adds a lovely contrast to smooth round ornaments.

Choose lightweight toy-shaped ornaments designed to hang. Red, blue, cream, and natural wood tones can connect different shapes without making every piece identical.
Give the toys space: hang a distinctive horse or drum on a visible supported branch, then use smaller plain balls around it. Keep the upper pieces particularly light and proportionate to the narrower branches.
Decorative ornaments are different from toys for children to play with. Follow their labeling and avoid improvising hanging attachments for heavy wooden toys. If the display feels crowded, remove a few supporting balls so the painted details can stand out. A small collection with varied silhouettes can tell the theme more clearly than a tree filled edge to edge with the same shape.
15. Turn Family Photo Copies Into Ornaments
A family picture gives the tree a personal kind of nostalgia. A small copy in a lightweight frame can be a lovely detail among simple red and gold ornaments.

Choose photographs you are happy to display and make copies, leaving treasured originals stored safely. Keep the frame and backing light enough for a tree branch, with a secure hanging loop attached to the frame itself.
Choose a quiet background: place the picture where greenery frames its edges and nearby ornaments do not cover it. Repeat the frame color in a few other pieces so the photographs feel part of the tree.
Use only a handful if you want people to notice each image. Copies of a family home, a memorable gathering, or a familiar holiday scene can all work; the pictures do not have to share the same decade. If faces are too small to recognize, crop the copy more closely or display that photograph elsewhere.
16. Let Handmade Keepsakes Set the Theme
A slightly uneven paper star or a little felt heart can be the piece that makes the tree yours. Give handmade keepsakes a deliberate place rather than treating them as gaps to fill.

Gather the pieces you want to display and check their loops, edges, and condition. Select a few colors from them to repeat in plain ornaments elsewhere on the tree.
Place meaningful pieces first: choose visible supported branches where you can appreciate the details. Spread the keepsakes through the tree instead of putting the whole collection along one edge.
A larger handmade decoration may need a more open branch pocket; a fragile paper piece may suit a separate unlit display. You can also make new ornaments in the same spirit, letting the collection grow gradually. Aim for a tree that has room for different hands and different years. Repeated colors can connect the mixture without hiding the variations that make it personal.
17. Try a Pastel Midcentury-Inspired Palette
Blush, mint, pale blue, and silver give retro ornament shapes a softer mood. The palette is especially pretty when pointed pieces and recessed reflector centers remain easy to see.
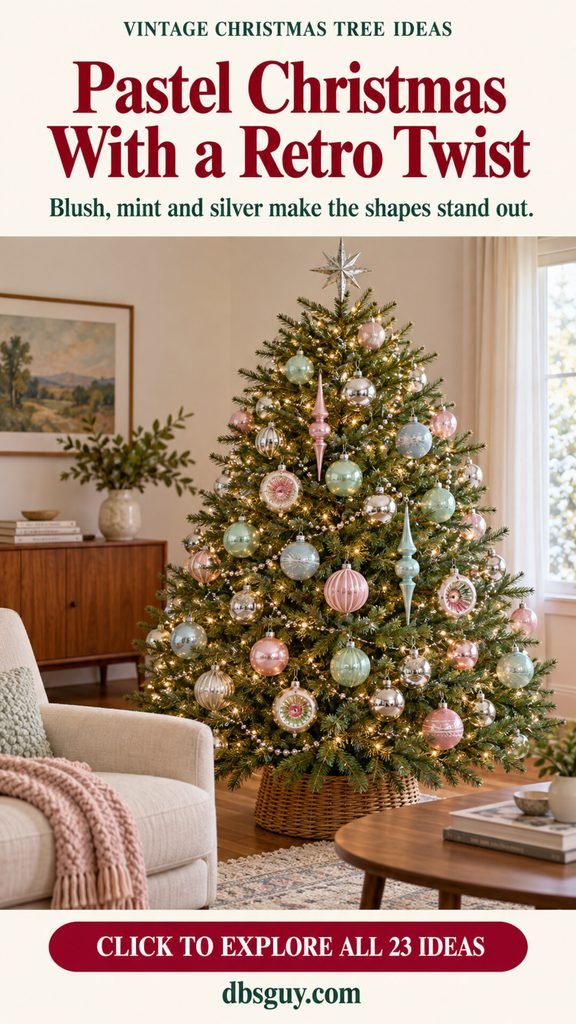
Choose a few pastel colors already present in your collection, then use silver as a connecting finish. Green branches provide contrast, so a white or heavily flocked tree is not required for this look.
Repeat the shapes: combine a few reflectors, long finials, and plain spheres in the selected colors. Distribute each pastel around the visible sides rather than placing pink at the top and blue at the bottom.
Warm white lighting can make the display feel gentle; test the actual lights with your ornaments before committing to the arrangement. If the result looks pale from across the room, add one slightly stronger shade within the same palette. This is a retro-inspired styling choice, with new pieces perfectly welcome alongside a few sound older ornaments.
18. Style an Unlit Silver Tree With Colorful Baubles
Silver branches make the tree itself part of the retro look. Colorful round ornaments can stand out clearly while the metallic surface catches daylight and ordinary room light.
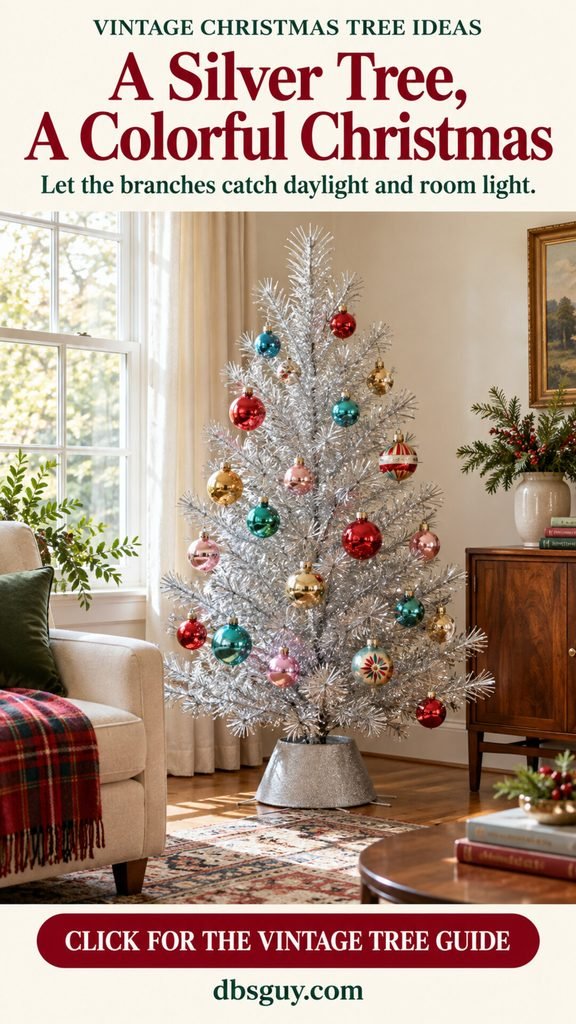
Keep a metallic tree unlit: do not attach electric light strings to its branches. Let the reflective foliage provide the shimmer and follow the tree’s assembly instructions for its complete stand and branch arrangement.
Keep the ornaments clear: choose a small mix of red, turquoise, pink, and gold pieces, and leave space around their outlines. Check the supports and use short, secure loops suited to the branches.
A contemporary silver-colored reproduction can provide the look without needing a collectible tree. Read its materials and instructions rather than assuming all silver trees are constructed the same way. You can enjoy the nostalgic shape in a bright corner during the day; there is no need to add an old color wheel or improvise an electrical display to make it feel festive.
19. Add a Few Space-Age Shapes
A ringed planet, a small starburst, or a stylized rocket gives a retro-inspired tree a playful twist. Their unusual silhouettes are most effective when they have room to stand out.
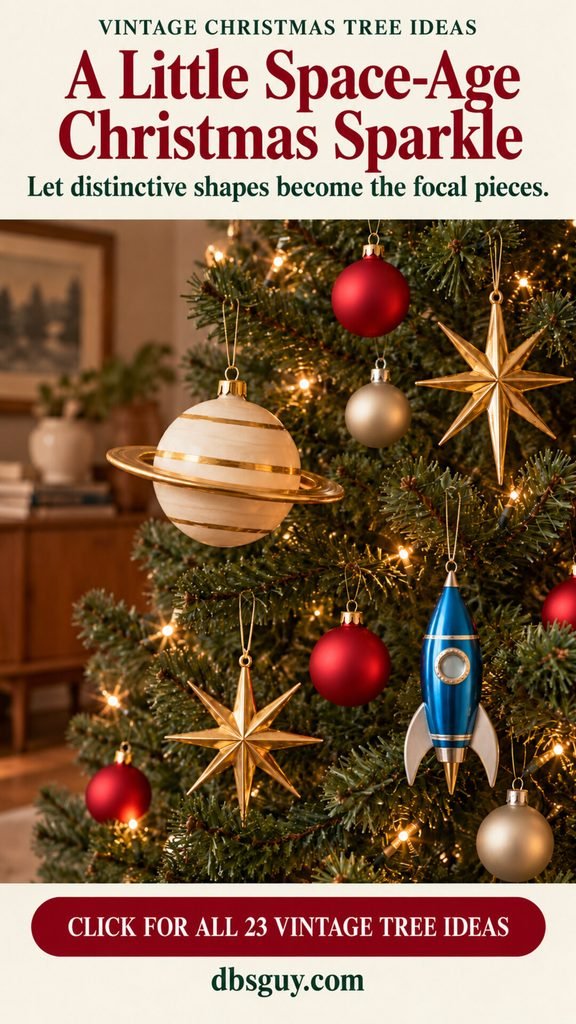
Choose lightweight ornaments made for hanging and limit the strong shapes to a small selection. Gold, ivory, blue, and red can connect them with simple round ornaments.
Make each shape readable: place a planet where its ring is visible, and turn flat starbursts toward the room. Keep projecting edges clear of neighboring ornaments and branches.
Balance these focal pieces with plain spheres rather than adding a different novelty to every branch. If a rocket or large starburst rotates into the greenery, adjust its hanging position or choose a shorter compatible loop. The style is a creative nod to space-age forms, so contemporary ornaments can work beautifully. Clear shapes and repeated colors will do more for the arrangement than trying to reproduce an exact historical collection.
20. Bring Back a Lace-and-Ribbon Angel Topper
A small angel can set the tone for the whole tree. Cream fabric, lace edging, and a simple face give the topper a gentle, familiar appearance.

Choose a topper with a secure attachment method compatible with your tree. Check its weight and width against the upper branches, and include it when measuring the finished height.
Connect it with the tree: repeat cream in a few ornaments below, then add red or warm gold for contrast. Keep the top area simple so the angel’s outline remains distinct.
If a treasured topper has become unstable or damaged, a modern lightweight replacement can carry the same feeling while the original stays safely stored. Do not rely on a decorative dress or loose trim as an attachment. A suitable unlit topper also lets the angel be a visual detail without adding another electrical connection. View the finished arrangement from across the room before filling the upper branches.
21. Finish With a Classic Glass-Style Spire
A narrow pointed spire creates a different finish from a star or bow. Repeating its colors in the ornaments below can make the whole tree feel complete.
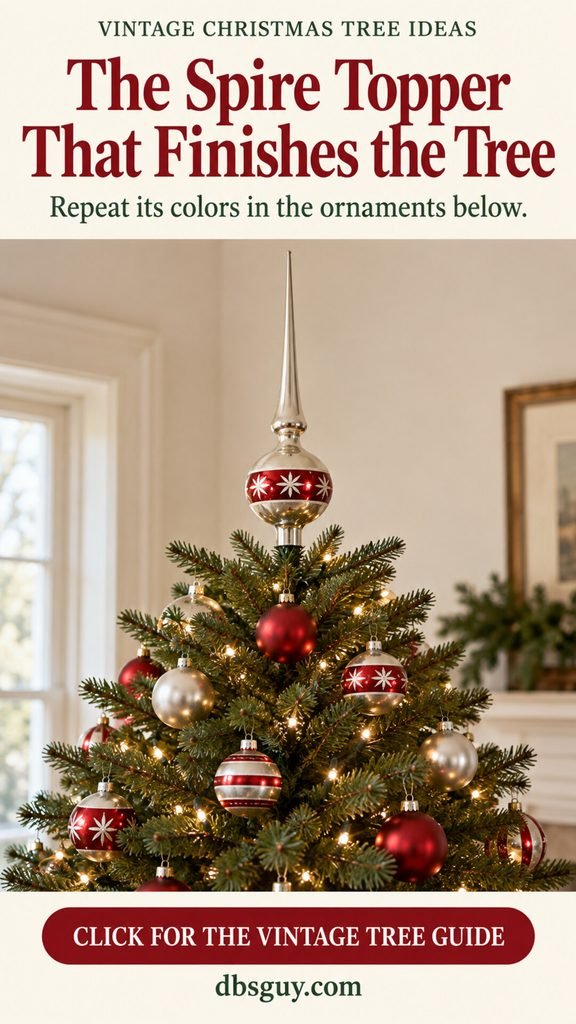
Choose a glass-style reproduction if a fragile original would be impractical. Check its mounting design against your tree’s tip and follow the attachment instructions rather than forcing the topper onto a branch.
Try the placement first: hold the spire in position to judge its height and proportion. Allow overhead clearance and check that the support can keep it upright without bending.
A red-and-silver spire pairs neatly with plain ornaments in the same colors. Leave the nearest branches relatively quiet so its long outline is visible. If it leans or feels too heavy, choose a lighter compatible topper. The slender silhouette is enough to supply the old-fashioned detail; extra sprays and large ribbon loops can make this particular finish harder to appreciate.
22. Make a Storybook Tree With Santas and Snowmen
Small character ornaments make the tree feel cheerful and full of little stories. Santas and snowmen can share a theme when their colors connect.

Choose lightweight hanging figures in a manageable size, then repeat their red and white details in simpler ornaments. A small collection can be enough to establish the look.
Face the figures into the room: give each one a branch pocket where its outline and expression can be seen. Use shorter compatible loops if a figure keeps turning behind the greenery.
Distribute the characters through the tree, with plain balls between them. This gives the eye a place to pause instead of confronting one crowded line of figures. Modern reproductions can provide the storybook style without depending on fragile glass collectibles. In a household where small or breakable decorations are unsuitable, choose appropriately labeled unbreakable pieces and keep the display arranged for the people who use the room.
23. Try an Old-Fashioned Woodland Tree
Pinecones, acorns, and small woodland shapes make a warm final option for a nostalgic tree. Natural textures let a few favorite ornaments feel at home among the branches.

Gather lightweight hanging pinecone or acorn decorations and a few simple felt animal shapes. Cream, brown, green, and a small amount of red can give the theme a comfortable holiday palette.
Mix the textures: place a soft felt deer near a wood ornament, then repeat plain red or gold balls through the tree. Keep the hanging pieces supported and their outlines visible.
Use decorations prepared and intended for indoor display rather than adding outdoor finds without checking their condition. A few natural-looking shapes can create the atmosphere without turning the tree into a dense rustic arrangement. If the brown details disappear into the foliage, lighten a neighboring ornament or move the shape to a more open pocket. Let the greenery remain a generous part of the finished look.
How to Make Mixed Family Ornaments Look Collected
Start with the pieces you want to notice. Set them out on a soft surface, look at their colors and shapes, and choose a small number of details to repeat. A red painted stripe, a silver finish, or cream stitching might become the thread that connects an otherwise varied collection.
Choose the lighting before adding decorations. Multicolored bulbs make their own strong statement; warm white lights leave more attention for the ornament colors. An unlit tree can be the right choice for a metallic tree or a display focused on delicate paper details.
Place the main garland next, if you are using one, then hang distinctive keepsakes on supported visible branches. Fill the remaining spaces with simpler pieces that repeat your chosen colors. View the tree from the sofa and from its usual approach, since the arrangement should work from the places where you will enjoy it.
If it feels busy, move or remove a few supporting decorations before adding another color or another garland. Keep favorite shapes visible. A vintage-inspired tree can have a varied collection and still feel coherent; the repetition simply gives those differences a comfortable setting.
Handle Older Decorations Gently and Keep the Glow Modern
Inspect older ornaments before hanging them. Cracks, loose caps, damaged loops, and weakened strings are reasons to set a piece aside. Choose a well-supported display for sound keepsakes, and avoid cleaning or refinishing an unfamiliar fragile finish with household products. Valuable or delicate pieces may need advice from a conservator.
Use appropriately tested, present-day lights rated for the location. Replace damaged strings, keep connections accessible, and follow the manufacturer’s limits for connecting sets. Metallic trees should remain free of electric light strings. Never use lit candles as tree decorations.
Keep the tree clear of exits and at least 3 feet (about 0.9 m) from heat sources. Turn its lights off before leaving home or going to bed, and add water daily if you are using a fresh-cut tree. Where young children may reach the display, avoid small, sharp, breakable, or food-shaped decorations; choose pieces and placement that suit your household.
Questions About Decorating a Vintage Christmas Tree
Do I need genuine antique ornaments for a vintage-looking tree?
No. Retro-shaped lights, striped ornaments, reflectors, bead garlands, and handmade pieces can create the look with modern materials. Add sound older keepsakes where they fit the display. The shape, color, and arrangement establish the style; every piece does not need to be a collectible.
Should a vintage Christmas tree have colored lights or white lights?
Either can work. Modern multicolored bulbs give the lighting a strong nostalgic role. Warm white lights can suit a collection where you want the ornament colors and shapes to lead. Test the effect with your decorations before choosing. A metallic tree should stay unlit, with no electric strings attached.
How can I mix inherited ornaments with new ones?
Start with the inherited pieces you want to display, then repeat some of their colors in simpler new ornaments. Place the distinctive shapes first and give them room. A plain sphere can connect two very different keepsakes without needing to copy either one exactly.
How can I tell whether an ornament is genuinely old?
Appearance alone is not enough. Look for documented history, maker information, condition details, and a seller’s clear description of what is known. Caps and other parts may have been replaced. If age or value matters to a purchase, ask a knowledgeable specialist rather than relying on a retro shape or a single marking.
What can I use if loose tinsel is unsuitable for my home?
Try silver-colored fabric ribbon, a suitable lightweight bead garland, or reflective silver ornaments. Each can add a shimmering line or bright surface. Choose the material for your household and keep loose ends or small pieces away from anyone who might pull or ingest them.
What is an easy vintage-inspired look for a small tree?
Pick one clear idea: red and cream felt ornaments, a small collection of striped balls, or an unlit tree with a paper chain. Scale the decorations to its branches and use a light, proportionate topper if needed. A small tree can show a few favorite details especially well.
Keep the Details That Mean Christmas to You
The most memorable tree often has a few pieces you look forward to seeing again. Give those decorations a visible place, then choose the lights, colors, and supporting shapes that help them shine.
Start with one familiar detail and build gradually. A striped ornament, a little bird, or a handmade star can be enough to suggest the feeling you want. Leave room for new favorites, too; the tree you decorate this year can become part of someone else’s happy Christmas memories.




