

A red bow at the front door feels even more inviting when a little of that color appears at the windows. Suddenly, the Christmas look travels across the house. A wreath, a soft outline of lights, or a winter window box can connect the entrance to the rest of the facade without filling every pane with decorations.
Windows are useful decorating anchors because the house has already arranged them for you. Repeated shapes give you a rhythm to follow, while a bay window or a wide picture window offers a natural place for one larger feature. The trick is choosing the detail each window actually needs.
These outdoor Christmas window decor ideas cover greenery, ribbon, lights, and a few displays placed on the room side of the glass so they shine toward the street. You’ll find ways to make small windows, shuttered windows, and larger groupings feel connected, with practical guidance for keeping the windows usable through the season.
Make a Simple Window Plan Before You Decorate
Choose one detail to repeat. It might be red ribbon, evergreen texture, white snowflake shapes, or a consistent light color. You can vary the decoration by window while keeping that shared detail. Look at the porch and front door first; your windows can carry the same palette farther across the house.
Measure the visible glass and surrounding trim. Note window widths, the space above each opening, and any shutters or existing boxes. Check where the sash moves, where locks and handles sit, and which windows are part of your escape plan. Decorations and supports should leave those functions available.
Match the attachment to the actual surface. Glass, painted trim, masonry, and vinyl need different approaches. Use products approved for the surface, exposure, and decoration weight. Command’s mounting guidance stresses surface preparation, the correct strip type, waiting time, and weight limits. The temperature at which you apply a product can differ from the temperatures it withstands after installation; follow its exact packaging.
Find the power route before buying lights. Use suitable outdoor lights and cords with GFCI protection for exterior electrical displays. The U.S. Consumer Product Safety Commission advises checking outdoor ratings and discarding damaged light sets. Keep the supply away from walking routes and moving window parts, and follow the lights’ connection limits.
Start with reachable ground-floor windows. For higher placements, use a qualified installer or choose a display on the room side of the glass that you can position safely indoors. You can create a coordinated front of the house without working from an awkward height.
1. Repeat Evergreen Wreaths Across Matching Windows
A row of matching wreaths is an easy way to make the front of the house feel intentionally decorated. The windows provide the spacing, and the wreaths give your eye a shape to follow. A red bow repeated at each opening can connect them to the front door in one small move.
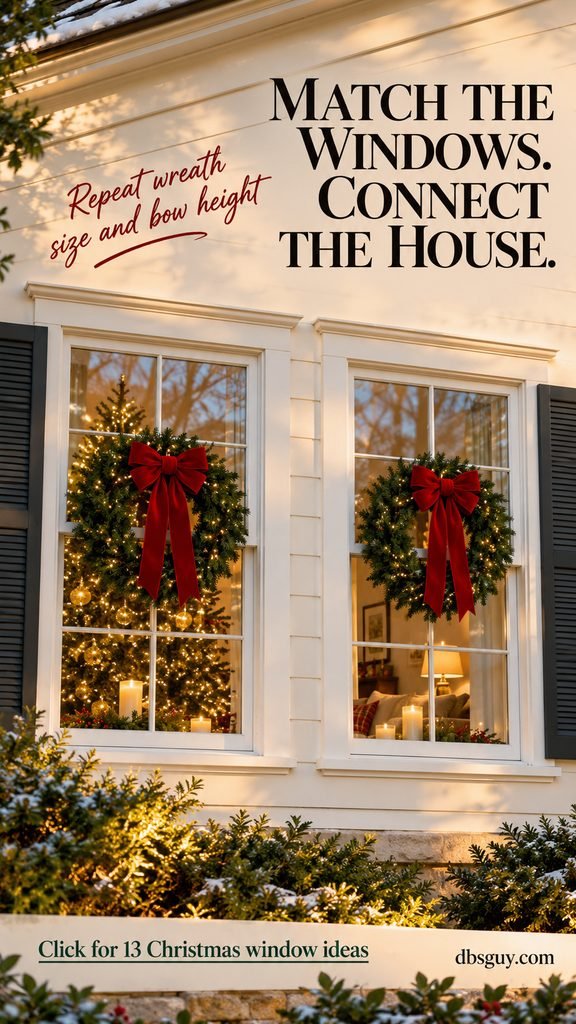
Choose outdoor-suitable wreaths proportioned to the visible glass, ribbon appropriate for the exposure, and attachments rated for the finished decoration. Measure a sample position before ordering a whole set. Leave enough glass around each wreath that the window still reads as a window.
Keep the wreath centers at a consistent visual height on windows of the same size. Then match the bow location and tail length. If the windows differ, aim for similar proportions rather than forcing the same wreath diameter into every opening. A small window may need a slimmer wreath or a simple bow instead.
Use a mounting method approved for your particular glass or surrounding surface. Decorative ribbon can conceal a support, but it should not be trapped through a closing sash or interfere with seals and locks. Confirm that the entire arrangement allows normal window use and remains clear of any required escape route.
The detail that makes it work: consistency. You don’t need identical pinecones on every wreath; the repeated scale, greenery color, and bow position do the connecting. Step back to the sidewalk before adding extras. If the wreaths already link the house together, a plain porch garland may be all the supporting decoration you need.
2. Fill Window Boxes with a Low Winter Greenery Mix
A window box gives you a place to decorate below the glass. That is useful when you want greenery without hanging a large object over the view. Branches spilling lightly over the edge can make the house feel dressed for winter, even when the garden is quiet.

Check the box, brackets, and drainage before adding materials. Use fresh cut evergreen boughs or foliage specifically intended for outdoor display, then add lightweight pinecones and a few secured red accents. Keep the total load within what the container and its supports can safely hold.
Build a low green base across the length of the box. Let a few tips trail at the ends, group pinecones toward the front, and add taller twigs sparingly where they won’t interfere with the window. Repeat one color from the door or wreaths so this separate feature belongs to the same display.
Fresh arrangements need care suited to their climate and holding medium. University of Minnesota Extension’s winter greenery guidance explains why freezing conditions and warmer spells call for different attention. Check moisture as appropriate and replace stems that become brittle or unattractive. Use plant material you can identify, especially where children or pets might reach it.
For a narrow box: keep the arrangement close to its original footprint. A compact mix that shows the frame and glass can look fuller than a sprawling display with branches pointing in every direction. Secure the accents against wind, and keep window openings, vents, and drainage paths available.
3. Outline the Window with Warm White Lights
A clean outline of lights lets the architecture become the decoration. After dark, the rectangular frame reads clearly from the street, especially on darker siding. It is a useful choice for a home where the windows already have an attractive shape and you want to emphasize it.
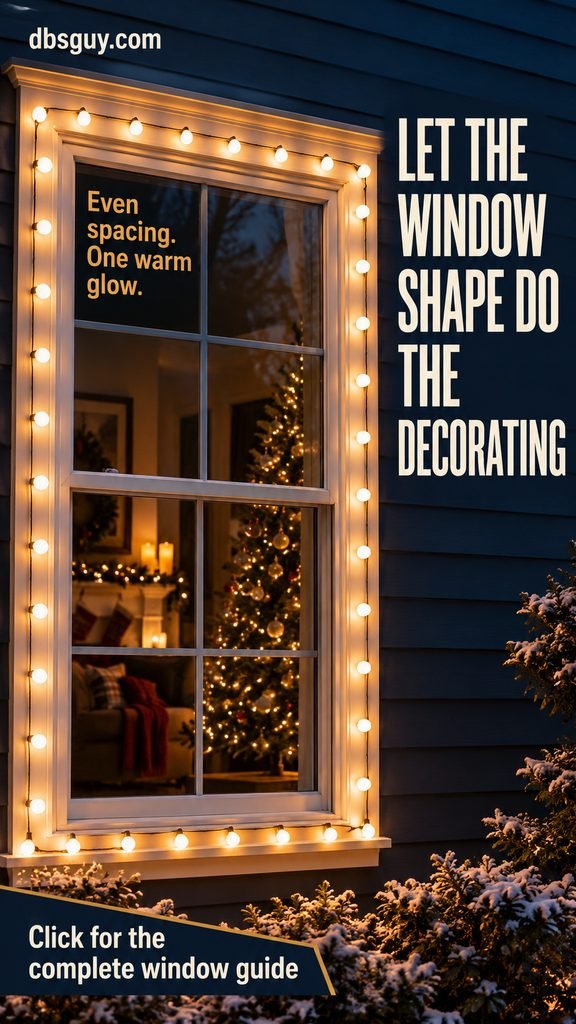
Measure the route around the fixed surrounding trim, then choose a suitable outdoor light set and compatible clips. Check the cord length and outlet position before installation. The supply route matters just as much as the lit section; it should reach its power source without crossing the window’s moving parts.
Lay out the string before clipping it in place. Keep the bulbs at a consistent distance from the trim, and work toward evenly spaced corners. Avoid pulling the wire tight to make it reach. Use the clips intended for that cord and surface, with support that doesn’t pinch or damage the insulation.
Choose a light color that matches the porch. Even products described as warm white can appear different, so switch them on together before finishing the layout. A steady glow is an easy starting point if you want the outline to feel calm and coordinated with nearby candles or lanterns.
Keep the shape simple: skip extra crisscrossing strands through the glass. The empty center makes the outline easier to recognize. Test the window after mounting, manage connections as the product instructs, and follow the manufacturer’s limits for linking sets. One well-defined window can establish the evening look for the entire entrance.
4. Give Shutters a Bold Red Bow
Shutters give ribbon its own place to shine. A generous red bow against dark paint can make the window feel festive in daylight while leaving the glass clear. This is especially helpful when the rest of the front of the house has greenery and needs one more visible touch of color.

Use outdoor-suitable ribbon or a ready-made exterior bow with a secure attachment method approved for the shutter material. Check whether the shutters are purely decorative or functional. Working shutters need their hinges, latches, and movement available throughout the season.
Try the bow size against the shutter before making a full set. Broad loops usually read more clearly from the street than a small, intricate knot. Keep the tails short enough to stay on the shutter area without falling into the window opening or catching nearby hardware.
On a pair of decorative shutters, place the bows at matching heights. If the window is narrow, one accent on the more visible side may be enough. Repeat the same ribbon shade at the door, then let the shutters’ existing color provide the contrast.
For a windy frontage: make a compact bow with secure loops and check it after rough weather. Long flowing tails look charming in a still photograph but can become awkward beside moving windows. If ribbon isn’t appropriate for your exposure, choose a weather-ready molded bow that keeps the same clear shape and color.
5. Hang Icicle Lights Above the Window
Icicle lights add a little movement to the line above a window. The hanging strands give a straight frame a softer evening edge, and the sparkle can connect a single opening to a nearby roofline or porch. You can get the effect from a short, intentional run.
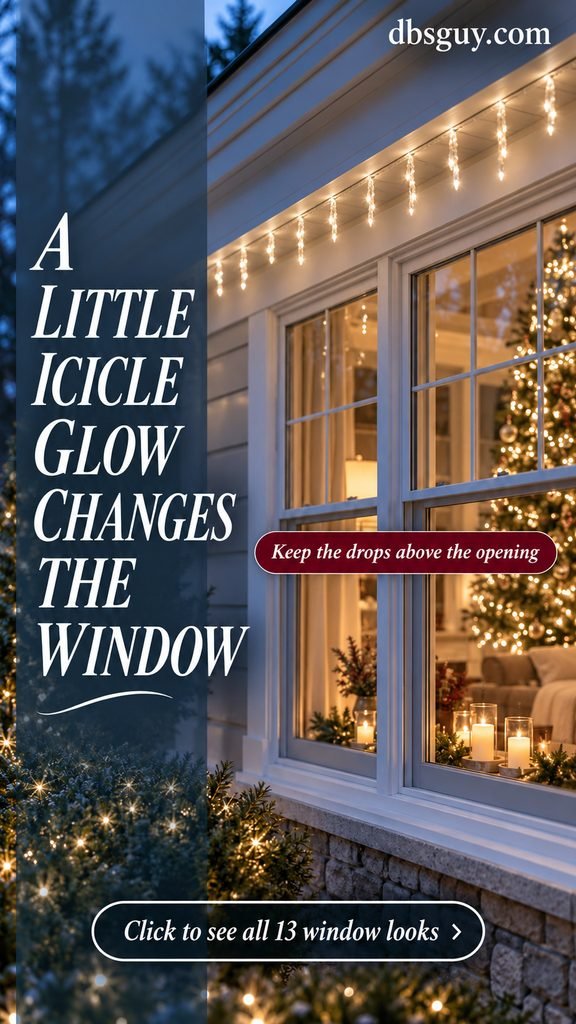
Choose an outdoor-rated set with hanging lengths that suit the available clearance, plus mounting clips compatible with the fixed surface. A reachable ground-floor location under an overhang is easier to inspect and maintain than an exposed upper-story installation.
Position the main wire along a suitable fixed support above the opening. Let the drops hang freely according to the product’s instructions, clear of the sash, hinges, and any area that needs access. Don’t shorten the electrical strands or improvise a connection to make a set fit; choose an appropriate size instead.
Keep the color consistent with the rest of the exterior lighting. Warm white gives the window a softer glow, while a crisp white can work with a snowflake theme. Check the whole display at night so the icicles feel like part of the house rather than a separate patch of brightness.
Use a light touch: the window doesn’t need an additional illuminated figure in its center if the hanging lights already provide the feature. Keep connections managed for the location and cords clear of snow or standing water. If installation requires awkward access, choose a safely reachable window or arrange professional help.
6. Make One Illuminated Star the Window’s Focal Point
A single illuminated star can give a wide window a strong evening identity. Its shape is recognizable from the approach, and the open glass around it helps the glow stand out. This works particularly well when you prefer one clear feature to a collection of tiny ornaments.
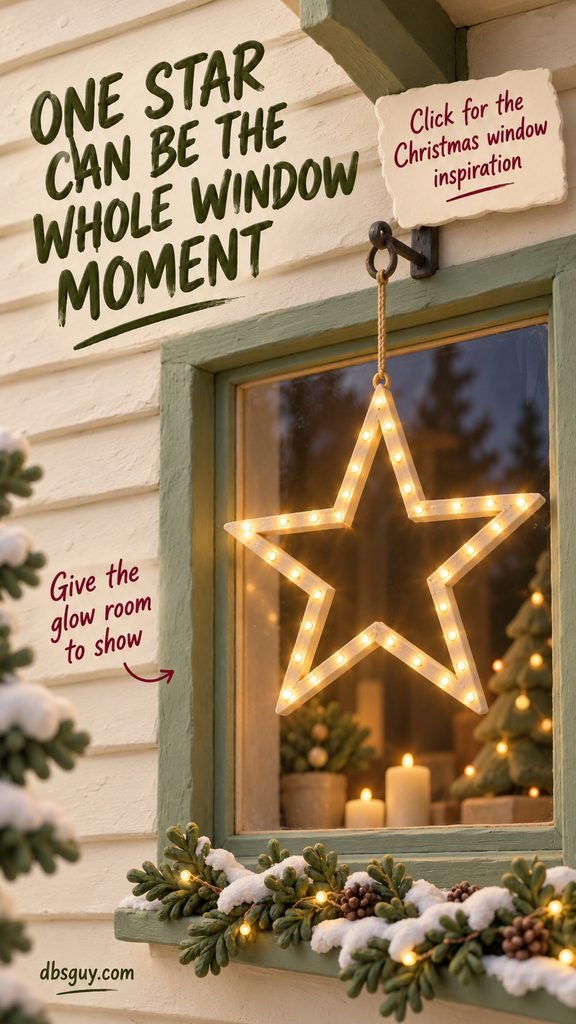
Choose a star explicitly rated for the location, including its lights, power supply, and hanging components. Paper stars and indoor lamps belong on the room side of the glass with their specified indoor support. For an exterior display, use a weather-appropriate product and its required mounting method.
Measure the opening and test the visual position before installing. Keep the star proportioned to the window, with generous space around its points. Centering works well on a simple rectangular opening, while a wide picture window may look more balanced with the star slightly toward one side.
Suspend or mount the piece from a suitable support approved for its load. Keep it from swinging into the glass, and route the cord without trapping it through a closing window. Check that the complete assembly leaves the window’s operation and any escape access available.
Give the glow some room: use nearby greenery or ribbon as quiet daytime support instead of surrounding the star with equally bright shapes. Turn it on with the porch lights before deciding whether you need anything else. The star’s outline should remain the easiest thing to notice at that window.
7. Line the Windows with Flameless Candlelight
A candle-shaped light in each window gives the house a welcoming rhythm after sunset. The small points of warmth can connect windows that are different sizes or sit at different heights. This display works from inside the house while contributing directly to the outdoor Christmas view.

Choose battery-operated flameless window candles with stable bases and lighting suited to the indoor position. A timer can make repeated lights easier to coordinate; follow the candle’s actual settings rather than assuming every model switches on in the same way. Keep battery compartments secured and accessible for maintenance.
Set the candles on a level indoor sill or another suitable steady support behind the glass. Keep curtains, blinds, cords, and the window’s moving parts clear. Use a secure arrangement that children or pets cannot easily knock over, and preserve access to any window needed for escape.
Start with the front-facing rooms, then check the effect from the sidewalk. Match the light color and approximate visual height where possible. If a narrow sill cannot hold a stable candle, skip that opening or use a mounting system specifically designed for the product and your window.
What keeps it beautiful: a consistent, quiet glow. The candles can support outdoor wreaths or stand on their own against an otherwise simple facade. Use flameless models for the seasonal display; you can get the traditional look without leaving real flames beside curtains and holiday decorations.
8. Add a Slim Pinecone and Bell Swag Beside the Frame
A side swag gives a window a little holiday character without placing a large shape in the middle of the glass. Evergreen tips, pinecones, and a few bronze-toned bells look particularly inviting against pale trim or a sheltered cottage wall. The vertical shape can also suit a narrow opening.

Gather a small greenery bundle, lightweight weather-appropriate decorative bells, ribbon suited to the exposure, and a mounting method approved for the surrounding surface. Keep natural materials on a sheltered part of the exterior when possible, and inspect them through the season.
Arrange the greenery as one slim falling shape. Put the longest stems behind the shorter ones, secure the bundle, then position pinecones where their texture will show. Attach the bells with short secure loops at slightly different heights. A small ribbon knot can cover the attachment area.
Mount the finished swag beside the fixed frame, clear of operating hinges, opening shutters, drainage paths, and any equipment that needs access. Leave enough space that the bells can’t swing against the glass. If the finished piece is too bulky for the available trim, make it smaller rather than forcing it into the gap.
Connect the detail: repeat the ribbon or bell finish at the door. The swag can be a small supporting feature when another window has a wreath or a larger light. You don’t have to use the same shape everywhere for the house to feel coordinated.
9. Create a Snowflake Corner with Removable Window Clings
A little cluster of white snowflakes can make a window feel wintry even in a neighborhood without snow. The shapes are easy to recognize from outside, and a corner arrangement lets the glass remain light and open. This is a useful option when you want a festive detail with very little physical bulk.
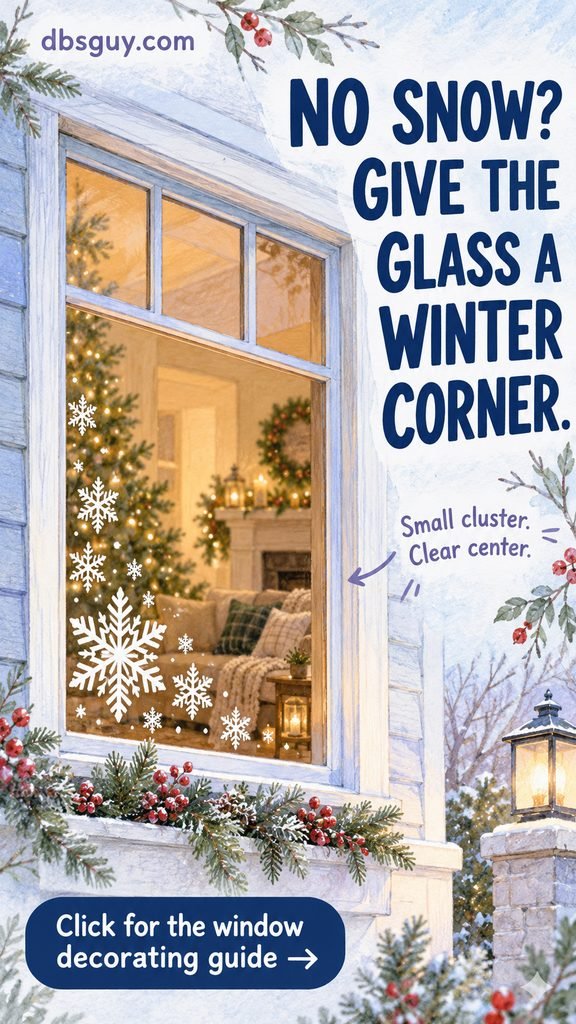
Choose removable decorations specifically intended for your glass, and follow both the decoration instructions and the window maker’s care guidance. Room-side placement keeps an indoor product protected from wind and rain. Avoid substituting an unfamiliar adhesive, spray, or paint for the intended method.
Lay the shapes out before applying them. Start with one larger snowflake near a lower or upper corner, then let a few smaller ones trail away from it. Leave space between the designs so their individual outlines stay readable; a dense covering can turn into a white patch from the street.
Use the same corner or visual pattern on nearby matching windows if you want a repeated effect. For a wider pane, one cluster can be enough. Keep the glass around handles and locks accessible, and check the view from indoors before committing to the arrangement.
Help the shapes show: inspect them in daylight and with the room’s normal evening lighting. A clear white design looks different against a dark room than a bright one. Choose the version that works with your home, and remove or clean the clings according to their care instructions when the season ends.
10. Group Weather-Ready Ornaments at One Window Corner
Three well-placed ornaments can give a plain window a playful Christmas accent. Different sizes add interest, while a limited color palette helps them connect to the porch. A compact cluster near one corner can be easier to read than small ornaments scattered across all the glass.
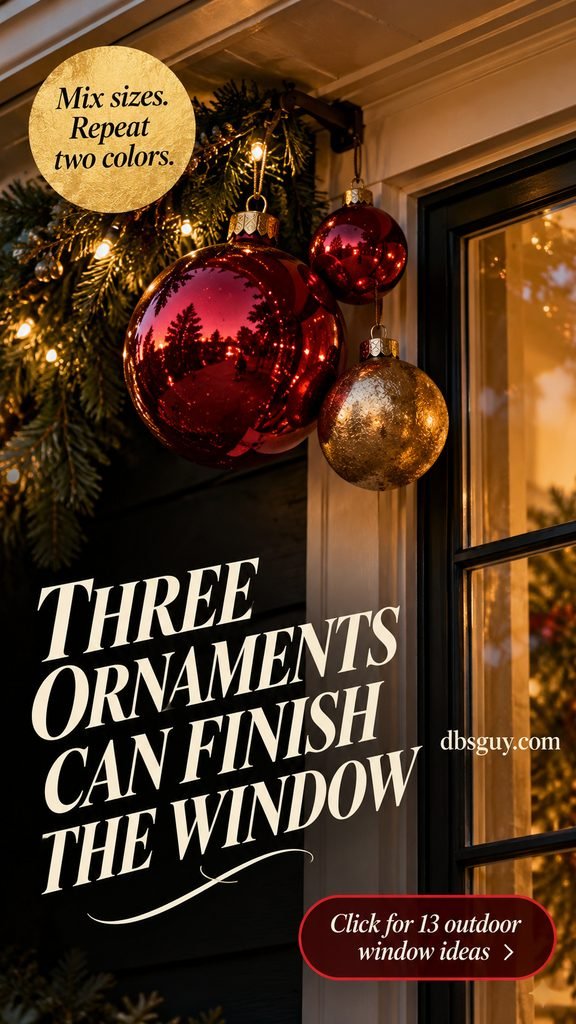
Use lightweight ornaments labeled for the intended outdoor setting, sound hanging loops, and a support approved for their combined weight. Avoid fragile glass ornaments outdoors. A sheltered position helps reduce exposure, but every component still needs to suit the location.
Try one larger ornament with two smaller ones at different heights. Keep the colors close to those already used at the entrance: red and muted gold for a traditional display, or ivory and silver for a quieter winter look. Let each ornament have enough space that its shape remains visible.
Mount the cluster from a suitable fixed support beside or above the frame, away from the window’s moving parts. Keep the hanging lengths short and secured so the pieces won’t strike the glass. Check the arrangement in the breeze as well as from a still front view.
Choose the right amount: one compact group can finish the window. If you already have a heavily decorated wreath there, move the ornament cluster to a quieter opening. The repeated color will connect the two windows, while the different shapes give each its own role.
11. Give the Window a Soft Evergreen Top Border
A greenery border above a window can echo the garland at the front door. It gives the opening a holiday frame while preserving the view through the middle. On a wide window, a gentle dip in the greenery can soften the long horizontal line.

Measure the fixed area above the frame, allowing extra length only for the drape you actually want. Choose fresh or outdoor-rated artificial garland, secure attachments suited to the surface and finished weight, and a few restrained accents. The supports need to carry the arrangement after you add ribbon or lights.
Lay the garland out before mounting. Keep the ends balanced, then make one shallow curve rather than several deep loops across a short opening. Let a few natural branch tips extend beyond the main line, provided they stay clear of the window’s operation and nearby equipment.
Repeat the greenery texture or ribbon shade used at the entrance. You can add outdoor-rated lights if the location and power route suit them, but an unlit border still contributes to the daytime appearance. Don’t depend on the light wire to carry the foliage; support each component appropriately.
For a small window: shorten the border and reduce its fullness. The trim should still show beneath the greenery. A modest arrangement with a clear silhouette can look more considered than a thick bundle squeezed under an overhang. Check the supports after rough weather and keep access around the opening available.
12. Use One Oversized Snowflake as a Winter Statement
An oversized snowflake gives a window area a clear winter identity. Its open shape can feel light even at a larger scale, especially against dark siding or a dim pane. This is a good way to decorate a feature window while keeping the surrounding palette simple.
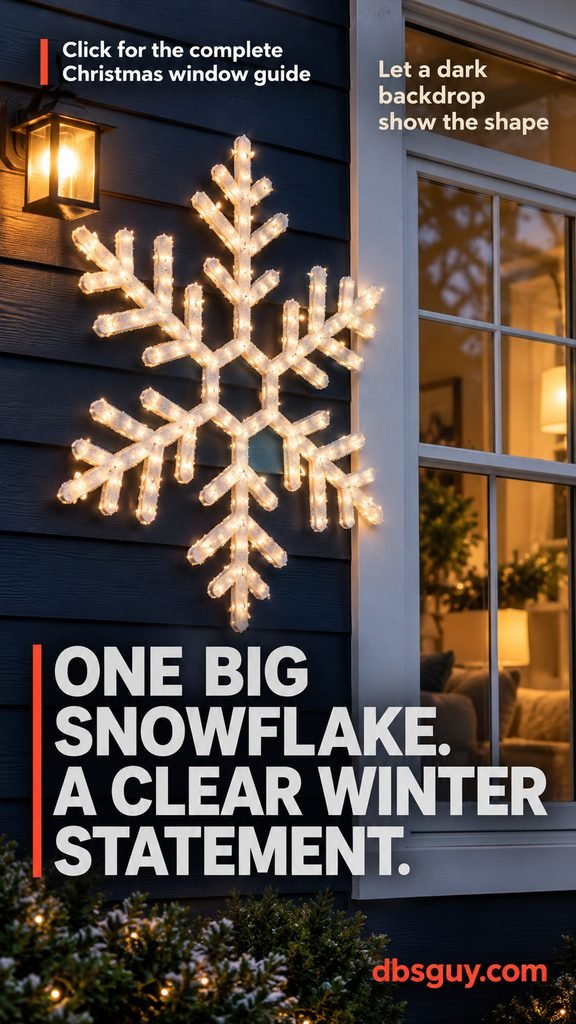
Choose a weather-appropriate snowflake made for the intended mounting position. Indoor paper cutouts and craft foam belong in a protected indoor display. For an exterior statement, check the material, finish, connections, and support instructions rather than relying on the shape alone.
Test the size with a paper outline indoors or a removable visual mockup before buying. Place the actual outdoor piece on a suitable fixed surface beside the window or use its specified hanging method where window operation and escape access remain clear. Keep enough background visible to reveal the cutout pattern.
Use a small amount of matching white elsewhere, such as snowflake clings at another window or an ivory ribbon at the door. If you add lighting, choose a suitable outdoor product and position it as instructed without letting the snowflake interfere with the light’s ventilation or access.
Let the silhouette do the work: skip a ring of smaller ornaments around it. A clear snowflake shape needs space to read from the street. Keep it securely attached, check for wind movement, and move it to a protected position when conditions exceed the product’s guidance.
13. Treat a Bay Window as One Christmas Composition
A bay window already has several sections working together. Decorating each pane with a different feature can make that grouping feel busy. Start by treating the entire bay as one composition, with a clear center and quieter details at the sides.

Choose a central feature proportioned to the middle pane, such as a wreath or one illuminated shape. Add small flameless candles on suitable indoor supports behind the side panes. You get greenery or a recognizable shape by day, then a balanced line of light after dark.
Match the light color across the grouping and keep any ribbon in the same palette as the door. A red bow on the center wreath may be all the color you need. Leave generous clear glass at the sides so the bay’s angled shape remains visible.
Plan each attachment and candle position around how the individual windows operate. A decorative feature should not bridge moving sections, trap cords, or prevent access. If the exterior center is hard to reach, place a suitable indoor decoration behind that glass and enjoy the same street-facing effect from a safer setup position.
Check the view from an angle: a bay is seen differently as people approach the house. Walk along the front path and confirm that the center feature still reads clearly while the side lights feel balanced. Adjust one piece at a time. The result should make the window group feel complete without asking every pane to be the main attraction.
Connect the Windows to the Rest of the House
For a traditional red-and-green porch: pair matching window wreaths with a simple door garland, then repeat one red ribbon. Warm flameless window candles can extend that look into the evening. Let the greenery and bows supply the daylight detail.
For a clean winter-light display: choose frame outlines or one illuminated star, then repeat the light color at the entrance. Snowflake clings or a single weather-ready snowflake can provide daytime interest. Keep the lighting shapes few enough that the architecture remains easy to see.
For a small home or townhouse: start with the most visible window and the front door. One matching color or material can join them. A compact window box and a door wreath may already be enough; you can add a light later if it improves the evening view.
Photograph the house in daylight and again after dark. The daytime view shows whether the ribbon, greenery, and shapes relate to each other. The evening view reveals competing light colors or a feature that disappears into the background. Change the least useful detail first before buying more decorations.
Keep the Display Easy to Live With
Open and close each usable window after decorating, with someone checking the exterior clearance where needed. Keep handles, locks, screens, shutters, and planned escape access available. A decoration that catches the sash needs a different position or a different window.
Check the full electrical route, including the sections you tried to hide. The Electrical Safety Foundation International warns against pinching cords in windows or doors and advises keeping outdoor light strings and cords clear of standing water and snow. Use supports that suit the product, and turn decorative electrical displays off when leaving home or going to sleep.
After rough weather, inspect hanging loops, hooks, clips, and supports. Remove damaged or loose pieces rather than leaving them until the end of the season. Refresh fresh greenery as it needs attention, and follow the actual weather limits of battery compartments, ribbon, and other accessories.
When the season ends, remove mounting products as directed, let reusable decorations dry, and pack the pieces by window or window group. A photo and a note about the successful light route will make next year’s setup easier. Store the lights without sharply bending or crushing their wires.
Questions About Outdoor Christmas Window Decor
How can I decorate Christmas windows without drilling?
Use a mounting product approved for the actual glass or surrounding surface, the outdoor conditions, and the decoration’s finished weight. Follow its preparation, application-temperature, waiting-time, and removal instructions. Room-side displays such as stable flameless candles or suitable window clings can also create a festive street view without exterior drilling.
Do all front windows need the same decoration?
They need a connection more than a perfect copy. Repeat one ribbon shade, greenery texture, or light color. Matching windows can take matching wreaths, while a bay window or a smaller opening may need a different shape. Keep the scale appropriate and give each feature enough clear space to be readable.
Can I use indoor Christmas decorations on the outside of a window?
Use exterior products only where their labels and instructions allow them. An overhang can still admit wind-driven rain, sun, or cold. Place indoor paper stars, indoor lights, and other moisture-sensitive decorations on the room side of the glass, with suitable supports and clear window access. They can still contribute to the outdoor view.
What works best for a small window?
Try one small wreath, a compact corner of suitable snowflake clings, or a simple outline of lights around the fixed surrounding trim. Leave a generous open center. If the sill and brackets are appropriate, a low window-box arrangement can decorate below the glass instead. Choose the idea that fits the available mounting surface and access.
How do I make the display look good in daylight and at night?
Pair a visible daytime material with restrained evening light. A wreath can work with an indoor flameless candle; a window box can sit beneath an illuminated frame. Check both views before adding more. Match the light colors and keep the main shape recognizable, then use ribbon or greenery to connect it to the porch.
Give the House One Welcoming Christmas Rhythm
Start with the window that makes the biggest difference to the front of your home. Choose one feature for it, then repeat a color, texture, or gentle glow at the next opening and the door. You can let the arrangement grow at the pace your space and materials allow.
Keep the glass open enough to enjoy the view, the hardware available enough to use, and the decorations clear enough to notice from the street. Those choices help outdoor Christmas window decor pull the whole house together, one thoughtful detail at a time.




