19 December Nails Not Christmas: Winter Looks for When You’re Skipping the Holiday Motifs

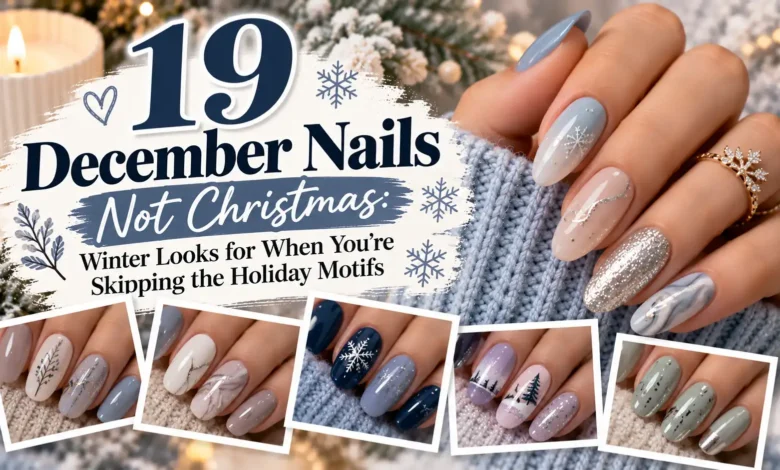
For December nails without Christmas motifs, start with blue-gray, espresso, plum, or a sheer pink with an opal sheen. A matte surface, a narrow metallic curve, or a soft color fade can give the manicure a winter mood without adding a single holiday symbol.
These 19 looks cover quiet everyday colors, small graphic details, and finishes with enough shine for an evening out. Pick the feature you actually want to wear—color, pattern, or reflected light—then use the placement notes to adapt it to your own nail length.
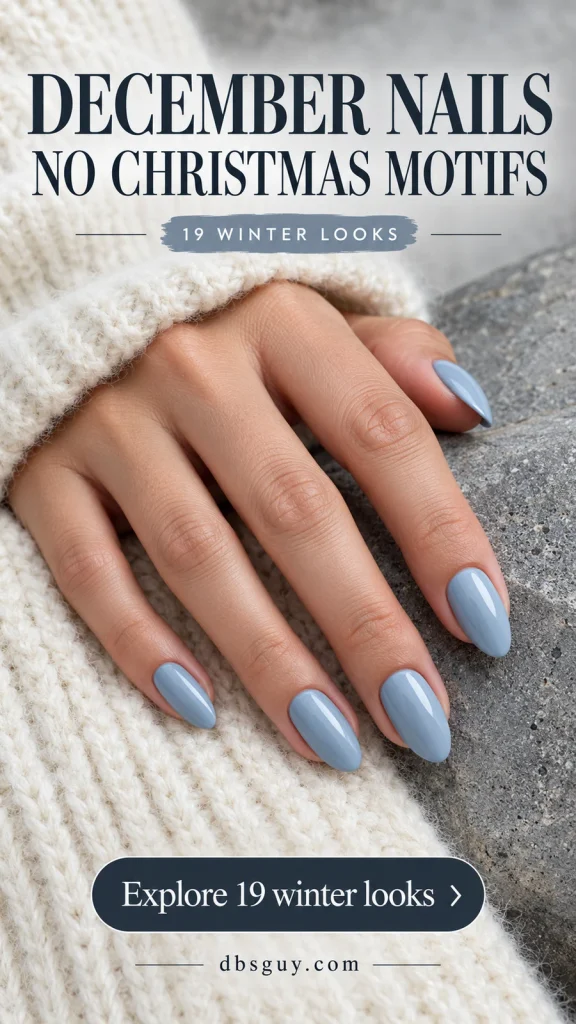
The images are AI-generated nail-design concepts, not photographs of completed or wear-tested manicures. Use them as references for color, placement, and finish; actual results depend on the products, application, nail shape, and lighting.
Choose Your Winter Mood First
- Quiet and simple: opal pink, blue-gray gloss, espresso, or matte taupe.
- A little shine: brushed silver, plum velvet, or a fine shimmer fade.
- Pattern without holiday symbols: navy curves, tortoiseshell, herringbone, or ivory pinstripes.
- A useful starting point for very short nails: one solid color, or a small accent on just one nail.
The shape shown is a reference, not a requirement to add length. Start with a comfortable length, then scale the line, tip, or pattern to the space you have.
1. Sheer Opal Pink
If you like your own nails to show through, choose a soft pink with a pale blue-white glow. The color stays gentle, while the reflection adds something you would notice beside a gray sweater or a black coat. Short rounded nails keep the look compact and easy to style.

Ask for translucent coverage and a fine pearl finish, with no painted white tip. Check the swatch over a nail rather than against an opaque display card: the visible free edge is part of this look. For a home version, a pearlescent regular lacquer can suggest the effect; it does not have to be a chrome-powder service. If you prefer more coverage, choose a milkier pink and accept that less of the natural nail will remain visible.
2. Blue-Gray Gloss on Short Nails
Blue-gray is a useful middle ground when pale blue feels too sweet and navy feels too dark. Here, an opaque cream finish gives every nail the same quiet color. The rounded corners of a squoval shape soften the straight free edge.
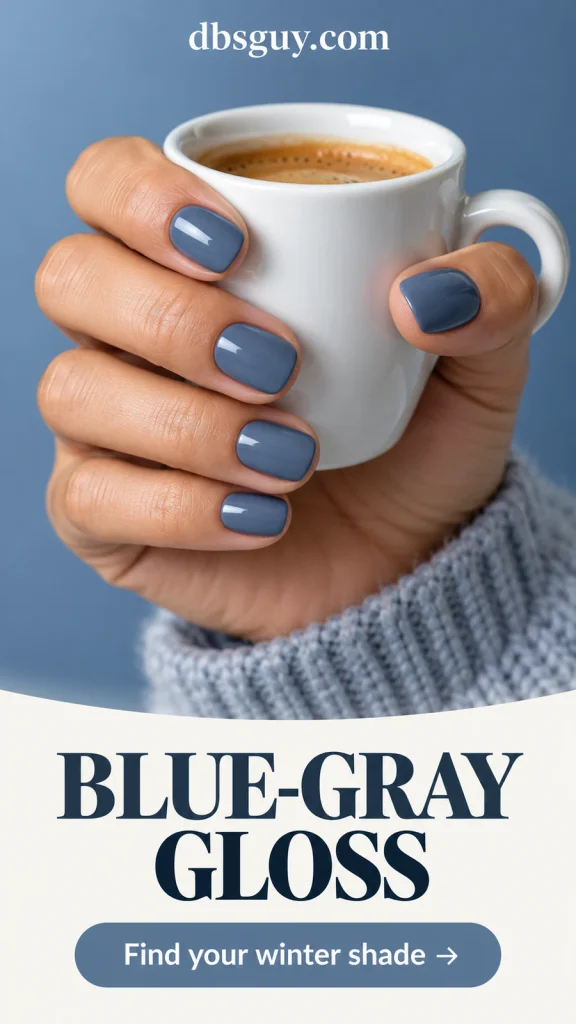
Compare a blue-leaning swatch with a gray-leaning one beside your hand. Choose the former if you want the winter color to be obvious; choose the latter if you mainly wear charcoal, denim, and neutrals. Keep this set free of shimmer so the color remains the focus. It is also one of the simpler DIY options in the guide: use a base coat, thin color coats, and a compatible glossy top coat according to the product directions.
3. Espresso After Dark
Espresso brings depth to a winter manicure without relying on red, green, or decoration. A short soft-square shape gives the dark color a tidy frame, and a glossy surface adds a clear reflection beside textured wool or leather.
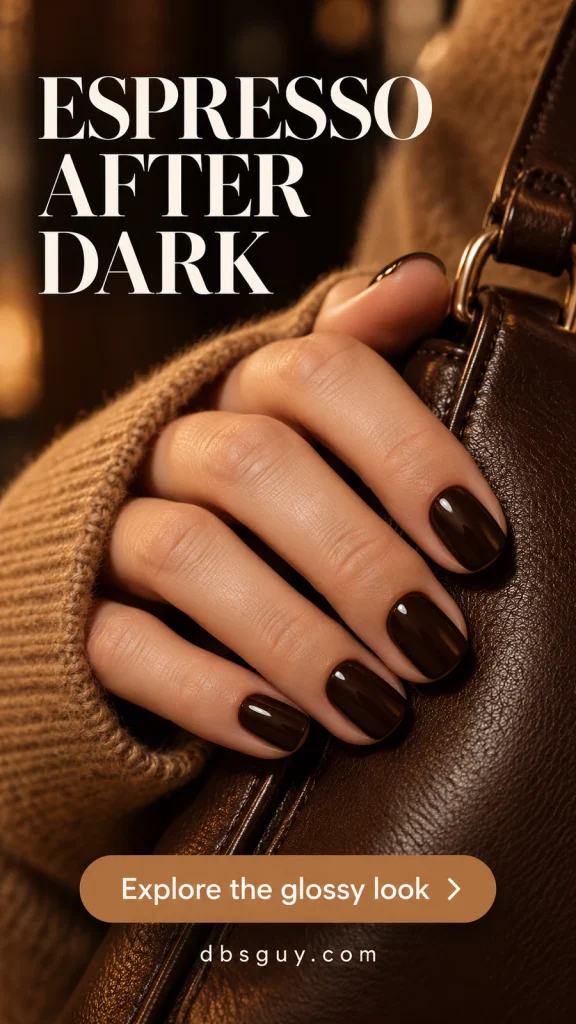
Choose a swatch that still looks brown in ordinary daylight if you want that warmth to show. Some nearly black browns lose their distinction in dim light; that is a color choice to make before the appointment, rather than something a reference image can settle. Keep the whole nail one shade for this version. If the other looks you saved involve French tips or accent art, this is the uncomplicated alternative you can wear with a camel coat and leave alone.
4. Slate-Blue Micro French Tips
A narrow blue edge gives a familiar French manicure a cooler palette. The sheer rosy-beige base keeps the center light, while the slate tip traces the shape rather than becoming a wide block of color. Medium almond nails show the curve clearly.

Tell your artist that the width is the important detail: you want a micro tip, with plenty of base showing beneath it. On shorter rounded nails, follow the existing free-edge curve and make the line finer instead of copying the depth of a longer reference. If painting all ten tips at home feels frustrating, put the blue edge on two accent nails and leave the others sheer. The color connection is enough to hold the set together.
5. Brushed Silver Instead of Full Mirror Shine
Brushed silver has a different character from both chunky glitter and mirror chrome. The fine metallic grain gives the surface a directional sheen, making the nails feel like a small silver accessory. It is a strong choice with a black dress when you want the manicure itself to supply the shine.
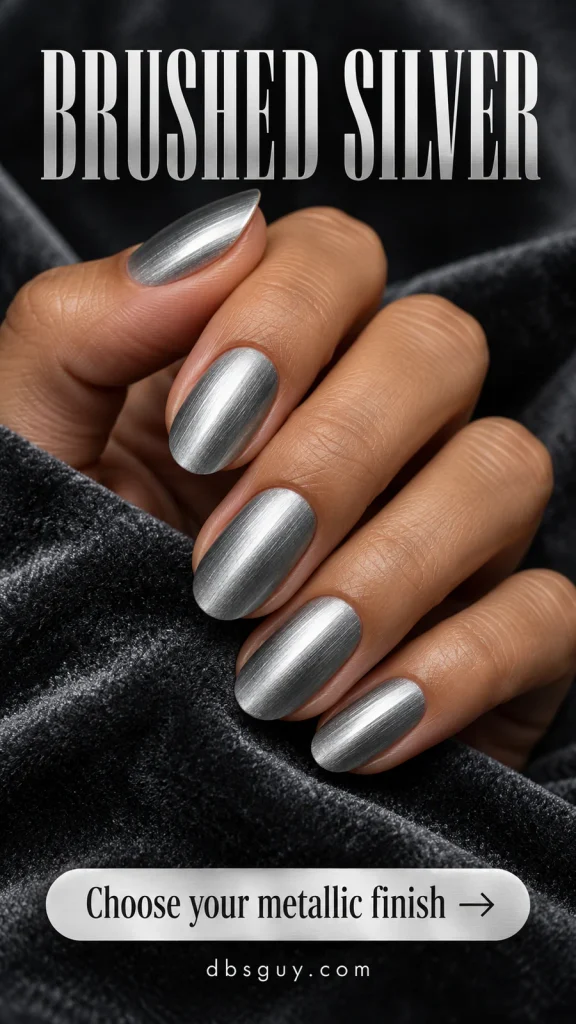
Bring a reference for the finish as well as the color. Ask to compare a brushed metallic sample with a smooth mirror sample, because the word silver does not distinguish them. A metallic regular polish offers a home route, although its brush marks will be part of the result. Keep your strokes consistent from base to tip and follow the formula’s top-coat instructions. Avoid adding glitter over it if the brushed surface is what attracted you.
6. Matte Cashmere Taupe
Taupe can feel quite different once the gloss is removed. A warm gray-brown shade with a matte finish looks soft beside an ivory cuff, especially on short nails with rounded corners. This is the option for someone who wants a winter mood without shimmer or an accent nail.
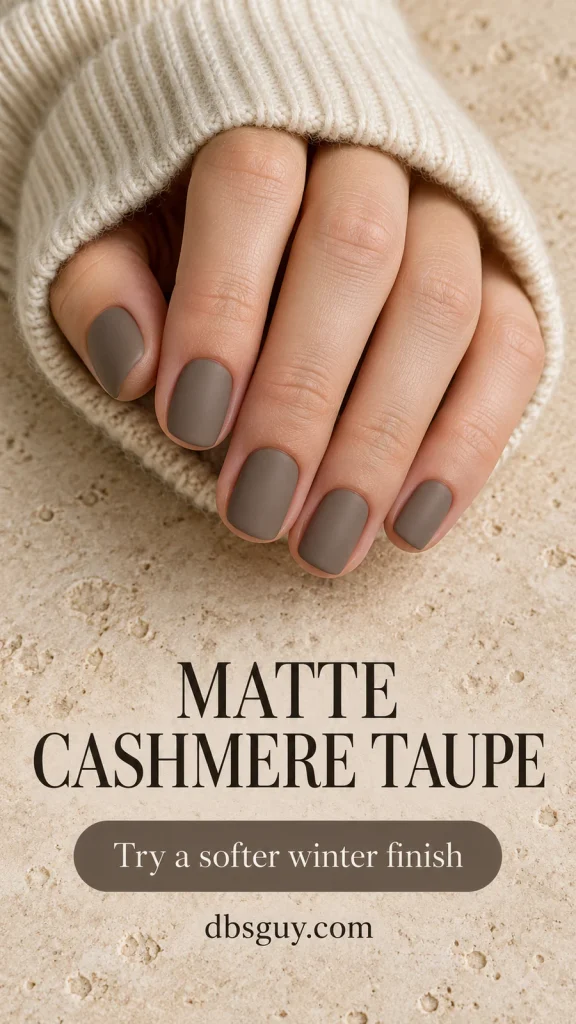
Choose from finished matte swatches if possible. A bottle shows the color, but it cannot show the surface you are asking for. At home, use a compatible matte top coat as directed; finishing with an all-over glossy layer would change the effect. If taupe is your starting point, the related neutral December nail ideas offer more ways to keep the palette quiet while varying the finish.
7. Plum Velvet With a Broad Glow
Choose a cool purple plum when you want a dark manicure that still has visible color. The velvet effect comes from a broad luminous highlight across the nail, giving the surface a sense of depth as the light changes. It is a finish to consider for winter dinners when plain purple feels too flat for your taste.
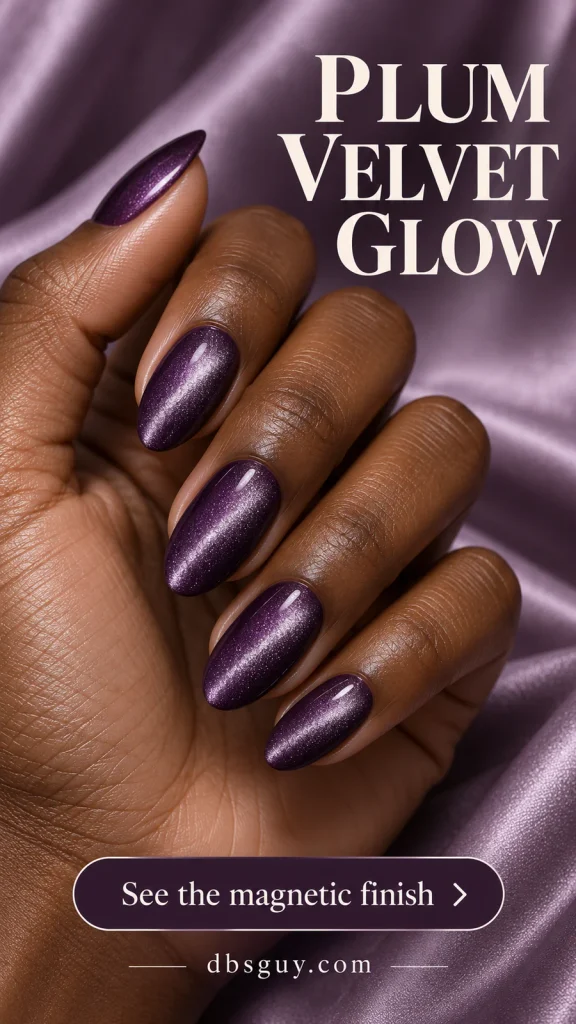
Ask for a soft magnetic glow rather than a sharply drawn cat-eye stripe, and inspect a finished sample from more than one angle. Magnetic particles and a magnet create the effect; ordinary glitter polish will give a different result. If the service uses gel, leave the product-specific application and curing to the trained technician following that system’s instructions. For a simpler lacquer alternative, choose a fine plum shimmer and expect sparkle rather than the same moving highlight.
If you are deciding between a soft glow and a sharper light band, compare the references in these December velvet cat-eye nail ideas before choosing your finish.
8. Deep Teal With No Accent Art
Deep teal gives you a jewel tone without turning the manicure into a holiday palette. Look for a shade with a noticeable blue cast, then keep every nail glossy and undecorated. Short oval nails make the rich color the main feature.

Check how the swatch reads under both the salon lights and daylight. A very dark teal may look almost black in a dim room, while a greener shade may feel closer to evergreen than you intended. Show your artist the blue-teal direction you want instead of relying on a shade name. Pair it with charcoal or winter white if you want the contrast to be visible; there is no need to add silver foil simply because the month is December.
9. Navy Curves Over Negative Space
If you like navy but do not want a full dark manicure, put the color into one curved ribbon on each nail. The sheer beige base remains visible around the line, so the design has movement without covering the entire surface. An oval or almond outline gives the curve room to travel.
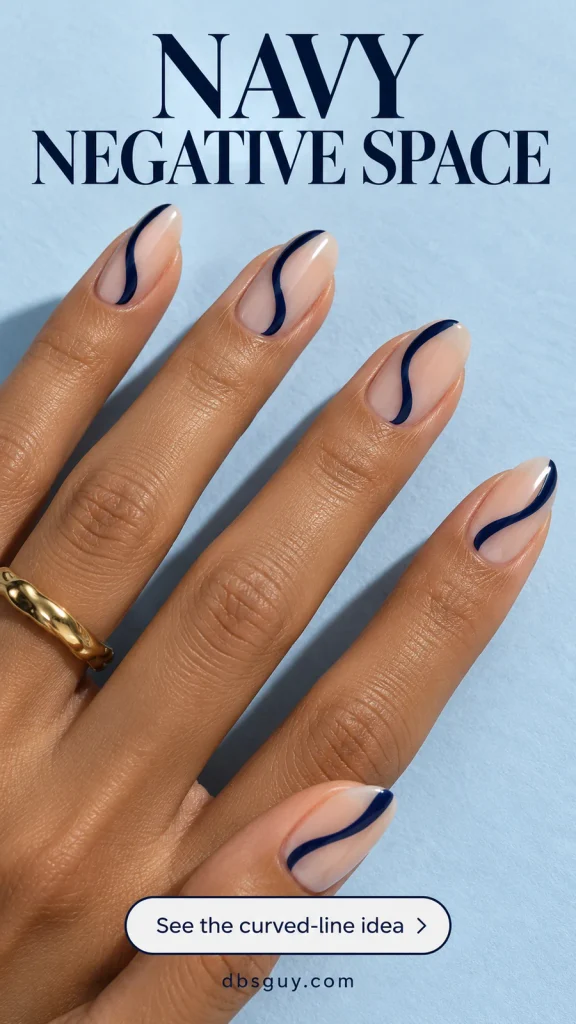
Ask for a single flowing stroke rather than several intersecting swirls. Keep the band narrower on smaller nails so the open space does not disappear. This is a placement-led design, so show where the curve should begin and where it should meet the edge. For a manageable home adaptation, paint one curve on each ring nail and keep the remaining nails sheer; a single repeated accent is easier to balance than ten matching curves.
10. Charcoal With Silver Base Crescents
Here, the metallic detail sits at the base of the nail instead of the tip. A fine silver crescent curves around glossy charcoal, bringing a small jewelry-like accent to an otherwise dark set. The center stays completely plain.

Use the phrase reverse French and point to the base in your reference, since a silver French tip would create a different design. Ask for a narrow painted arc with a small clean margin from the skin, rather than a thick half-moon of metal. On a very short nail, limit the crescent to the ring finger if all ten would feel busy. A flat metallic detail suits this look better than a row of stones because the curve, rather than raised decoration, is the feature.
11. Smoky Lavender Aura
A smoky gray-lilac border and a pale lavender center give this manicure its soft-focus effect. The interest comes from a gradual change in color, with no distinct circle around the lighter area. It is a gentle alternative to dark winter shades when you still want more depth than a plain pastel.
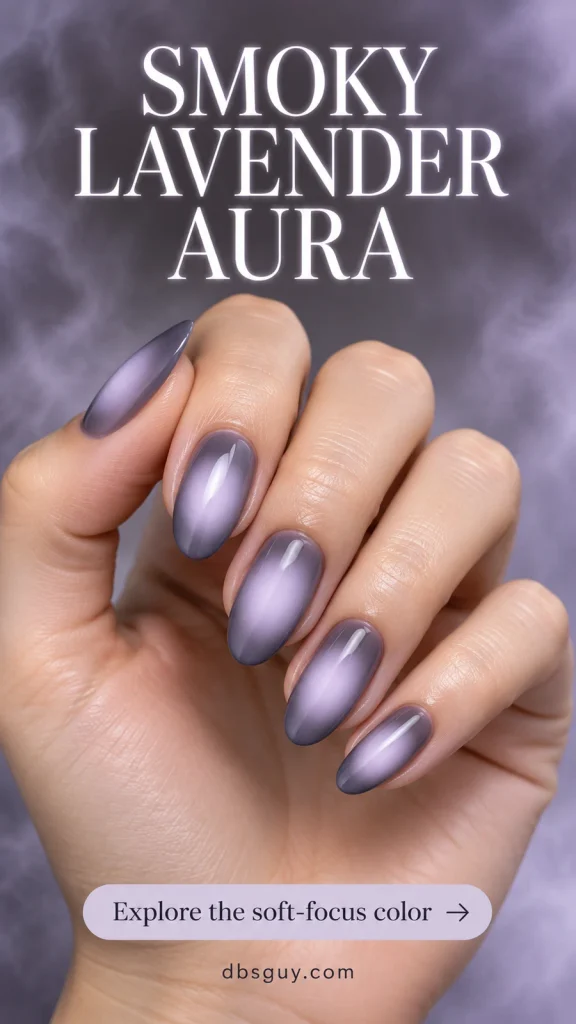
Ask your artist to keep the glow centered and the blend diffused, then check one sample before committing to the full set. On a shorter nail, make the pale center smaller so the surrounding gray-lilac remains visible. A salon airbrush or another controlled blending method can create the transition. At home, a fine lavender shimmer is the easier substitute if a smooth two-color blend would be more work than you want.
12. Clouded Ice in White and Gray
Clouded ice uses milky white, pale gray, and partly transparent areas to suggest depth. The wisps stay soft, with no strong black veins. That makes the manicure feel lighter than a high-contrast stone pattern and gives winter white a little movement.
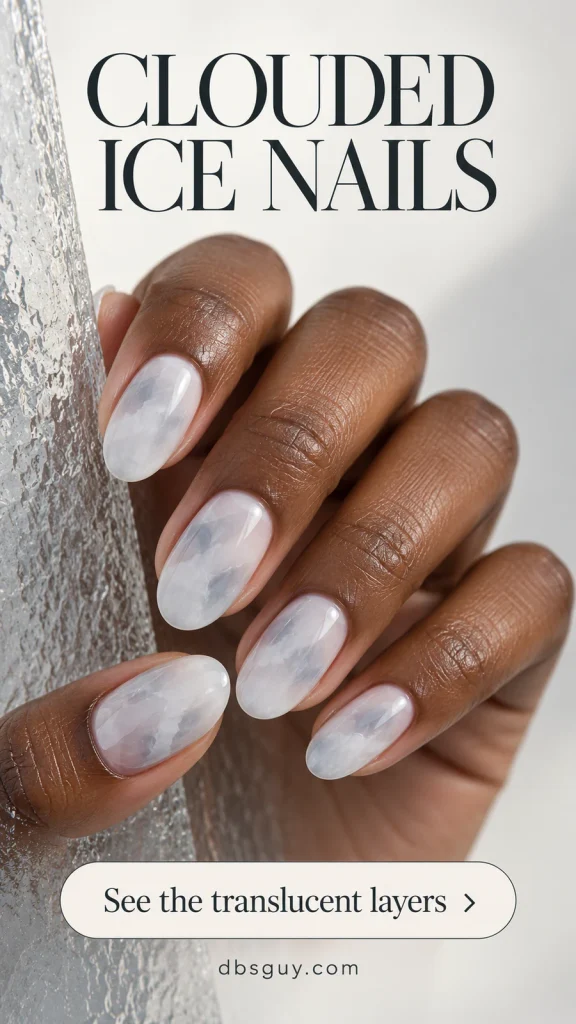
Ask for a translucent cloudy effect, with gray shading used sparingly. Point out the clear-looking gaps in the reference; filling them with more white would make the result much more opaque. Medium oval nails give the layers room, but on short nails you can concentrate the clouding on two accents and use a sheer milky base elsewhere. This is a blended-art option rather than the quickest beginner manicure, so choose it for the layered appearance rather than expecting an ordinary white polish to reproduce it.
13. Cocoa With Two Tortoiseshell Accents
Cocoa and amber bring a warmer direction to a winter list that could otherwise become all blue and gray. Keep the thumb, index, and little nails glossy cocoa, then use the middle and ring nails for translucent tortoiseshell patches. The pairing gives the pattern a clear place to sit.
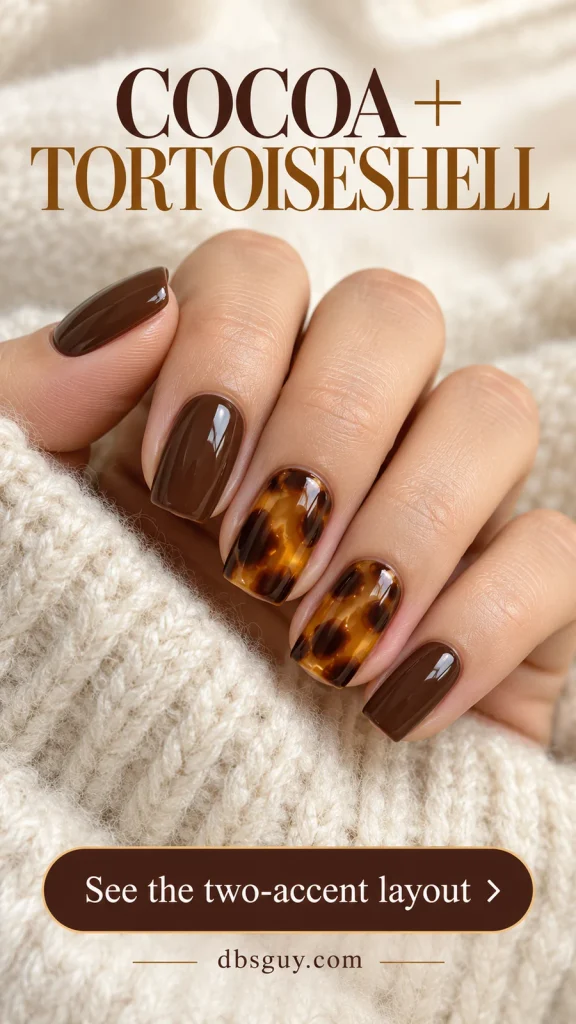
The distinguishing detail is the amber visible between irregular dark patches. Avoid evenly outlined spots if you want tortoiseshell rather than leopard print. Tell your artist which two nails get the pattern, and ask to retain some honey-colored space instead of covering each accent in dark brown. If two accents feel like too much, choose one on each hand. A suitably sized nail wrap can offer a home alternative, but its printed pattern will not have the same layered transparency.
14. Graphite With One Herringbone Panel
A small ivory herringbone panel gives graphite nails the graphic rhythm of winter tailoring. Put the pattern on one ring nail and leave the others solid gray. The contrast makes the lines visible without needing a different color on every finger.
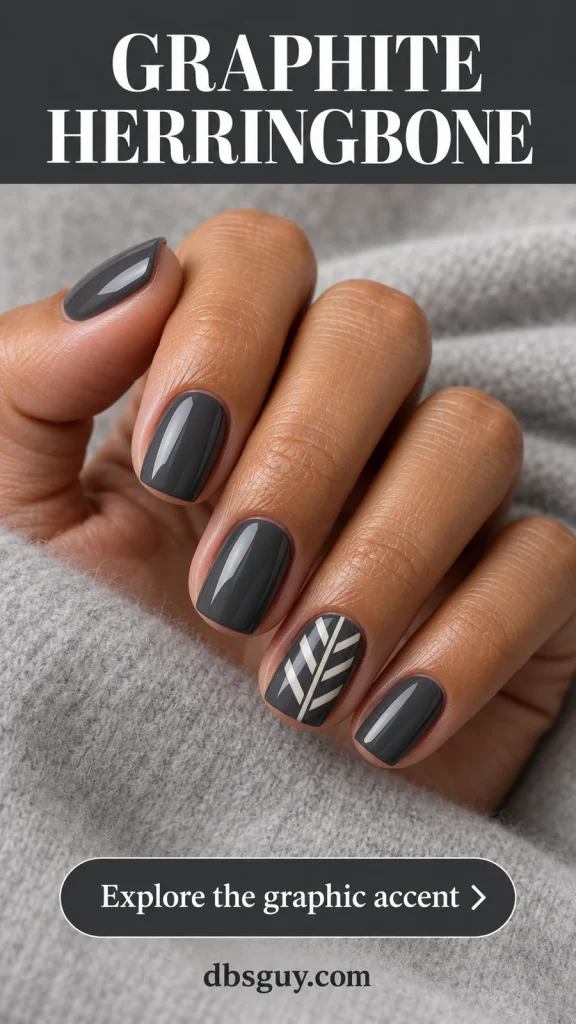
Keep a central spine and a few pairs of angled strokes, leaving plain margins beside them. On a small nail bed, simplify the number of strokes rather than making a dense miniature pattern. Ask for flat painted linework; this design does not need raised gel texture. A fine stamping pattern is another route if it fits the nail width. Check the scale before choosing it, since an oversized motif can lose its shape once its edges are cut off.
15. Sapphire Jelly on Squoval Nails
Sapphire jelly is the brighter blue option in the collection. The color is saturated, but the formula’s translucency lets some of the natural nail show through. A glossy finish and short squoval shape keep the result focused on that glass-like color.
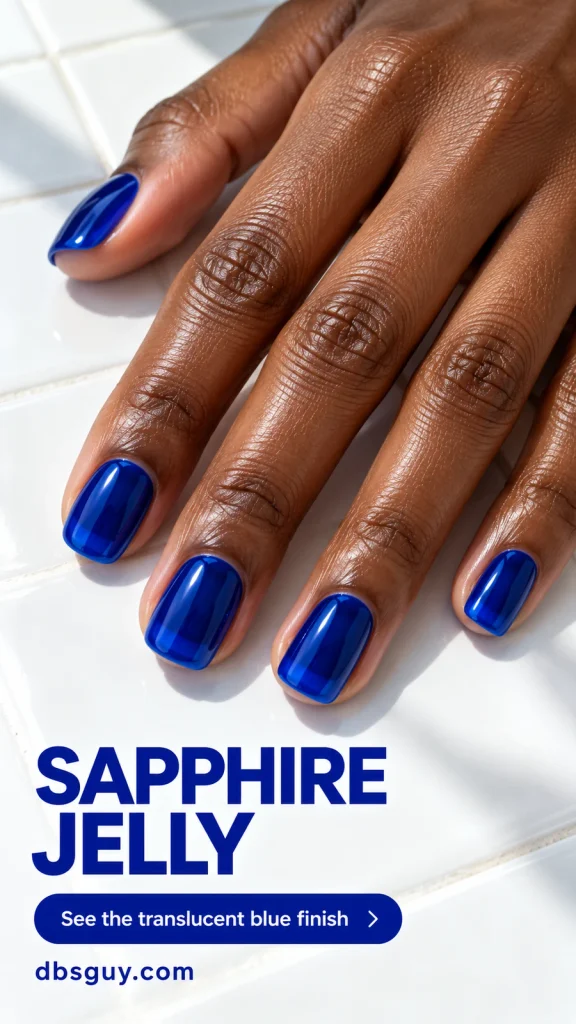
Ask to see how transparent the blue looks on an actual nail or clear swatch. An opaque cobalt cream may share the color family, but it will not have the same depth. Follow the chosen formula’s coat recommendations and stop when you reach the coverage you like; extra layers change the balance between transparency and color. If you strongly dislike a visible free edge, choose opaque sapphire instead and treat it as a deliberate variation. No white artwork is needed to make the blue feel at home in winter.
16. A Silver Shimmer Fade From the Base
Move the sparkle away from the tips for this version. A little fine silver shimmer gathers near the base of a sheer rosy-beige nail, then fades toward the middle. The upper part stays mostly clear, giving the manicure a small flash rather than full glitter coverage.
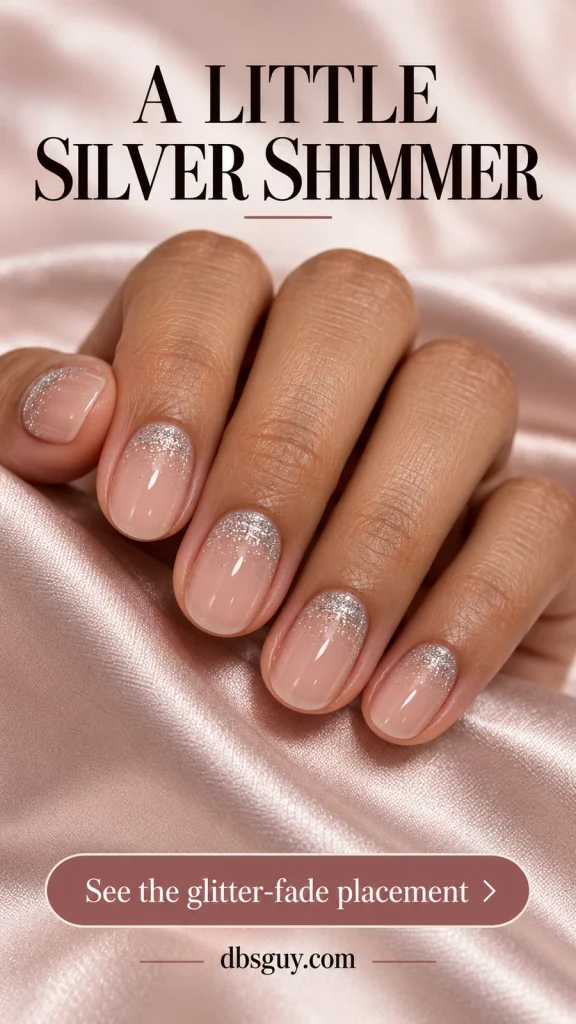
Show your artist the direction of the fade and specify fine particles. Large glitter pieces would create a different texture and stronger contrast. At home, let the sheer base become ready for layering according to its directions, then use a small brush to place a little compatible shimmer just above the cuticle area, keeping it off the skin. Use less as you move upward. If the fade spreads too far, try it on one accent nail rather than covering every tip to make the set match.
17. Ivory Winter Pinstripes
Ivory does not need sparkle to work as a winter color. One fine taupe stripe running along each nail gives the creamy base a little structure. The palette stays soft beside gray knitwear, while the repeated line makes the manicure more graphic than plain white.
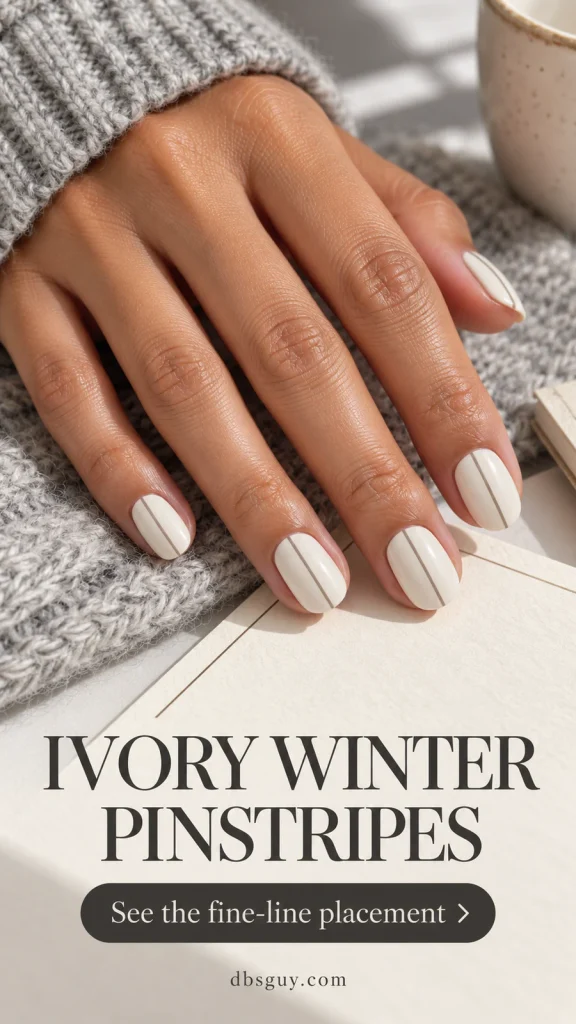
Ask for a single thin stripe, placed centrally or slightly off center, and decide on that alignment before the first nail is painted. Leave a small margin near the base and keep the line narrow enough for ivory to remain visible on both sides. A striping brush or a suitably fine nail-art sticker can give you a home route. If ten lines feel like too much detail, use the stripe on the middle and ring nails and keep their neighbors plain. Choose taupe for gentle contrast or charcoal if you want the line to stand out more.
18. Black Satin French With Glossy Tips
Black satin French nails use finish contrast instead of a second color. The body stays matte black, while a slim glossy black tip catches the light. In softer lighting the manicure looks almost plain; a closer view reveals the edge.
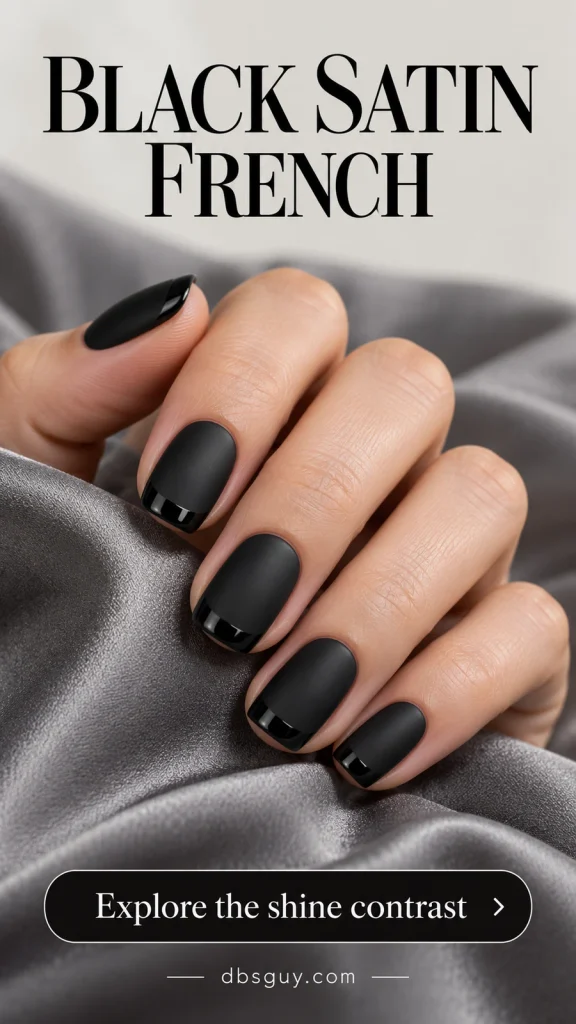
Choose a sample where you can actually see the difference between matte and gloss before committing. On short nails, keep the shiny edge narrow enough to leave a visible matte center. For a regular-polish version, use compatible matte and glossy top coats in the sequence their directions allow, applying the gloss selectively at the tip. Do not add a final glossy layer over the whole nail, because it would erase the contrast. If the fine edge feels fiddly, one entirely glossy accent nail is an easier adaptation.
19. A Latte-to-Ink Five-Shade Manicure
If choosing one neutral is the difficult part, use a different shade on each finger. This version moves from caramel latte on the thumb to warm taupe, mushroom gray-brown, charcoal, and black on the little finger. All five nails share the same glossy finish and short squoval shape.
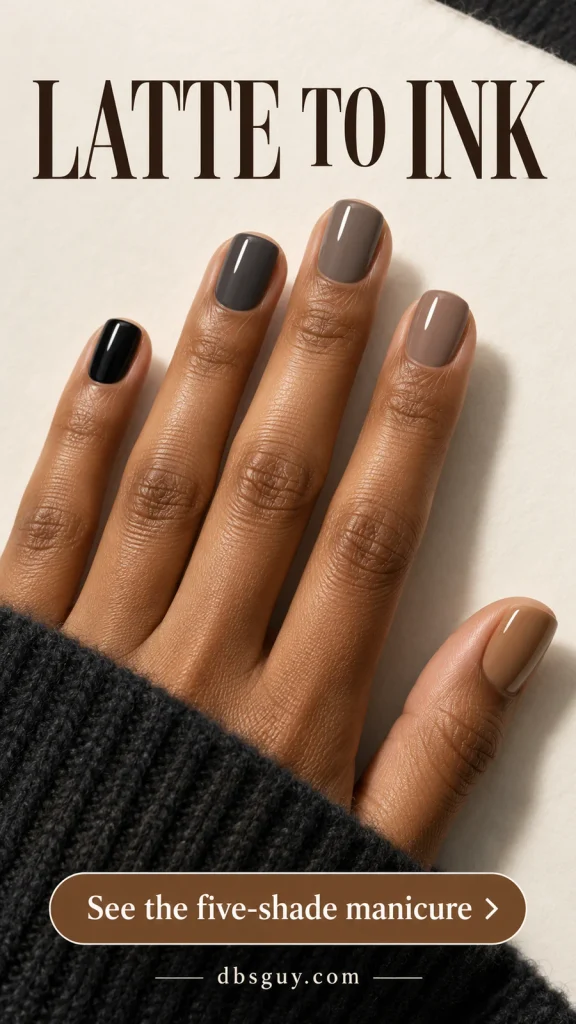
Lay out the swatches in order before application. You want visible steps between neighboring colors, rather than two middle shades that look identical once they are on the hand. Repeat the thumb-to-little-finger order on the other hand if you want both sides to feel consistent. This design needs several polishes but no detail brush, making it a useful DIY choice when you already own a collection of browns and grays. The progression supplies the pattern.
Turn Your Favorite Image Into a Clear Salon Brief
Save one main reference, then tell your nail artist four things: your comfortable length, the base color and coverage, the exact finish, and which nails receive the detail. If you like the color in one image and the shape in another, say so before the service begins.
For example: “Short rounded nails, sheer rosy-beige coverage, fine silver shimmer fading from the base on the ring nails, and no other artwork.” That brief is easier to interpret than asking for winter nails and hoping the artist pictures the same thing.
Ask for a finished swatch when the surface is the main attraction. Matte, brushed metallic, mirror chrome, magnetic velvet, and ordinary shimmer can share a color while giving quite different results. Treat the AI references as a conversation starter rather than a promise of an identical finish.
A Brief Note if You Choose Gel
A winter design does not require gel. If you do choose it, the American Academy of Dermatology’s gel-manicure guidance recommends protecting your hands from the curing light with broad-spectrum, water-resistant SPF 30 or higher, or dark, opaque gloves with the fingertips removed. Avoid picking off gel polish, and moisturize your nails and cuticles between manicures.
Questions About Non-Christmas December Nails
What nail colors feel like December without looking Christmas-themed?
Blue-gray, navy, smoky lavender, deep teal, espresso, taupe, and silver all offer winter directions. Choose a plain finish or abstract detail if you want to avoid symbols entirely. There is no required December palette; the useful test is whether you like the color beside the clothes you actually wear.
Can I wear winter nails without snowflakes?
Yes. None of the 19 designs here needs a snowflake. A cool pearl glow, a dark glossy color, or a small metallic curve can suggest the season through color and light alone.
Which looks are easiest to try with regular polish?
A single cream color, a pearlescent pink, or the five-shade latte-to-ink set are straightforward starting points. Matte taupe adds a change of top coat. Fine French lines, aura blending, and layered tortoiseshell require more control, so simplify them to an accent nail or take the reference to an artist.
Will these designs still make sense in January?
The colors and patterns do not refer to a particular celebration, so you can choose the same design again in January. That is a styling point, not a claim that one manicure will last across both months. Refresh or remove it as needed for the product and the condition of your nails.
Pick the Detail You Want to Keep Looking At
For an everyday set, start with the color you reach for most: blue-gray if you like cool shades, espresso if you prefer warmth, or opal pink if you want something sheer. If the finish is what caught your eye, keep the rest of the design simple. One clear choice gives you a useful reference to bring to your next appointment.