15 Nail Products for Square Acrylic Nails When December Calls for Bold Tips and Glitter

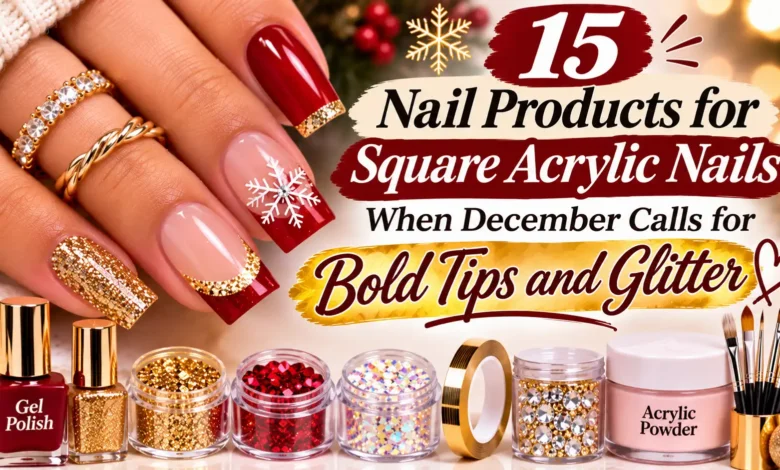
Square acrylic nails give December colors a little more room to show off: a crisp red edge, a dark green base, or glitter that catches the light across a straight tip. These 15 products cover building, decorating, and finishing your set, with practical ways to use each one. Choose the pieces that fit your plans and your existing nail kit.
I may earn a commission if you buy through these Amazon links, at no extra cost to you.
1. KISS French Acrylic Sculpture Kit

For building a square acrylic foundation
If you want to build the actual acrylic set before choosing the festive color, start here. KISS includes 40 tips—20 white and 20 natural—along with acrylic liquid, clear acrylic powder, nail glue, a sculpting brush, a file, and a manicure stick. The tips can be filed to your preferred length and shape, which makes this a useful starting point for a straight square edge.
For December, the natural tips leave your color choices open. You could finish the set in red, make just the tips green, or keep the base simple and add a glitter accent. Settle on a manageable length before planning the artwork; a very deep French tip can overwhelm a short nail, while a thin band leaves more of the base visible.
The tradeoff is the learning curve. This is a liquid-and-powder acrylic system, so shaping and application take more practice than attaching a finished press-on. Follow the kit instructions, including preparation, ventilation, and removal, and leave time to practice before a party. It makes the most sense for someone who wants the building process as well as the finished look.
2. KISS PowerFlex Brush-On Nail Glue

For a brush applicator when attaching tips
A glue bottle with a brush is worth considering if you find a small nozzle awkward to control. This PowerFlex version is the 5-gram brush-on nail glue, designed for artificial nails, tips, and wraps. The applicator spreads adhesive across the intended contact area, giving you a different handling option from the glue included in the KISS sculpture kit.
Its place in a square acrylic routine is at the tip-attachment stage, before the acrylic and decorative color. Have your correctly sized tips laid out first so you can concentrate on placement. A square design looks more deliberate when the tips sit straight; glitter and dark polish draw attention to the outline, so the foundation deserves as much thought as the artwork.
This is an optional refill or applicator preference, especially if you already own glue that works with your tip system. It does not replace acrylic liquid and powder, and it is not a decorative top coat. Use only as directed on the package and keep the bottle tightly closed between uses. Choose it for the brush format rather than treating an extra adhesive as an essential purchase.
3. OPI Nail Lacquer in Big Apple Red

For a bright red square French or full-color set
Big Apple Red is the clear starting point for someone who wants a bold holiday color without adding another texture. This is OPI’s regular Nail Lacquer in the bright red crème shade, in a 0.5-fluid-ounce bottle. The smooth color gives a straight square edge a strong outline, whether you use it across the whole nail or reserve it for a French tip.
Try a slim red band on a longer neutral-looking acrylic base, then repeat the color on one full accent nail. For a more graphic look, use the striping brushes later in this list to add a fine white line above the red. Keeping the width of that band consistent helps a square manicure look intentional from nail to nail.
OPI recommends two thin color coats within its lacquer routine. Plan for drying time before adding detailed lines or a glitter topper. The tradeoff is the finish: this is a solid red, so the bottle supplies color rather than sparkle. That makes it a versatile base, but you will need a separate decorative product if your goal is visible glitter.
4. OPI Nail Lacquer in Stay Off the Lawn!!

For deep evergreen color with room for metallic accents
Stay Off the Lawn!! suits the December manicure that starts with a dark green sweater rather than a bright red ornament. OPI describes this Nail Lacquer shade as a deep, lush green; the selected 0.5-fluid-ounce variant has a crème finish. It gives square acrylic nails a saturated backdrop that can carry a small amount of gold or silver decoration.
A useful styling approach is to keep most nails green and add a little Summit Of Style near the straight edge of one or two nails. Another option is a green French tip outlined with a very narrow copper stripe. Both designs let the square shape do some of the work, so you can stop before every nail has a different motif.
The main tradeoff is that a dark base makes uneven borders more noticeable. Choose a length you can paint comfortably and give each layer time before starting the next detail. This is regular lacquer rather than the GelColor version, so check the product family when shopping. Pick it when you want evergreen color that can also work after the holiday decorations come down.
5. OPI Nail Lacquer in Alpine Snow

For crisp white French tips and high-contrast details
Alpine Snow is the white to consider when your square set needs a clear, graphic contrast. The selected item is OPI’s regular Nail Lacquer in the opaque white crème shade, in a 0.5-fluid-ounce bottle. It can serve as a full color, a French-tip shade, or the white detail in a red-and-green December design.
On a square acrylic shape, a straight white edge feels particularly clean. You can keep the band narrow for a shorter set, or make it deeper on a longer nail and add a fine red stripe along the border. With a dotting tool, the same white polish can become a scattering of small snow-like dots over a green or black base.
The practical tradeoff is precision: white lines and bands make differences in thickness easy to see. OPI’s standard lacquer brush is useful for covering the nail, while a separate striping brush gives you another option for smaller details. Work in thin layers and let the color settle before adding decoration. Choose this for crisp contrast; a sheer, milky white would create a softer effect.
6. OPI Nail Lacquer in Black Onyx

For dramatic square tips and silver-glitter contrast
Black Onyx brings the evening-out side of December into the mix. This 0.5-fluid-ounce OPI Nail Lacquer is an opaque black crème, making it a useful background for metallic lines and silver glitter. If bright Christmas colors are not your usual style, black square nails still leave plenty of room for a festive detail.
Try black across most of the set with Set In Stones concentrated on the outer edge of one accent nail. Or use black for a square French tip, then add a very thin copper line where the tip meets the base. Limiting the reflective finish to one area makes the contrast easy to read and keeps the design connected to the shape.
The tradeoff is that dark polish asks for careful borders and a tidy finish. Leave enough time for the color layers before adding your metallic accent so you do not have to keep reworking the same area. This shade supplies a smooth solid base; the sparkle comes from whichever topper you pair with it. It is a good choice for a manicure that needs to carry into New Year’s plans.
7. OPI Nail Lacquer in I’m Not Really a Waitress

For a dark red pearl finish with less layering
If you want your December color to have its own dimension, I’m Not Really a Waitress is worth a look. The selected OPI Nail Lacquer is a dark red pearl shade in a 0.5-fluid-ounce bottle. It gives you a different effect from the bright red crème of Big Apple Red: richer color with a pearly reflection built into the polish.
For square acrylic nails, an all-over application lets that finish take the lead. You could also use it for a deep French tip and keep the rest of the design restrained. A tiny white dot pattern on one accent nail is enough to make the look more playful without covering the red. It is an appealing option when you would rather spend your time on an even color application than on several decorative layers.
The tradeoff is the kind of shine. Pearl gives a different look from chunky glitter, so choose Set In Stones or Summit Of Style if you want obvious reflective pieces. For this shade, keep your brushwork consistent and finish with the top coat appropriate to your lacquer routine. It fits a holiday dinner manicure that can stand on color alone.
8. essie Set In Stones

For chunky silver glitter over your December base color
Set In Stones is the silver-glitter option for the manicure that needs a little party lighting. The selected essie bottle is 0.46 fluid ounces, with silver glitter that can be layered over another color. Its clear-looking base and visible glitter pieces make it useful for accents where you still want the underlying red, green, or black to show.
On square acrylic nails, try placing the sparkle mainly toward the free edge, with a lighter scattering farther down the nail. The straight tip gives that arrangement a clear boundary. For an easier version, coat just one accent nail and leave the rest in Black Onyx or Stay Off the Lawn!!. You get a coordinated set without painting a separate motif on every finger.
The tradeoff is coverage control: a glitter topper creates a scattered effect, and a thin layer will not look like a solid metallic polish. Check the balance on each nail before adding more. Start with a small amount and build only where the design needs it, allowing time between layers. Choose this for silver sparkle rather than a smooth chrome-style surface.
9. essie Summit Of Style

For warm gold glitter on red, green, or neutral-looking acrylics
Summit Of Style is the warmer glitter choice in this edit. The selected 0.46-fluid-ounce essie polish contains chunky gold glitter with a shimmer finish; essie’s own page describes its color family as glitter bronze. That warm metallic direction pairs naturally with deep green and dark red when you want your December nails to echo gold jewelry or ribbon.
For a square set, use a sparse gold accent near the tip of a green nail and repeat it on one red nail. Keeping the placement similar ties the colors together. If you prefer an understated base, a little glitter at one corner can emphasize the square outline without covering the entire nail. A clear base underneath also leaves more negative space in the design.
Like the silver topper, this is about visible glitter pieces rather than a smooth, even sheet of metal. The tradeoff is the extra layering needed if you want a denser effect. Decide whether you want a scattering or a statement before you start. It is most useful for someone who already has a favorite December base color and wants to add a warm festive finish.
10. essie Penny Talk

For a copper metallic tip without loose glitter
Penny Talk is a useful change of pace if your December mood board has more copper and cream than red and green. The selected 0.46-fluid-ounce essie polish is a copper metallic shade. Its reflective color gives you a different decorating option from the two chunky glitter toppers, especially when you want a defined stripe or a solid accent nail.
A copper square French tip can look festive alongside a neutral-looking acrylic base. You can also use a striping brush to draw a narrow copper border across a dark green or black tip. Repeating one metallic line across the set gives the manicure a clear pattern, and it leaves the larger areas of color easy to appreciate.
The tradeoff is surface definition. Reflective polish can draw attention to uneven application, so give your prepared acrylic surface and brush strokes some care. Use the normal essie lacquer routine and avoid repeatedly dragging through a layer that has started to dry. Choose Penny Talk for a metallic color accent; choose Summit Of Style if you would rather see separate gold glitter pieces. Both can be festive, but their finished looks are quite different.
11. Seche Vite Dry Fast Top Coat

For a glossy final layer over regular nail lacquer
A glossy top coat can be the finishing product that pulls a December design together. Seche Vite Dry Fast Top Coat is a clear lacquer top coat in a 0.5-fluid-ounce bottle. The manufacturer describes a formula that penetrates the polish layers to form a protective finish, and the brand’s application directions call for using it over wet nail polish.
That timing matters when you are planning a square acrylic manicure with several decorative steps. Finish the artwork according to your chosen products’ directions, then follow Seche’s instructions for the final coat. A glossy surface is a natural partner for red crème, dark green, and glitter when you want the whole set to share one reflective finish.
The tradeoff is that a quick-drying top coat still has its own application method; it is not a reason to rush every layer underneath. Read the directions and caution label, and use it in the appropriate working conditions. This is a regular lacquer product rather than a gel top coat that requires a lamp. Choose it when high gloss fits the design you have already built.
12. OPI Matte Top Coat

For a softer-looking finish on bold December colors
A matte finish gives the same December color a different personality. This is OPI’s regular Matte Top Coat in the 0.5-fluid-ounce bottle, made to seal lacquer color with a matte finish. It is useful for someone who likes dark square nails but would rather have a softer surface than an all-over glossy shine.
Try it over Stay Off the Lawn!! for a velvety-looking green set, or over Black Onyx for a dramatic base. You can keep one glitter accent glossy by planning that nail’s finish separately. The contrast works especially well when the colors stay consistent: the change in finish becomes the detail, so you do not need a large collection of additional decorations.
The tradeoff is that matting a glitter area changes how its sparkle reads. If bright reflections are the main reason you chose a topper, consider leaving that accent with its intended glossy finish. Follow OPI’s application directions over the color coats. Check that the bottle says Matte Top Coat; OPI’s professional gel top coats are different products with different application requirements. This one earns its place through the finish it creates.
13. Winstonia Amazing Trio Striping Brushes

For plaid, candy-cane lines, and narrow French-tip borders
A straight square tip is a good canvas for a simple line design. Winstonia’s Amazing Trio includes three striping brushes with synthetic nylon bristles, black acrylic handles, and three different bristle lengths. The brand describes them for elongated lines, color blocks, and marbling, making this a practical tool set for someone who wants to move beyond an all-over polish color.
Start with a single thin white stripe across a red tip, or add a fine copper border above a green French. A plaid accent is another December option: repeat a small number of horizontal and vertical lines on one nail. Practice the spacing on a spare tip first so you can see how much room the pattern needs at your chosen length.
The tradeoff is practice and cleanup. The brushes supply a finer tool, but they do not make every line automatic, and they need cleaning after use. Winstonia lists the acrylic handles as tolerant of acetone and polish remover; follow the brand’s care directions for the whole brush. Choose this set if line work is part of your plan, and begin with one accent rather than a full hand of plaid.
14. Winstonia Dotter Candy Dotting Tools

For polka dots, snow-like accents, and small circular details
Dotter Candy gives you a decorating option that starts with dots instead of brush lines. This Winstonia set contains five double-ended tools with ten metal tips in different sizes. The candy-colored wooden handles make the pieces easy to distinguish, while the stainless steel ball ends are intended for dotted patterns and other nail-art details.
For square acrylic nails, try a few small white dots over dark green, or create a red-and-white polka-dot accent alongside a plain red set. A larger dot near the tip with smaller dots farther back can make a simple pattern feel more considered. Test your chosen tip and polish together on a spare nail before repeating the design across the manicure.
The tradeoff is that dot size also depends on how much polish is on the tool and how you place it. Having ten tip sizes gives you options, but it still helps to work slowly and check the spacing. Clean the metal ends between colors so your white details stay clear. This set suits someone who wants playful December accents without drawing several tiny lines or committing to a complicated character design.
15. CND SolarOil Nail & Cuticle Care

For the care step around a finished manicure
The last product is for the skin and nails around the finished design. CND SolarOil combines jojoba, rice bran, and sweet almond oils with vitamin E to condition skin and nails. The selected variant is the original 0.25-fluid-ounce bottle, with a brush applicator; the product also comes in other sizes and scents, so check the selected option before ordering.
For a December square set, this belongs in your care routine after the manicure is finished, rather than on the nail surface before adhesive or color application. Keep the small bottle somewhere you will remember it and follow the label’s directions. It can be a useful final touch when you have spent time shaping a clean edge and painting careful details.
The tradeoff is straightforward: oil does not replace proper tip attachment, acrylic preparation, or a top coat. Choose it for conditioning, and review the ingredient list if you avoid particular oils or fragrance. There is no need to buy the largest bottle for an occasional manicure routine. The compact size is a reasonable starting point if you want to add one dedicated care product to your kit.
Choose a small combination that makes sense
For a classic red set, start with Big Apple Red and your preferred glossy finish. For evergreen sparkle, pair Stay Off the Lawn!! with one gold-glitter accent. For a darker party look, combine Black Onyx with Set In Stones. These are styling combinations, so keep the application order and compatibility directions for the products you use.
If you already have a professionally applied square acrylic set, focus on the color, decorating, and finishing choices that suit it. The KISS sculpture kit is for building acrylics, and the glue is for tip attachment. Pick the steps you actually need before adding more products to your cart.
Let the square shape guide the design
Keep the width of a French band consistent from nail to nail, and leave room for the base color to show. Shorter square nails can carry a narrow metallic border or one glitter accent; longer nails offer more room for plaid and wider tips. Practice a new detail on a spare tip before painting the full set.
Square acrylic nail shopping questions
Are all 15 products acrylic-building products?
They serve different stages of a square acrylic manicure. The KISS kit contains the liquid-and-powder building system; the other choices cover tip attachment, regular lacquer color, decoration, finishing, and care. You can select individual items to fill gaps in your existing routine.
Do these polish choices need a UV or LED lamp?
The color polishes and top coats selected here are regular lacquer products. Shop the exact Nail Lacquer, essie original, Seche Vite, and OPI Matte variants linked in this article. GelColor and other gel versions have different application requirements; follow the product label for the version you buy.
Which glitter should I choose for a dark square set?
Set In Stones gives a silver direction, while Summit Of Style gives a warmer gold-bronze direction. Either can become one accent over a dark base. Choose based on the metallic color you want, then keep the rest of the set simple enough for that accent to show.
How can I keep the look bold without making every nail busy?
Choose one main color and repeat it across most of the set. Add one type of detail—such as a glitter edge, a copper border, or a dotted accent—and repeat its placement deliberately. A consistent square outline helps those small details look connected.
Choose your December detail
Start with the square shape and one color you are excited to wear. Add the glitter, line work, or finish that fits your December plans, and stop when the design feels complete. A red French, an evergreen glitter accent, or a dark glossy set can all make the most of that clean, straight tip.
As an Amazon Associate I earn from qualifying purchases.