17 Winter Nail Art Ideas for Anyone Who Wants a Little Snow Without Going Outside


Snowfall dots on dark polish are a good place to start if you want winter nail art without a complicated drawing. For something more detailed, a snowy mountain, a frosted window pattern, or one tiny cabin gives you a whole winter scene on an accent nail.
These 17 ideas range from short, rounded nails to longer, icicle-inspired tips. Choose the part you like—the palette, the placement, or the little illustration—then adjust the amount of artwork to the length you actually wear.
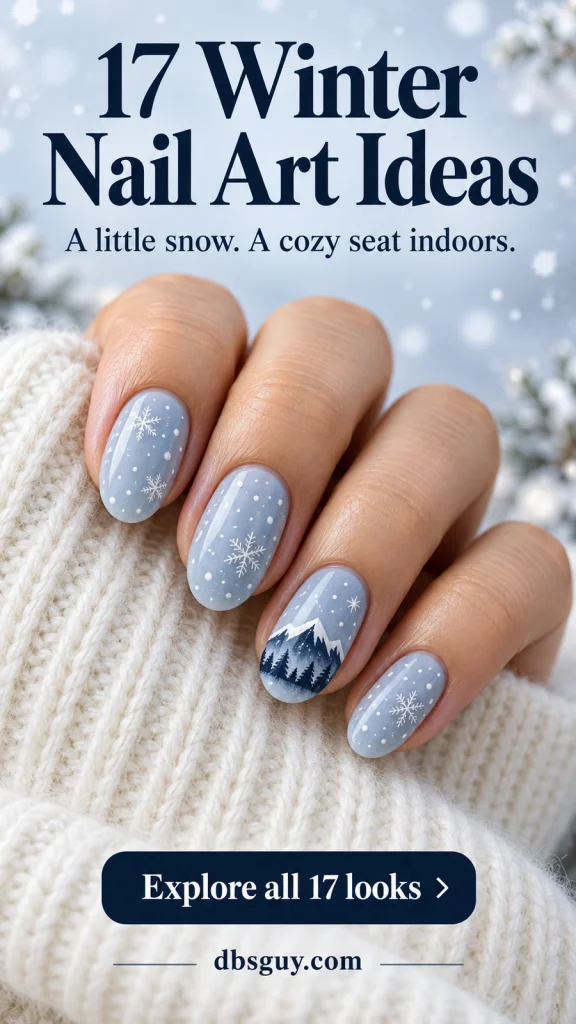
The images are AI-generated manicure concepts, not photographs of completed salon work. Use them as references for color and placement; your nail artist can adapt the detail and finish to your nails.
Find Your Snowy Starting Point
- For a first home attempt: try the snowfall dots in idea 1 or the soft snowbank tips in idea 2.
- For a small nail bed: consider the simple checkerboard accent in idea 12 or the frosted half-moons in idea 14.
- For a little illustrated scene: save the mountains in idea 6, the snow globe in idea 9, or the cabin in idea 15.
- For an icy statement: compare the pointed tips in idea 8 with the aurora colors in idea 17.
Keeping your nails short? Our short December nail ideas offer more ways to place small details without crowding the nail.
1. Espresso Nails With Tiny Falling Snow
White dots against deep espresso look like snow falling after dark, with a warmer feel than the usual blue-and-silver manicure. The short, rounded shape leaves the brown polish as the main color; the dots supply all the seasonal detail.
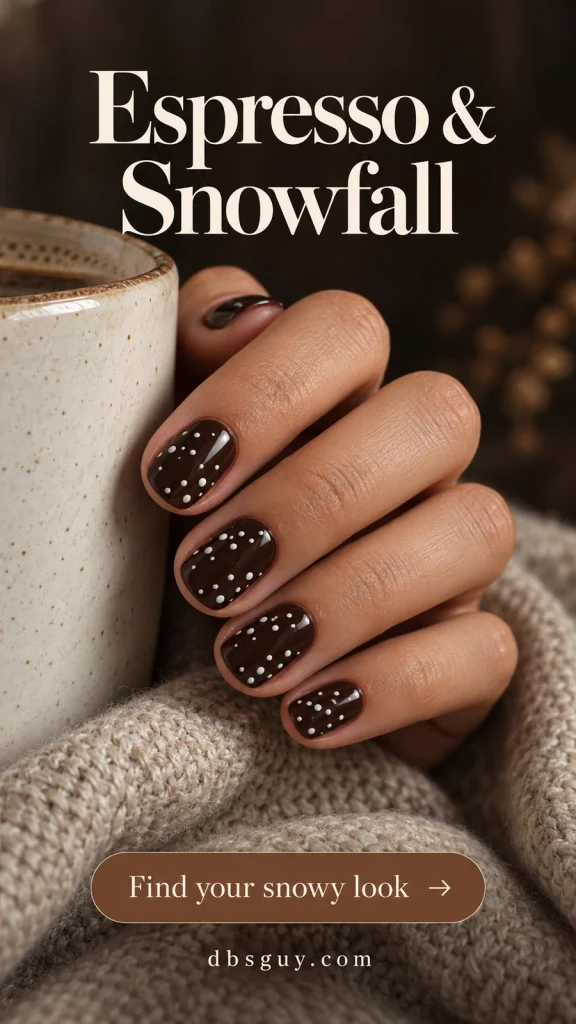
For a regular-polish version, let the brown base dry, then use a small dotting tool to place a few white dots in different sizes. Leave uneven gaps instead of arranging them in rows. Add fewer dots near the base and a loose diagonal cluster toward the tip if you want a sense of movement. Finish with a compatible top coat once the artwork is dry enough not to drag.
2. Dusty Blue Nails With Snowbank Tips
This is a French manicure with a softer edge: a shallow white bank of snow sits across each dusty blue tip. The uneven scallops make the difference. A perfectly smooth smile line would give you a classic French instead.
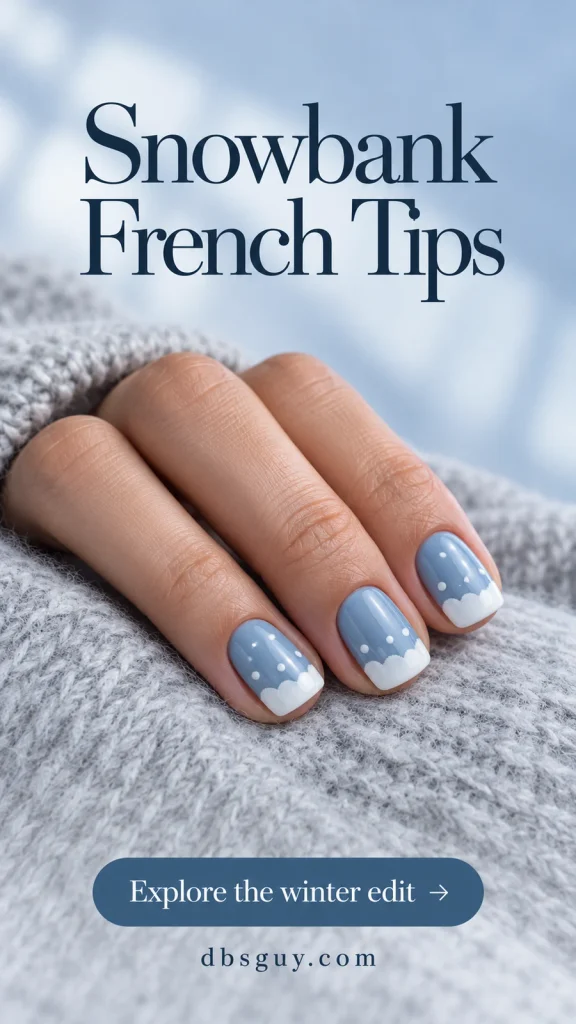
Lightly stipple white along the free edge with a small nail-art sponge or detail brush, keeping the band low enough to leave plenty of blue visible. Add a few separate dots above it. On very short nails, make one low drift rather than several tall mounds; the blue space is what keeps the snowbank recognizable.
3. Mauve Nails With Cropped Silver Snowflakes
Muted mauve takes snowy nail art in a less expected direction. Fine silver snowflakes on two nails add a metallic glint, while the plain nails give your eye a break from the branches.

Ask for an off-center flake that reaches the side edge, rather than a large symbol centered on every finger. A partly cropped motif can use the side of the nail without crowding the middle. If you are choosing decals, compare their width with your nail first and keep the material entirely on the nail plate. Skip extra glitter so the fine silver lines remain the feature.
If the flakes are your favorite detail, compare more placements in these delicate snowflake nail designs.
4. Sheer Nails With Windblown Snow Ribbons
A curved white ribbon and a few dots suggest snow blowing across a window. The translucent blush base keeps this design light, especially if you like your natural nail tone to show through.
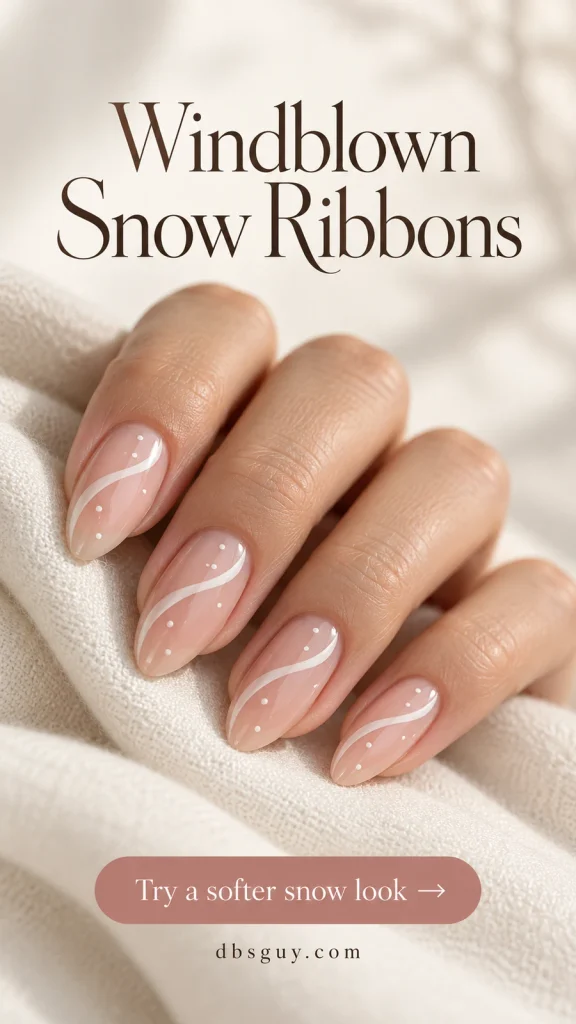
Request one narrow, flowing curve per nail with the curves pointing in a similar direction across the hand. They do not need identical bends. On a shorter oval, shorten the curve and use just a couple of dots; adding a second ribbon would cover the sheer space that makes this version feel airy.
5. Lavender Nails With Window-Frost Branches
These lavender nails borrow their pattern from frost spreading along a window. The white marks branch like little ferns, rather than meeting at the center of a snowflake.
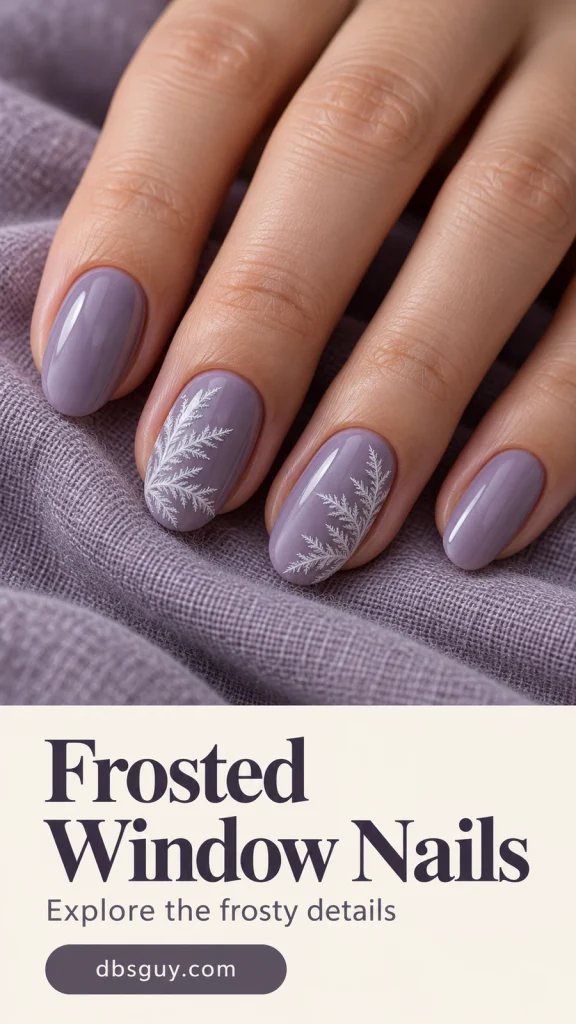
Keep the frost on two accent nails and let it grow inward from one side. Show your artist the fine branching pattern and ask for visible lavender between the filaments. On a small nail, one main stem with a few short offshoots will communicate the idea more clearly than a dense white patch. This is a detail-brush or decal option, so it is a better salon reference than a first freehand project.
6. A Snowy Mountain Horizon on Slate Blue
A dark mountain ridge with white snowcaps gives one slate-blue nail a miniature landscape. The surrounding nails carry only a few dots, leaving the peaks as the part you notice first.
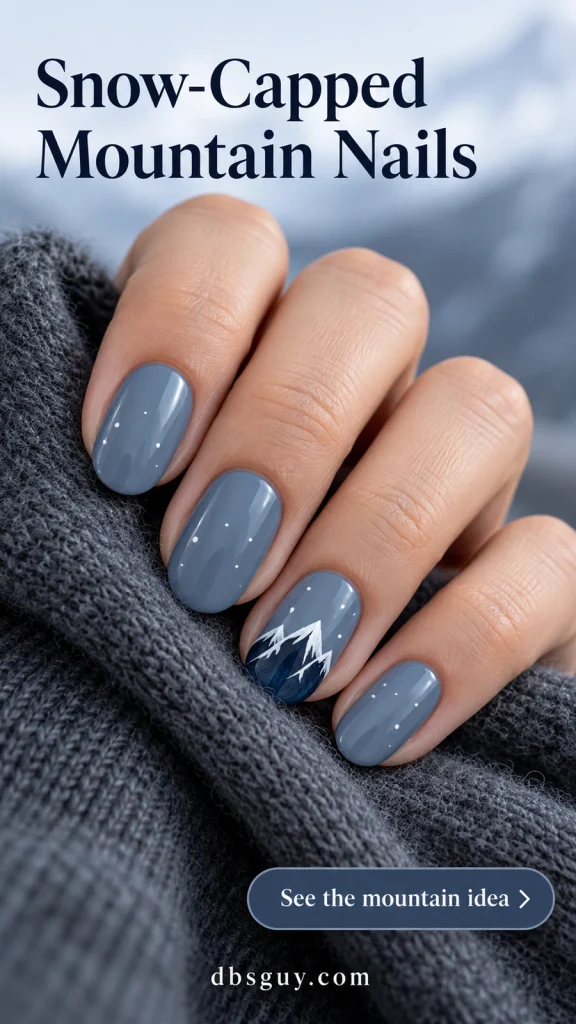
Ask for a compact ridge near the tip, a navy mountain shape, and white caps that follow the peaks. The blue area above should stay mostly open. If your nails are short, choose two simple peaks and leave out shading or trees. A few strong shapes will survive the smaller scale better than a whole mountain range.
7. Snow-Dusted Evergreens on Cream
Cream accent nails make tiny dark green trees easy to see. A few white touches resting on the boughs and a low drift at the tip turn the trees into a snowy forest, while the solid green nails tie the set together.

Keep each tree narrow, with gaps between the branch layers. Ask for small white marks on the upper edges of the boughs instead of covering the silhouette. The reference has a lightly textured-looking snow edge; a flat painted version can keep the same arrangement. Without ornaments, bows, or red accents, this feels like a winter walk rather than a specifically Christmas manicure.
8. Powder Blue Nails With Icicle Tips
Long, pointed tips give this icy design room for silver-white streaks that taper into the pale blue base. Clear space between the streaks helps them read as icicles, and the fine sparkle catches the light along the edge.
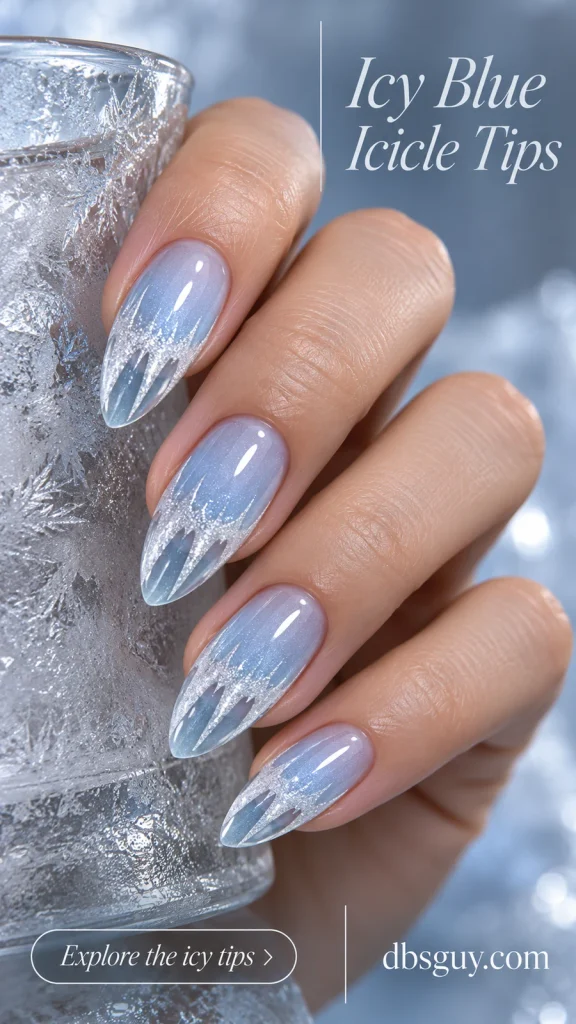
Bring this reference for the placement and translucency, then choose a length you are comfortable wearing. Ask for tapered painted points beneath a frosted tip, rather than attached icicle charms. A shorter oval can carry two tiny silver-white points at the edge, but it will have a subtler effect than the long, clear-tipped concept shown here.
9. One Little Snow Globe on Midnight Blue
One snow-globe accent gives midnight blue nails a small, storybook detail. A pale outline, a white snowman, and a little stand are enough to establish the globe; the dotted surrounding nails echo the snow inside.

This is worth discussing with your nail artist before the appointment because the outline and character need separate detail work. Keep the snowman simple and leave dark blue space around the globe. For a narrow nail, use a decal sized to fit inside the sidewalls or reduce the scene to a globe outline with snow dots and a low white bank.
10. Taupe Knit-Inspired Nails With Snowy Stitches
Ivory stitch marks over warm taupe make a sweater-inspired manicure, with white dots adding the snowy part. The pattern is painted flat, so you can get the knit reference without choosing a sculpted cable design.
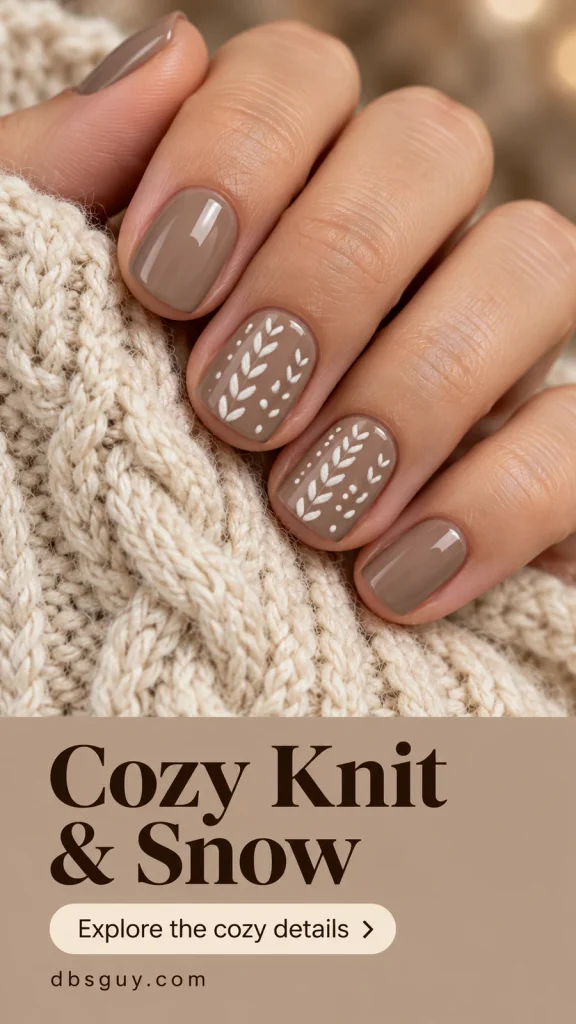
Use two accent nails for the stitches and keep the rest taupe. Ask for short paired diagonal marks arranged in columns, with dots in the open spaces beside them. The marks should stay separate instead of joining into a solid white stripe. If you prefer an even quieter version, keep one stitch column on each accent and leave the snow dots off the plain nails.
For more sweater patterns and reflective finishes, browse our winter nail designs with snowflakes, chrome, and cozy knits.
11. Snowy Birch Branches on Soft Gray
A white birch trunk, a few charcoal bark marks, and snow resting on fine branches make a restrained woodland design. Soft gray keeps the scene muted, and the off-center trunks leave room for the branches.
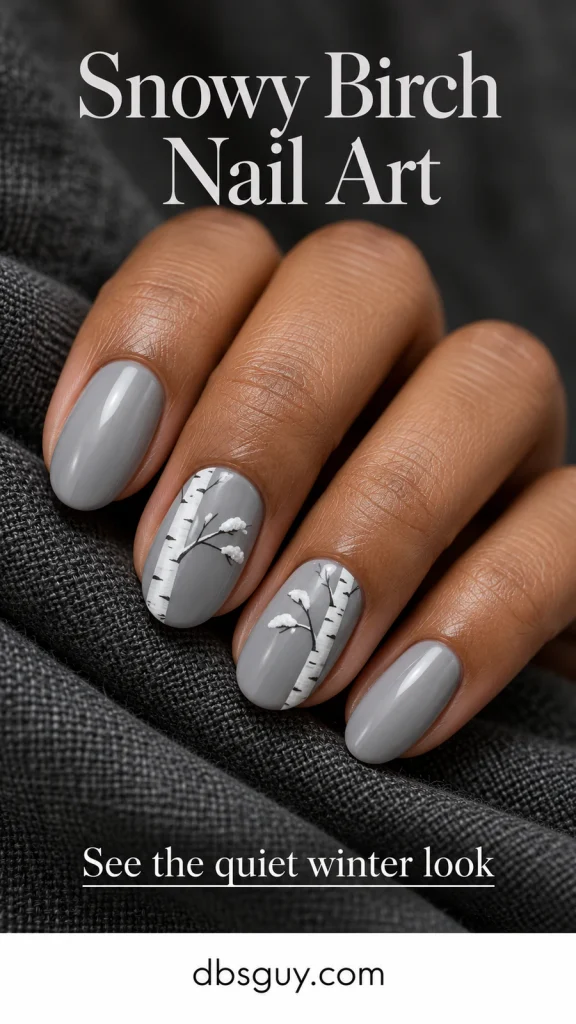
Choose two accent nails and ask for a narrow trunk entering from one side. Keep the bark marks short and irregular. The concept shows dimensional-looking snow on the branches; if you want a smooth surface, request small flat white dabs in those positions instead. On short nails, one trunk and one branch can replace the taller scene without losing the birch reference.
12. A Snowy Checkerboard Accent
If tiny landscapes are not your style, a charcoal-and-ivory checkerboard gives snowy nails a graphic direction. White dots in the dark squares connect the accent with the snowfall on the plain charcoal nails.

Keep the grid to one nail so the manicure does not become visually busy. The reference uses two columns and three rows, a useful starting point for a short nail. Ask for distinct, even squares and one dot in each dark square. At home, a small nail-art sticker may give a tidier grid than repeatedly repainting lines over a wet base.
13. A Blush Heart Peeking Through the Snow
A small blush heart appears inside a snowy white patch at the tip of one nail. Keeping the heart close to the base color makes this softer than a red-and-white holiday design.
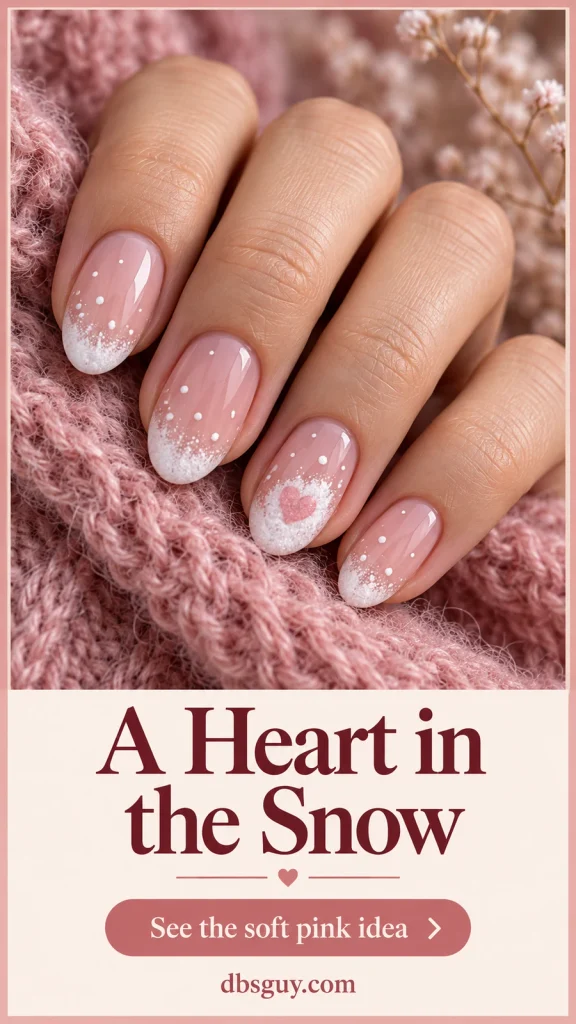
Ask for a stippled white tip on the surrounding nails and a little more white around the heart on the accent. The heart needs a clean outline to remain visible within the snowy patch. A simple approach is to paint the snow first, let it dry, then add a pink heart on top using two small dots joined into a point. Use a slightly deeper pink if your sheer base is very pale.
14. Pale Mint Nails With Frosted Half-Moons
Pale mint polish with white frost near the base moves the winter detail away from the tips. A translucent-looking half-moon and its fine white border make this one feel particularly neat on short squoval nails.

Ask for a small sheer half-moon at the nail base, with a stippled white curve where it meets the mint. Keep the free edge plain and leave a clean gap at the skin. The white should look like tiny frost specks, not a thick continuous outline. For a simpler home version, keep the whole nail mint and add only a fine dotted crescent just inside the base.
15. A Tiny Snow-Covered Cabin Accent
A tiny cabin with one glowing window gives beige nails a cozy focal point. The white roof and snowbank make it a winter scene; the plain beige base keeps the little terracotta house easy to spot.
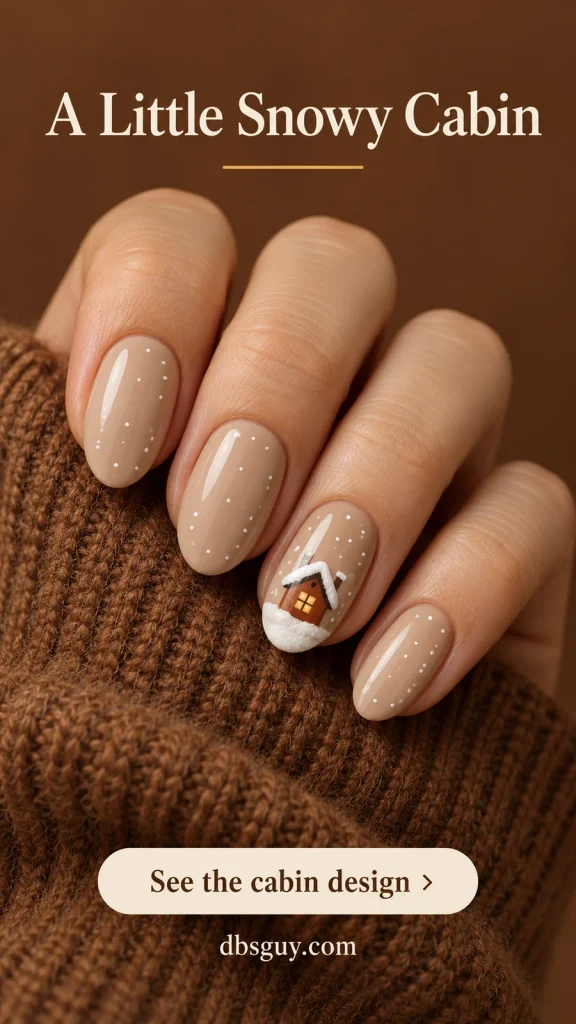
Save the cabin for one accent nail and use dots on the others. Ask your artist to prioritize the triangular roof, simple walls, and one warm yellow window. The concept has textured-looking snow, which can be replaced with flat painted white if that is your preference. On a shorter nail, remove the window divisions and keep one golden square.
16. A Polar Bear Peeking Over a Snowdrift
A polar bear peeking over a curved snowdrift adds a playful face to a dusty blue manicure. Two round ears, dot eyes, and a dark nose do most of the work; there is no need to paint a whole animal.
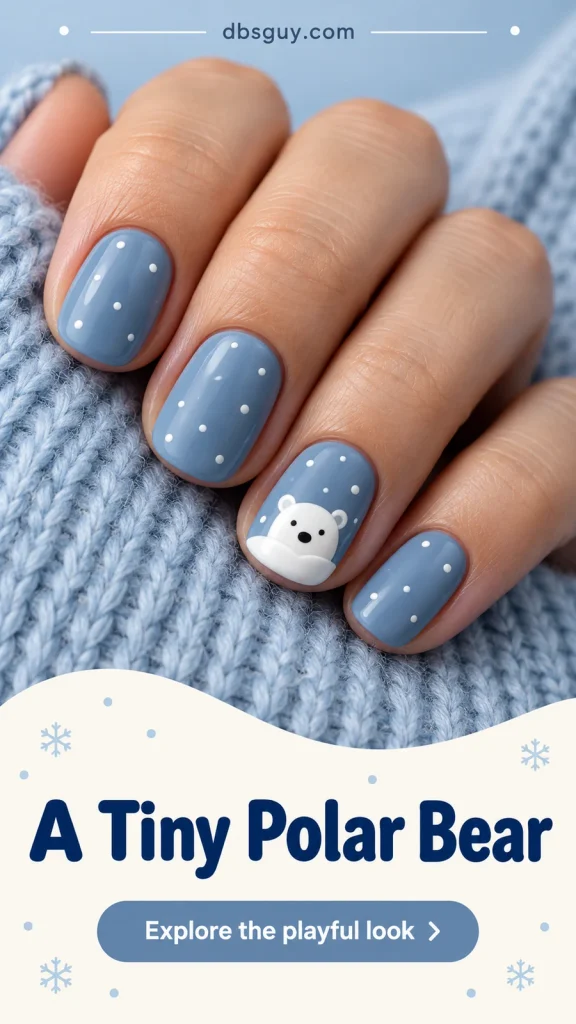
Keep the face on one nail and repeat only the snowfall dots elsewhere. Ask for enough blue above the bear to show the ears clearly. The concept has a softly dimensional appearance; a flat painted bear or small decal is another way to use the design. On a very short nail, make the snowbank shallow so the face has space above it.
17. Aurora Colors Above a Snowy Horizon
Mint and violet glow across a midnight blue base like a tiny aurora, with a white snowy horizon near the tips. This is the most color-rich option in the group, especially if you enjoy a manicure that rewards a closer look.

Ask for softly blended bands with dark blue still visible between them, then a fine stippled horizon and a few small white dots. An artist can interpret the glow with compatible shimmer colors; it does not have to be a magnetic effect. For a calmer set, keep the aurora on two nails and use plain midnight blue on the rest.
Make the Reference Work for Your Nails
Choose your comfortable length before you choose the scene. On short nails, keep one main shape: a low drift, two peaks, one tree, or a bear’s face. Removing background details usually helps more than shrinking every detail until it is difficult to see.
For home nail art, start with regular polish, opaque white, a small dotting tool, a fine brush, and a compatible top coat. Let each painted layer dry according to its directions before adding the next. A decal can replace the fine illustration; size it to fit within the nail, away from the skin.
Tell your artist which part of the picture you want to keep: the color, the outline, the snow placement, or the surface texture. For example: “Short slate-blue nails, two navy mountain peaks with white caps on one accent, and a few snow dots elsewhere.” That gives a clearer plan than asking for winter nails alone.
You do not need gel to wear a snowy design. If you choose it, the American Academy of Dermatology’s gel manicure guidance recommends protecting your hands with broad-spectrum, water-resistant SPF 30 or higher before curing, or using dark, opaque gloves with the fingertips removed. It also advises against picking gel polish off and recommends moisturizing nails and cuticles between manicures.
Winter Nail Art Questions
Which winter nail art is easiest to try at home?
The snowfall dots in idea 1 are the simplest starting point here because they do not need straight lines or matching shapes. Practice a few dots on a spare nail tip or another disposable surface first. Change how much polish is on the tool to make smaller and larger dots, then keep the nail pattern sparse.
Can I wear snowy nail art after Christmas?
Yes. Snowdrifts, mountains, frost patterns, and snowfall dots do not need holiday symbols. Choose blue, gray, brown, mauve, or mint and leave out ornaments and candy-cane details if you want a manicure that feels at home in January or February.
How do I stop white snow details from disappearing on pale nails?
Give the white artwork a little more contrast. Use opaque white over dusty blue or lavender, or put a silver flake over mauve. On a very pale base, choose a simple outline or dot pattern with visible gaps rather than many fine branches.
Should every nail have the same winter design?
Only if you enjoy that look. For a detailed scene, one accent per hand is a useful starting point. Repeat the base color and a few dots elsewhere. If you want several patterns, keep the same small palette across the set so they still look connected.