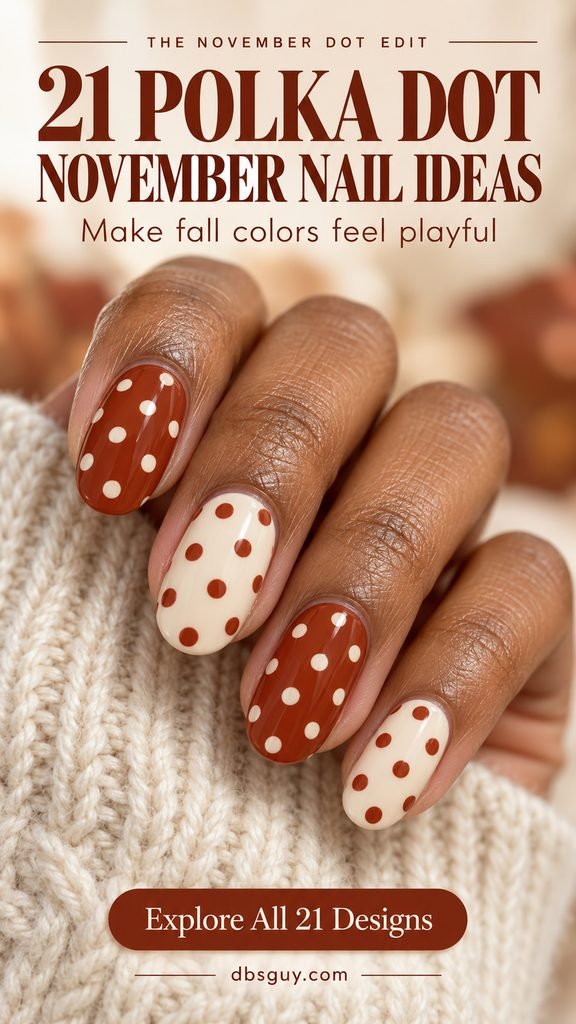
Some November manicures call for a dark, glossy color. Others need one small detail that makes you look down at your hands twice. Polka dots can do both: a few cream circles soften espresso polish, while tiny rust dots make an ivory set feel ready for sweater weather.
If a dotted manicure brought you here from Pinterest, you’ll find that look—and plenty of different ways to wear the idea—below. These 21 polka dot November nail ideas change the pattern as well as the palette, with options for short nails, longer shapes, quiet neutrals, and bolder color combinations.
Each look includes its own close-up concept image, practical styling advice, and a salon note to help you explain the detail you love.
Choose Your Dot Pattern Before Your Color
Start with the amount of pattern you want to see. Tiny dots leave more of the base color visible, while oversized circles make a bolder statement. A single accent nail is a gentle way to try the idea; borders, curved trails, and geometric rows bring more structure.
For a cozy November palette, look at cream, cinnamon, rust, and toffee. Navy, charcoal, teal, and muted lilac offer cooler options. Choose the pattern first, then adjust the length and colors to suit the nails you actually wear.
1. Cream Knits and Cinnamon Micro Dots

This is the cozy starting point: warm ivory nails covered in small, evenly spaced cinnamon dots. The pattern has the delicacy of a printed blouse, and the pale base keeps the whole set looking light. It’s an easy design to picture with oatmeal sweaters, tan boots, and a favorite pair of jeans.
Keep the dots small enough that you notice the ivory first and the pattern second. On a narrow nail, fewer columns will look cleaner than squeezing in the same number used on a wider one. A short shape with gently rounded corners suits the soft mood.
Salon note: Warm ivory base, tiny cinnamon dots in staggered rows, and a glossy finish. Please scale the number of dots to each nail.
2. Midnight Navy with Oversized Toffee Dots

Navy gives this manicure its depth; the large toffee dots bring the fun. Against the dark base, each circle reads clearly, so the design feels graphic even with only a few spots on a nail. Camel coats and dark denim are natural outfit partners.
The space between the dots matters here. Leave plenty of navy visible instead of filling every gap. Longer almond nails give the circles room to spread out, but a shorter version can work with fewer, slightly smaller dots. Keep the same generous spacing so it still has that bold, uncluttered look.
Salon note: Glossy midnight navy with a few large, warm toffee circles on each nail. Leave clear space between the dots.
3. Dusty Mauve with Gloss-on-Matte Dots
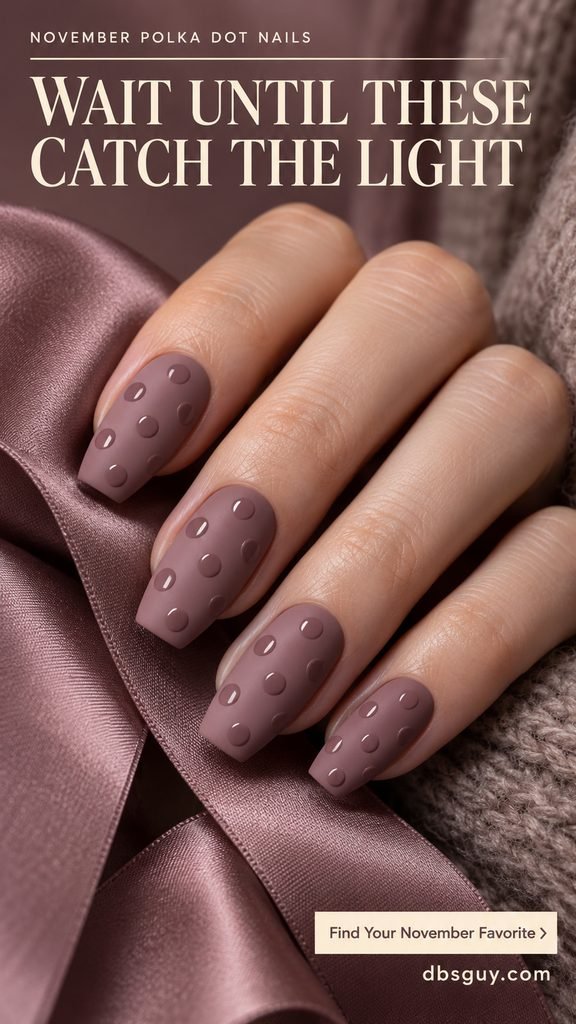
At first glance, this looks like a simple mauve manicure. Turn your hand toward the light and the shiny dots start to appear. Using one color lets the finish create the pattern, making this a good choice when you want nail art that reveals itself slowly.
A muted mauve keeps the look soft with gray sweaters, cream knits, or a plum scarf. Ask to see the finish combination on a sample nail if you’re unsure how subtle you want it. The important detail is preserving the contrast between the flat background and the reflective dots.
Salon note: A dusty mauve matte base with glossy dots in the same tone. Keep the surrounding nail matte so the dots remain visible.
4. Charcoal with One Powder-Blue Dot Accent

One dotted accent is enough to give a dark manicure a different personality. Here, charcoal stays on every nail, while powder-blue dots appear on the ring finger. The cool blue adds a small bright spot without changing the moody palette.
This is a useful option if you usually choose a solid color and want to try a little nail art. Keep the accent nail the same length and shape as the others so the pattern feels integrated. If you’re booking an appointment, show which finger you want decorated rather than leaving the placement to guesswork.
Salon note: Glossy charcoal on every nail, with small powder-blue dots on the ring finger only. Keep the other nails solid.
5. Rust and Cream, Reversed

Two colors can make a surprisingly lively set when you swap their roles. Some nails wear rust with cream dots; the others flip to cream with rust dots. The palette stays consistent, while the alternating backgrounds give your eye somewhere new to go.
Choose a rusty terracotta shade with enough depth to stand out against the cream. Keeping the circles roughly the same size ties the two versions together. This is a lovely pick when your November wardrobe is full of warm browns and ivory, and you want your manicure to echo those colors in a playful way.
Salon note: Alternate rust and cream bases, then reverse the dot color on each. Use one consistent dot size across the set.
6. Ochre with Espresso Ring Dots

These dots have open centers, giving the familiar pattern a lighter, more graphic feel. Espresso circles sit over a muted ochre base, and the color inside each ring matches the background. The result feels a little retro without needing any extra decoration.
Clean, rounded rings are the detail to focus on. If they become irregular or start touching, the pattern loses its crisp rhythm. A short square shape with softened corners provides a neat backdrop. Keep the ochre earthy and slightly muted if you want it to sit comfortably beside camel, brown, and denim.
Salon note: An ochre base with small, evenly spaced espresso outline circles. Keep the centers ochre and the ring edges round.
7. Chocolate and Blue Diagonal Dots
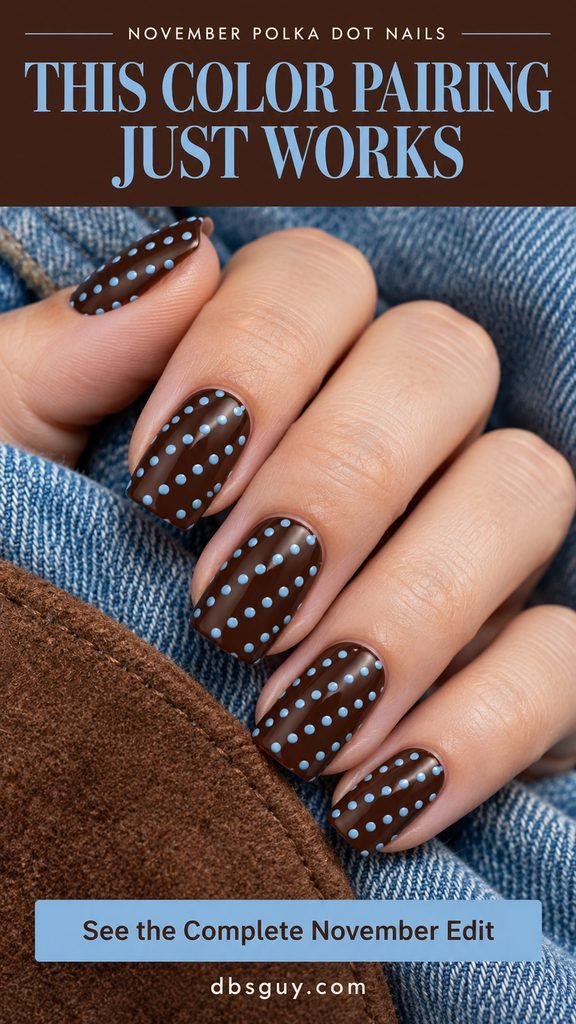
Icy blue makes chocolate brown feel fresh, especially when the dots line up on a diagonal. The arrangement has a tidy, almost fabric-like quality. You get a familiar fall base with a cool accent that stands out against it.
Ask for rows that continue in the same direction across the hand. A few partial dots near the edges can help the pattern look continuous rather than boxed into the center. This is a good one to save if you wear plenty of blue denim and want a brown manicure with a noticeable twist.
Salon note: Chocolate brown with evenly sized icy-blue dots in diagonal rows. Keep the row direction consistent from nail to nail.
8. Rose Taupe with a Dotted Frame

A dotted border gives each nail a little frame. The center stays rose taupe, and tiny cream dots follow the outline, including the sides and the curve near the cuticle. It’s a decorative detail with plenty of calm space inside it.
An almond shape makes the border look especially fluid, though the idea can follow other shapes too. The dots should sit inside the painted nail, with a small margin around them. For a softer effect, choose warm cream rather than a very bright white. The finished look pairs beautifully with blush, beige, and chocolate clothing.
Salon note: An opaque rose-taupe base with tiny cream dots tracing the full perimeter. Leave the center plain and keep the border inside the nail edges.
9. Teal with a Side-Swept Dot Trail

A curved trail gives these teal nails a sense of movement. The ivory dots sweep along one side and become smaller as they travel, leaving most of the rich base visible. It’s a different rhythm from an all-over polka-dot print.
The curve should feel relaxed, with enough space between dots to keep each one distinct. This is a lovely choice if you like dark green but want a blue-leaning shade. Wear it with cream knits or a tan coat to let the cool teal become the standout color.
Salon note: Deep petrol teal with one ivory dotted curve along the side of each nail. Taper the dots gradually and leave the center mostly plain.
10. Cream with a Falling Confetti Fade

Think of this as a small scatter of fall color. Rust, mustard, and teal dots gather near the base of each cream nail, then become more widely spaced toward the tip. The changing density gives the design its soft fade.
Round dots keep the look polished; irregular flecks would create a different effect. There’s no need to repeat an identical arrangement on every nail, but keep the heavier concentration in the same area. A short, rounded shape works well because the open space near the tips keeps the manicure from feeling crowded.
Salon note: Warm cream with small rust, mustard, and teal circles. Cluster them near the base, then gradually space them out toward the tips.
11. A Five-Shade Autumn Dot Set

Can’t settle on one fall color? Give each nail its own muted shade: cream, terracotta, sage, dusty blue, and mauve. Espresso dots are the detail that holds the palette together, so the set feels considered even with five different backgrounds.
Keep the colors similar in softness. One neon-bright nail would pull attention away from the balance of the others. Repeating the dot size also helps the manicure feel cohesive. Before the color goes on, line up the chosen polishes or ask for swatches together so you can see how the full hand will read.
Salon note: One muted fall shade per nail—cream, terracotta, sage, dusty blue, and mauve—with the same espresso dot pattern on all five.
12. Black and Ivory with Giant Cropped Circles

This is the statement set in the lineup. The ivory circles are so large that some disappear over the edges of the black nails. That cropping makes the pattern feel bold and deliberate, like a close-up of a graphic print.
Long coffin nails give the shapes room to breathe. Resist the urge to fill the remaining black areas with smaller dots; the oversized circles need that background around them. If you love simple black clothing and want your manicure to be the main accessory, this design has plenty of visual impact on its own.
Salon note: Glossy black with a few very large ivory circles, deliberately cropped at the nail edges. Leave generous areas of solid black.
13. Slate Blue with Tiny Pewter Dots

Slate blue and pewter make a cool, quiet pairing with a little evening shine. The base is smoky rather than bright, and the small metallic dots catch the light individually. It’s a useful middle ground when you want a reflective detail without covering the whole nail in shimmer.
Keep the dots flat and small so the surface still reads as a painted pattern. A short oval shape gives this set a soft outline. Gray wool, white shirts, and silver jewelry all echo the palette, making it easy to work into everyday outfits as well as dinner plans.
Salon note: A smoky slate-blue base with tiny painted pewter dots. Keep the metallic details flat, evenly spaced, and smaller than the main color areas.
14. Dusty Coral with Twin Dot Pairs
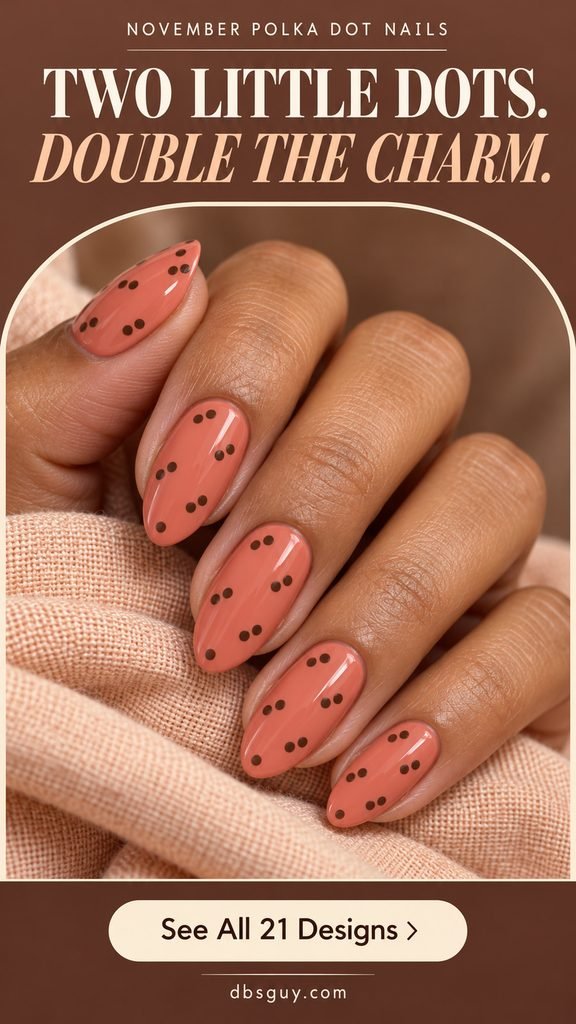
Pairing the dots changes the whole pattern. Each small cocoa circle has a neighbor, with a wider gap before the next pair. On dusty coral, the repeated duos feel cheerful while staying comfortably within a muted fall palette.
The spacing between pairs needs to be visibly wider than the space inside each pair. Otherwise, the design can read as ordinary rows of dots. Choose a softened coral with a brown or rosy undertone if you want the color to feel gentle beside sweaters, suede, and other textured November clothes.
Salon note: Dusty coral with repeating pairs of small cocoa dots. Keep each pair close together and leave a wider gap between the pairs.
15. Espresso with a Cream Dotted Center Stripe
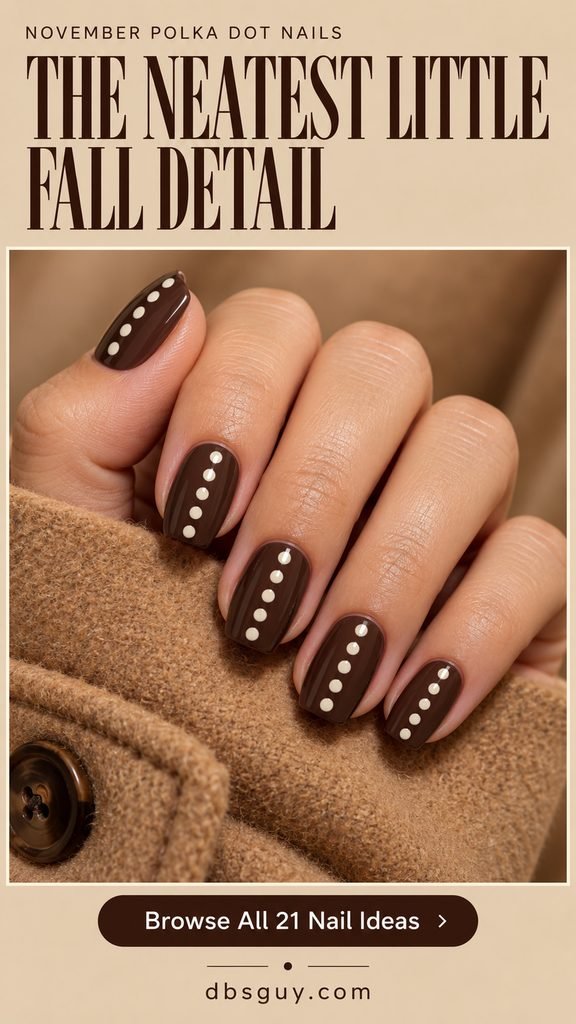
A single dotted column gives espresso polish a very neat focal point. The plain color on either side makes the cream dots feel intentional, and the repeated placement brings the whole hand together. It’s a strong option if you like order more than a scattered pattern.
Center the column on each nail rather than trying to align every dot across the entire hand. Different nail lengths may need different dot counts to keep the spacing comfortable. A short tapered-square shape suits the crisp layout, with enough width to leave a visible margin on both sides.
Salon note: Glossy espresso with one straight, centered column of ivory dots per nail. Adjust the dot count to the nail length while keeping the spacing even.
16. Sage and Clay Split-Panel Dots
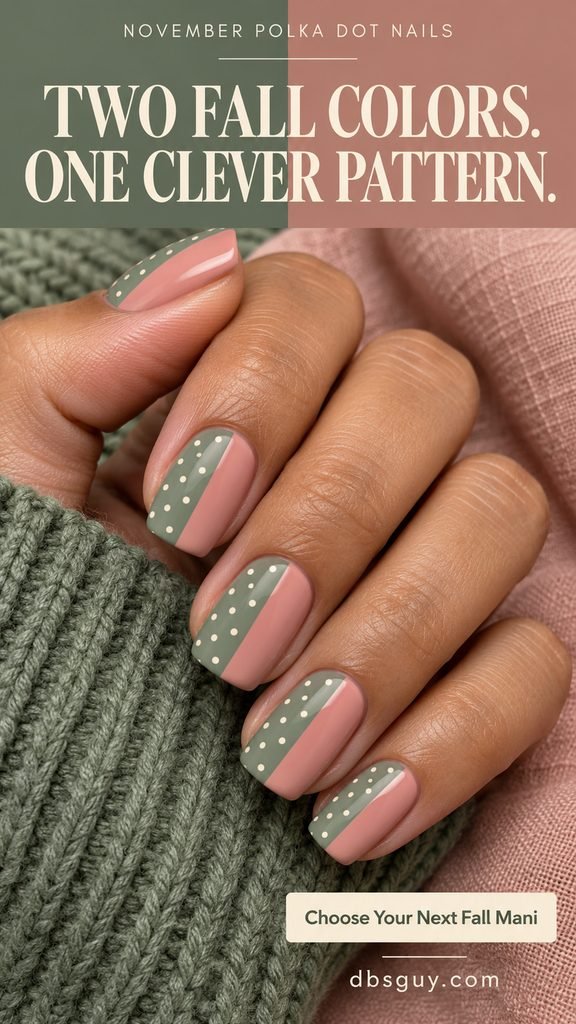
Each nail gets two blocks of color: sage on one side and clay pink on the other. Ivory dots decorate the sage panel, while the clay panel stays plain. That clear division gives this set a different structure from a full-nail print.
The two base colors should be close enough in softness that neither overwhelms the other. A clean dividing line helps the pattern feel tidy, especially on shorter nails. Keep all the dots within the sage area so the contrast between the busy and quiet panels remains easy to see.
Salon note: Split each nail vertically into muted sage and clay pink. Add small ivory dots to the sage half only and keep the dividing line clean.
17. Soft Greige with a Single Ink Dot

One small dot can be enough. This manicure uses a fully painted mushroom-greige base with a single black circle placed low on each nail. The simplicity makes the tiny detail feel more noticeable, especially when you see the whole hand.
It’s an easy reference to adapt to very short nails because there’s little pattern to fit in. Placement is the part to be particular about: keep the dot centered and a small distance above the cuticle. A soft greige keeps the contrast gentler than stark white while still letting the black show clearly.
Salon note: An opaque mushroom-greige base with exactly one small black dot on each nail, centered just above the cuticle. Keep the placement consistent.
18. Berry Jelly with Floating Vanilla Dots
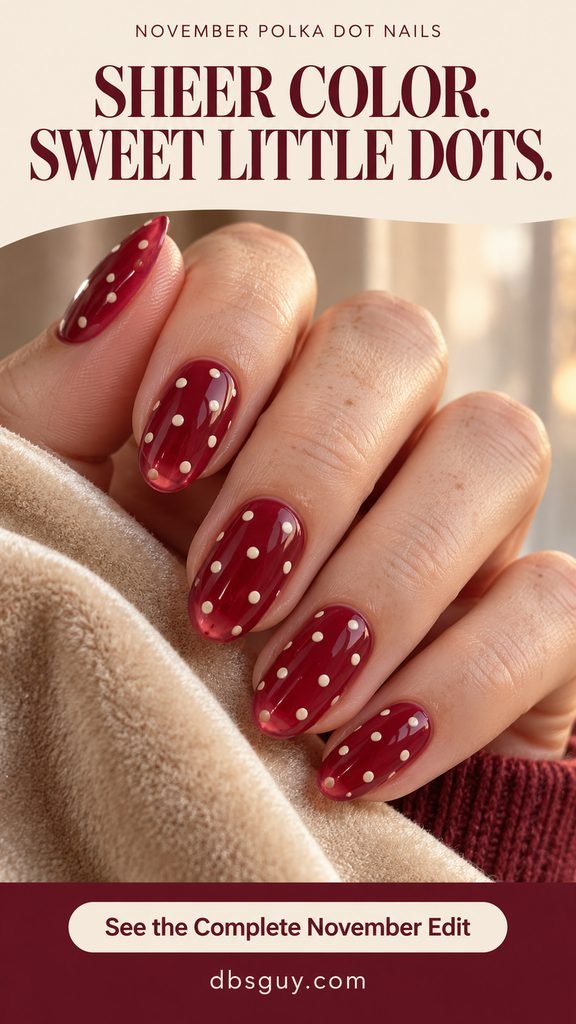
A sheer berry base changes the feeling of a dotted manicure. Light passes through the color, while the vanilla dots stay opaque, giving them a floating appearance. The cranberry tone brings depth without hiding the translucent finish.
Ask to see the berry polish at the coverage you want before adding the dots. More layers may make the base look denser, so the final effect depends on the particular formula and application. Keep the circles clean and evenly spaced. A medium oval shape echoes their softness and gives the jelly color room to show.
Salon note: A translucent cranberry jelly base with opaque vanilla dots. Preserve some sheerness in the color instead of building it to a fully solid finish.
19. Warm Gray with Mixed-Scale Rust Dots
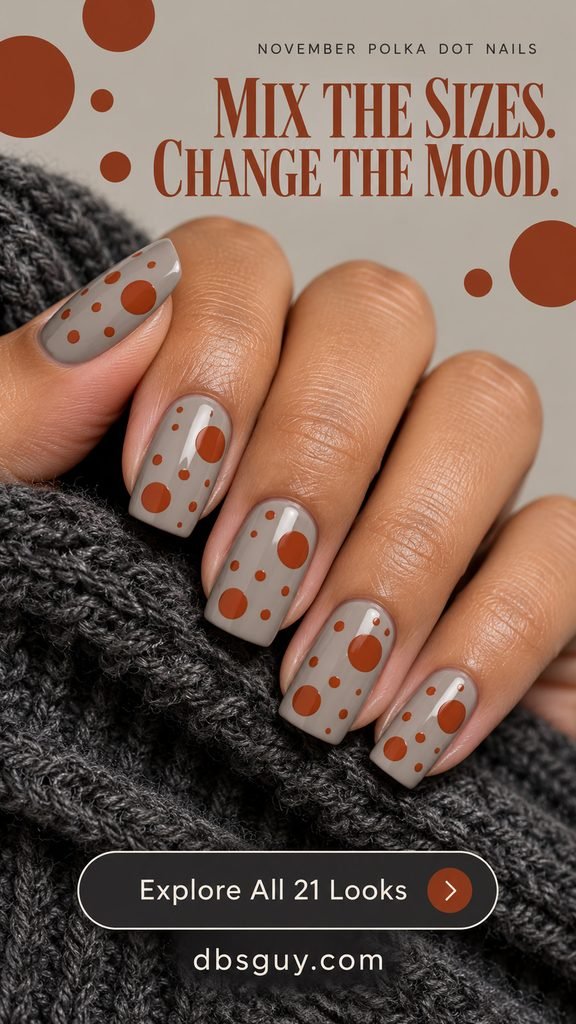
Changing the dot size makes this gray-and-rust combination feel lively. A couple of larger circles establish the pattern, and smaller ones fill selected spaces around them. The warm gray background softens the contrast while letting the rust stand out.
Keep the circles round and leave some open gray between them. The goal is a balanced scatter, with a few clearly larger dots doing most of the visual work. This design suits a medium square nail, where the wider surface makes the difference in scale easy to appreciate.
Salon note: Warm stone gray with a mix of large and tiny rust circles. Use only two distinct dot sizes and leave visible space around the larger ones.
20. Muted Lilac with a Polka-Dot S-Curve

A gentle S-curve gives plum dots a graceful path across muted lilac. The color pairing is soft, but the placement adds enough interest to make the manicure feel designed. Each dot stays separate, so the curve is suggested rather than drawn as a solid line.
An almond nail offers space for the trail to bend in both directions. Keep the curve loose and the dot size consistent so the movement remains clear. If you’re choosing this for shorter nails, simplify the bend instead of packing in more dots. Gray knits are an especially pretty companion to the cool lilac base.
Salon note: An opaque gray-lilac base with small plum dots arranged in one gentle S-curve on each nail. Keep the dots separate and the rest of the nail plain.
21. Terracotta with Dotted Chevron Rows

The final look turns simple cream dots into a repeating chevron pattern. Nested V-shaped rows sit over terracotta, giving the manicure a neat geometric rhythm. You still get the softness of polka dots, with a more structured arrangement to catch the eye.
Keep the V points centered on each nail and leave enough room between rows for the terracotta to show through. On a shorter nail, two rows may look better than trying to fit three. It’s a warm, graphic option to save if you like classic fall colors and want a pattern with a little more direction.
Salon note: Terracotta with cream dots arranged in centered, nested V-shaped rows. Use separate round dots throughout, with comfortable spacing between the rows.
What to Tell Your Nail Artist
Save your favorite image with its salon note. Tell your nail artist the length and shape you want, how large the dots should be, and whether the pattern belongs on every nail or just one accent.
Compare color swatches before the design begins, especially for warm cream, smoky shades, and sheer berry polish. Mention detailed borders or matte-and-gloss contrast when booking so the salon can confirm the time and price.
A Simple Way to Try Polka Dots at Home
For a first attempt with regular air-dry polish, start with the single-dot greige design or one dotted accent nail. Follow the product directions for your base coat and color, and let the color dry before adding dots.
Practice a few dots on a suitable palette, then touch a dotting tool lightly to the nail and lift it straight up. Reload for each dot when you want similar sizes. Let the dots dry before adding a compatible top coat so the pattern stays clean.
Nail educator Rebecca Orme recommends reloading the tool between dots for consistent sizing. OPI’s Dotticure tutorial also shows how to build diagonal rows. Its gel-product curing steps apply to that system; follow the directions for the products you use.
Polka Dot November Nails: FAQs
Do polka dot nails work on short nails?
Yes. Choose a pattern that leaves some base color visible, such as micro dots, one accent nail, or a single centered dot. For borders and geometric rows, reduce the number of dots to fit the available space.
Which colors make polka dot nails feel right for November?
For this collection, warm ivory, cinnamon, terracotta, espresso, and toffee supply the cozy side of the palette. Navy, charcoal, slate blue, and muted lilac offer cooler options. Start with a base color you already enjoy wearing, then choose a dot color that shows clearly against it.
How do I keep a polka-dot manicure from looking too busy?
Change one element at a time. Use fewer dots, keep the pattern on one nail, or choose a smaller contrast between the base and the dots. In a multicolor set, repeating the same dot color and size helps the different nails feel connected.
How can I make the dots a similar size?
Use the same end of a dotting tool, similar pressure, and a fresh amount of polish for each dot. Practice on a palette first. If the polish starts getting thick or stringy, follow its product guidance rather than trying to force clean circles from it.
Can these designs be recreated with regular polish?
Many can, especially simple painted dots and single-accent designs. More precise layouts and mixed finishes may be easier to request at a salon. The pictures are concept references, so your nail artist can suggest suitable products and adjust the pattern to your nail size.
Save the Little Details You Love
Choose the image you’d be happiest to see every time you reach for your coffee. If two looks are tied, compare their dot spacing and finish—that often makes the decision easier than color alone. Save your favorite with its salon note, and you’ll have a clear starting point for your next November manicure.
Manicure images are AI-generated concepts created for dbsguy.com. Your nail artist can adapt the colors, proportions, and placement to your nails.
More inspiration: Allure’s fall nail-art report and Manucurist’s polka-dot guide.