

A wooden hoop, an empty picture frame, or a bendable wire hanger can become a Christmas wreath without a bulky store-bought wreath form. The trick is to choose decorations that suit the base: light greenery for a hoop, suspended ornaments for a frame, and fabric knots or small baubles for a hanger.
If you want an easy first project, start with the evergreen-and-velvet hoop in idea 1. Have leftover cotton fabric? Try the no-sew rag wreath in idea 10. Want something useful as well as festive? Idea 11 gives your holiday cards a place to land.
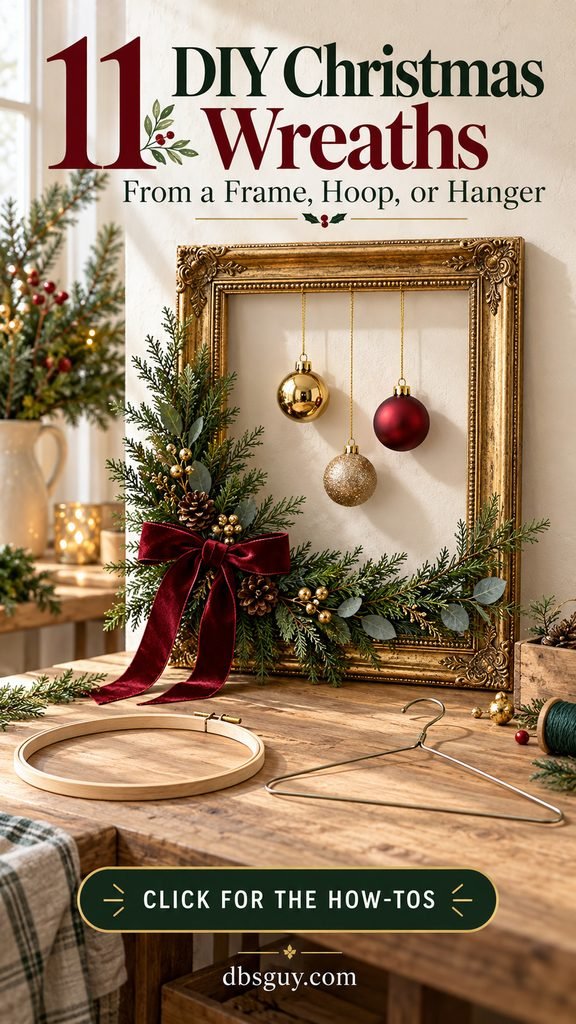
The visuals are AI-generated design concepts to help you plan colors and placement; handmade results will vary.
Choose your base before buying decorations
Shop your craft drawer, closet, and ornament box first. A beautiful wreath does not need all three types of base, and you do not need every supply mentioned below.
- Wooden embroidery hoop: A 10- to 14-inch hoop is a manageable starting size for an indoor door or wall. Use the solid inner ring for a clean circle, or keep both rings assembled if you like the visible tightening screw.
- Empty picture frame: Remove the glass, backing, and loose metal tabs. Choose sound corner joints and enough space inside the opening for your decorations. Picture-frame sizes often describe the opening, so measure the outside too.
- Wire clothes hanger: Choose a plain, flexible wire hanger that you can reshape with pliers. A plastic, wooden, rusty, or unusually stiff hanger is not suitable for these projects. Keep the existing hook where possible.
- Large hula hoop: This works for the oversized paper-star design. Use a rigid, lightweight hoop; check that the hanging spot has room for its full diameter.
Useful tools include scissors, a ruler, needle-nose pliers, wire cutters, thin floral wire, ribbon, and a surface-protecting craft mat. Needle and thread help with felt and yarn. Use wire or stitching for structural attachments; reserve glue for small accents and follow the adhesive’s material and temperature instructions. For example, Gorilla’s hot-glue guidance specifies low temperature for delicate materials and excludes certain plastics. Test a hidden spot rather than assuming every ornament will bond.
Supply counts below are starting amounts for the suggested base sizes, not exact shopping guarantees. Lay everything out first, then adjust for your materials. These designs are planned primarily for indoor display; paper, felt, yarn, and dried fruit especially need a dry location.
1. Evergreen and Velvet Embroidery-Hoop Wreath
This is the wreath to make when you want a little Christmas color without hiding the entire door. The exposed wood keeps the design light, while a cranberry velvet bow gives the greenery a clear focal point.

Gather: One 12-inch wood hoop, about 6–8 short faux cedar and eucalyptus pieces, thin floral wire, and 1½–2 yards of 1- to 1½-inch-wide velvet ribbon. Start with fewer stems; dense faux picks can fill the space quickly.
- Put the hoop on your work surface and arrange the stems along its left and lower edge. Leave at least the upper-right half of the circle open.
- Overlap the stem ends near the lower-left corner. Wire each small group to the hoop, then add a second attachment farther along any stem that sticks out.
- Tie the velvet bow over the meeting point. Let the tails fall below the ring, but trim them so they cannot catch on the door handle.
- Add a separate ribbon loop around the hoop for hanging. Turn the wreath over and tuck cut wire ends inward.
The underlying attachment is straightforward: This Old House’s hoop-wreath tutorial demonstrates wiring stems to the ring and securing them farther along their length. The important adjustment here is restraint. If the greenery buries all the wood, remove a stem before adding another decoration.
2. Dried Orange and Cinnamon Hoop Wreath
Amber orange slices bring warmth to a kitchen, breakfast nook, or neutral entryway. Pair them with cinnamon sticks and a small amount of faux pine, leaving the upper half open so the fruit stays the star.

Materials: A 14-inch hoop, twine to cover the ring, approximately 8–12 fully dried orange slices, 9 cinnamon sticks, a few faux pine sprigs, fine thread, floral wire, and an oatmeal-colored hanging ribbon.
Use purchased craft-ready dried slices, or prepare your own before starting the wreath. They should be dry throughout, with no damp or sticky areas. Fresh slices are not an interchangeable shortcut.
- Wrap the hoop closely with twine, securing the starting and finishing tails at the back.
- Wire small pine pieces around the lower half. Lay out the orange slices before attaching them, alternating larger and smaller pieces.
- Pass a fine needle and thread through a sturdy area near each slice’s rind, making two spaced attachment points where possible. Tie the thread around the hoop without pulling hard enough to tear the fruit.
- Tie cinnamon sticks in three small bundles with twine, then lash each bundle to the ring. Finish with a simple linen ribbon loop.
Keep this wreath indoors and away from steam. Do not promise yourself a strong room-filling fragrance; the dried fruit and cinnamon are primarily decorative. Before storing, check for moisture or mold, and discard any affected pieces rather than packing them away.
3. Felt Poinsettia Hoop Wreath
Three felt flowers give you a Christmas floral look without arranging a whole ring of stems. Deep red petals, olive leaves, and small mustard centers look especially good against a bare wooden hoop.
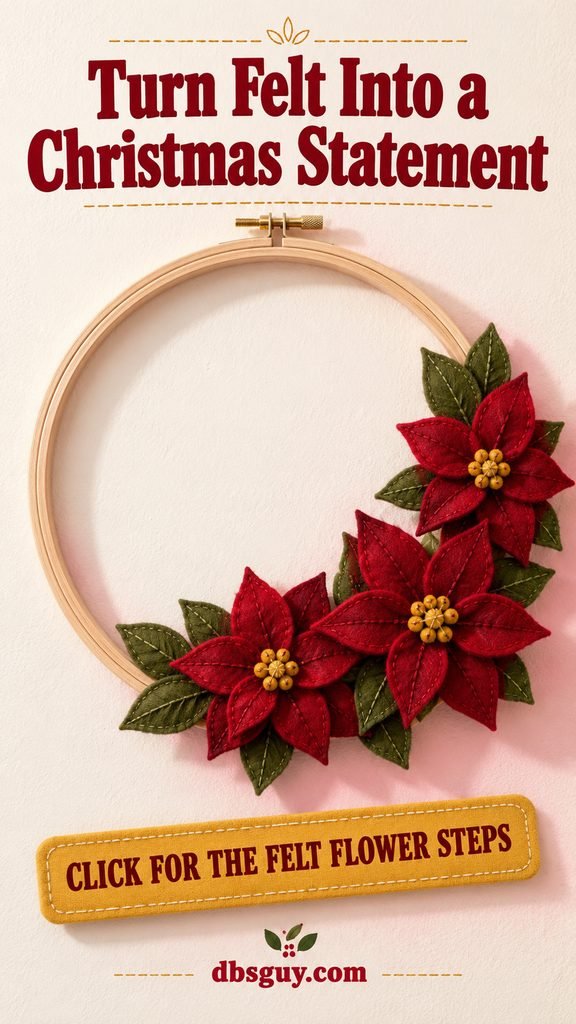
For a 10-inch hoop: Gather red, olive, and mustard felt; matching thread; a needle; scissors; three 2-inch felt backing circles; and thin ribbon. Make the largest flower roughly 4 inches across and the other two slightly smaller.
- Draw a pointed oval on paper, about 2 inches long and 1 inch wide, for the large petals. Make a second shape around 1½ inches long. Cut six of each size per flower, adjusting down for the smaller blooms.
- Pinch the base of each petal and stitch it to hold a shallow fold. Sew the larger petals around a backing circle, overlapping their bases; add the smaller layer above.
- Stitch three little mustard felt balls or rolled felt knots into the center. Cut several pointed olive leaves and sew them behind the flowers.
- Sew two short ribbon ties to the back of each flower. Use those ties to fasten the three blooms along the hoop’s lower-right curve, hiding the knots behind the ring.
Arrange the flowers before tightening the ties. Slight overlap looks natural; stacking all three directly on top of one another makes a bulky lump. This is a good indoor wall wreath if you want saturated color with very little weight.
4. Winter-White Yarn Pom-Pom Wreath
For a softer look, cover a hoop with ivory yarn pom-poms and add a dusty-blue bow. The texture reads as snowy without loose artificial snow, and the quiet palette can stay up after Christmas.
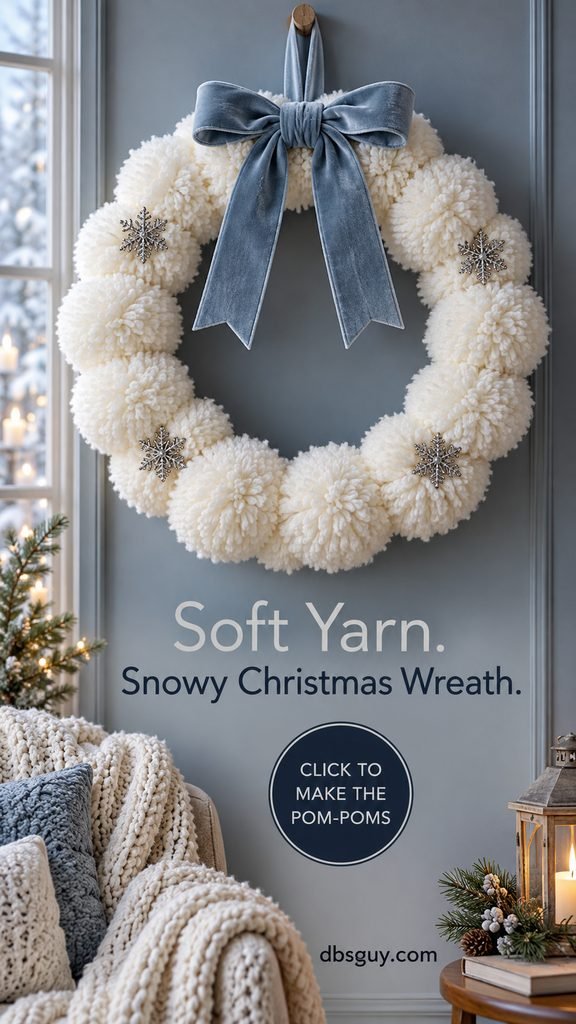
Start with: A 12-inch hoop, about 18–24 pom-poms roughly 2–2½ inches across, ivory yarn, scissors, a pom-pom maker or two homemade cardboard rings, blue ribbon, and a few lightweight silver snowflake accents.
If you are making the pom-poms from scratch, cut two matching cardboard doughnuts with a narrow slit in each. Stack them, wrap yarn around the cardboard until thick, and cut the yarn along the outer edge between the rings. Slide a separate strong yarn strand between the rings, tie tightly around the bundle’s middle, and remove the cardboard. Trim the ball evenly and keep the long tying tails.
- Tie each pom-pom to the hoop with its long tails, using a tight double knot on the back.
- Push neighboring pom-poms together until the wood disappears, while keeping a visible open center.
- Stitch or tie lightweight snowflakes between a few pom-poms. Add the blue bow at the top and a separate hanging loop.
Give each pom-pom a gentle tug before hanging. A loose center tie can shed yarn, so fix that pom-pom before attaching it. Use this one on an interior wall rather than a busy door that repeatedly brushes against it.
5. Double-Hoop Wreath With Brass-Look Bells
Two concentric hoops make a surprisingly architectural wreath. A small greenery accent on the outer ring and three bells inside the smaller ring create movement without filling the whole opening.

You’ll need: Solid wooden rings approximately 14 and 10 inches across, fine floral wire, three lightweight brass-look bells with hanging loops, narrow ribbon, a few faux evergreen sprigs, and wine-colored velvet ribbon.
- Center the smaller ring inside the larger one on a flat surface. Cut four pieces of wire long enough to span the gap and wrap securely around both rings.
- Join the rings at the top, bottom, left, and right. Wrap each attachment several times, keeping the inner circle centered. Trim and tuck the ends.
- Hang the three bells from the upper portion of the inner hoop on ribbons of different lengths. Keep the lowest bell clear of the bottom ring.
- Wire a short greenery cluster to the lower-left outer hoop. Cover its stem junction with a small velvet tie, then hang the wreath from the outer ring.
Choose decorative bells that feel light in your hand. Heavy solid-metal bells change the load on both the connections and the wall hook. Before adding the greenery, lift the wreath and check that the inner hoop stays centered; if it drops or swings excessively, tighten the four connectors.
6. Oversized Paper-Star Hula-Hoop Wreath
A large hoop is useful when a small wreath would disappear above a console. Six folded paper stars clustered along one side create scale while keeping the decoration light and the center open.
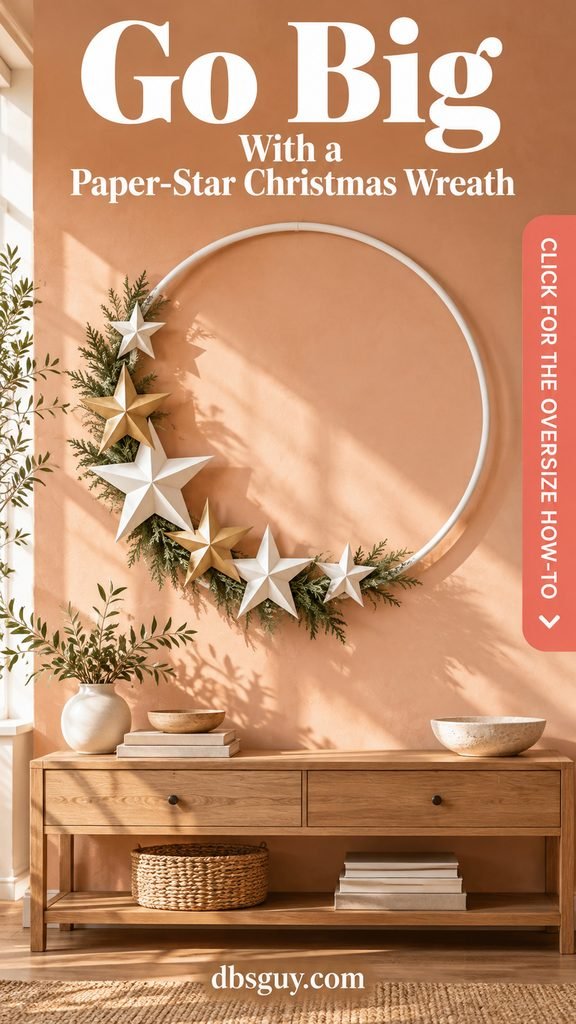
Plan for: One rigid 24- to 30-inch hula hoop, approximately six sheets of white and soft-gold cardstock, scissors, a ruler, a blunt scoring tool, fine thread, a few faux cedar sprigs, and paint compatible with the hoop if you want a white finish.
If painting, follow the paint label and let the finish dry fully before assembly. Make stars about 4–7 inches wide so they do not all compete at the same scale.
- Draw and cut a five-point star from cardstock. Lightly score from every outer tip to the center and from every inner notch to the center.
- Fold the tip-to-center lines outward as raised ridges and the notch-to-center lines inward as valleys. Gently shape the star into a shallow dimensional form.
- Make six stars in mixed sizes. Arrange them around the left and lower arc, letting a few edges overlap but keeping most of the ring visible.
- Use a fine needle to make two tiny holes near a strong fold on each star, then tie it to the hoop. A second discreet tie can stop a larger star from rotating. Wire the cedar pieces between the stars.
Hang from two separated points on the upper hoop if one loop makes it tilt. Keep the stars indoors, away from damp windows and heating vents. This wreath needs wall space around it; measure before choosing the largest hoop.
7. Tartan-Corner Picture-Frame Wreath
An empty walnut frame already has the outline you need. A pine-and-tartan cluster on one corner turns it into a wreath while letting the rectangular shape remain obvious.
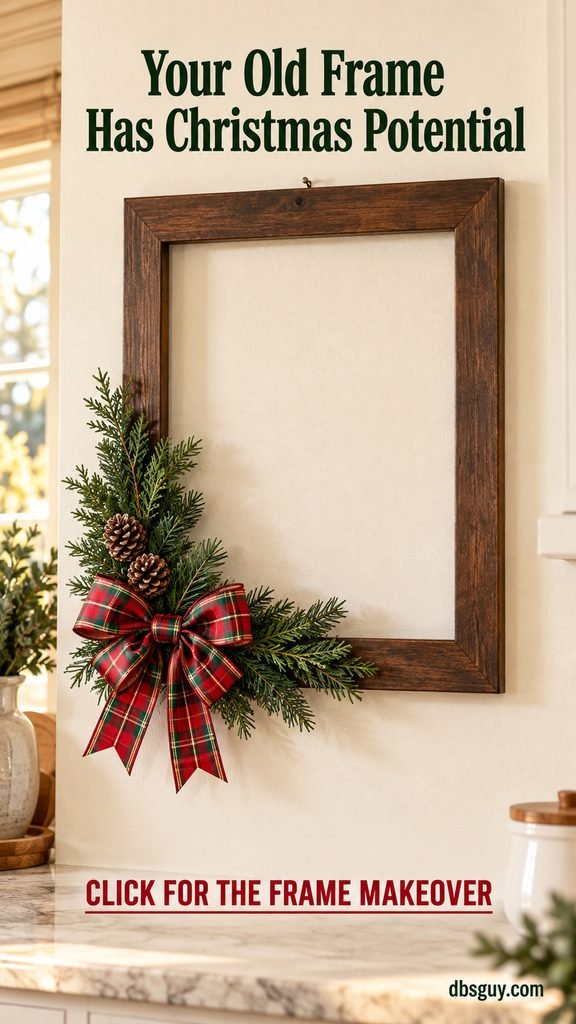
Use: A sound empty frame roughly 12 by 16 inches on the outside, about 4–6 short faux greenery pieces, two small pinecones, floral wire, wired red-and-green tartan ribbon, and an appropriate hanging fitting or loop.
- Remove the glass and backing, and check the frame’s corners and existing hanging hardware. Keep its current finish if it suits your room.
- Build two small greenery bundles. Position one up the left rail and the other along the bottom rail so their stems meet at the lower-left corner.
- Wire the bundles around the frame rails. Lash the pinecones by looping thin wire around their bases beneath the scales, then attach them to the cluster.
- Make a tartan bow and wire it over the exposed stems. Shape the wired ribbon loops and trim the tails.
Stand back before adding anything else. The open rectangle is part of the design, so there is no need to decorate every rail. A soft piece of felt under the wrapped wire can protect a finish from scratching. Hang from the frame itself, using sound hardware, rather than from the decorative bow.
8. Gilded Frame Wreath With Hanging Baubles
If you have just a few beautiful ornaments left, give them space. A gold frame with three suspended baubles creates a different look from a dense ornament wreath: the ribbons and empty space do much of the decorating.

Gather: An empty gold frame with an opening around 11 by 14 inches, three lightweight shatterproof ornaments in emerald, gold, and burgundy, narrow satin ribbon, a small faux cedar piece, and a short ribbon for the corner accent.
- Lay the frame flat and place the ornaments inside the opening. Leave clearance below each ball and between neighboring balls.
- Thread ribbon through each ornament’s secure hanging loop. Tie each ribbon around the top rail, arranging the knots at the back.
- Adjust the lengths to create three staggered heights. Lift the frame and check the arrangement before trimming the ribbon tails.
- Wire the small cedar accent to the upper-right corner and cover that tie with a narrow bow.
Choose a quiet interior wall for this one. A frequently slammed door can make the ornaments knock against the frame. If a cap pulls away from its ornament, replace or securely repair that ornament with a compatible product before hanging; the ribbon must hold the ornament itself, not merely a loose cap.
9. Shatterproof Ornament Wreath From a Wire Hanger
A mix of cobalt, turquoise, and silver makes this wreath feel like a bright holiday jewel. Unlike the previous frame design, the ornaments cluster into a full ring and largely hide the hanger underneath.

Starting supplies: One flexible wire clothes hanger, around 40–60 lightweight shatterproof ornaments in mixed 1- to 2-inch sizes, needle-nose pliers, ribbon, and an adhesive suitable for the ornaments if their caps need securing. The final count depends on the ring and the shape of each ornament.
- Use pliers to untwist the hanger’s neck joint while preserving the hook. Shape the long wire into a circle about 11–12 inches across. Round it gradually rather than repeatedly bending one spot.
- Check every cap and hanging eyelet. Secure loose caps according to the compatible adhesive’s directions and let the bonds set fully before threading. Prefer molded, firmly attached hanging loops when available.
- Slide the ornament loops onto the open wire. Alternate sizes and rotate ornaments toward the front and sides to fill gaps. Do not force an undersized loop over thick wire.
- Leave enough bare wire to remake the original twisted closure with pliers. Close it securely, tuck any sharp end inward, and cover the joint with a ribbon bow.
Lift the wreath over a soft surface and check for slipping ornaments before putting it on the wall. If the hanger distorts under the load, remove ornaments or use a sturdier purpose-made ring. Heavy glass ornaments are a poor match for this base. Keep the center open instead of forcing in another layer just to use the whole box.
10. No-Sew Fabric-Scrap Hanger Wreath
This is a useful way to turn leftover cotton into Christmas texture. Red gingham, cream solids, and muted green plaid make a fluffy ring; the slight fraying gives it a relaxed handmade finish.
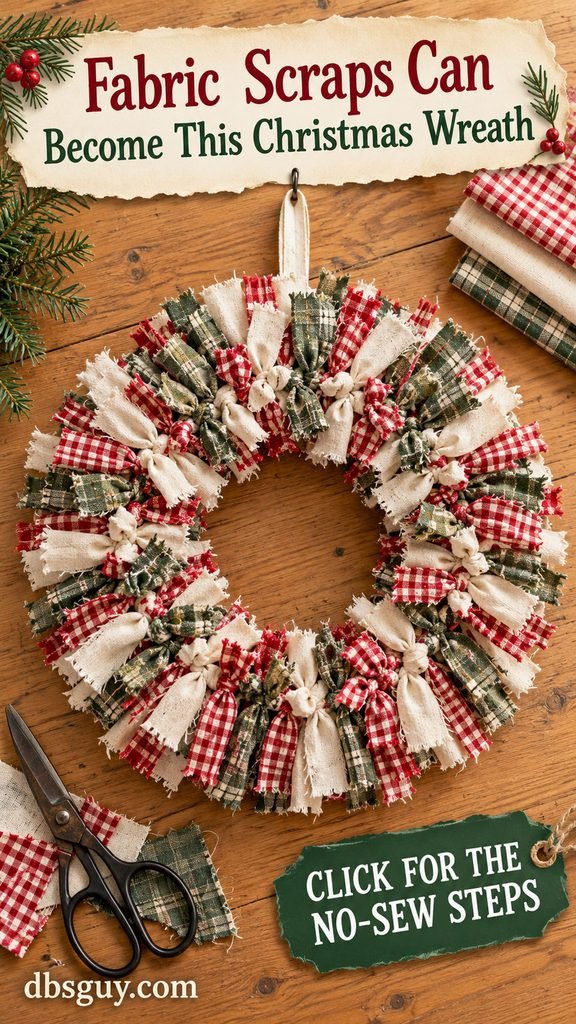
For an 11-inch wire circle: Start with roughly 80–120 cotton strips about 1 inch wide and 7 inches long, a flexible hanger, pliers, fabric scissors, and a short hanging ribbon. Thick fabric needs fewer strips than lightweight cotton.
- Reshape the hanger into a circle. If you opened the neck joint to shape it, close that joint securely before adding fabric; this project does not require threading pieces over the wire.
- Fold a strip in half. Put the folded loop behind the wire, bring the two loose ends through the loop, and pull snugly to make a lark’s-head knot.
- Keep knotting, loosely alternating the three fabrics. Slide the knots together as you work, then add strips wherever the wire still shows.
- Fluff the tails, trim any unusually long pieces, and add a simple ribbon at the hook.
Test three strips before cutting the entire batch. If the fabric is too stiff to tighten or the tails make the center disappear, narrow or shorten the strips. For a balanced color mix, use roughly half cream and split the remaining strips between red and green. No sewing machine or glue gun is needed.
11. Holiday-Card Clip Wreath From a Hanger
A card wreath starts as a simple green ring and becomes more personal as the mail arrives. Small wooden clothespins hold greetings around the outside, leaving the middle open.
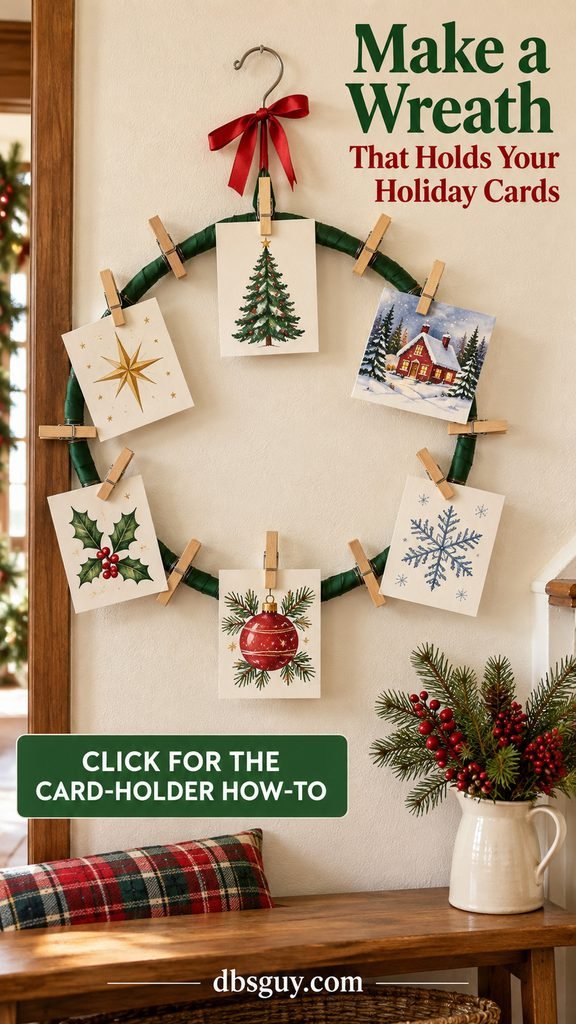
Prepare: A flexible hanger shaped into a 12-inch circle, dark green ribbon to wrap it, about 12 small wooden clothespins, thin floral wire, pliers, a red ribbon accent, and several lightweight cards. Use mini cards or trimmed decorative card fronts if full-size folded cards overwhelm the ring.
- Shape and securely close the hanger, then wrap the ring in green ribbon. Tie the ribbon ends at the back.
- Position a clothespin across the ring with its gripping jaws clear of the base. Angle most outward, adjusting a few inward if that helps space the cards. Pass fine wire through the spring’s center where accessible, keeping it clear of the moving jaws and handles, and wrap it around the ring.
- Secure a second discreet wire tie around the closed handle area if the pin swivels. Repeat around the circle, then trim and tuck wire ends behind the ribbon.
- Open every clip to make sure it still works. Hang the wreath, add a red ribbon at the top, and begin with six small cards spaced around the outside.
Check one clothespin before buying a whole pack; some springs do not offer enough room for wire. If your clips cannot be wired without restricting their movement, choose a different style rather than forcing them. Keep the cards light, and test the loaded ring’s shape. Add more cards only while the clips hold firmly and the wreath stays balanced.
Hang and Store Your Wreath Without Undoing the Work
Before display, lift the wreath by its intended hanging point over a table. Look for a shifting bow, a sagging ring, exposed wire, or an ornament touching the frame. Correct those details while the wreath is still within easy reach.
Use hanging hardware rated for the finished weight and suitable for the surface. For an adhesive hook, follow that product’s cleaning, surface, temperature, and waiting instructions. On a door, check that the hanger does not prevent it from closing and that decorations clear the handle and any storm door.
Keep these paper, fabric, dried-fruit, and faux-greenery decorations away from heaters and flames. The U.S. Fire Administration’s holiday guidance explains why heat sources matter around seasonal decorations. If you want nearby candlelight, use flameless candles. Lights are optional; if you add them, use a set rated for the location, inspect it for damage, and follow its instructions.
After the season, let the wreath dry fully if it has picked up moisture. Store it flat or supported so bows and paper stars are not crushed. Remove the greeting cards, cushion suspended baubles separately, and check dried fruit before packing. Label the container with the display location so next year’s decorating begins with less guesswork.
DIY Christmas Wreath Questions
Which wreath is easiest for a beginner?
The evergreen-and-velvet hoop is a good starting point because it needs only a few stem bundles and a bow. The fabric-scrap wreath uses repetitive knots and no adhesive, but cutting and tying many strips takes patience. Choose based on the materials and type of work you prefer.
Can I use a plastic clothes hanger instead of wire?
No. These hanger designs depend on a flexible wire that can be reshaped into a circle. A plastic hanger will not create that base. Use a wooden embroidery hoop or a purpose-made wire ring instead.
Do I need a hot glue gun?
Not for every design. Floral wire secures greenery; thread holds felt pieces and orange slices; yarn tails secure pom-poms; and fabric strips knot directly onto wire. Ornament caps may need compatible adhesive, but glue is not a replacement for a sound hanger closure or hanging fitting.
Can these wreaths go on an outdoor front door?
The plans here favor indoor use. Only move a design outdoors if every component, its adhesive, and its hanging hardware are suitable for that exposure. A porch roof does not guarantee protection from blowing rain. Keep paper, yarn, felt, cards, and dried fruit indoors.
How do I stop a hoop wreath from tilting?
Lift it before finishing and move the hanging loop toward the heavier side until it hangs as intended. If a single loop still lets it rotate, use two spaced attachment points. Reduce an overly heavy cluster rather than relying on the hook to correct the balance.
What is the least expensive option?
The wreath that uses what you already own. Fabric scraps and a suitable hanger can keep new purchases small; a hoop with a few leftover faux stems can do the same. Compare the supplies still missing rather than assuming one design always costs less.




