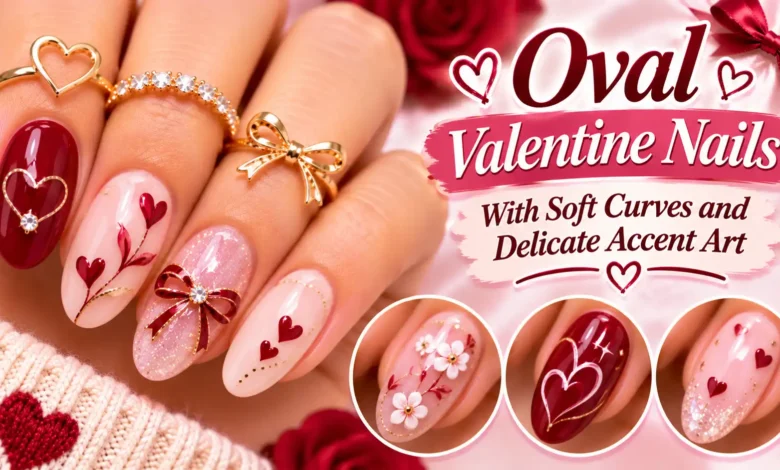
For oval Valentine nails with a delicate finish, choose the length first and give the artwork a spot of its own. On short ovals, try three ivory dots at the base or a sliver of cherry at the tip. On medium ovals, there’s room for a painted ribbon, a tiny envelope, or a lace edge with space between the scallops.
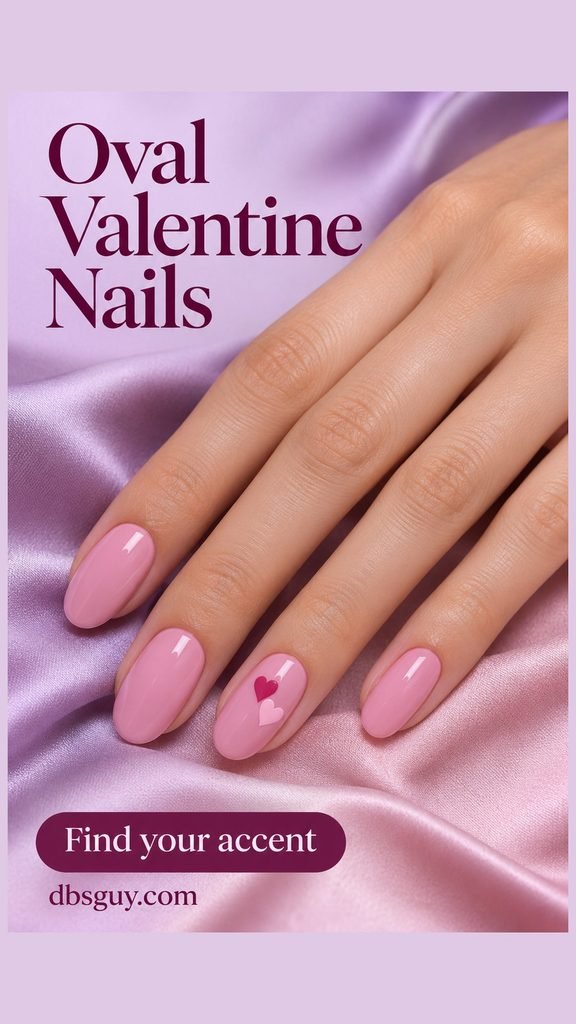
These images are AI-generated design concepts. Use them as references for shape, color, and placement.
Ask for a Full, Rounded Oval
An oval has softly tapering sides and a rounded end. A round nail follows the fingertip more closely, while an almond narrows into a more defined tip. If you like the shape in these images, ask your nail artist to keep the tip broad and round, with a gradual curve on both sides. For a visual reference, see OPI’s nail-shaping guide.
On short nails, keep artwork near the center or along one curve. With a little more length, you can move a motif toward the tip or give a bow longer tails. Pick the length you want to wear and scale the art to fit it.
Also Read 17 Oval Acrylic Nails for February With Soft Edges and Romantic Details
1. Rosewater Pink With Two Tiny Hearts
Set a raspberry heart and a paler pink heart on a diagonal across one accent nail. The darker one gives the pair a focal point, and the lighter one makes it feel softer than a matched pair of reds.
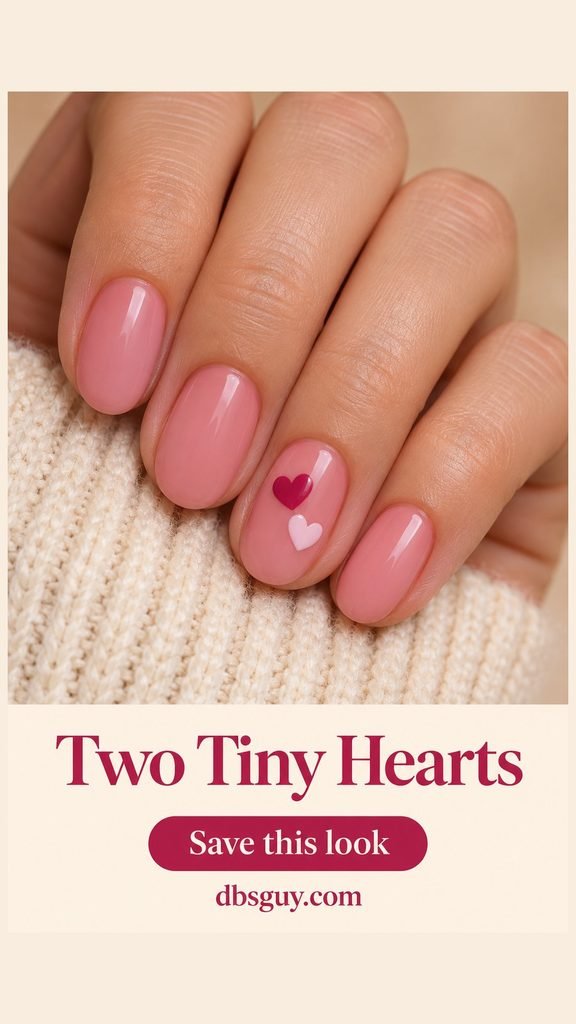
Keep a sliver of base color between the hearts so both outlines are easy to see. If your ring nail is narrow, set the hearts one above the other or put one heart on each hand. Choose a pale heart with enough coverage to stand out over the rosewater pink.
2. An Ivory Pearl Dot Arc
Three little ivory dots just above the cuticle give sheer pink-beige nails the look of a tiny strand of pearls. Start with the middle dot and let the two outer dots follow the curve, keeping a visible gap between the art and the skin.
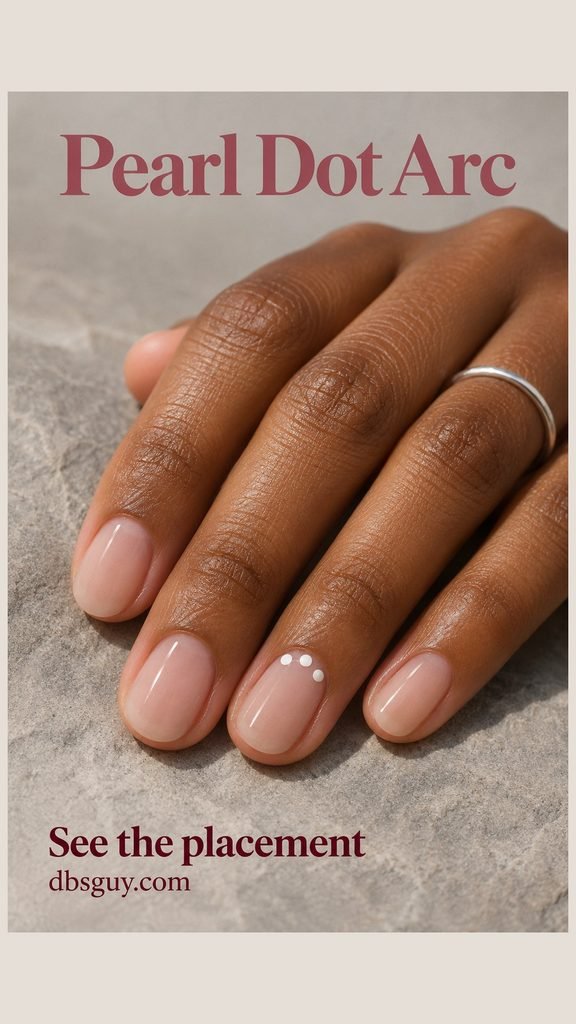
Ask for flat painted dots if you want the pearl look with a smooth surface. This is a good choice for very short ovals because the detail sits at the base, where it has room even when there’s barely any visible tip.
3. A Plum Ribbon on Milky Lilac
A small plum bow gives milky lilac a Valentine detail in a cooler palette. Put it on one ring nail, with the loops above the knot and the short tails running down the nail. That leaves space between the loops and the oval’s curved sides.
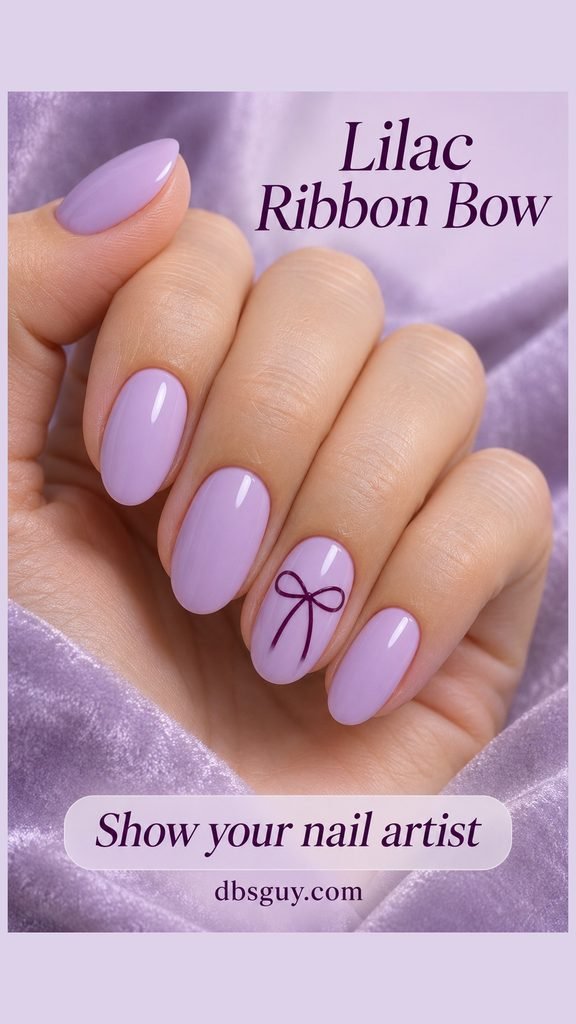
Show your nail artist the size you want. Two open loops and two short tails are enough for the ribbon to read at a glance. On a shorter oval, trim the tails first so the knot and loops can stay legible.
4. A Cherry-Red Sliver Along the Tip
For a little red on every finger, sweep a fine cherry line from one side of each sheer pink-beige tip and let it taper toward the center. The sweep makes the oval’s curve easy to see and leaves the other side sheer.
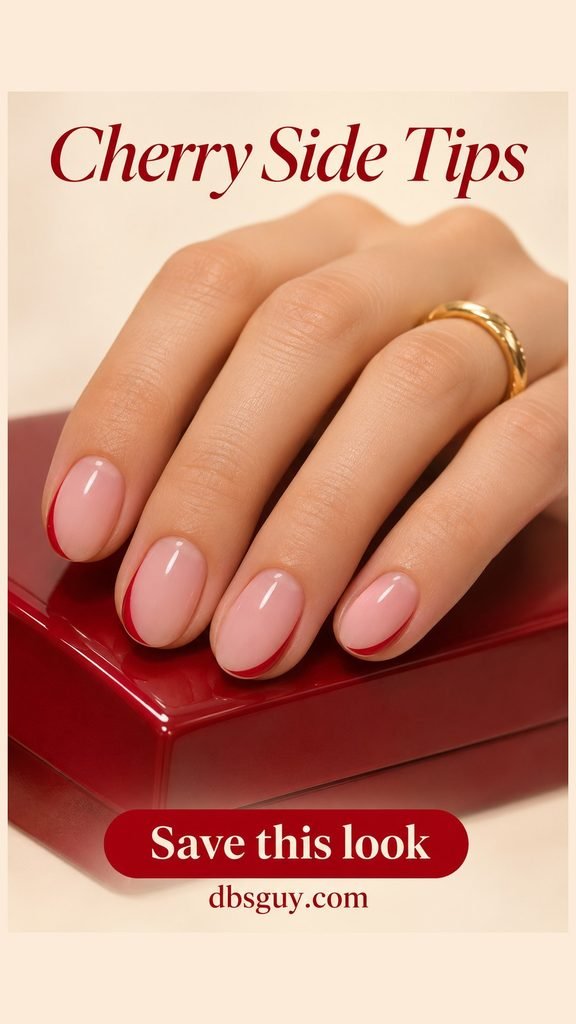
Point out where you want the color to stop when you show the reference. Start with the sliver on one nail before repeating it across the hand. On very short ovals, keep the red close to the edge so you still see a generous area of the base.
5. Powder Blue With Tiny Porcelain Blooms
Cluster two tiny ivory flowers on one powder-blue nail, with a warm yellow center in each. The warm centers draw your eye to the accent, while the blue makes this an easy February-to-spring choice if you’re ready for a break from pink.
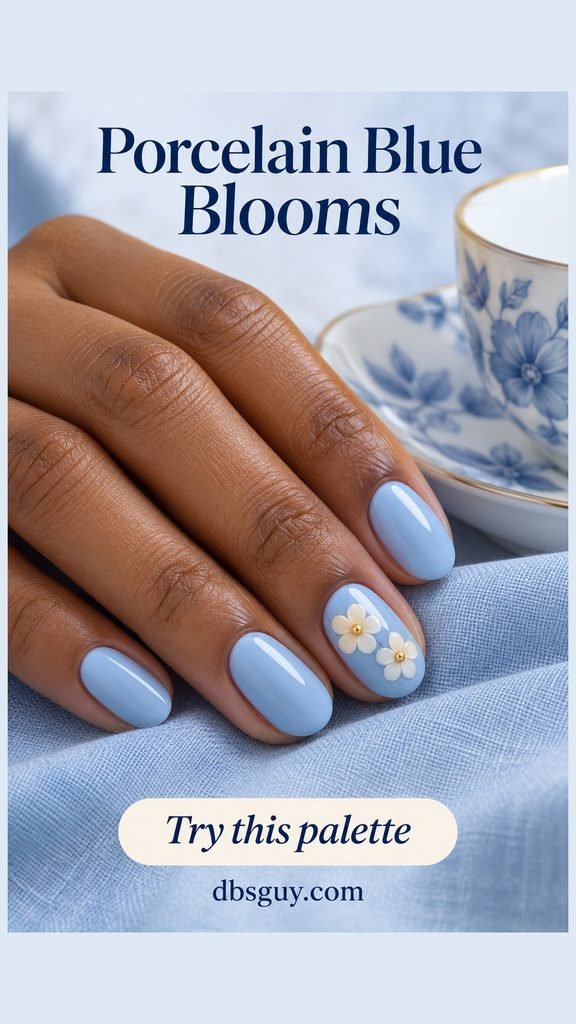
Place the flowers on a loose diagonal and leave a gap between the petals. On a short or narrow nail, use one slightly larger flower and let the plain blue around it serve as the frame.
Also Read 13 Unique Valentine Nail Ideas With Unexpected Colors and Clever Details
6. An Espresso Lace Edge on Vanilla Cream
Paint a fine espresso scallop along the rounded edge of one vanilla nail. A few small dots echo the holes in lace. Leave most of the cream surface visible so the trim reads as an accent from a distance.
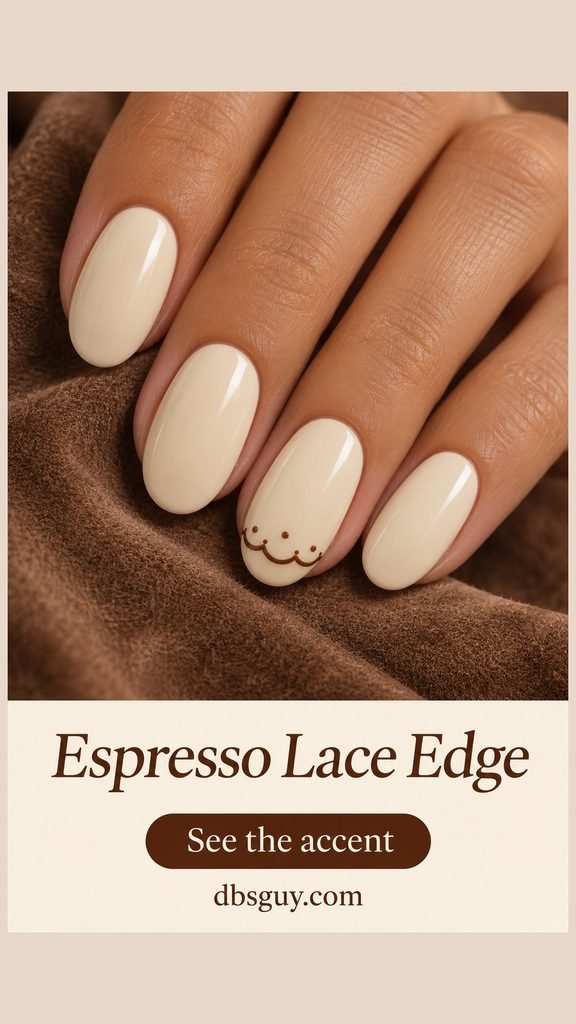
If your ovals are short, ask for a few larger scallops on the ring finger. A wider curve with room around it will show up better than a row of tightly packed loops.
7. A Tiny Dusty-Rose Love Letter
Put one dusty-rose envelope on a glossy peach-nude ring nail. A thin V across the rectangle suggests a folded flap, and a darker seal gives the design a Valentine detail without lettering.
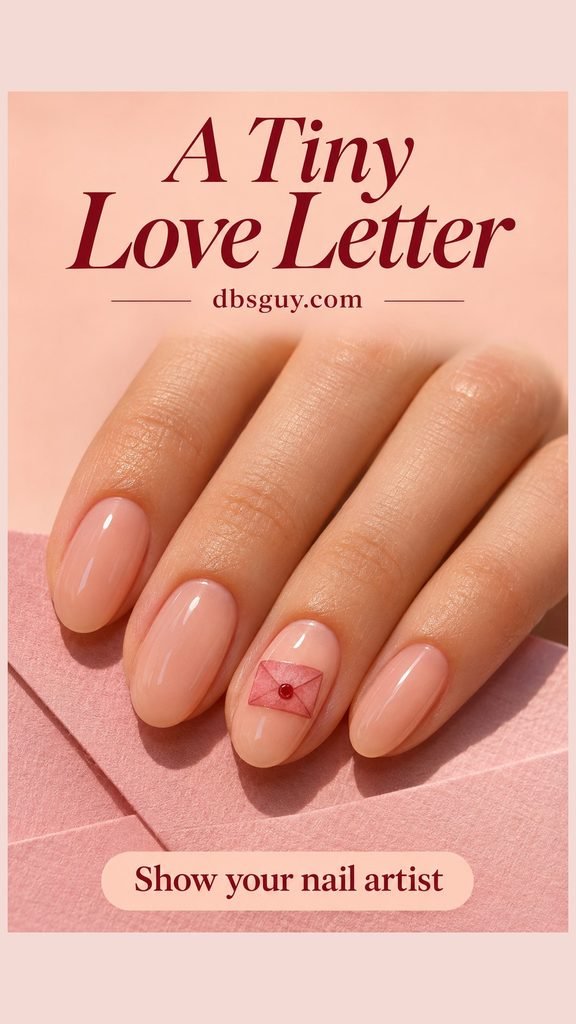
Choose your widest accent nail if the ring nail is narrow. Keep the corners and flap readable with space around the sides. For a short oval, keep just the envelope, flap, and seal.
8. Wine Jelly With a Rose-Gold Side Arc
A slim rose-gold curve adds a bit of light to a deep wine jelly manicure. Start at the curve of the ring nail’s base and let the line taper down one side. Keep the arc narrow so the wine stays visible across the center of the nail.
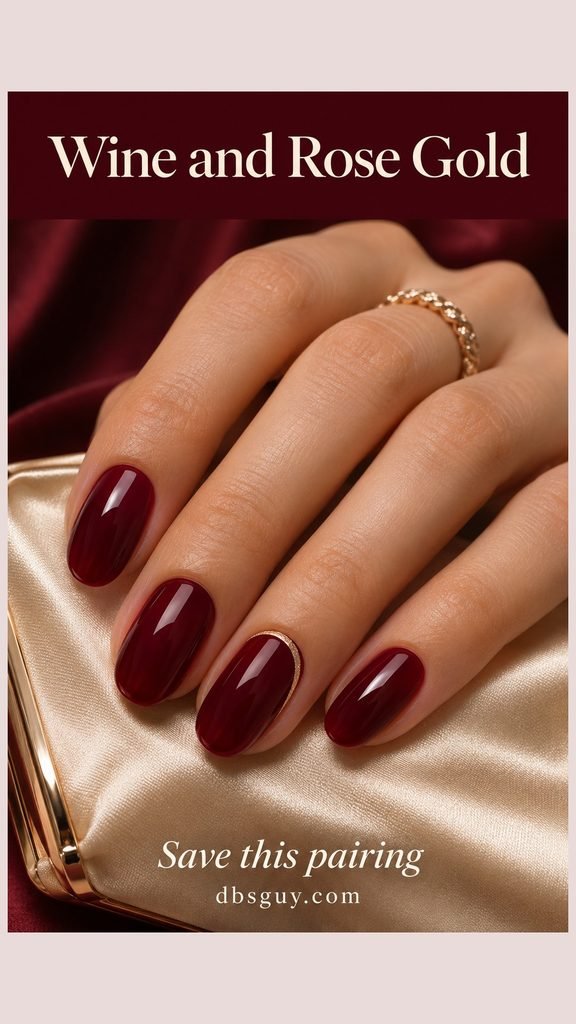
Ask to see the metallic shade beside the wine swatch. A lighter rose gold gives the line enough contrast, while a darker copper can blend into the burgundy. Choose a fine painted line for a smooth finish.
Also Read 15 Classy Valentine Nail Ideas for Dinner Plans and Everyday Wear
What to Show Your Nail Artist
Bring one reference and point to the part you want to keep. For example, “Short ovals with softly rounded ends, sheer pink-beige, and three flat ivory dots near the base of each ring nail.” If a detail feels crowded on the first nail, decide what to simplify before the artist repeats it on the other hand.
Can I get this look with regular polish?
Yes. The pearl dot arc is a good starting point. Put a little ivory lacquer on a palette, touch a dotting tool into it, and practice three dots on a spare nail tip. Let the base dry before adding the dots, then let the art dry before top coat so the brush is less likely to drag it.
Which design still feels right after February 14?
Try the ivory dot arc for a barely-there accent, powder-blue blooms for a cooler palette, or wine and rose gold if you like deep polish. The paired hearts and love letter make a more recognizable Valentine reference.
Also Read Minimalist Valentine Nails With Tiny Details and Plenty of Bare Space