13 New Year Nails Ideas Simple: A Little Sparkle for Your Last-Minute Plans


For simple New Year nails, choose one small upgrade: a fine shimmer topper, a single glitter accent, or a tiny metallic detail. You can keep your usual short shape and still have something that catches the light when you reach for a glass at midnight.
If you are starting from bare nails, ideas 1, 2, and 12 need no detail brush. If your polish is already neat, one decal or a little confetti may be enough. The designs below keep the artwork manageable, with a few options for a steadier hand and a predesigned press-on alternative.

The visuals are AI-generated design concepts for dbsguy.com, not photographs of tested manicures or specific products. Use them to compare colors, placement, and the amount of sparkle you want.
Choose the Version You Can Actually Finish
- Only a polish brush available? Start with the gold veil, navy-and-silver accent, or alternating espresso finishes.
- Already wearing a tidy manicure? Pick a small decoration that suits that base rather than repainting every nail.
- Wearing sequins or statement jewelry? A narrow tip or one decorated nail leaves more visual space.
- No drying time to spare? Consider a predesigned set you already own and know how to apply. Fitting and adhesive instructions still take time.
For the regular-polish versions, gather your chosen color, a compatible base and top coat, and only the extra tool that design needs. Remove old polish, file any rough edges, and begin with clean, dry nails. Use thin layers and follow the formula’s directions between coats. Finish getting dressed and handling zippers before painting.
Leave cuticles intact; do not cut or forcefully push them back. The American Academy of Dermatology’s manicure safety guidance also recommends moisturizing nails, especially after polish removal.
1. Sheer Peach With a Fine Gold Veil
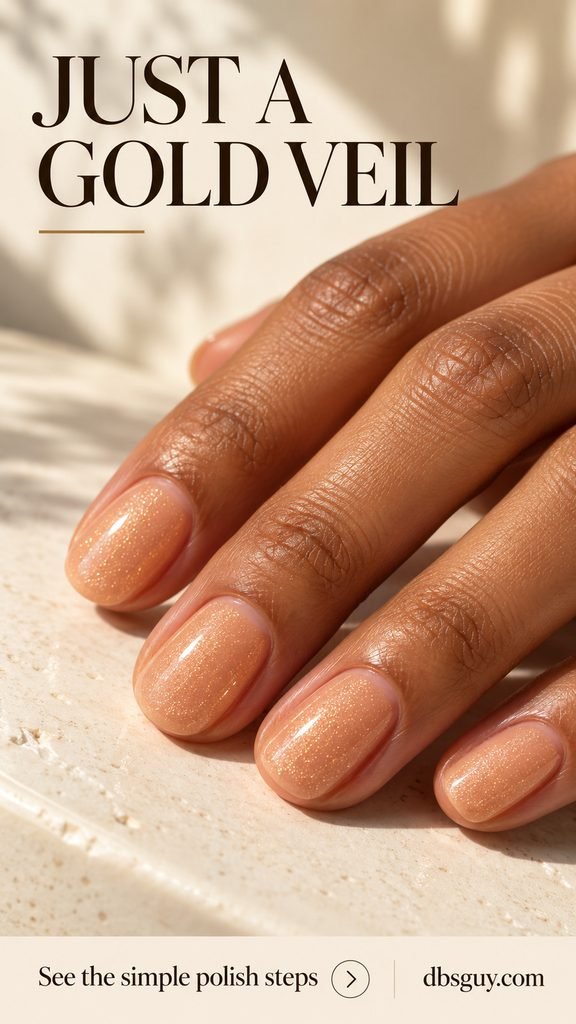
This is the low-fuss choice when you want the whole manicure to glow without painting a pattern. A translucent peach-beige base stays visible beneath fine gold shimmer, so the result feels lighter than an opaque glitter manicure.
Use a sheer shimmer polish, or apply a fine gold topper over a peach base once it is ready for the next layer. Check the topper on one nail first: a clear base with tiny particles gives this effect, while large flakes create a more scattered look. Keep the same finish across both hands.
2. Midnight Navy With One Silver Glitter Nail
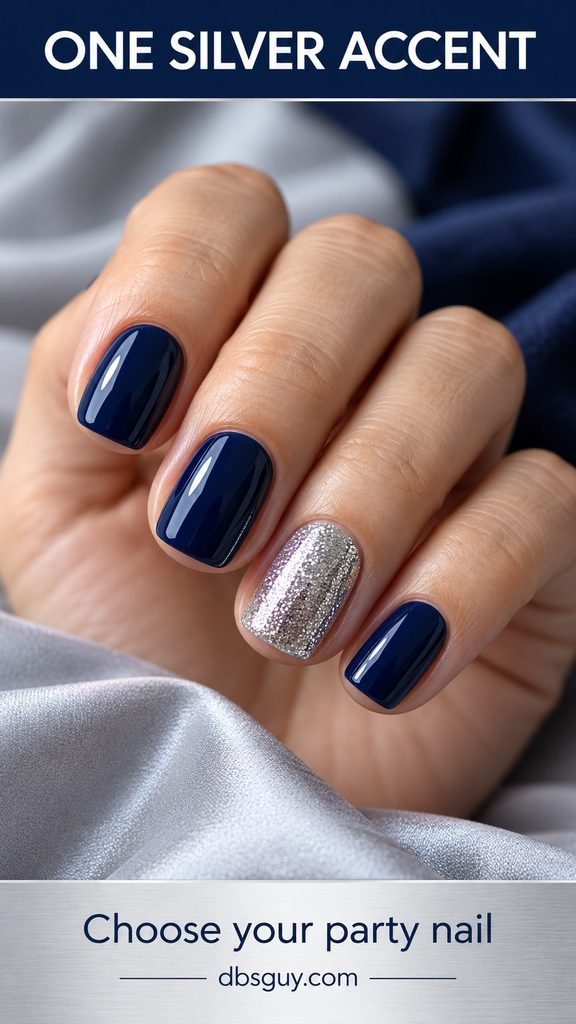
One fully sparkling ring nail gives dark navy a party detail without requiring any linework. The contrast is easy to see on short squoval nails—a square shape with softened corners—and looks especially clear beside gray, white, or navy clothing.
Paint the ring nail with silver glitter polish and keep the others glossy navy. Choose a glitter formula with the coverage you want; a sparse topper will not look like the dense silver accent shown. Build only the layers its directions allow, rather than applying one thick mound to hide every gap.
3. Blush Nails With a Rose-Gold Tip Fade
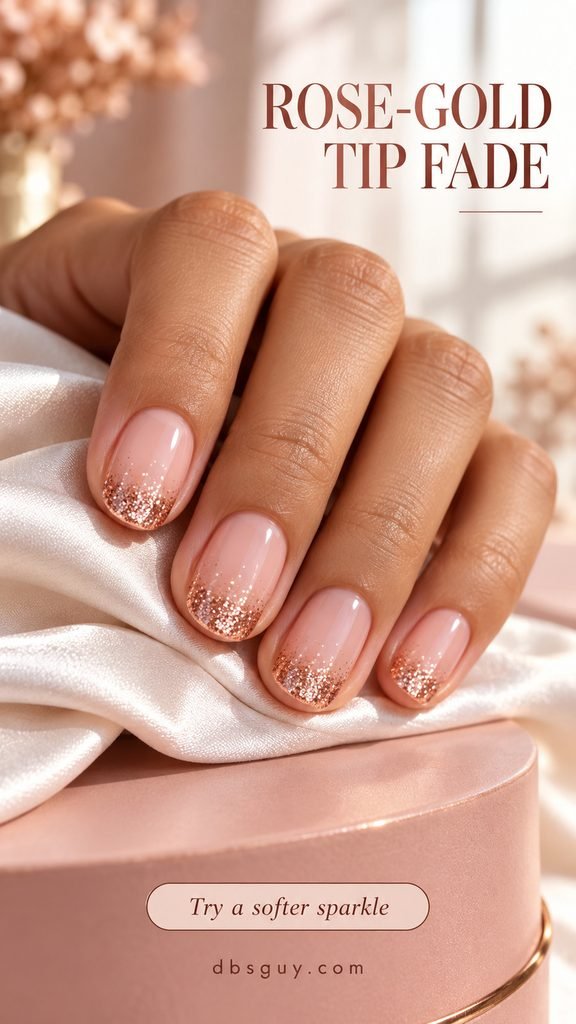
A tip fade gives you a softer edge than a crisp French line. Here, rose-gold glitter is concentrated at the ends of short pink nails and becomes sparse toward the middle. The area near the cuticle stays plain.
After the blush base has dried as directed, use a lightly loaded glitter-polish brush to dab a little sparkle near the tip. Add less as you move inward, leaving the lower half clear. Build the edge gradually instead of brushing a thick glitter stripe across it. On very short nails, keep the fade shallow so there is still visible pink.
Also Read: 21 New Year’s Nails to Ring In the Year Sparkling
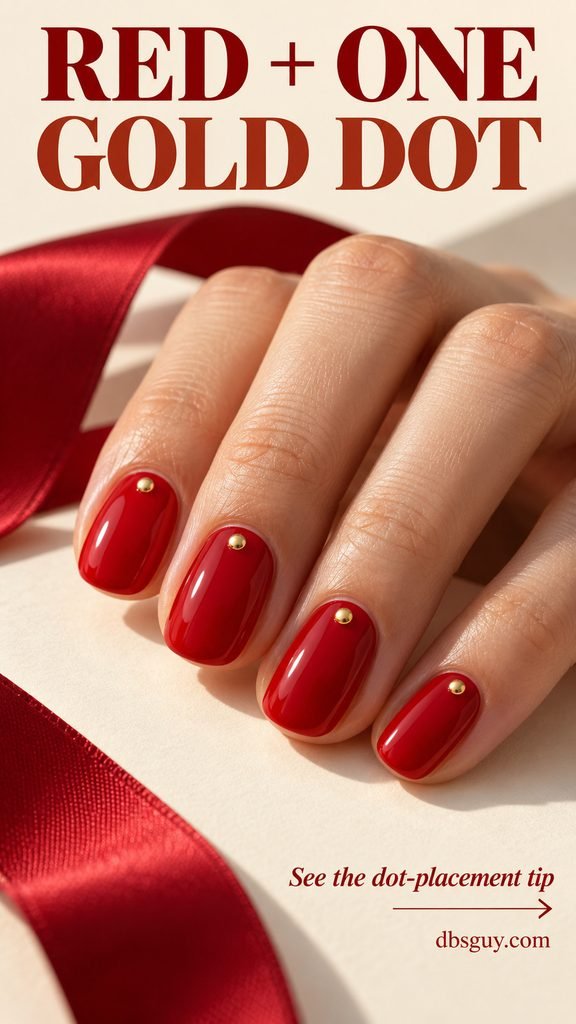
4. Cherry Red With One Tiny Gold Dot
If you already like red nails, one gold dot near the base changes the look without changing your color. The concept shows small domed gold accents, one on each nail, centered just above the cuticle with a visible gap from the skin.
For that version, use nail-specific round accents and the adhesive method supplied for them. Keep them small enough to sit entirely on the nail. Prefer a smooth surface? Place one dot of metallic gold regular polish with a dotting tool instead. Practice the size on a spare nail tip or a nonabsorbent practice surface before touching your manicure.
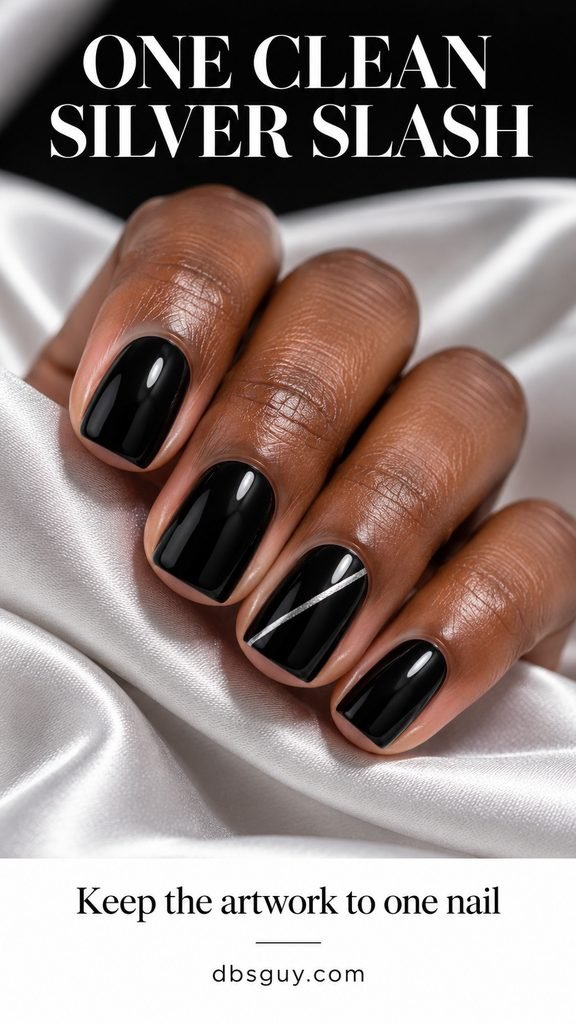
5. Glossy Black With One Diagonal Silver Slash
Keep the color bold and the artwork limited to one nail. A thin diagonal silver line across the ring finger breaks up an otherwise plain black manicure. It is a graphic choice for someone who wants a metallic detail without glitter everywhere.
Use a silver striping polish or fine nail-art brush over a dry black base. Brace your painting hand on the table and make one narrow stroke across the nail. If your non-dominant hand struggles with lines, use a nail-art strip designed for this purpose, following its trimming and sealing directions. Leave the other nails undecorated.
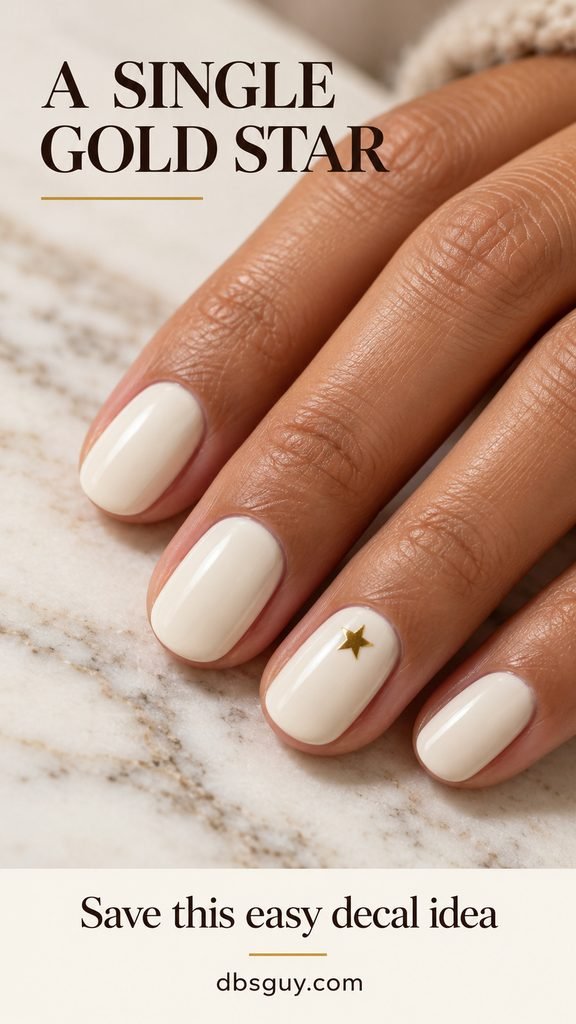
6. Creamy Ivory With a Single Gold Star
A small star decal gives ivory polish a celebratory detail without asking you to paint five neat points. Put it on the ring nail and let the rest of the set stay plain. The warm ivory background keeps the gold visible while feeling softer than bright white.
Choose a star that fits inside the nail’s curve before you start. The reference places it near the base of the ring nail, leaving room around every point. Apply the decal to a sufficiently dry base and seal it only as its instructions recommend. A point that folds over the side is a reason to use a smaller star.
Also Read: 21 December Nails From Early Sparkle to New Year’s Eve
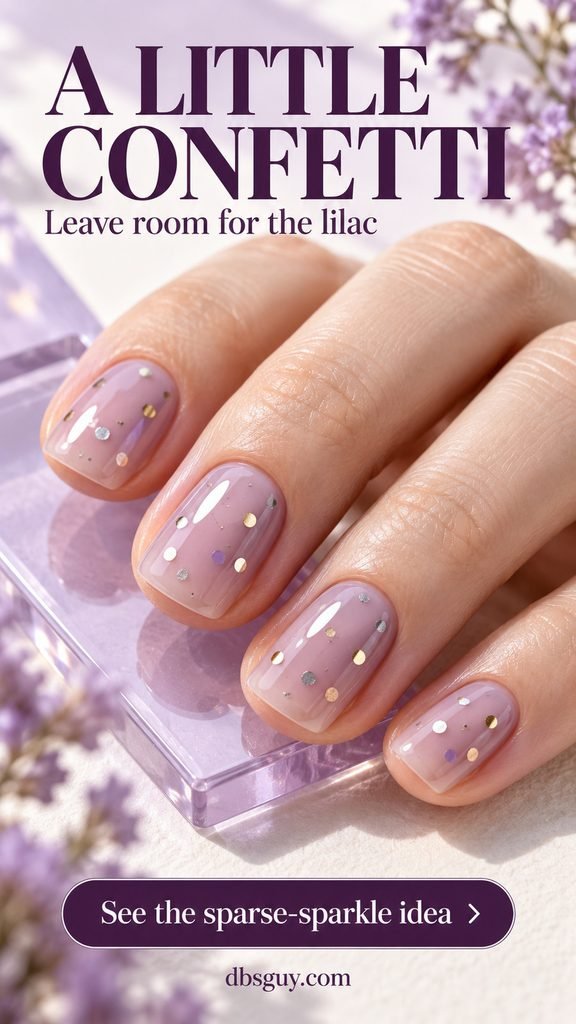
7. Smoky Lilac With Sparse Mixed-Metal Confetti
This is the playful option: little silver, gold, and lavender pieces scattered over a soft lilac base. The empty space matters as much as the sparkle. You should still notice the lilac first, rather than a solid layer of glitter.
Use a mixed-confetti nail topper and dab it where you want the pieces. If one brushful deposits too many, wipe some off at the bottle neck before trying another nail. Resist repeatedly sweeping the brush back and forth to rearrange every speck. A loose scatter suits the design, and shorter nails need fewer pieces.
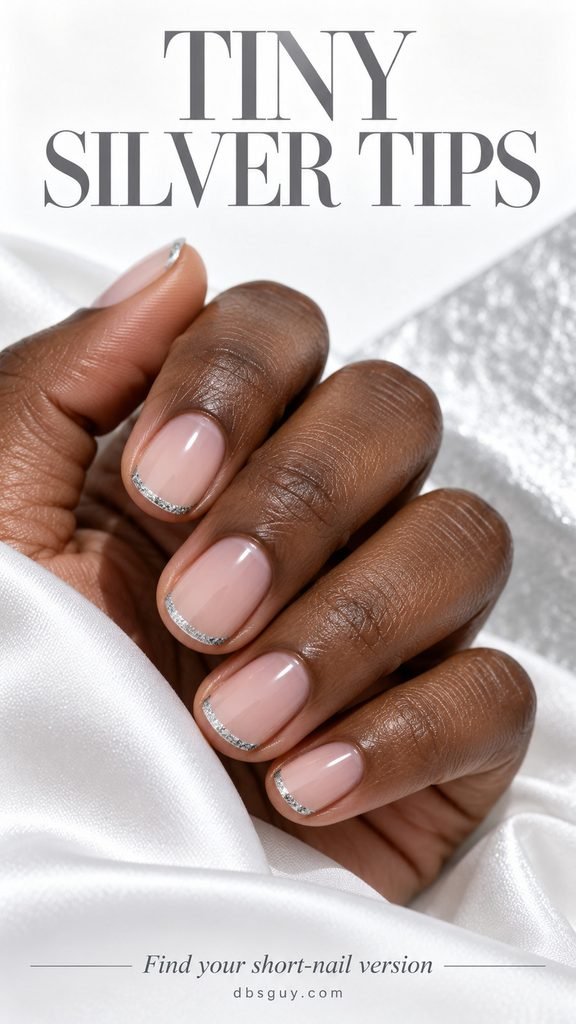
8. Milky Pink With Tiny Silver French Tips
A narrow silver edge gives a familiar pink manicure a festive outline. It leaves most of the nail quiet, which is useful when your outfit already has shine. Short rounded nails work well here because the decoration follows their existing edge.
This is one of the steadier-hand options. Use a fine brush to trace the free edge with silver glitter polish, keeping the band narrow enough that the pink remains dominant. Work from one side toward the center, then meet it from the other side. If you have almost no free edge or little time for cleanup, choose the all-over shimmer in idea 1 instead.
9. Deep Teal With Two Gold-Flake Corners
Teal gives the gold a strong background, while irregular flakes remove the pressure to paint a perfect shape. Decorate the middle and ring nails only. Keep the clusters toward a tip corner, with plenty of teal showing around them.
A nail polish containing gold flakes is a straightforward way to interpret this at home: dab a few pieces where you want the cluster. If using separate nail-art flakes, follow that product’s placement and sealing method; transfer foil and loose flakes do not necessarily use the same process. Avoid spreading the gold across the full nail, which changes the balance.

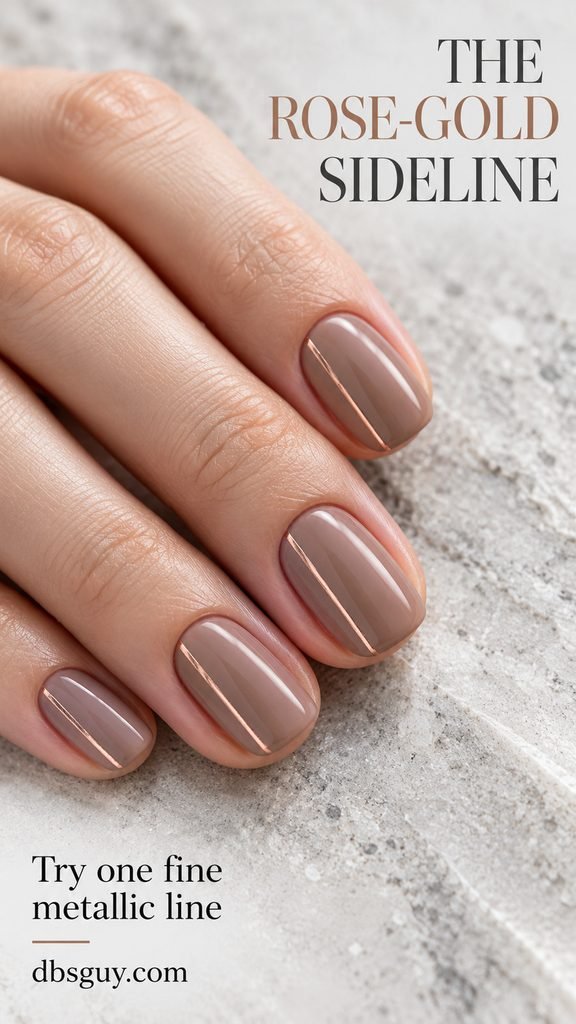
10. Mushroom Taupe With a Rose-Gold Sideline
A lengthwise metallic line creates a different kind of sparkle: quiet and linear, almost like a fine piece of jewelry. The mushroom-taupe base makes the rose gold feel warm without turning the whole manicure pink.
Place one narrow stripe slightly inside one side of each nail, stopping before the skin. Use a metallic striping polish or suitable nail-art strip, and keep the width consistent. This design takes more precision than the polish-only looks. If matching all ten lines feels ambitious, put the stripe on the ring nails and leave the others taupe.
Also Read: 21 December Nails Ideas Sorted by Occasion: Work, Party, Family
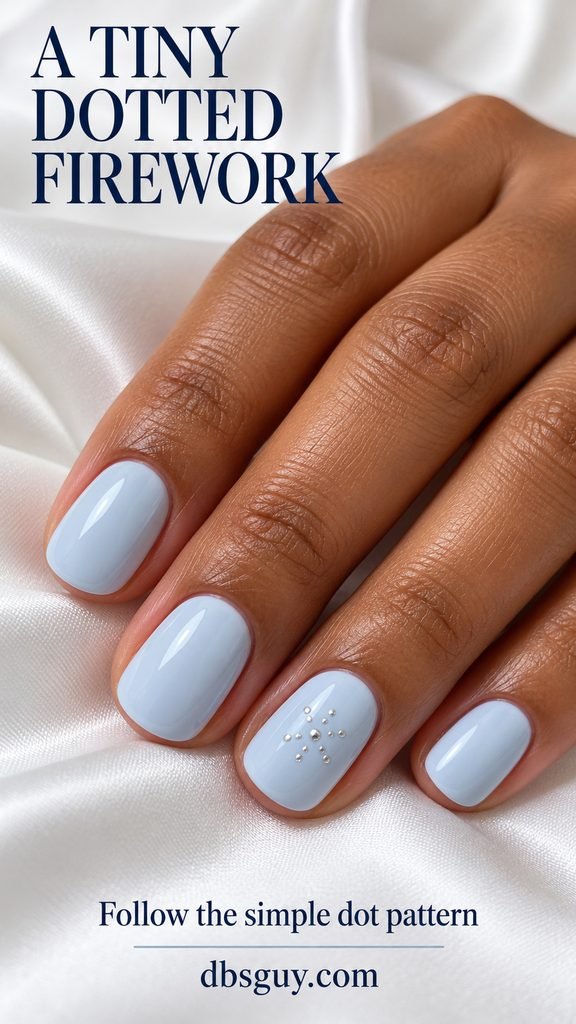
11. Icy Blue With a Tiny Dotted Firework
A dotted burst gives you a New Year’s motif without drawing miniature rockets or a countdown. Keep it centered on one ring nail against an icy-blue base. The reference uses tiny raised silver round accents, with a larger center and smaller pieces radiating around it.
For a flatter, simpler interpretation, use silver polish and a dotting tool. Make the center dot first, then place a few smaller dots around it, leaving gaps so the burst does not become a solid blob. Test the pattern on a practice surface and stop while blue still shows between the dots. If you want the raised version shown, use nail-specific accents and follow their adhesive directions.
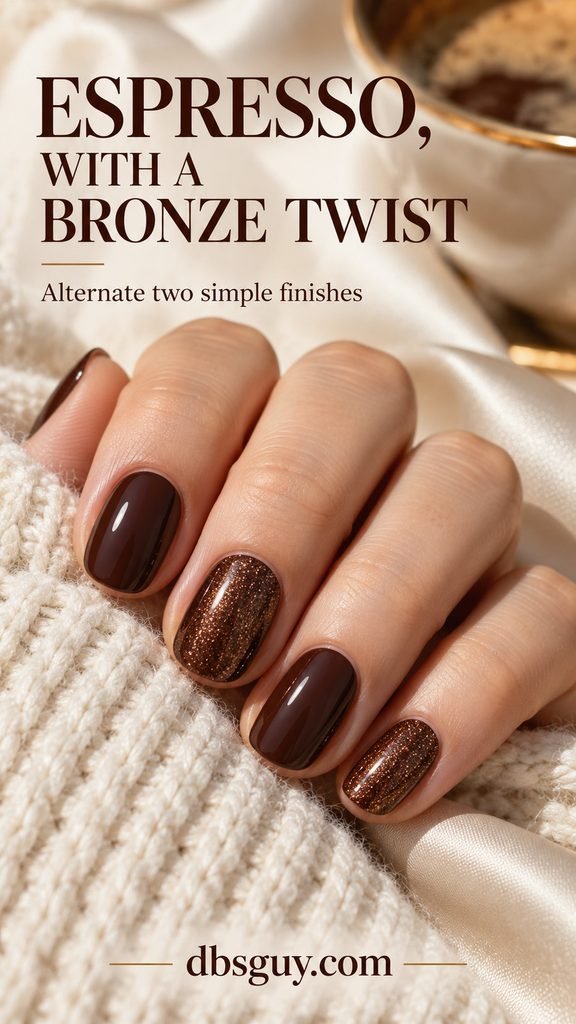
12. Espresso With Alternating Bronze Shimmer
Two finishes can do the work of nail art. Alternate glossy espresso cream polish with a similar brown containing fine bronze shimmer. Keeping both shades in the same brown family makes the contrast about texture and light rather than several competing colors.
Lay out the bottles in order before painting. The visible fingers in the concept alternate cream, shimmer, cream, shimmer; continue that rhythm or give both thumbs the plain espresso finish. Choose an ordinary shimmer lacquer if you want this to stay a brush-only manicure. A magnetic cat-eye product needs a different technique and will not behave like a regular bronze shimmer.
13. Predesigned Blush-and-Silver Press-Ons
If freehand decoration is the part you want to skip, a predesigned set can provide the artwork. Look for a short blush style with restrained silver sparkle, such as the base-focused fade illustrated here. This is a design direction, not a specific set confirmed for sale.
Use this fit-first checklist before applying adhesive:
- Lay out a comfortable size for every finger; do not force a narrow nail to cover the sides.
- Check that the length and curve feel manageable for getting dressed, carrying a bag, and using your phone.
- Confirm whether the kit uses glue or adhesive tabs, and follow that exact kit’s preparation and application directions.
- Read removal instructions now, and have the recommended supplies available. Do not pull attached nails off.
A familiar set already in your drawer is a more practical last-minute choice than ordering an unverified style. The illustrated fade is useful as a visual reference even if you choose a simpler ready-made shimmer.

Also Read: December Almond Press-On Nail Sets Worth Asking About
Before You Reach for Your Bag
Inspect the nail edges, remove stray polish from surrounding skin with an appropriate cleanup tool and remover, and give the finish the drying time its label requires. A quick-dry top coat does not make every layer underneath instantly hard. Avoid testing a fresh manicure by pressing one nail into another.
If you already have chips, decide whether a small touch-up looks tidy enough before decorating. A metallic accent is decoration, not a repair for lifting polish. When the base is rough or peeling, remove it and choose a simpler fresh finish rather than burying it under glitter.
Simple New Year Nails: Common Questions
Which idea is easiest if I have never done nail art?
The gold shimmer veil is the simplest starting point because it uses the normal polish brush across the whole nail. The navy-and-silver accent and alternating espresso finishes also avoid tiny patterns. French tips and matching side stripes require more control, even when the finished design looks minimal.
Can I do these designs with regular polish?
Yes, the painted looks can be interpreted with regular color, shimmer, glitter, and metallic nail polishes. Choose decals or accents that are compatible with that system. If a bottle says it needs lamp curing, follow its instructions; it is not interchangeable with air-drying lacquer.
What if my nails are very short?
Choose full fine shimmer, one glitter accent, or a small dot near the base. Scale any star or dotted burst to fit within the nail, with space around it. A narrow tip can work if you have an edge to follow; you do not need extensions to make these designs feel festive.
How much time should I leave?
Count preparation, painting, decoration, and drying separately. There is no single reliable total for every formula and layer thickness. Read your polish or adhesive directions before starting, get dressed first, and choose fewer layers or less artwork when the schedule is tight.
How do I remove the sparkle afterward?
Use the remover and method recommended for your polish, and give glitter time to release rather than scraping it off. Press-ons, gel, and regular lacquer have different removal needs. Follow the exact system’s directions and moisturize afterward.
If you are still deciding, choose the polish-only gold veil for the least detail work, navy with one silver nail for stronger contrast, or a tiny star when you want a recognizable motif. Pick the version you can finish comfortably, then let that one detail carry the manicure.
Also Read: 25+ December Nail Ideas to Match Your Mood, From Cozy to Party-Ready