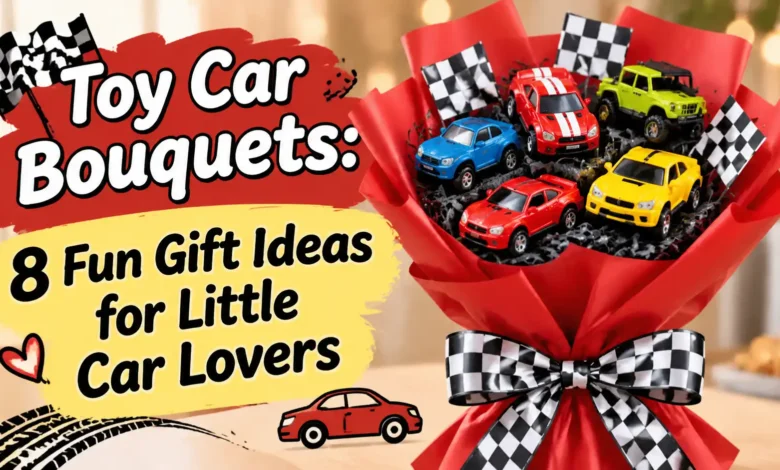
A toy car bouquet turns a few carefully chosen cars into a gift with a proper reveal. Keep the cars in their packaging, arrange them so every vehicle shows, and let the wrapping carry the theme. You do not need a huge collection—or fresh flowers—to make it feel special.
For a birthday, start with the race-day bouquet. For a small congratulations gift, choose the one-car star. If the present needs to travel, the road-trip bouquet box is easier to support than a tall handheld arrangement. Below are eight different ways to match the gift to the child who will open it.
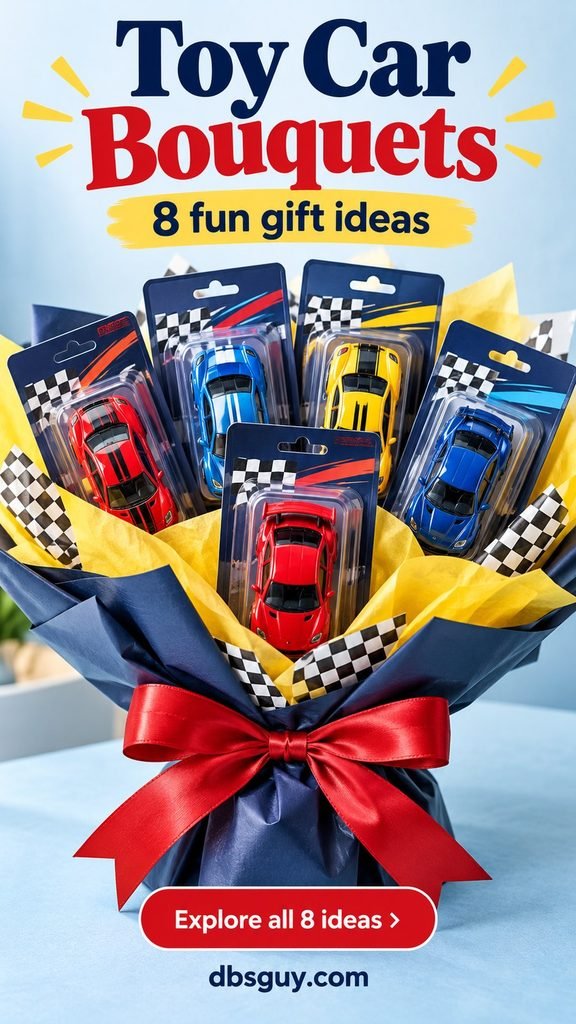
The images are AI-generated design concepts, not photographs of tested projects. Package shapes and toy sizes vary; arrange your actual items before cutting the backing.
Choose the Toys Before the Wrapping
Check the age guidance and warnings on every vehicle, including anything sold in a multipack. A car-themed gift is not automatically suitable for a toddler. The CPSC’s toy safety guidance recommends following packaging age information and keeping toys with small parts away from children under 3. For a younger recipient, choose vehicles specifically labeled for their age and give them in a simple gift box that an adult unwraps.
These bouquets are adult-assembled gift presentations. Remove the wrapping, tape, ribbon, backing, and decorative cutouts before play. Keep the original toy warnings available for the caregiver. Skip pointed skewers, exposed wire, loose beads, and loose glitter; none is necessary for these designs.
Ask which vehicles the child actually likes. A rescue-vehicle fan may enjoy an ambulance more than another sports car. If the family uses a particular track, check the toy and track maker’s compatibility information instead of assuming every small vehicle will fit.
A Simple Backing That Keeps the Cars Visible
For the handheld designs, use a broad piece of sturdy corrugated cardboard behind the packages rather than attaching each car to a separate stick. This is a suggested construction approach, not a tested load rating: the backing and tape must support your particular packages.
- Gather the packaged vehicles, clean cardboard, wrapping paper, tissue, wide ribbon, scissors, and tape appropriate for the cardboard and packaging.
- Lay the packages faceup in a shallow fan. Put the center package slightly higher and keep each clear blister visible. Trace a backing that supports the full arrangement, including the lower packages.
- Have an adult cut the backing with rounded corners. Cover its front with paper. Secure ordinary, expendable package backs to it, testing the tape first; adhesive can mark or tear printed cards. Do not tape directly to the cars.
- Lift the assembly a little above a table while supporting its bottom. If packages slip, the card bends, or tape lifts, set it down and reinforce it—or use the box arrangement in idea 6.
- Place tissue and wrapping behind the supported fan. Fold the sides inward and gather only the paper below the toys. Tie the ribbon around the paper; the bow is decoration, not a carrying handle.
Keep the gift supported from underneath when carrying it. For valuable collectible packaging, avoid adhesive altogether and use an appropriately sized presentation box. The goal is an enjoyable gift, not damaged cards hidden inside elaborate wrapping.
1. Race-Day Birthday Bouquet
Black-and-white checks make the birthday theme readable immediately. Use three packaged race cars, a black paper wrap, red ribbon, and a few flat checkered paper accents. Red, blue, and yellow cars keep the gift cheerful without needing extra decorations.
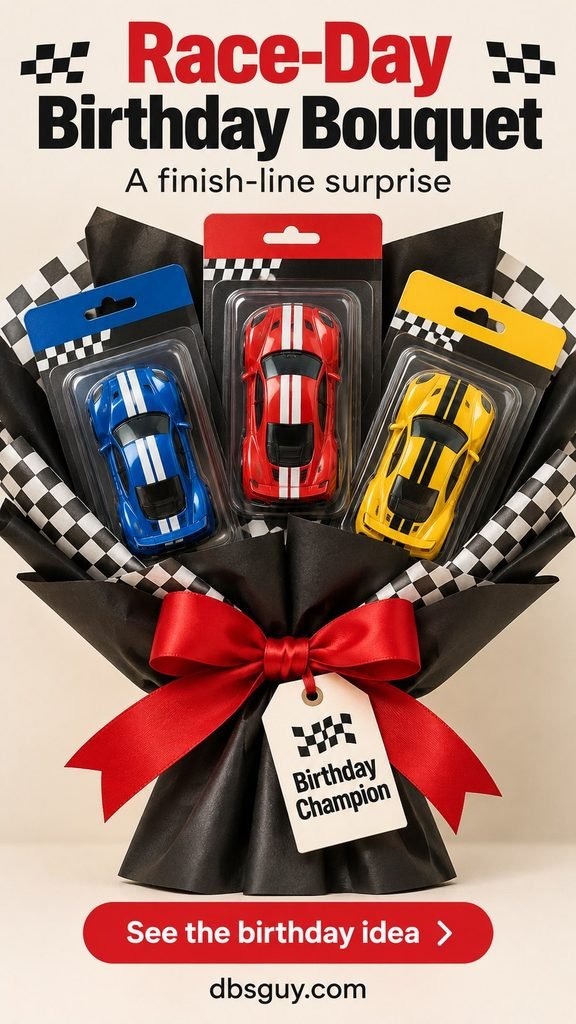
Arrange one package at the top and two slightly lower, leaving all three cars visible. Let the checkered paper peek out around the outside edge rather than covering the vehicles. Attach a flat “Birthday Champion” tag to the wrapping, where it will come off with the paper.
This is a good choice when the party already has a racing theme: repeat the party colors and stop there. If the cars are intended for an existing track, make compatibility part of your shopping check. A matching color scheme cannot compensate for cars that do not work with the child’s favorite play setup.
2. One-Car Star Bouquet
One well-chosen car can make a more personal gift than a bundle of random vehicles. This small bouquet suits a recital, a school milestone, or a little “thinking of you” surprise. Pick the car first—a favorite color or vehicle type gives you an easy starting point.

Place the sealed package against a large flat cardstock star, then support both with cardboard. The star should extend beyond the package enough to frame it without hiding the car. Wrap the bottom in kraft paper, add a narrow collar of cream tissue, and finish with ribbon that echoes the vehicle.
Keep this version compact. A tiny car surrounded by a towering paper cone can feel lost. The orange-and-blue concept works because the star creates the volume, while the toy stays at the center. If you are gifting a collector’s item, switch to a box with the star behind it so the original card stays untouched.
3. Construction Crew Bouquet
For a child who watches every excavator on the way to school, make the vehicles a working crew: a dump truck, an excavator, and a bulldozer. Their different shapes give the gift more variety than three nearly identical trucks.
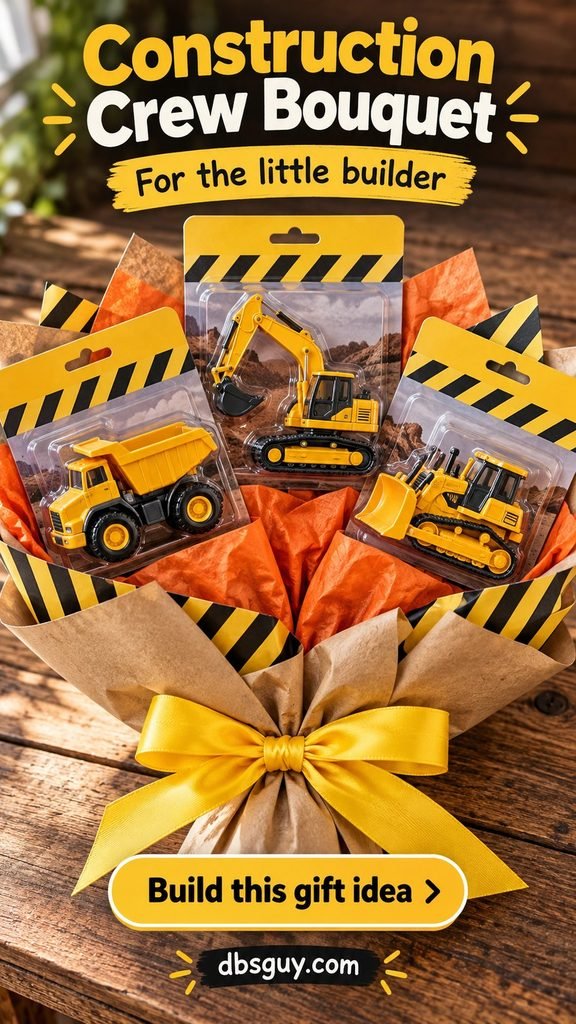
Kraft wrapping, orange tissue, and a yellow ribbon suit the theme. Add a flat strip of black-and-yellow paper along one edge for a construction-site detail. Skip miniature cones or loose gravel; the packaged vehicles already provide the interesting parts.
Construction packages can be deeper than sports-car packages. Lay them out before sizing the backing, and keep the heaviest one low and close to the center. Do not stack one blister on top of another. If the fan becomes awkward to carry, nest the supported arrangement in a shallow box instead.
A handwritten note can turn the gift into a play invitation: “Which truck will move the dirt, and which one will clear the road?” Keep any later play materials appropriate for the child’s age.
4. Rescue-Team Bouquet
A fire engine, ambulance, and police car make a gift built around pretend-play roles. Choose recognizable vehicles rather than relying on tiny printed package labels to explain the theme.
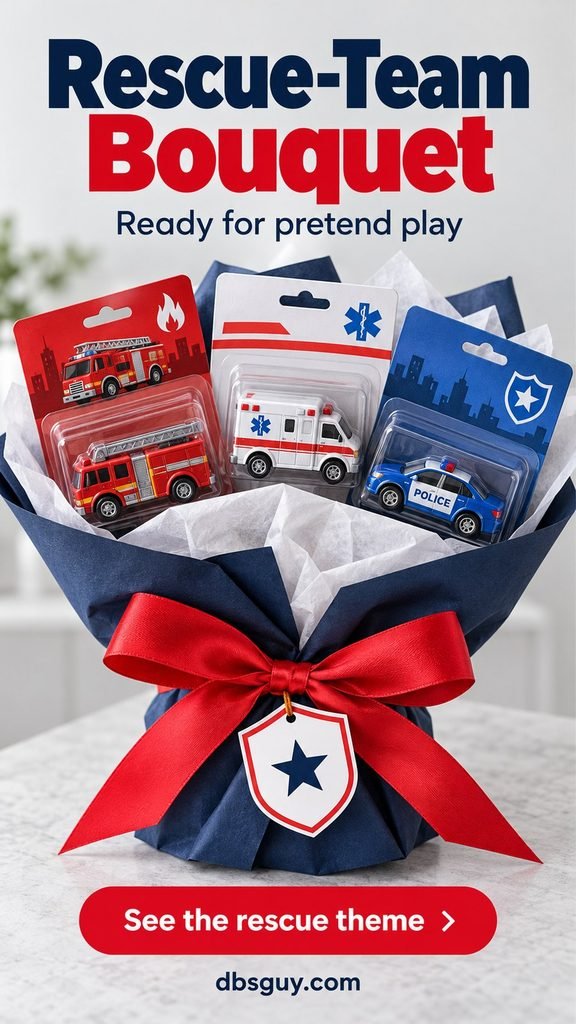
Use navy wrapping and white tissue so the red fire engine remains easy to spot. Position the longest package across the lower part of the fan, then balance the other two above or beside it. A flat paper shield on the wrap is enough decoration; it does not need a separate stick.
Before buying, check whether any vehicle uses batteries or makes sounds. A quiet set may suit the household better, and mixed sets can have different age guidance. Keep instructions with the gift. To personalize it, write a short pretend mission on the card, such as “Help the toy animals get home before bedtime.”
5. Rainbow Car Bouquet
This version makes color the organizing idea, but the cars should still be interesting to play with. Choose five cars in clearly different colors—red, yellow, green, blue, and purple work well—and mix body shapes if the child enjoys variety.
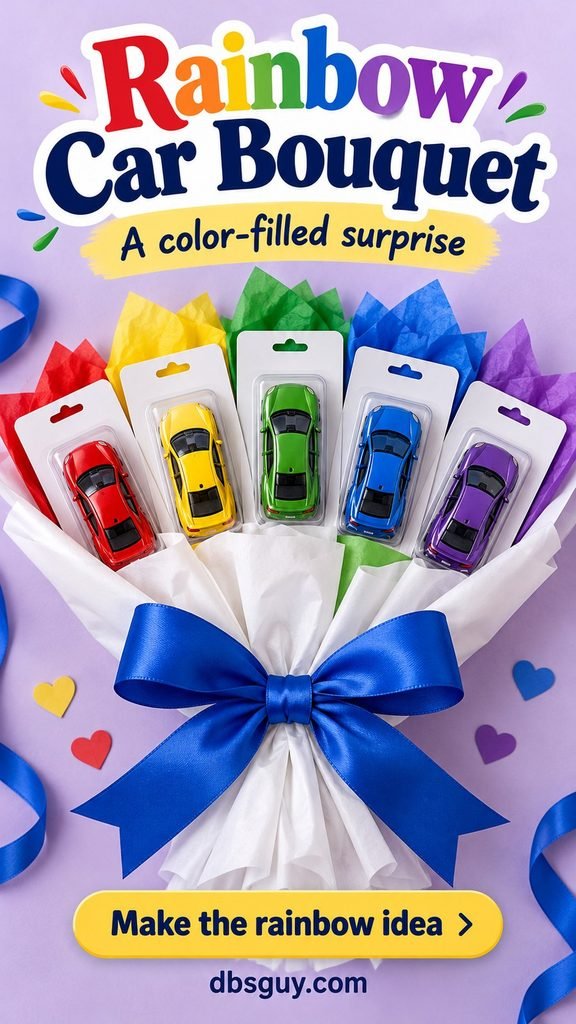
Arrange the packages in a wide, shallow fan on a broad backing. Tuck a little coordinating tissue behind each package, then use white wrapping to keep the overall gift from looking busy. One blue ribbon pulls the colors together.
Five packages need more width than three. If a car disappears behind its neighbor, spread the fan before adding more tissue. When package sizes vary too much for a neat arc, stagger them in two shallow rows and support the lower row fully.
This is the most useful option when you know a favorite palette but not a favorite vehicle. You can reduce the number of cars to suit your budget; a small, clear arrangement is better than a crowded one padded with toys the child will not use.
6. Road-Trip Bouquet Box
A low bouquet in a box is easier to set down and transport. It also leaves room for something useful after the reveal: a small fabric car pouch and a folded road play mat.
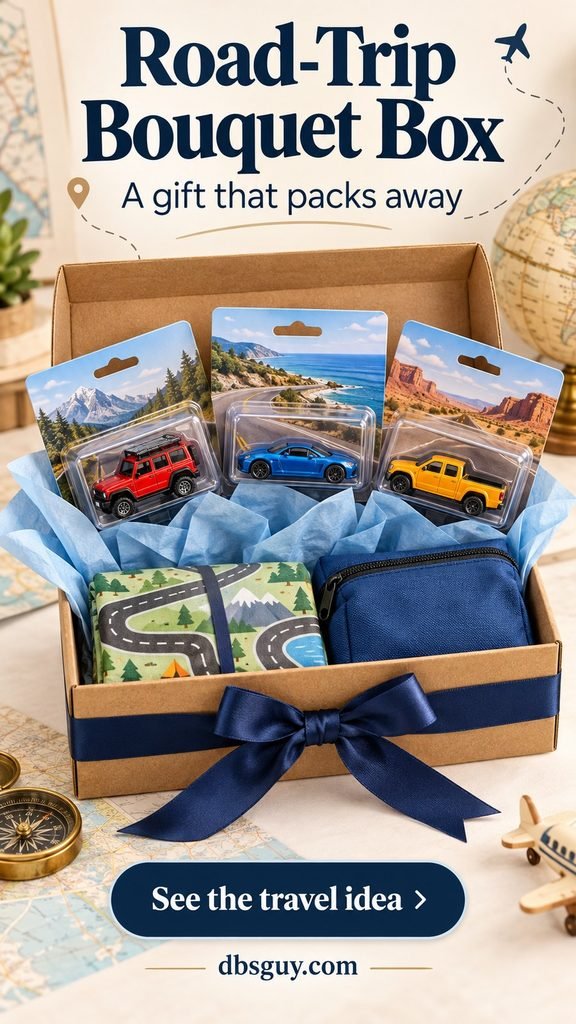
Choose a sturdy box that fits the packages and accessories without forcing its sides outward. Secure a broad cardboard back panel inside it, then arrange three packaged cars in a low fan against that panel. Use folded tissue around the edges for the bouquet effect. Keep the pouch and mat at the front, where they can be lifted out without pulling on the cars.
Make sure the box can close if it needs to travel in luggage. Do not depend on crumpled tissue to support a tall, heavy arrangement. Carry the box from its base, and let an adult remove all assembly materials before the child uses the toys.
The play mat is for a suitable stationary play space, such as a visit or travel stop. The bouquet itself should be packed securely during the journey. Check the mat and pouch for age suitability, and avoid promising that an elaborate unwrapping project will keep a child occupied in a moving car.
7. Cars and Paper Hearts Bouquet
Paper hearts give two toy cars a Valentine’s Day look without adding candy. This can also be a family “just because” gift. Red and teal cars against blush paper create enough contrast that the toys do not disappear into the wrapping.
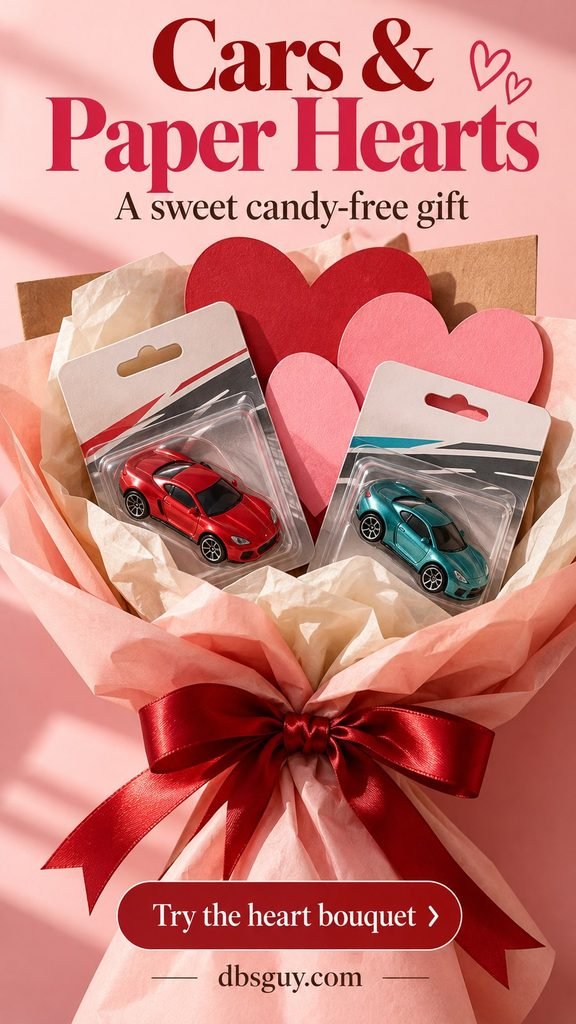
Cut three large hearts from cardstock and attach them flat to the backing between and behind the packages. Keep their edges above the cars, not across the clear fronts. Cream tissue softens the outline, and a red ribbon makes the small arrangement feel finished.
Write “You make my heart race” on the gift card if you like a playful message. For a classroom exchange, check school rules first and keep any gifts consistent across recipients. This two-car bouquet is better suited to one child than a large class where cost and package size quickly add up.
Flat paper decorations are easy to remove together with the backing. Avoid turning each heart into a separate wired or skewered pick.
8. Christmas Garage Bouquet
Turn three packaged cars into a little holiday garage with forest-green wrapping, cream tissue, and a red fabric bow. Red, green, and silver cars make a festive combination, but do not buy a less suitable toy just to complete the palette.
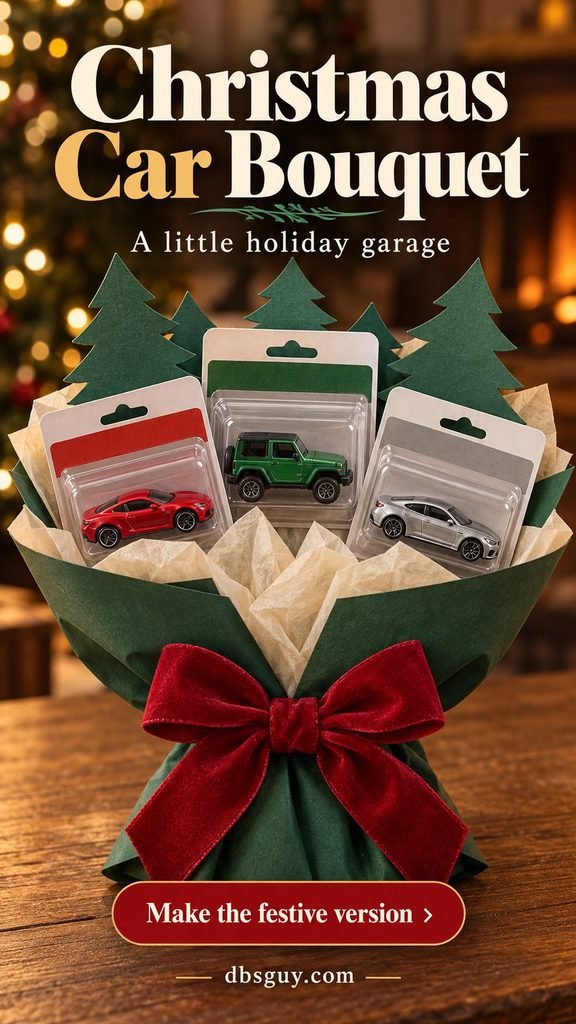
Stagger the packages so the cars form a compact triangle. Tuck large paper evergreen silhouettes behind the top edges; these add a seasonal outline without loose ornaments, artificial berries, or shedding greenery. Write the child’s name on a flat tag attached to the wrap.
Keep the package warnings accessible and save the instructions. If another relative is buying a track, coordinate the cars before shopping. For a gift traveling to another house, place the entire supported bouquet in an outer box so the wrapping is not crushed.
If you want the present to include more than vehicles, borrow the container approach from 30 DIY Christmas Gift Basket Ideas That Are Perfect for Anyone and keep the additions specific to this child, such as a suitable storage pouch.
Before You Hand It Over
Look at the finished arrangement from the front: can the child see each vehicle without pulling the bouquet apart? Then check it from underneath. Every package should be supported, and nothing should rely on a decorative ribbon to stay attached.
Give it a gentle lift over a table, supporting its base. If anything shifts, fix the support or move the gift into a box. Tell the caregiver that the wrap and backing need to come off before play. Include any receipts separately so they stay readable.
Toy Car Bouquet Questions
How many cars do I need?
One is enough for a small gift. Three make a compact fan, while five create a fuller arrangement that needs a wider backing. Choose the quantity around the child’s interests, your budget, and the actual package sizes.
Can I use cars that are already out of their packages?
Yes, but a box with separate compartments is more practical than attaching loose cars to a handheld bouquet. Check their condition and confirm their age suitability. Do not glue cars to sticks or run tape over wheels and moving parts. Keep the bouquet effect in the paper around the compartments.
Do I need hot glue or floral foam?
Neither is required for the backing-and-wrap approach described here. Use suitable tape on expendable packaging and cardboard, checking that it holds. If the packages are too heavy or their backs cannot be taped, choose a fitted box. Adding more decoration will not solve weak support.
Can I add sweets?
You can, but check with the caregiver about age suitability, allergies, and household preferences first. Keep food in its original sealed packaging with the ingredient information intact. A separate treat bag is easier to check and remove than candy hidden among toy packages; none of these eight designs requires food.
How do I keep the cost manageable?
Spend on the vehicle the child wants, then use paper you already have. A single-car bouquet can look intentional with a large paper star and a handwritten note. Set a total budget before choosing wrapping, and compare the complete cost rather than assuming a handmade gift is always cheaper.
Also Read
For a holiday version with more paper details, see 15 Paper Christmas Decorations That Make a Big Impact With Simple Supplies.