You don’t need a loom, a wall-sized pattern, or a box of specialty tools to make your first piece of beaded wall art. Start with a small wooden dowel, cotton cord, and large-hole wooden beads. Five simple strands give you enough repetition to learn the process without turning your table into a tangle.
The buying decision that matters most is the bead hole, not just the bead diameter. Your cord has to pass through comfortably, and the knot underneath has to be large enough to hold the beads. Check those two things before committing to a big pack.
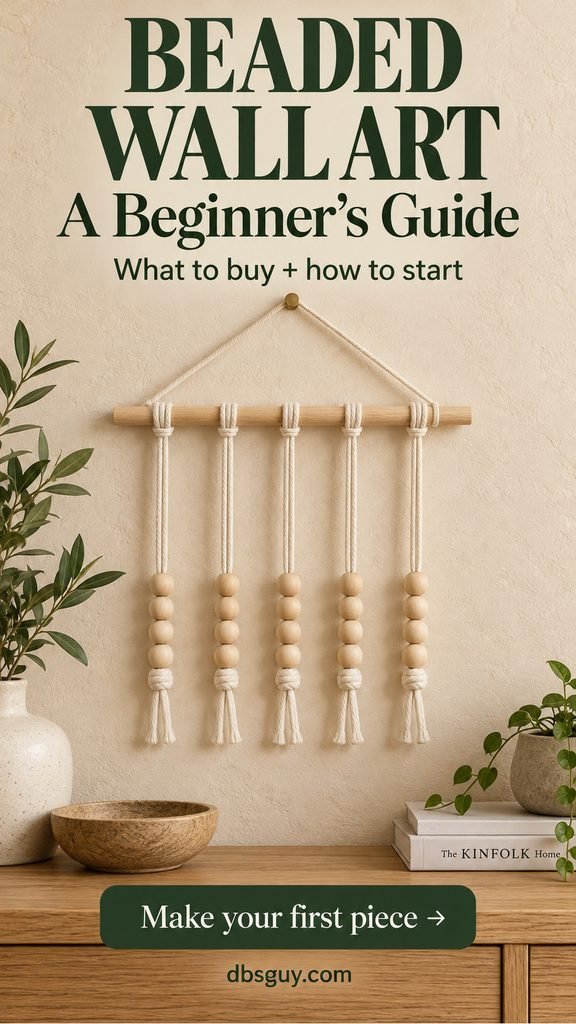
The images are AI-generated instructional concepts, not photographs of a tested build. Follow the written measurements and checks; the close-ups illustrate individual details.
Start with a small hanging you can adjust
“Beaded wall art” can mean woven seed-bead pictures, beads stitched onto fabric, or suspended strands. This guide uses the suspended-strand approach: five beaded cords attached to one dowel. There is no loom, sewing, or adhesive in the construction.
The suggested layout is 12 inches wide, with five identical stacks of four wooden beads. Cream cord and natural wood keep the focus on spacing and texture. The bead stacks sit at the same height, so you can compare one strand against the next as you work.
This is an original starter layout built around established stringing and knotting methods, rather than a hands-on-tested pattern. Make the one-bead sample below before cutting the remaining cords. The generous cutting lengths leave room to adjust for your actual beads and knots.
What to buy—and what to leave on the shelf

- 25 round wooden beads, approximately 16 mm across, with a stated 6 mm hole. The project uses 20; the extras cover a rough hole, a split bead, or a practice sample. Buy one size and finish so the rows are easier to align.
- At least 7 meters (about 23 feet) of 2 mm braided cotton cord. Each strand uses a folded length, so two cord ends must fit through every bead together. Choose nonelastic cord with a firm, tidy surface.
- One smooth wooden dowel, 12 inches long and about ⅜–½ inch thick. A precut dowel avoids a separate cutting job. Check the ends for splinters before handling the cord.
- Scissors, a ruler or tape measure, and a little paper tape. A shallow tray or folded towel keeps loose beads from rolling away.
- A wall hook or picture hanger suitable for your wall and the completed piece’s weight. Choose the mounting hardware after weighing the finished hanging.
Search craft-store listings for “large-hole wood beads,” then open the specifications. A photograph of a big bead does not tell you the hole size. For example, Paracord Planet’s 16 mm wooden beads list a 6 mm hole and a 14-piece pack. That illustrates two details to check separately: cord clearance and how many packs your project needs. It is a specification example, not a claim that this is the cheapest option.
Compare the cost of enough usable beads, cord, and a dowel—including shipping—rather than the price of one pack. You can skip a loom, beading wire, jewelry pliers, glue gun, and tassel maker for this project. Tiny seed beads and heavy stone beads call for different materials and are poor substitutions for this particular shopping list.
Make your first beaded wall hanging
1. Test one bead and a stopper knot
Cut a short practice piece of cord from your spare allowance and fold it in half. Thread both free ends through one bead together. If the cord frays, wrap the ends in a narrow piece of paper tape and twist the tape into a slim tip. The tape should help guide the cord, not make a bulky plug.
Next, treat the two tails as one thicker cord and tie a double-overhand stopper underneath the bead: form a loop, pass both tails through that loop twice, then draw it closed. Settle the turns together and tighten firmly. The bead should rest on the knot without slipping over it when you pull gently.
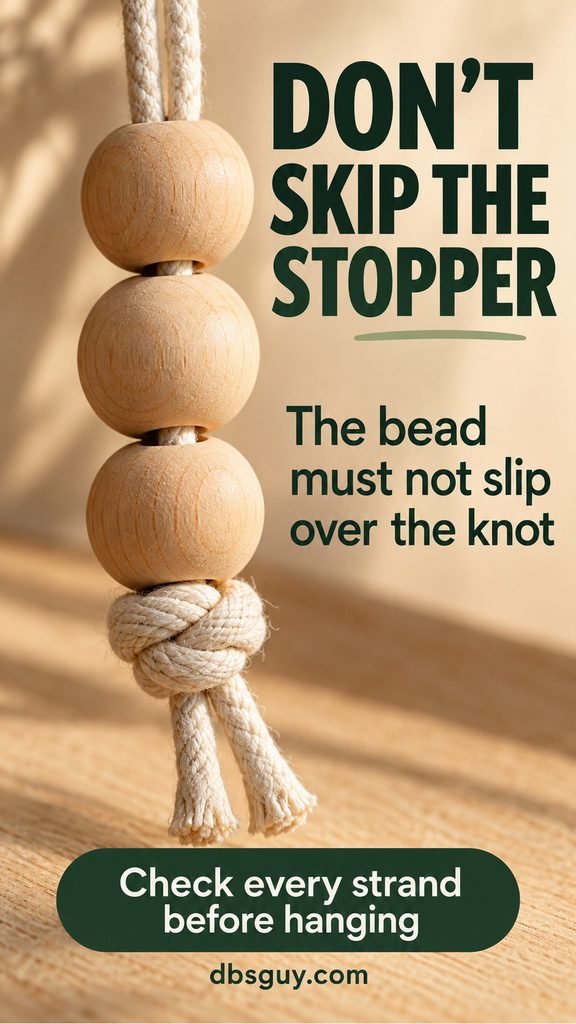
If the bead passes over the tightened knot, the combination has failed the sample check. Try a bulkier stopper by passing the tails through the loop three times before tightening, and test again. If it still slips, choose a different cord-and-hole combination. A dab of glue is not a substitute for a stopper that physically holds the bead.
2. Cut the cords and mark the spacing
Once the sample works, cut five 36-inch lengths for the beaded strands and one 30-inch length for the hanger. Those cuts use 210 inches of cord—about 5.34 meters—leaving spare cord from the recommended 7 meters for practice and adjustments.
On the 12-inch dowel, mark five attachment positions at 1½, 3¾, 6, 8¼, and 10½ inches from one end. Use small removable tape markers instead of dark permanent marks. Lay out five groups of four beads so you can see the full quantity before threading.
3. Attach the folded cords
Fold a 36-inch cord in half. Place its folded loop behind the dowel, bring the loop over the top toward you, and pass both free ends through it. Pull the ends down evenly to snug the knot against the wood. This is a lark’s head knot: one folded cord produces two hanging tails.
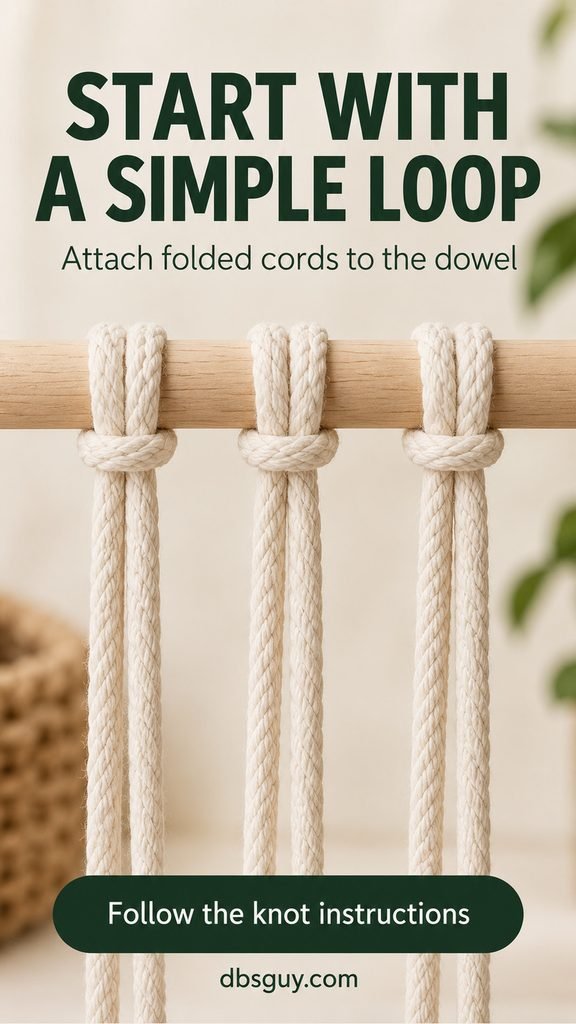
Repeat at all five marked positions. Keep the knots facing the same way and the two tails of each strand roughly equal. At this stage, the attachments can still slide along a smooth dowel; that lets you correct the spacing before the final check.
4. Thread four beads onto each pair of tails
Wrap each pair of ends together with a slim tape tip if needed. Feed both tails through each bead, adding four beads to every strand. Keep the pairs separate as you work. Do not thread just one tail and leave the other hanging behind the beads.
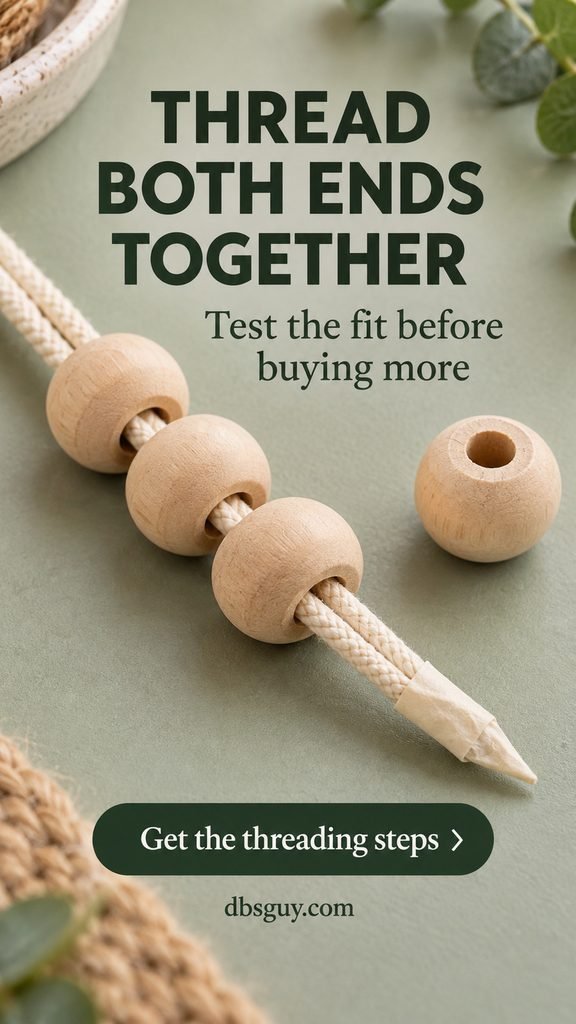
The threading close-up shows a short practice section; the full project uses four beads per strand. If a bead catches, remove it and inspect the hole. Replace a cracked bead or one with a rough interior that snags the cord. Forcing it through can leave you with damaged fibers hidden inside the bead.
5. Set the bead height and secure the stacks
On the center strand, tie the tested stopper so its top sits roughly 10 inches below the underside of the dowel. Keep the knot loose enough to reposition until you like the height, then tighten it fully and slide the four beads down to rest on it.
Four 16 mm beads make a stack approximately 2½ inches tall, although drilled beads can vary along their stringing axis. The space above the stack will therefore be mostly exposed cord. That open space is intentional; this is a small, airy hanging rather than a dense beaded curtain.
Use the center strand as your reference for the remaining four stoppers. Compare the bottoms of the bead stacks, not the loose cord ends. Check each knot after tightening, because tightening can move its position slightly. Leave all tails long until the piece hangs level.
6. Add the hanger, check the balance, and trim
Attach one end of the 30-inch hanger cord near one end of the dowel. Wrap it around the wood once; pass the short end around the longer section and through the loop you just made. Repeat that half hitch a second time and tighten. Attach the other end near the opposite end of the dowel the same way, leaving a shallow triangular hanger above the wood. Keep at least an inch of tail beyond each finished attachment knot.
Hold the hanging by the center of the hanger over your worktable. Adjust the cord and strand positions until the dowel is level. If an attachment creeps toward an end during a gentle handling check, retie it more snugly and check again before mounting.
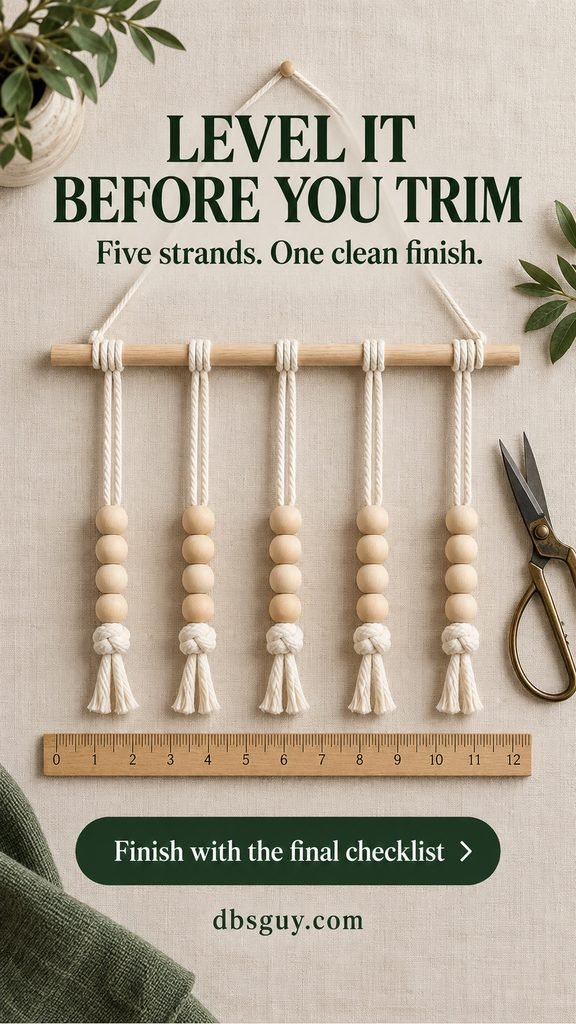
Only now trim the paired tails beneath the bead stoppers to approximately 1½ inches. Leave the stopper knots intact. Remove the tape markers and threading tape, then check that every bead stack is secure and all five strands hang freely.
Where to hang it
A 12-inch piece works well beside a reading chair, above a small shelf, or within a larger wall arrangement. On a wide empty wall it may look undersized; try a paper rectangle in the intended spot before installing hardware. Leave enough clearance beneath the cords that nearby books and objects do not push them out of line.
Use the mounting instructions for your particular hook and wall surface. If you choose an adhesive hook, follow its surface preparation, weight limit, and waiting time; “lightweight” does not mean every adhesive will hold. Keep loose beads and hanging cords out of reach of young children and pets, and do not position the piece above a crib or where someone can pull on it.
Also Read: 27 Living Room Gallery Wall Ideas That Look Designer for ways to fit a small textured piece into a bigger arrangement.
Quick fixes for common beginner problems
- The cord will not fit: Check that the hole accepts both tails, not just one. Remove bulky tape first. If it still catches, change the bead or cord instead of forcing it.
- The bottom bead slips: Retie a larger stopper and repeat the sample check. Do not hang the piece until each knot holds.
- The stacks look uneven: Compare stopper positions with the dowel level. Adjust the knots before cutting tails; trimming the tails cannot fix a misplaced bead stack.
- The dowel tilts: Check the hanger’s attachment positions and redistribute the five strands symmetrically. Make sure no strand is caught behind another.
- The piece looks too busy: Finish this version with one bead size and one wood tone. Consistent spacing will do more for this simple layout than extra embellishments.
Beginner questions
Do I need a beading needle?
Usually not for this large-hole project. Start with the taped cord ends. A needle adds thickness at its eye, so it can actually make a tight fit worse; check the complete needle-and-cord combination before buying one.
Can I use yarn or fishing line?
Not as a straight swap for these measurements and knots. Yarn can stretch or split, and fine fishing line behaves differently when knotted. The shopping list and sample check are built around braided cotton cord.
Can I use beads I already own?
Yes, if they are sound and the doubled cord passes through them while the tightened stopper holds. Changing bead size changes the stack height. Lay out the actual beads and recheck the cord length before cutting all five pieces.
Can I paint the beads?
You can, but finish them before threading. Follow the coating’s instructions, keep the holes clear, and allow the finish to dry or cure as directed. Test one spare bead first, especially if it already has a glossy coating.
How do I clean the finished hanging?
Support the strands while dusting gently with a soft, dry brush. Follow the bead finish’s care instructions before using moisture. Check the cords and knots when you clean, and take the hanging down if you find fraying or loosened attachments.
Make the sample your first step
Before filling a cart, choose your dowel and test one bead on doubled cord. Once that bead threads cleanly and the stopper holds, the rest is repetition: attach five cords, add four beads to each, align the stacks, and trim at the end. A small finished piece gives you a useful starting point for deciding whether you want to try a more involved beading project next.
Also Read: Best Fall Decorations Shelf Ideas to Brighten Your Space if you plan to display your hanging above a seasonal shelf.