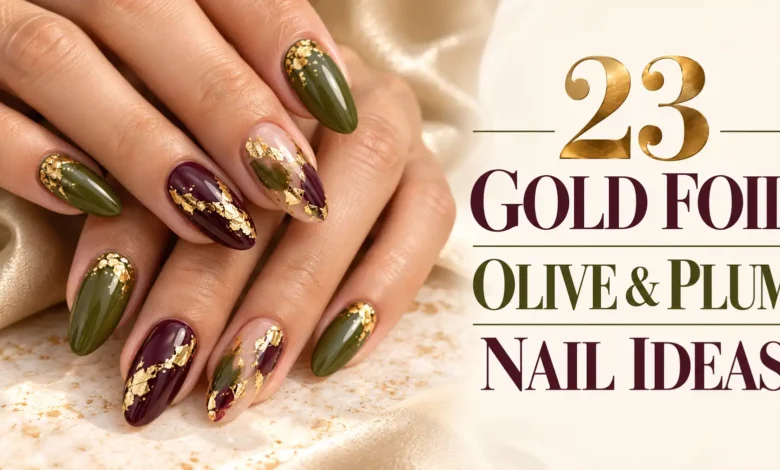
Gold foil gives olive and plum nails a small point of light without covering up the colors that make this pairing work. The most useful choice is where to put it: a tiny cuticle accent feels quiet, a gilded French tip feels crisp, and a broken marble seam makes the whole manicure more decorative.
Start with cuticle crescents or a single foil medallion if you want something simple. Choose marble, aura, or patchwork if you want the nail art to be the focus. Below, each of the 23 designs includes a placement detail and a way to adapt it to your own nails.
The images are AI-generated design concepts, created to illustrate the ideas. They are not photographs of completed salon work; use them to discuss color, shape, and placement with your nail artist.
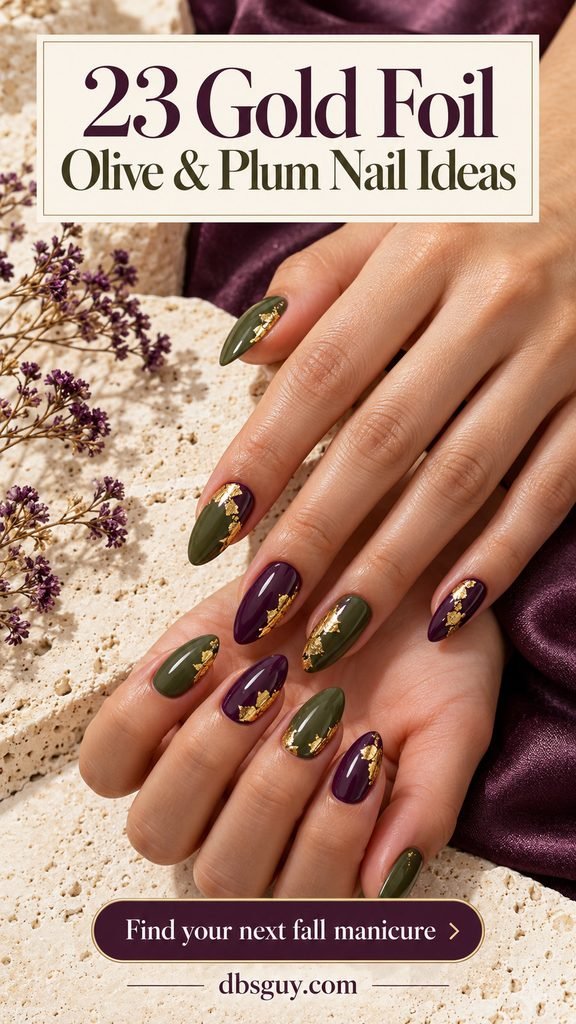
Choose Your Color, Shape, and Foil Placement
Choose the color depth first. A muted yellow-green olive and a clearly purple plum create a visible contrast. If both swatches look almost black indoors, lighten one of them. Check the colors together in daylight before committing.
Match the art to the space available. Small crescents, corner clusters, and one accent patch fit short nails. Curving channels, marble, and patchwork need enough room for the pattern to remain readable.
Decide how much gold you want. Loose fragments create a broken, organic effect. A solid-looking foil area makes a stronger statement. Neither requires covering every nail.
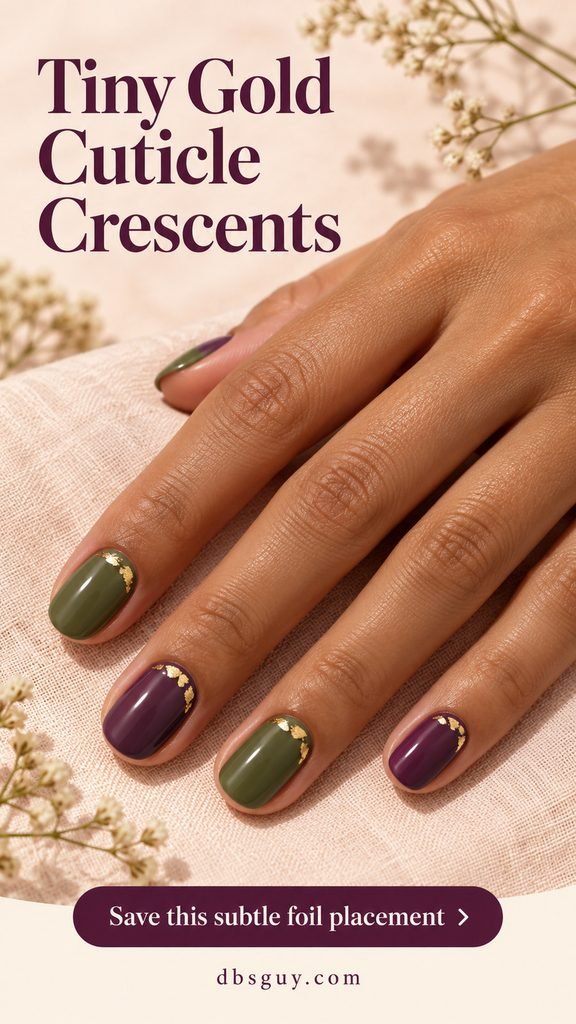
1. Tiny Cuticle Crescents on Short Nails
Alternate muted olive and plum on short rounded nails, then place tiny foil fragments in a sparse curve just above the base. The little breaks between the pieces keep the crescent light rather than turning it into a heavy gold border.
This is a good starting point if you usually wear solid polish. Ask for the same shallow curve on each nail and keep the foil on the nail plate, clear of the surrounding skin. On very short nails, a few small pieces are enough.
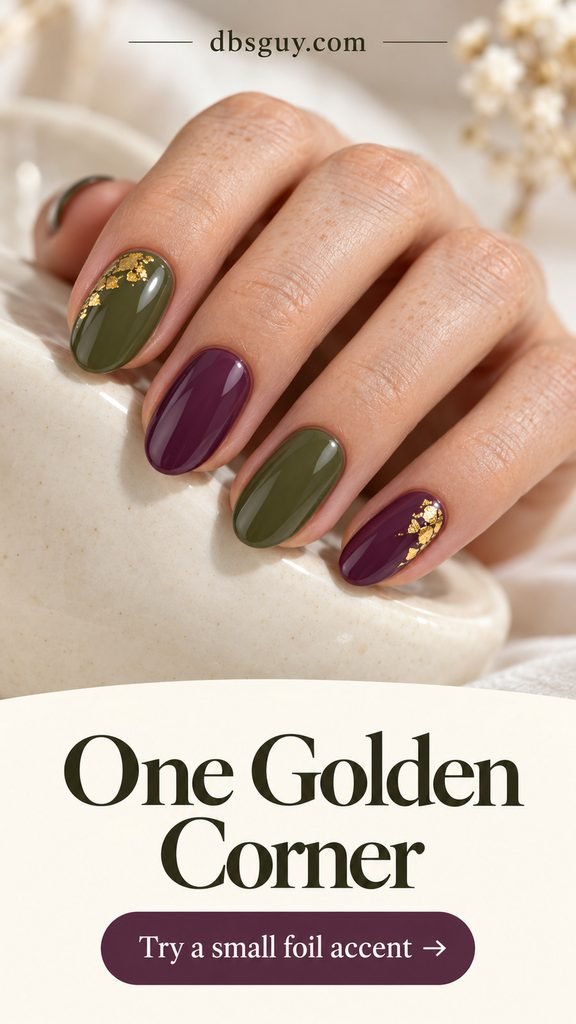
2. Small Foil Clusters in One Corner
A cluster tucked into one corner leaves most of the nail uninterrupted. Use olive and plum solids, then add gold to just two nails. Let the placement vary slightly across the hand, as in the concept, rather than scattering foil over every surface.
Choose this when you want an accent that is visible up close but still reads mostly as color. For a precise salon brief, point to the corner you prefer on each reference nail. A side cluster and a tip cluster give noticeably different results.
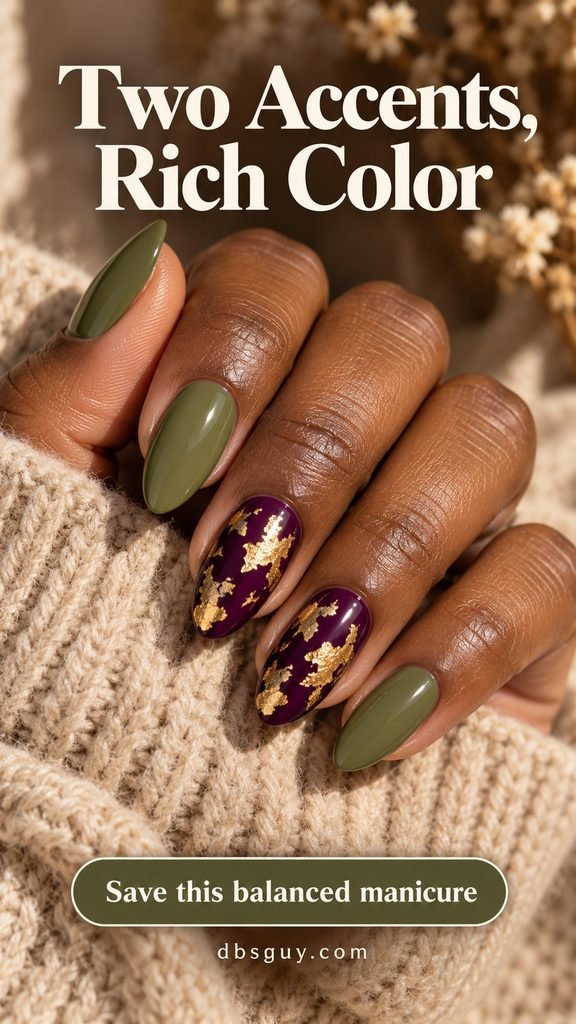
3. Two Plum Accent Nails with Olive Solids
Give the middle and ring fingers the decoration: deep plum with irregular gold patches, framed by solid olive on the thumb, index, and little finger. Grouping the gold on neighboring nails makes the design feel deliberate.
The plum should still show between the flakes. If you want less shine, reduce the size of the patches before reducing the number of accent nails; that preserves the paired arrangement. Medium almond nails give this version room without needing a complicated pattern.
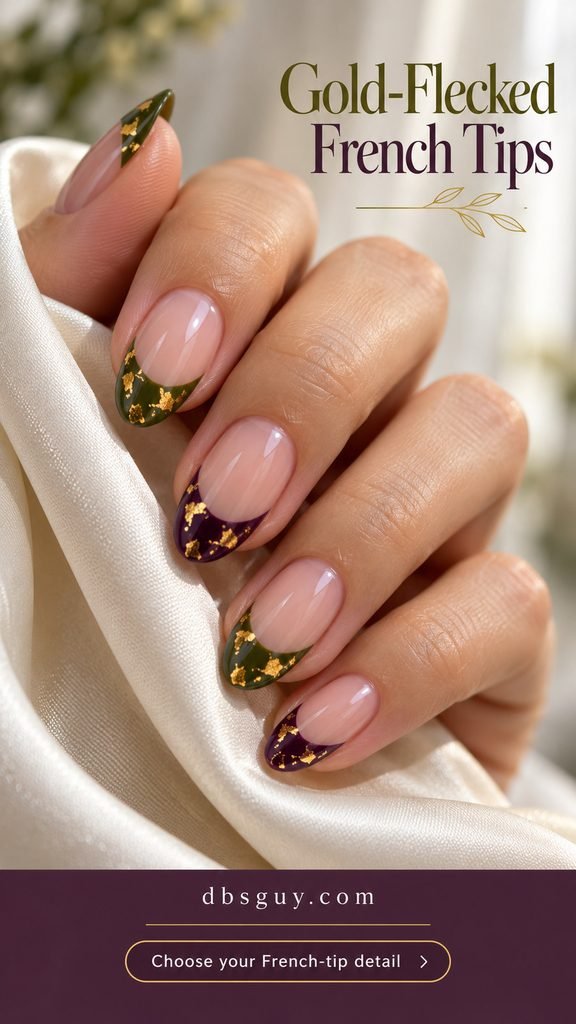
4. Gold-Flecked Olive and Plum French Tips
Keep the base sheer and put both the color and foil inside the French tips. Alternate olive and plum tips, then tuck a few flakes into each colored edge. The open-looking base makes this a lighter way to wear the palette.
Ask for the foil to stay inside the tip rather than spilling down the nail. On shorter nails, shrink both the colored band and the fragments. A broad gold patch can hide a narrow tip, so show your artist which detail matters most to you.
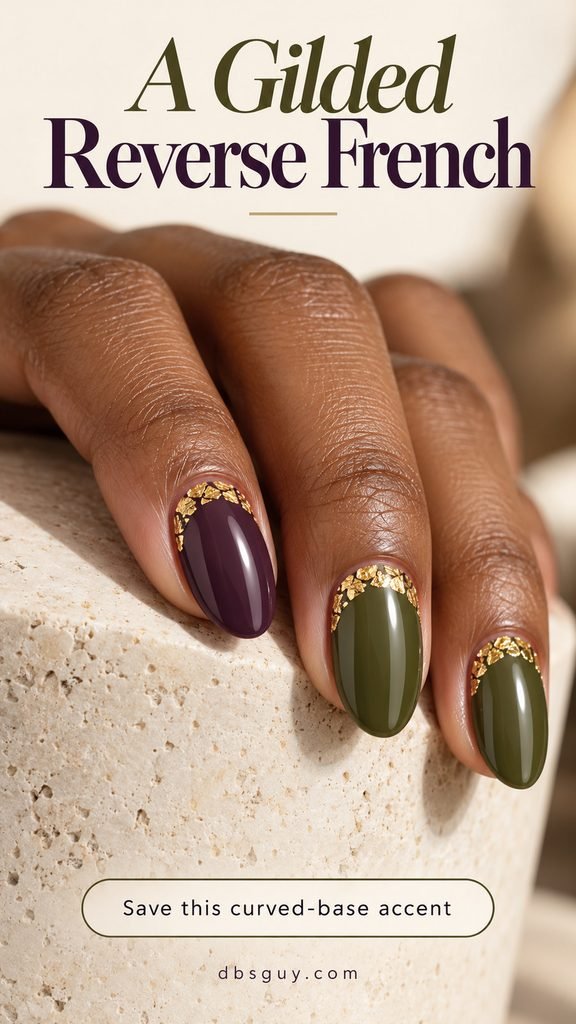
5. A Fuller Gold Reverse-French Band
For a stronger base detail, build a fuller broken band of foil along the cuticle curve over solid olive and plum. Compared with the tiny crescents in idea 1, this version uses a denser arc and a longer oval shape.
Keep the band narrow enough that the polish remains the main color. Ask for a curved edge made of foil fragments, with its natural irregular texture, rather than a perfectly smooth painted line. Plain tips balance the more decorated base.
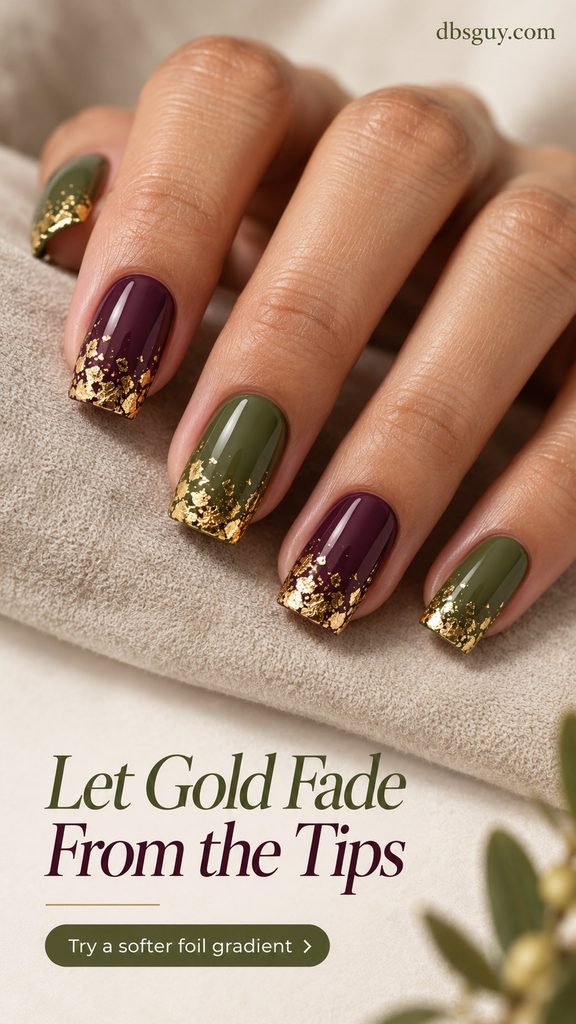
6. Gold Foil Fading Down from the Tips
Gather the larger fragments at the free edge and let smaller pieces trail toward the center. Stop before the lower half fills up. On alternating olive and plum nails, that change in density creates the fade without adding another polish color.
A soft square tip gives the foil a broad starting point. If you prefer rounded nails, concentrate the pieces toward the center of the edge instead. Ask for a scattered transition, not an even gold stripe across the whole tip.
Also read: October nails short inspiration for your autumn manicure for more ways to scale fall details to a smaller nail.
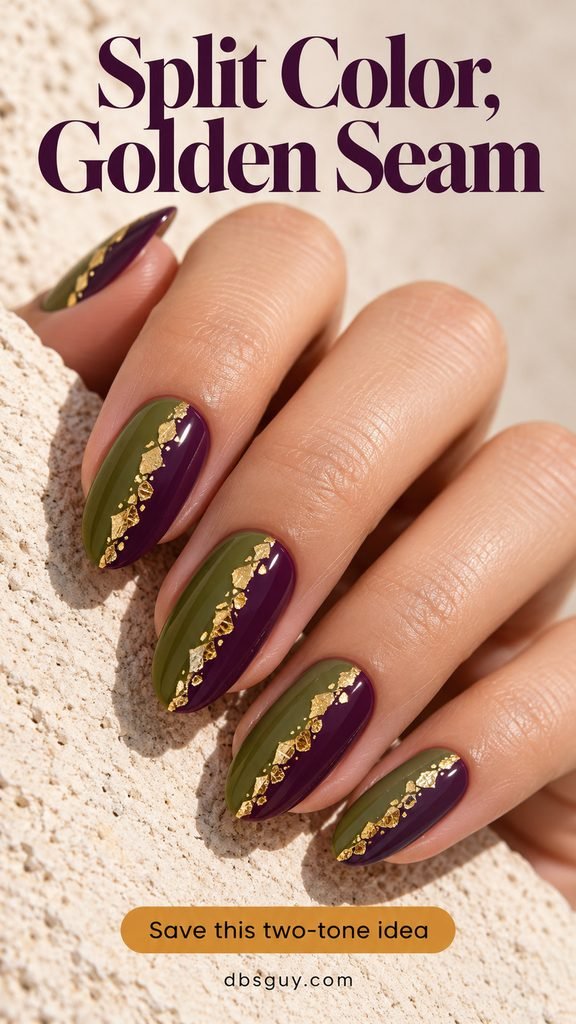
7. Lengthwise Color Splits with a Golden Seam
Divide each nail into olive and plum side by side, then follow the join with a narrow trail of gold foil. Both colors appear on every nail, which makes this useful if you do not want an alternating manicure.
The seam needs to remain slim enough that you can still read the two halves. Medium almond or oval nails suit the long division. Ask your artist to keep the split direction consistent across the hand, then allow small gaps in the gold.
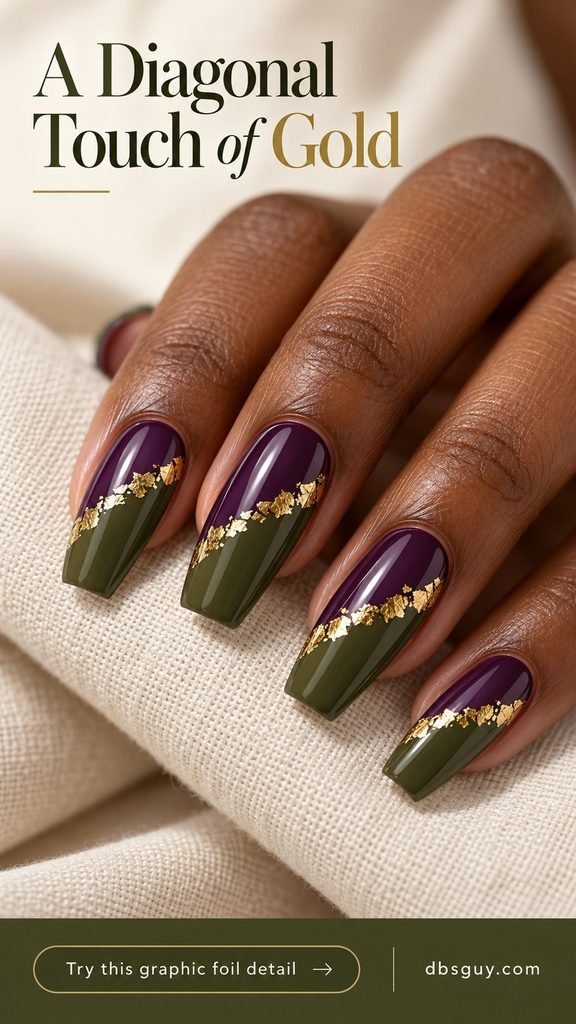
8. Diagonal Panels with Foil at the Join
A diagonal split changes the geometry: olive fills one section, plum the other, and the foil travels between them. The angled line is the feature here, so this design works especially well when every nail follows the same slope.
On a shorter shape, make one panel smaller rather than squeezing two equal areas into the nail. On a medium coffin shape, the broad tip leaves more room for the diagonal. Keep gold off the surrounding color fields so the join stays defined.
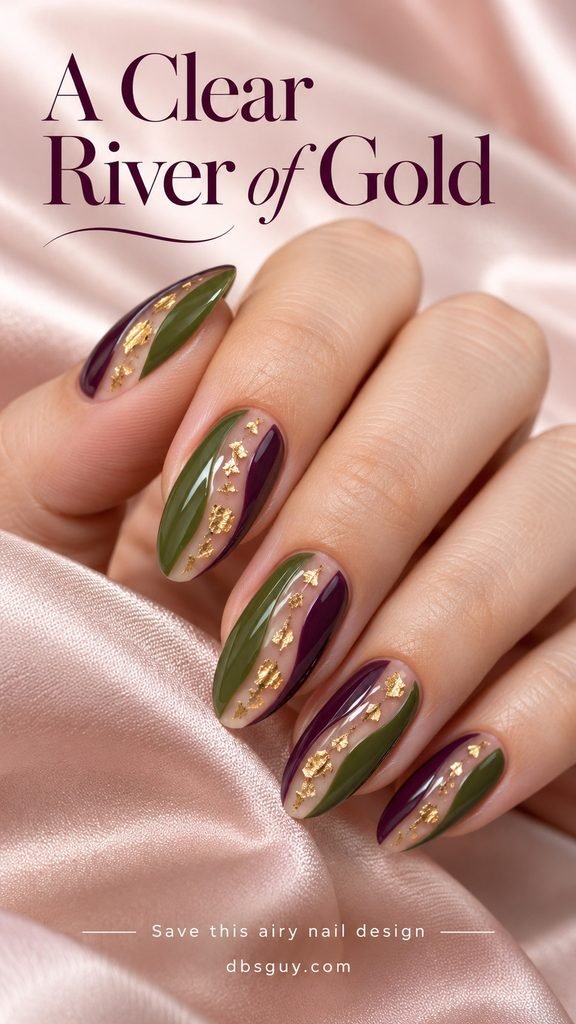
9. A Sheer River between Olive and Plum
Leave a narrow, gently curving channel of sheer base between olive and plum, then float a few foil pieces inside that channel. The gold sits in the open space instead of on top of the opaque colors.
This is a useful option when you like dark shades but want some breathing room. Ask for a channel that stays visible from base to tip; packing it with foil defeats the effect. Medium almond nails give the curve space to move.
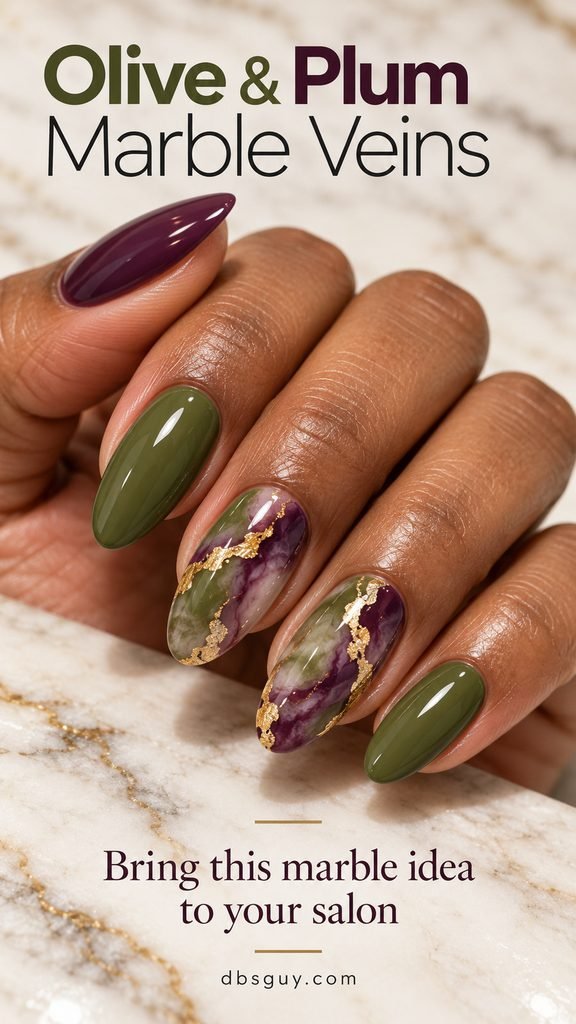
10. Olive and Plum Marble with Gilded Veins
Use two cloudy marble accent nails between solid olive and plum. Let the colors mingle with a little translucent or milky space, then add short gold seams where the swirls meet. The uneven veining should feel different on each accent.
Bring this reference to an artist whose marble work you like. Specify that you want olive and purple-plum areas to remain distinct; blending everything together can produce a murky middle color. A couple of strong foil veins are easier to read than a web of tiny gold lines.
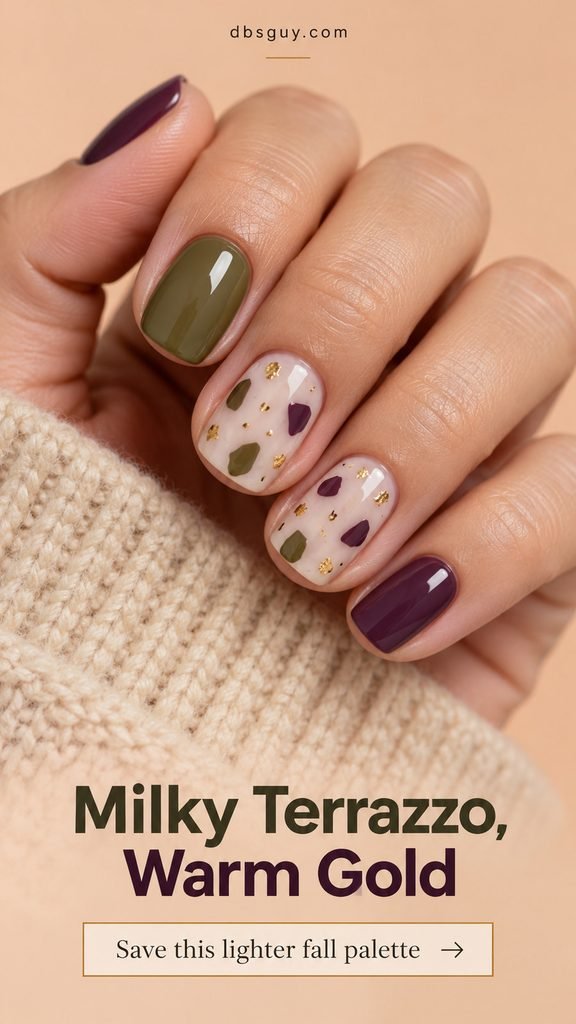
11. Milky Terrazzo with Olive, Plum, and Gold
Two milky ivory accent nails break up the darker solids. Small painted olive and plum chips establish the terrazzo pattern, while gold foil adds a few brighter fragments. The pale background needs to remain visible between them.
This is a practical way to keep a short square manicure decorative without drawing fine lines. Vary the chip shapes rather than lining them up like dots. If you want a quieter result, use fewer colored pieces and keep the gold smaller than the largest chips.
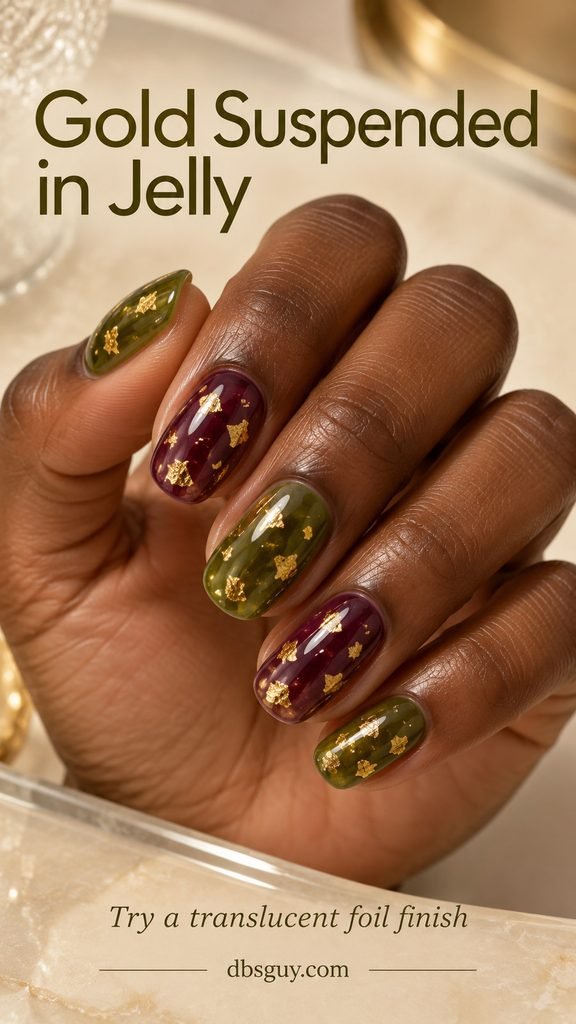
12. Gold Flakes Suspended in Olive and Plum Jelly
Translucent olive and plum give the foil a different setting: the fragments appear suspended beneath a glossy surface. The jelly color should let some light through instead of looking like a solid cream polish.
Ask to see the actual jelly swatches before choosing. A shade that looks sheer in a thin sample may look much darker in the finished application. Tell your artist you want visible depth with separated flakes, and let them choose the layering that suits their product system.
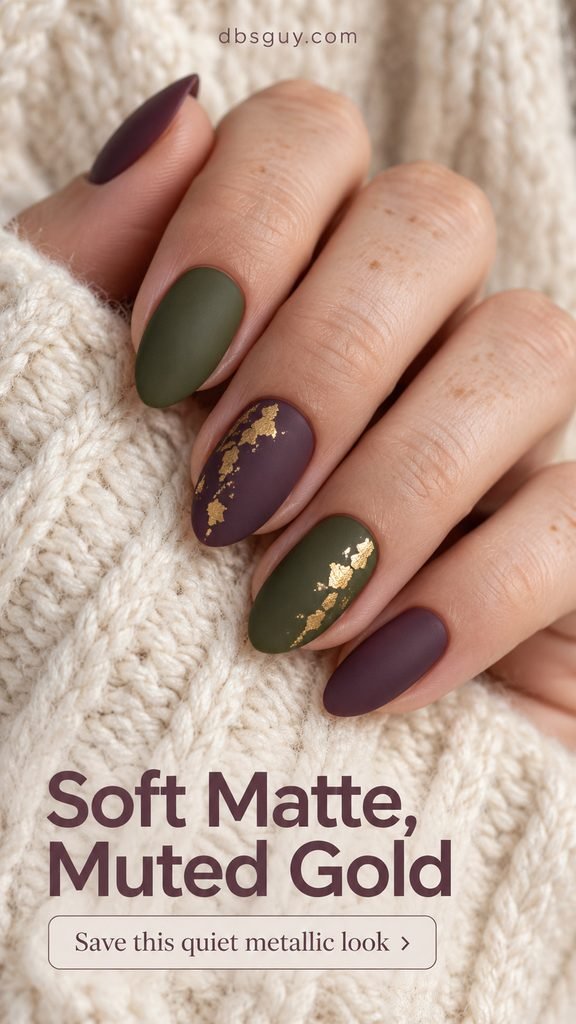
13. Matte Olive and Plum with Subdued Foil
A matte finish makes the base colors look softer and the foil less mirrorlike. Keep the decoration to two nails, using irregular trails rather than a full gold coating. The result has more texture than a plain matte manicure but less shine than the glossy options.
Show your artist that you want the final surface matte, including the decorated areas. If bright metallic reflection is your priority, choose a glossy version instead. The finish is an aesthetic choice, so compare a sample rather than expecting matte and gloss to show foil identically.
For a more reflective direction, explore Best October Nails Chrome Designs for a Chic Fall Look. Chrome gives a different effect from the broken foil accents here.
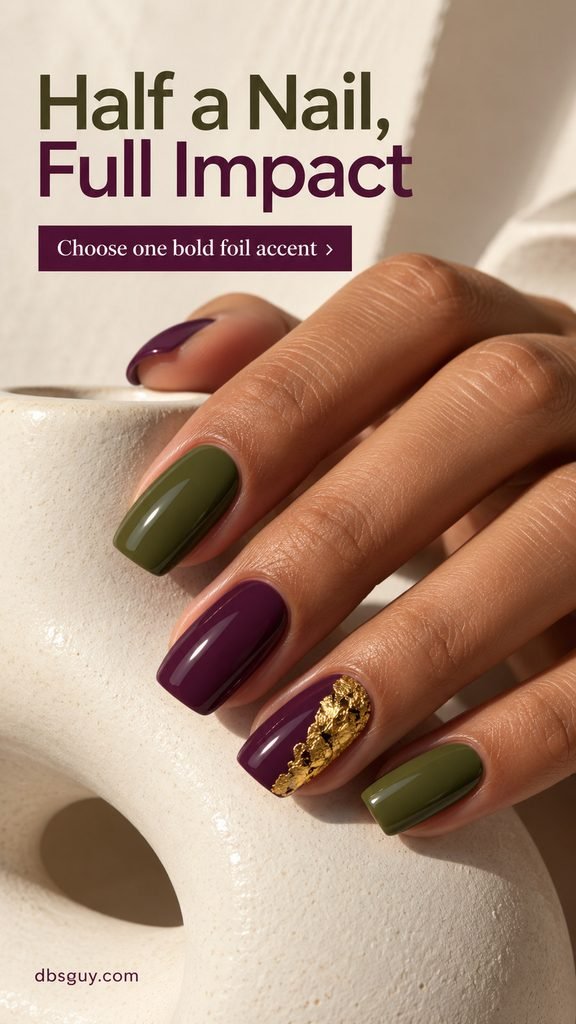
14. One Half-Foil Plum Accent
Cover roughly one lengthwise half of a plum accent nail with gold foil, leaving the other half visibly purple. Surround it with olive and plum solids. This uses a larger metallic area without turning the whole manicure gold.
A soft square shape makes the division especially clear. Ask for a flat, sealed finish with the texture visible beneath it, rather than a raised decoration. If half a nail feels too bold, narrow the foil area along the outer side while keeping the same direction.
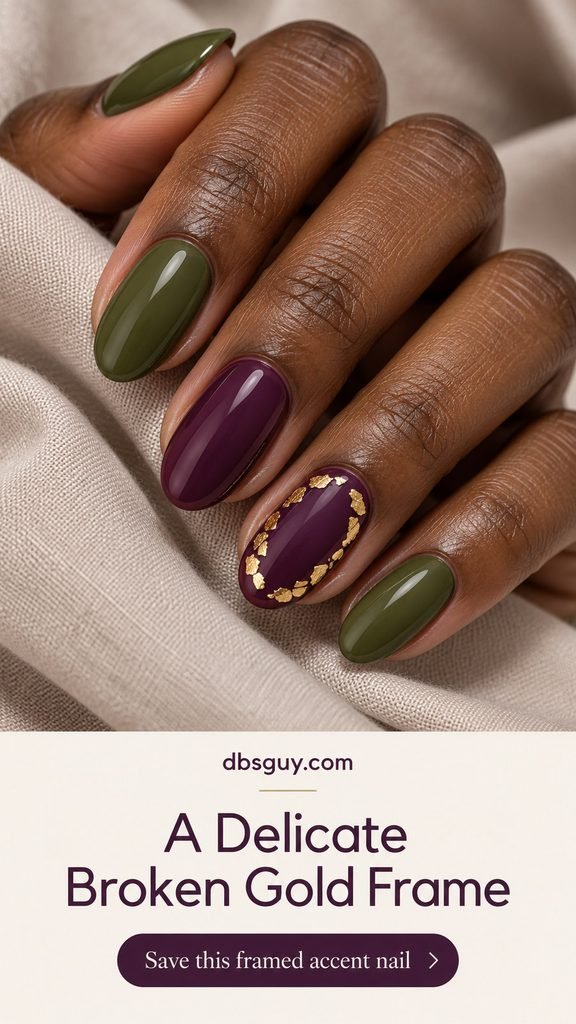
15. A Broken Gold Frame around Plum
Place tiny foil pieces around the perimeter of one plum nail, leaving gaps and an open center. Solid olive and plum on the surrounding nails keep the frame easy to notice.
This design depends on placement more than quantity. Ask for an inset border with clear space between the foil and the skin, and keep the middle plain. For a shorter nail, decorate just two sides of the frame rather than crowding the entire perimeter.
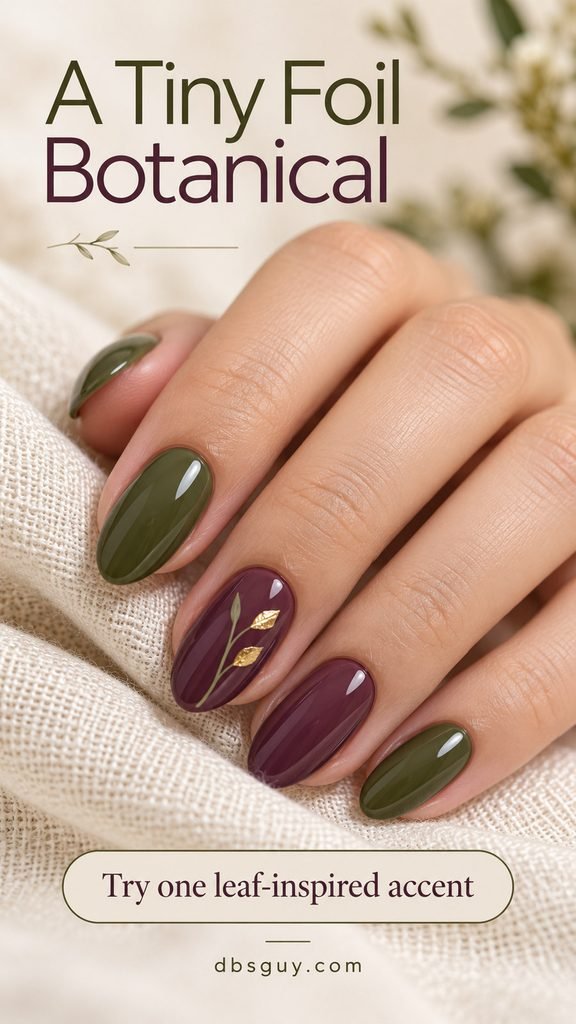
16. An Olive Stem with Tiny Foil Leaves
Give one plum nail a fine olive stem, then arrange a couple of tiny gold foil pieces beside it as leaves. The concept keeps the botanical small, with solid nails around it, rather than turning the whole manicure into a floral set.
Foil pieces will have uneven edges, so a loose leaf impression is more realistic than a perfectly matched pair. Ask for the stem to stay fine and the gold leaves separated. For a wider nail, add a little space around the branch before adding more leaves.
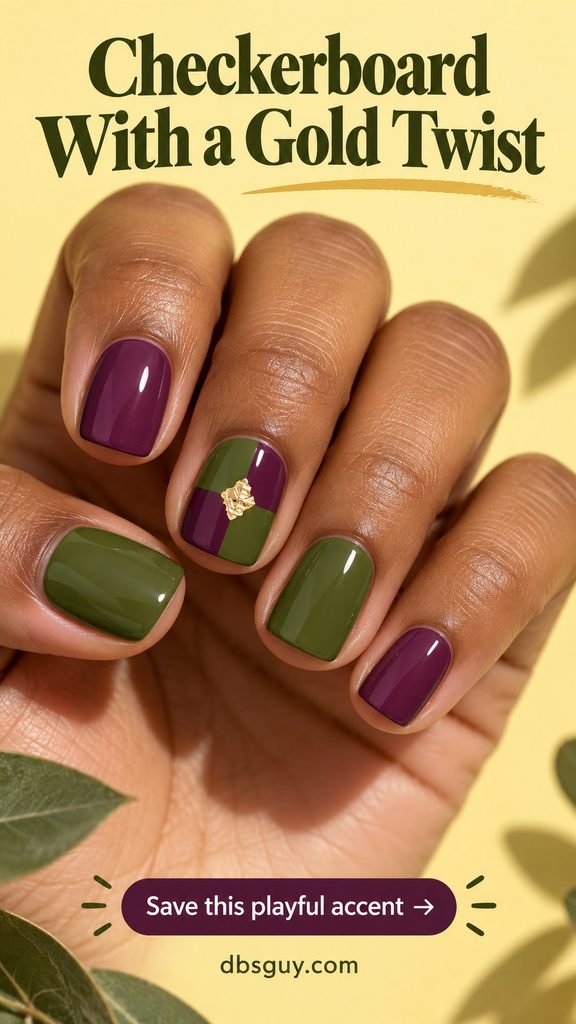
17. A Four-Square Checkerboard Accent
Use four large squares, alternating olive and plum, on one accent nail. Put a small foil patch where the squares meet. The rest of the hand stays solid so the check pattern has one clear home.
Four blocks are easier to read on short nails than a dense miniature checkerboard. Ask for the gold to sit at the crossing, not cover an entire square. If the nail is too narrow for clean checks, choose the lengthwise split in idea 7 instead.
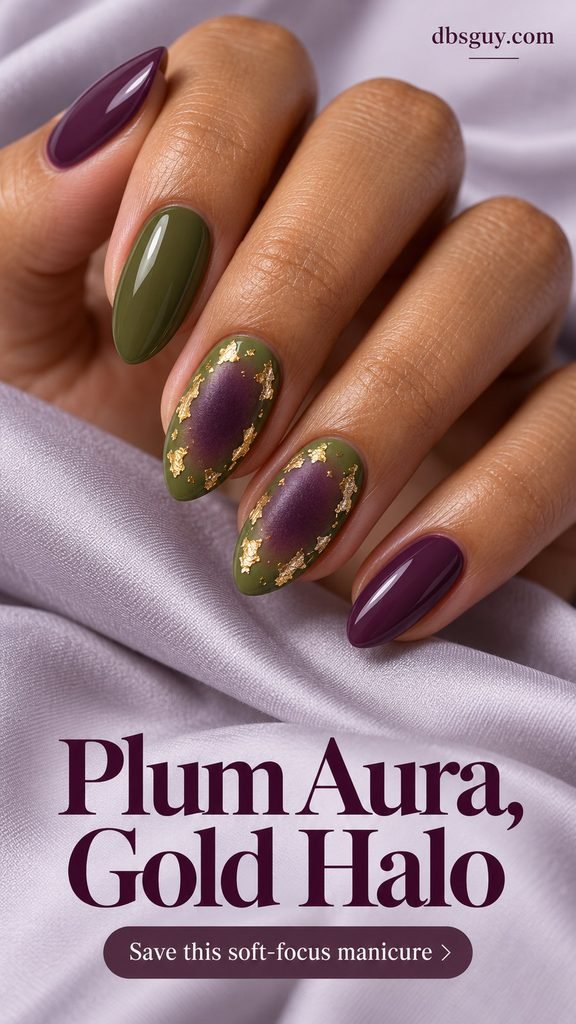
18. Plum Aura Centers with a Broken Foil Halo
Start with olive and soften a plum glow into the centers of two accent nails. Place a few foil fragments around the edges of those centers, leaving gaps so the gold suggests a halo rather than drawing a solid circle.
This needs a soft color transition, so discuss it with an artist who offers aura work. Keep the plum center large enough to see and the outer olive border visible. Short nails can carry a single aura accent if two feel too busy.
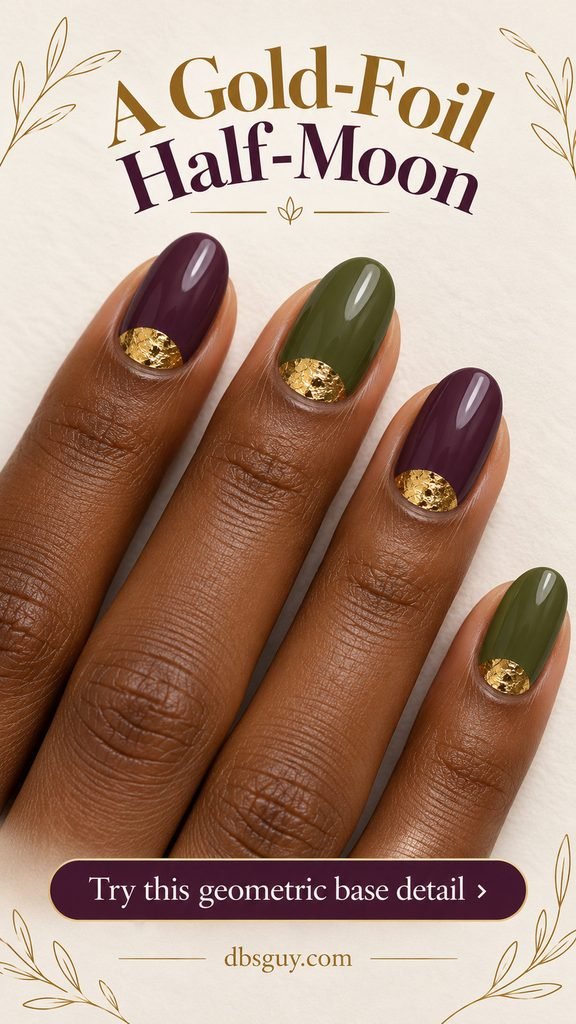
19. Filled Gold-Foil Half-Moons
Fill a small semicircle at the base of each olive or plum nail with gold foil. This differs from a reverse-French band because the gold occupies a little filled shape instead of following a thin outline.
Keep the half-moons shallow, especially on shorter nails, so they do not take over the color. Show your artist whether you want the curved boundary crisp or slightly irregular. The concept uses a defined semicircle with the texture of foil inside it.
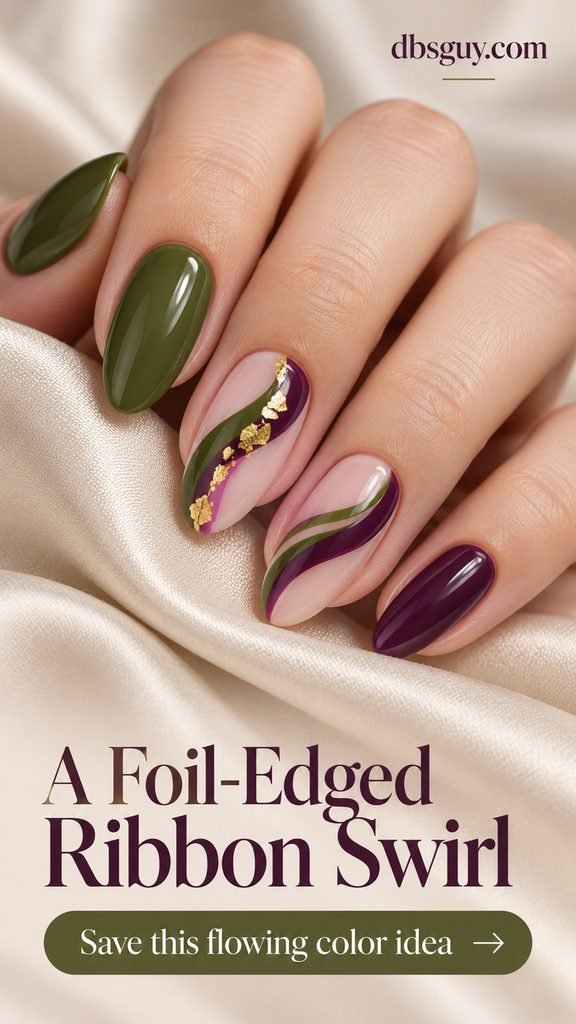
20. Olive and Plum Ribbons with One Foil Edge
Let broad olive and plum ribbons curve across two sheer accent nails. Add foil along a short stretch of just one ribbon edge, then leave the neighboring accent mostly about the color and movement.
The sheer areas are important: without them, the ribbons can read as a fully marbled nail. Ask for smooth color curves and a broken foil edge. If you wear short nails, use one broad sweep instead of several narrow ribbons.
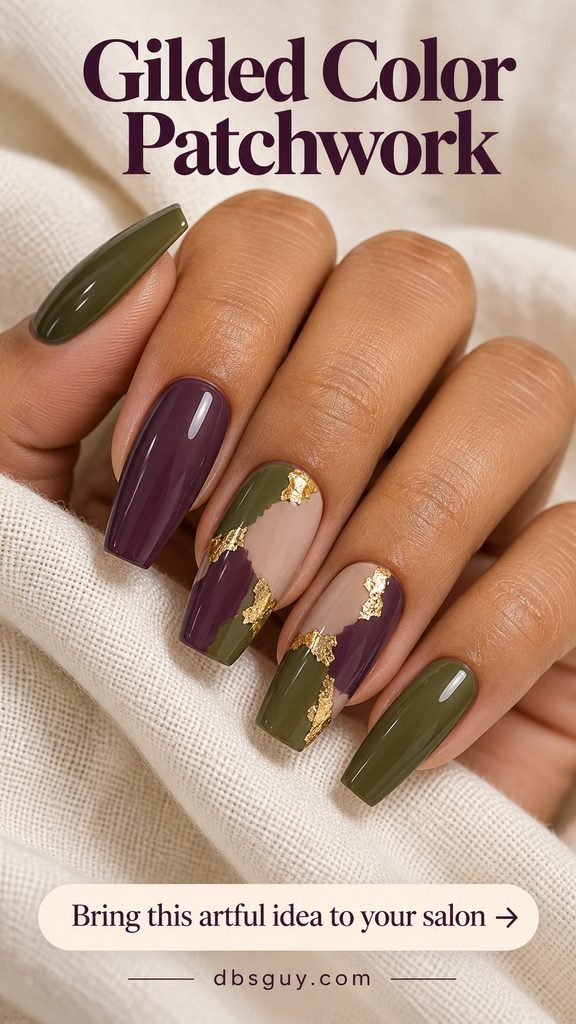
21. Olive, Plum, and Taupe Patchwork
Add taupe to olive and plum for two patchwork accents. Give each nail a few irregular color blocks, then tuck foil into selected joins. The taupe separates the deeper shades and makes the composition easier to follow.
Medium coffin nails offer room for three readable areas. Ask for disconnected foil patches rather than outlining every block in gold. For a smaller nail, use two blocks and let the second base color appear on the surrounding solid nails.
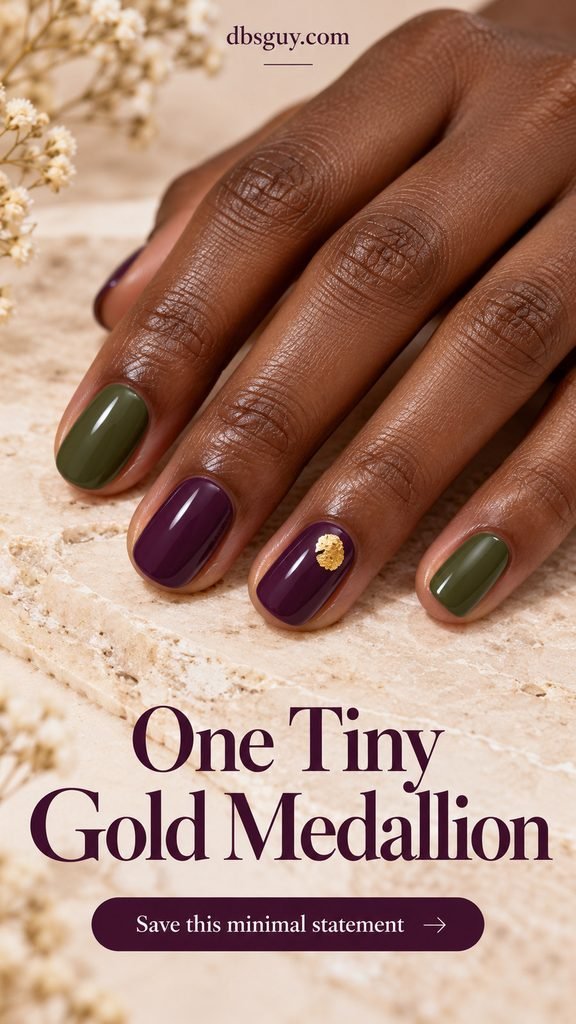
22. A Single Off-Center Foil Medallion
Put one small, roughly rounded gold foil patch in the upper third of a plum accent nail. Olive and plum solids surround it. Its compact shape makes this different from a scattered cluster or a long seam.
The patch should look like flat foil, not a raised charm. Keep it slightly off center and leave a visible border of plum all around. On short oval nails, one accent per hand can be enough to finish the whole design.
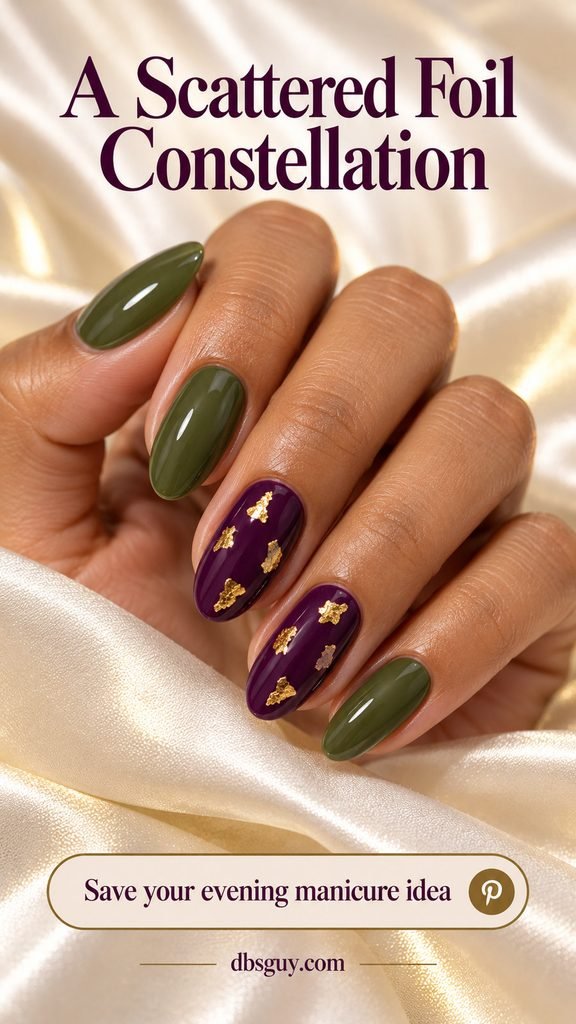
23. A Sparse Foil Constellation on Plum
Place a few separated foil fragments across two plum nails, with solid olive around them. Think of the spacing of stars rather than literal star-shaped decals: the pieces stay irregular, with no connecting lines.
This is an evening option for someone who wants flashes of gold but still wants the plum visible. Ask for only a few pieces on each accent. If the fragments start touching, remove some rather than adding another decorative element.
What to Know Before Applying or Requesting Foil
Name the foil type in your salon brief. Loose foil flakes are placed as individual fragments. Transfer foil releases its metallic layer from a backing and may need a dedicated adhesive or transfer gel. They are not interchangeable instructions.
Choose products labeled for nail art, and follow the directions for the exact foil, polish, adhesive, and finish you use. For example, Daily Charme’s gold transfer-foil instructions describe a transfer-gel system with its own preparation and sealing steps. Those instructions do not establish a universal method or curing time for other products.
For regular polish, a loose-flake design is the simpler place to start: use a compatible tacky polish or clear layer as directed, place small pieces with a clean detail tool, flatten them, and finish with the recommended top coat. Work on one accent nail first so you can judge the size and placement before repeating it.
A useful salon request is: “Muted olive and purple plum, this nail shape, foil on these fingers, and this exact placement.” Show both the full-hand concept and the detail you care about. Agree on the finish before the appointment starts.
Frequently Asked Questions
Which designs work best on short natural nails?
Start with tiny cuticle crescents, corner clusters, the four-square checkerboard, or a single medallion. Each can leave most of the nail visible. Scale down the foil pieces before adding more details; you do not need extensions just to wear this palette.
Can I swap plum for burgundy?
Yes. For burgundy and green nails, keep the olive and change the purple-plum swatch to a redder wine shade. The placements still work, but the color balance will look warmer and less purple. Check the two actual swatches together rather than relying on shade names.
Are gold foil and gold glitter the same effect?
No. Foil gives irregular pieces or patches of reflective metal, while glitter produces a more granular sparkle. If the broken gilded look is what you like in these concepts, ask specifically for nail-art foil rather than a gold glitter polish.
Can these designs use regular polish instead of gel?
Some loose-flake designs can, provided the products are compatible. Do not assume a transfer gel or gel top coat works with an air-dried polish system. Check the foil maker’s directions; for a first attempt, choose one accent nail with a few loose fragments.
Which finish should I choose?
Choose gloss when you want clearer reflections and a glassy appearance. Choose matte when you want softer color and more subdued foil. Ask to see the actual foil under the intended finish, because the concept image cannot predict your product combination.