
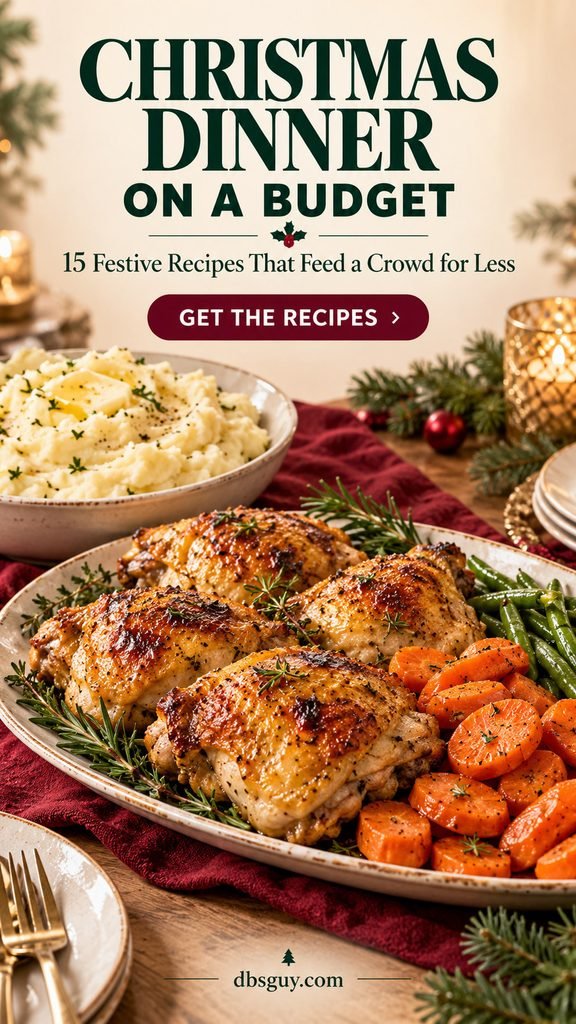
For Christmas dinner on a budget, choose one main, two or three sides, and one dessert. Chicken thighs, a lentil pie, or a big pan of baked pasta can anchor the meal; potatoes, carrots, and cabbage help fill the plates without a long list of specialty ingredients.
These 15 complete recipes are written for a table of about 12. Choose the dishes that suit your guests and your grocery prices—you do not need to cook the whole list. The biscuits make 18, giving you a few extras.
Build a Budget Christmas Menu for 12
Start with the main because it usually decides the biggest part of the grocery bill. Then choose sides that use ingredients you already have. Here are three ways to turn this list into dinner:
- Roast-dinner menu: garlic-herb chicken thighs, mashed potatoes, glazed carrots, garlic-crumb green beans, and apple crumble. Add biscuits if your guests enjoy bread.
- Meatless menu: lentil and mushroom shepherd’s pie, garlic-crumb green beans, braised red cabbage, and chocolate peppermint cake. The pie already includes potatoes, so another potato dish is optional.
- Pasta-centered menu: spinach baked ziti, braised red cabbage, and apple crumble. Add the drop biscuits if you want bread alongside the pasta.
Portion note: The mains serve 12 with the accompanying sides, rather than promising 12 enormous standalone portions. For hungry adults, generous seconds, or planned leftovers, buy extra portions of the main. To feed 24, double ingredients and use more pans; do not make a casserole twice as deep or simply double its baking time.
Recipe and image note: These recipes have not been kitchen-tested for this article. Cooking times are guides; use the doneness cues and thermometer targets provided. The visuals are AI-generated styling concepts, not photographs of tested batches.
Spend Less Before You Start Cooking
- Set a cart limit. For example, a $90 grocery cap for 12 works out to $7.50 per person. Reserve $9 for a missed ingredient and build the planned cart to $81. This is a budgeting example, not a quoted price for any menu here.
- Count the full checkout cost. A recipe may use only a spoonful of mustard, but buying a new jar still affects today’s bill. Check the pantry first and count entire packages you need to buy.
- Compare usable portions. Bones, trimming, and portion sizes matter as well as the shelf price per pound. Compare your chosen ham, chicken, turkey, and meatless options using your actual store prices.
- Repeat ingredients. Milk, butter, onions, flour, apples, and cider vinegar appear in several dishes. Choose a menu that uses those purchases instead of opening five unrelated ingredient lists.
- Keep the festive finish small. A lemon, a little parsley, or a crushed candy cane can finish a whole dish. Treat garnishes and extra sweets as optional purchases.
For a festive table that fits the same approach, see 21 Christmas Table Decor Ideas That Look Expensive on a Small Budget.
Find your recipes: Mains: recipes 1–5 · Sides and bread: recipes 6–13 · Desserts: recipes 14–15. All oven temperatures are for a conventional oven.
1. Garlic-Herb Roasted Chicken Thighs
Chicken thighs make a welcoming holiday centerpiece without asking you to carve a whole bird. Roast them on two pans so the skin browns instead of steaming, then bring them to the table on one platter.
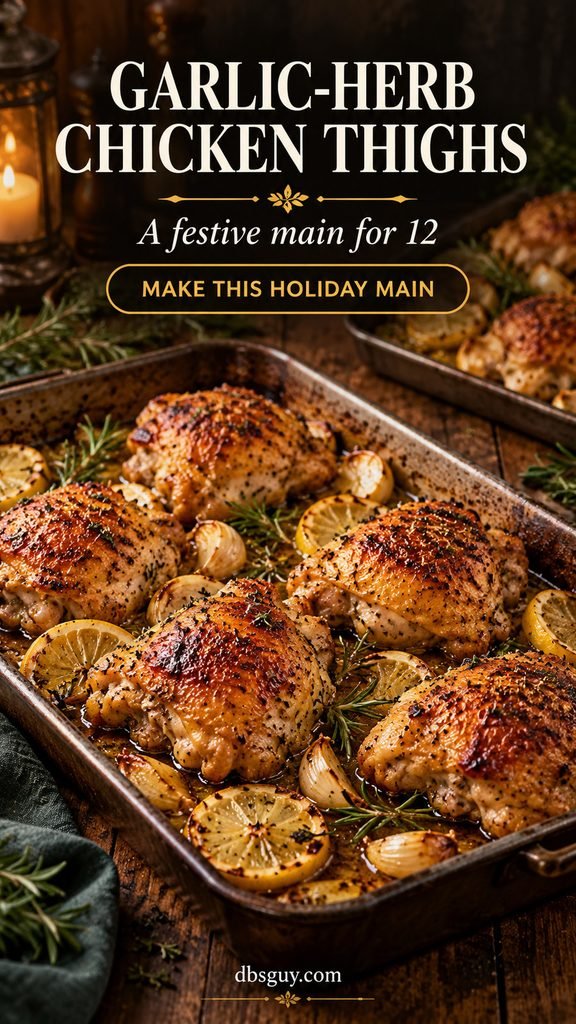
Yield: 12 servings: 1 large thigh per person, with sides.
Prep: 15 minutes. Cook: 40–50 minutes, plus a 10-minute rest.
Equipment: Two rimmed half-sheet pans; instant-read thermometer.
Budget move: Compare the price per pound of family packs. Bone-in thighs include bone weight, so also compare the cost of the 12 portions you actually need.
Ingredients
- 12 large bone-in, skin-on chicken thighs, about 6–7 pounds total, fully thawed
- 3 tablespoons olive or neutral oil
- 2 teaspoons garlic powder
- 2 teaspoons dried thyme
- 1 teaspoon paprika
- 1½ teaspoons fine salt, or less for chicken labeled with added salt or solution
- 1 teaspoon black pepper
- 6 garlic cloves, peeled and lightly crushed
- 1 lemon, thinly sliced
- Optional: 2 tablespoons chopped parsley or a few rosemary sprigs
How to Make It
- Heat the oven to 425°F. Pat the chicken dry with paper towels; do not rinse it. Mix the oil, garlic powder, thyme, paprika, salt, and pepper, then rub over the thighs.
- Arrange 6 thighs skin-side up on each pan, leaving space between them. Tuck the crushed garlic and lemon around the chicken. Put the pans on upper- and lower-middle racks.
- Roast for 40–50 minutes, switching rack positions and rotating the pans after about 25 minutes. Check several of the largest thighs in the thickest meat, away from bone: each must reach at least 165°F. Continue cooking any underdone pieces.
- Rest for 10 minutes. Transfer to a platter and spoon a little hot pan juice around the chicken rather than over the crisp skin. Add the optional herbs.
Plan ahead or adjust: For generous appetites, buy extra thighs rather than counting on small pieces to stretch. Keep raw chicken on the bottom refrigerator shelf until cooking day.
2. Brown Sugar Mustard Glazed Ham
A modest boneless ham is easy to slice into even portions, and a pantry glaze gives it the glossy finish people expect at Christmas. Choose ham when the store price makes sense for your menu; it is not automatically the cheapest protein.
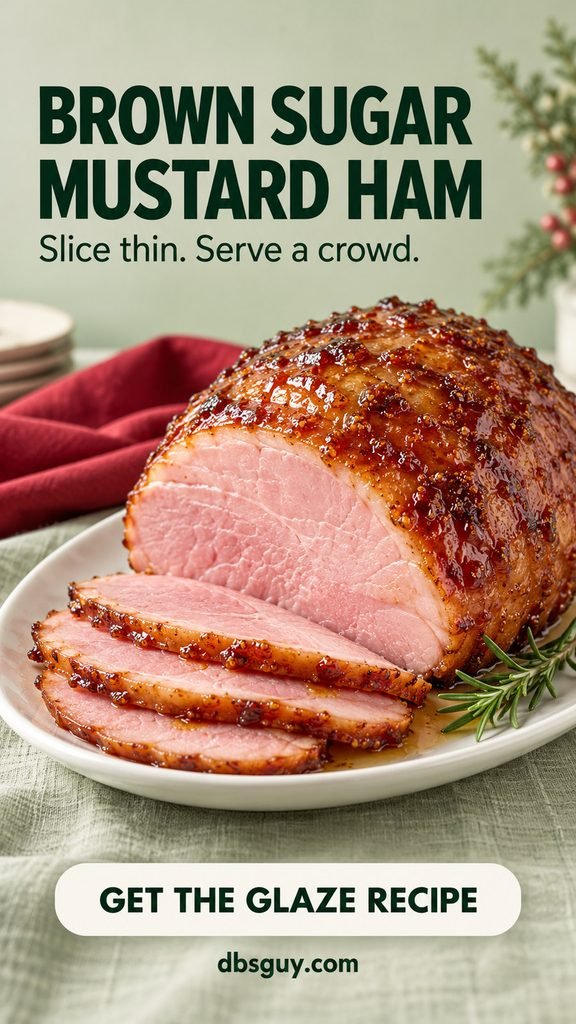
Yield: 12 servings, about 5 ounces of ham each before reheating.
Prep: 10 minutes. Cook: About 75–100 minutes; follow the package schedule and temperature.
Equipment: Small roasting pan; foil; thermometer.
Budget move: Shop by usable servings. A boneless ham can cost more per pound but has no large bone to subtract from the yield.
Ingredients
- 1 fully cooked boneless ham, about 4 pounds, in its original USDA-inspected plant packaging
- ½ cup water for the roasting pan
- ½ cup packed brown sugar
- ¼ cup Dijon or yellow mustard
- 2 tablespoons apple cider vinegar
- ¼ cup water for the glaze
- Optional: rosemary for the serving platter
How to Make It
- Heat the oven to 325°F unless the ham label specifies another method. Remove all packaging, including any plastic bone guard or absorbent pad. Place the ham in a roasting pan, add ½ cup water, and cover tightly with foil.
- Warm according to its package directions. Start checking the center with a thermometer early; a 4-pound ham may take roughly 75–100 minutes, but its shape and starting temperature change the timing.
- Meanwhile, simmer the brown sugar, mustard, vinegar, and ¼ cup water in a small saucepan for 3–5 minutes until lightly syrupy. Brush over the ham during the final 20 minutes and return it to the oven uncovered. Tent loosely if the glaze darkens too quickly.
- For the specified fully cooked ham packaged in a USDA-inspected plant, reheat to 140°F. Repackaged ham and leftover ham should reach 165°F. Rest 10 minutes, then slice thinly across the grain.
Plan ahead or adjust: This method is for fully cooked ham, not fresh or uncooked ham. Make the glaze a day ahead and refrigerate it; warm it before brushing.
3. Lentil and Mushroom Shepherd’s Pie
This meatless main earns its place at the center of the table with savory mushrooms, tender lentils, and a fork-ridged potato topping. The filling and potatoes are substantial, so you can pair it with two vegetable sides and skip a second starch.
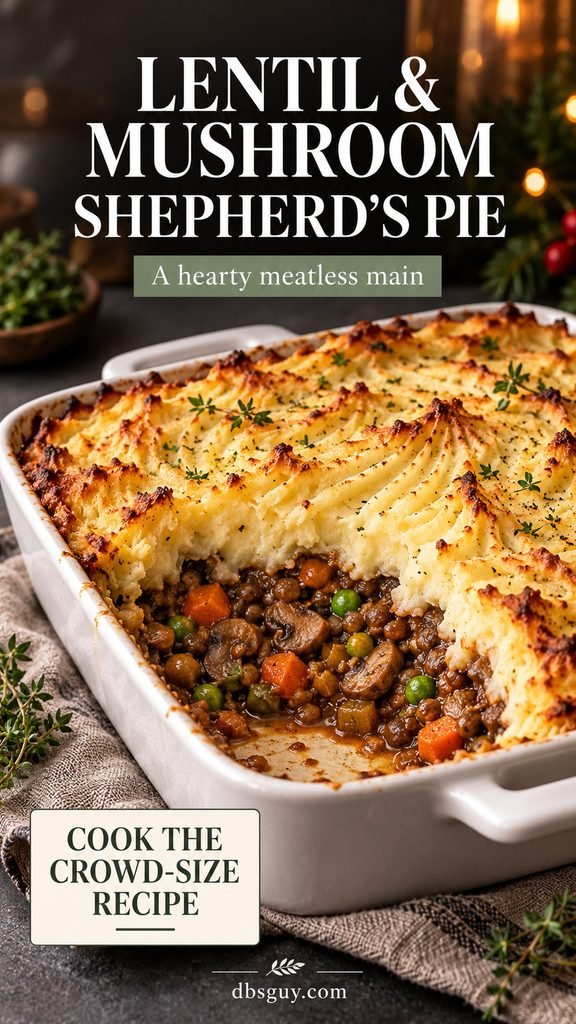
Yield: 12 servings with vegetable sides.
Prep: 30 minutes. Cook: About 60 minutes, with lentils and potatoes cooking at the same time.
Equipment: Two 9-by-13-inch baking dishes; two pots; large skillet.
Budget move: Dry lentils provide the bulk of the filling. Ordinary white mushrooms work well; there is no need for a specialty mushroom mix.
Ingredients
- 2 cups dry brown or green lentils, picked over and rinsed
- 6 cups water for the lentils, plus water for the potatoes
- 3 pounds russet potatoes, peeled and cut into 1-inch pieces
- ½ cup milk and 4 tablespoons butter for the topping
- 3 tablespoons oil
- 2 medium onions, diced
- 3 medium carrots, finely diced
- 16 ounces white mushrooms, chopped
- 3 tablespoons all-purpose flour
- 2 tablespoons tomato paste
- 3 cups low-sodium vegetable broth
- 1 tablespoon soy sauce; choose a vegetarian product
- 1 teaspoon dried thyme
- 2 cups frozen peas
- 1½ teaspoons fine salt, divided, plus black pepper to taste
How to Make It
- Heat the oven to 400°F. Simmer the lentils in 6 cups water for 20–30 minutes until tender but intact; drain well. In another pot, cover the potatoes with water, bring to a boil, and simmer 15–20 minutes until soft. Drain, then mash with milk, butter, and ¾ teaspoon salt.
- Heat the oil in a large skillet or pot. Cook the onions and carrots for 8 minutes. Add the mushrooms and cook 8–10 minutes, stirring, until most released liquid evaporates.
- Stir in the flour and tomato paste for 1 minute. Gradually add broth, then soy sauce, thyme, cooked lentils, and peas. Simmer 5–8 minutes until thick enough to mound on a spoon. Season with the remaining salt and pepper to taste.
- Divide the filling between the two baking dishes. Spoon on the potatoes and roughen with a fork. Bake for 25–35 minutes, until bubbling and at least 165°F in each center. Switch rack positions halfway through if using two racks. Rest 10 minutes before serving.
Plan ahead or adjust: Prepare the filling and mash a day ahead, cool promptly in separate shallow containers, and refrigerate. Rewarm before assembling, or allow additional baking time for a chilled casserole and verify 165°F. Use plant-based milk and butter to make it vegan.
4. Spinach and Ricotta Baked Ziti
Red sauce, green spinach, and a browned cheese top make this pasta feel right at home on a Christmas buffet. Two pans heat more evenly than one overfilled dish and make it easier to serve opposite ends of a long table.
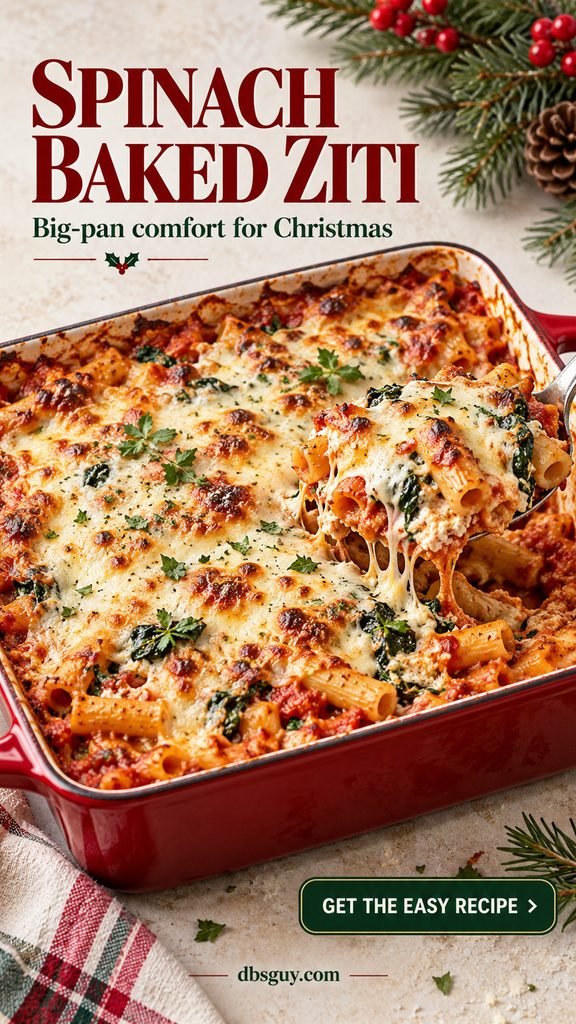
Yield: 12 generous main-dish servings with a vegetable side.
Prep: 25 minutes. Cook: 30–40 minutes, plus a 10-minute rest.
Equipment: Two 9-by-13-inch baking dishes; large pasta pot.
Budget move: Frozen spinach and store-brand pasta keep the ingredient list straightforward. Compare shredded mozzarella with a block; the better buy varies by store.
Ingredients
- 2 pounds dry ziti or penne
- 2 jars marinara sauce, 24 ounces each
- 1 cup water, divided
- 1 bag frozen chopped spinach, 16 ounces, thawed and squeezed very dry
- 1 container ricotta, 15 ounces
- 12 ounces mozzarella, shredded, divided
- ½ cup grated Parmesan; use vegetarian cheeses if needed
- 2 teaspoons Italian seasoning
- ½ teaspoon fine salt, plus salt for pasta water
- ½ teaspoon black pepper
- 1 tablespoon oil for the baking dishes
- Optional: 2 tablespoons chopped parsley
How to Make It
- Heat the oven to 375°F and oil both baking dishes. Cook the pasta in salted water for 2 minutes less than the package’s al dente time. Drain.
- Mix the ricotta, dry spinach, half the mozzarella, Parmesan, Italian seasoning, ½ teaspoon salt, and pepper. In a very large bowl or the pasta pot, combine pasta, marinara, and ½ cup water. Fold in the ricotta mixture, leaving some creamy pockets.
- Divide between the dishes. Drizzle the remaining ½ cup water around their edges, cover with foil, and bake for 20 minutes. Uncover, add the remaining mozzarella, and bake 10–20 minutes more, until bubbling and 165°F in the center.
- Rest for 10 minutes so the sauce settles. Scatter on parsley if using, then serve from the pans.
Plan ahead or adjust: Assemble up to one day ahead and refrigerate, covered. Use metal pans if transferring directly from fridge to oven; follow any bakeware temperature-change limits. A chilled pan will take longer to reach 165°F.
5. Cranberry-Glazed Turkey Meatballs
These meatballs bring familiar turkey-and-cranberry flavor to the table in a format that is easy to portion. Four meatballs per person make a main course alongside potatoes and vegetables; smaller portions work on a mixed buffet.
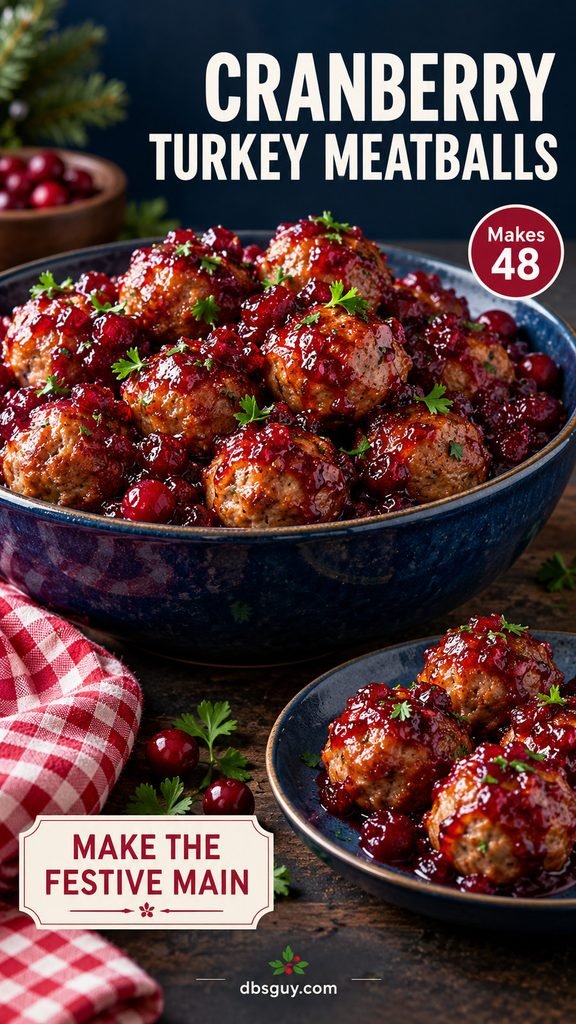
Yield: 48 meatballs; 12 main-dish servings of 4 meatballs.
Prep: 25 minutes. Cook: 20–25 minutes.
Equipment: Two lined rimmed sheet pans; small saucepan; thermometer.
Budget move: Check ground turkey against ground chicken. Either works here, and both need the same 165°F minimum internal temperature.
Ingredients
- 3 pounds ground turkey, preferably 93% lean
- 1½ cups plain breadcrumbs
- ¾ cup milk
- 2 large eggs
- 1 medium onion, finely grated
- 2 teaspoons garlic powder
- 1½ teaspoons fine salt
- ½ teaspoon black pepper
- 1 can whole-berry cranberry sauce, 14 ounces
- ½ cup ketchup
- 2 tablespoons apple cider vinegar
- 2 tablespoons brown sugar
- ¼ cup water
- Optional: 2 tablespoons chopped parsley
How to Make It
- Heat the oven to 425°F and line the pans with parchment rated for that temperature. Soak the breadcrumbs in milk for 3 minutes. Mix in eggs, grated onion, garlic powder, salt, and pepper, then gently combine with the turkey.
- Divide into 48 equal meatballs, about 1½ inches across. Arrange 24 on each pan with space between them. Bake for 20–25 minutes, switching rack positions halfway through, until several meatballs checked in the center reach 165°F.
- While they bake, simmer cranberry sauce, ketchup, vinegar, brown sugar, and water in a saucepan for 5–8 minutes, stirring and breaking up the sauce, until glossy.
- Gently toss the fully cooked meatballs with the hot glaze in a large serving bowl. Add parsley if using. Serve promptly, or transfer hot food to equipment that maintains at least 140°F.
Plan ahead or adjust: Bake the meatballs a day ahead, cool promptly in shallow containers, and refrigerate. Reheat in the sauce on the stovetop or in the oven to 165°F; a slow cooker is for hot holding, not reheating cold leftovers.
6. Creamy Mashed Potatoes for 12
A big bowl of mashed potatoes stretches a holiday plate without needing cream cheese, sour cream, and heavy cream all at once. Warm milk, butter, and a few minutes of steam-drying give you a simple, fluffy result.

Yield: 12 side-dish servings.
Prep: 20 minutes. Cook: 25–30 minutes.
Equipment: Large pot; colander; potato masher.
Budget move: Compare the total cost of a 5-pound bag with loose potatoes. Use the remaining milk and butter in other recipes from your chosen menu.
Ingredients
- 5 pounds russet or Yukon Gold potatoes, peeled and cut into even 1½-inch chunks
- Water to cover the potatoes
- 1 tablespoon fine salt for the cooking water
- 1½ cups whole or 2% milk, warmed, plus up to ½ cup more as needed
- 8 tablespoons unsalted butter, softened, plus optional butter for serving
- ½ teaspoon fine salt to start, then adjust after tasting
- ½ teaspoon black pepper
- Optional: 2 tablespoons chopped parsley
How to Make It
- Put potatoes in a large pot, cover with cold water by 1 inch, and add 1 tablespoon salt. Bring to a boil, then reduce to a steady simmer and cook 15–20 minutes, until a fork goes through the largest pieces easily.
- Drain thoroughly. Return to the warm pot over low heat for 1–2 minutes, shaking gently, to evaporate excess moisture.
- Turn off the heat. Mash with the butter, then fold in 1½ cups warm milk. Add the extra milk a little at a time only if needed. Season with ½ teaspoon salt and the pepper, taste, and adjust.
- Transfer to a warm serving bowl. Add optional parsley and butter. Avoid a blender or food processor, which can make the potatoes gluey.
Plan ahead or adjust: Make one day ahead and chill promptly in shallow containers. Reheat covered with a splash of milk, stirring occasionally, until 165°F throughout. If holding hot, maintain at least 140°F and check the center.
7. Sage and Onion Bread Stuffing
This is the side to make when you have a plain loaf to use up. Dry bread absorbs the seasoned broth, while onion, celery, and sage deliver the holiday flavor without sausage or an expensive mix of add-ins.
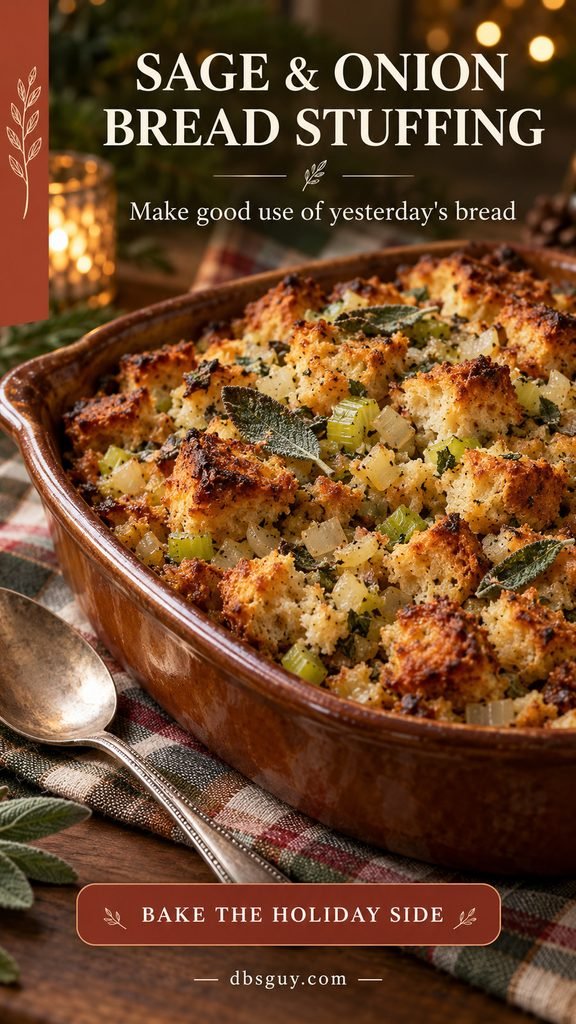
Yield: 12 side-dish servings.
Prep: 20 minutes, plus drying the bread. Cook: 45–55 minutes.
Equipment: 9-by-13-inch baking dish; large skillet.
Budget move: Save sound bread ends in the freezer ahead of time. Never use moldy bread; drying or baking does not make it suitable.
Ingredients
- 1 pound plain sandwich or French bread, cut into ¾-inch cubes, about 12 loosely filled cups
- 6 tablespoons butter, plus a little for the dish
- 2 medium onions, diced
- 4 celery stalks, diced
- 2 teaspoons dried rubbed sage
- 1 teaspoon dried thyme
- ½ teaspoon fine salt, or to taste
- ½ teaspoon black pepper
- 2½–3 cups low-sodium chicken or vegetable broth
- 2 large eggs, beaten
- Optional: 2 tablespoons chopped parsley
How to Make It
- Spread the bread on baking sheets. Dry at 300°F for 20–30 minutes, tossing once, until dry but not deeply toasted. Cool. Increase the oven to 375°F and butter the baking dish.
- Melt 6 tablespoons butter in a large skillet. Cook onions and celery for 10–12 minutes until softened. Add sage, thyme, salt, and pepper for the final minute.
- Toss bread with the vegetables in a large bowl. Whisk the eggs with 2½ cups cool or room-temperature broth, then toss with the bread just before baking. Add the remaining broth only if dry pockets remain; the cubes should be moist without liquid pooling.
- Spread in the dish, cover, and bake 25 minutes. Uncover and bake another 20–30 minutes until the top is crisp and the center reaches 165°F. Finish with optional parsley.
Plan ahead or adjust: Dry the bread and cook the vegetables a day ahead; refrigerate the vegetables separately. Combine the wet and dry ingredients just before baking. Bake stuffing in its own dish for simpler timing.
8. Brown Sugar Glazed Carrots
Carrot coins cook quickly and carry a light glaze well. A small amount of brown sugar gives them a Christmas-dinner feel while the stovetop method keeps your oven free for the main course.
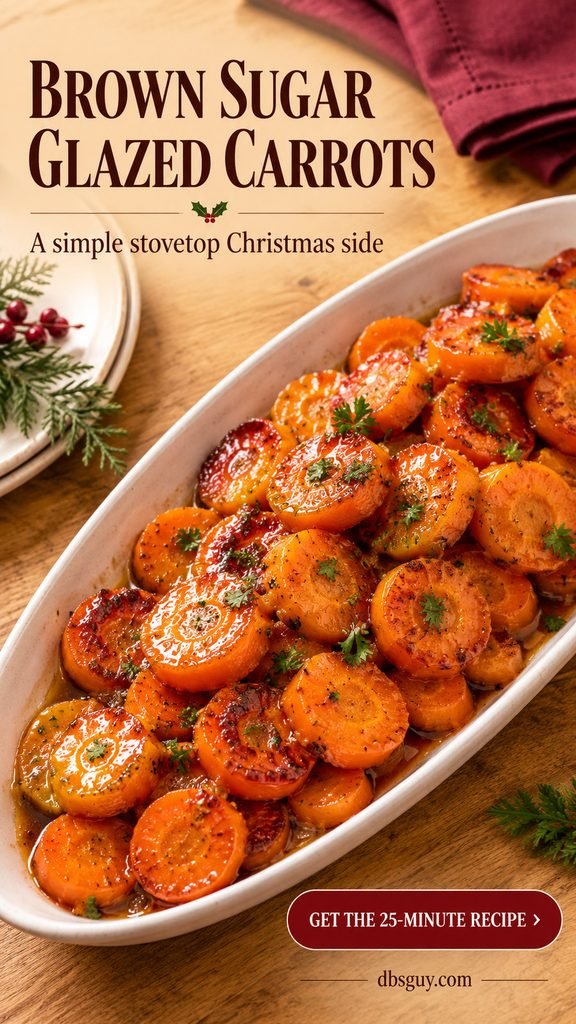
Yield: 12 side-dish servings.
Prep: 10 minutes. Cook: 15 minutes.
Equipment: Wide 5- to 6-quart sauté pan or Dutch oven with a lid.
Budget move: Whole carrots are often a better buy than pre-cut ones, but compare your store’s unit prices before choosing.
Ingredients
- 3 pounds carrots, peeled and cut into even ¼-inch coins
- ¾ cup water
- 3 tablespoons butter
- 3 tablespoons packed brown sugar
- ½ teaspoon fine salt
- ¼ teaspoon black pepper
- 1 tablespoon apple cider vinegar
- Optional: 2 tablespoons chopped parsley
How to Make It
- Put the carrots, water, and salt in the pan. Cover, bring to a simmer over medium-high heat, and cook 6–8 minutes, stirring once, until almost tender.
- Uncover and let most of the water evaporate, about 2–3 minutes. If the carrots are still firm, add a splash of water and cook a little longer first.
- Add butter, brown sugar, and pepper. Cook, stirring frequently, for 3–4 minutes until the carrots are tender and the glaze clings to them. Let a few edges color, but reduce the heat if the sugar begins to catch.
- Stir in the vinegar and optional parsley. Taste before adding any more sugar; the carrots already bring their own sweetness.
Plan ahead or adjust: Peel and slice a day ahead and refrigerate in a covered container. Reheat cooked leftovers with a spoonful of water until 165°F.
9. Green Beans with Toasted Garlic Breadcrumbs
A crunchy topping makes frozen green beans feel finished without a creamy casserole. Keep the crumbs separate until serving so they stay crisp against the tender beans.

Yield: 12 side-dish servings.
Prep: 10 minutes. Cook: About 15 minutes; follow the frozen-bean package instructions.
Equipment: Large pot; colander; skillet.
Budget move: Plain frozen cut green beans avoid trimming waste. Skip seasoned steam bags if the plain bag is the better price per ounce.
Ingredients
- 3 pounds plain frozen cut green beans
- Water and salt as directed on the bean package
- 3 tablespoons butter, divided
- 1 cup plain breadcrumbs or panko
- 3 garlic cloves, finely minced
- 1 lemon: 1 teaspoon finely grated zest and 1 tablespoon juice
- ½ teaspoon fine salt, or to taste
- ¼ teaspoon black pepper
How to Make It
- Cook the frozen beans according to the package directions until tender, using batches if needed. Drain well and let steam escape so water will not soften the topping.
- Meanwhile, melt 2 tablespoons butter in a skillet over medium heat. Add breadcrumbs and cook 3–5 minutes, stirring, until golden. Add garlic and cook about 1 minute more, just until fragrant; do not let it burn.
- Remove the crumbs from the heat and stir in the lemon zest. Toss the drained hot beans with the remaining tablespoon butter, lemon juice, salt, and pepper.
- Transfer beans to a warm platter and scatter the garlic crumbs over them immediately before serving.
Plan ahead or adjust: Toast the crumbs a day ahead, cool, and refrigerate in a sealed container; re-crisp briefly in a dry skillet. For a gluten-free version, use labeled gluten-free crumbs and check all other ingredient labels.
10. Sweet Potato and Apple Bake
Apple wedges add sweetness and variety to a pan of sweet potatoes. This version keeps the pieces recognizable and leaves out marshmallows and nuts, so the ingredient list stays short.
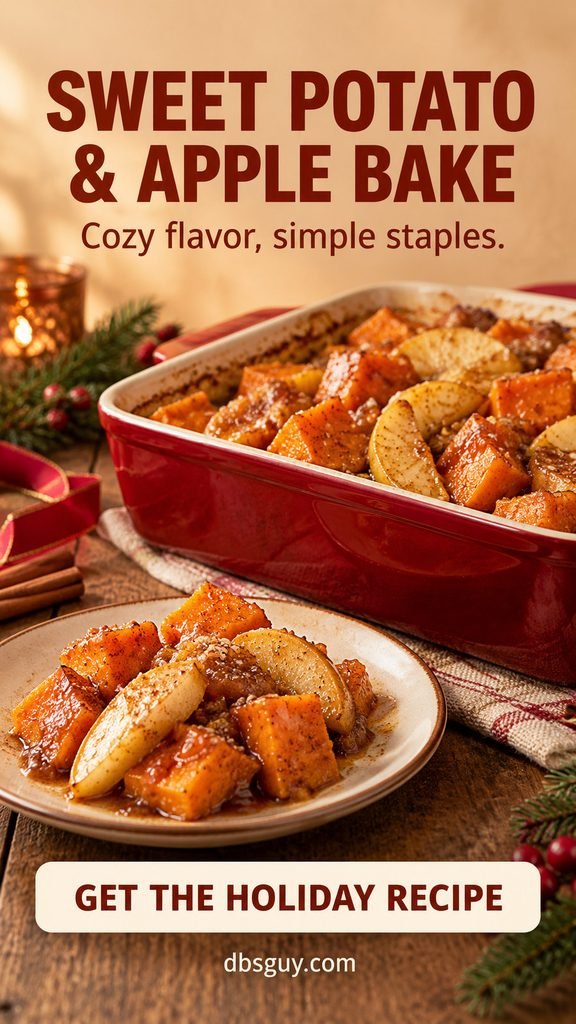
Yield: 12 side-dish servings.
Prep: 20 minutes. Cook: 50–65 minutes.
Equipment: Deep 9-by-13-inch baking dish; foil.
Budget move: Choose firm everyday baking apples such as Granny Smith. This is a useful place to use apples with cosmetic blemishes after trimming them.
Ingredients
- 4 pounds sweet potatoes, peeled and cut into ¾-inch cubes
- 3 medium firm apples, about 1¼ pounds, cored and cut into thick wedges
- 4 tablespoons butter, melted, plus a little for the dish
- 3 tablespoons packed brown sugar
- 1 teaspoon ground cinnamon
- ½ teaspoon fine salt
- ½ cup water
- 1 tablespoon lemon juice
How to Make It
- Heat the oven to 375°F. Butter the dish. Toss the sweet potatoes with melted butter, brown sugar, cinnamon, and salt, then spread them in the dish. Pour the water around the edges.
- Cover tightly with foil and bake for 25 minutes. Toss the apple wedges with lemon juice while the potatoes bake.
- Stir the apples into the partly cooked sweet potatoes. Cover again and bake 15–20 minutes, then uncover for 10–20 minutes, until the sweet potatoes are easily pierced and the apples are tender but still hold their shape.
- Gently turn the pieces in the pan juices before serving. If the pan is dry before the potatoes soften, add a few tablespoons water and cover again.
Plan ahead or adjust: Cut the sweet potatoes a day ahead and refrigerate. Cut the apples on cooking day. Cooked leftovers can be reheated covered to 165°F, though the apples will soften further.
11. Stovetop Creamed Corn
Frozen corn and a quick milk sauce make a comforting side without using another baking dish. Mash a small portion of the corn if you prefer a thicker texture instead of adding more dairy.

Yield: 12 side-dish servings.
Prep: 5 minutes. Cook: 15 minutes.
Equipment: Wide 5- to 6-quart saucepan.
Budget move: Use plain frozen corn and regular milk. There is no need to buy heavy cream for this recipe.
Ingredients
- 3 pounds plain frozen corn kernels, about 9–10 cups
- 3 tablespoons butter
- 3 tablespoons all-purpose flour
- 2 cups whole or 2% milk
- ½ cup water, plus a little more if needed
- ¾ teaspoon fine salt, or to taste
- ½ teaspoon black pepper
- Optional: 1 teaspoon sugar, only if the corn needs it
- Optional: 1 tablespoon chopped parsley
How to Make It
- Melt butter over medium heat. Whisk in flour and cook for 1 minute without browning it.
- Gradually whisk in milk, then ½ cup water, until smooth. Add the frozen corn, salt, and pepper. Bring to a gentle simmer, stirring often.
- Cook for 10–12 minutes, or longer if required by the corn package, until the corn is cooked and the sauce thickens. Keep the heat moderate so the milk does not scorch.
- For a thicker finish, mash about 1 cup of corn against the side of the pan and stir it back in. Add a splash of water if too thick. Taste before using the optional sugar; finish with parsley if desired.
Plan ahead or adjust: Make one day ahead, cool promptly in shallow containers, and refrigerate. Reheat gently with a little milk or water, stirring, until 165°F throughout.
12. Braised Red Cabbage with Apples
Red cabbage brings deep Christmas color and a tangy break from rich potatoes and cheese. It is especially useful beside glazed ham, and it can be cooked ahead without losing its character.
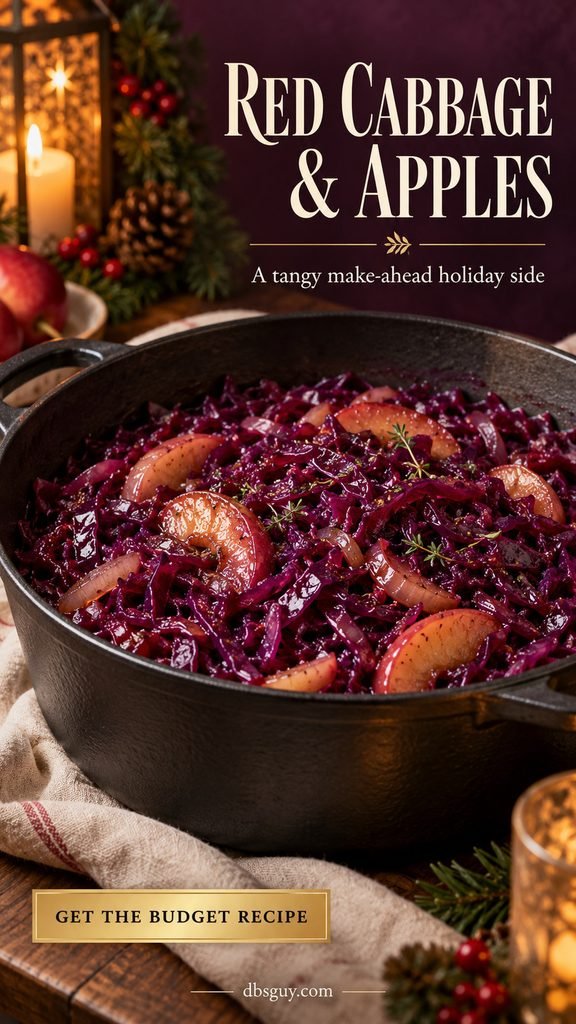
Yield: 12 side-dish servings.
Prep: 15 minutes. Cook: 40–50 minutes.
Equipment: Large 6-quart Dutch oven with a lid.
Budget move: One whole cabbage makes a generous pot. Use the same apples and cider vinegar already bought for other dishes on the menu.
Ingredients
- 1 red cabbage, about 3 pounds, tough core removed and leaves thinly sliced
- 2 medium apples, cored and thinly sliced
- 1 large onion, thinly sliced
- 2 tablespoons neutral oil or butter
- ⅓ cup apple cider vinegar
- ½ cup water, plus more as needed
- 2 tablespoons packed brown sugar
- 1 teaspoon fine salt
- ½ teaspoon black pepper
How to Make It
- Heat the oil in the Dutch oven over medium heat. Cook the onion for 5 minutes until softened.
- Add the cabbage in two batches, stirring for a few minutes so the first batch wilts and makes room. Add apples, vinegar, water, sugar, salt, and pepper.
- Cover and cook over medium-low heat for 35–45 minutes, stirring every 10 minutes, until the cabbage is tender. Add water a few tablespoons at a time if the bottom begins to dry.
- Uncover for the last 5 minutes if there is excess liquid. Taste and adjust with a small splash of vinegar for brightness or a pinch of sugar if especially sharp.
Plan ahead or adjust: Cook one or two days ahead, chill promptly, and reheat in the pot until 165°F. Keep a lid nearby; the cabbage needs moisture to braise rather than scorch.
13. Cheddar Drop Biscuits
Drop biscuits give you warm bread without kneading, rolling, or waiting for yeast. A modest amount of sharp cheddar adds flavor throughout the dough, so you do not need a heavy cheese topping.

Yield: 18 medium biscuits; 12 servings with 6 extra biscuits.
Prep: 15 minutes. Cook: 15–18 minutes.
Equipment: Two baking sheets; large mixing bowl.
Budget move: Shred a 4-ounce portion from a block of cheddar if that is the better buy. These biscuits also give you a use for milk and flour already on the shopping list.
Ingredients
- 3 cups all-purpose flour, about 360 grams, spooned and leveled
- 1 tablespoon baking powder
- ¾ teaspoon fine salt
- ½ teaspoon garlic powder
- 8 tablespoons cold unsalted butter, cut into small cubes
- 1 cup shredded sharp cheddar, about 4 ounces
- 1¼ cups cold milk, plus up to 2 tablespoons if needed
- Optional: 1 tablespoon chopped parsley
How to Make It
- Heat the oven to 425°F. Line two baking sheets with parchment rated for that temperature. Whisk flour, baking powder, salt, and garlic powder in a large bowl.
- Cut in the cold butter with a pastry cutter or fingertips until the largest pieces are pea-size. Stir in cheddar and optional parsley.
- Fold in 1¼ cups milk just until a shaggy, scoopable dough forms. Add up to 2 tablespoons extra milk only if dry flour remains; stop mixing as soon as it comes together.
- Scoop into 18 equal mounds, about ¼ cup each, leaving 2 inches between them. Bake 15–18 minutes, rotating and switching pans halfway through, until golden underneath and cooked through in the center. Serve warm.
Plan ahead or adjust: Bake earlier the same day and warm briefly before dinner, rather than squeezing another baking job into the last 15 minutes. Keep leftovers refrigerated in a sealed container.
14. Cinnamon Apple Oat Crumble
A big baking dish of crumble serves everyone without the cost or extra work of individual pastries. The oat topping is crisp and simple, and the dessert is easy to portion after dinner.
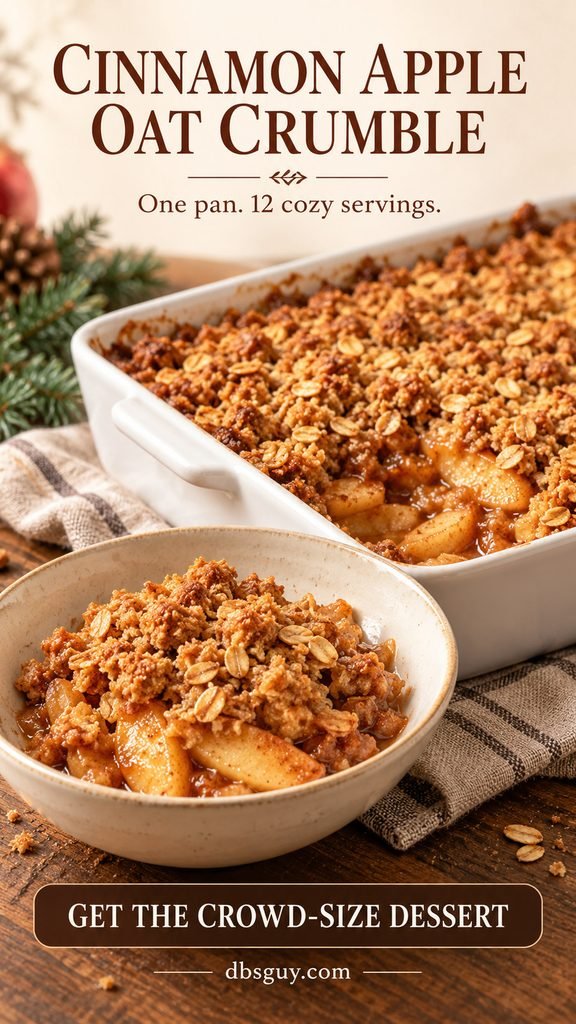
Yield: 12 dessert servings.
Prep: 25 minutes. Cook: 45–55 minutes, plus a 15-minute rest.
Equipment: 9-by-13-inch baking dish; two mixing bowls.
Budget move: Choose apples sold in a bag if their unit price is lower. Serve the crumble on its own, or use ice cream only if it already fits your grocery budget.
Ingredients
- 4 pounds firm apples, about 9–10 medium, peeled, cored, and sliced ¼ inch thick
- 2 tablespoons lemon juice
- ⅓ cup granulated sugar
- 2 tablespoons all-purpose flour for the filling
- 1½ teaspoons ground cinnamon, divided
- 1½ cups old-fashioned rolled oats
- 1 cup all-purpose flour, about 120 grams, for the topping
- ½ cup packed brown sugar
- ¼ teaspoon fine salt
- 10 tablespoons unsalted butter, melted, plus a little for the dish
- Optional: vanilla ice cream for serving
How to Make It
- Heat the oven to 375°F and butter the baking dish. Toss apples with lemon juice, granulated sugar, 2 tablespoons flour, and 1 teaspoon cinnamon. Spread evenly in the dish.
- Combine oats, 1 cup flour, brown sugar, the remaining ½ teaspoon cinnamon, and salt. Stir in melted butter until clumps form, then scatter over the apples without pressing it flat.
- Bake for 45–55 minutes until the topping is golden, juices bubble at the center, and the apples are tender when pierced. Loosely cover with foil if the top browns before the apples soften.
- Rest for at least 15 minutes so the juices thicken. Spoon into 12 portions; add the optional ice cream only when serving.
Plan ahead or adjust: Bake one day ahead, cool, and refrigerate covered. Rewarm covered at 325°F, uncovering near the end to crisp the oats. Refrigerate remaining portions promptly.
15. Chocolate Peppermint Sheet Cake
This simple cocoa cake needs no butter in the batter and no electric mixer. A thin chocolate glaze and a little crushed candy cane supply the festive finish without a tub of elaborate frosting.
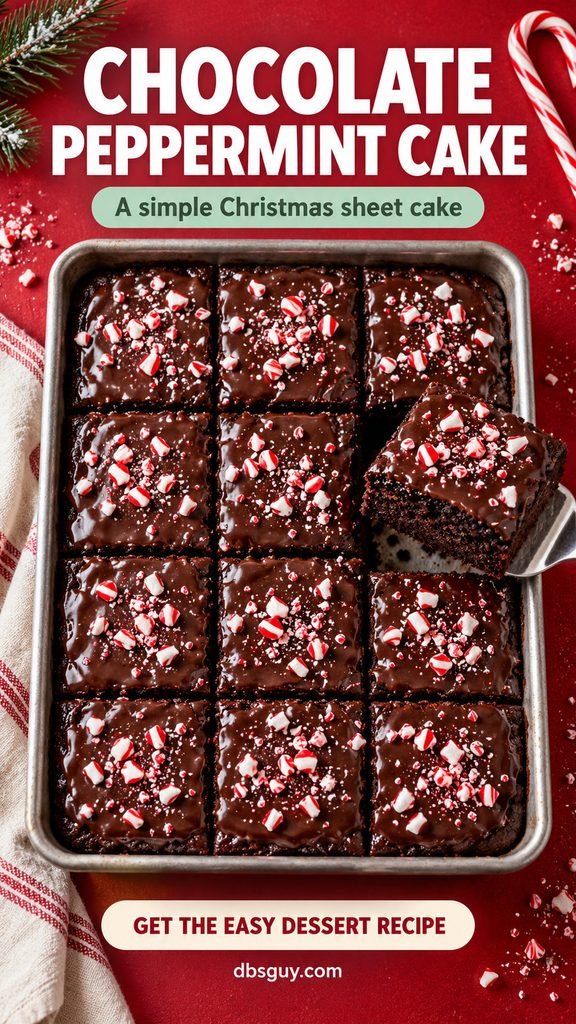
Yield: 12 large squares, or 15 smaller portions.
Prep: 20 minutes. Cook: 30–38 minutes, plus about 1 hour to cool.
Equipment: 9-by-13-inch baking pan, at least 2 inches deep; whisk; mixing bowls.
Budget move: Use unsweetened natural cocoa and neutral oil. Candy canes are a finishing touch, so one or two are enough.
Ingredients
- 3 cups all-purpose flour, about 360 grams, spooned and leveled
- 1¾ cups granulated sugar
- ½ cup unsweetened natural cocoa powder
- 2 teaspoons baking soda
- 1 teaspoon fine salt
- 2 cups room-temperature water
- ⅔ cup neutral oil, plus a little for the pan
- 2 tablespoons white vinegar
- 2 teaspoons vanilla extract
- ¼ teaspoon peppermint extract, optional for the batter
- For the glaze: 1½ cups powdered sugar, 3 tablespoons natural cocoa, 3 tablespoons milk plus up to 1 more tablespoon as needed, and 1 tablespoon neutral oil
- For the finish: 2 tablespoons finely crushed candy canes
How to Make It
- Heat the oven to 350°F. Grease the pan and line its bottom with parchment. Whisk flour, sugar, cocoa, baking soda, and salt until no cocoa lumps remain.
- In another bowl, mix water, oil, vinegar, vanilla, and optional peppermint extract. Pour into the dry ingredients and whisk just until smooth, scraping the bottom. Transfer to the pan promptly.
- Bake for 30–38 minutes, checking from 30 minutes, until the center springs back gently and a toothpick comes out without wet batter. Cool completely in the pan before glazing.
- Whisk the glaze ingredients, starting with 3 tablespoons milk and adding more a teaspoon at a time if needed. Spread a thin layer over the cooled cake. Add crushed candy canes just before serving, then cut into 12 squares.
Plan ahead or adjust: Bake and glaze a day ahead, cover, and refrigerate because the glaze contains milk. Bring portions out shortly before serving. Add candy canes last so they keep their crunch. Check candy labels for guests with allergies.
Make-Ahead Plan That Leaves Room for Dinner
Two days before: Count guests, check dietary needs, choose the menu, and shop from one combined list. Make sure the roasting pans fit your oven and that the refrigerator has space for shallow containers. Check labels for milk, wheat, egg, soy, mustard, and other allergens relevant to your guests.
One day before: Bake your chosen dessert. Cook the cabbage if it is on the menu. Dry the bread for stuffing, peel and slice the carrots, and prepare any components described in the recipes. Refrigerate perishable food promptly; keep wet stuffing ingredients separate from the dry bread.
On dinner day: Cook the main at its stated temperature and use the stovetop for vegetables. Choose dishes around the burners and oven space you actually have. A main that needs two oven pans leaves little room for last-minute baking, so bake biscuits earlier or leave them off the menu.
A Practical Schedule for the Roast-Chicken Menu
This example serves dinner at 5 p.m. and uses chicken, mashed potatoes, carrots, green beans, and a dessert baked the previous day. It needs two oven racks, two roasting pans, and three usable stovetop burners. Shift the schedule if your equipment or chicken size needs more time.
- 3:30 p.m.: Peel and cut the potatoes and carrots, set out serving dishes and trivets, and measure the seasonings. Keep the raw chicken refrigerated until you prepare it.
- 3:50 p.m.: Preheat the oven to 425°F. Season the chicken and arrange it on the two pans.
- 4:00 p.m.: Put the chicken in the oven. Start the potatoes by 4:15; begin the carrots around 4:25.
- 4:25 p.m.: Rotate and switch the chicken pans. Cook the green beans according to their package and toast the crumbs while the potatoes and carrots finish.
- 4:40–4:50 p.m.: Check several chicken thighs for at least 165°F. Remove only the pieces that are done and let them rest 10 minutes. Mash the drained potatoes with warm milk and butter.
- 5:00 p.m.: Add crumbs to the beans, transfer everything to the table, and serve. If the chicken needs longer, delay dinner and keep finished hot dishes at 140°F or above.
To leave space for passing bowls, use the serving-dish-first approach in 15 Small Christmas Table Decor Ideas That Still Leave Room for Dinner.
Keep the Buffet and Leftovers Safe
Use a thermometer for chicken, meatballs, casseroles, and reheated dishes; browning alone does not confirm doneness. Keep hot food at 140°F or above and cold perishable food at 40°F or below. Refrigerate leftovers in shallow containers within 2 hours, or within 1 hour when the temperature is above 90°F. Do not wait for a large pot to cool on the counter.
Use refrigerated leftovers within 3–4 days or freeze them promptly for later meals. Reheat leftovers to 165°F. The USDA’s leftovers and food-safety guidance explains these storage and reheating steps.
Christmas Dinner on a Budget: FAQs
What is the cheapest Christmas dinner for a crowd?
There is no single cheapest menu everywhere. Price the spinach baked ziti and lentil pie against the chicken and ham at your store, then add two simple sides and one dessert. A discounted ham may win one week; a pantry-based meatless main may win another. Compare the whole shopping basket rather than just the main ingredient.
How many dishes do I need for 12 people?
One appropriately portioned main, two or three sides, and one dessert is a useful starting point. A casserole main already contains starch, while roast chicken benefits from a potato or bread side. Ask about dietary needs first so every guest has a complete meal, rather than only a side dish.
Can I make this Christmas dinner vegetarian?
Choose the lentil and mushroom pie, or make baked ziti with vegetarian-labeled cheeses. Use vegetable broth in stuffing and check cheese, sauce, and condiment labels. The lentil pie can also be made vegan using plant-based milk and butter; choose compatible sides for the rest of the meal.
How do I feed a crowd without filling the oven with sides?
Choose a main that fits the oven and use stovetop mashed potatoes, carrots, green beans, creamed corn, or cabbage alongside it. Bake dessert the previous day. If your main uses both oven racks, do not plan a biscuit tray for the same time.
Should I cook all 15 recipes for Christmas dinner?
No. These are choices for building a smaller menu. Pick one main, the sides your guests enjoy, and one dessert, then make a single combined shopping list. Cooking fewer dishes well also leaves more room to serve them hot.